This training guide highlights the features of Prosper's sales module available through the Kynection mobile application, specifically designed to enhance your sales process.
1. Prosper Module on Mobile
From the home dashboard select the sales button, the view of this shorcut menu may vary depending on your role
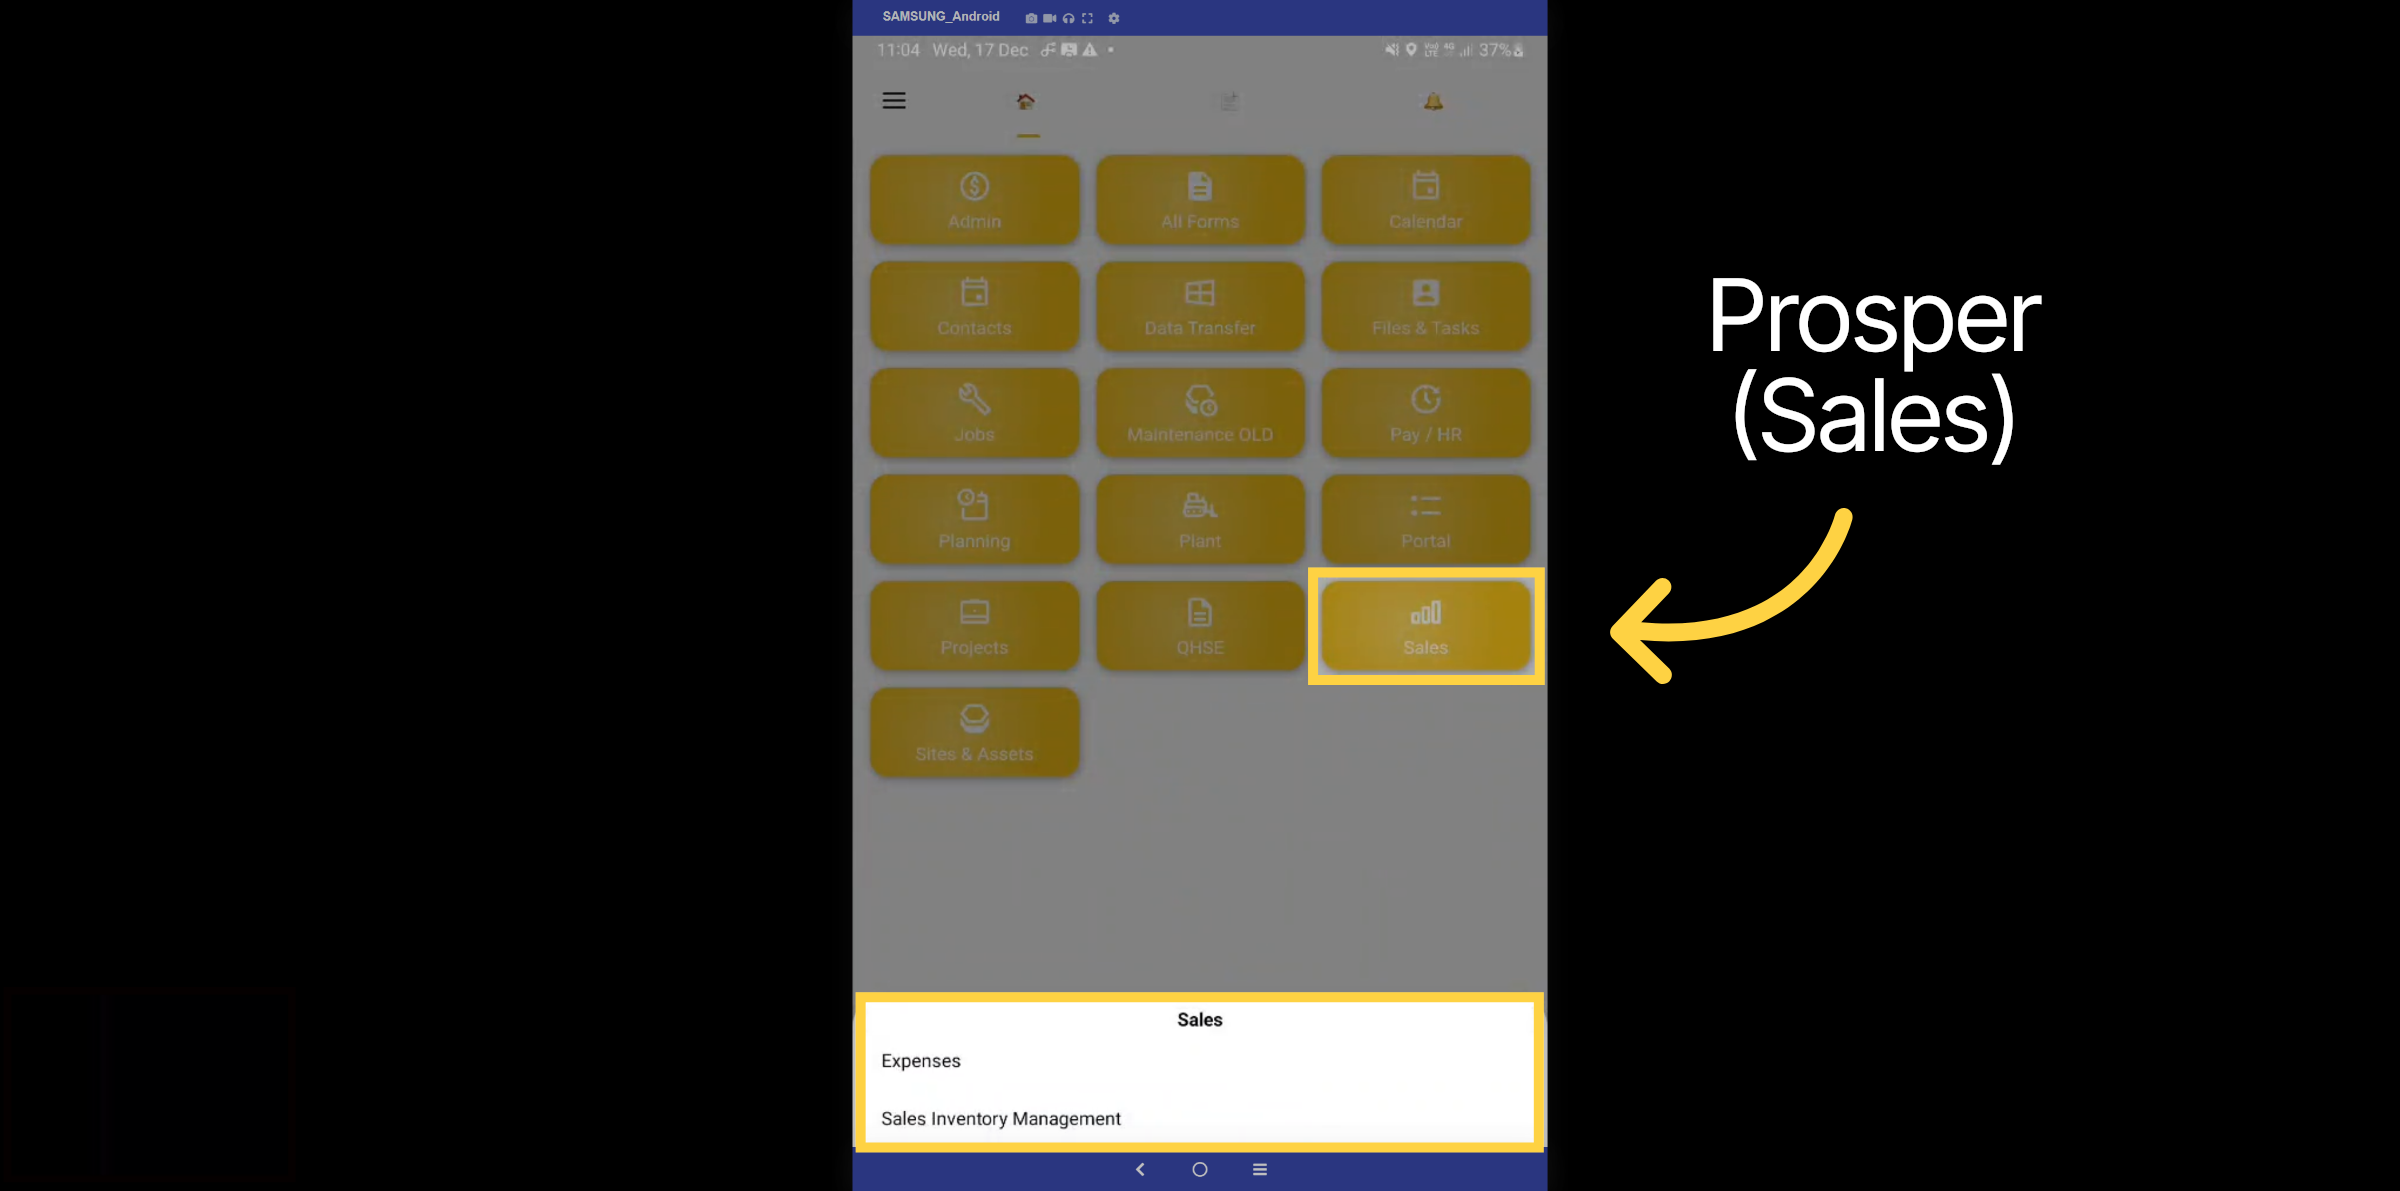
2. Sales Dashboard
From the Sales dashboard, several features are displayed. Let's explore the Leads tab.
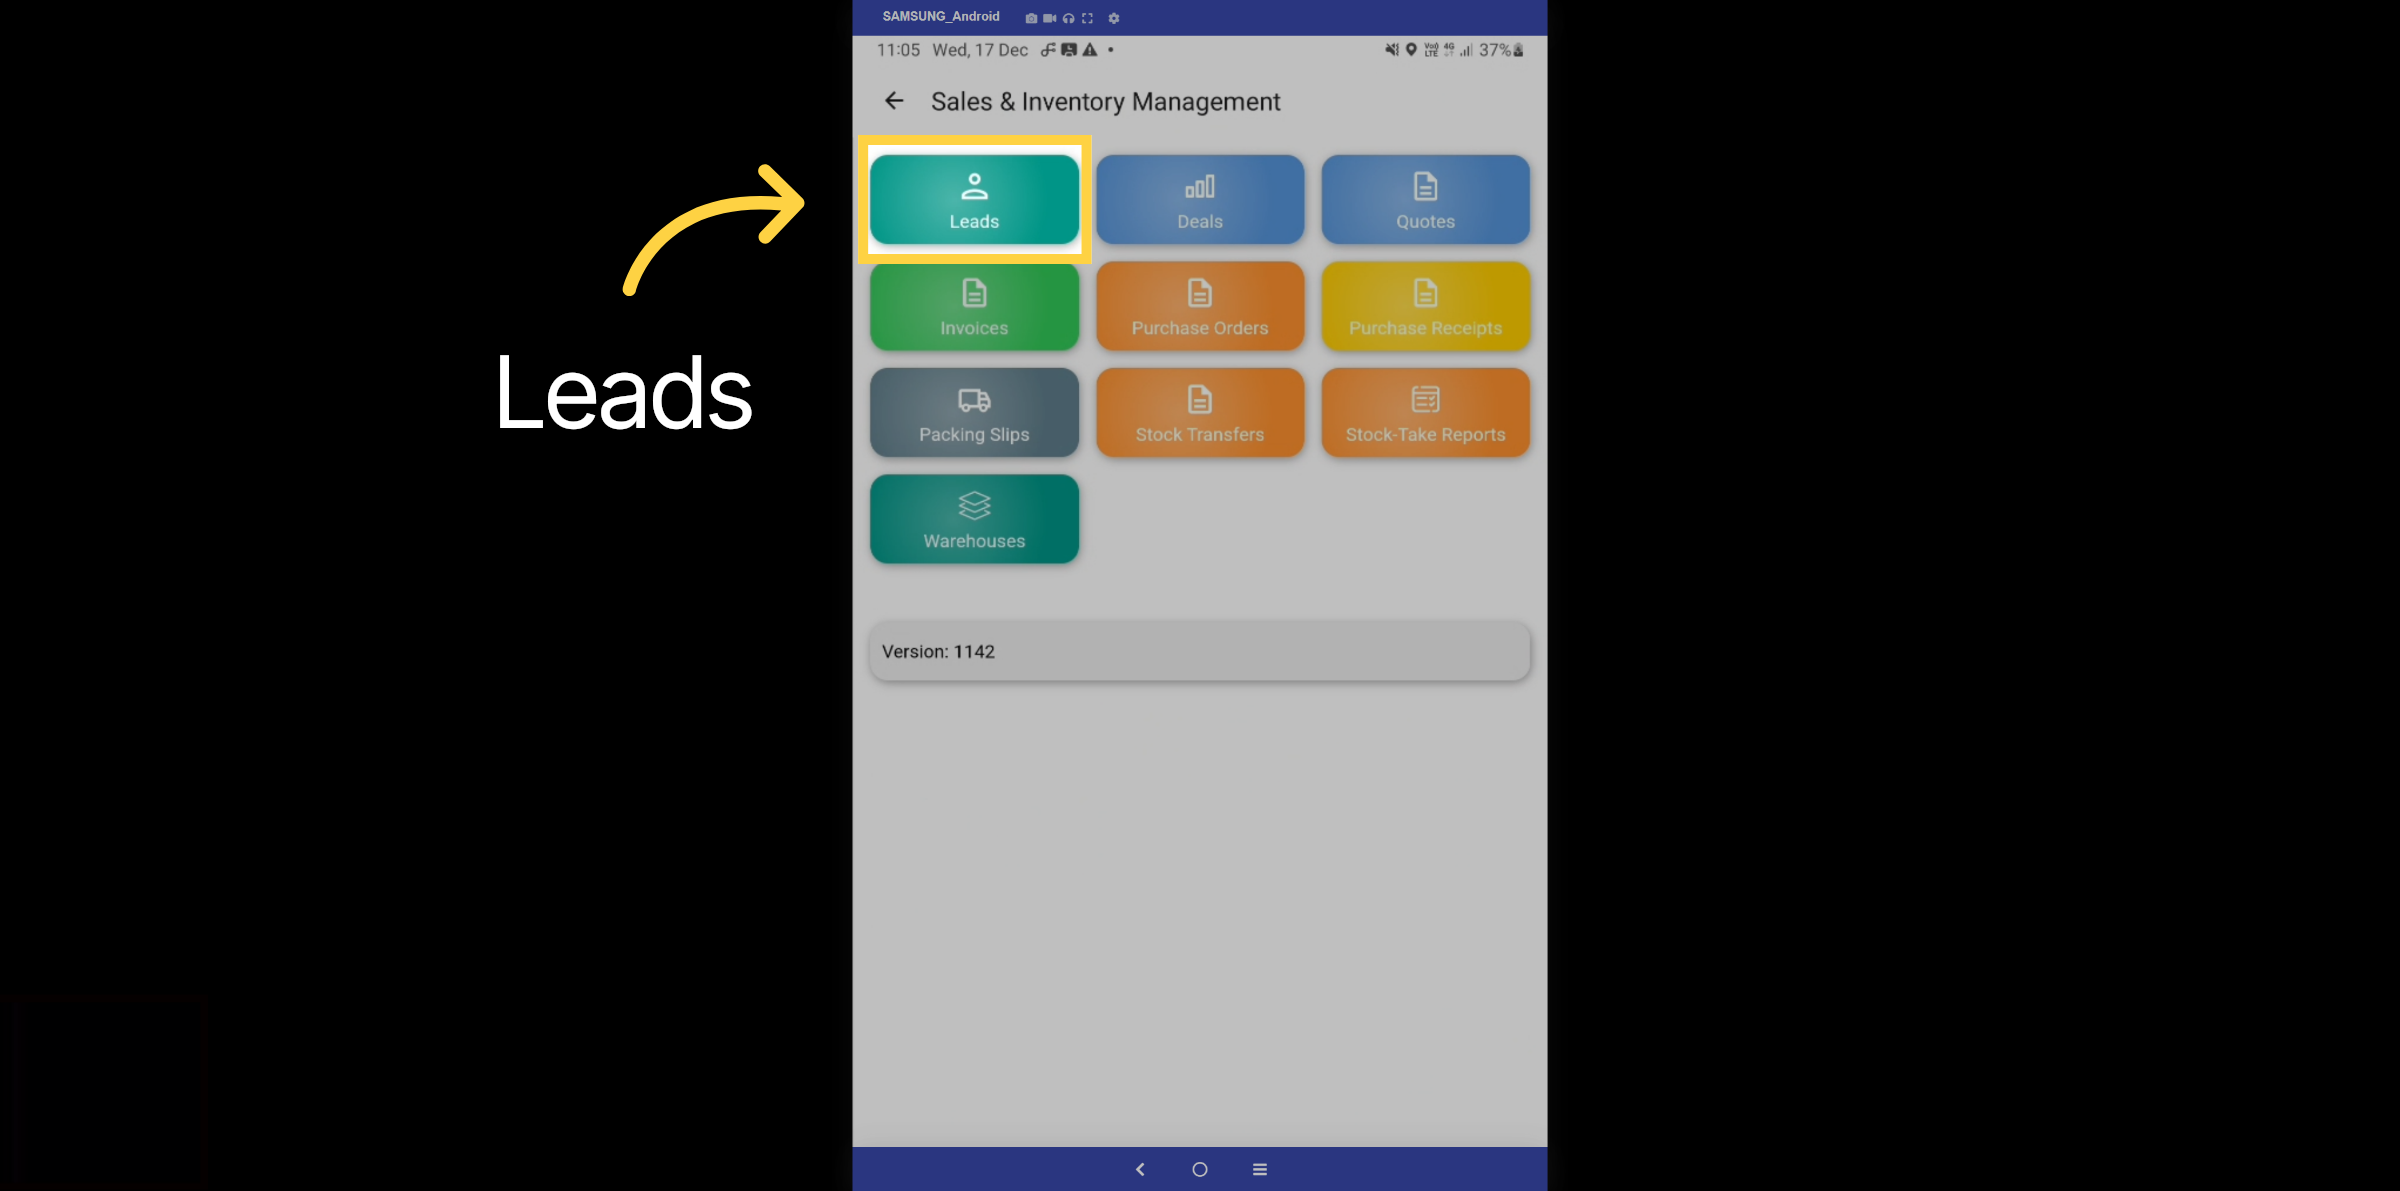
3. Leads
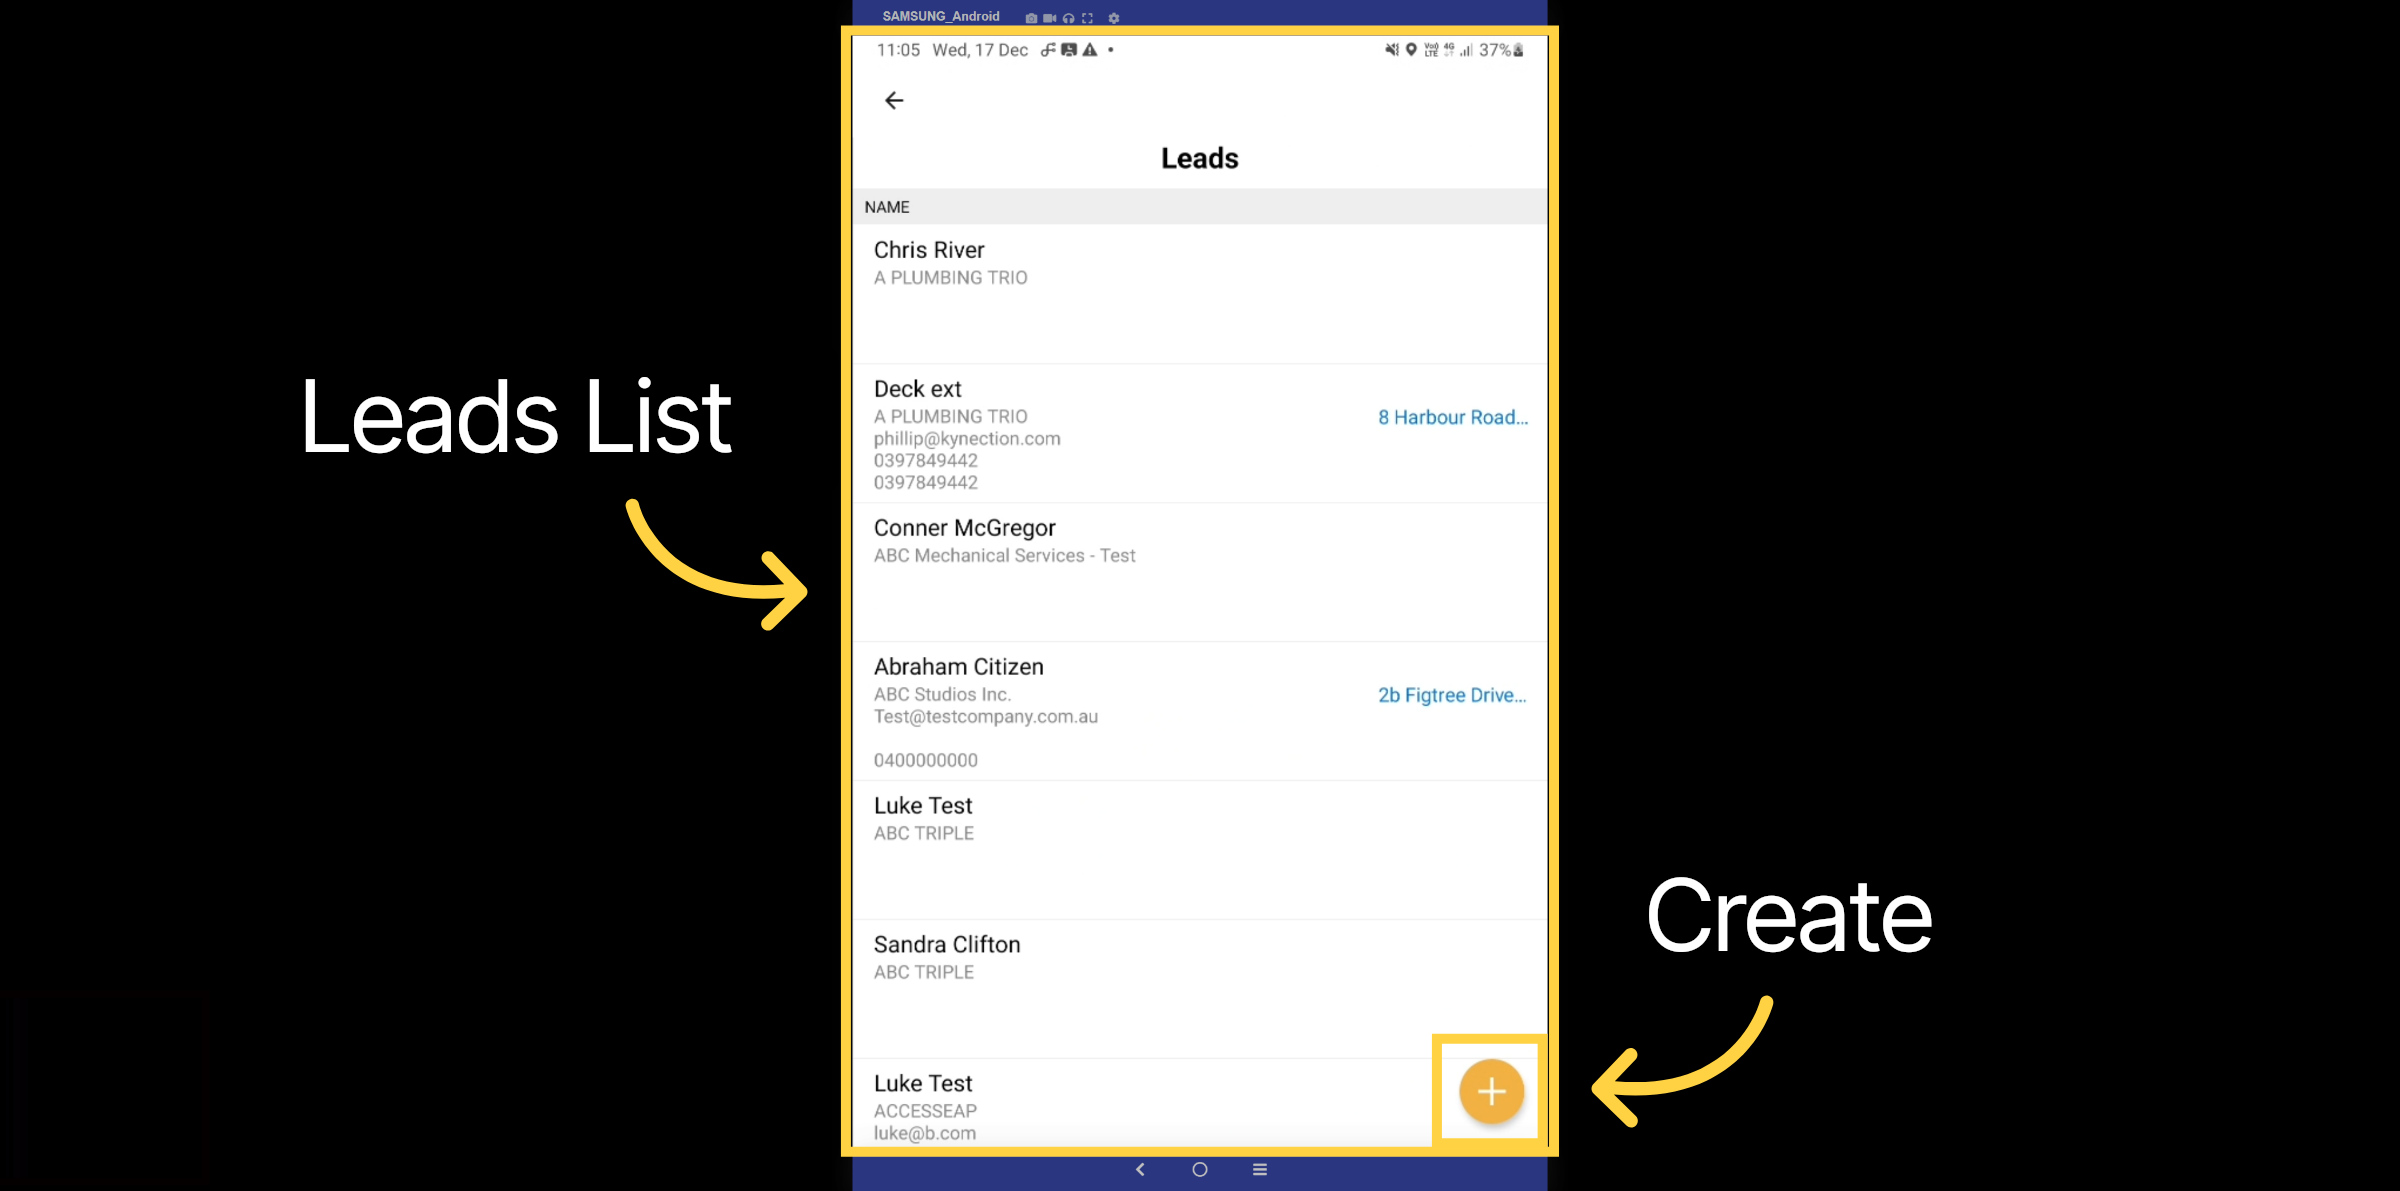
In the leads list, you can view all leads and their contact information. You can generate leads from various sources and fully import them into Kynection via CSV, or even integrate with your other CRM solutions through an API. Select the Plus icon to create a new lead.
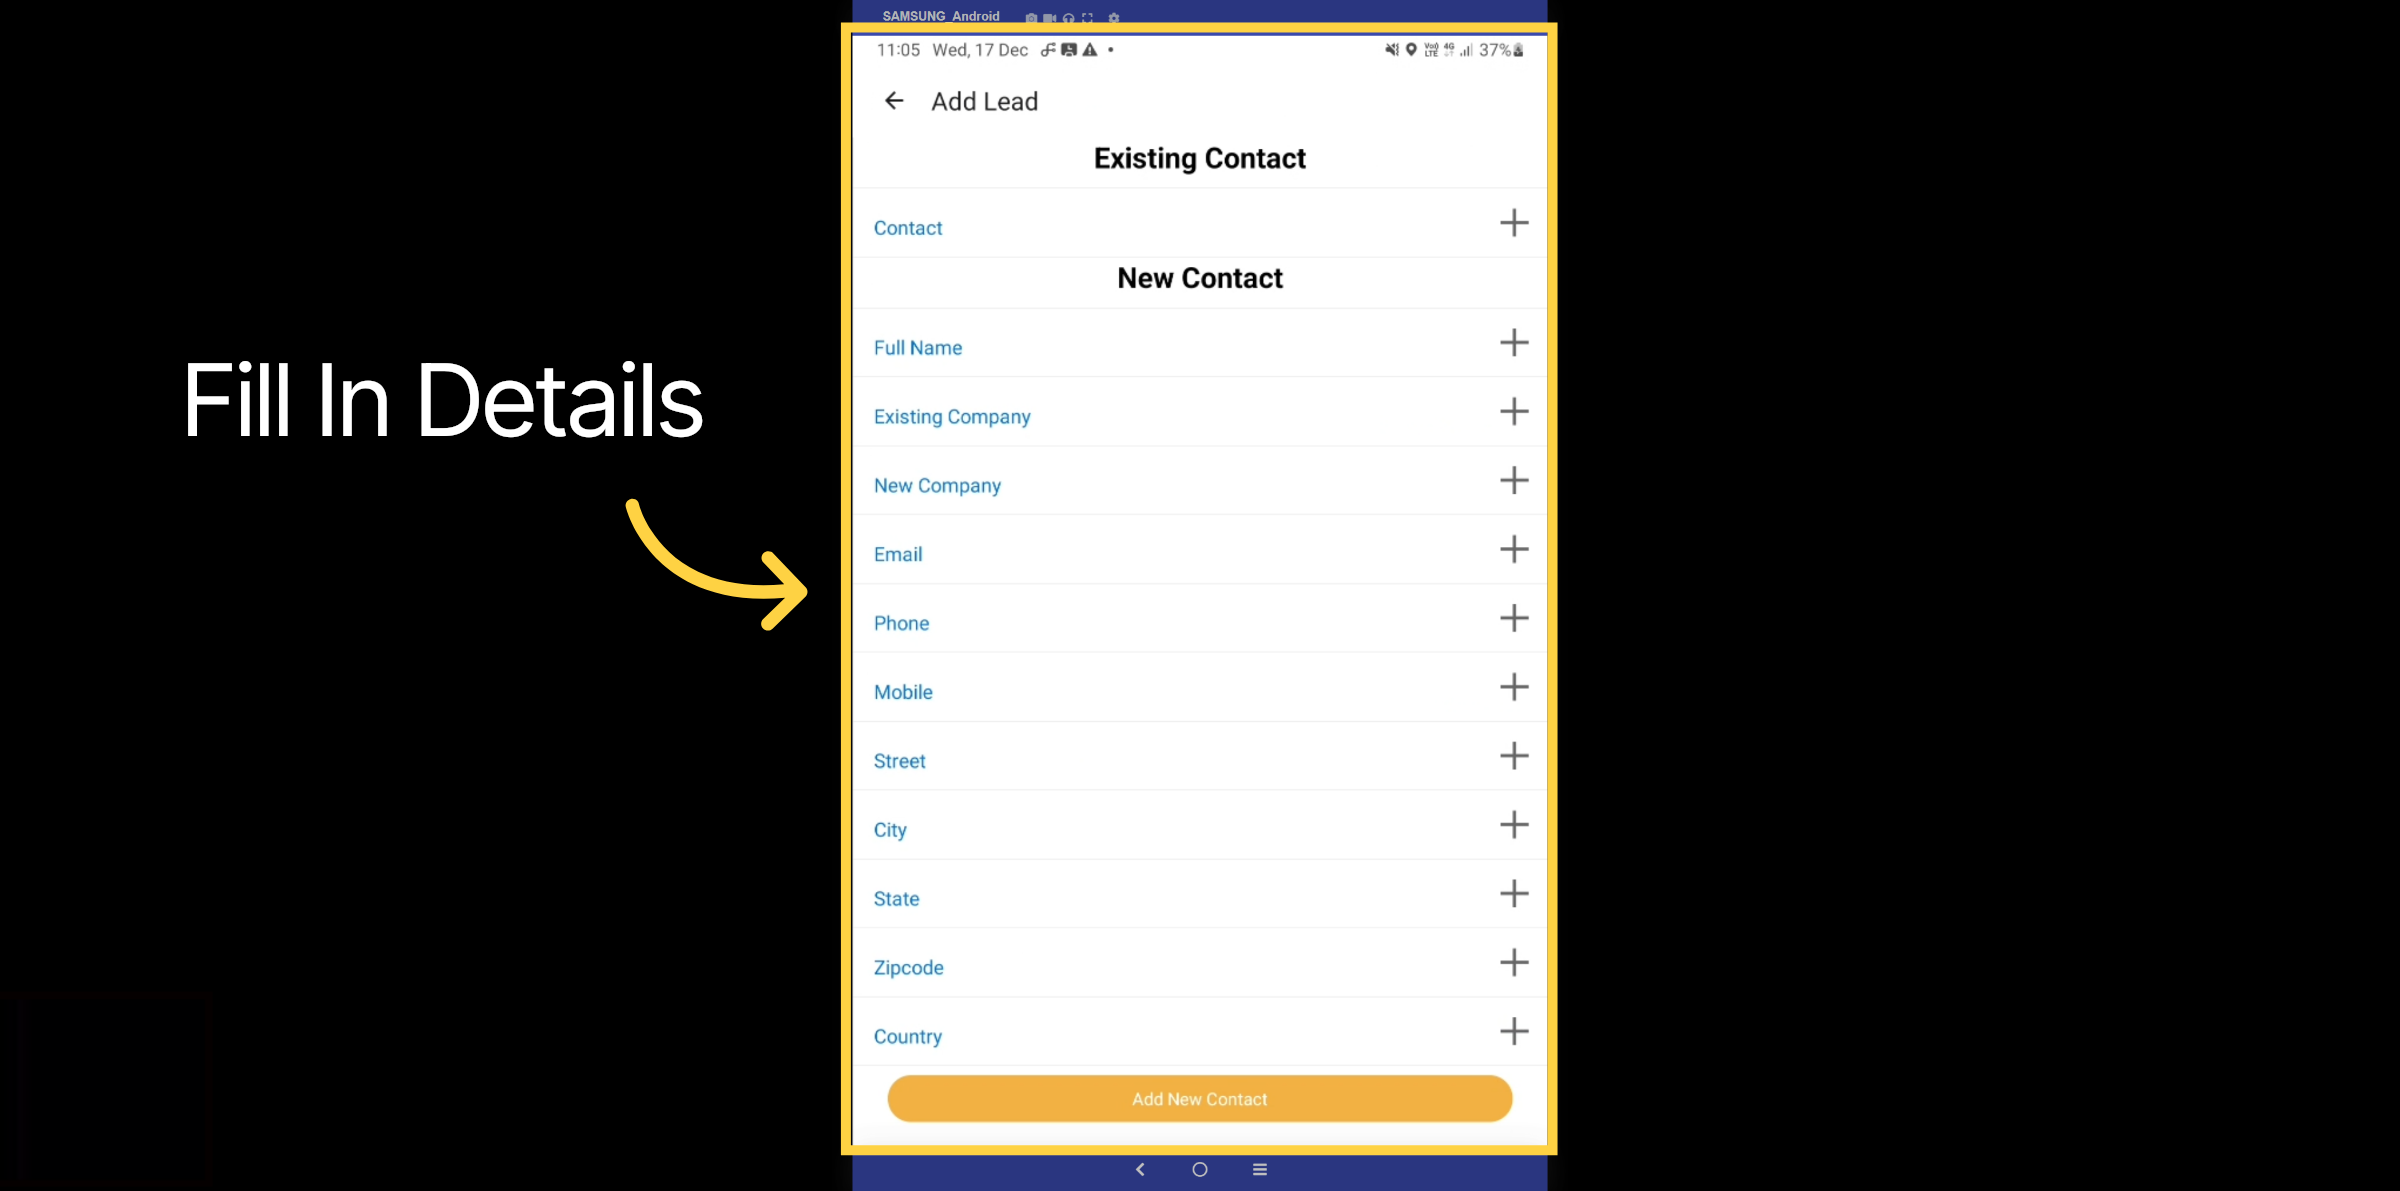
4. Lead Creation
Please provide all necessary details to create a new lead contact. This form can be fully customized to determine the number and type of fields you wish to display.
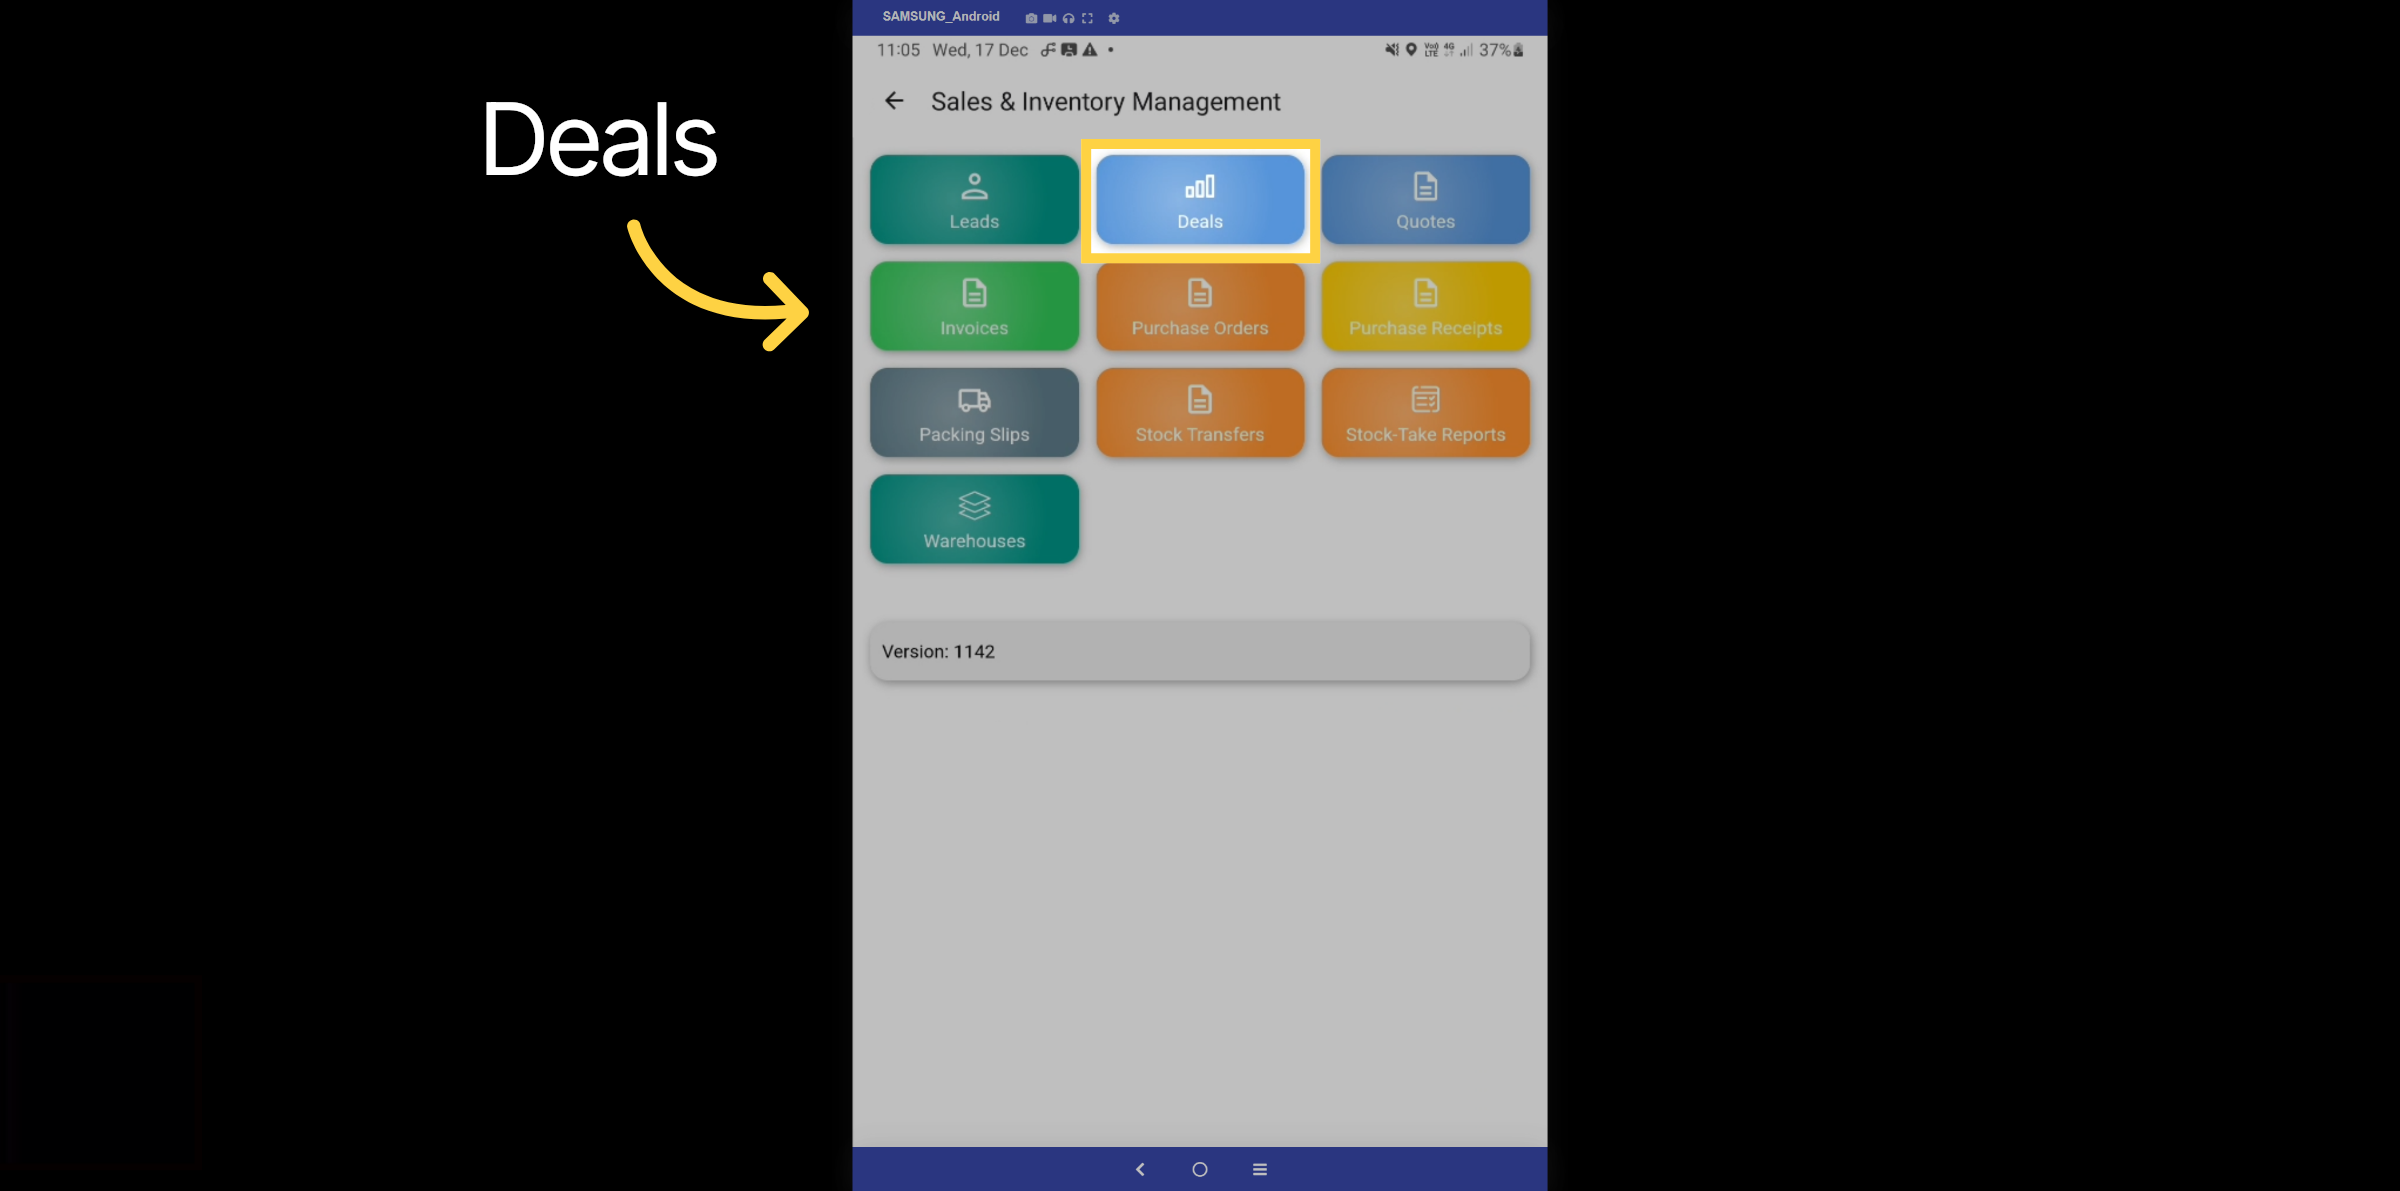
5. Deals
Let’s now explore the Deals Tab.
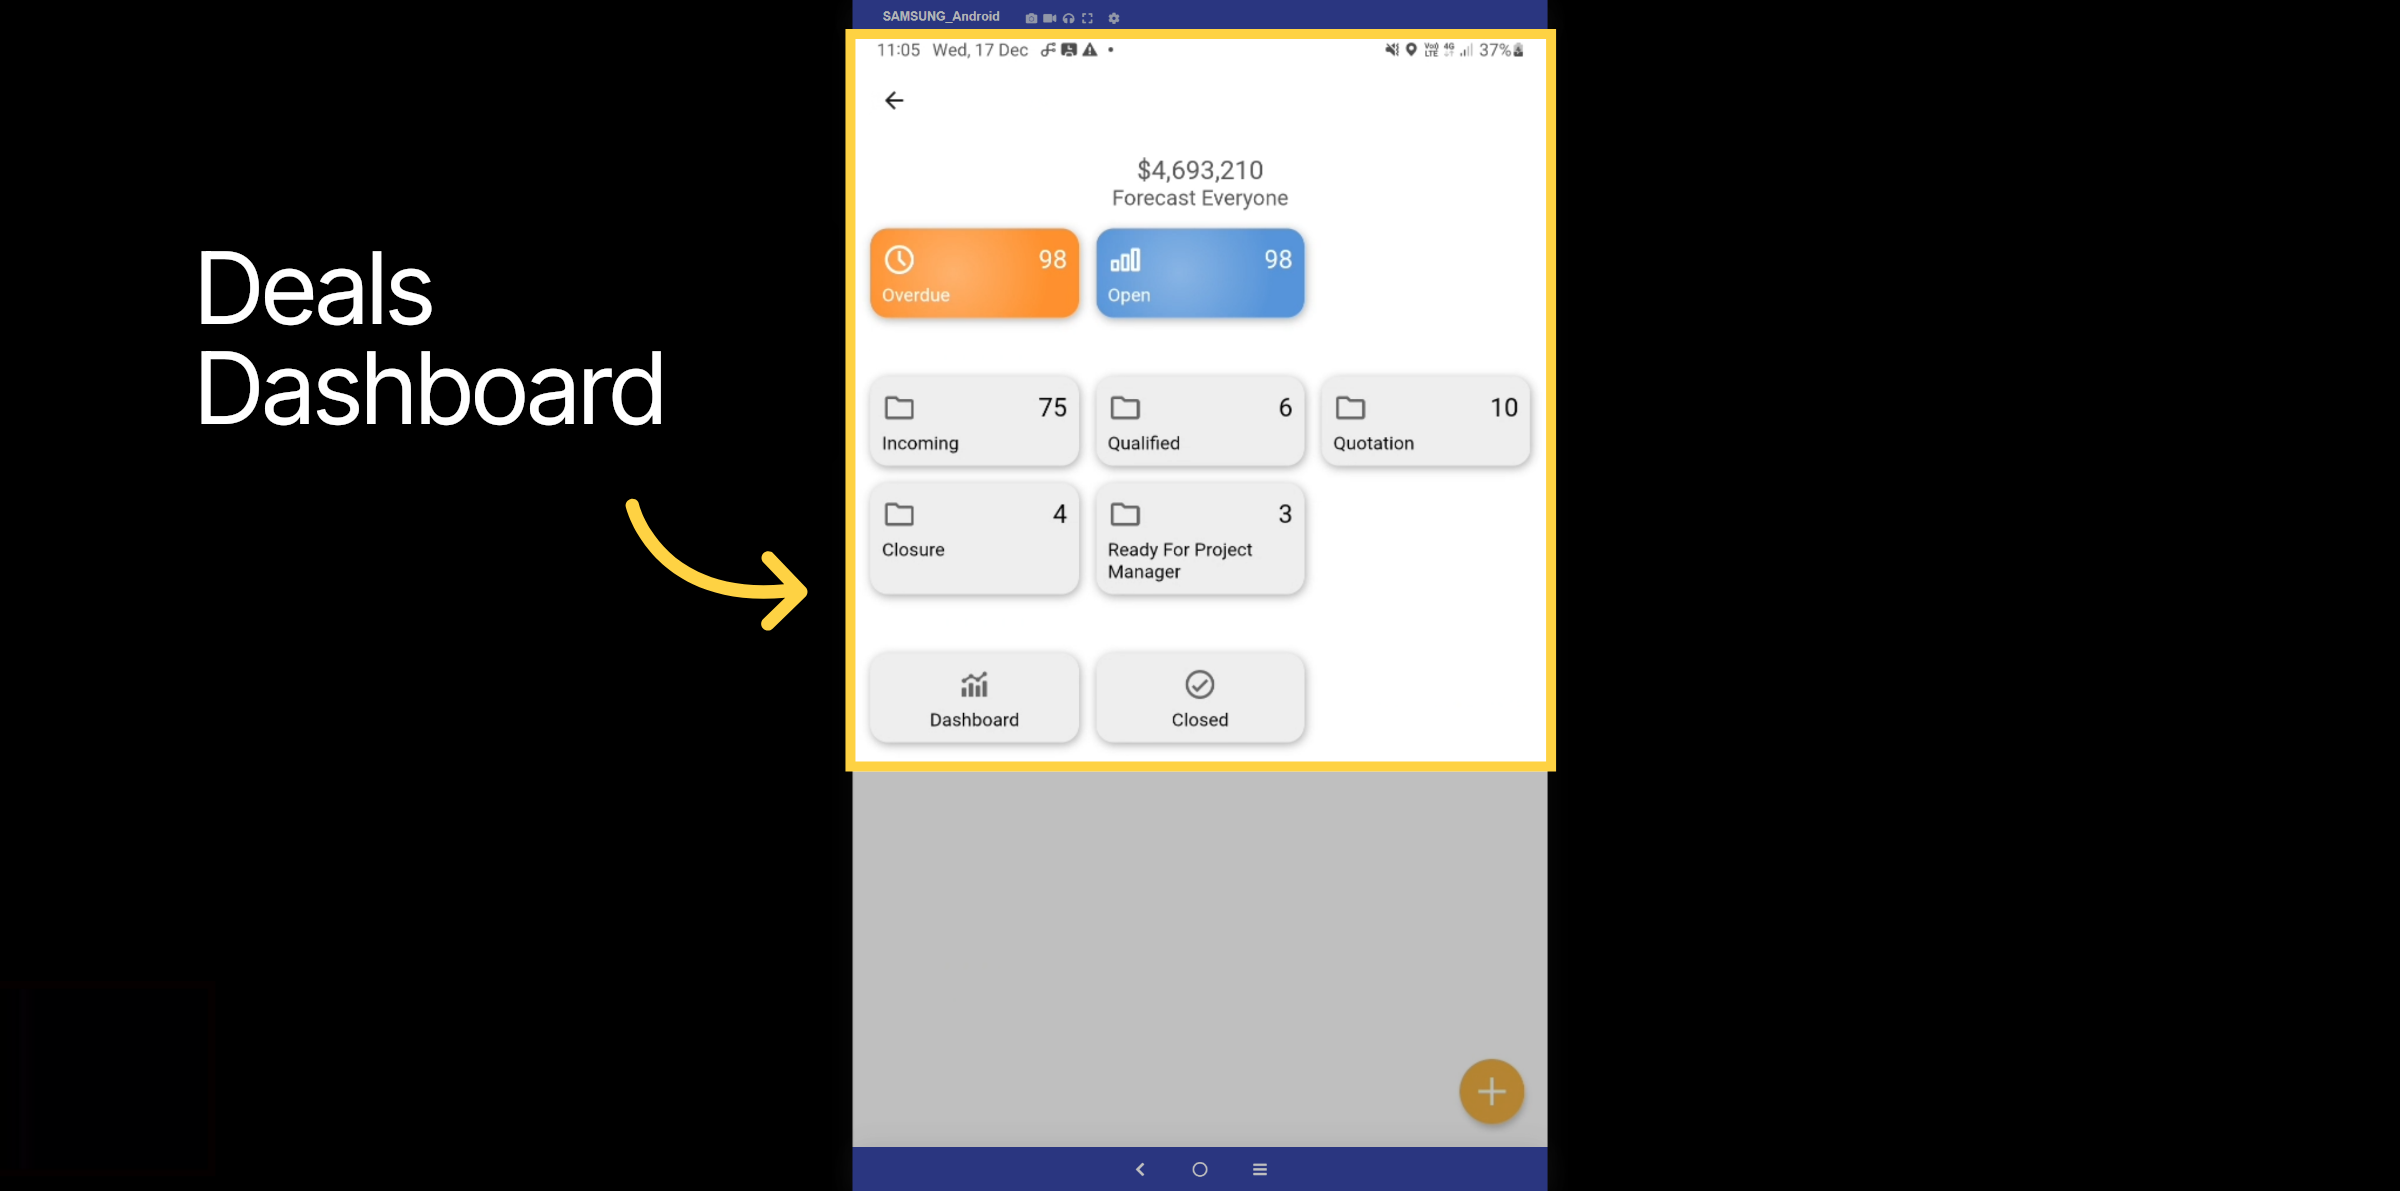
6. Deals Dashboard
The Deals Dashboard offers a forecast of the total deals in your pipeline and can be filtered by date. It encompasses the entire deal cycle, from incoming to closed win or lost. The purpose of the deals feature is to enable you to create several quotes against the same company or tender.
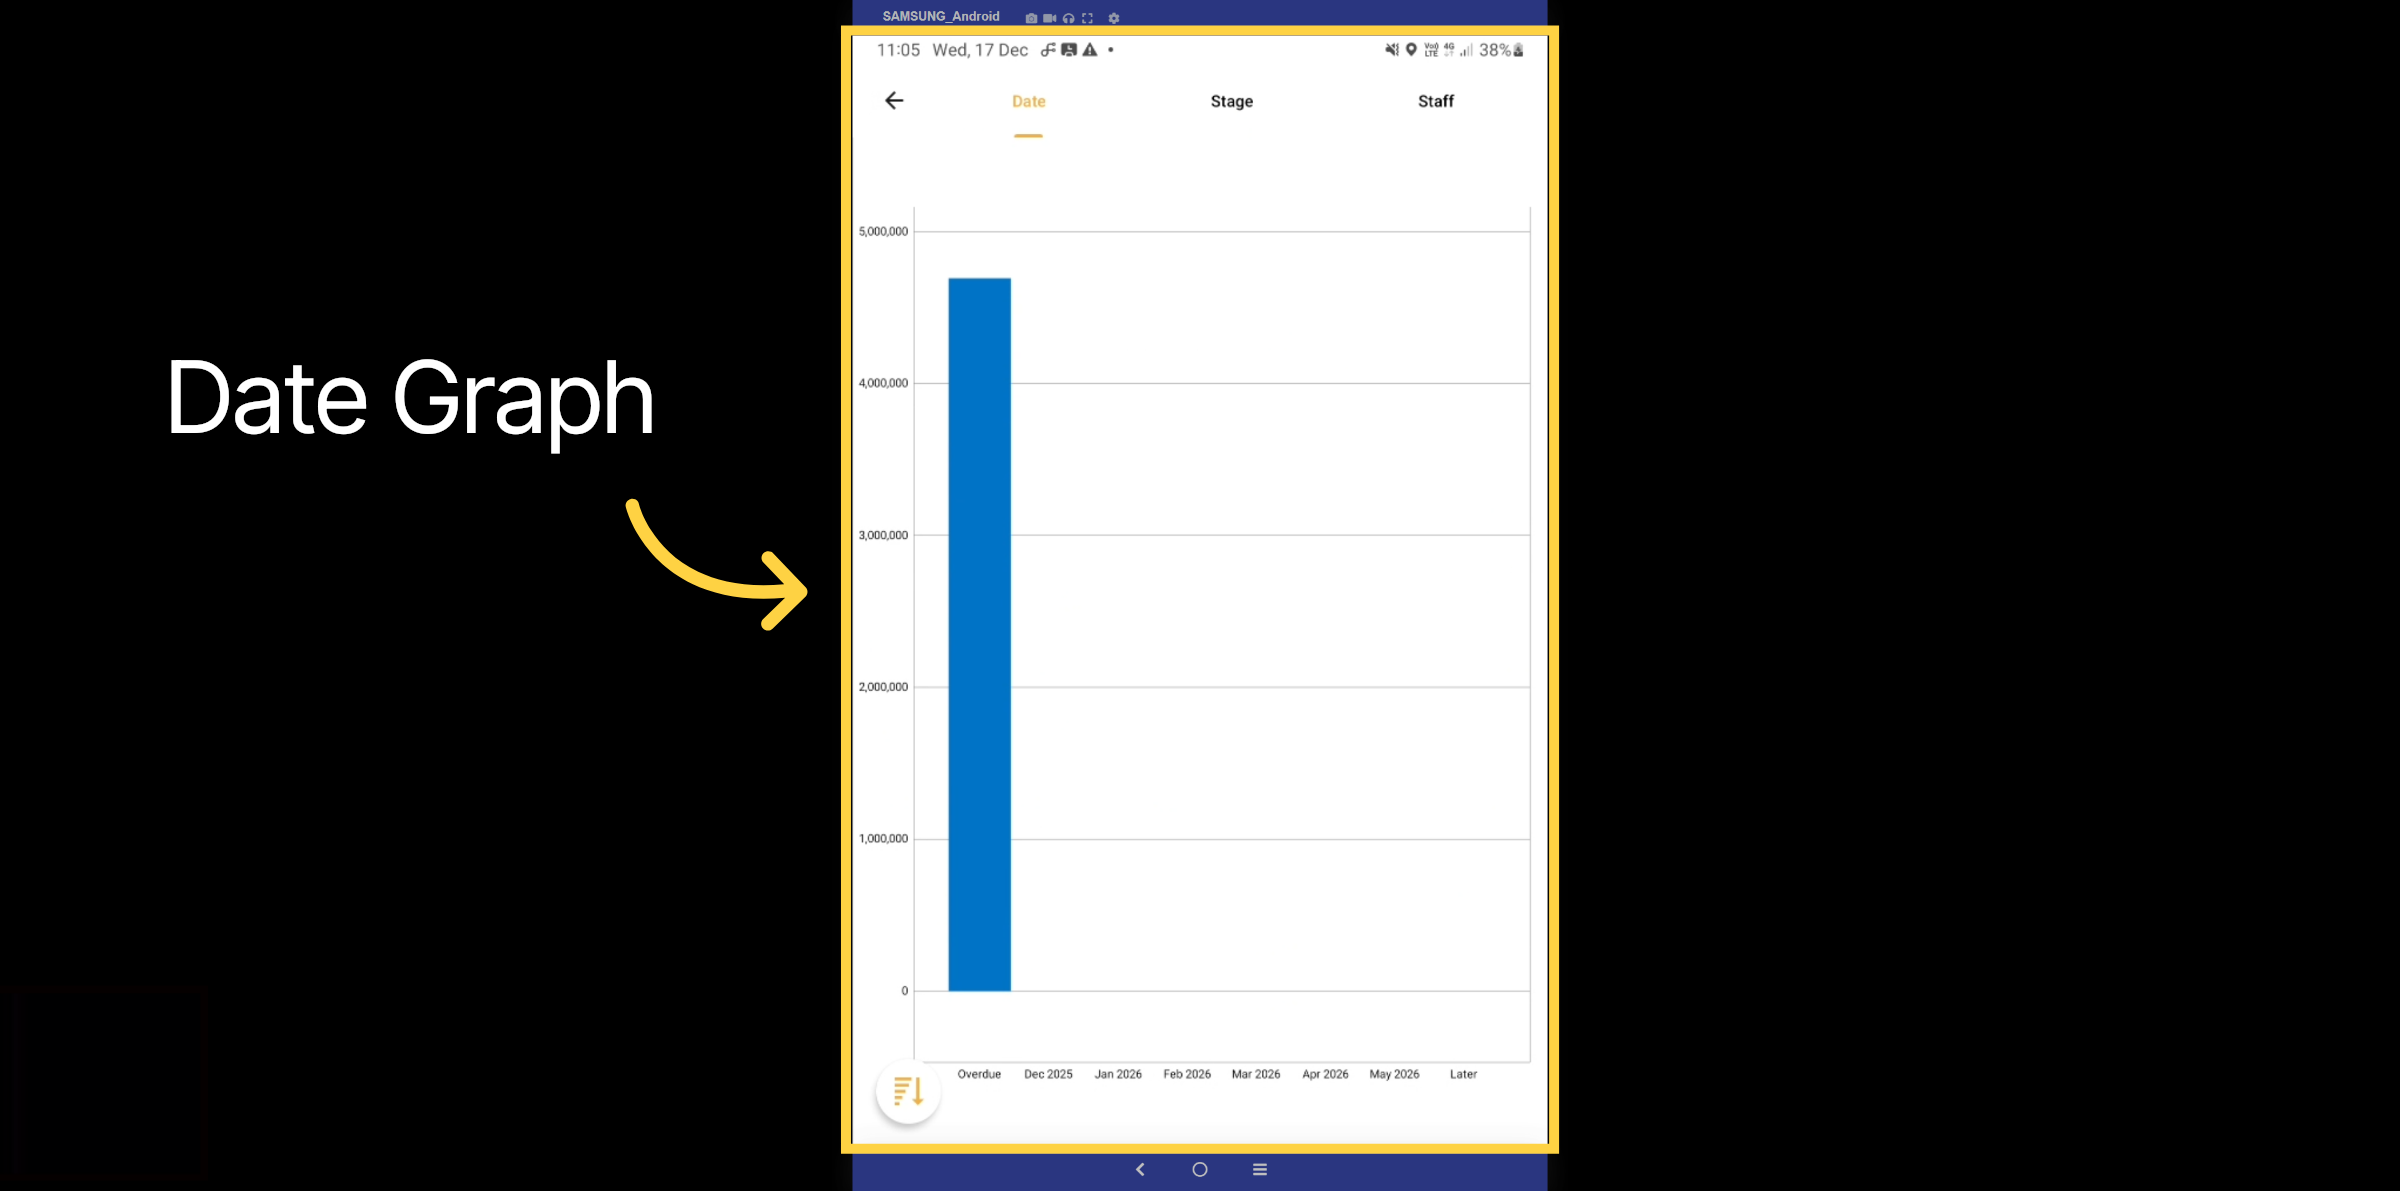
7. Date Graph
On the date graph, you can view the deals in the pipeline represented by this vertical bar graph.
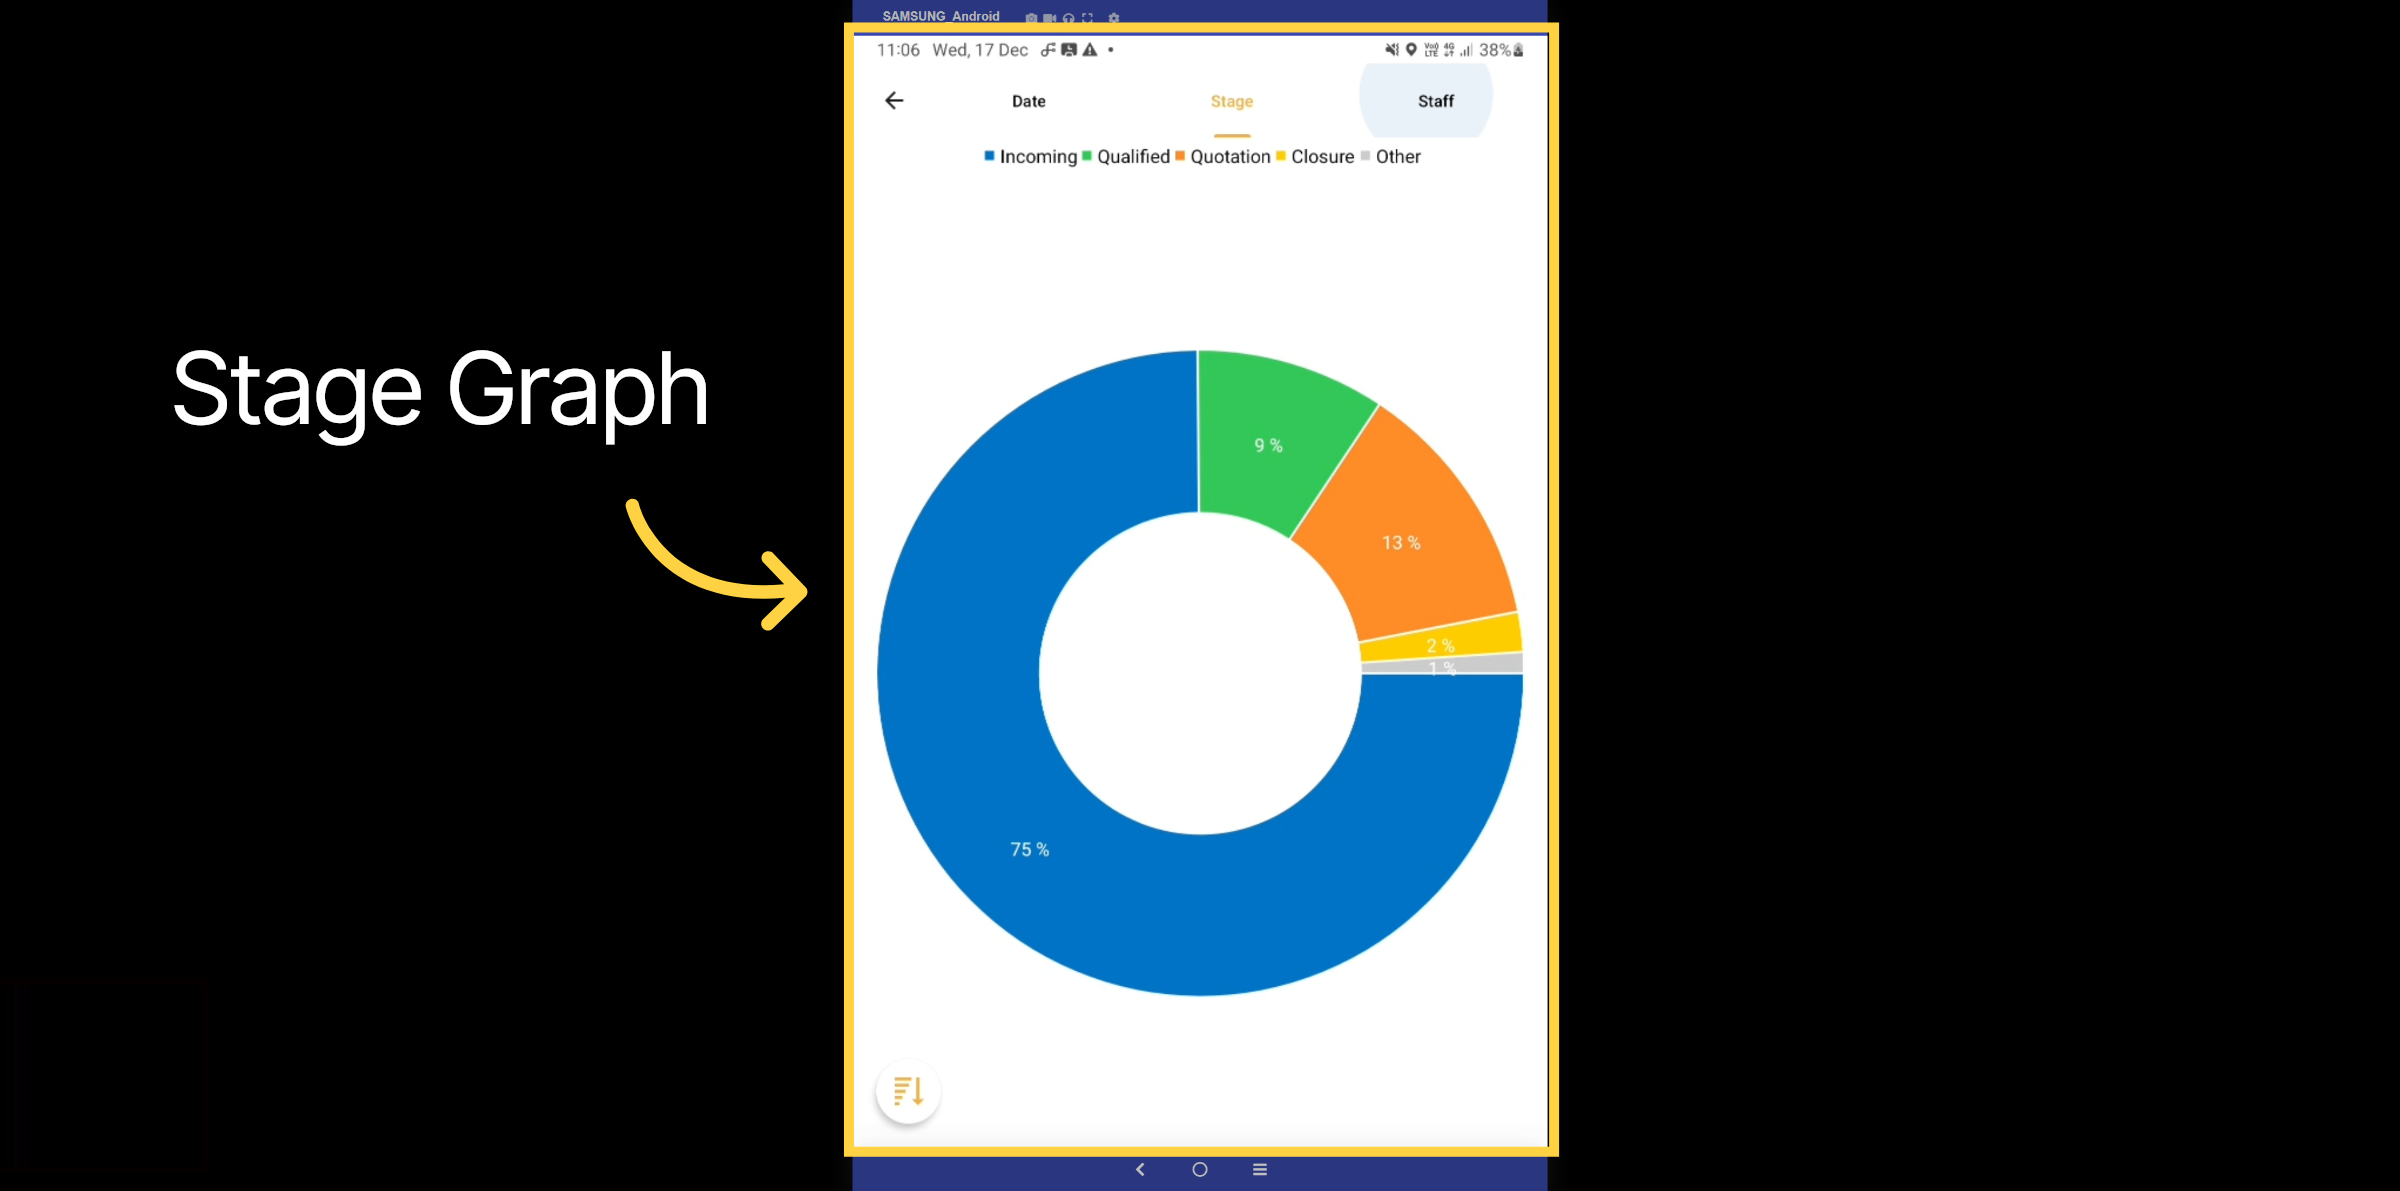
8. Stage Graph
The Stage Graph allows you to view the deal cycle in a donut graph.
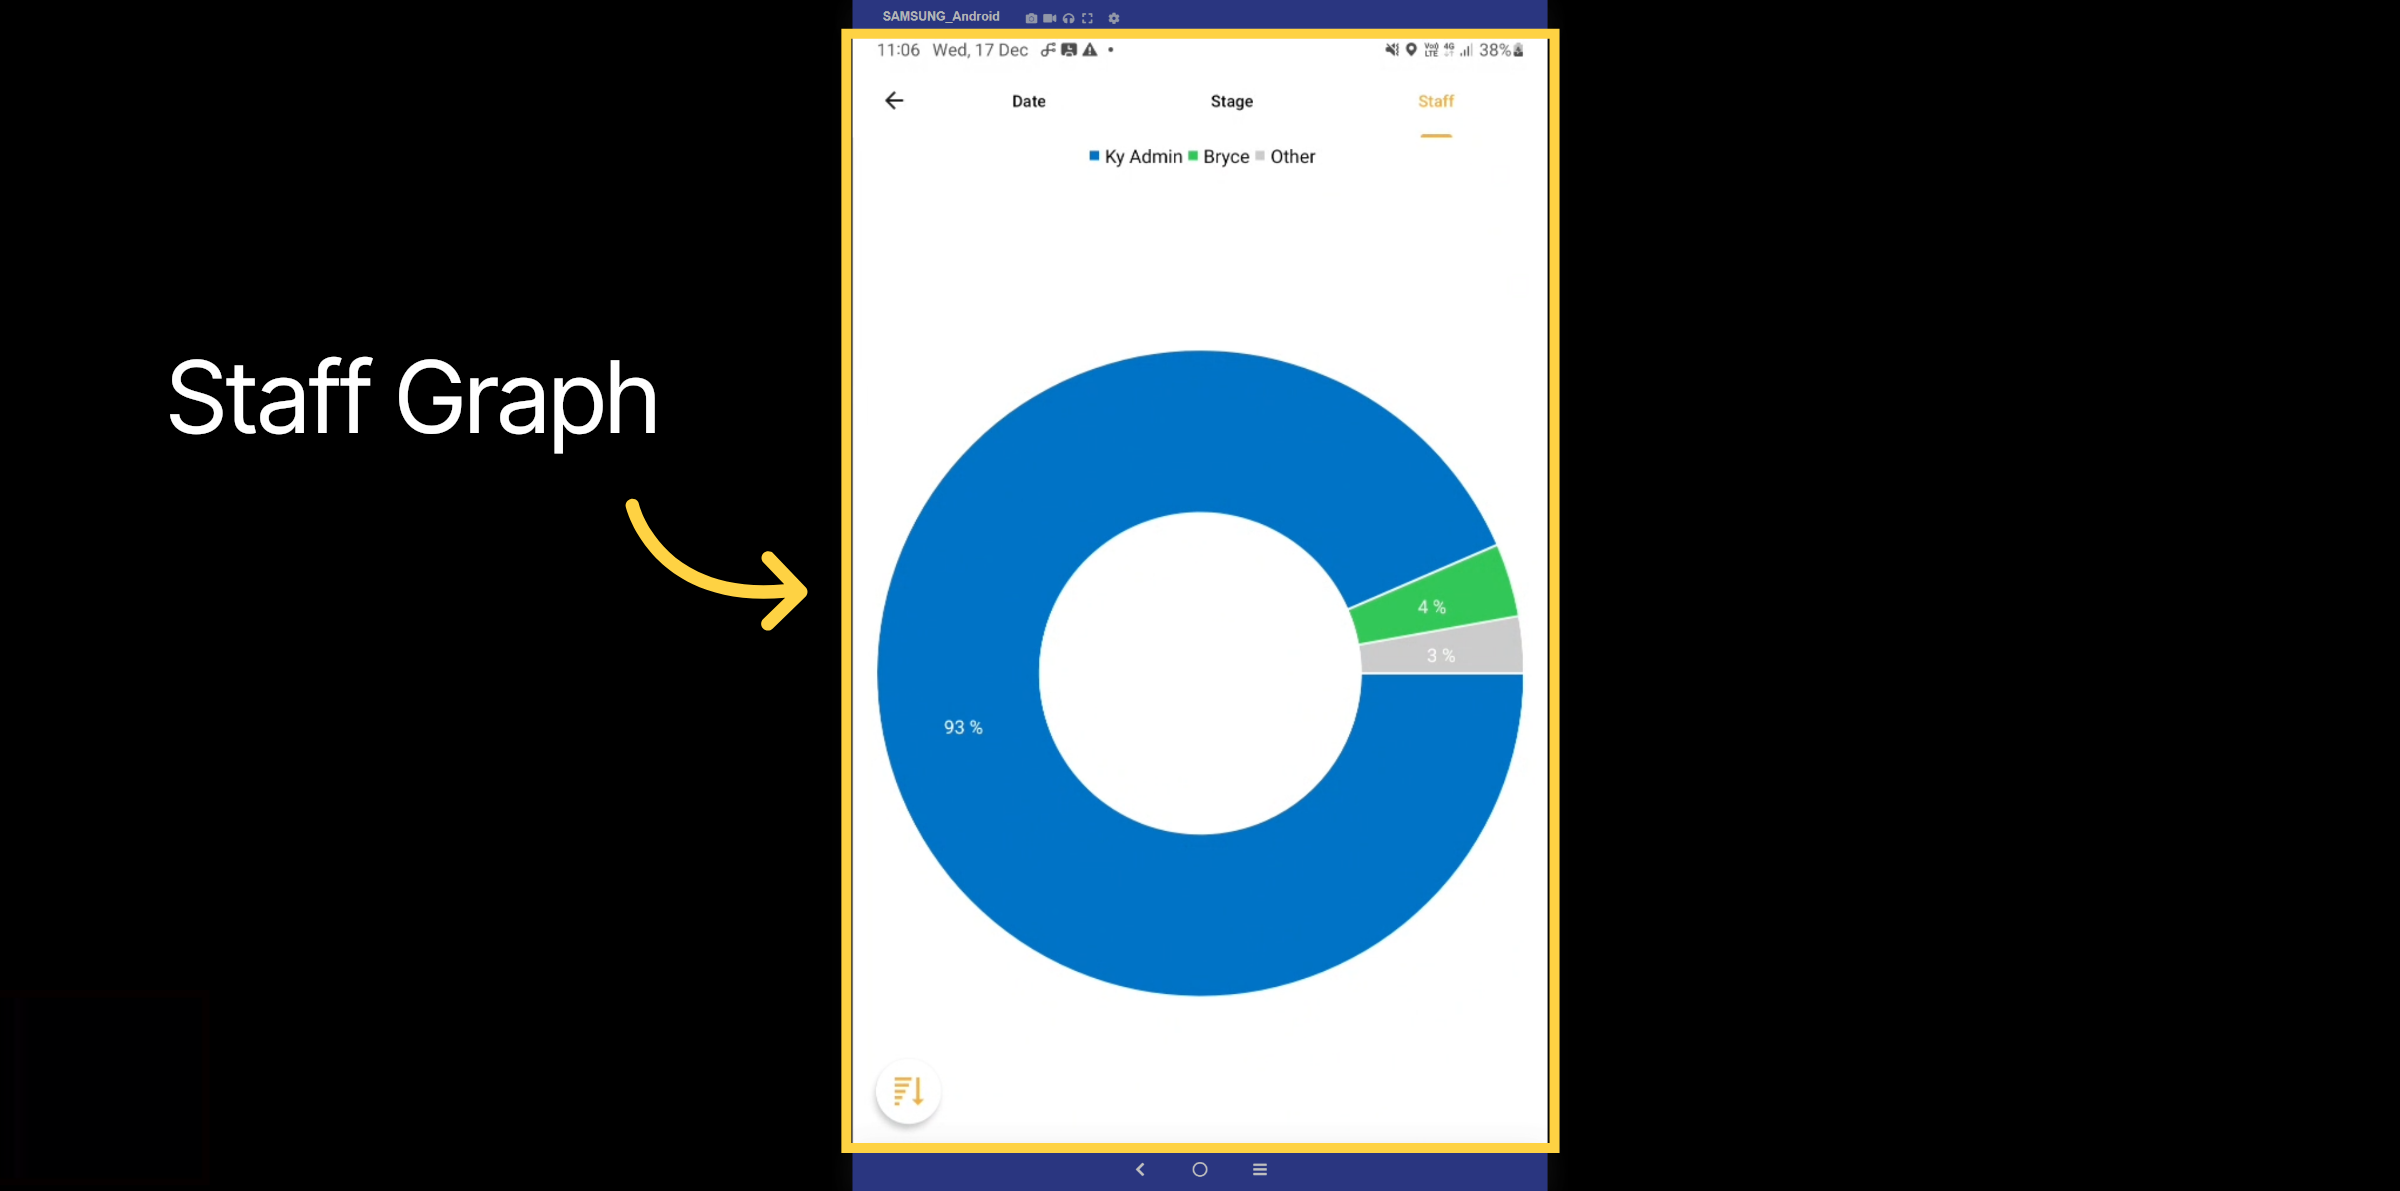
9. Staff Graph
The Staff Graph enables you to see which staff members have the most and least deals.
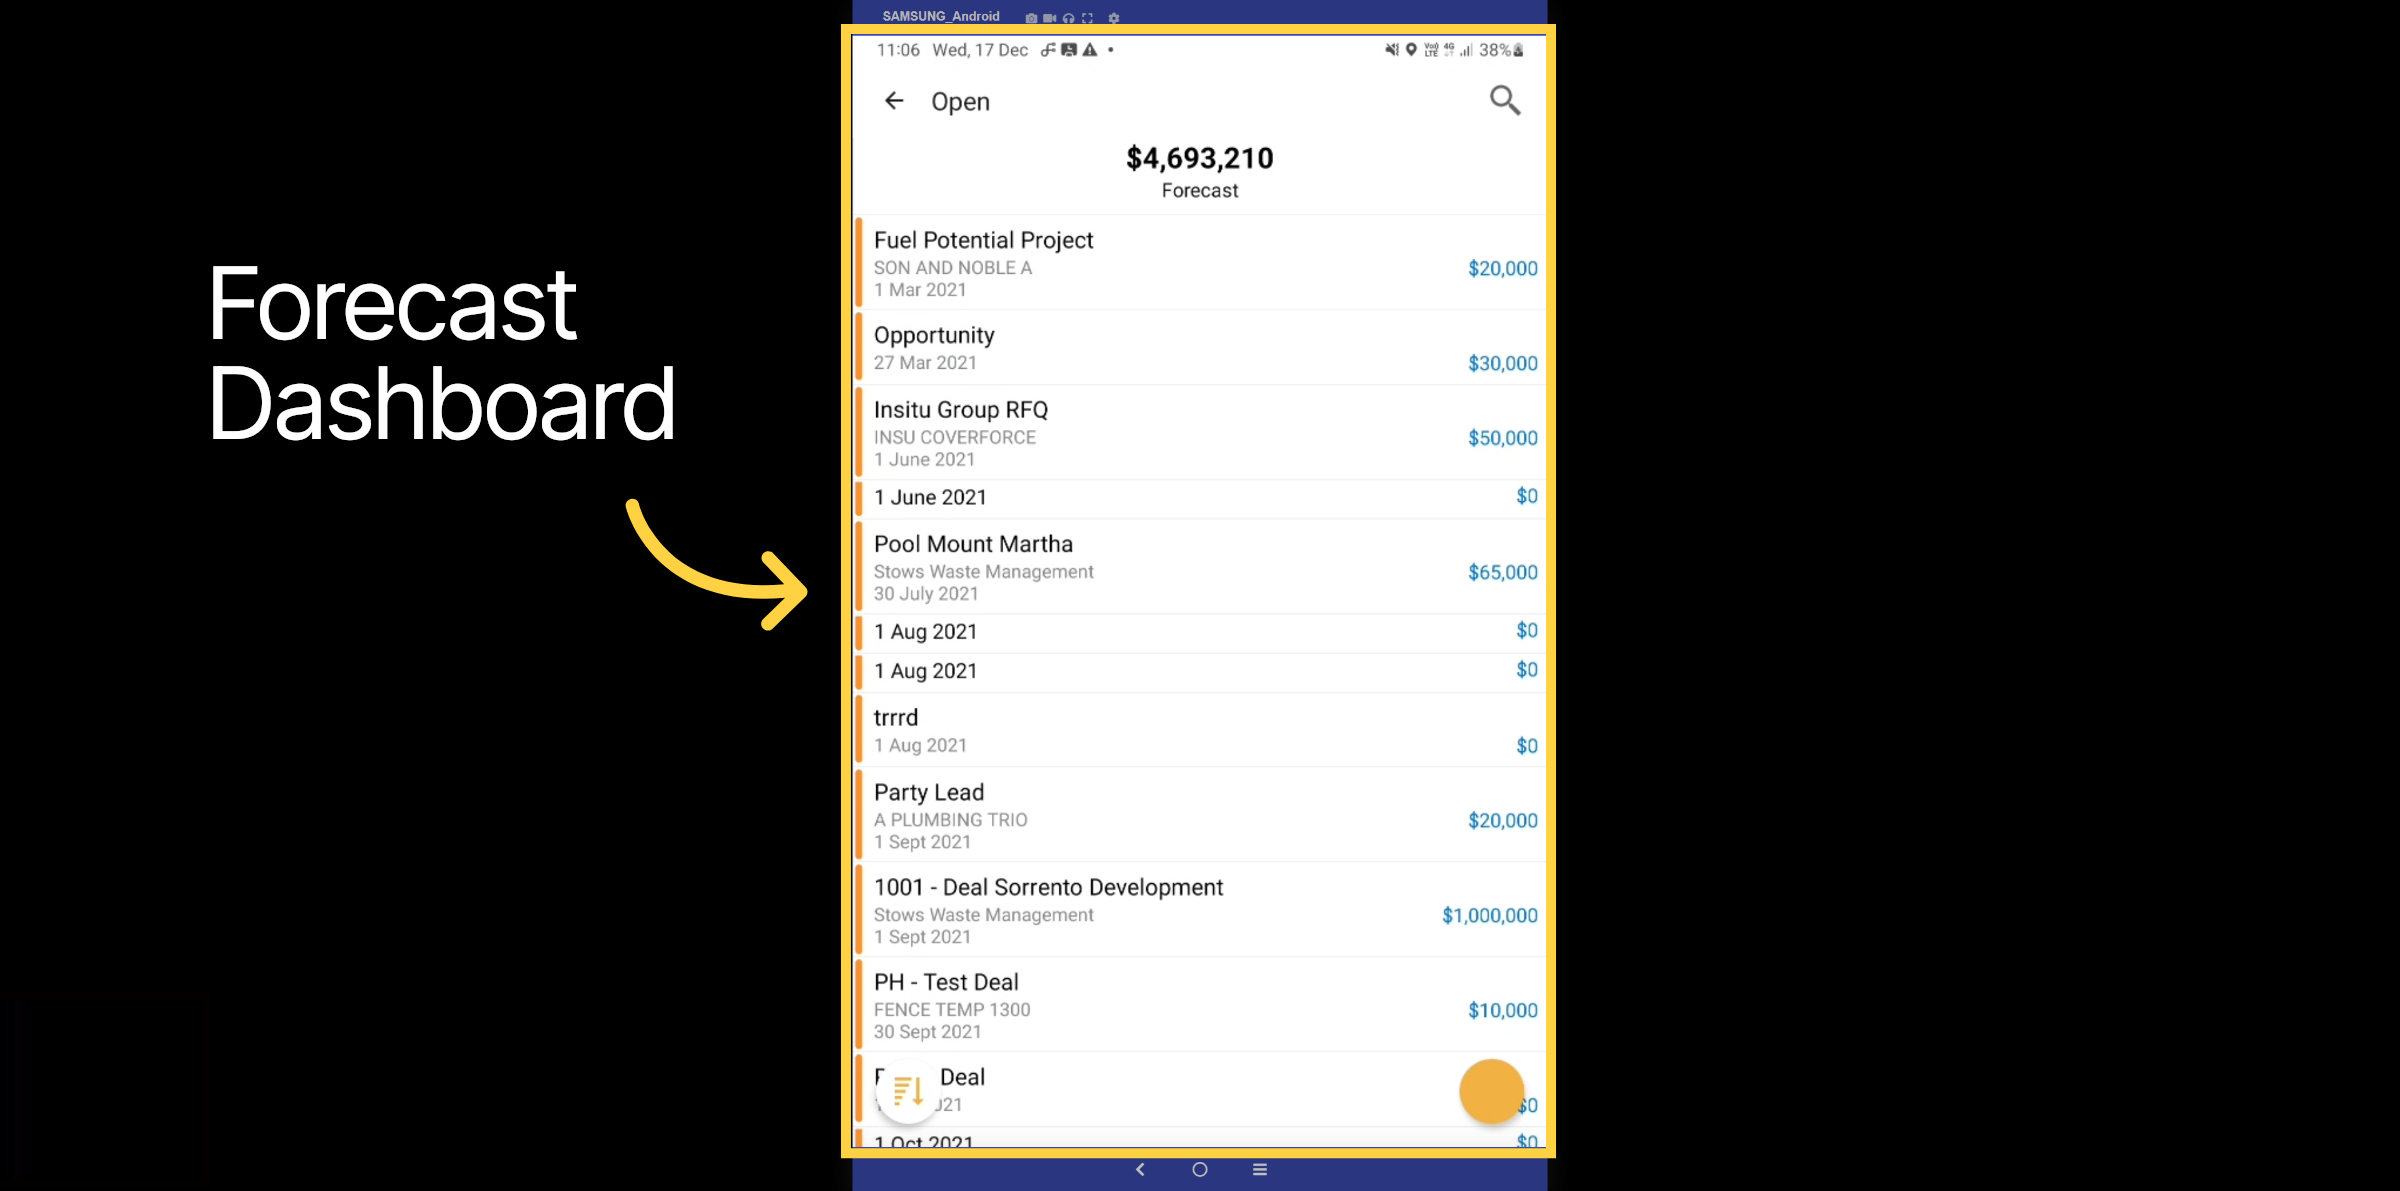
10. Forecast Dashboard
The forecast dashboard total up all your total deal
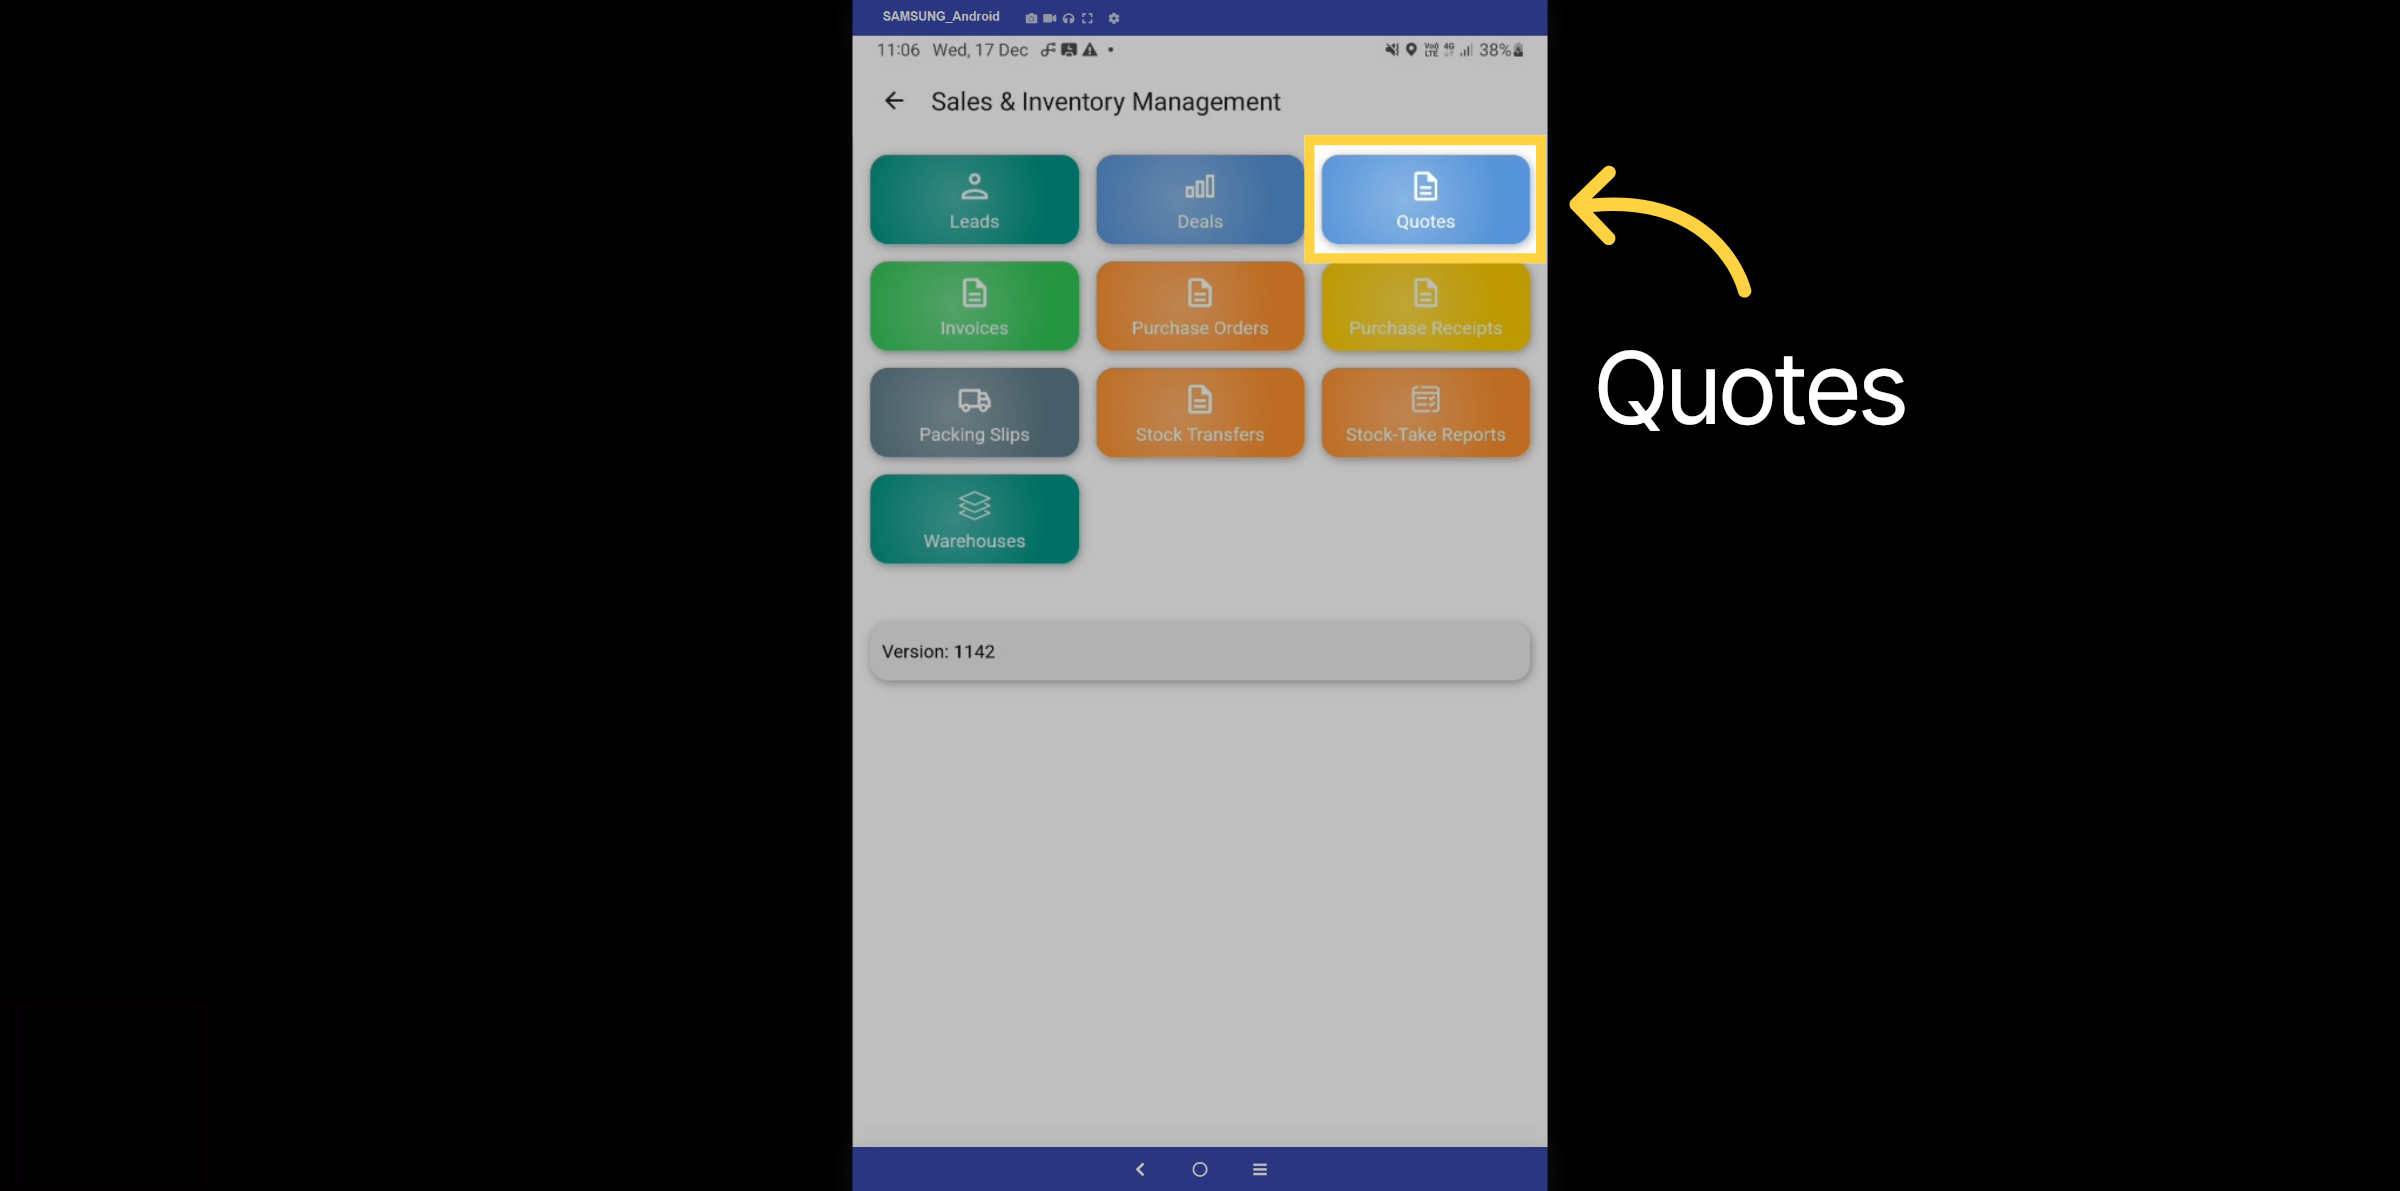
11. Quotes
Let's explore the quotes t
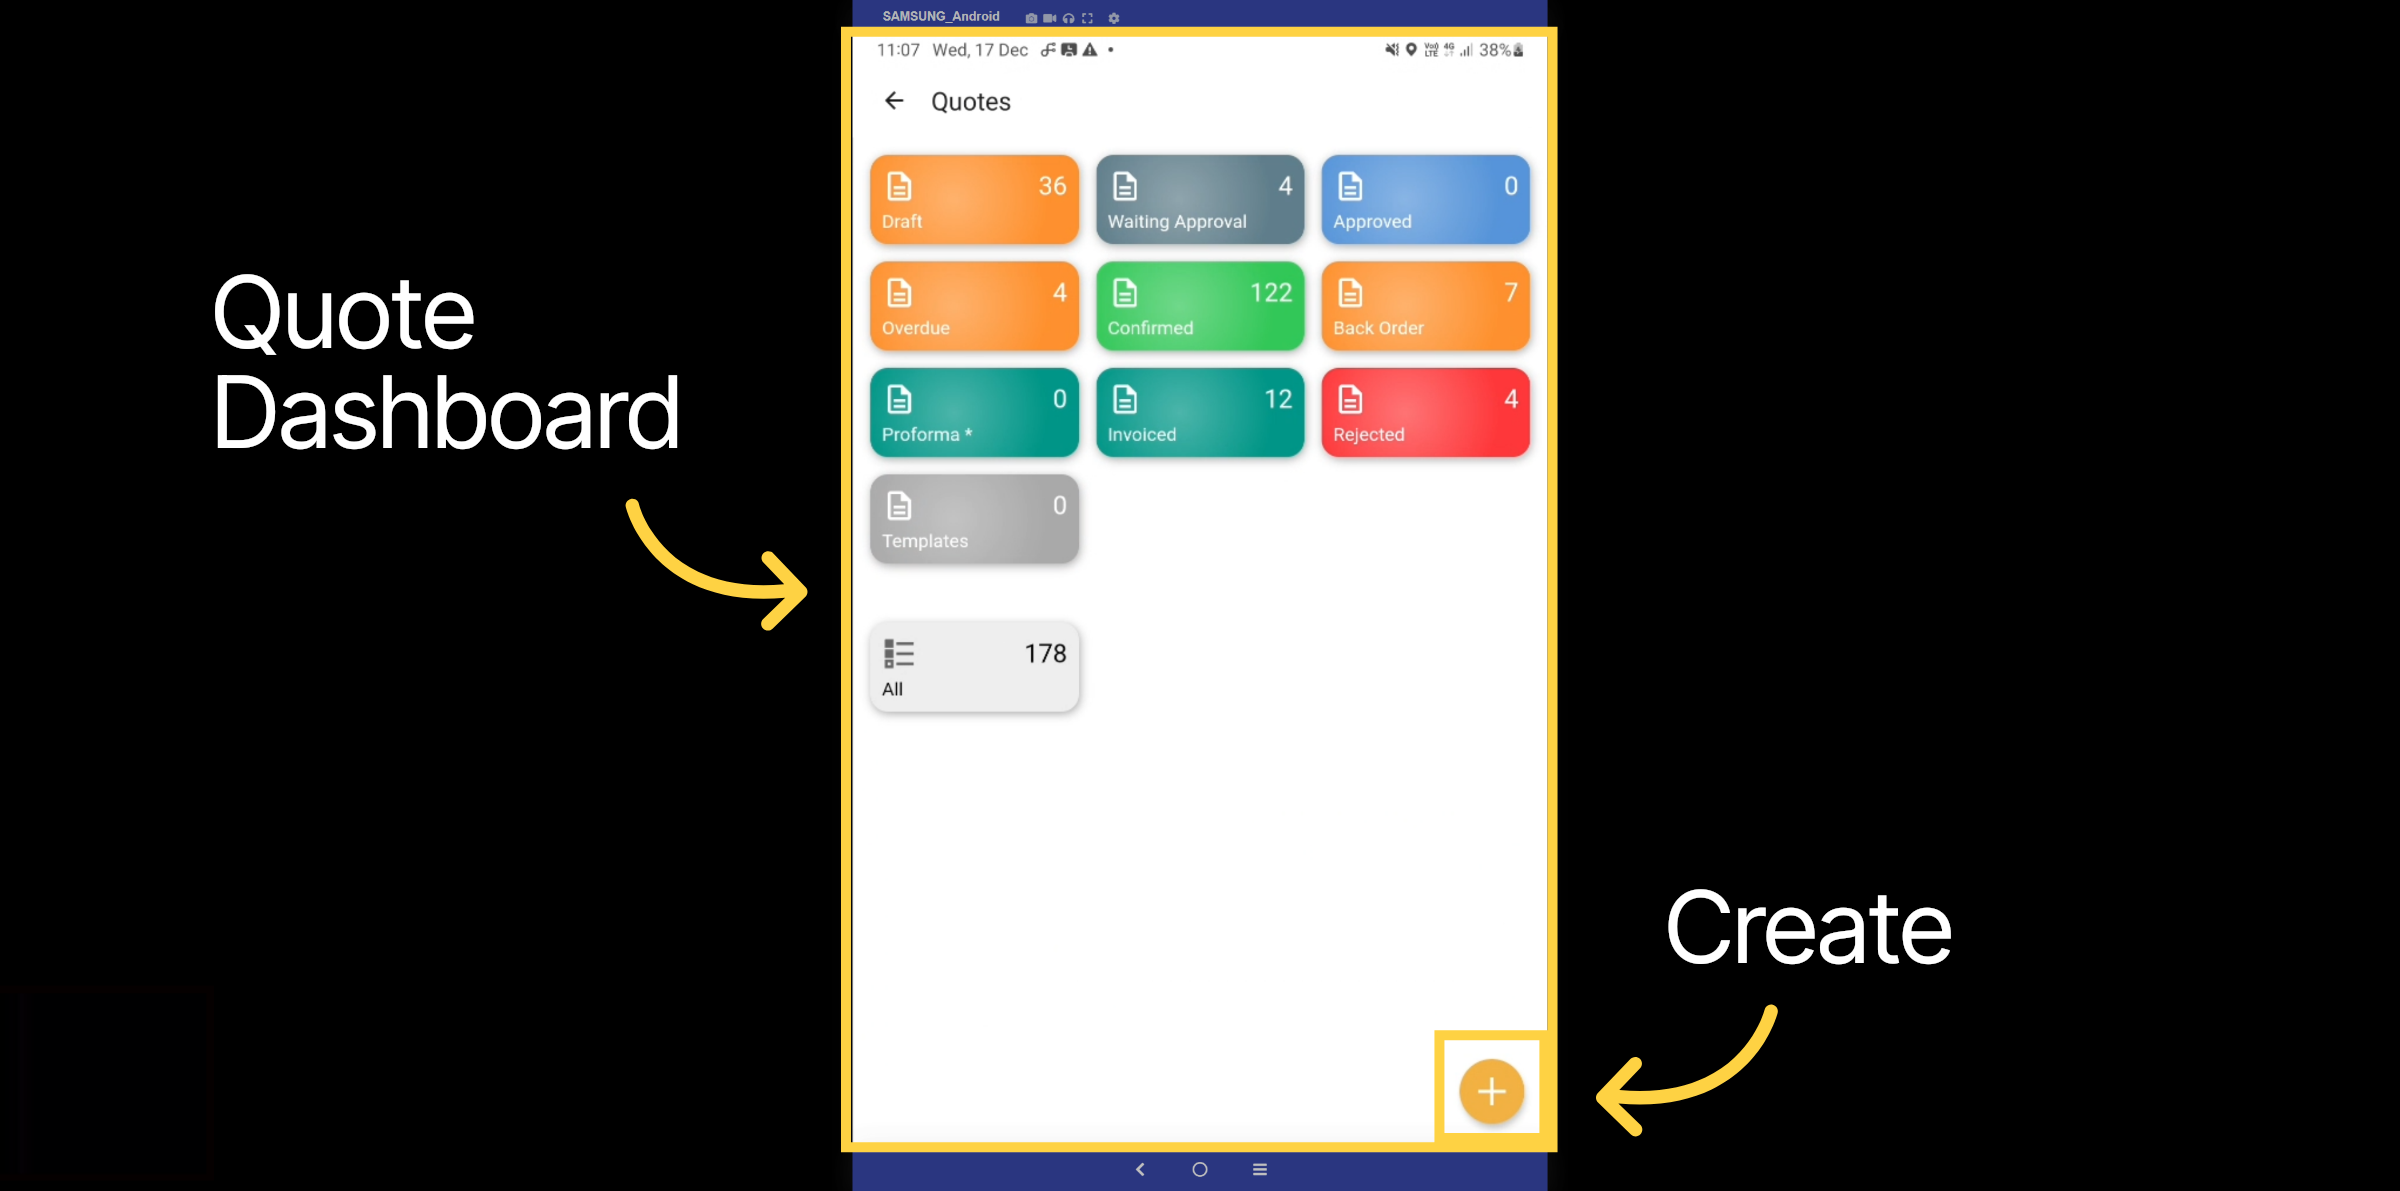
12. Quote Dashboard
The quote dashboard offers a clear workflow that includes draft, awaiting approval, approved, overdue, confirmed, back order, proforma, invoices, and rejects. Additionally, there are templated quotes to simplify and streamline the quoting process. Select the Plus icon to create a quote from the beginning.
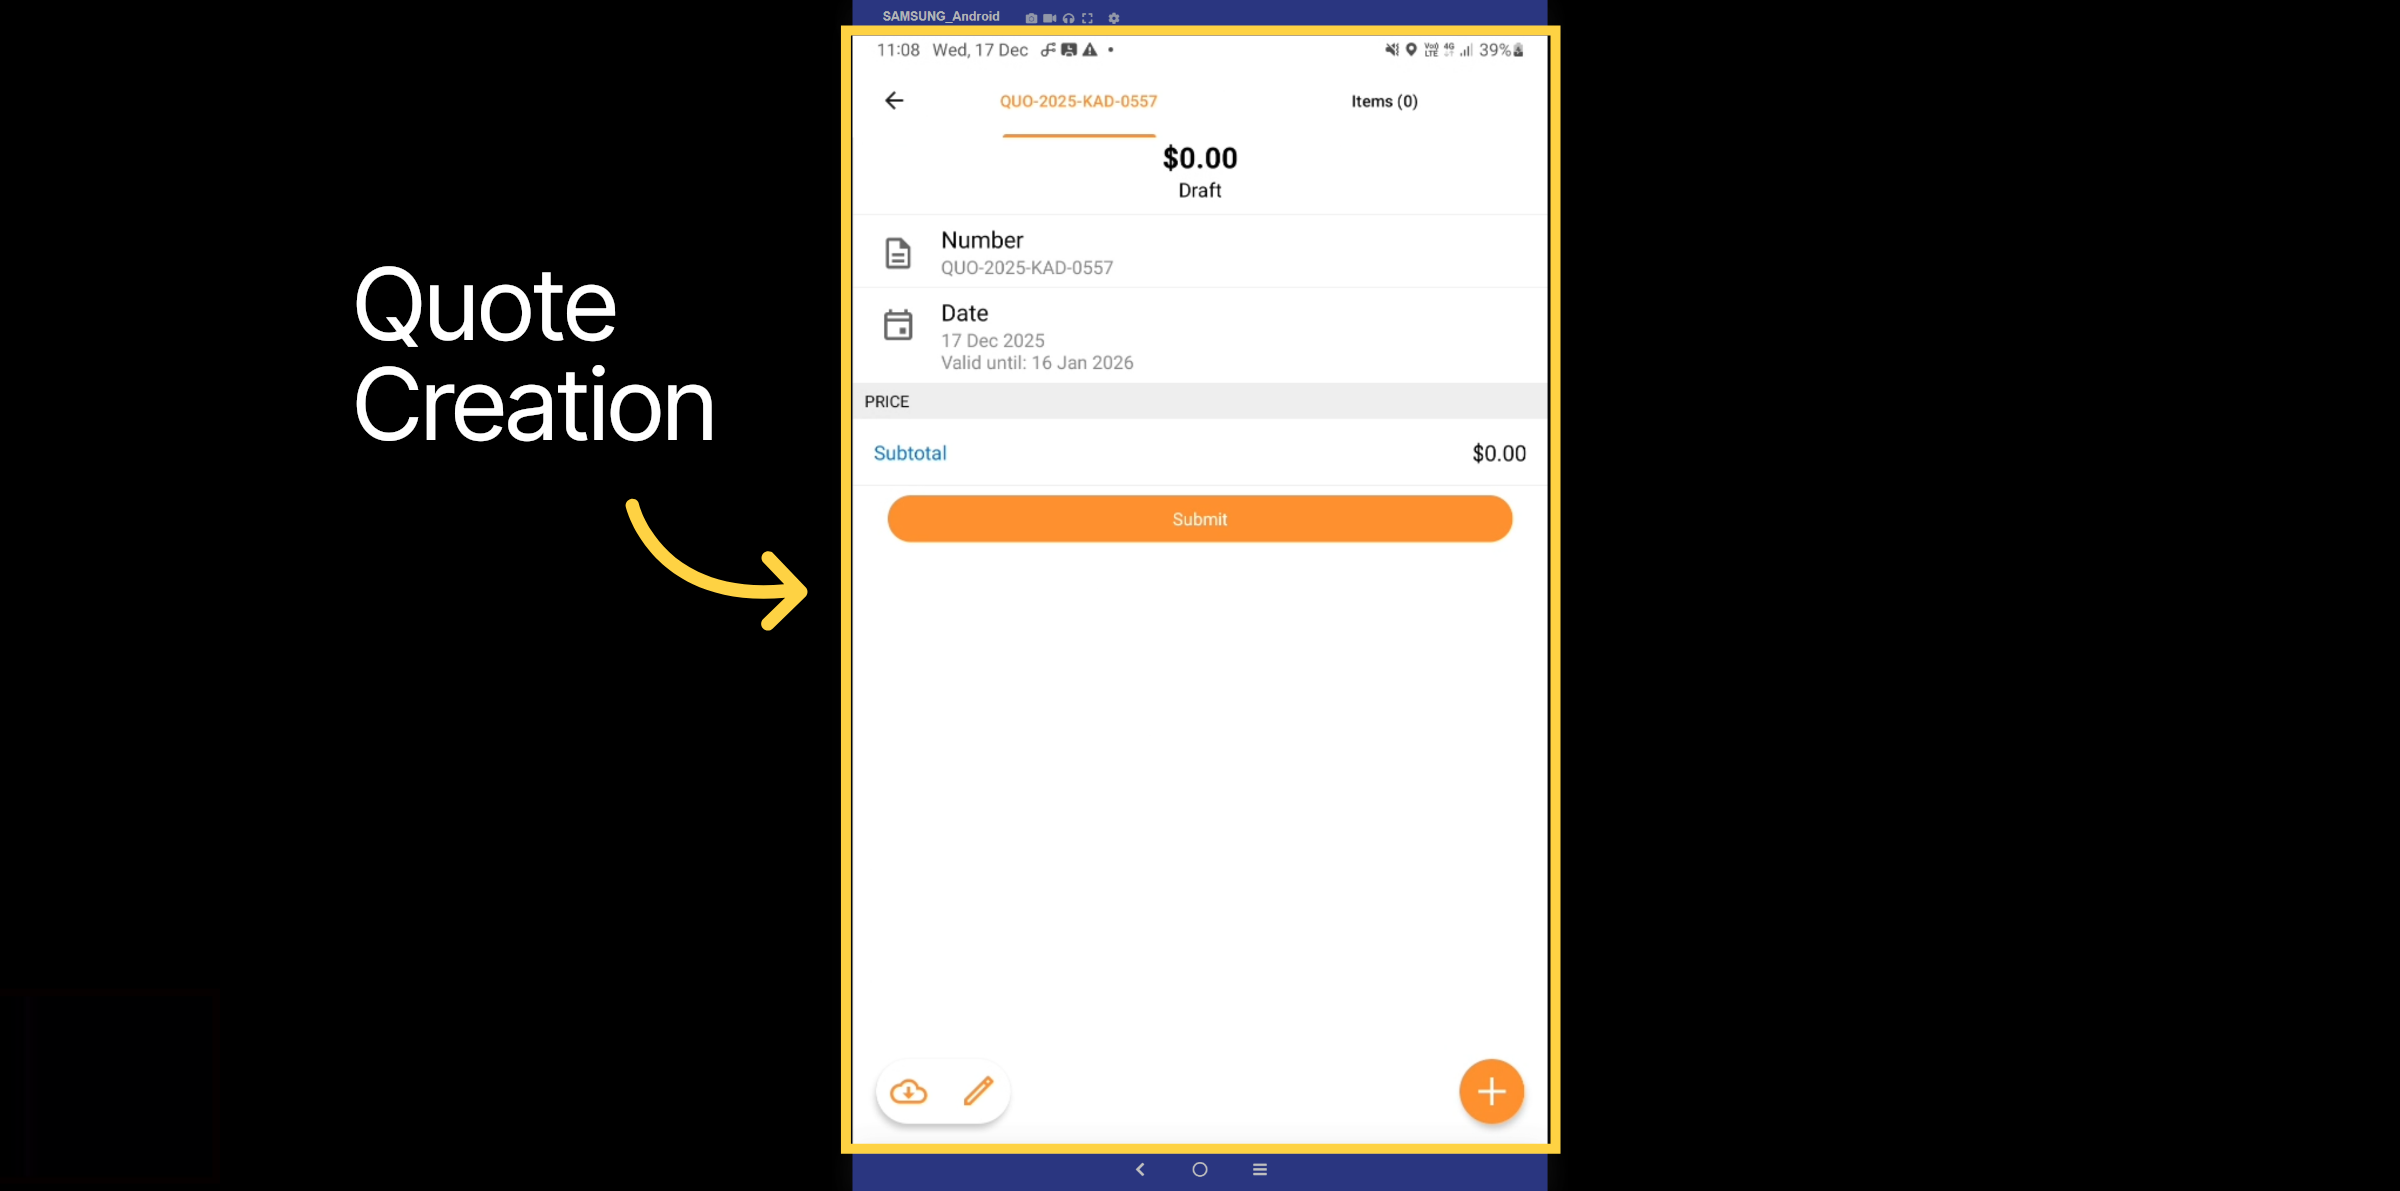
13. Quote Creation
The draft quote has been created. Select the edit pencil to begin inputting details.
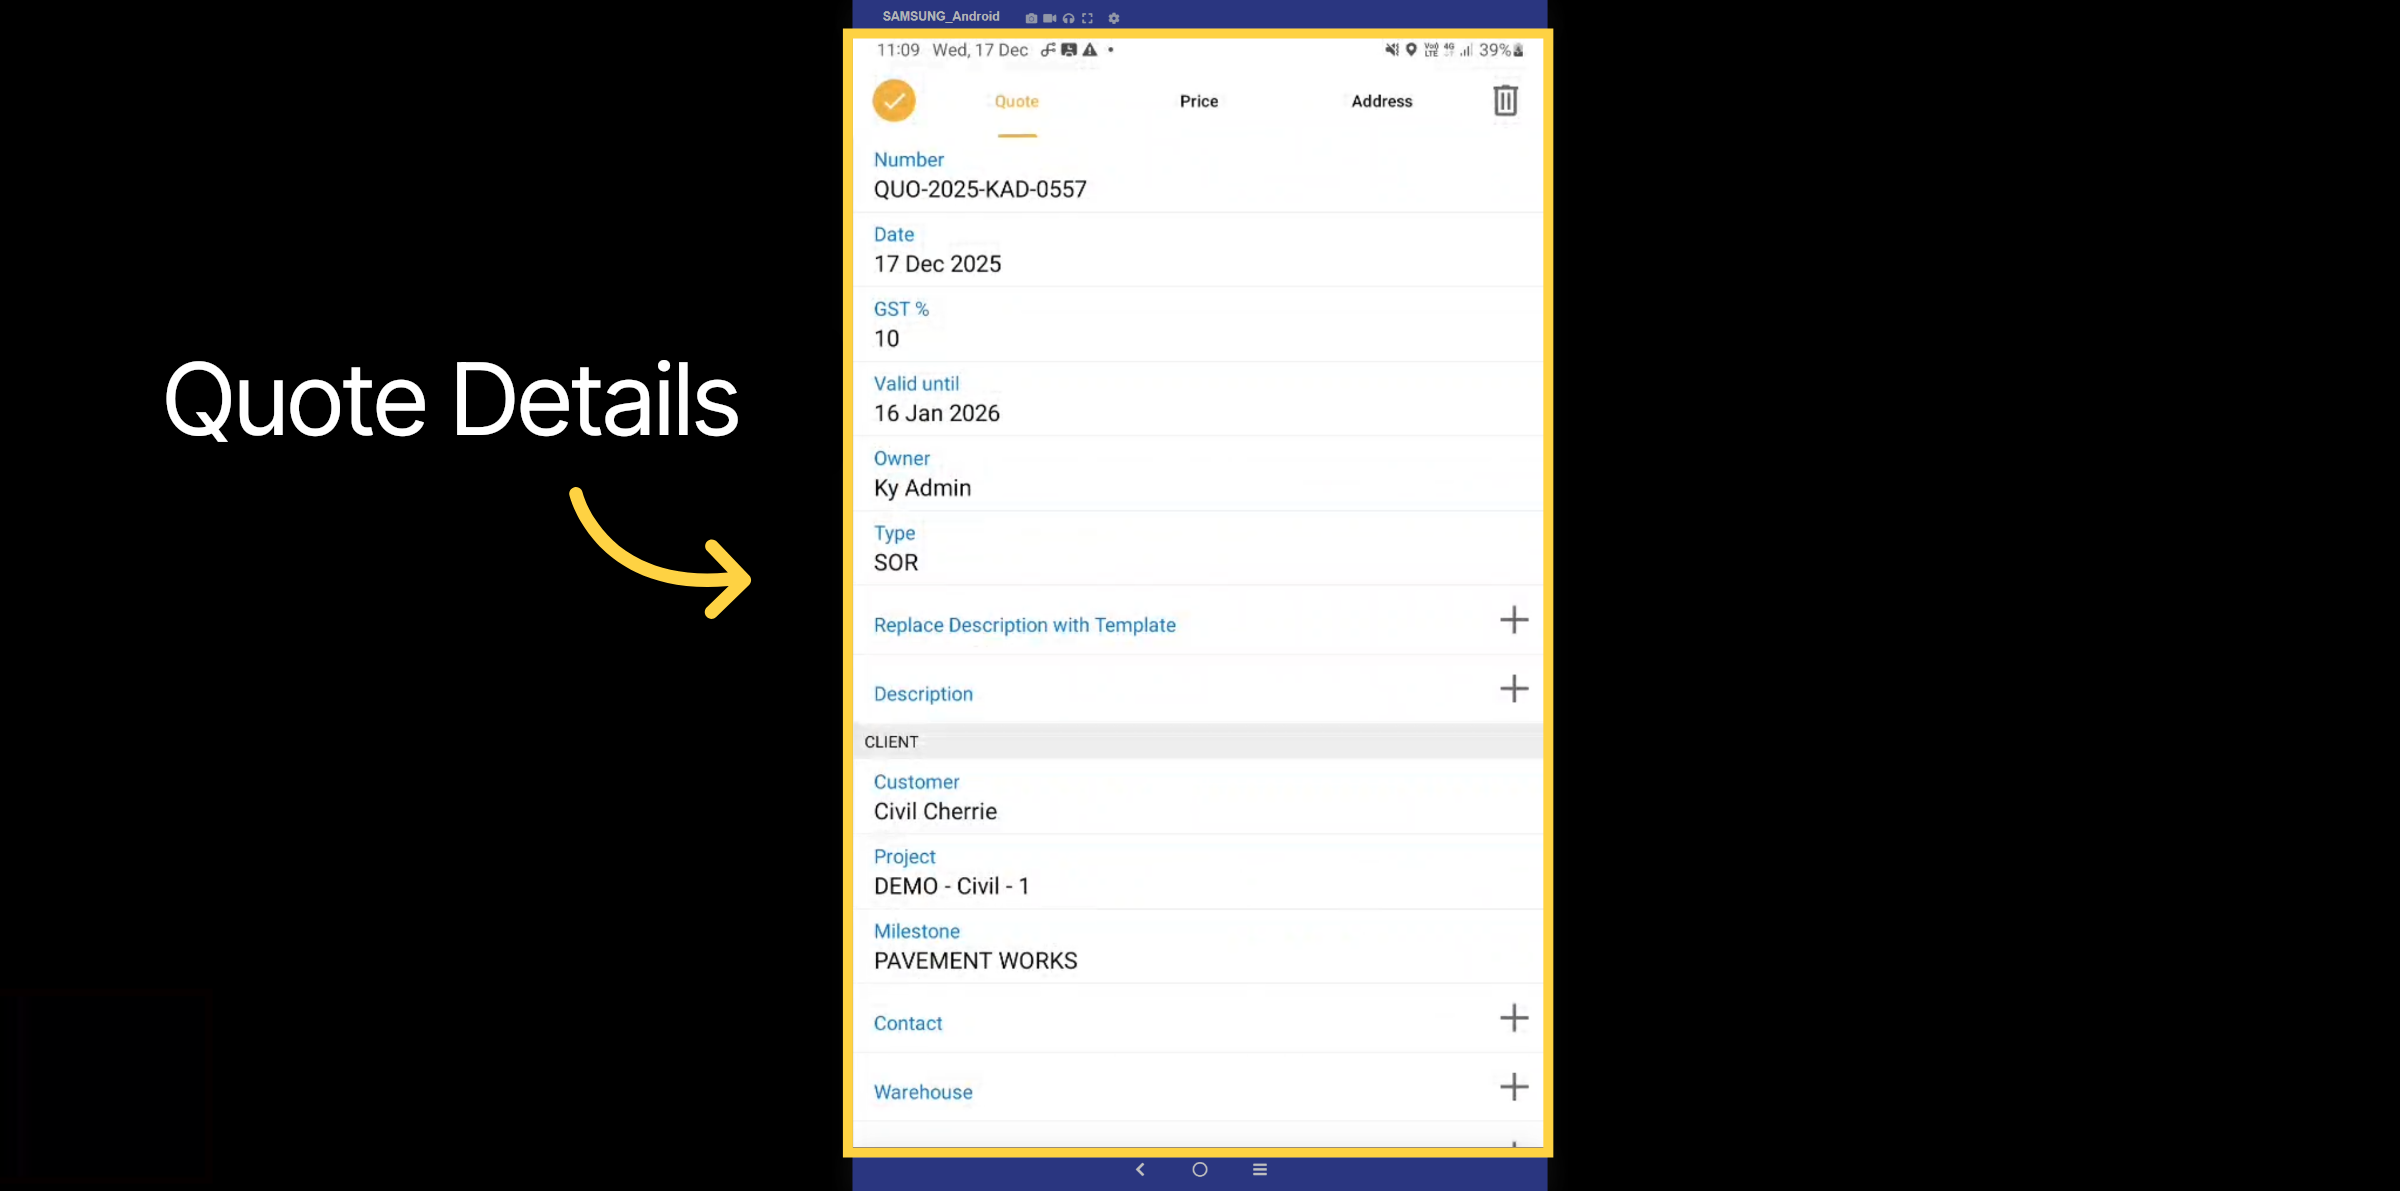
14. Quote Details
Please input all relevant details, including customer information, site specifics, description, payment plan, and more.
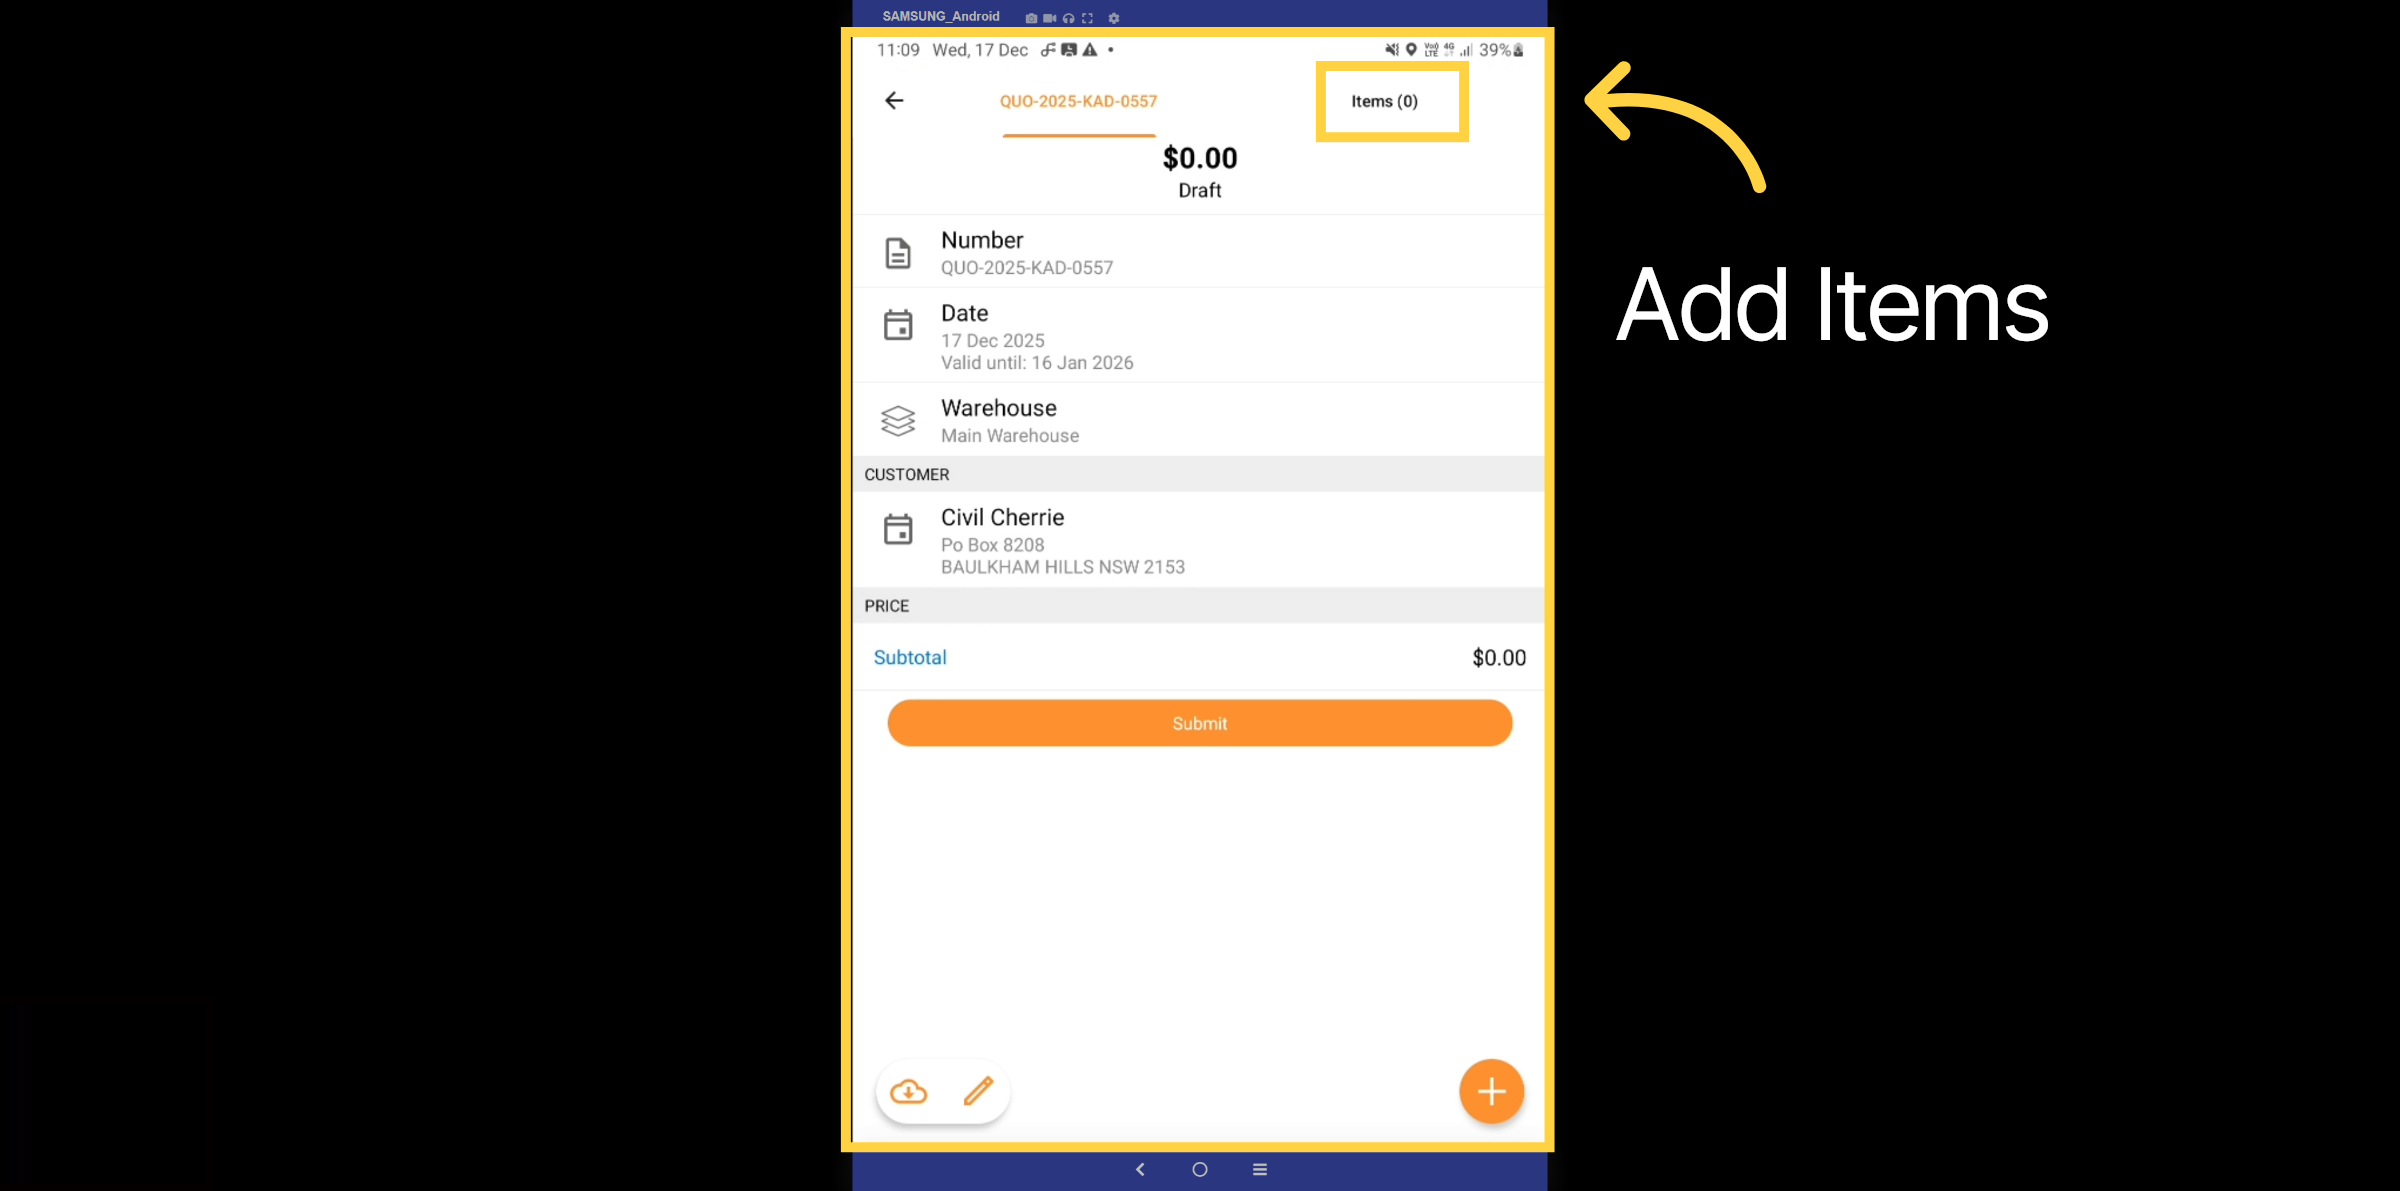
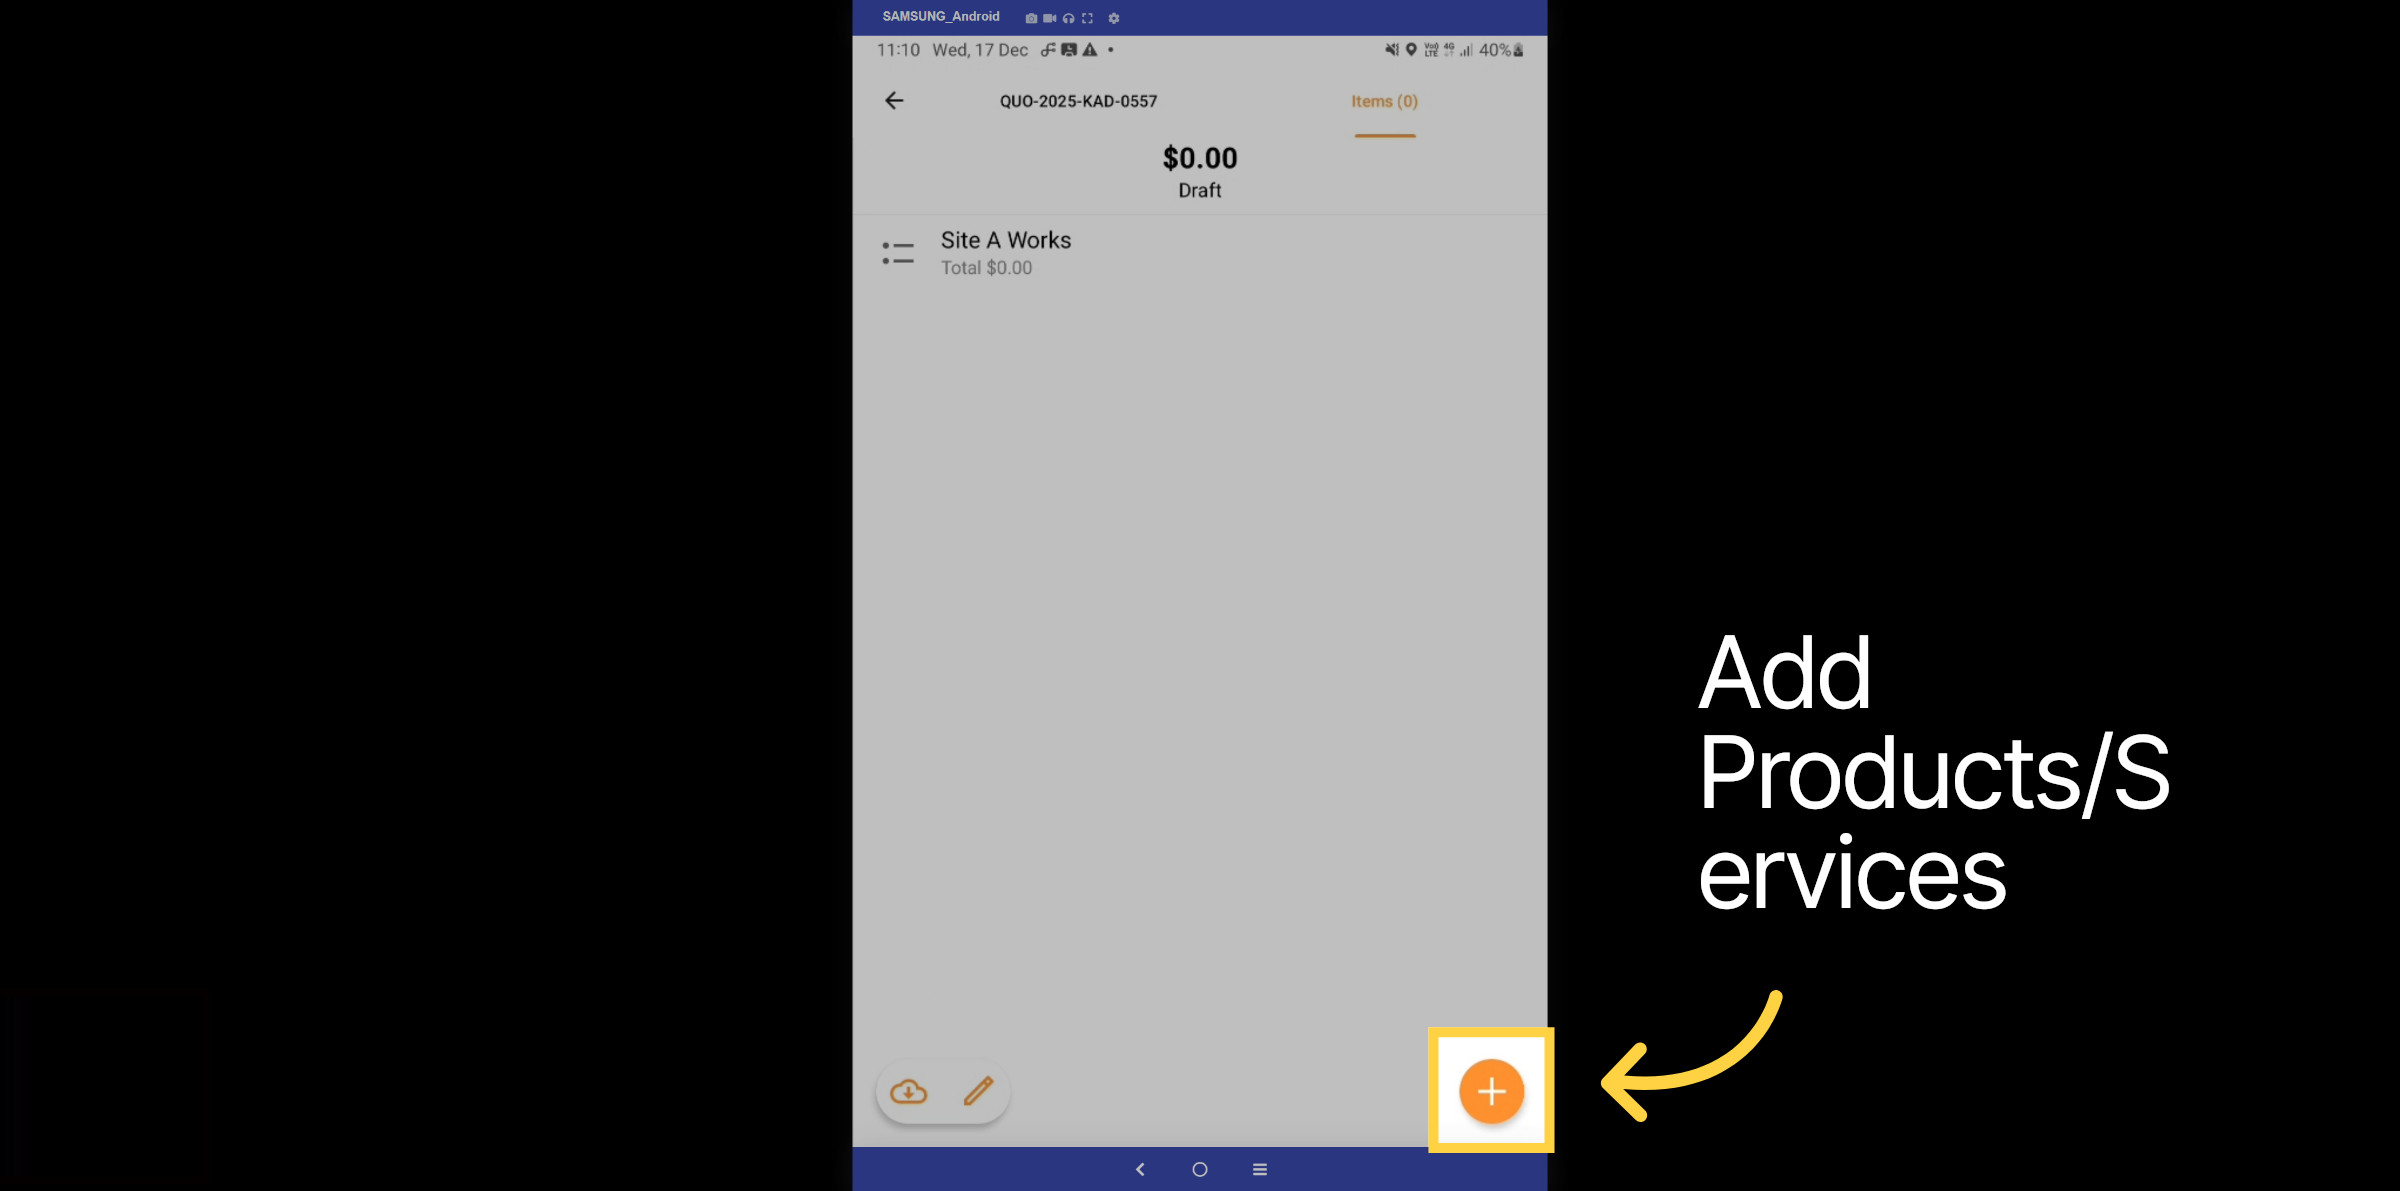
15. Add Items
Once the details are complete, select the "Add Items" tab.
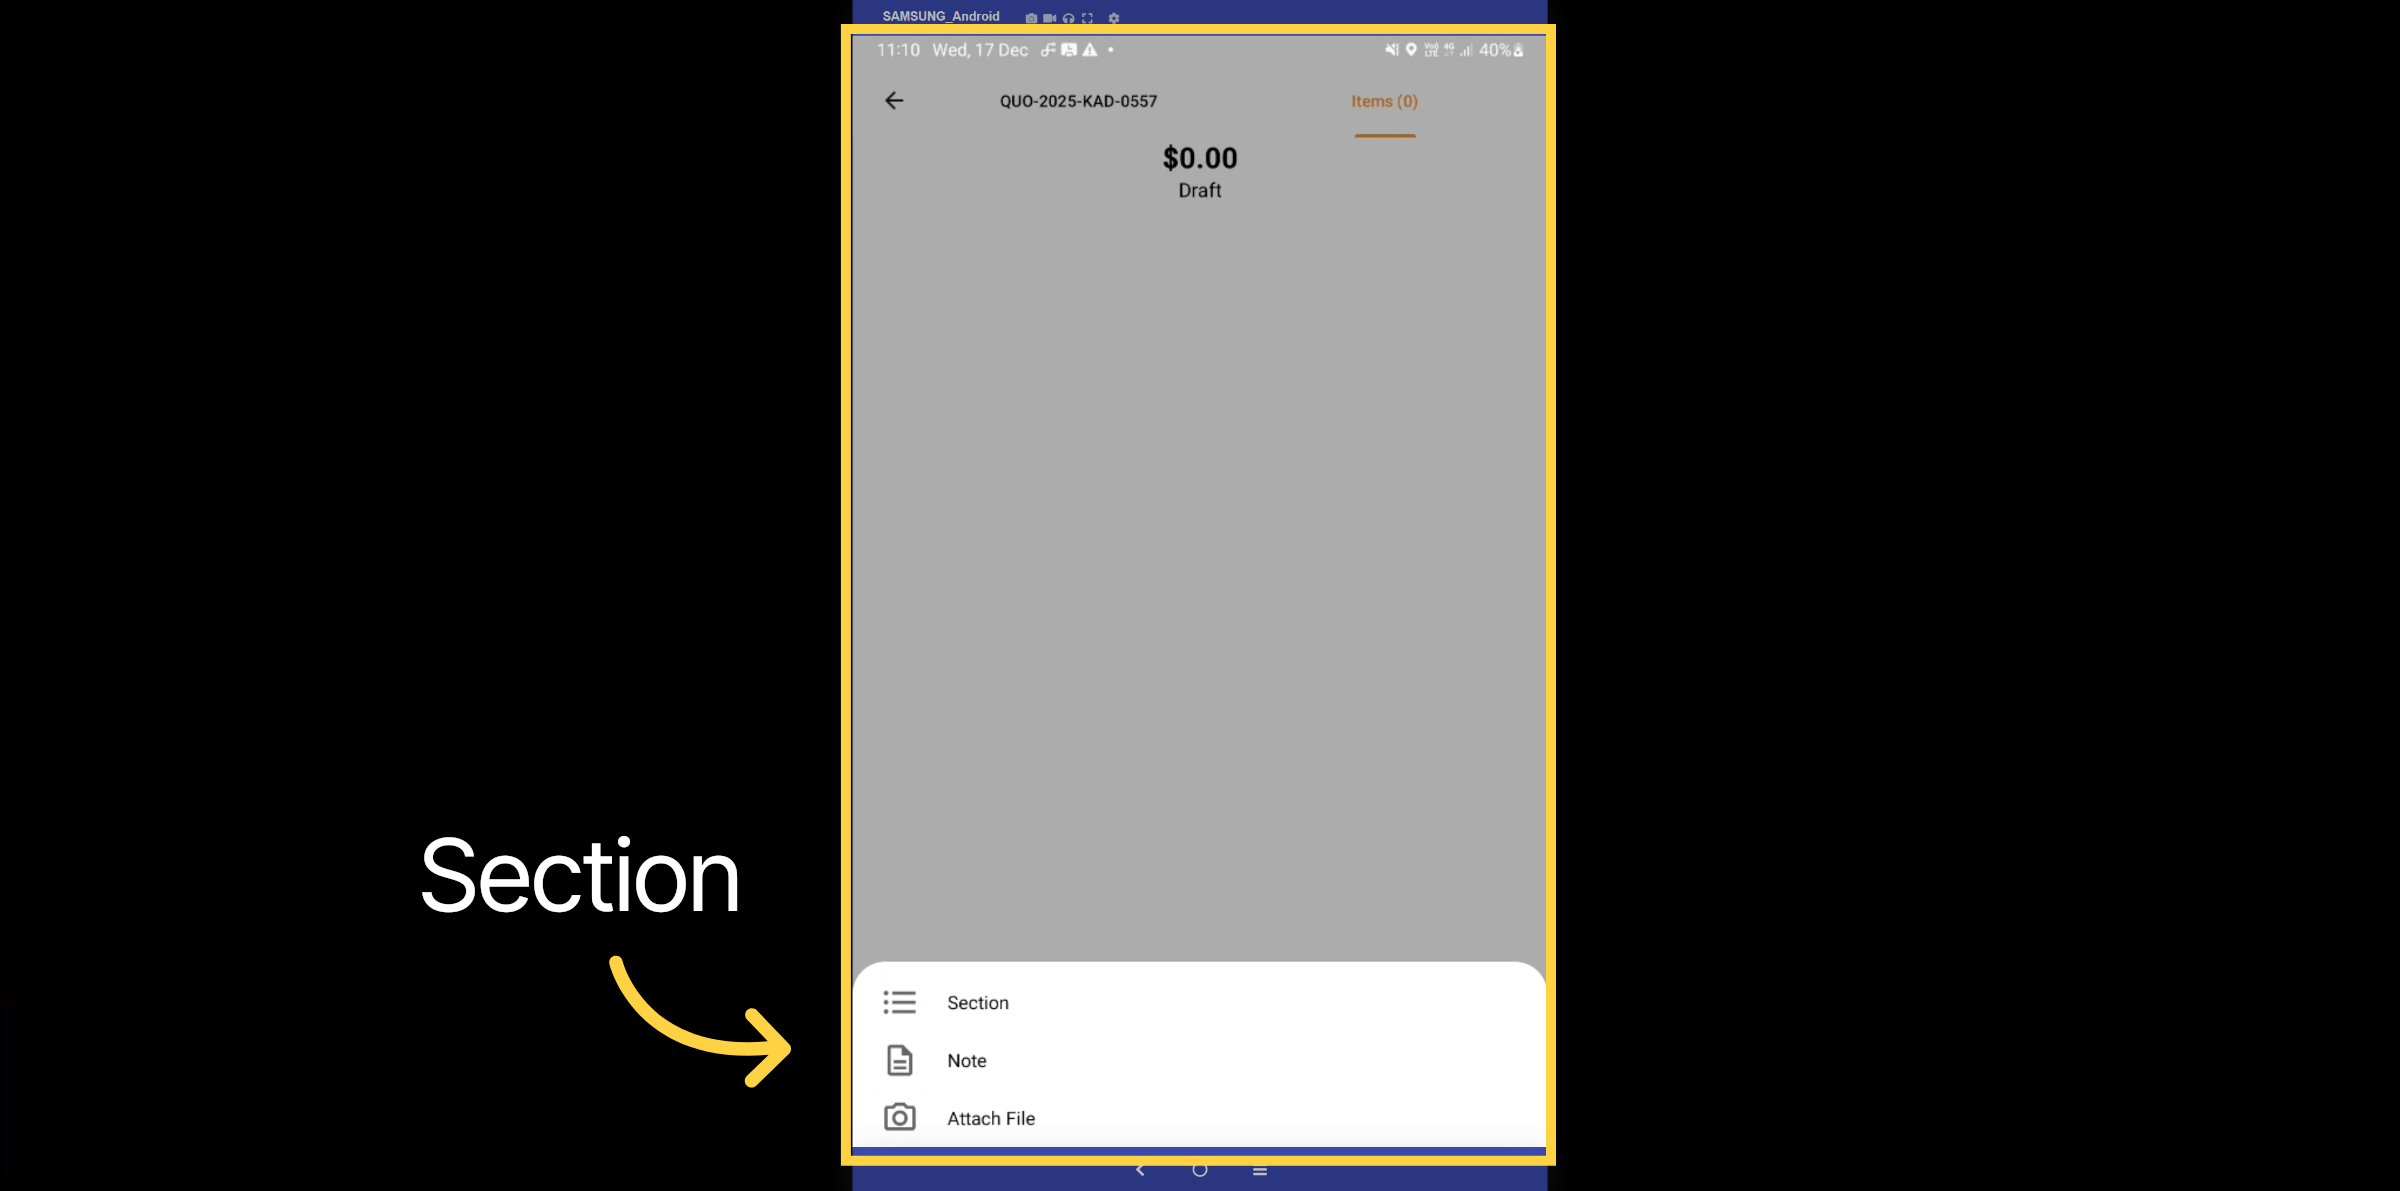
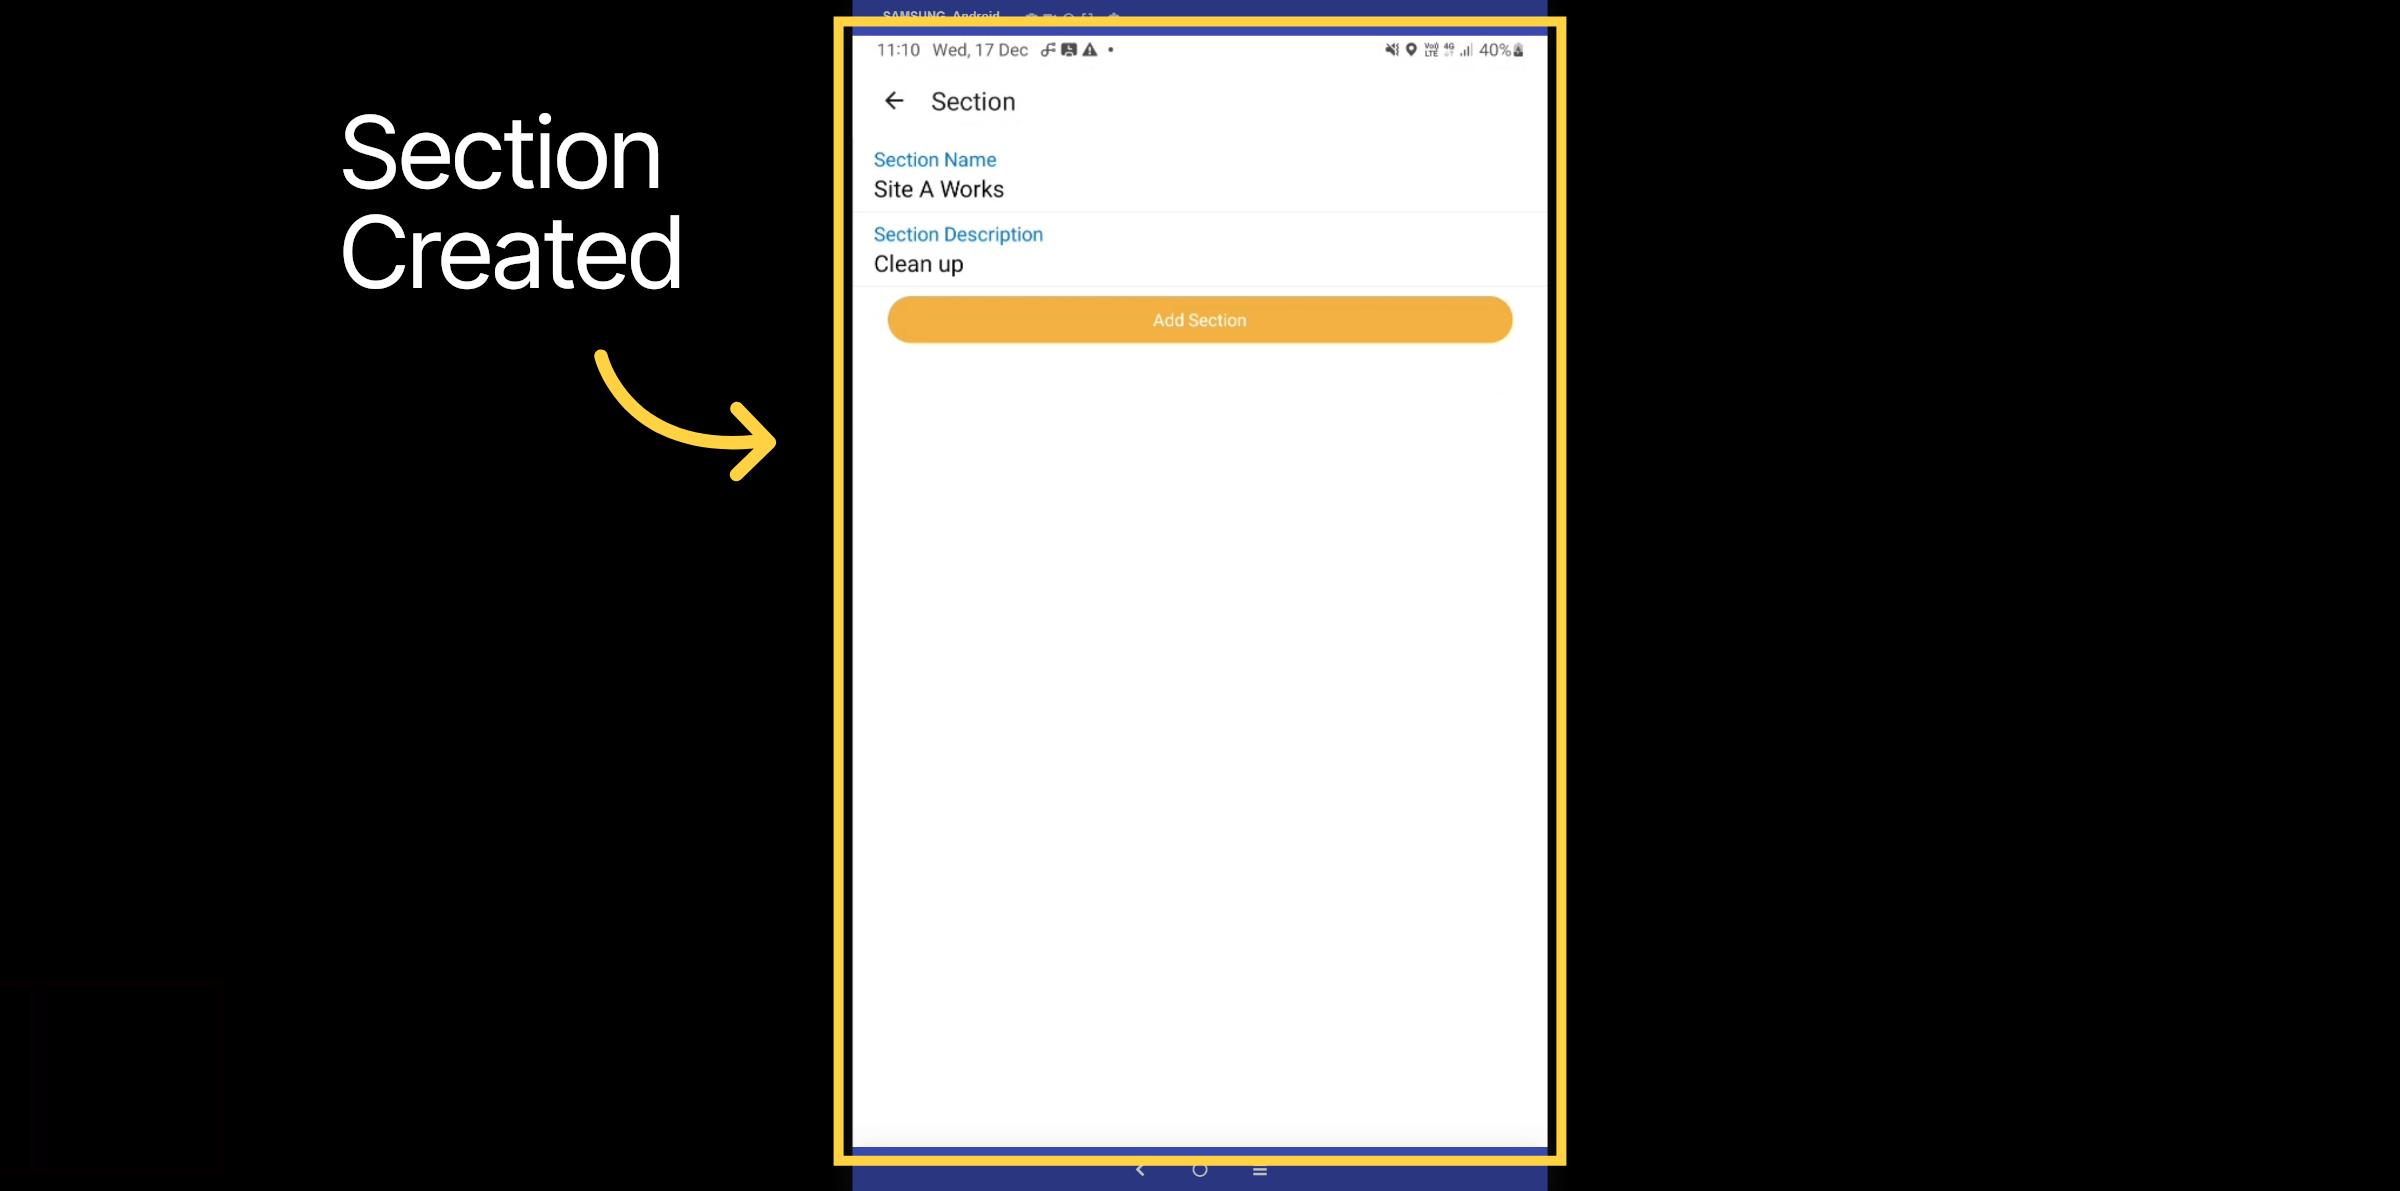
16. Section
Select the plus icon and enter the section name. This could represent a milestone in a project, such as 'Mobilisation Stage' or Site A.
17. Section Created
Once the sections are created, you can now add your line items.
18. + Icon Products
In this section, click the plus icon to add products or services.
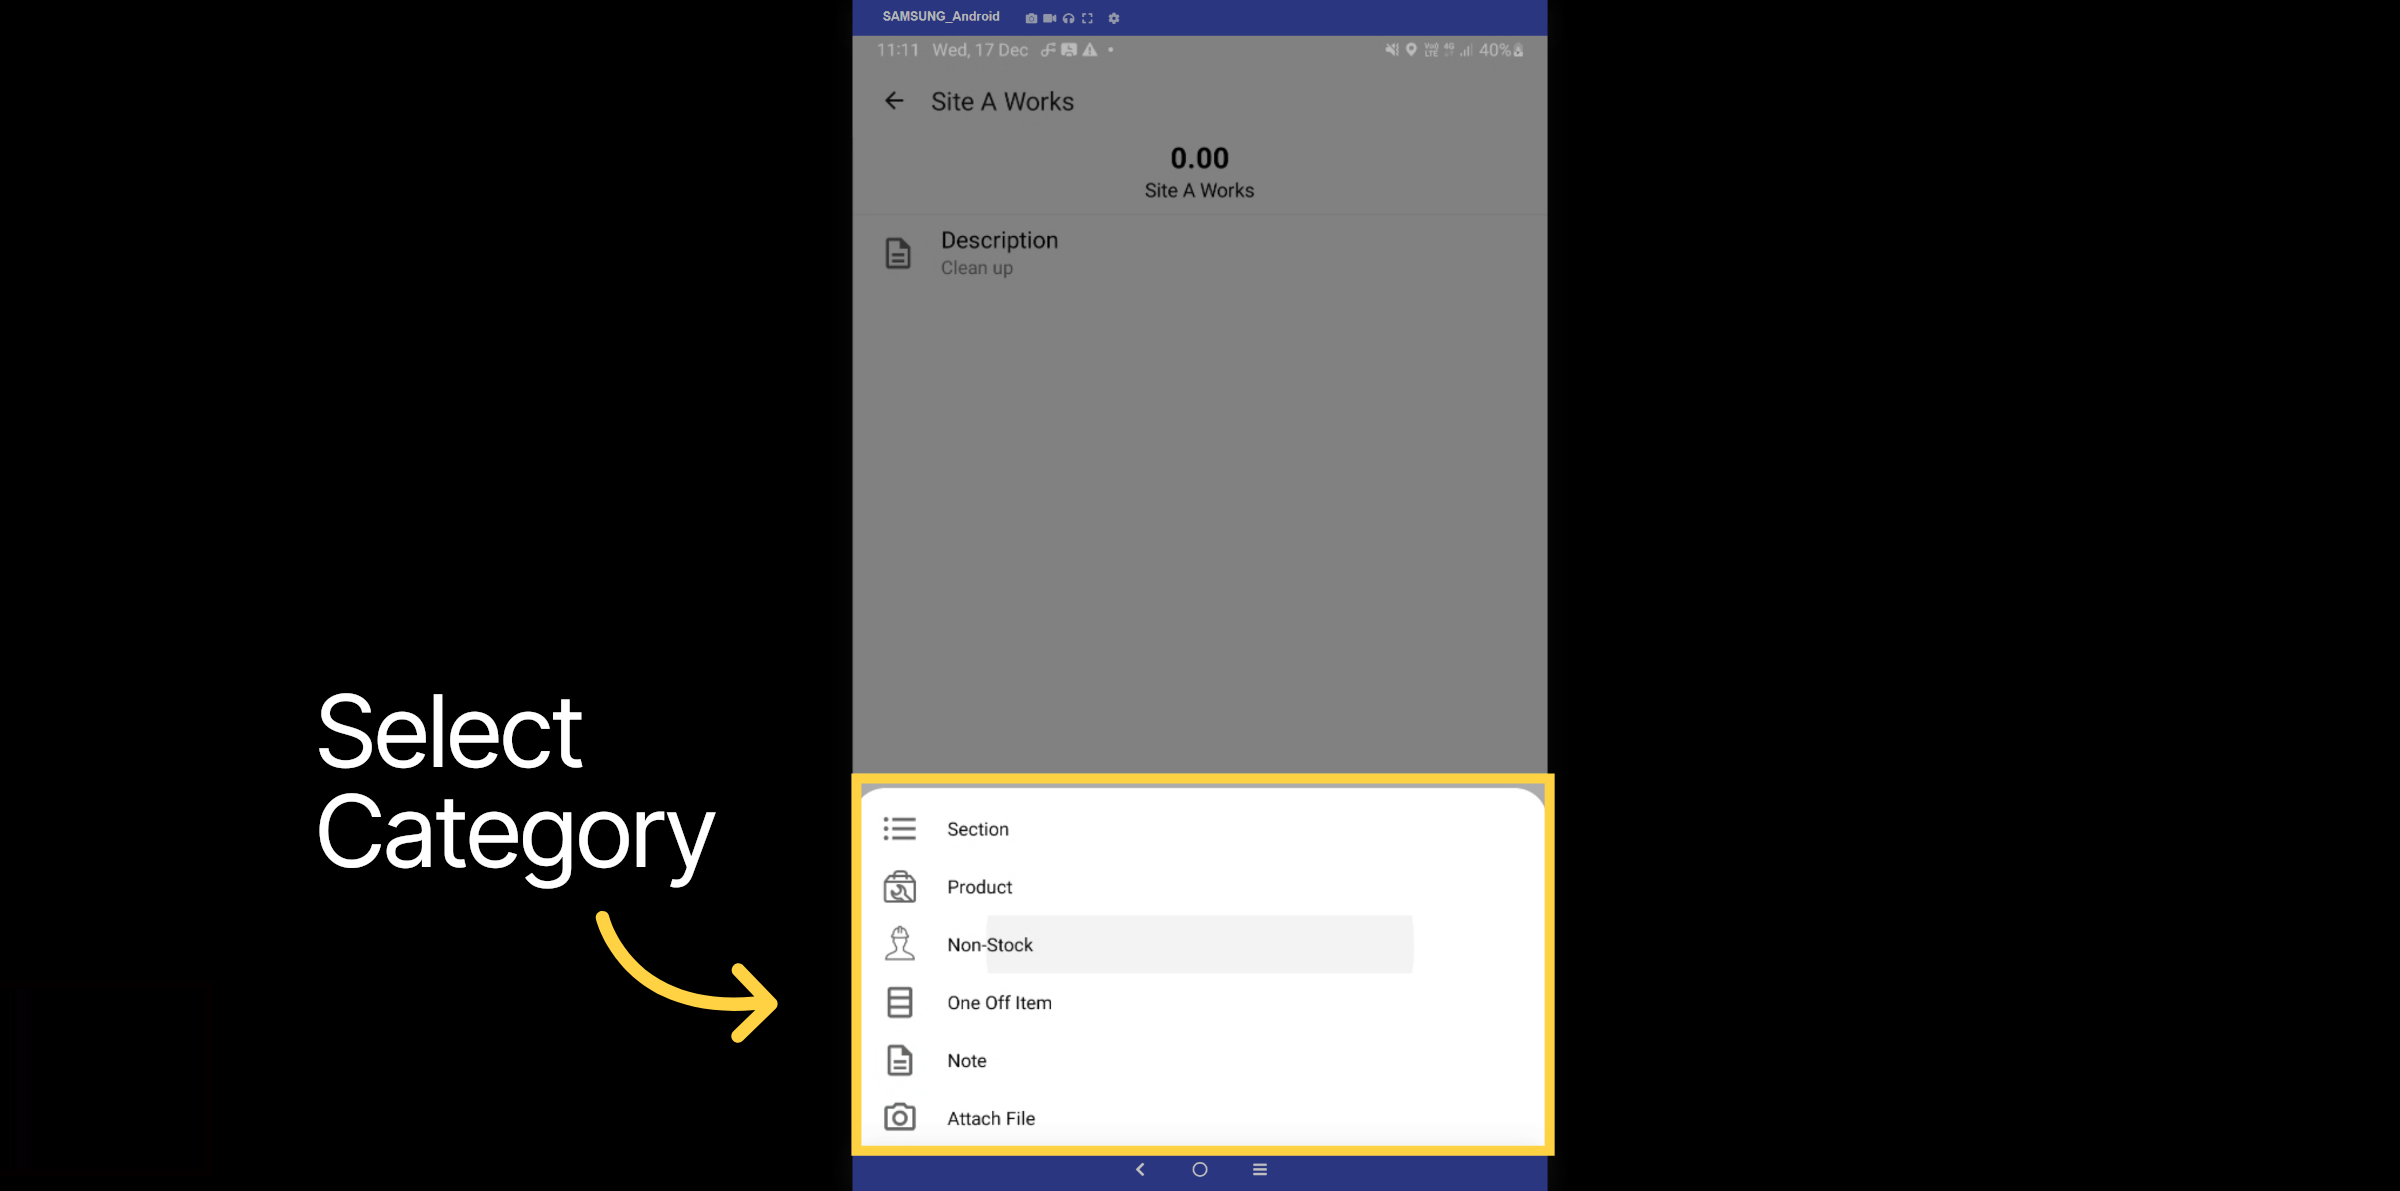
19. Cost Code Category
Select the category for your product or service.
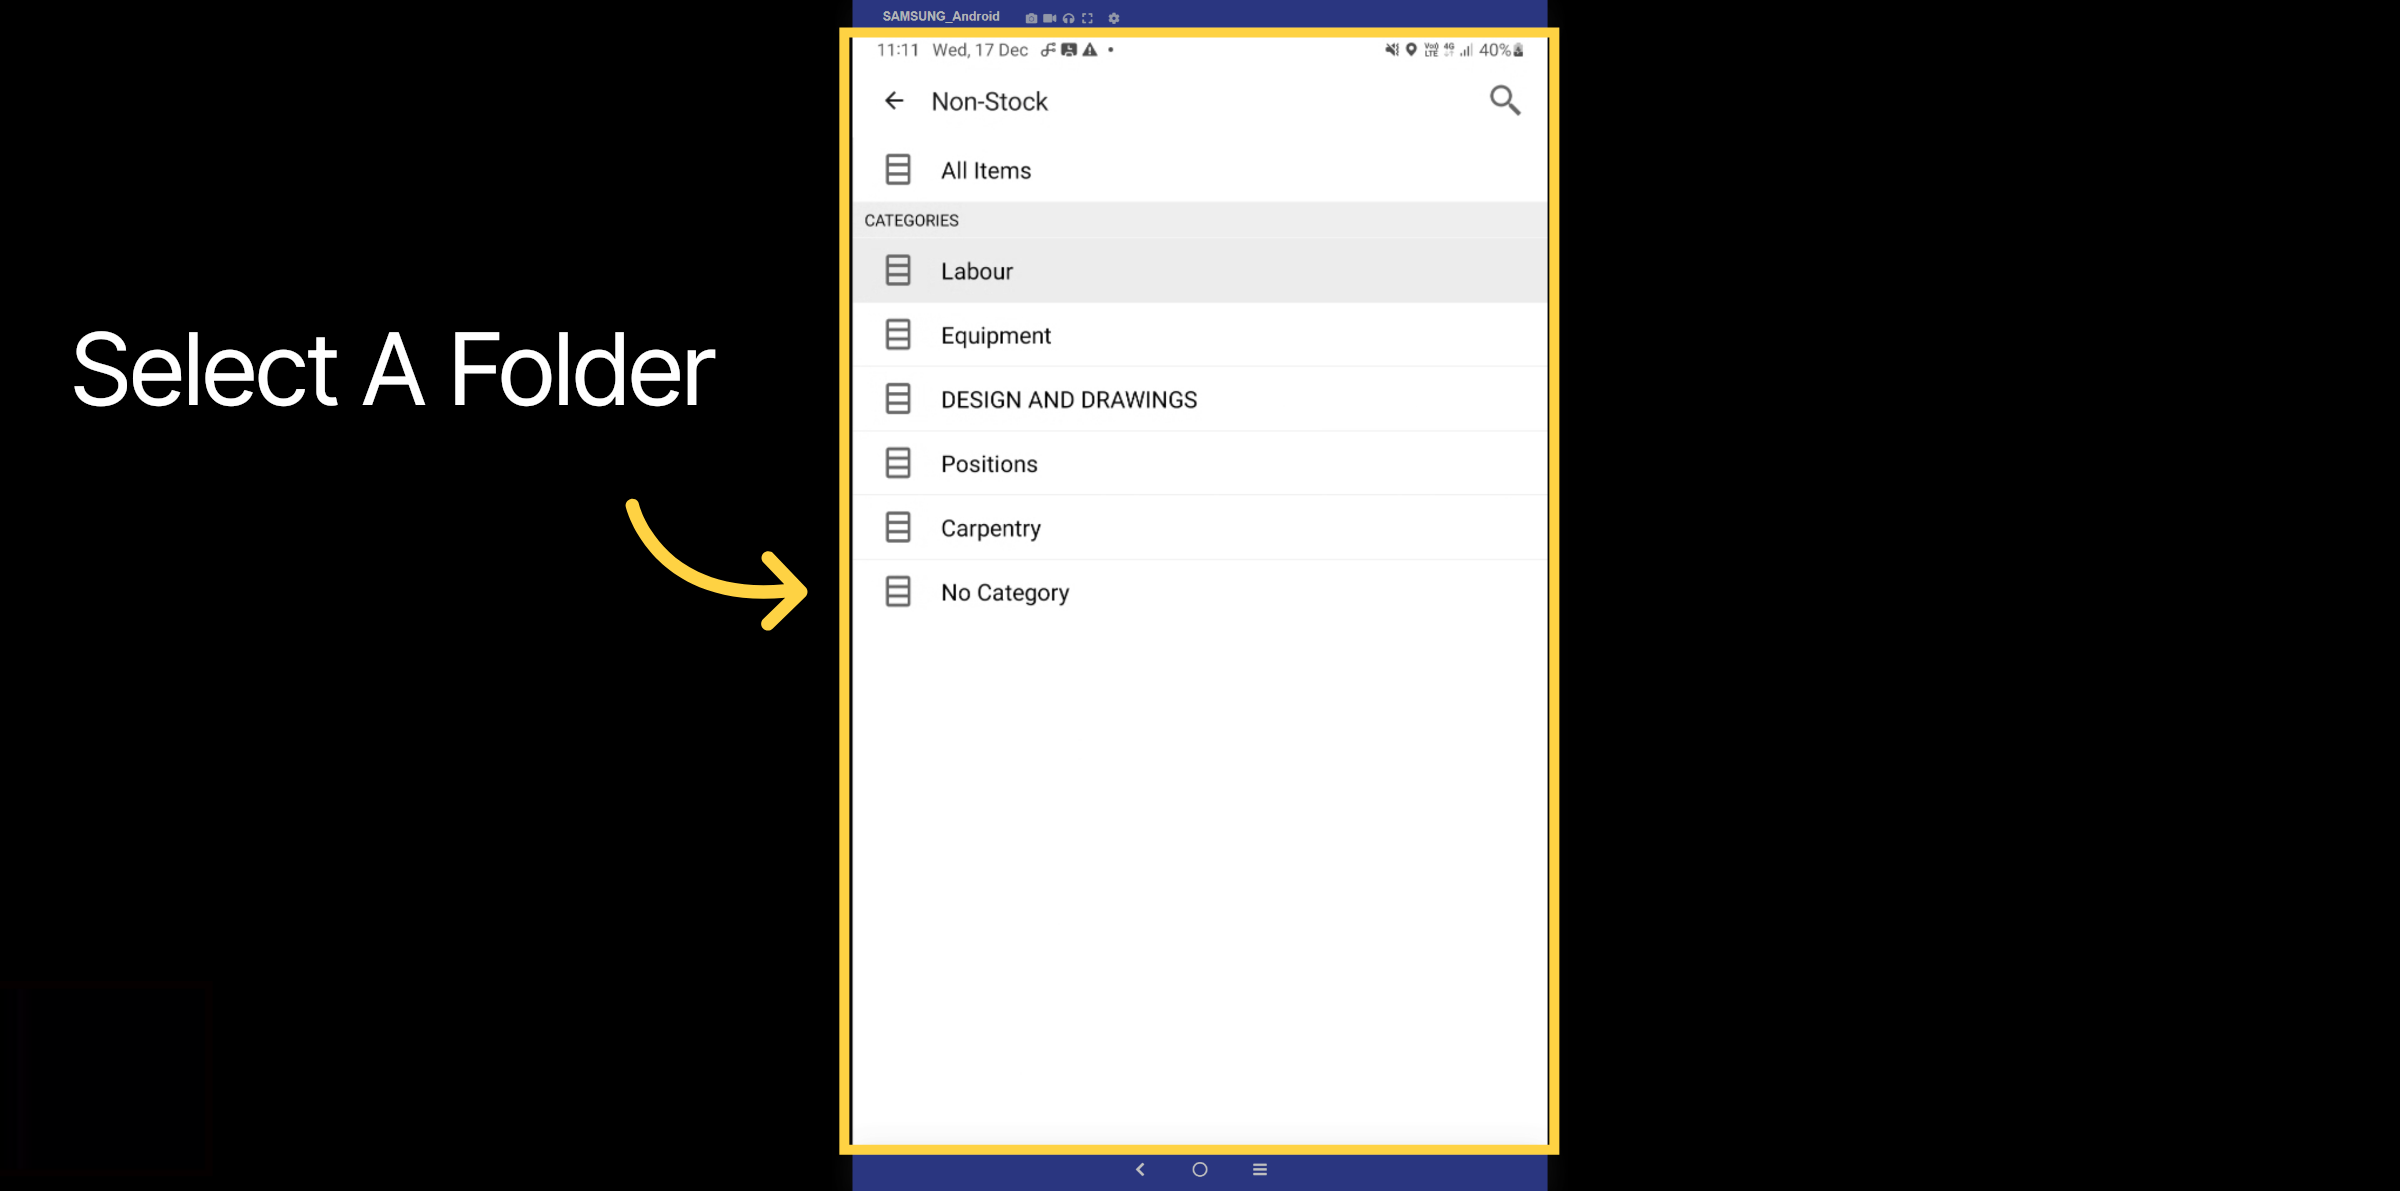
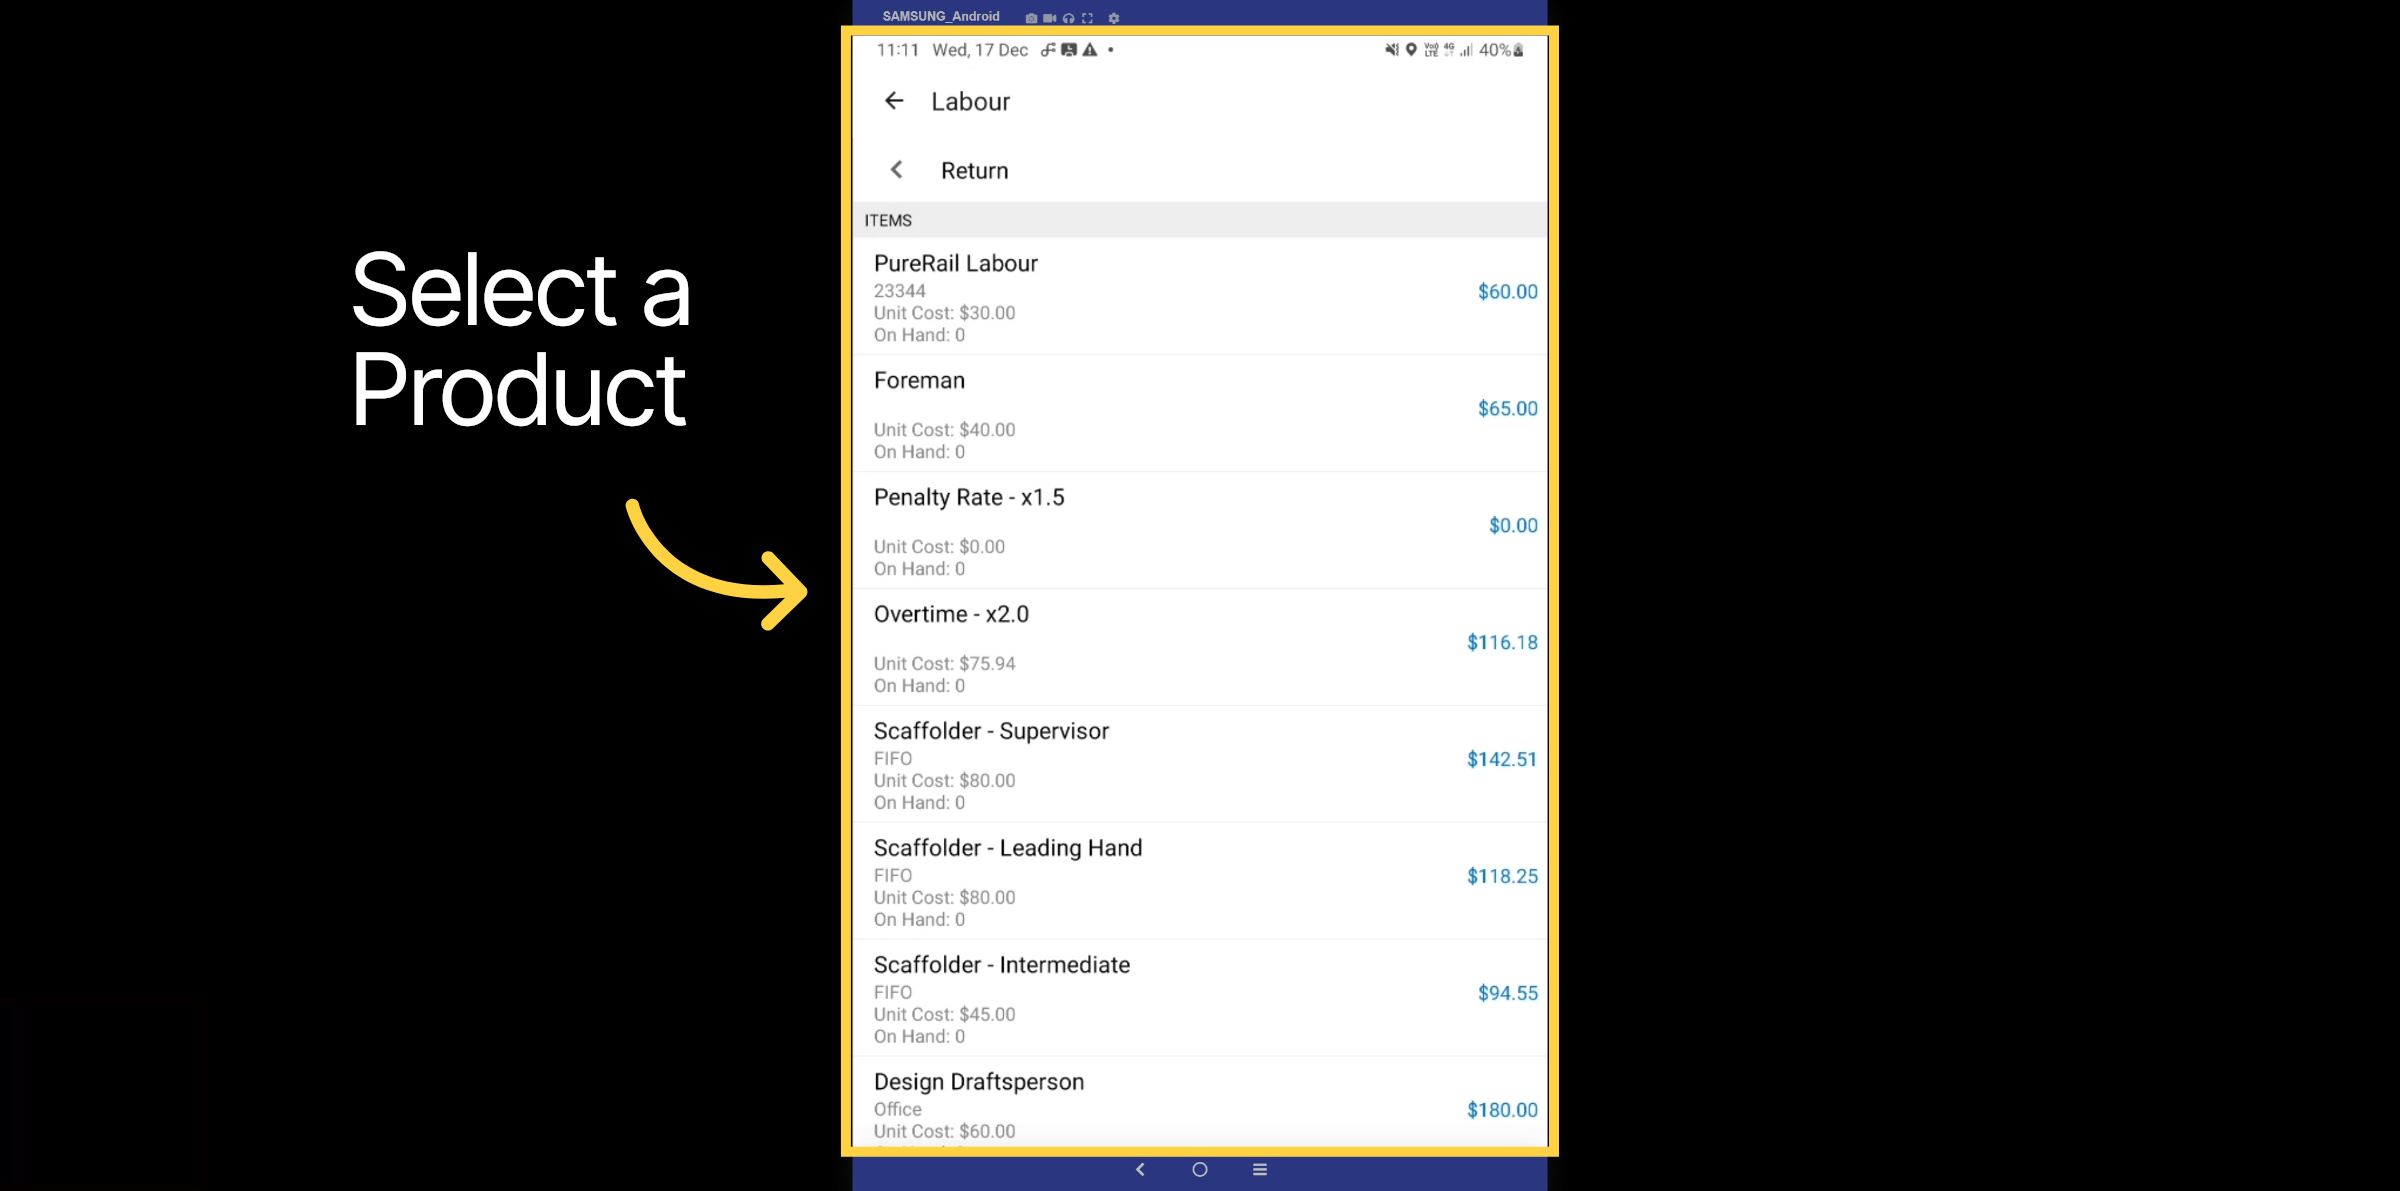
20. Folders
For this example, we have selected the Non-Stock folder and the labor category.
21. Products
Select your products or services.
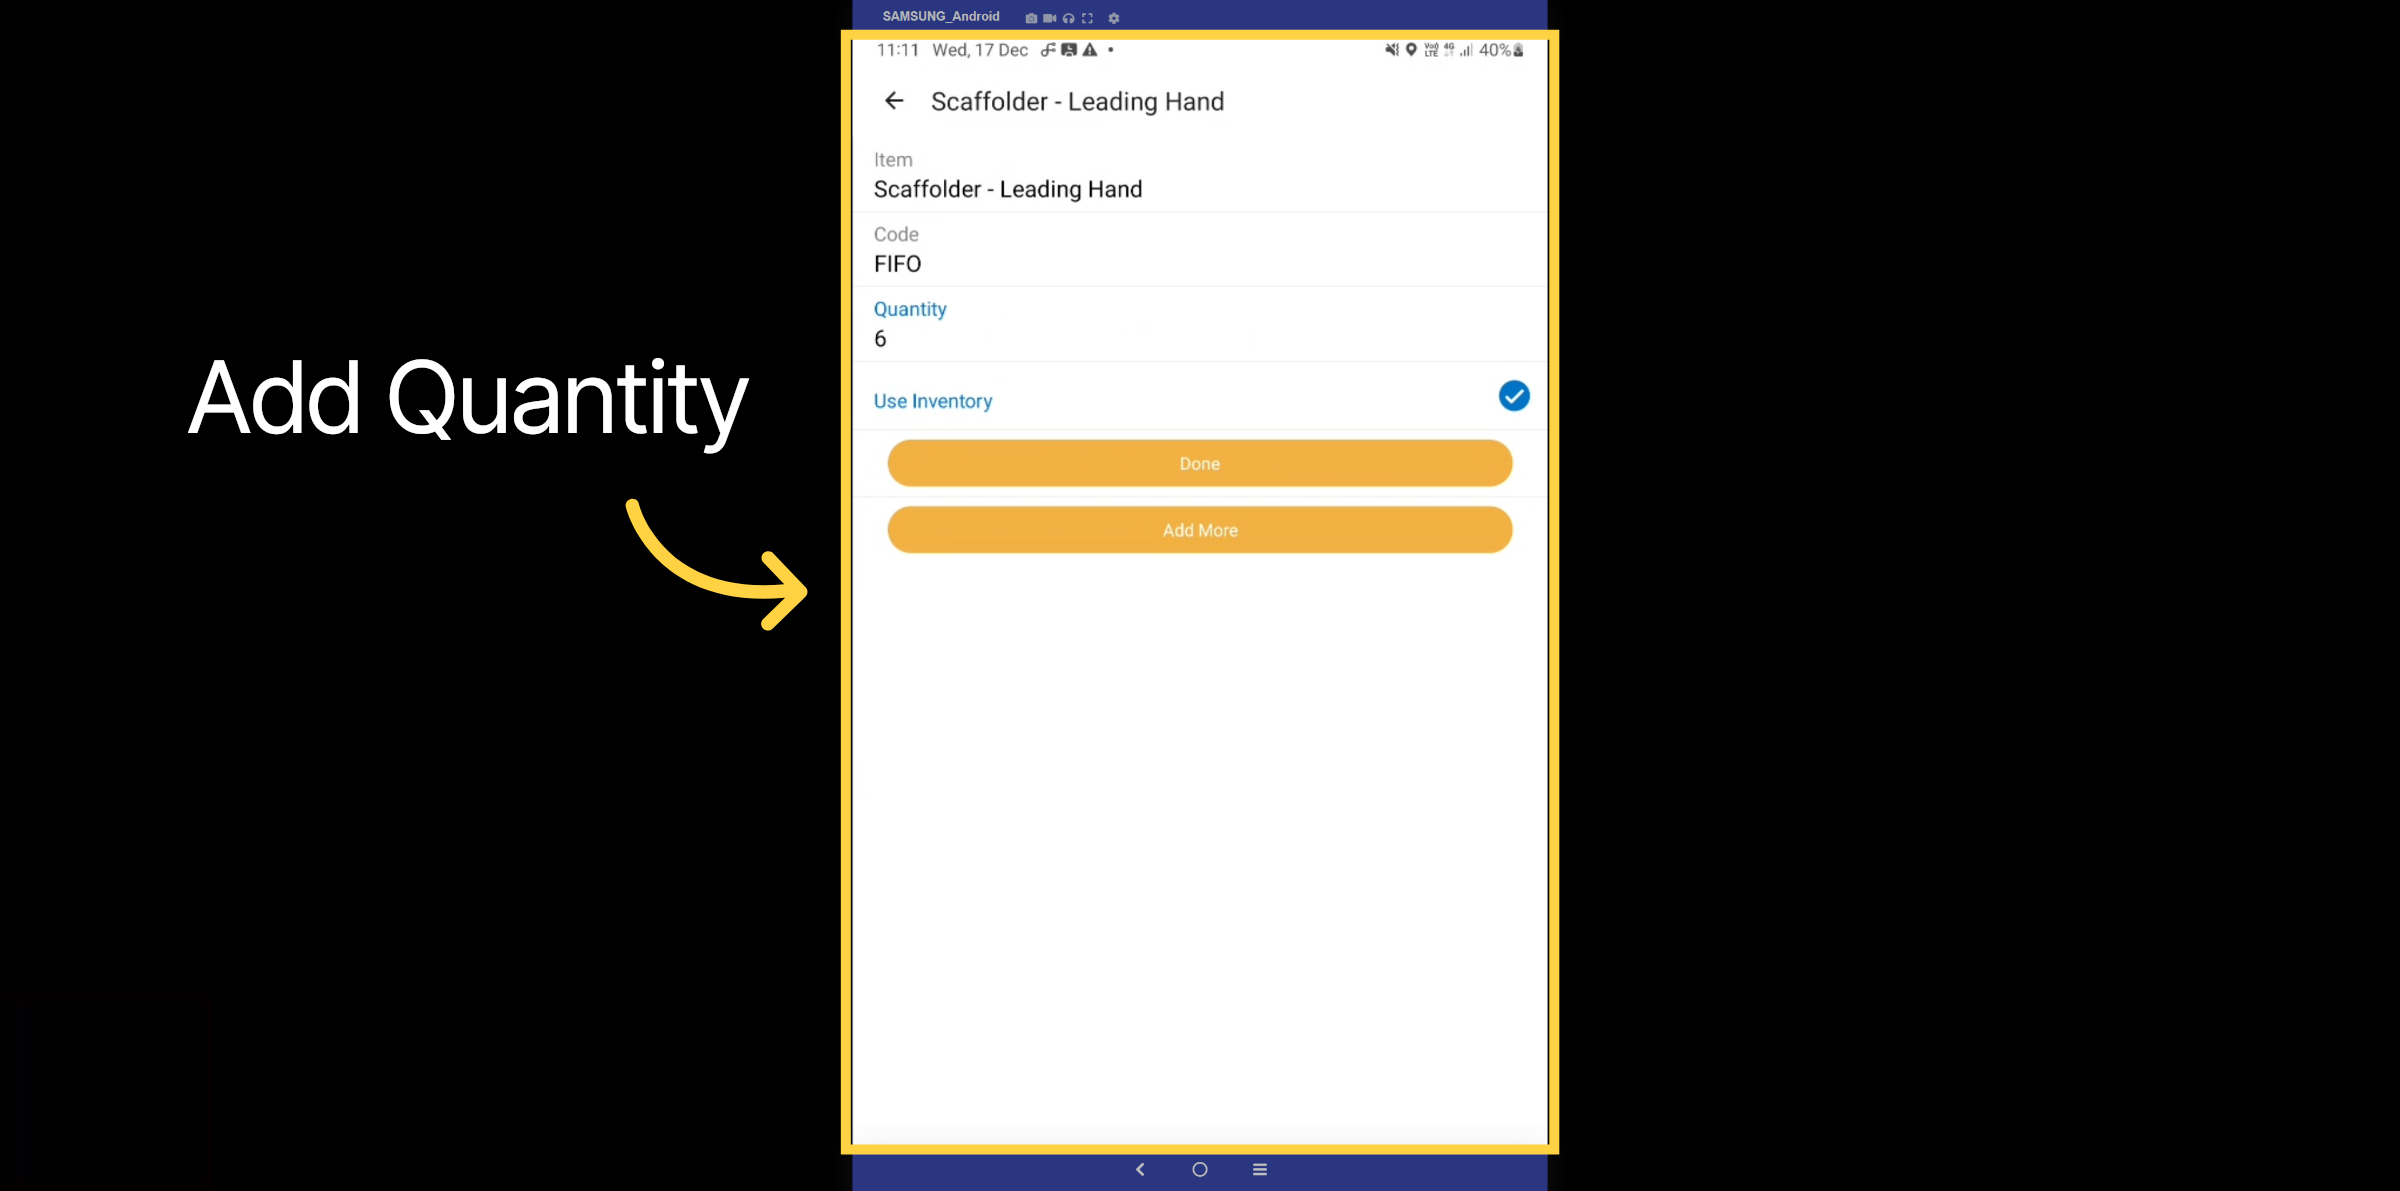
22. Add Quantity
Add the quantity of that particular product or service.
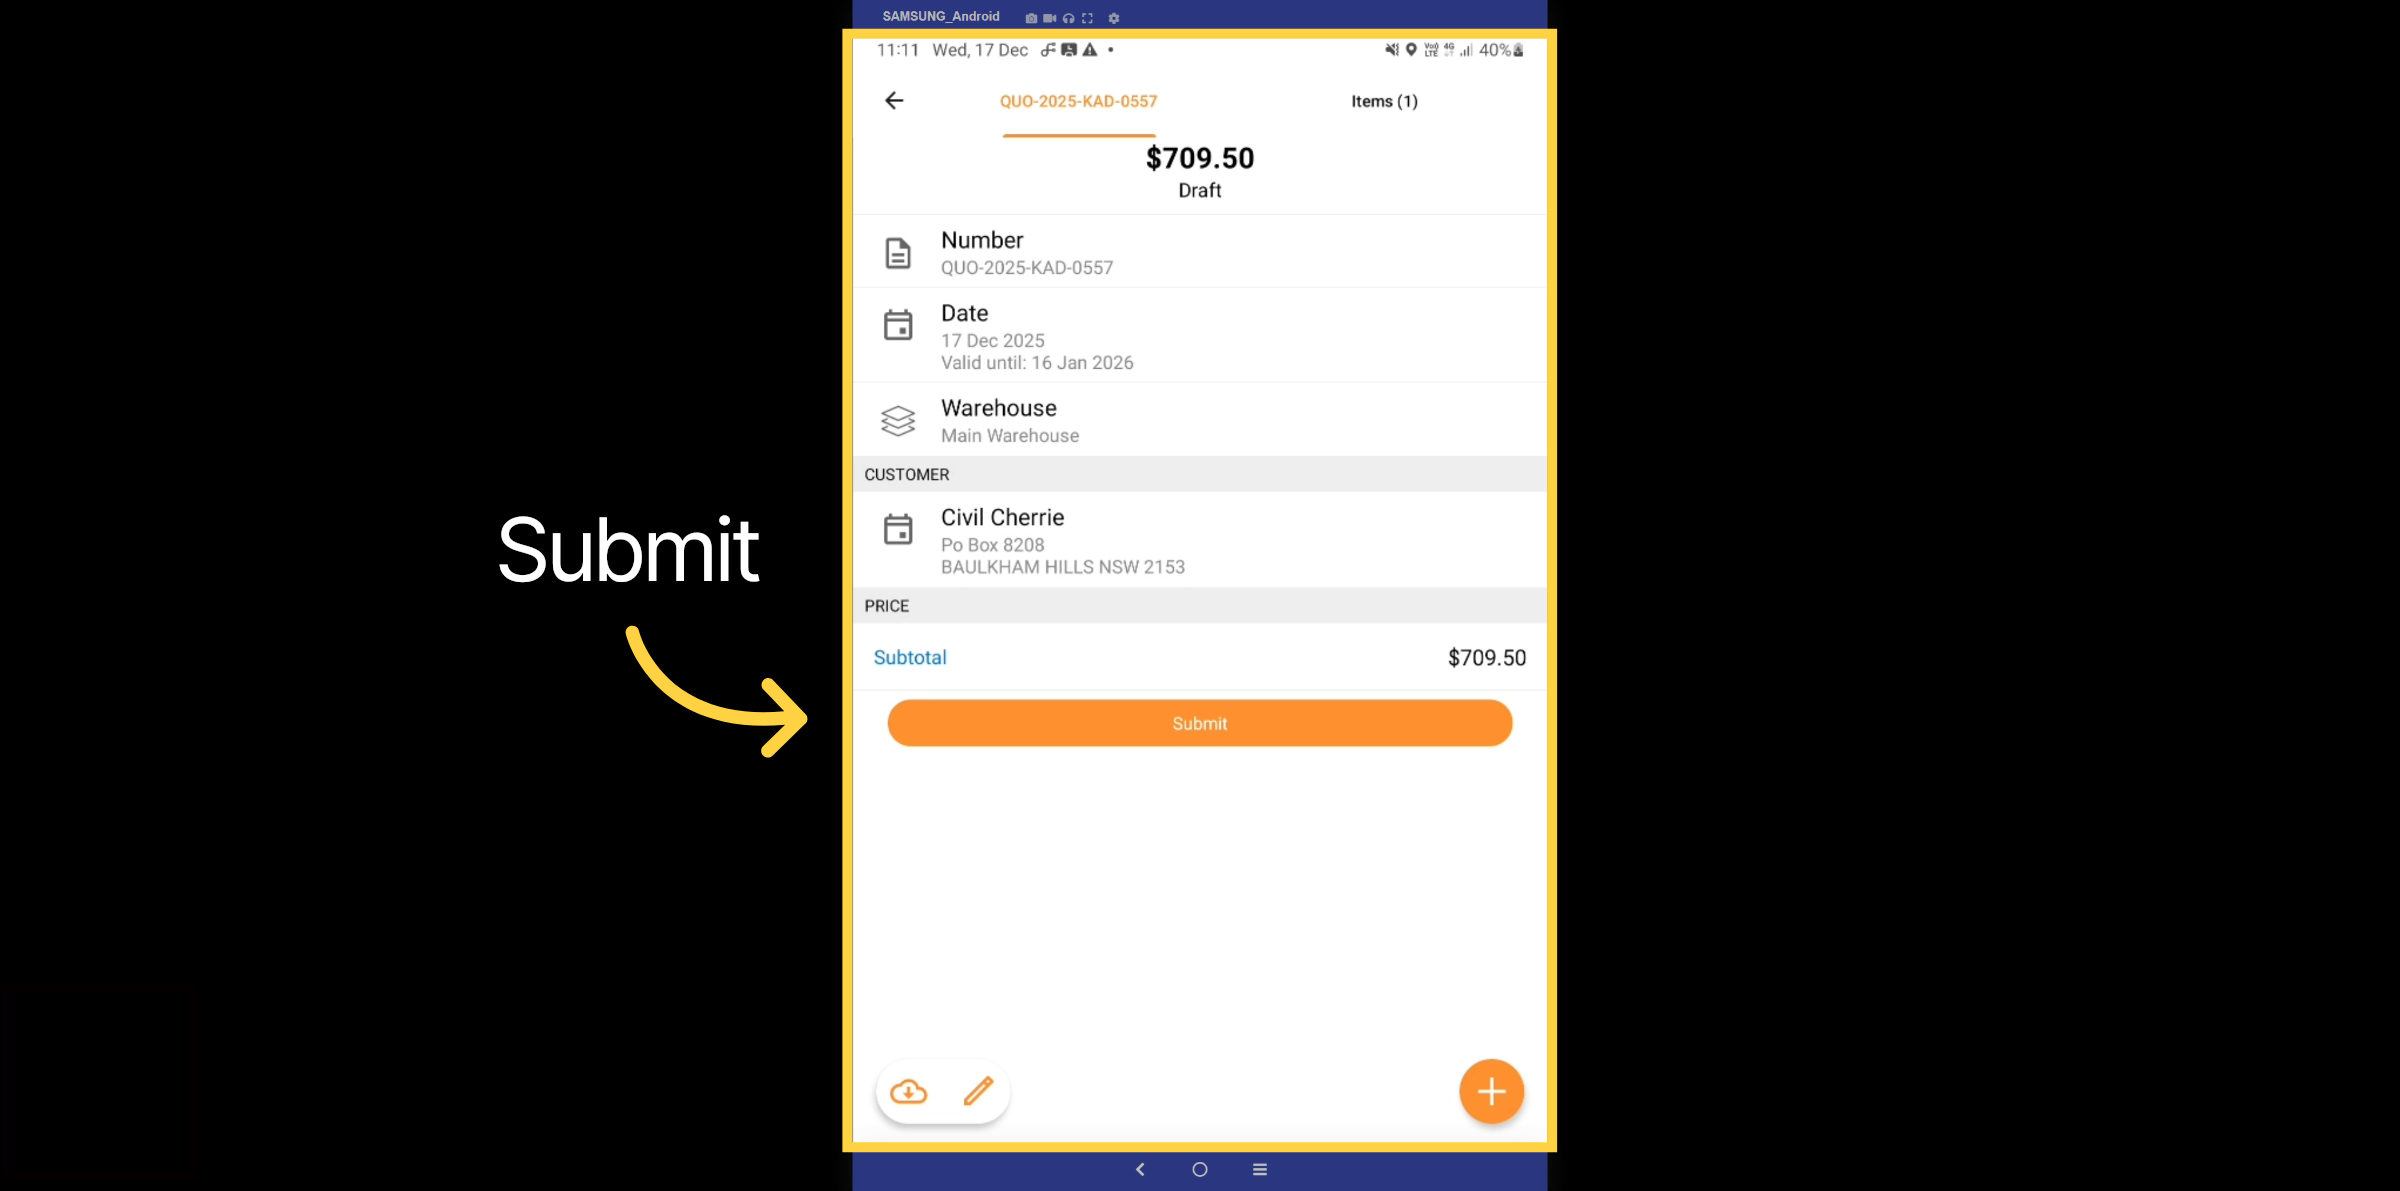
23. Submit
Please double-check all the details before clicking the submit button.
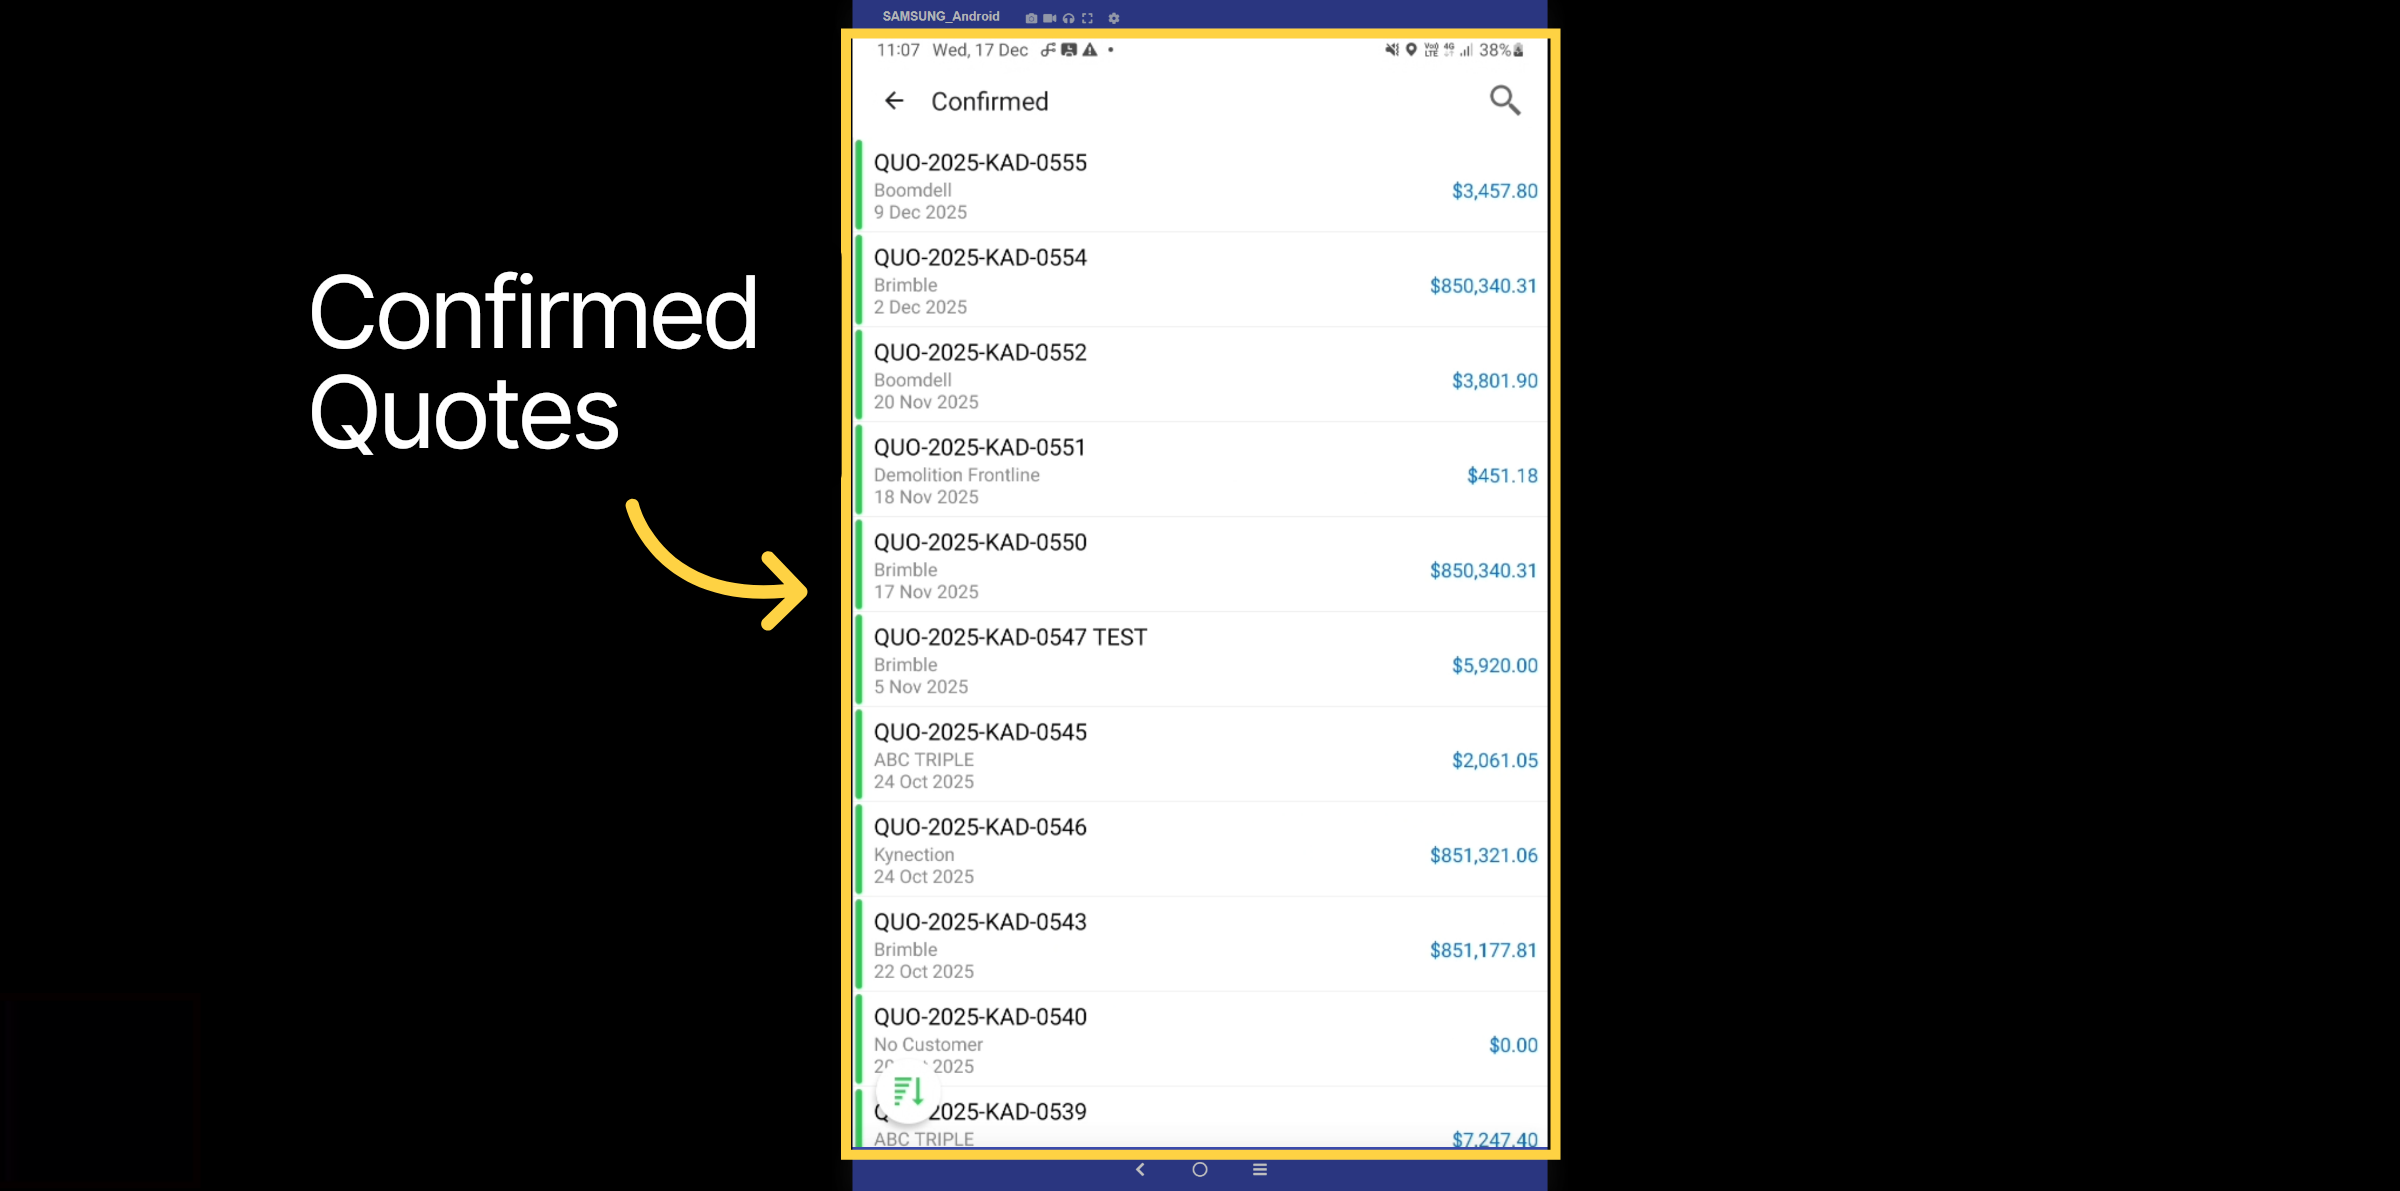
24. Confirmed Quote
Let's now take a look at the confirmed quote section. Here, we can view a list of all the confirmed quotes and their totals.
25. Confirmed Quote Example
Here is an example of a confirmed quote. We can view the customer details, date, and total costs.

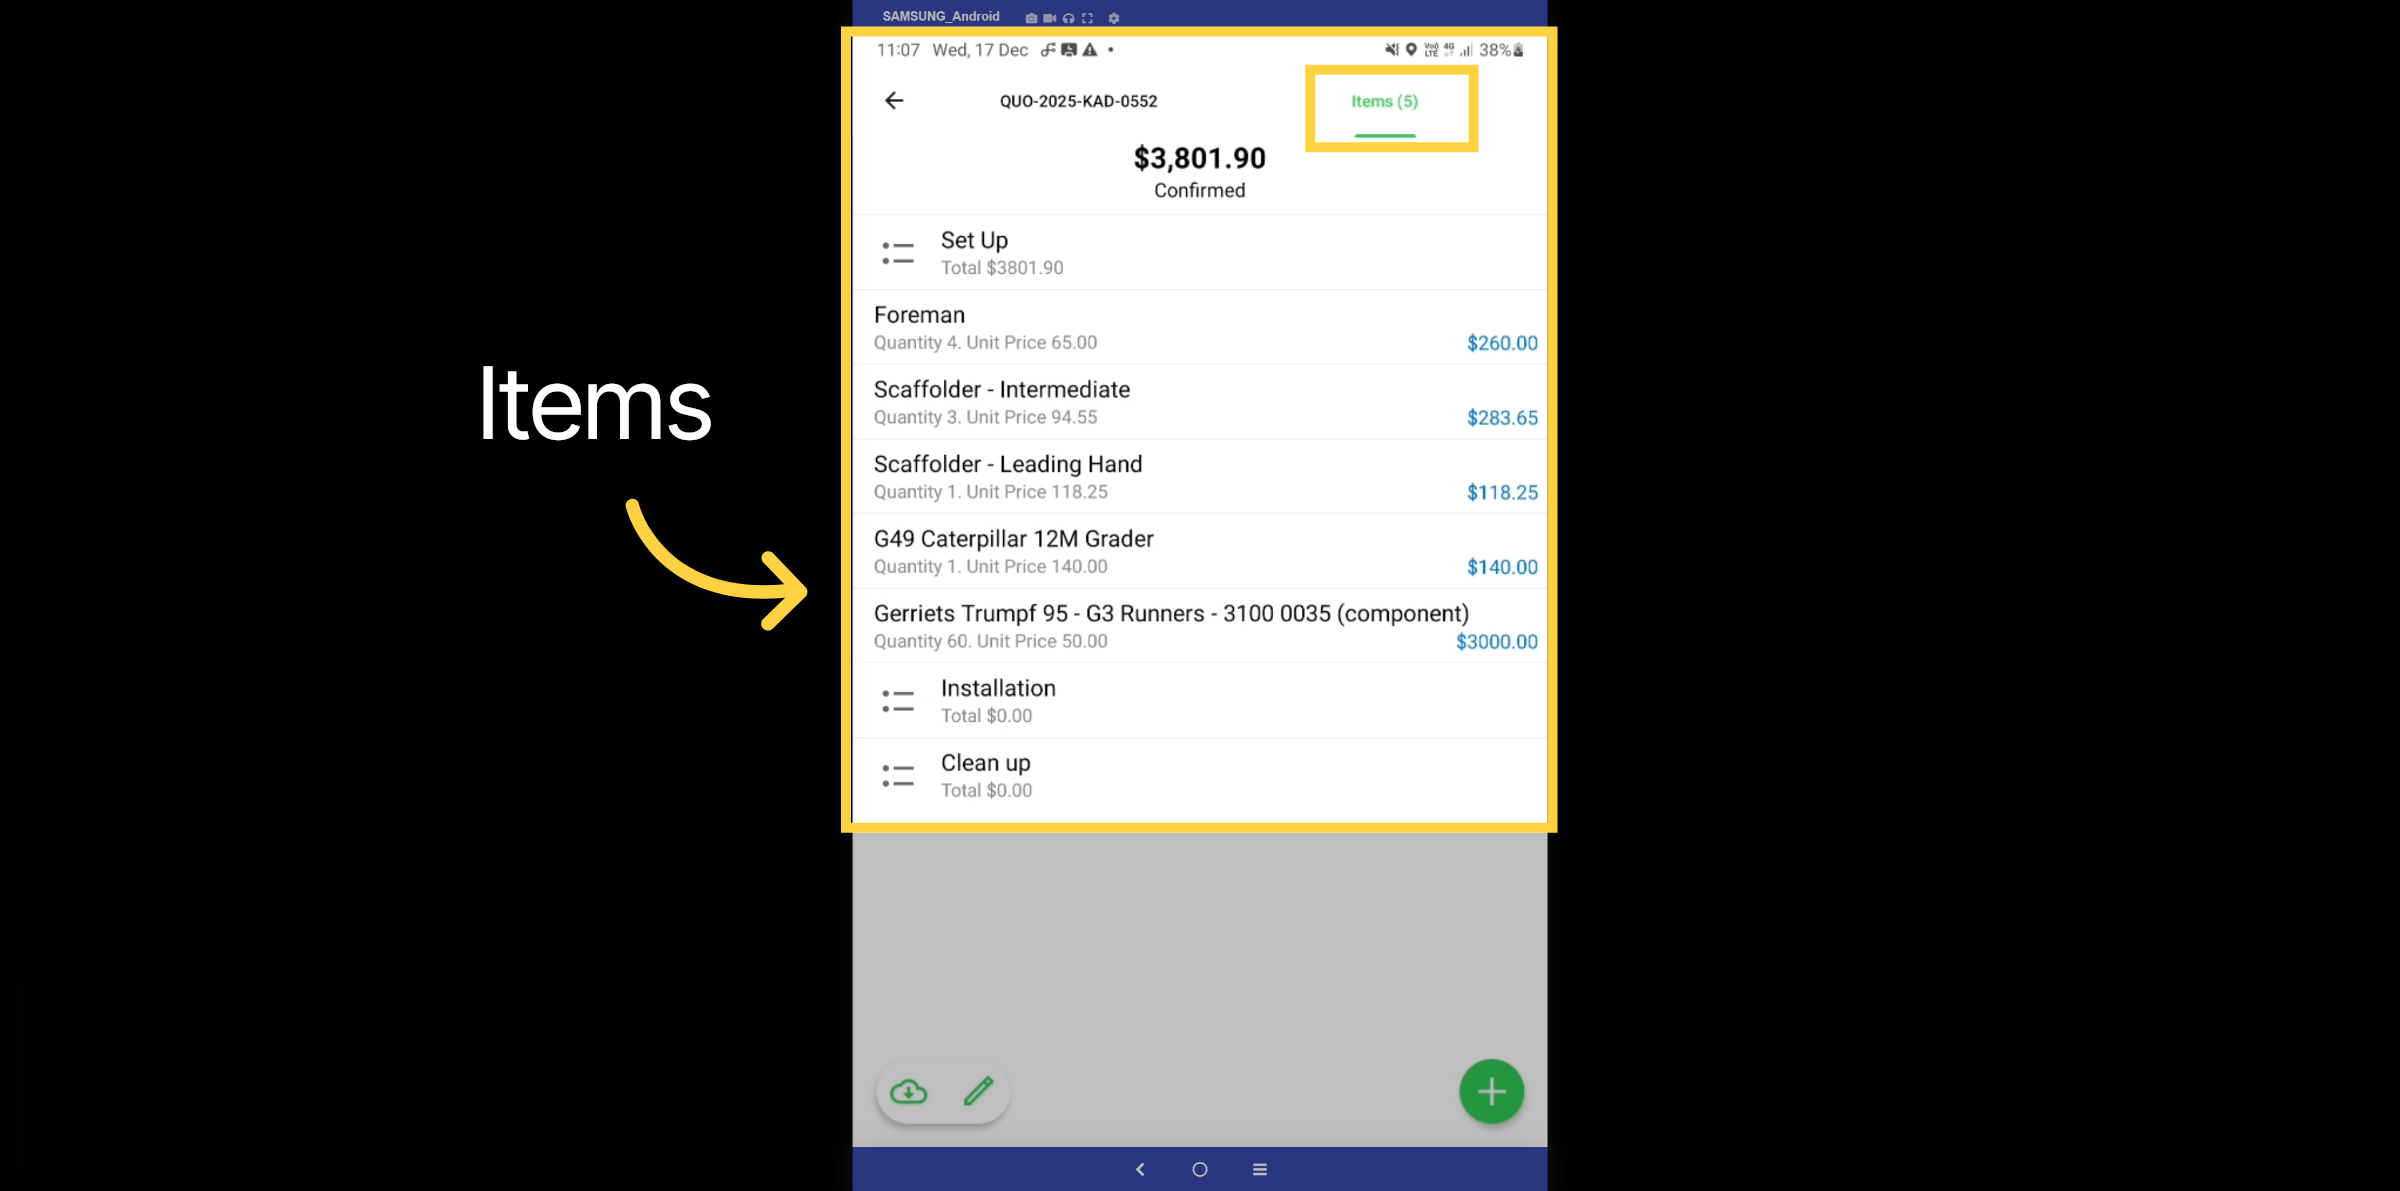
26. Items
Once we select the items tab, we can view all products, including both stock and non-stock items (cost codes).
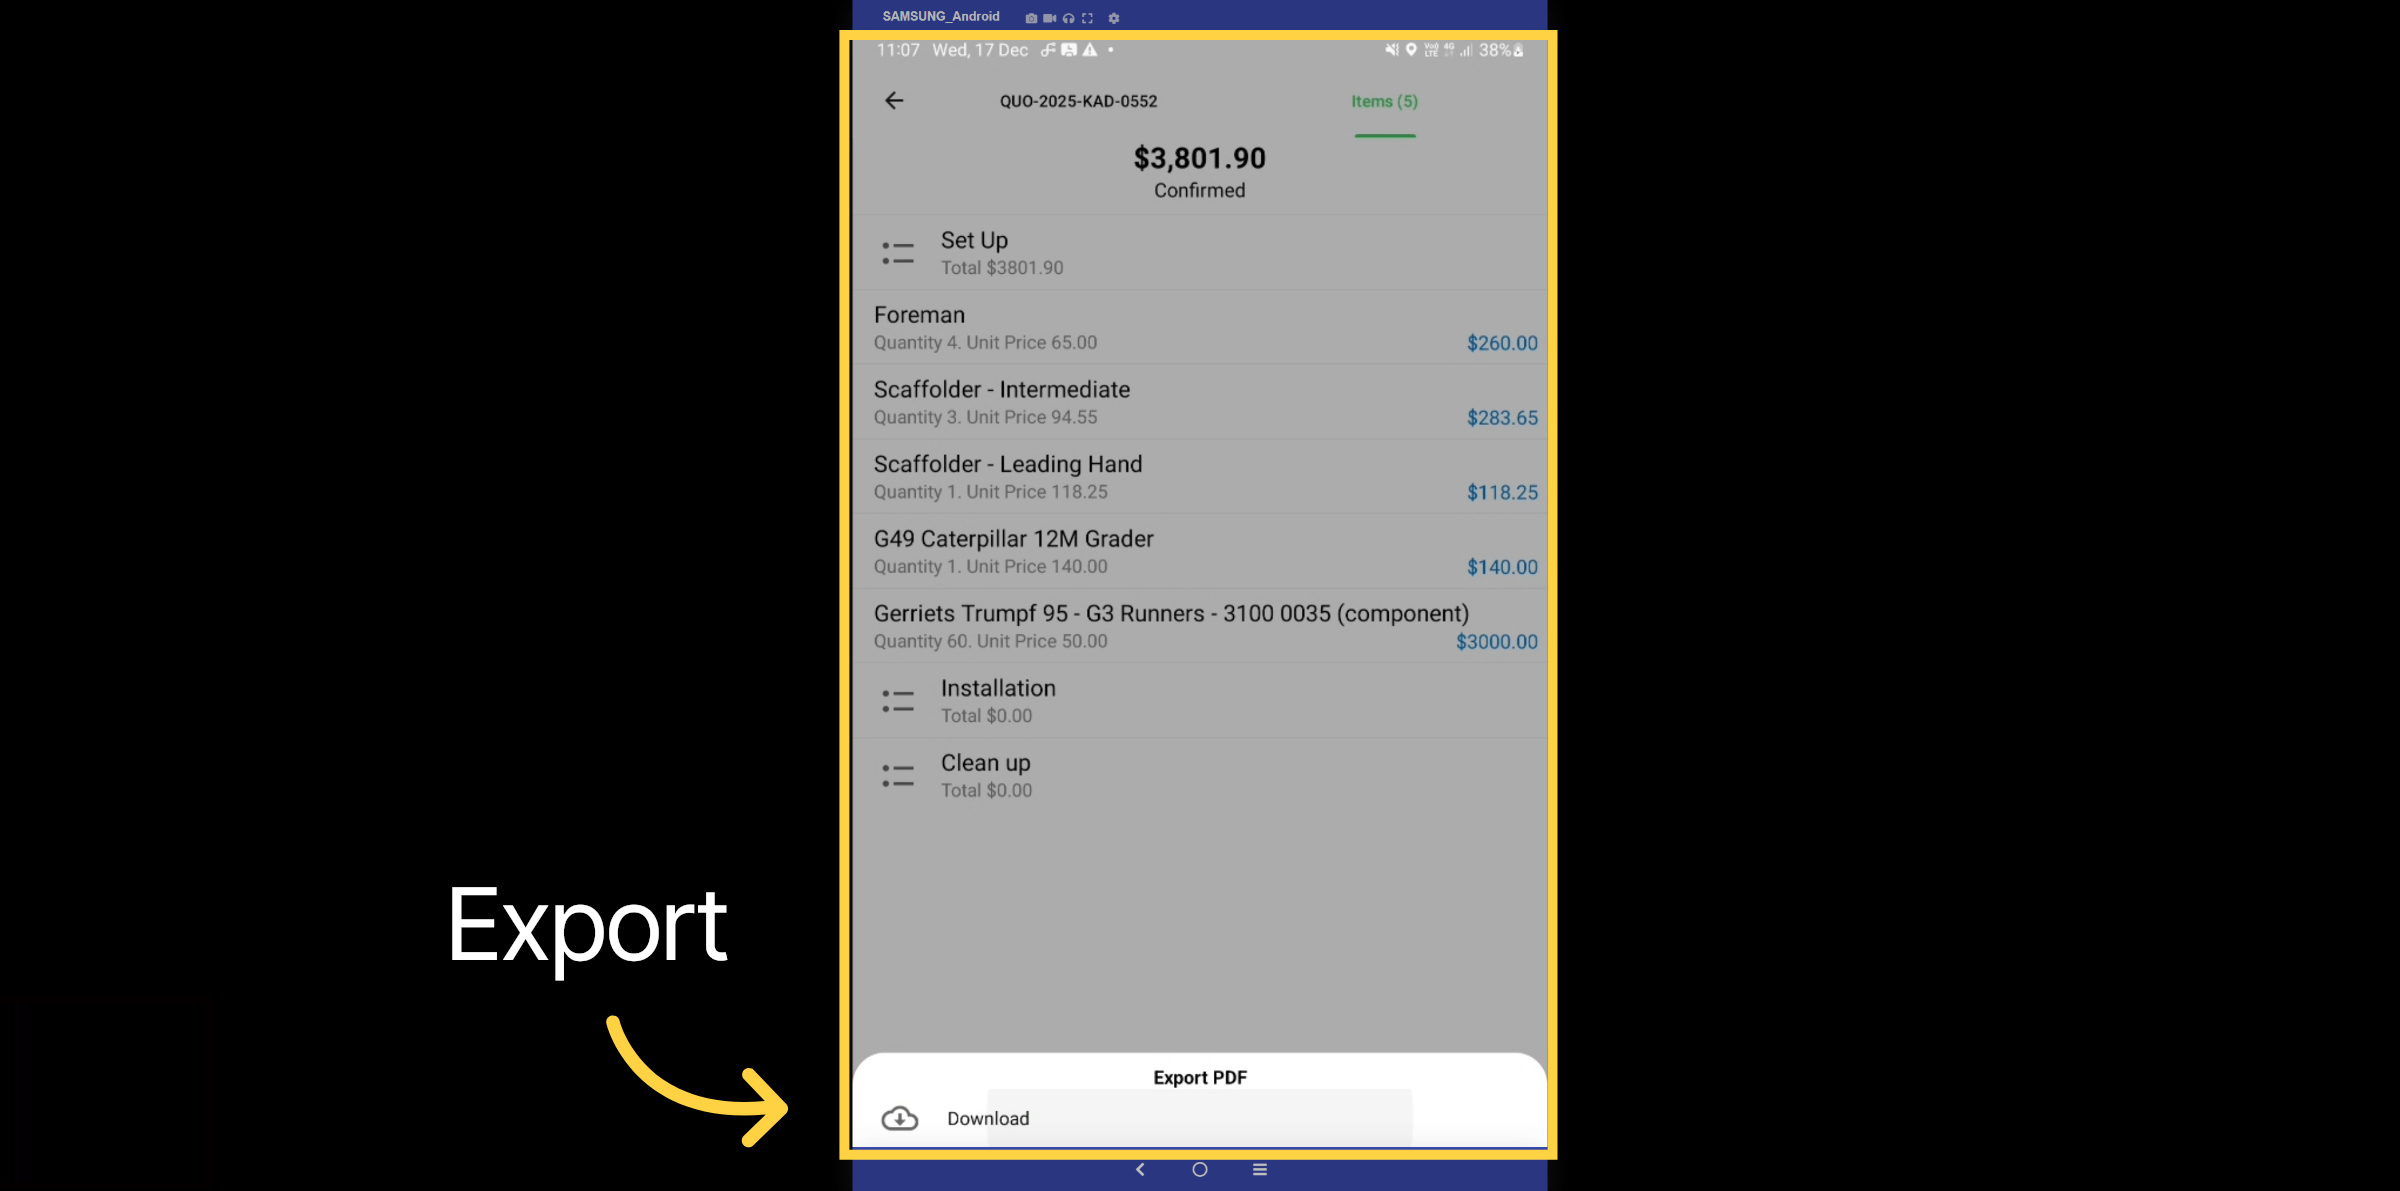
27. Export
Select the cloud icon to export to PDF or directly email to the customer.
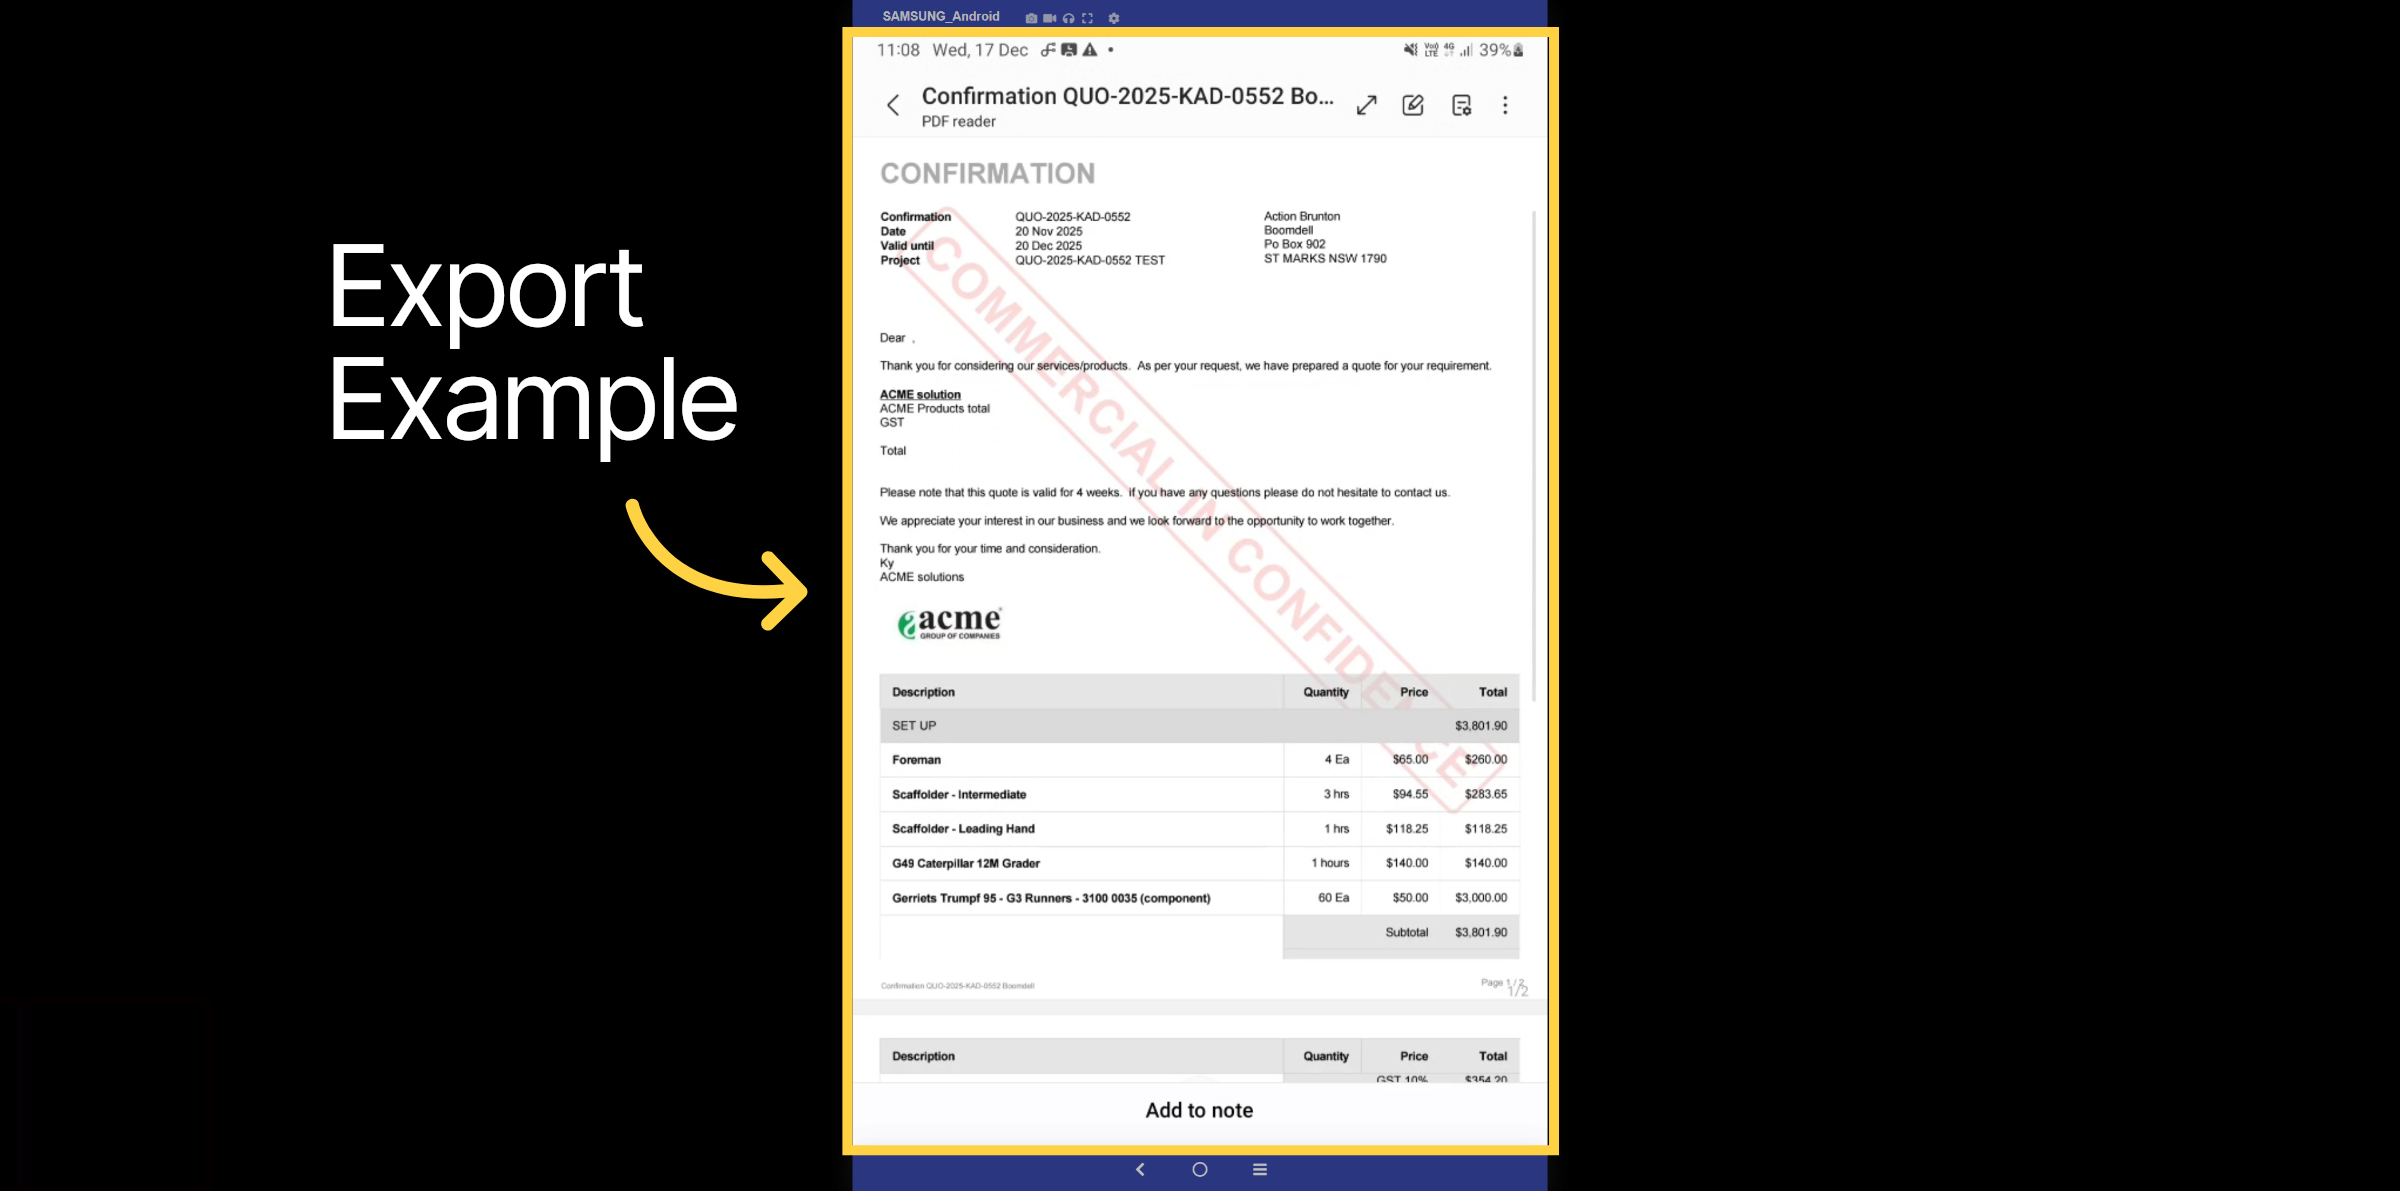
28. Export Example
Here is an example of the quote export. Once the customer accepts the quote, it can automatically create a project with Kynection for you to assign your resources to it.
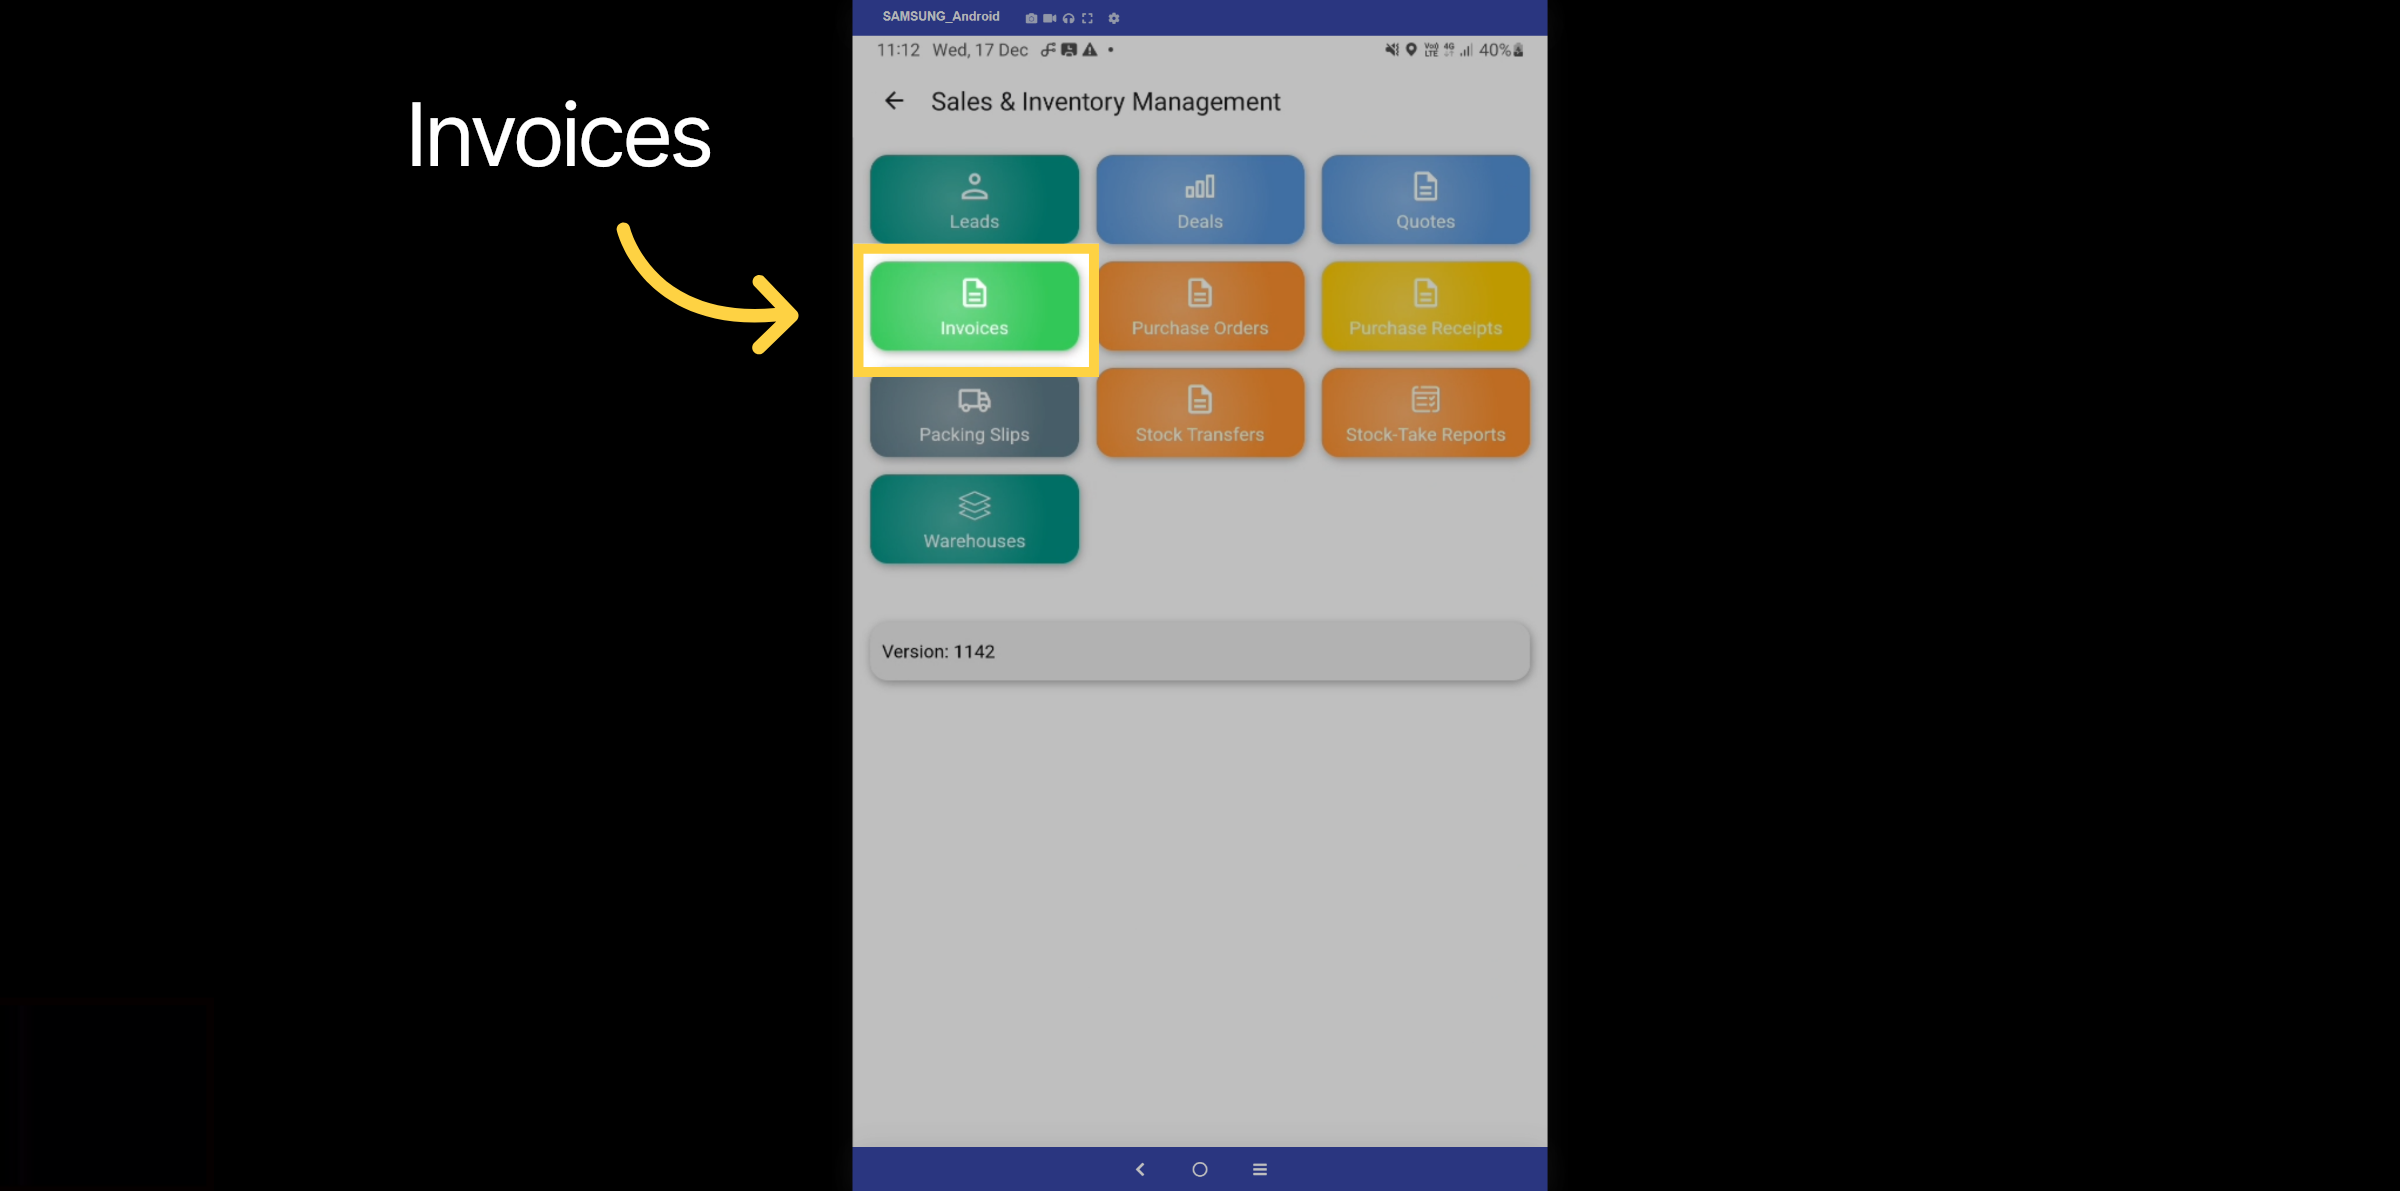
29. Invoices Tab
Let's explore the invoices tab
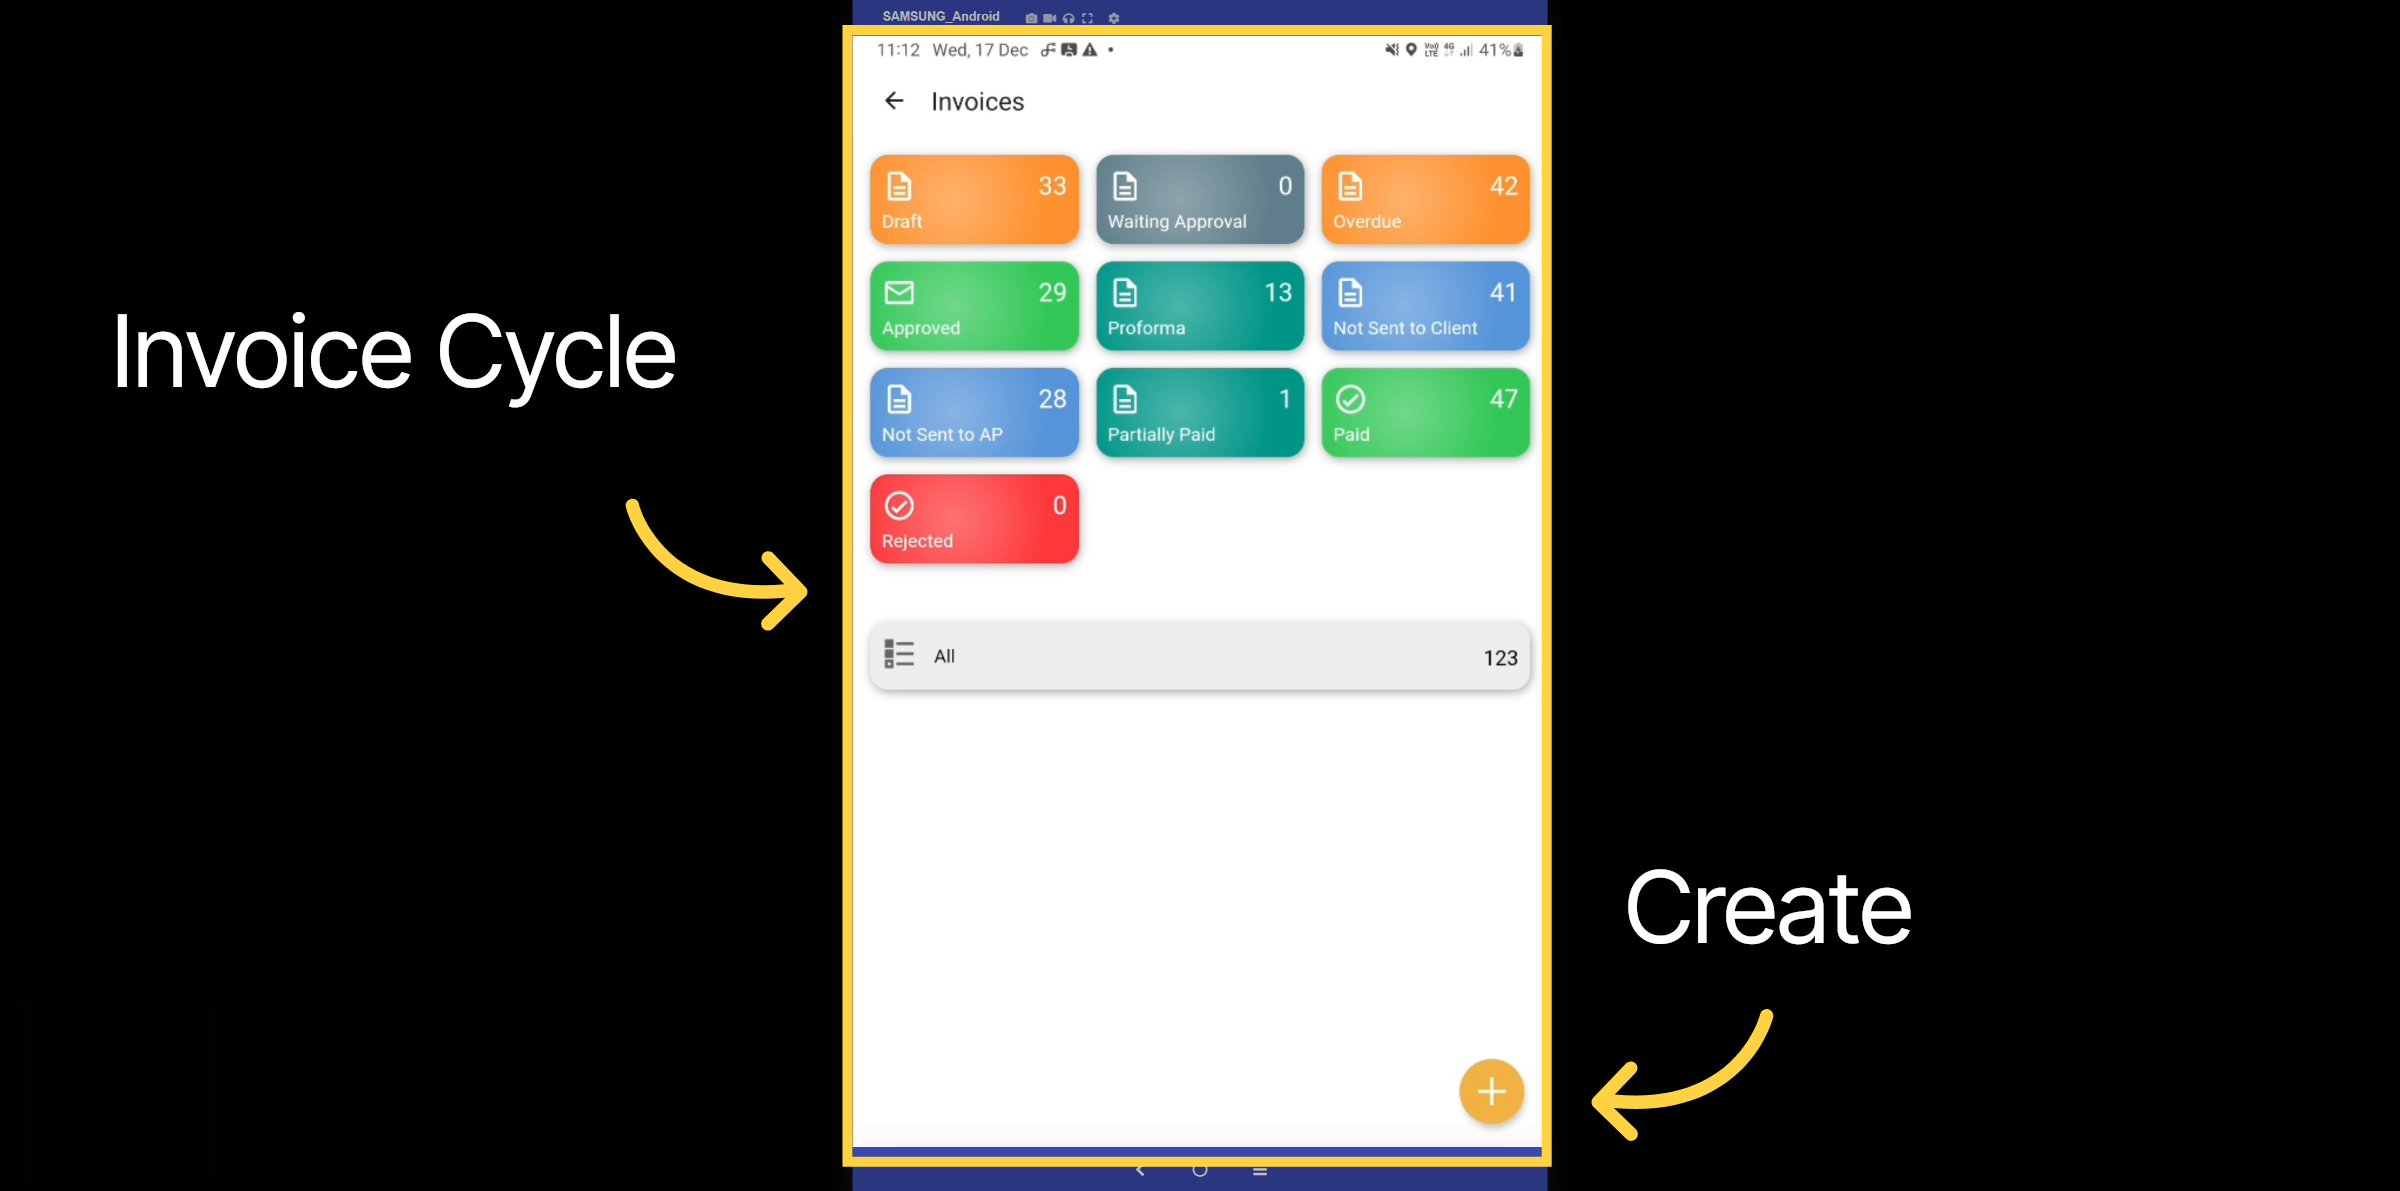
30. Invoice Cycle
Similar to the quote cycle, the invoice follows its own progression from draft to paid. Click the plus icon to create an invoice from the beginning and follow the same process
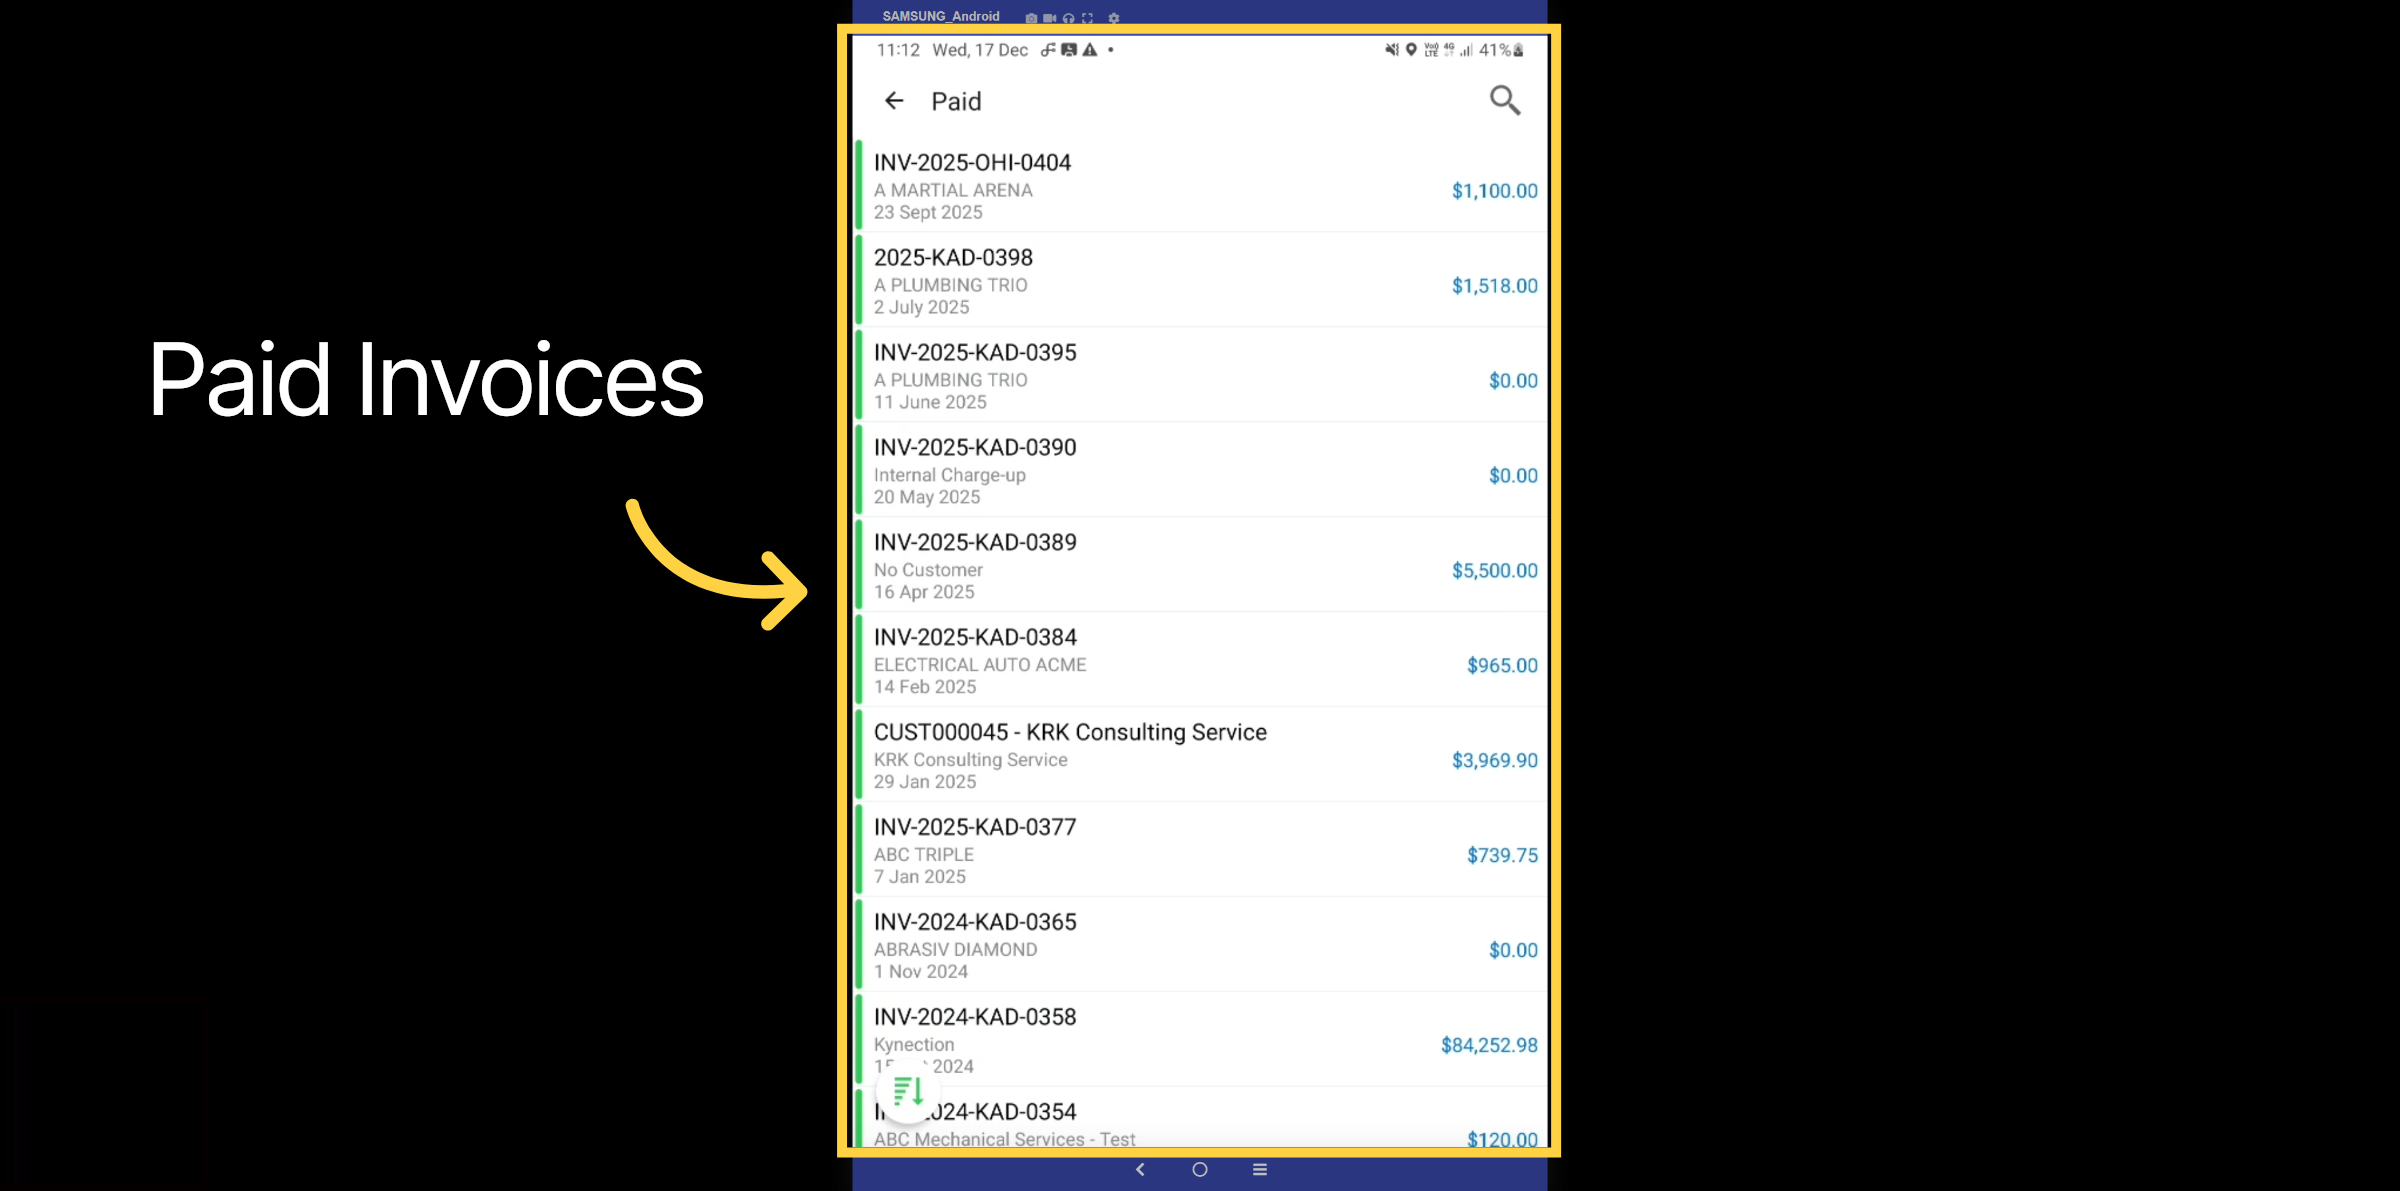
31. Paid Invoices
Here is a list of all paid invoices. Once the invoice has gone through each stage and is marked as paid in your accounting package, it will be displayed in Kynection as paid through the API integrations.
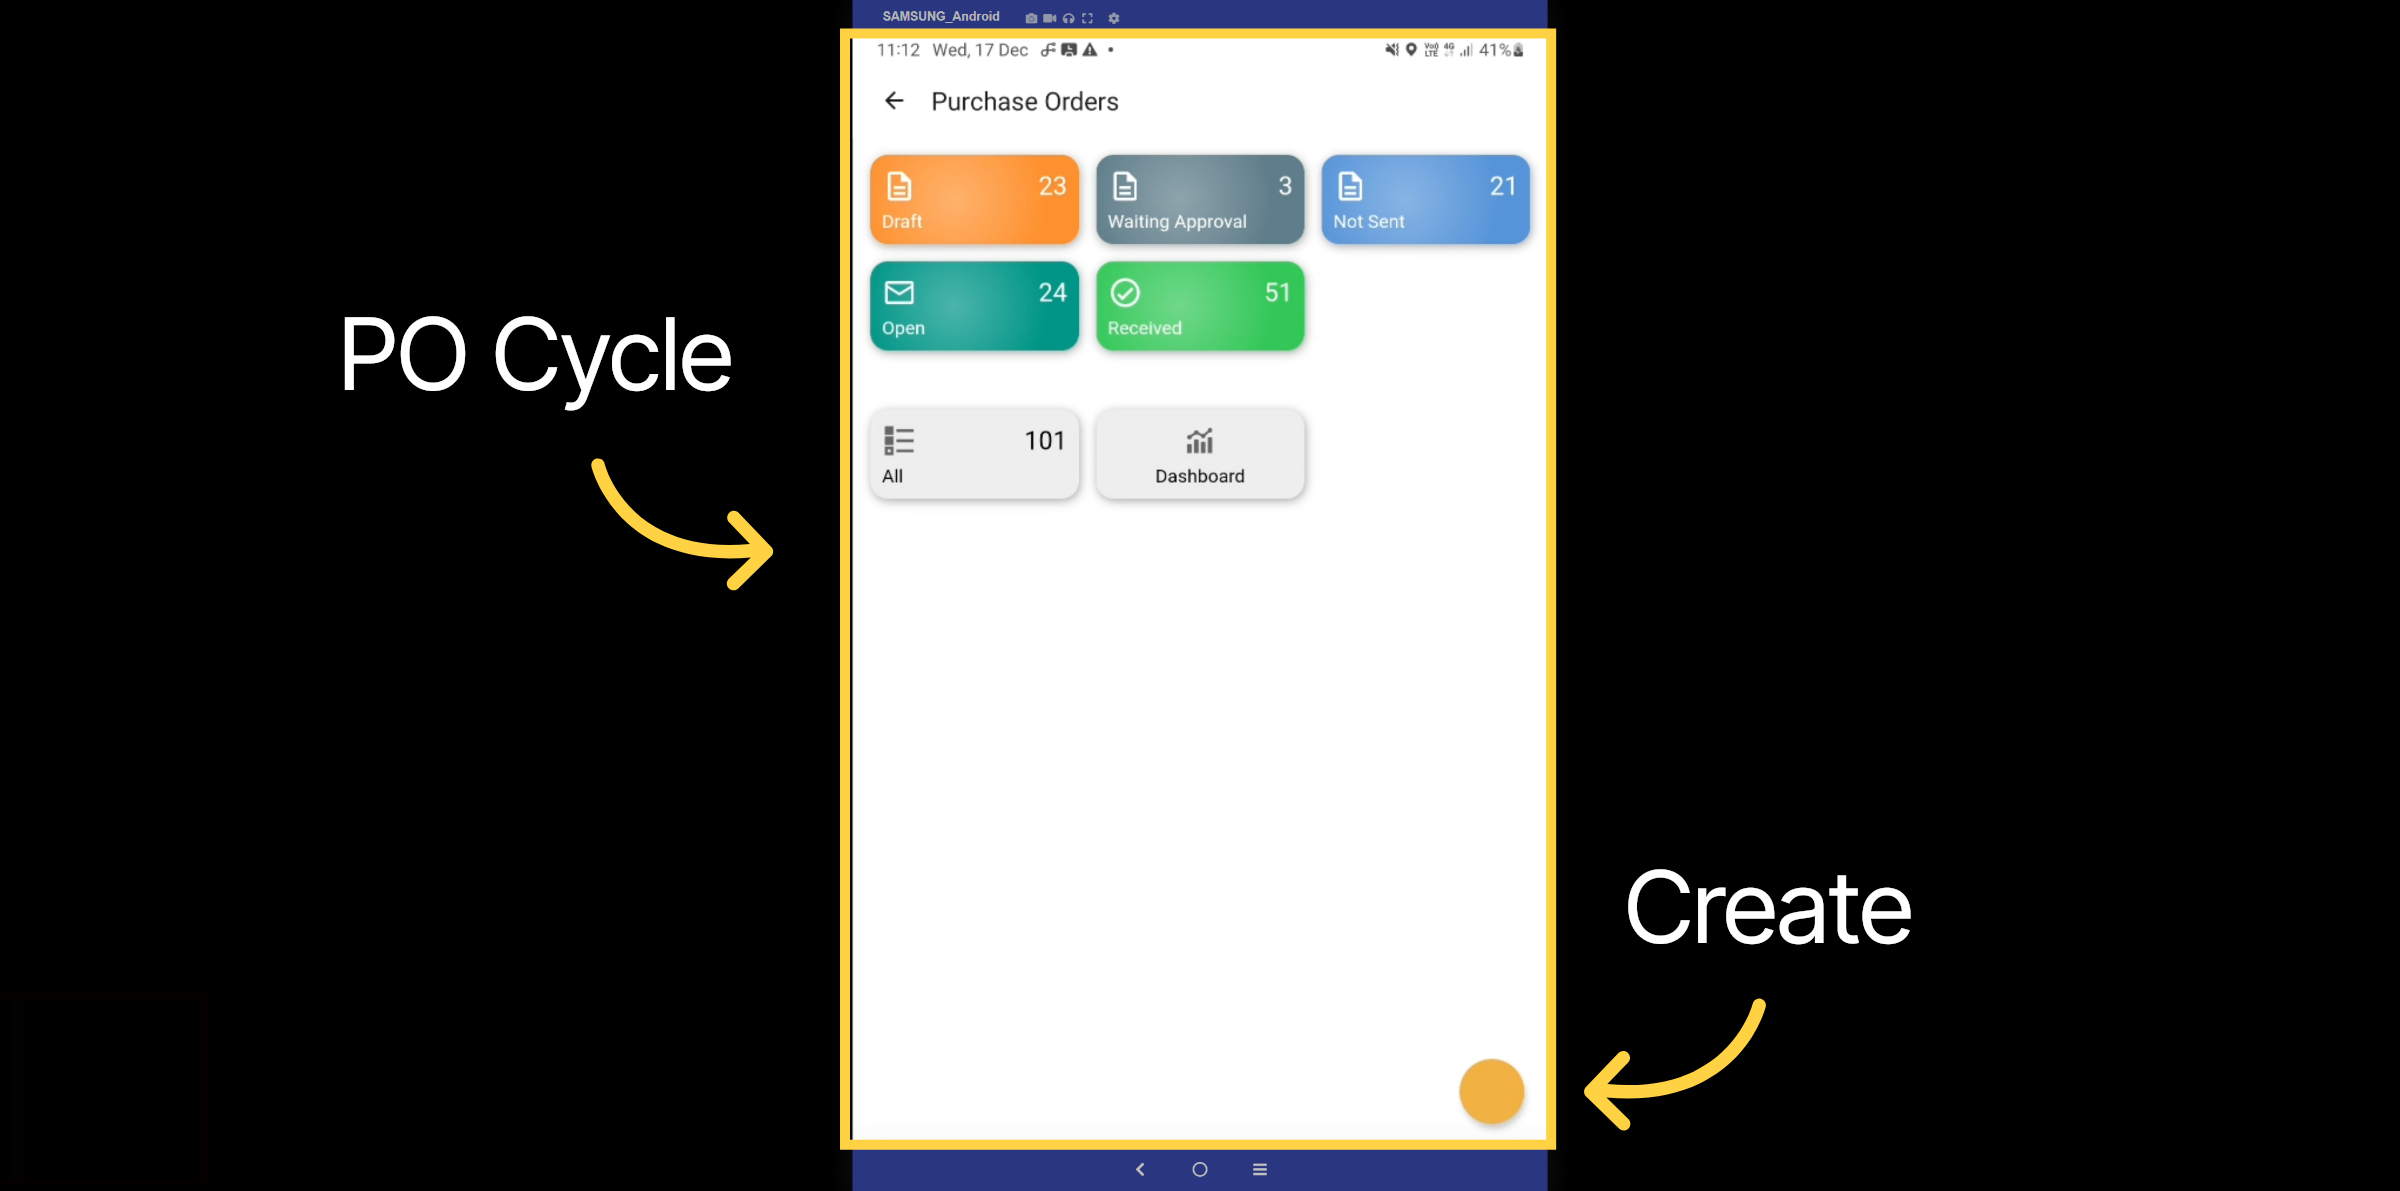
32. Purchase Orders
Let's explore the purchase order ta

33. Purchase Order Dashboard
Here you can view the purchase order cycle, including draft, waiting for approval, not sent, open, and received statuses. You have the ability to apply approval budgets and create purchase orders from the beginning by clicking on the plus icon and following the same process.
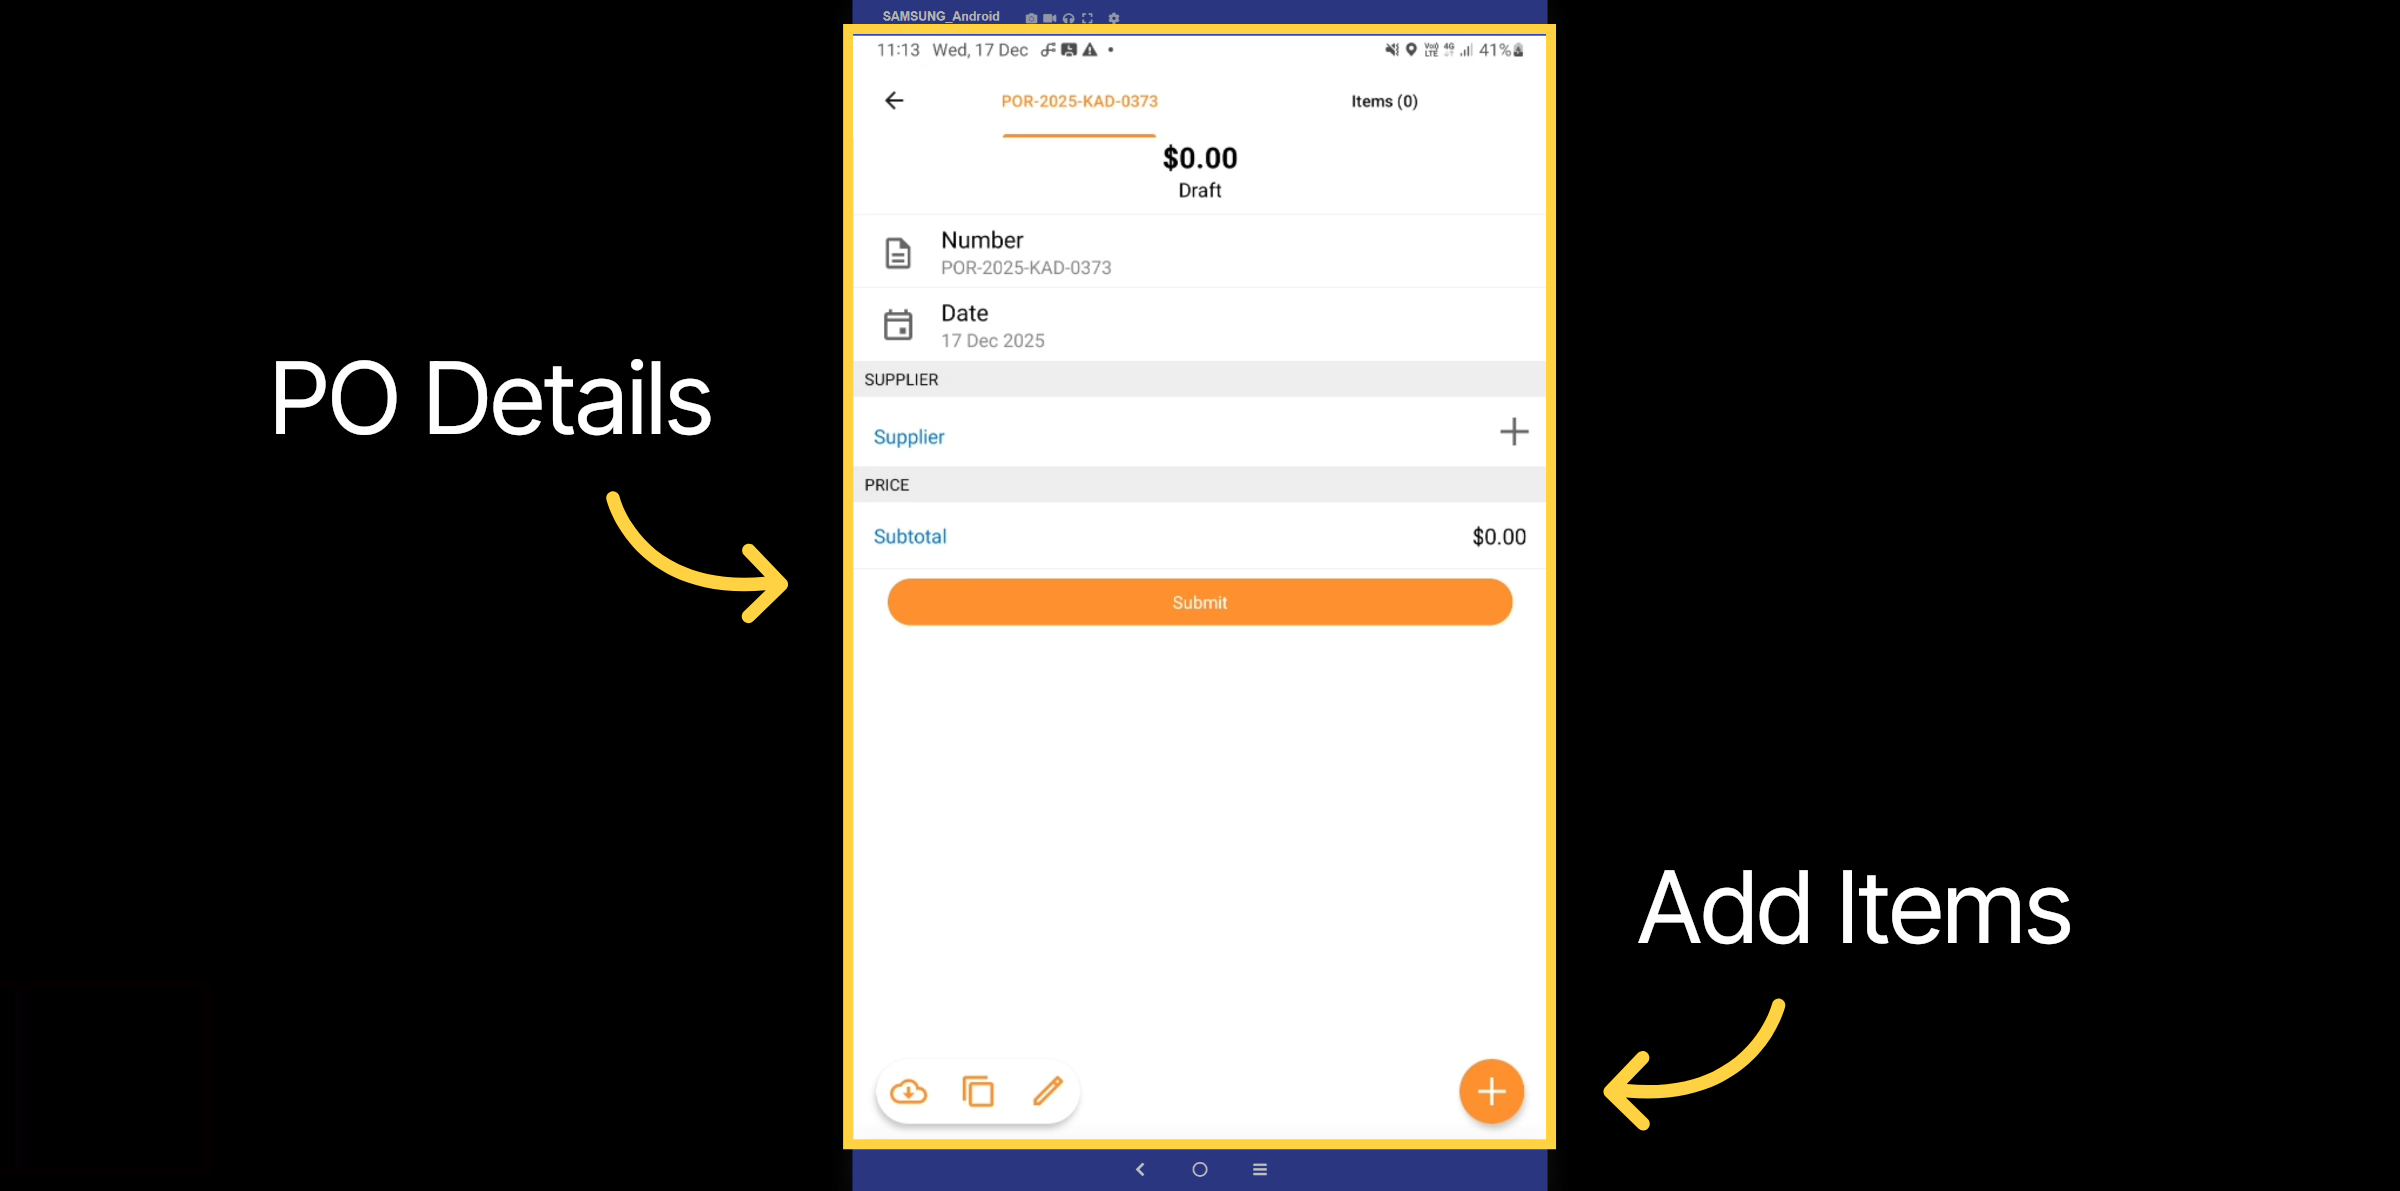
34. Draft PO
First, select the edit pencil and input the supplier details. Then, click the plus icon to begin adding products and services from that particular supplier.
35. Purchase Order Receipts
Let’s delve into the purchase order receipt tab.
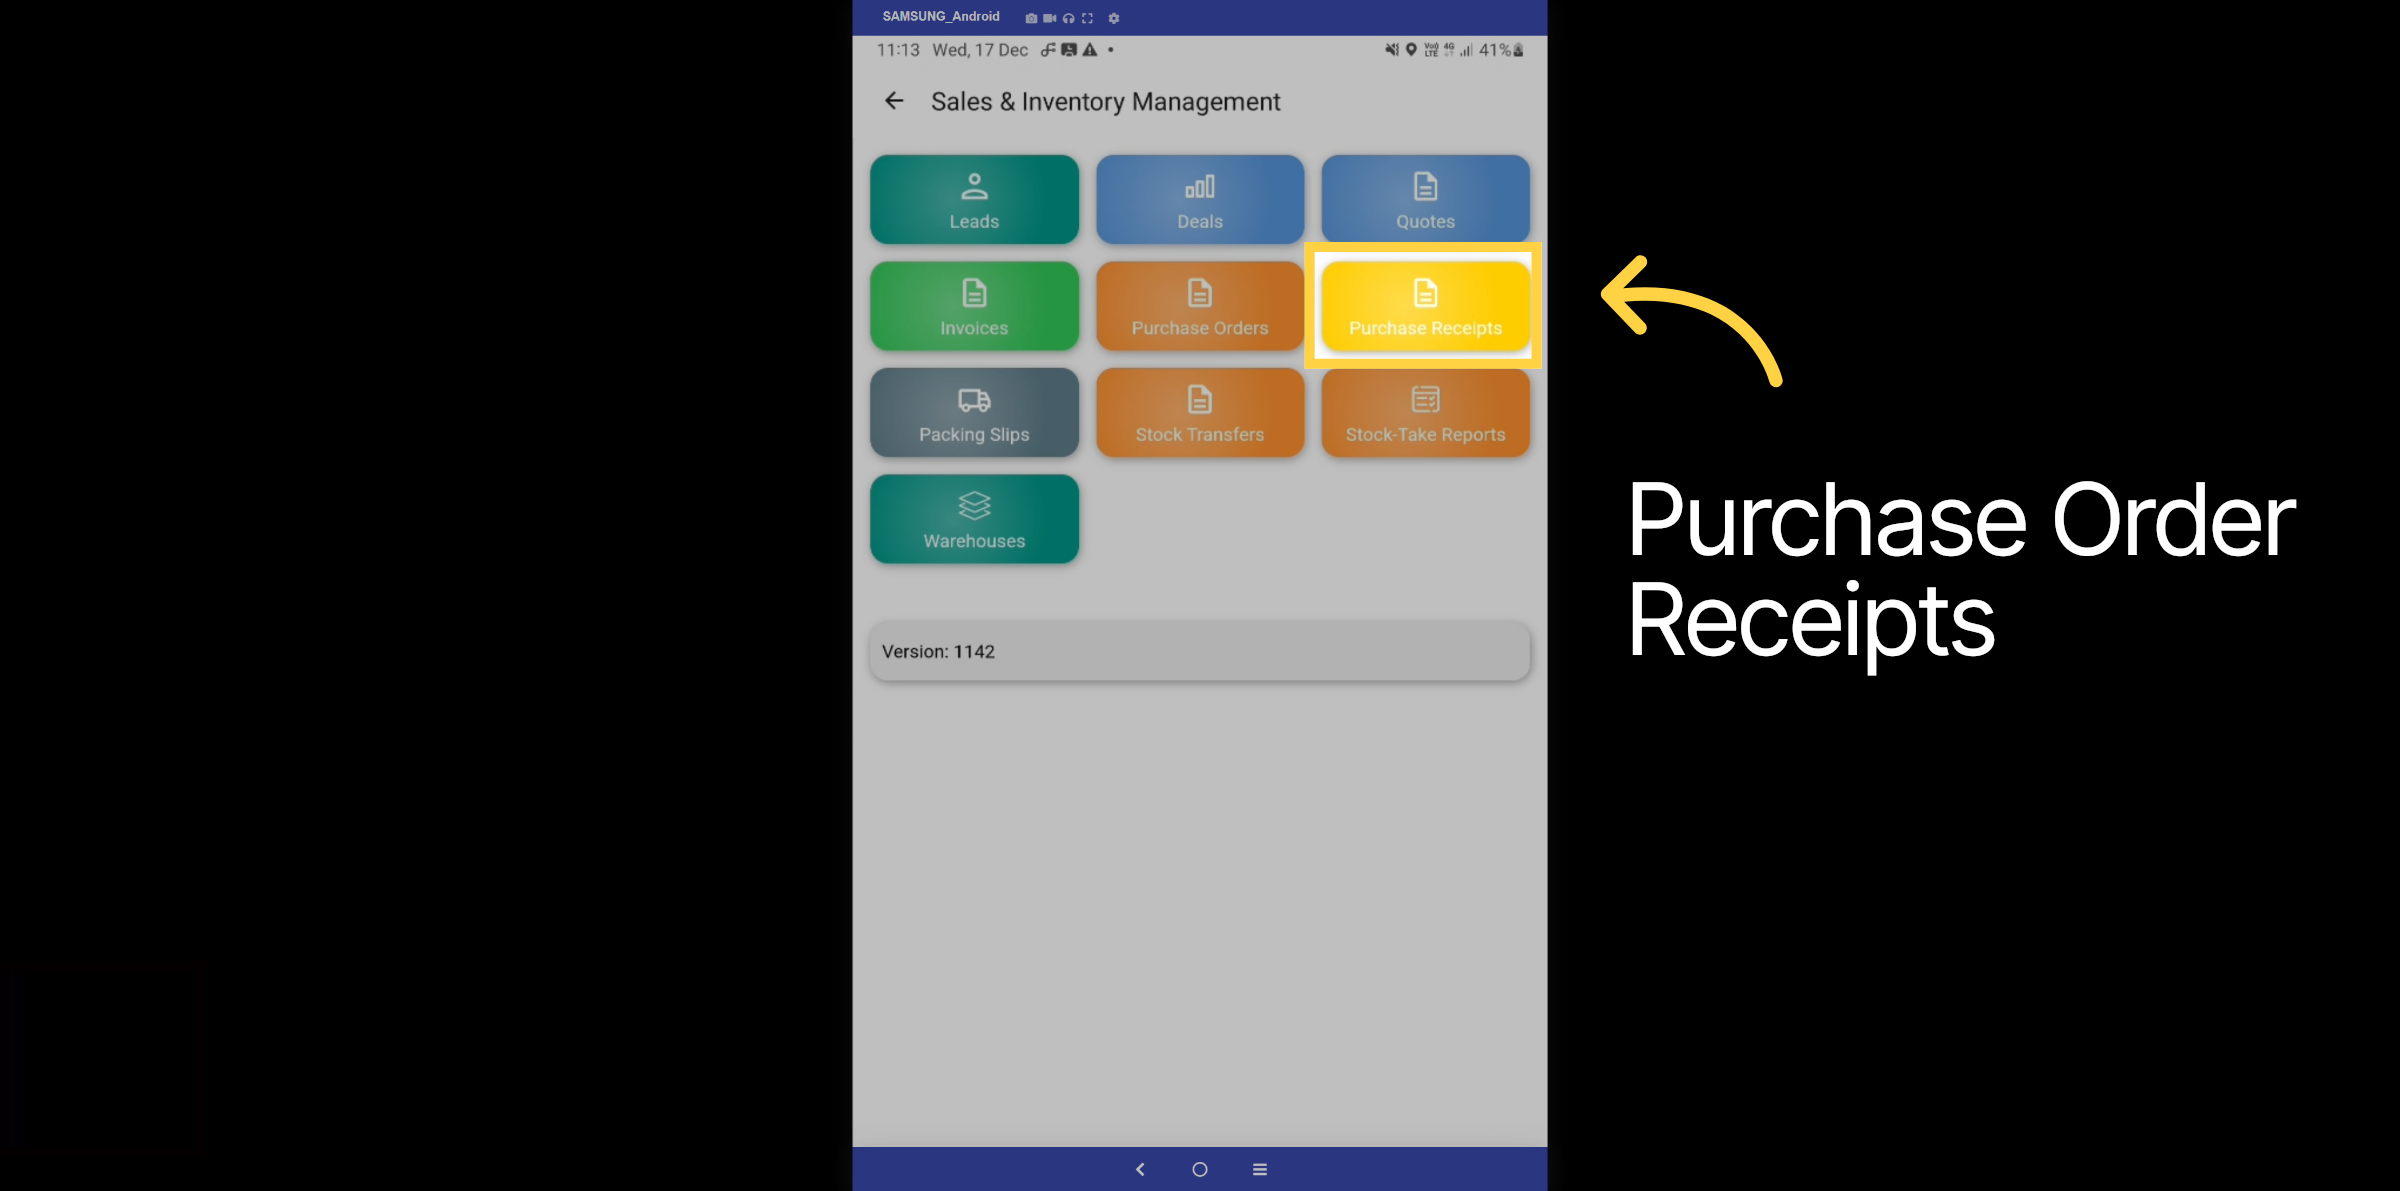
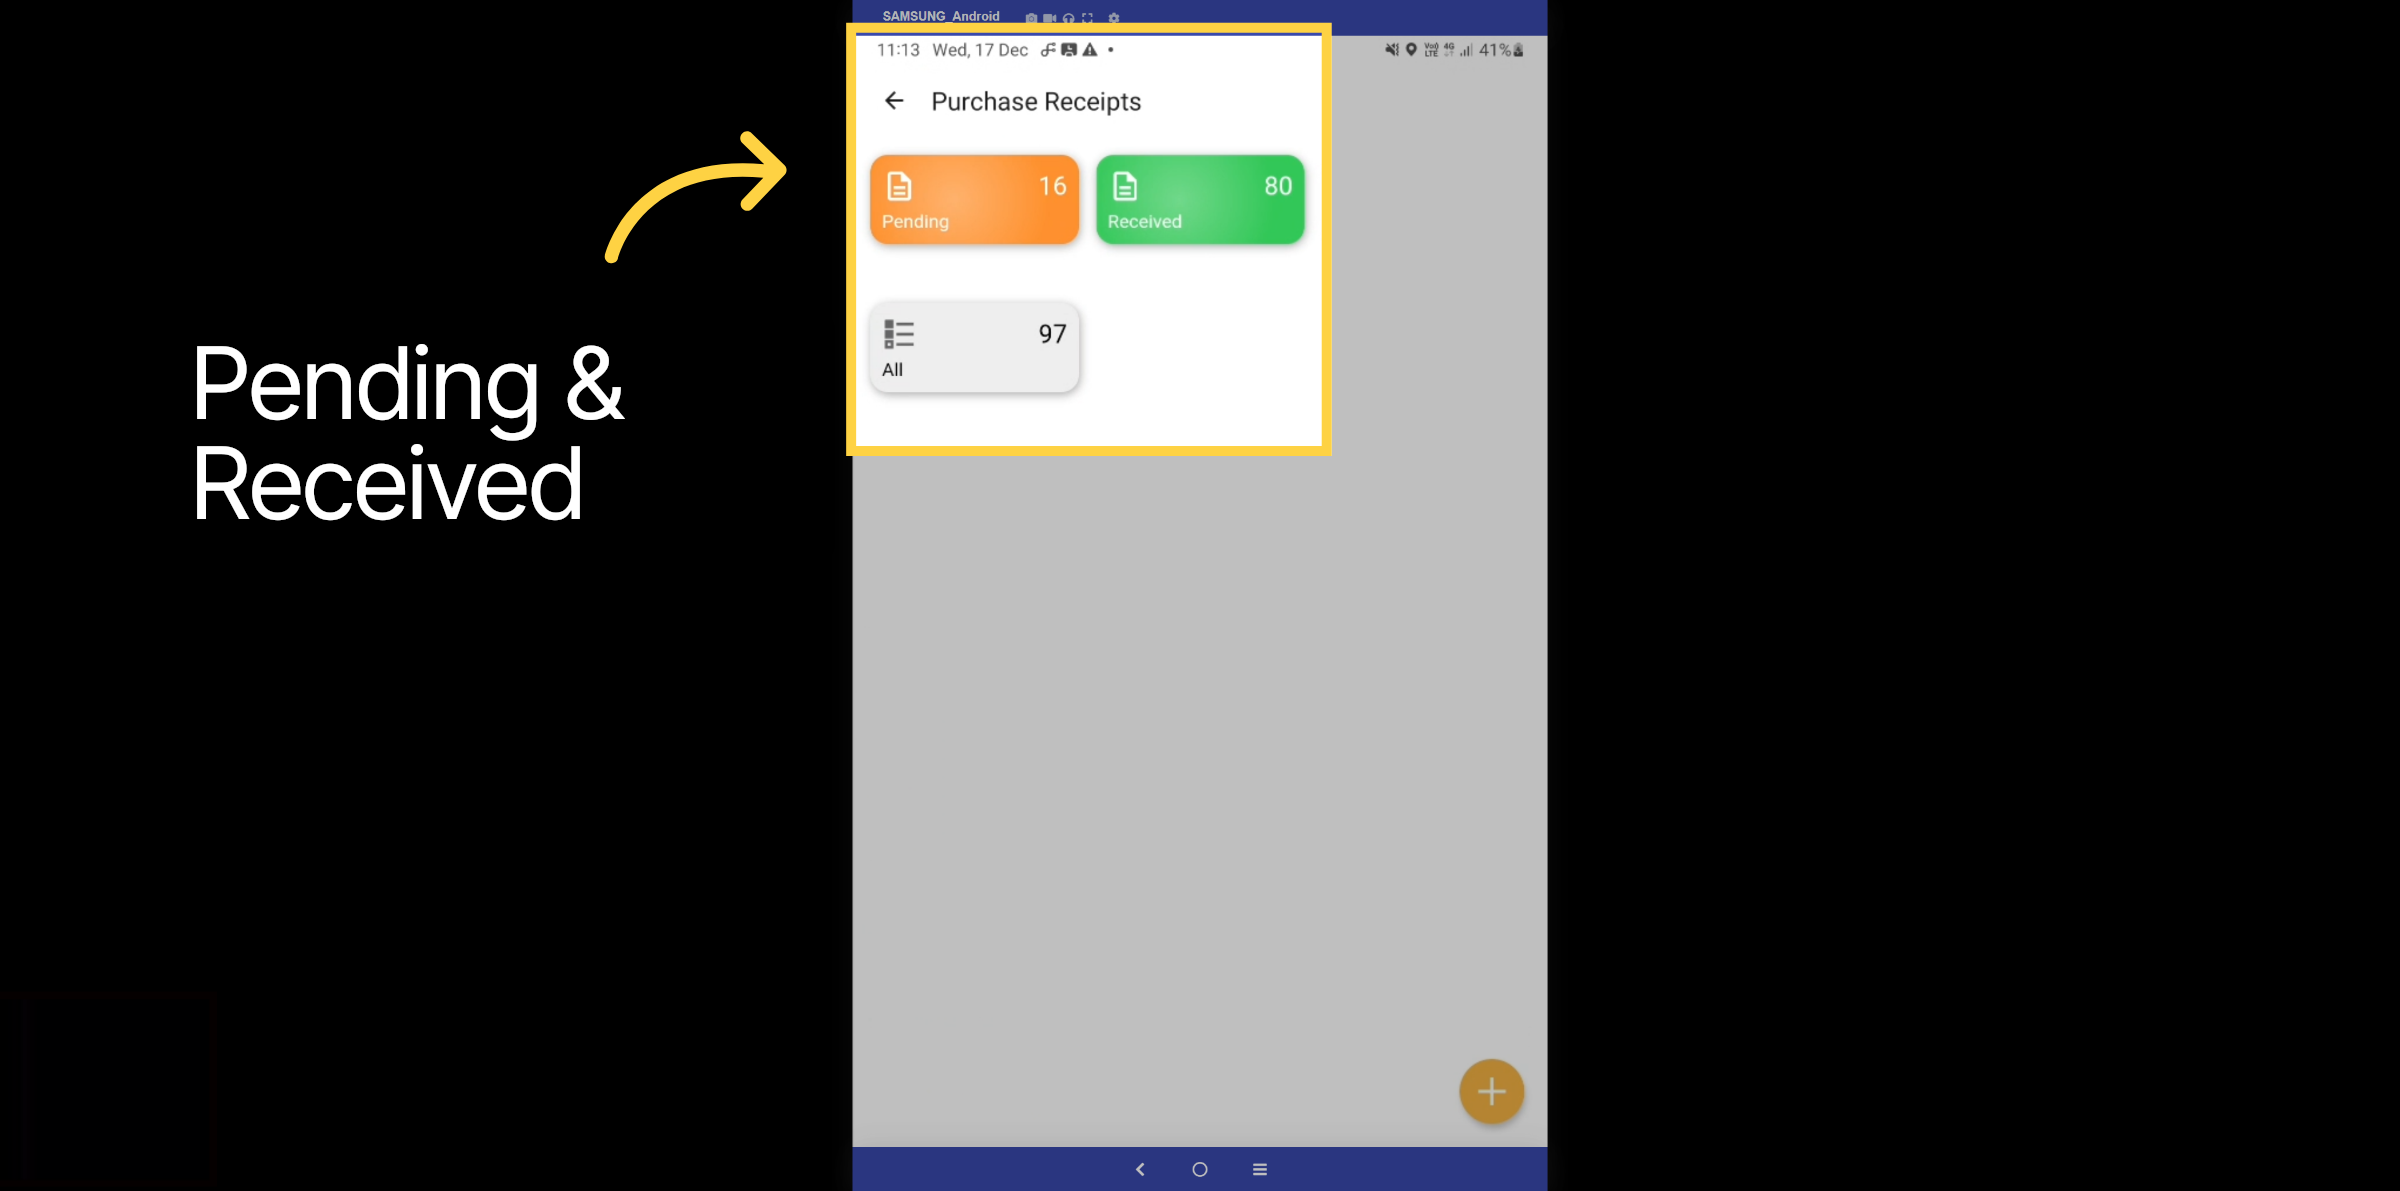
36. Purchase Order Receipt Dashboard
Within the dashboard, you can view lists of all purchase orders that are pending and received. You have the ability to receipt purchase orders directly from the application, which may be linked to a daily docket.
Thanks for watching

