This Guide will demonstrate how to efficiently manage maintenance of equipment using Kynection's Maintenance Module.
1. Equipment
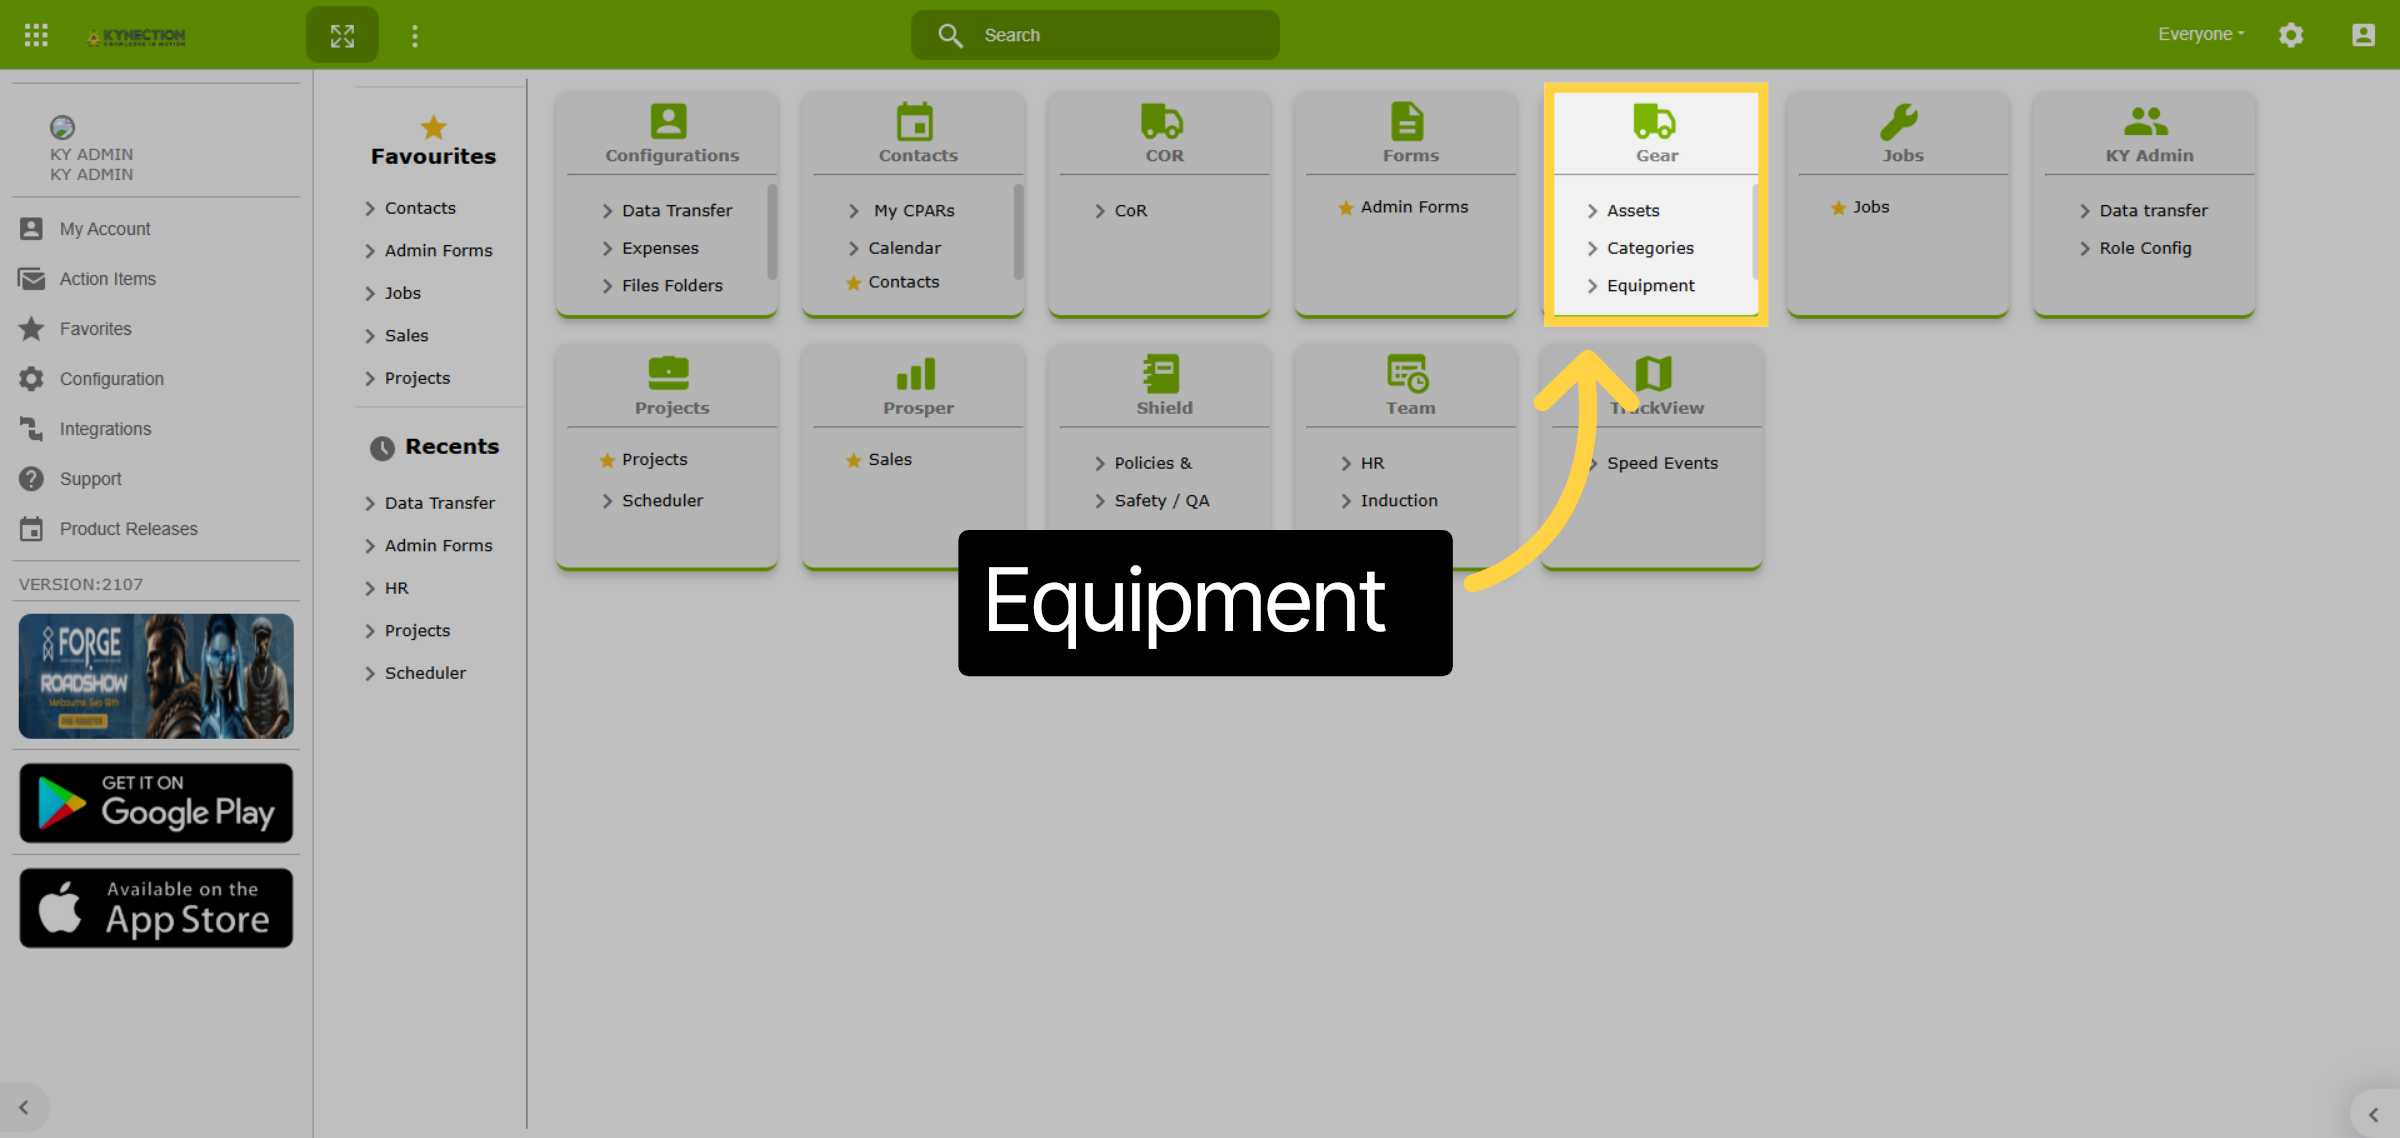
From the home dashboard select Equipment and then navigate to the Equipment tab.
2. Equipment List
The Equipment List offers several search and filter options. You can initiate a search by clicking on the search function located in the top toolbar. Alternatively, use the toolbar clipboard icon to filter your results based on project, site, tag, or region. Table column headers also offer filter and sort options.

3. Categories
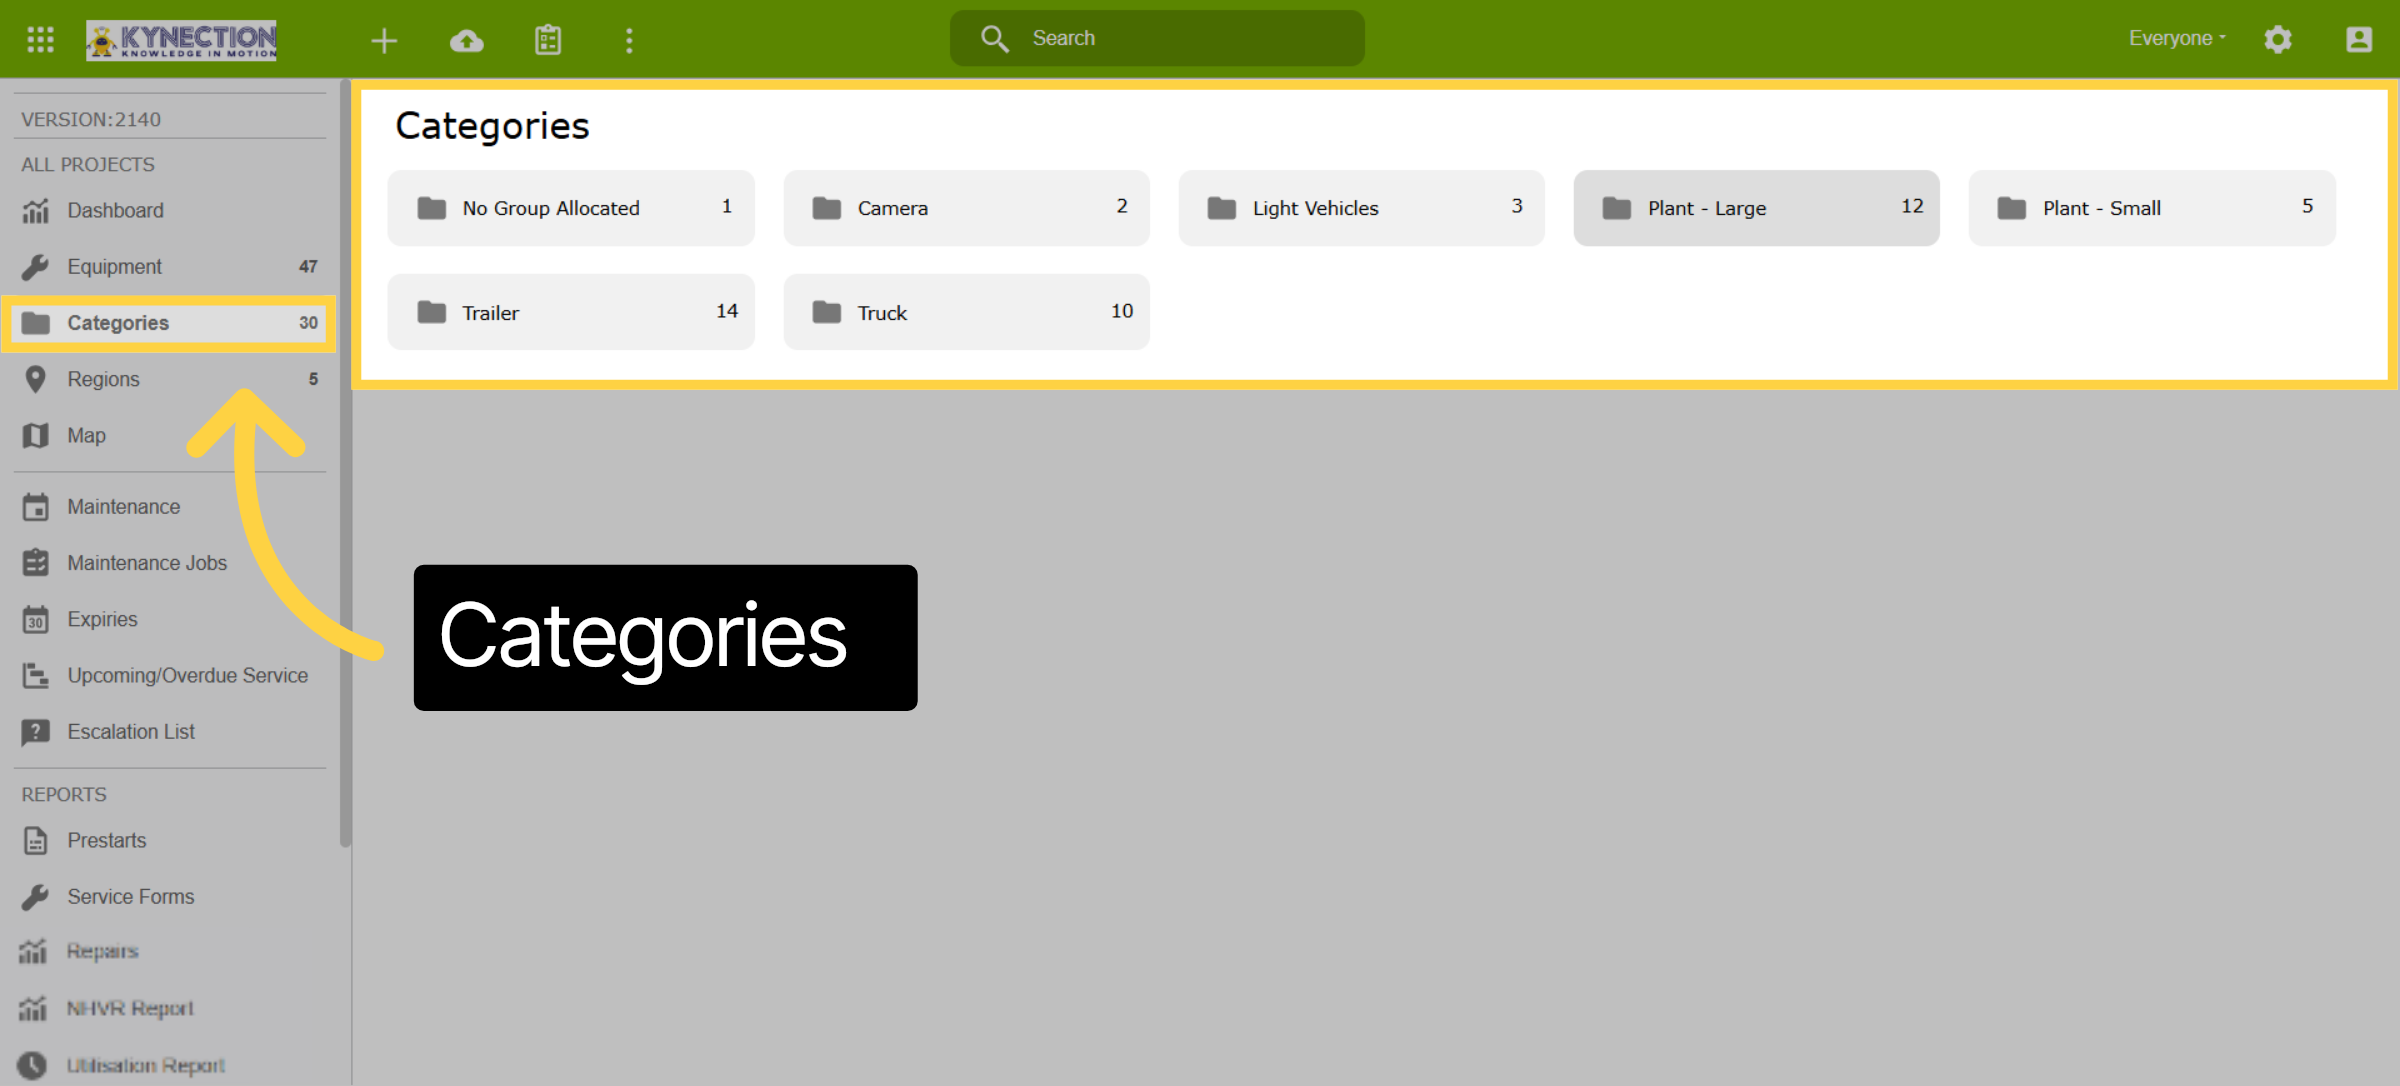
Categories provide an alternative approach to finding equipment records. They organise equipment by Parent categories, which may contain sub-folders for better organisation. This structure would have been established during your initial configuration.
4. Sub-Categories
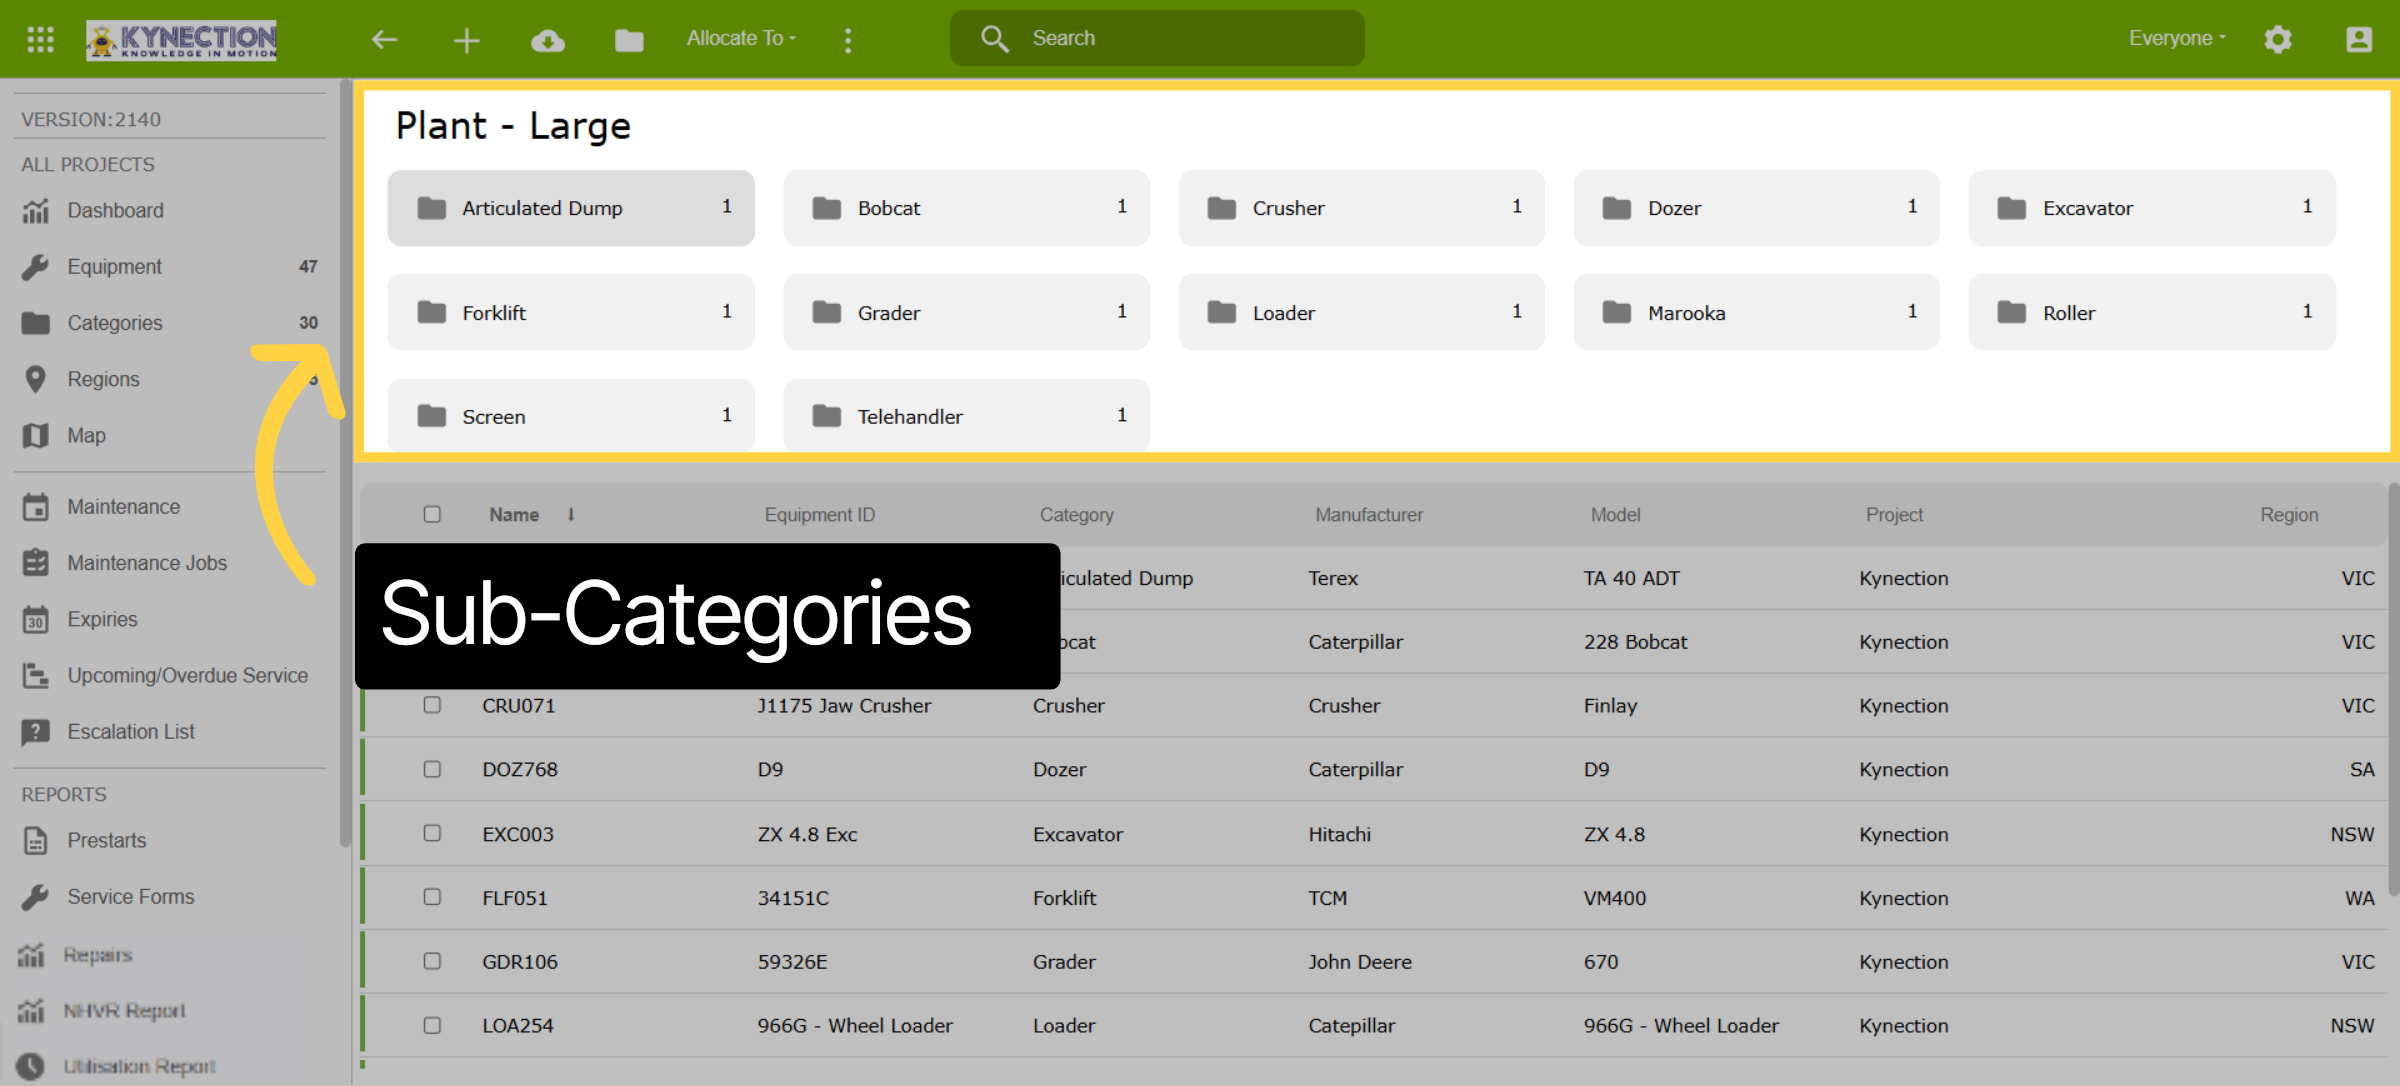
This example shows the parent category of "Plant Large" and the sub-folders categories contained within.
5. Equipment Record
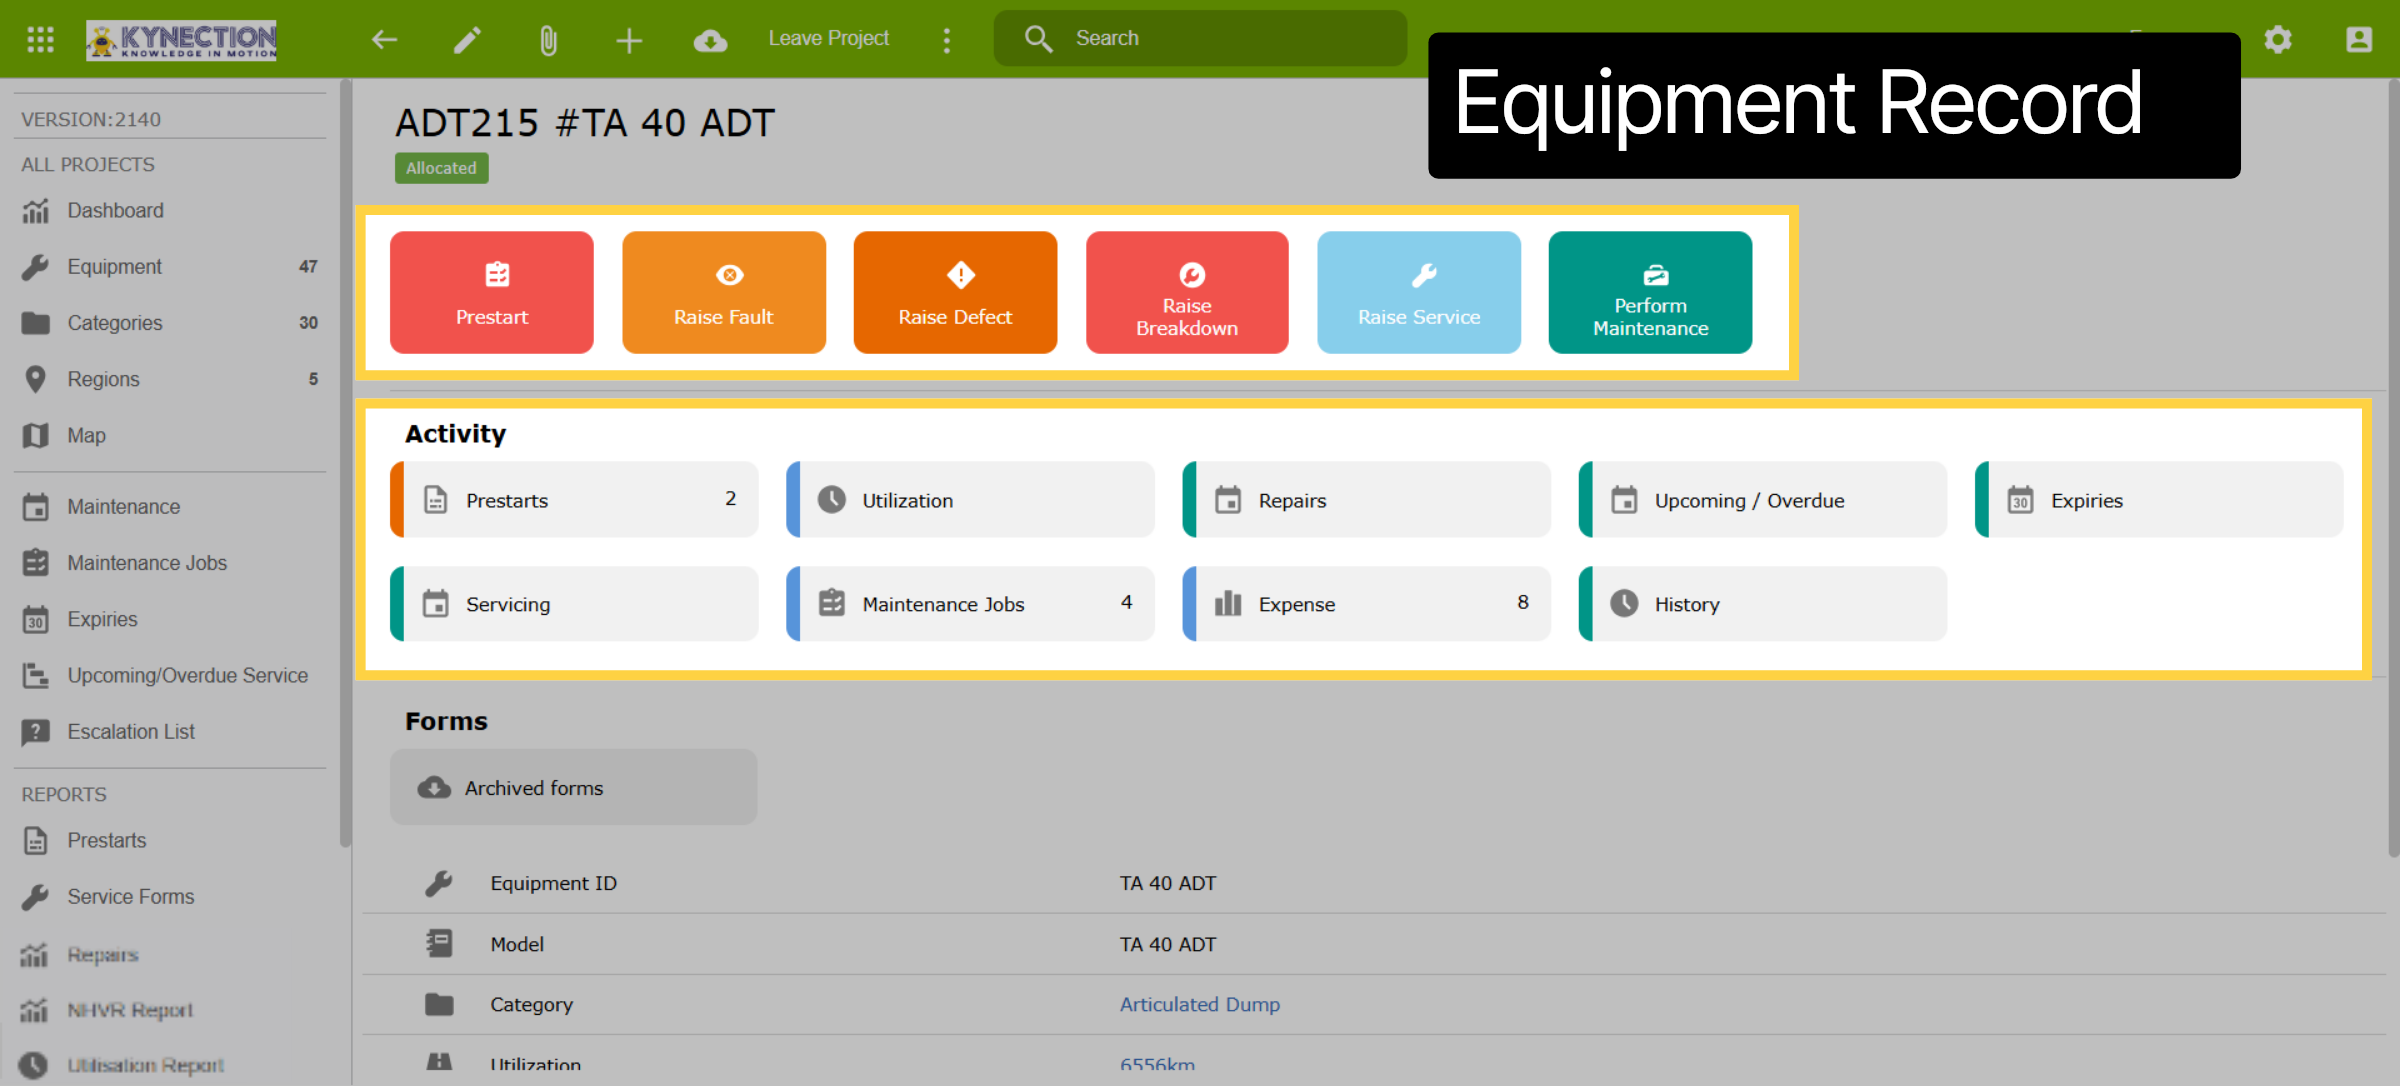
The equipment record displays quick links at the top. Solid colour tabs to raise maintenance items, whereas the activity tabs are a record of previous items raised against the equipment.
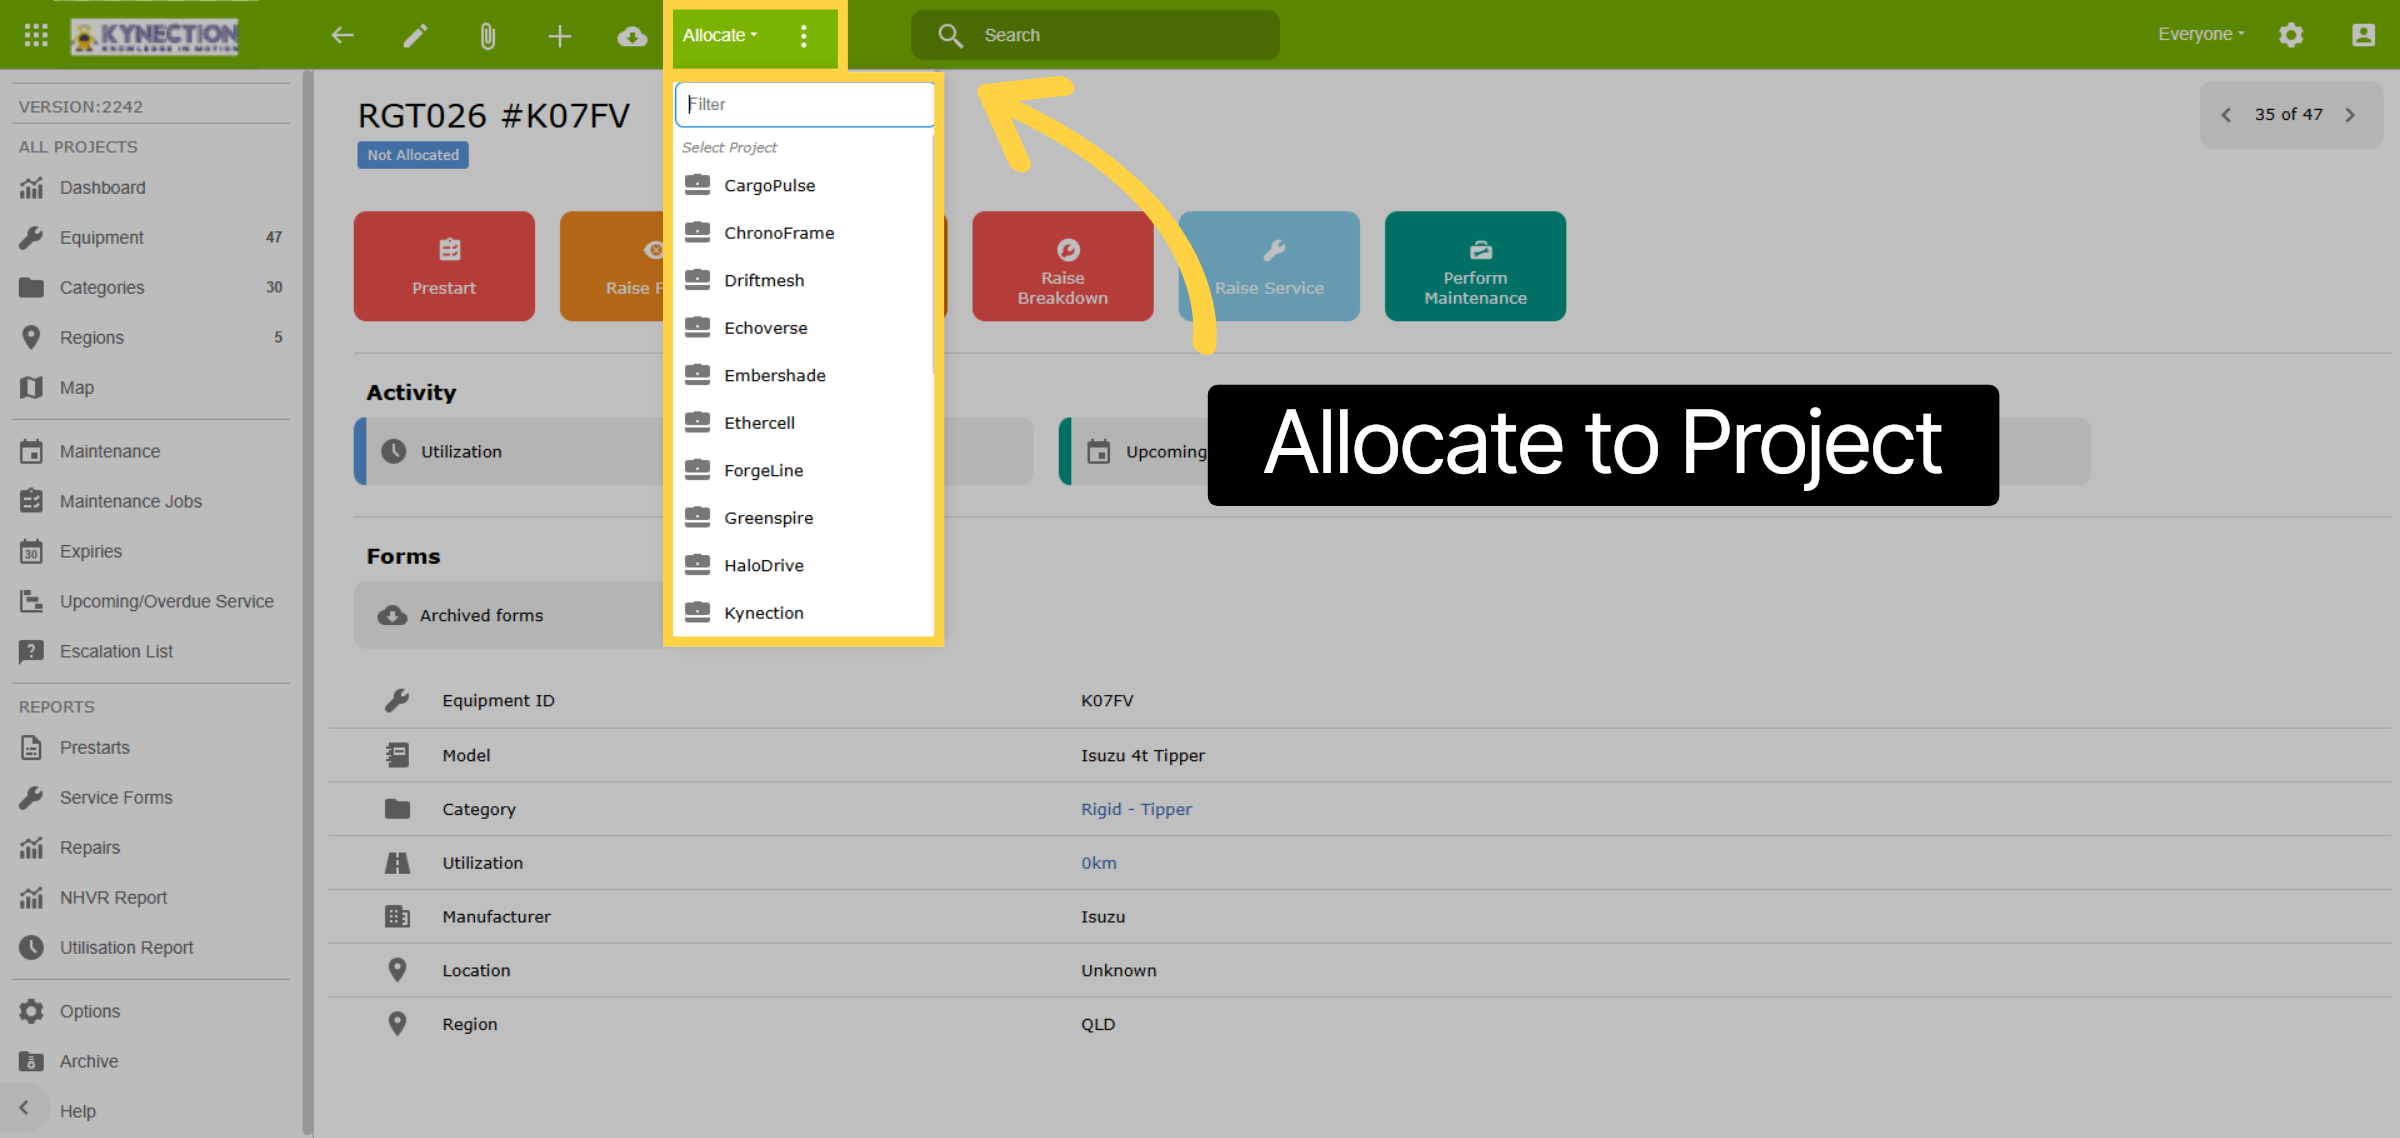
6. Allocate to Project
Allocate equipment to projects by selecting the equipment you want to assign and choosing the corresponding project.
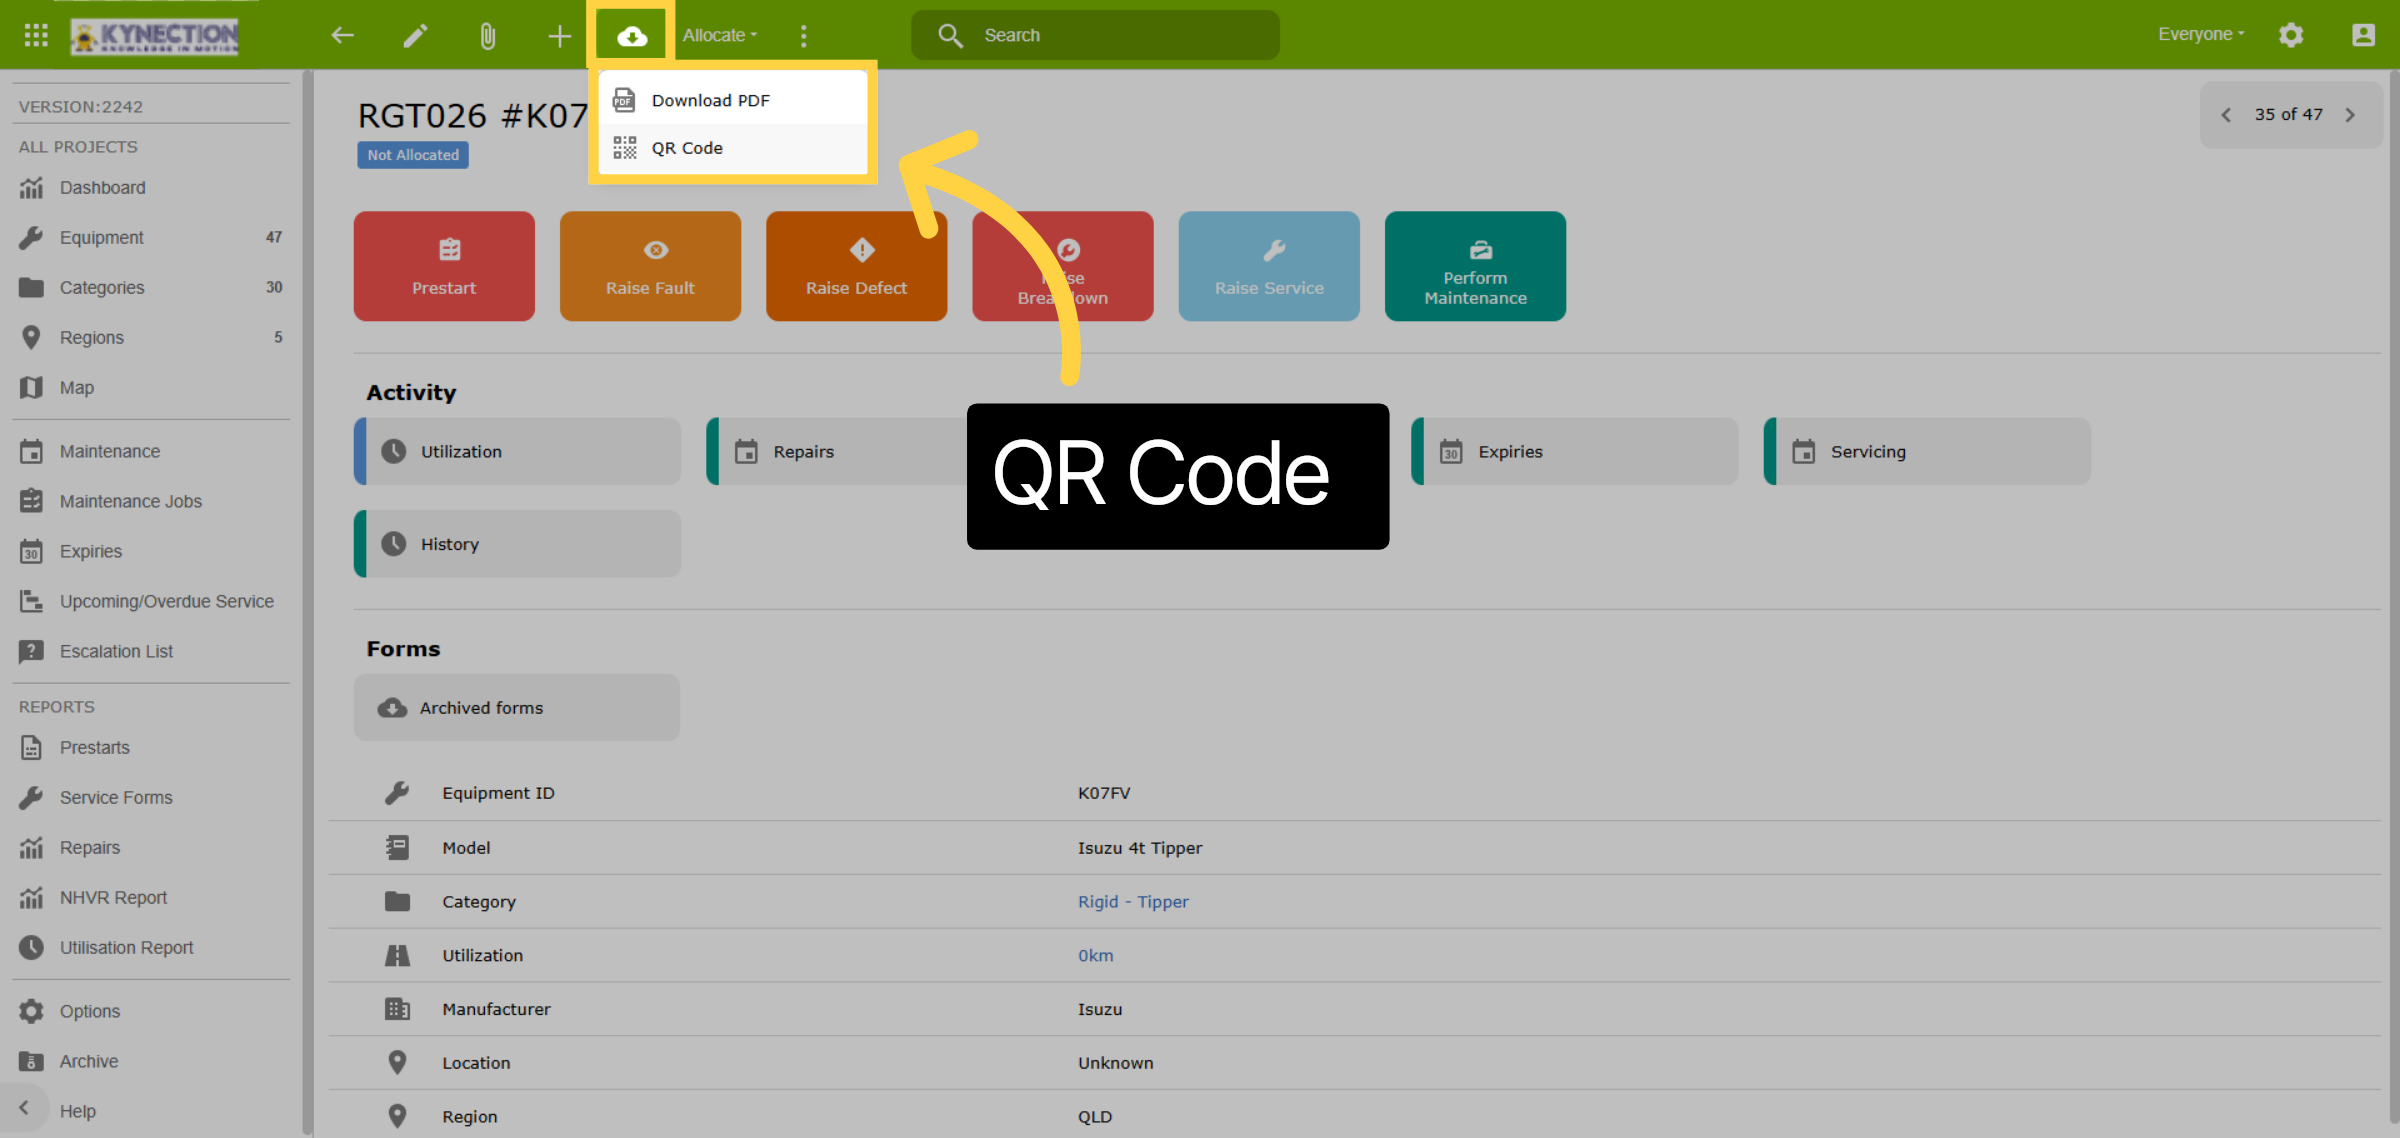
7. QR Code
QR codes that link to Equipment can be downloaded using the cloud icon. Additionally, Kynection's NFC tags can be easily attached to any asset and enable a tap-on or tap-off action.
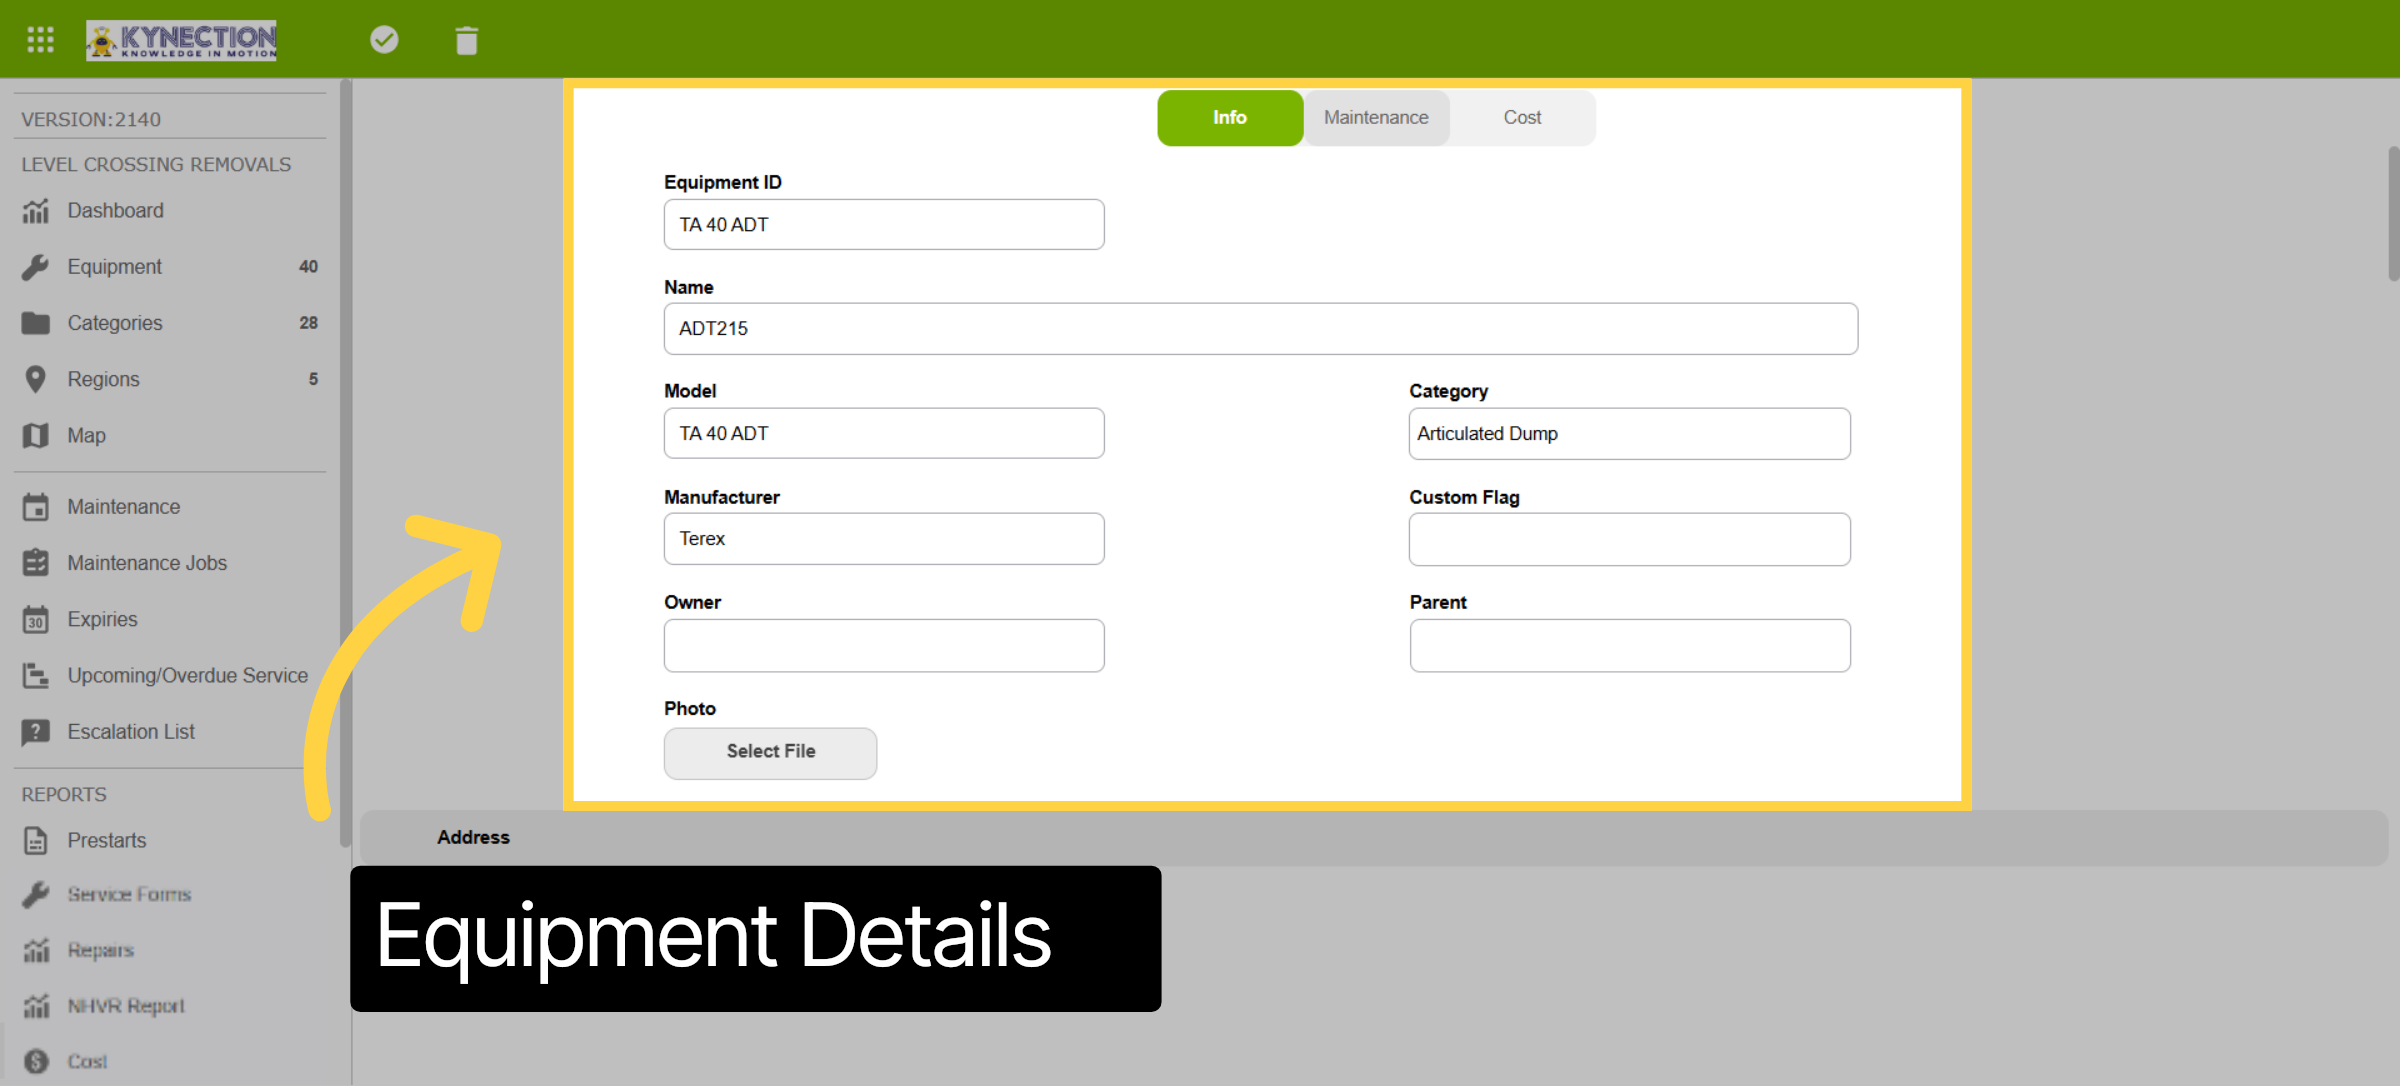
8. Equipment Details
Use the pen from the toolbar to access the edit screen. The first section of the equipment record relates to identification, such as name, category, model, manufacturer, and ID. Scrolling down the record you will find further details related to servicing, registration and dimensions.
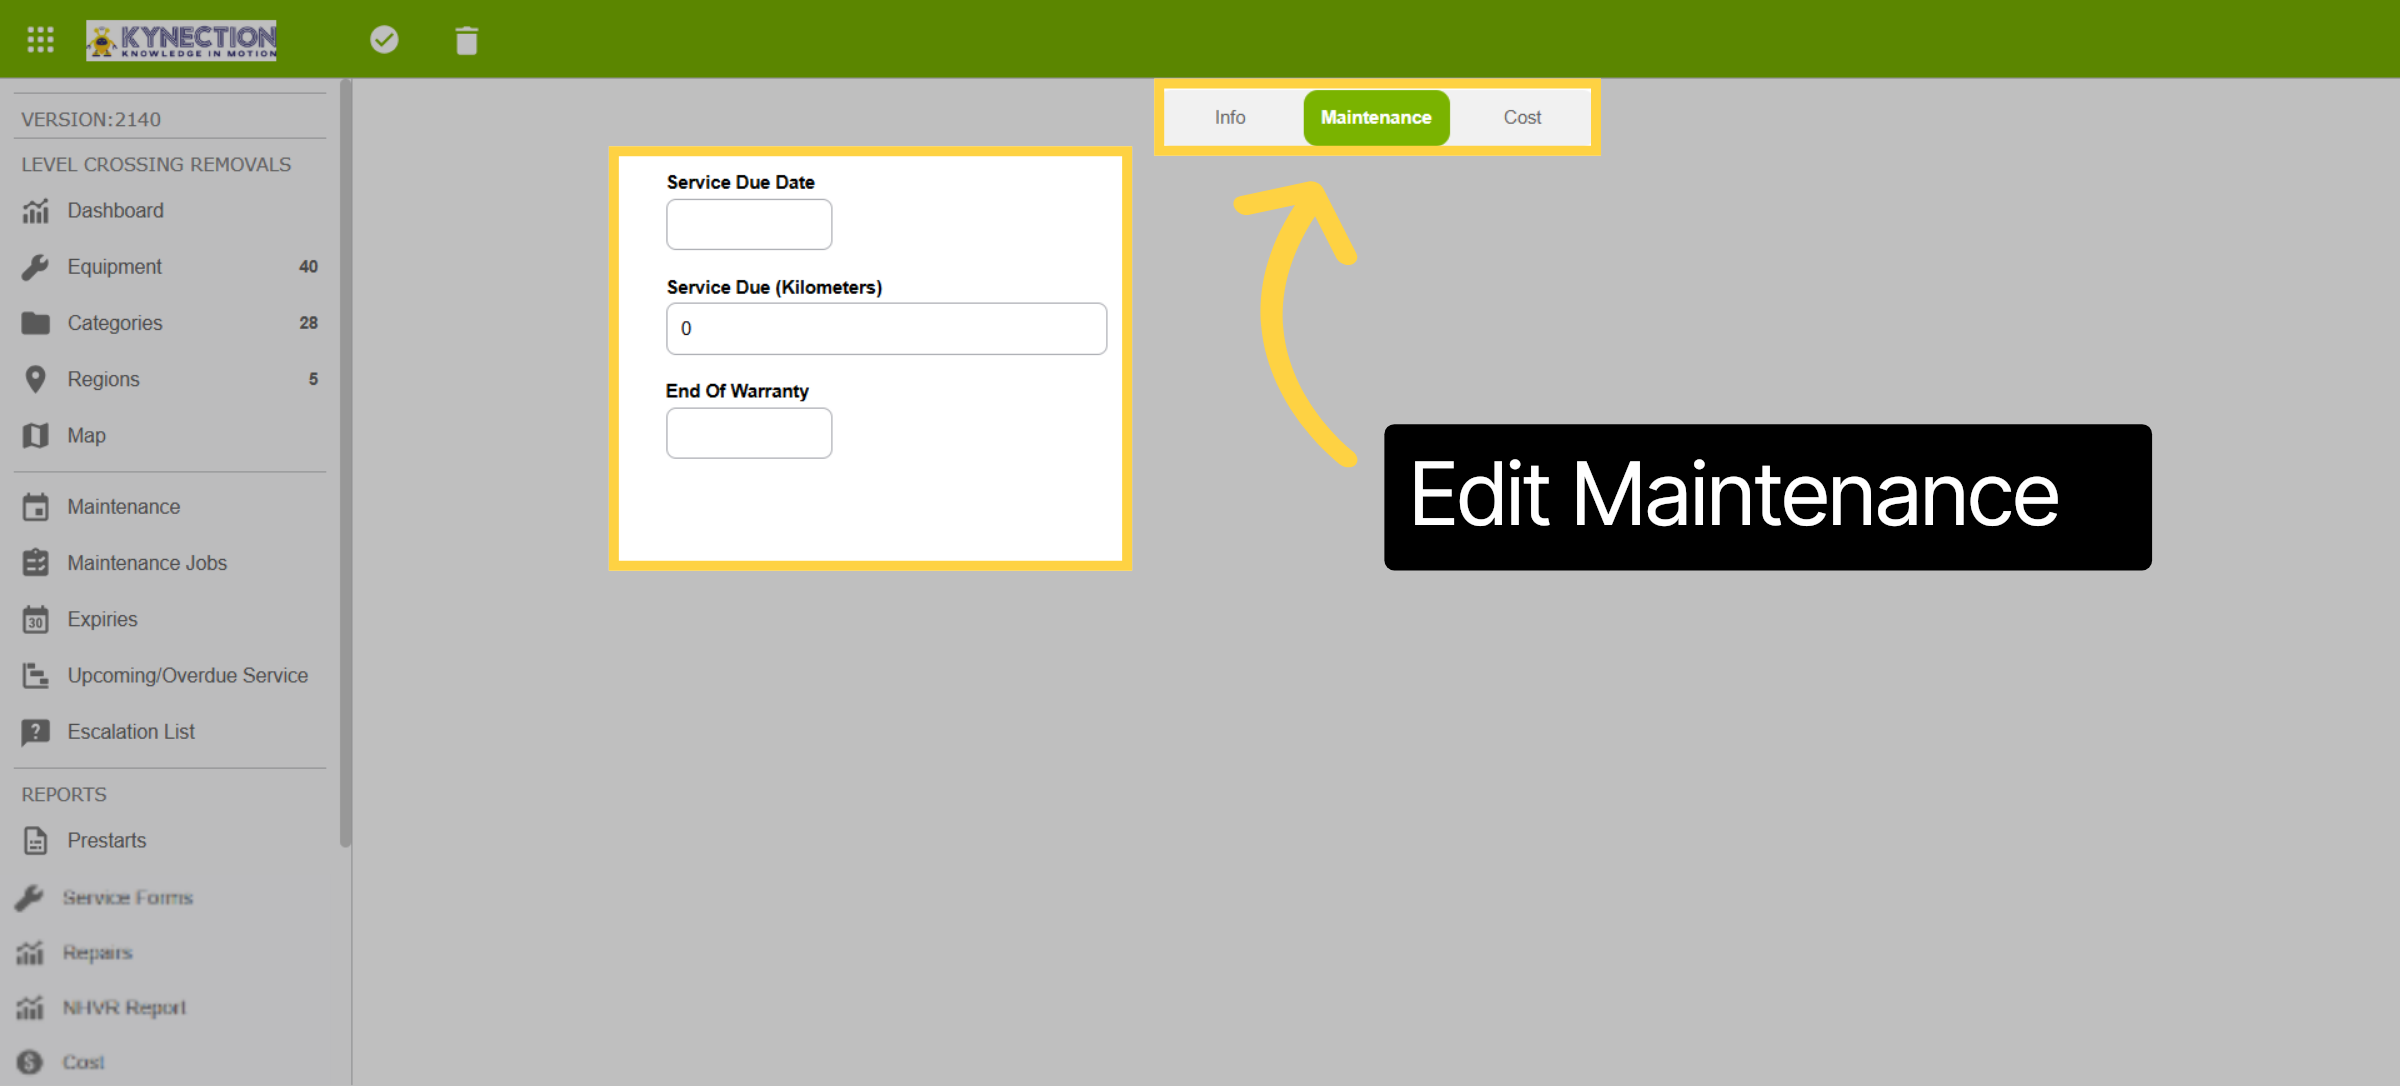
9. Edit Maintenance
From the equipment edit screen select the maintenance tab. This allows you to edit the maintenance details of the equipment such as service due date, warranty and service hours.
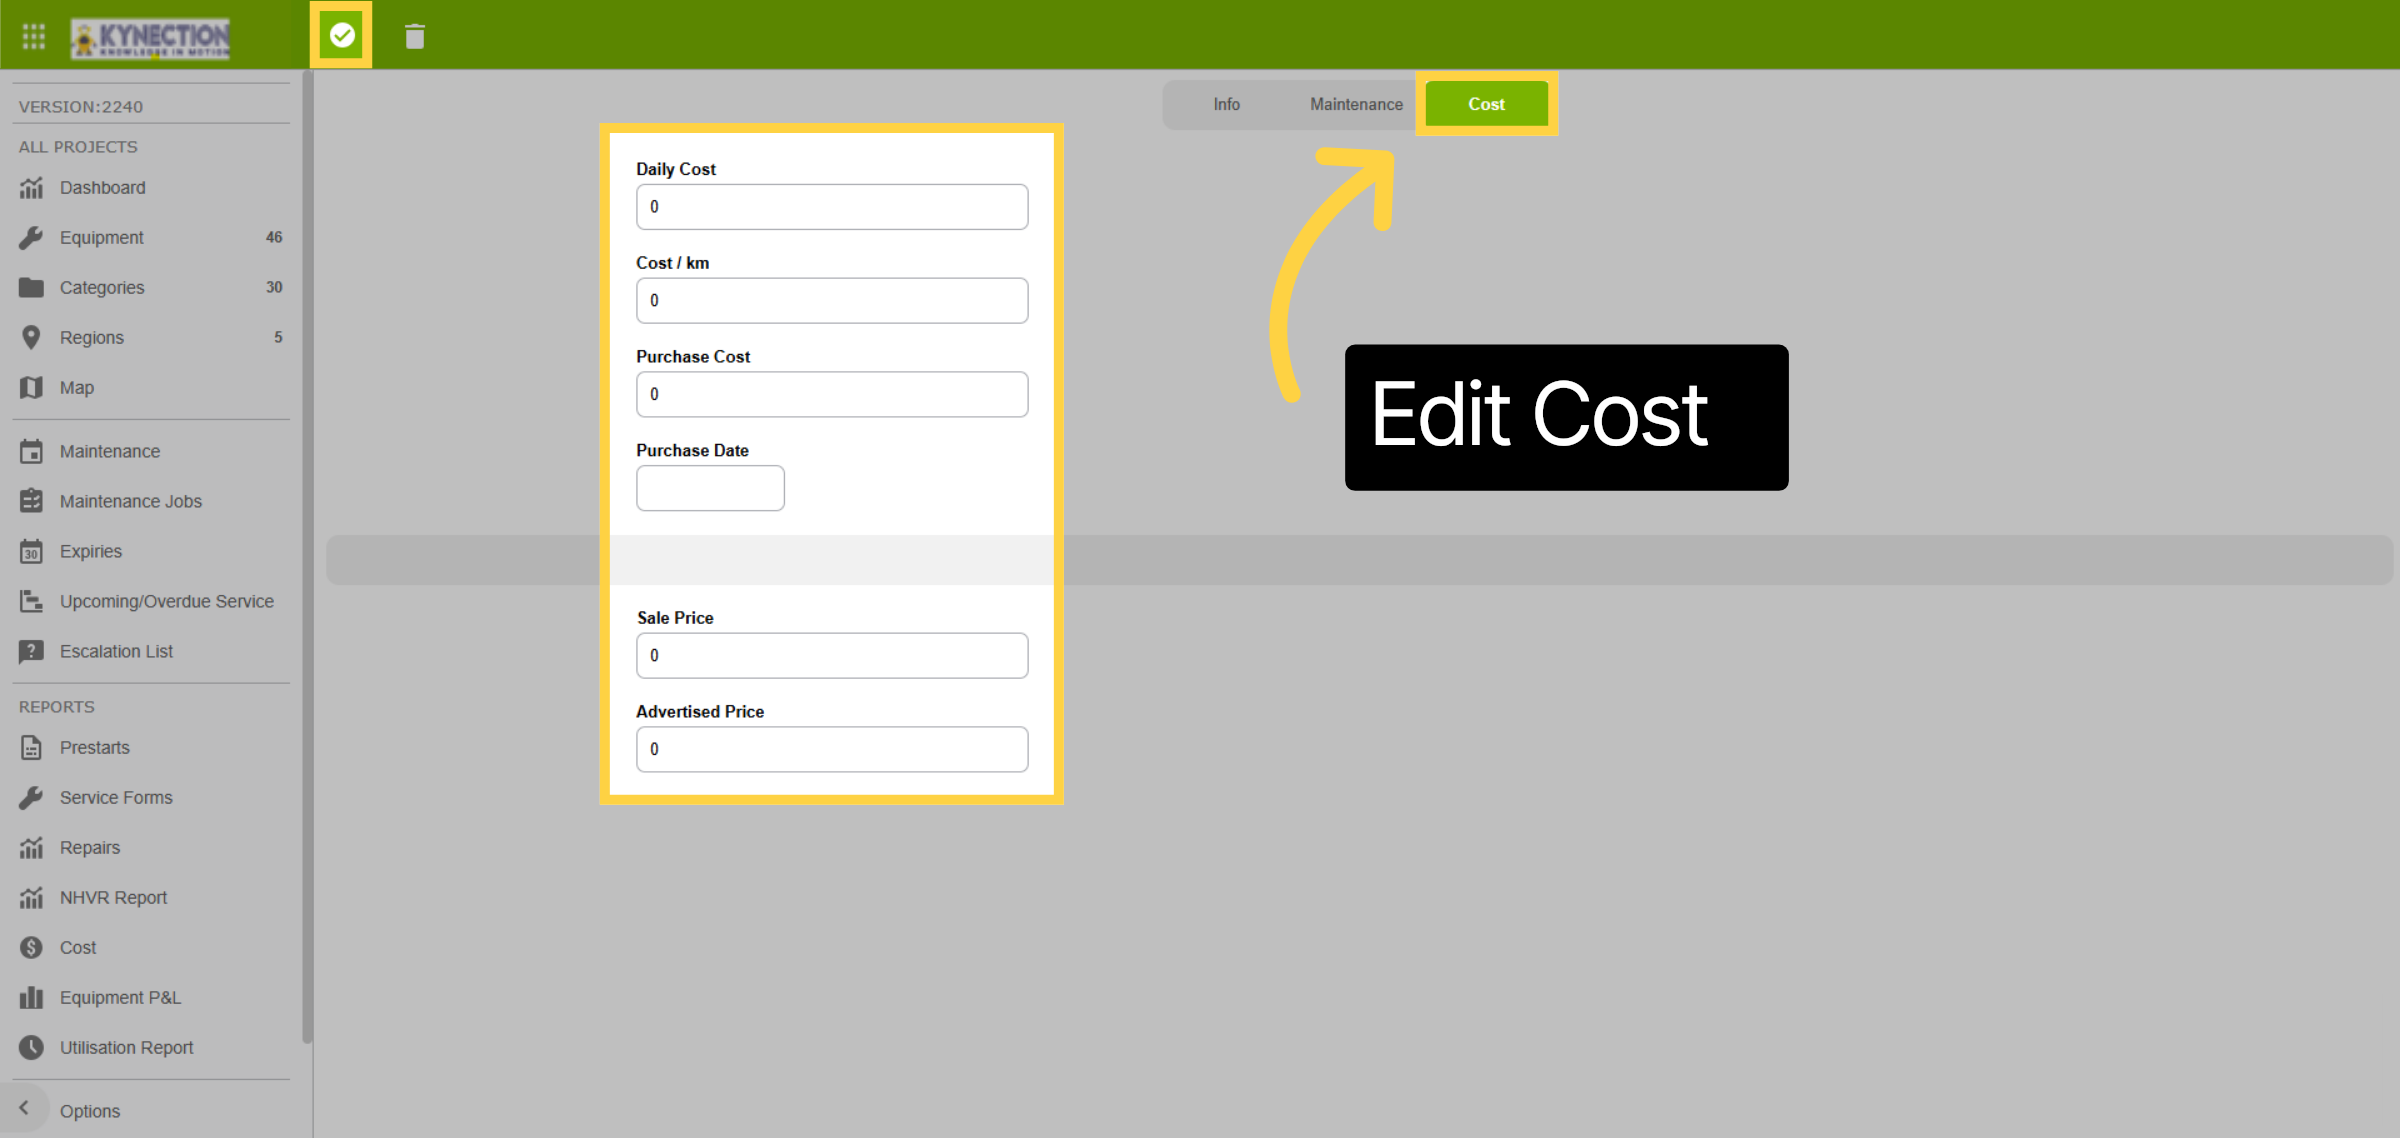
10. Edit Cost
The last tab in the editing panel is where you can edit the cost information of the asset such as daily costs, cost per kilometre and purchase data. This can be important in calculating the profit and loss of assets. Asset P&L is configurable in the Options tab.
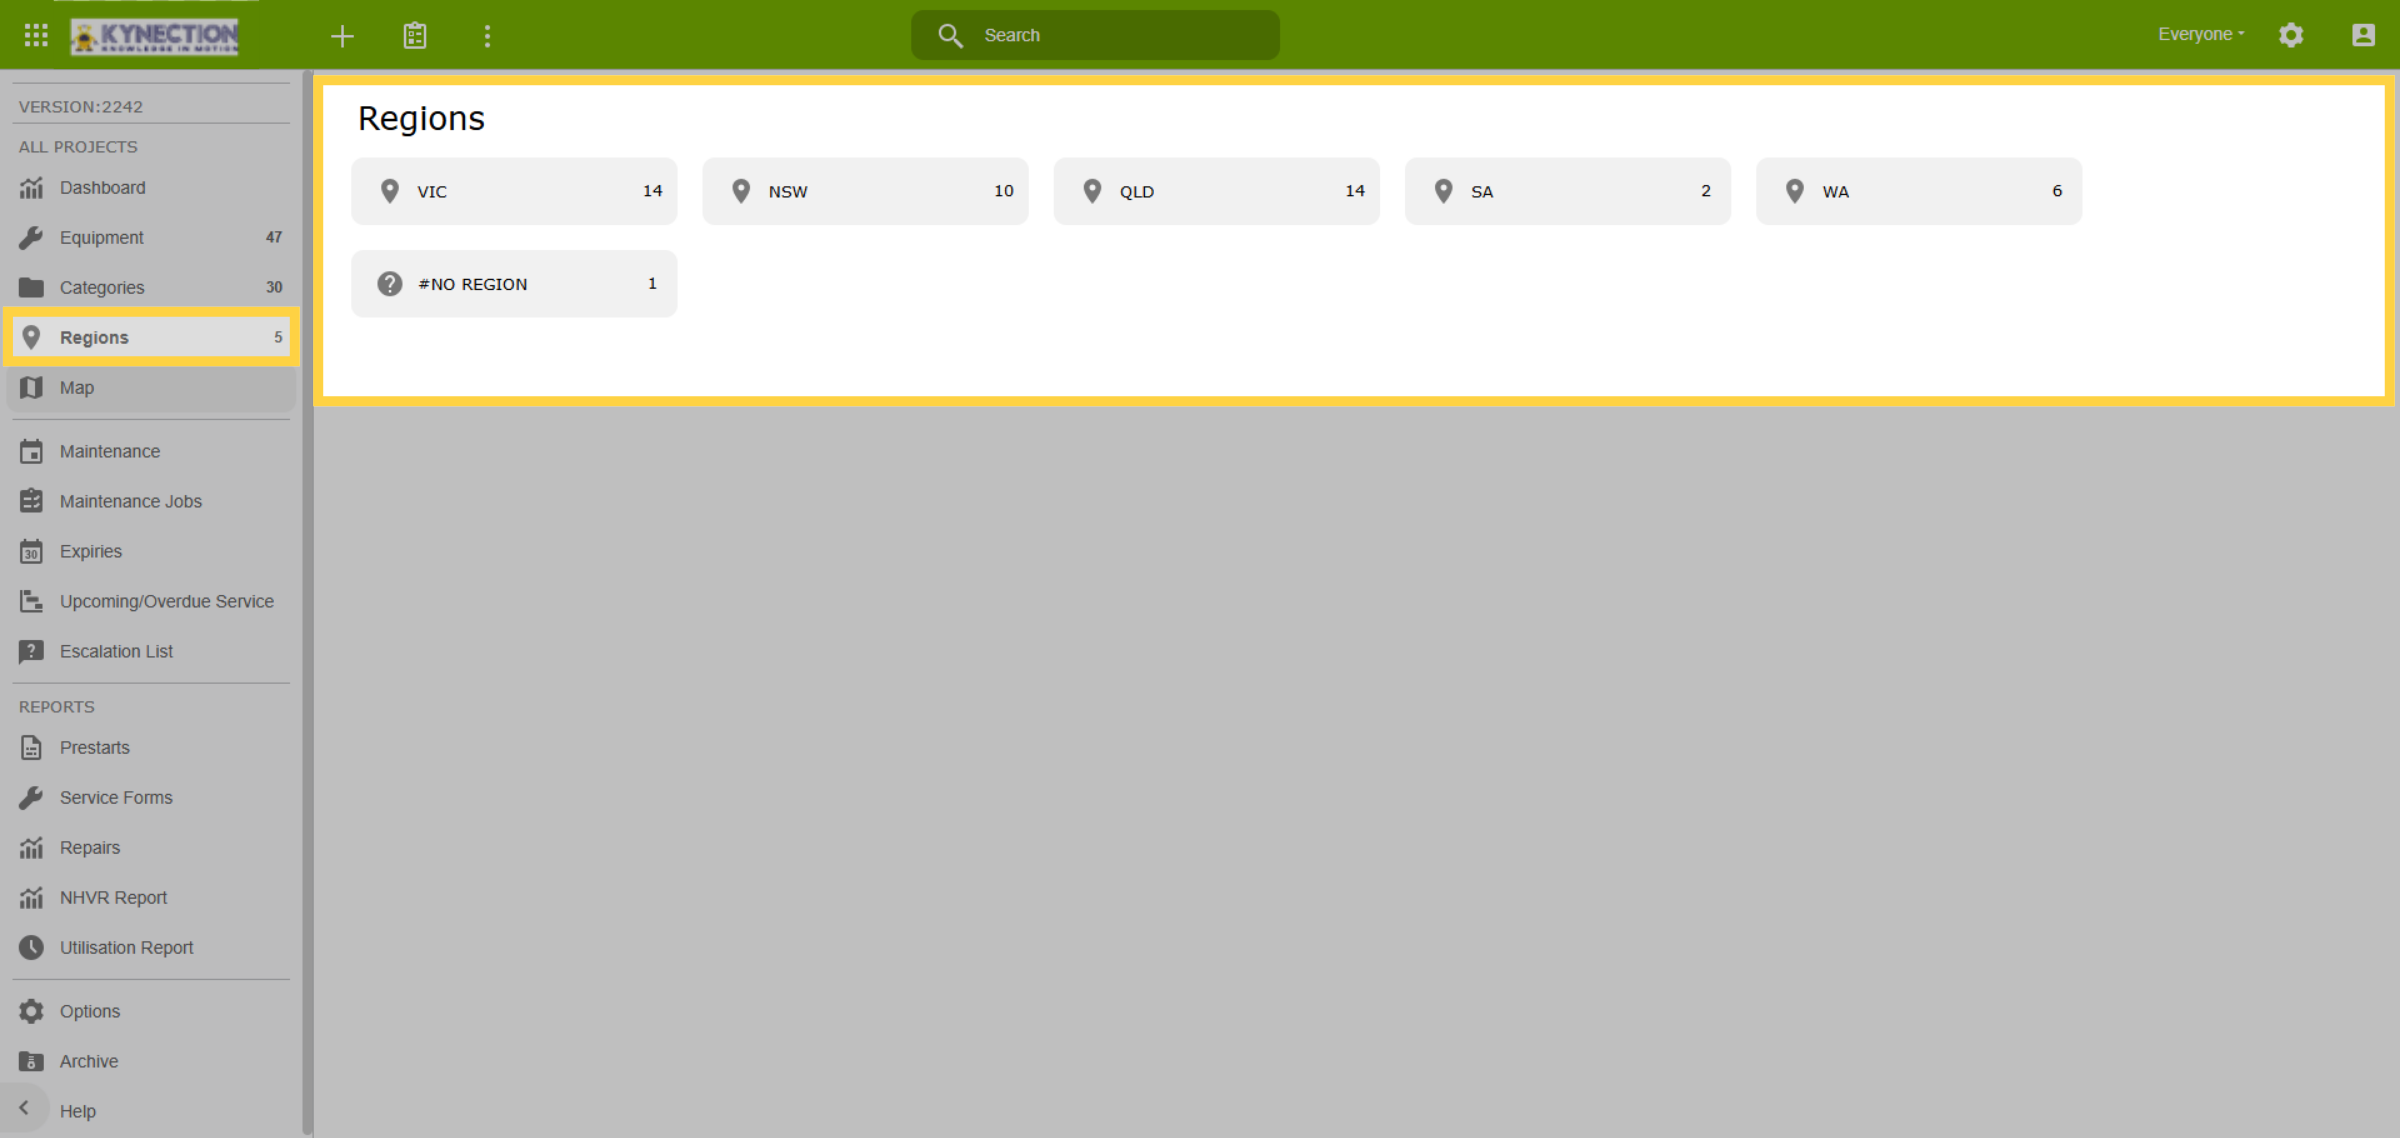
11. Regions
Select region to view the equipment list allocated by region.
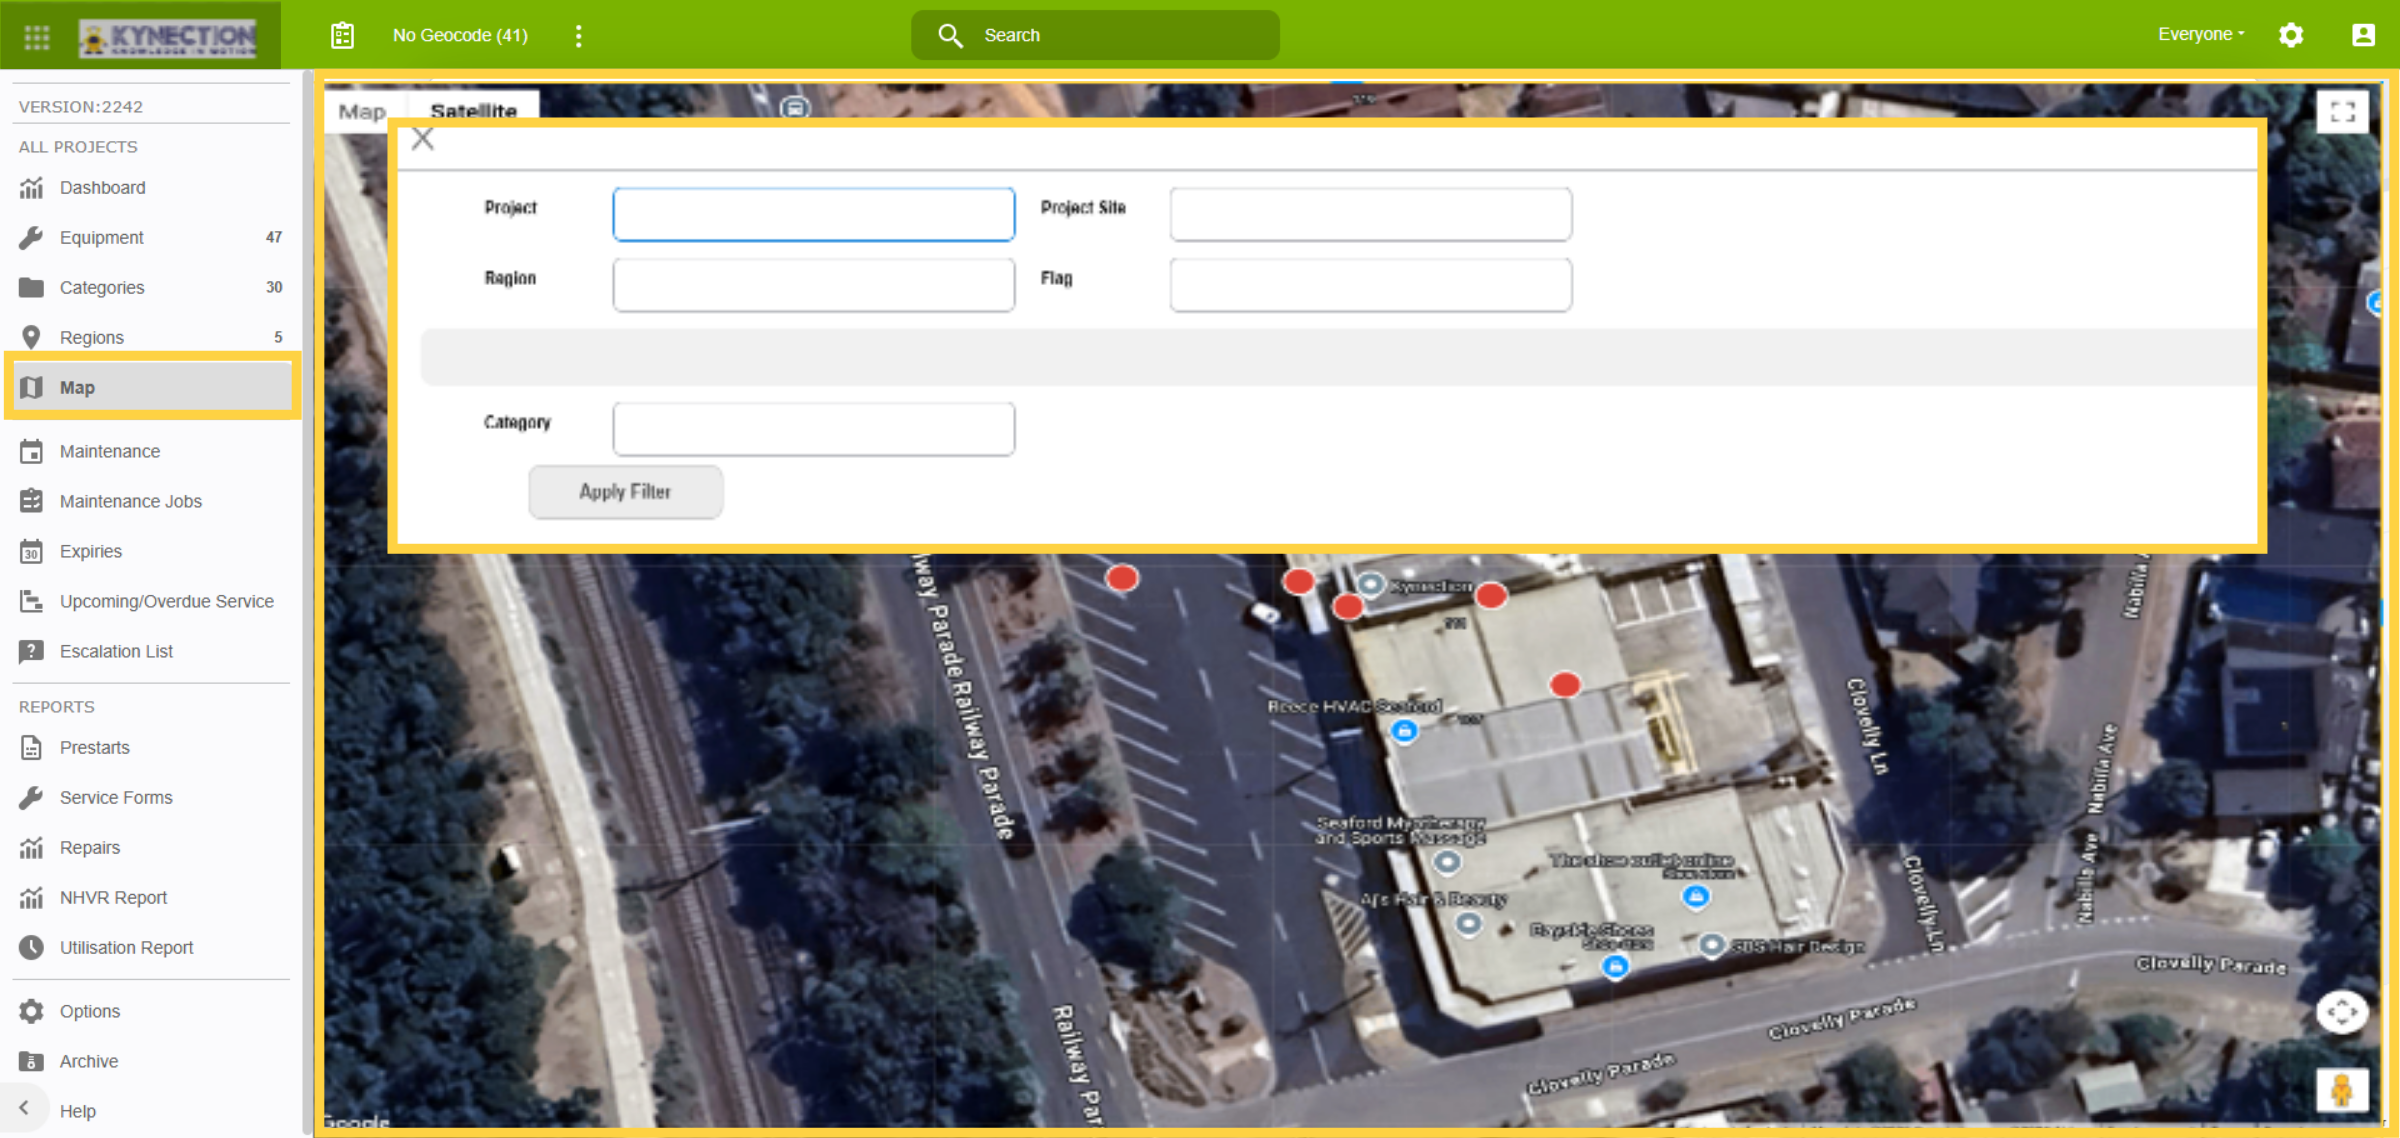
12. Maps
Maps shows the last known location where an action took place with an asset — for example, where a pre-start check was completed. Use the clipboard icon to filter results.
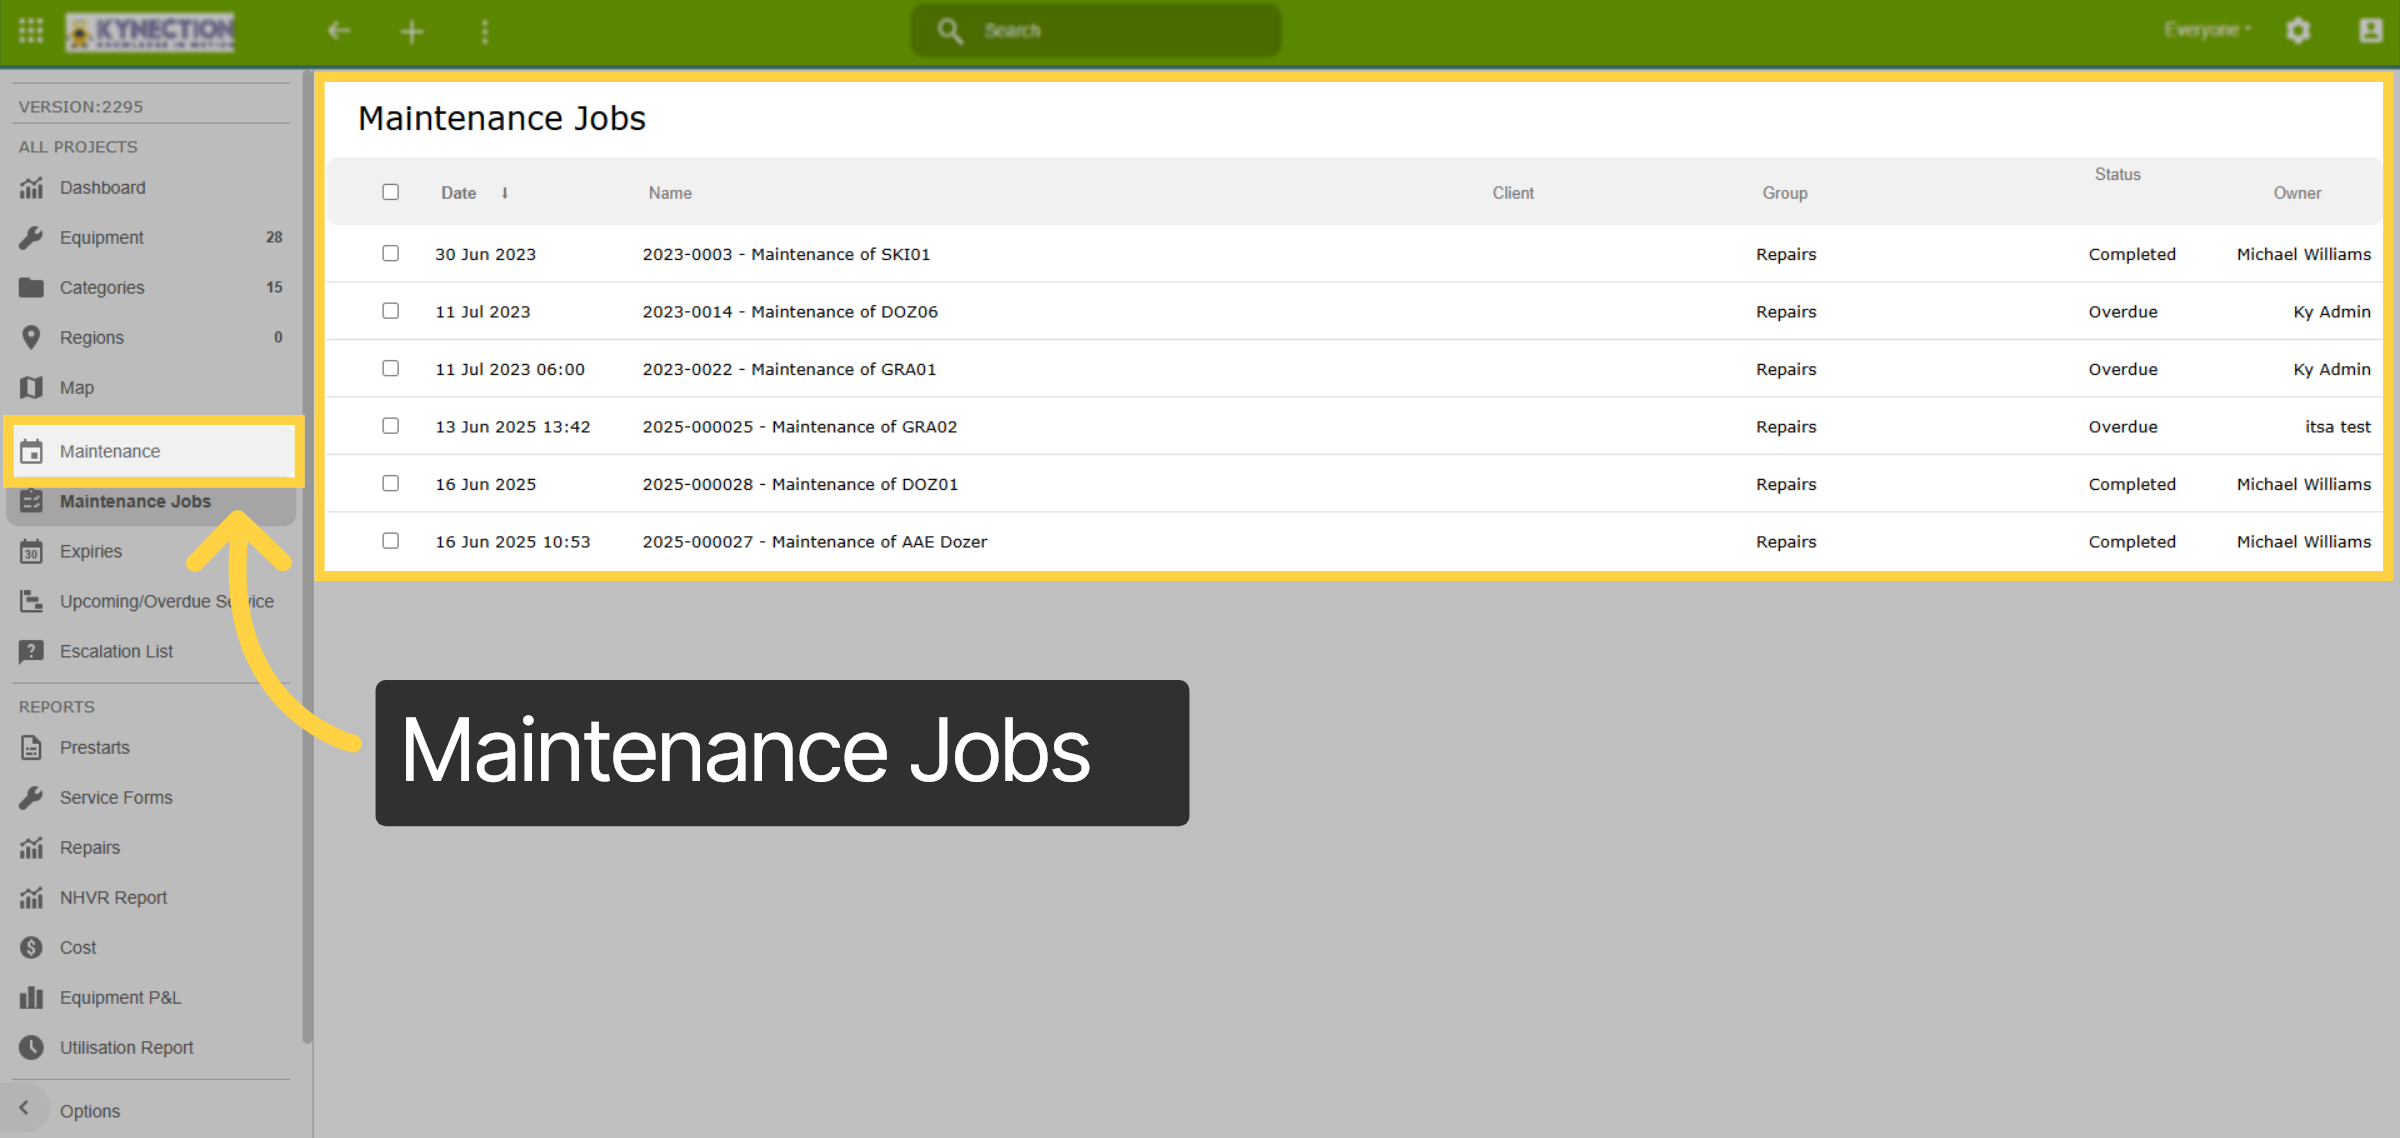
13. Maintenance Jobs
Access a list of ongoing and upcoming maintenance jobs to ensure nothing falls through the cracks. Scheduled maintenance jobs are copied to Projects scheduler to ensure the equipment isn't scheduled for work.
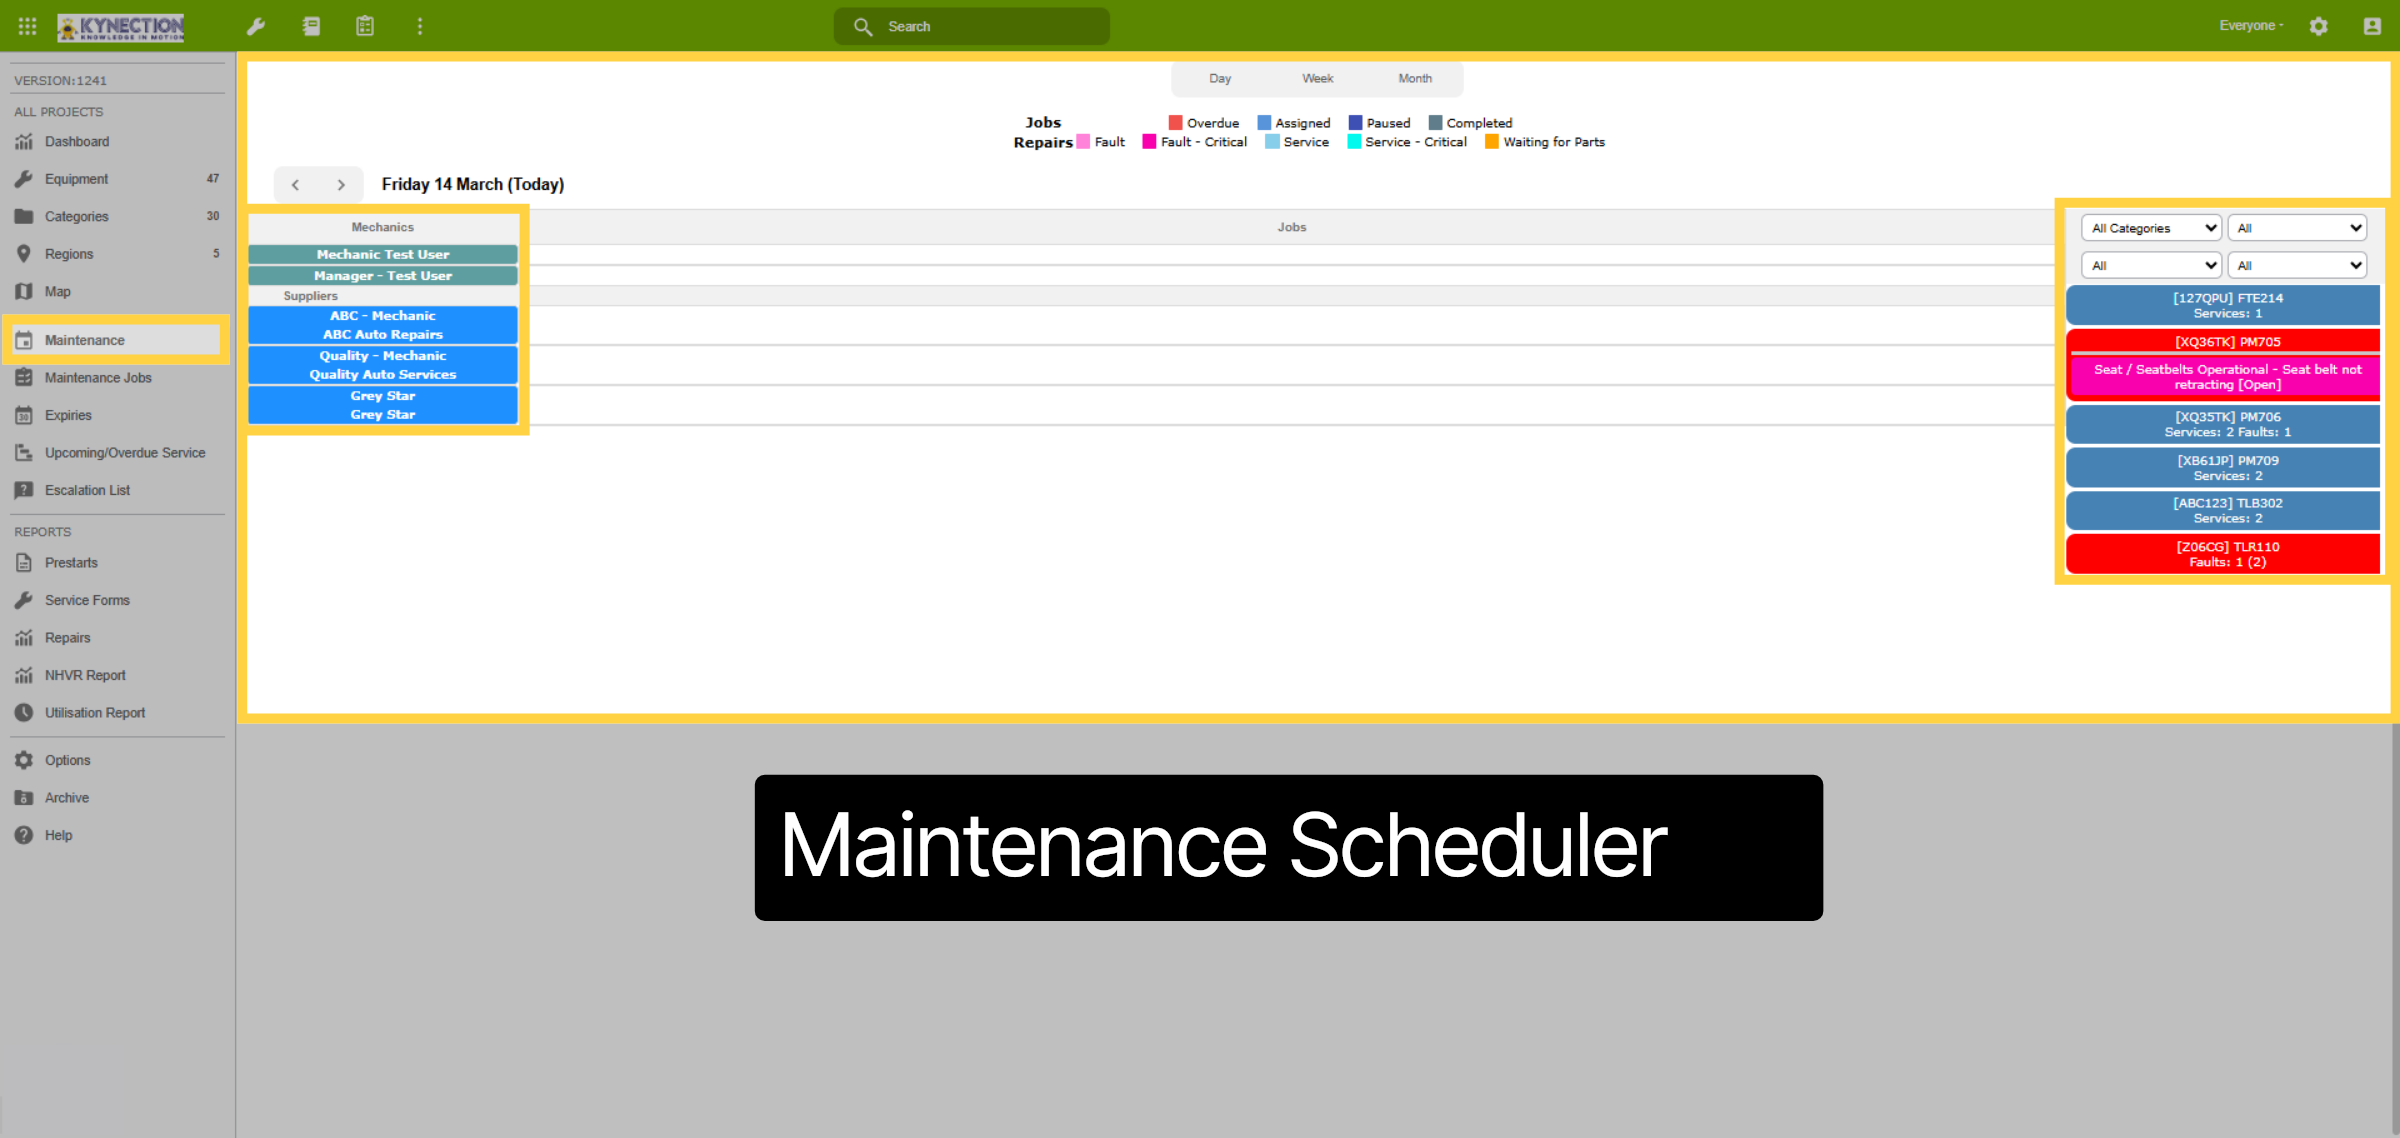
14. Scheduler
The Maintenance tab, located in the left-hand pane, is where you can access the scheduler. On the right, jobs are organised by equipment and can be easily dragged onto the planner for either an internal mechanic or an external supplier.
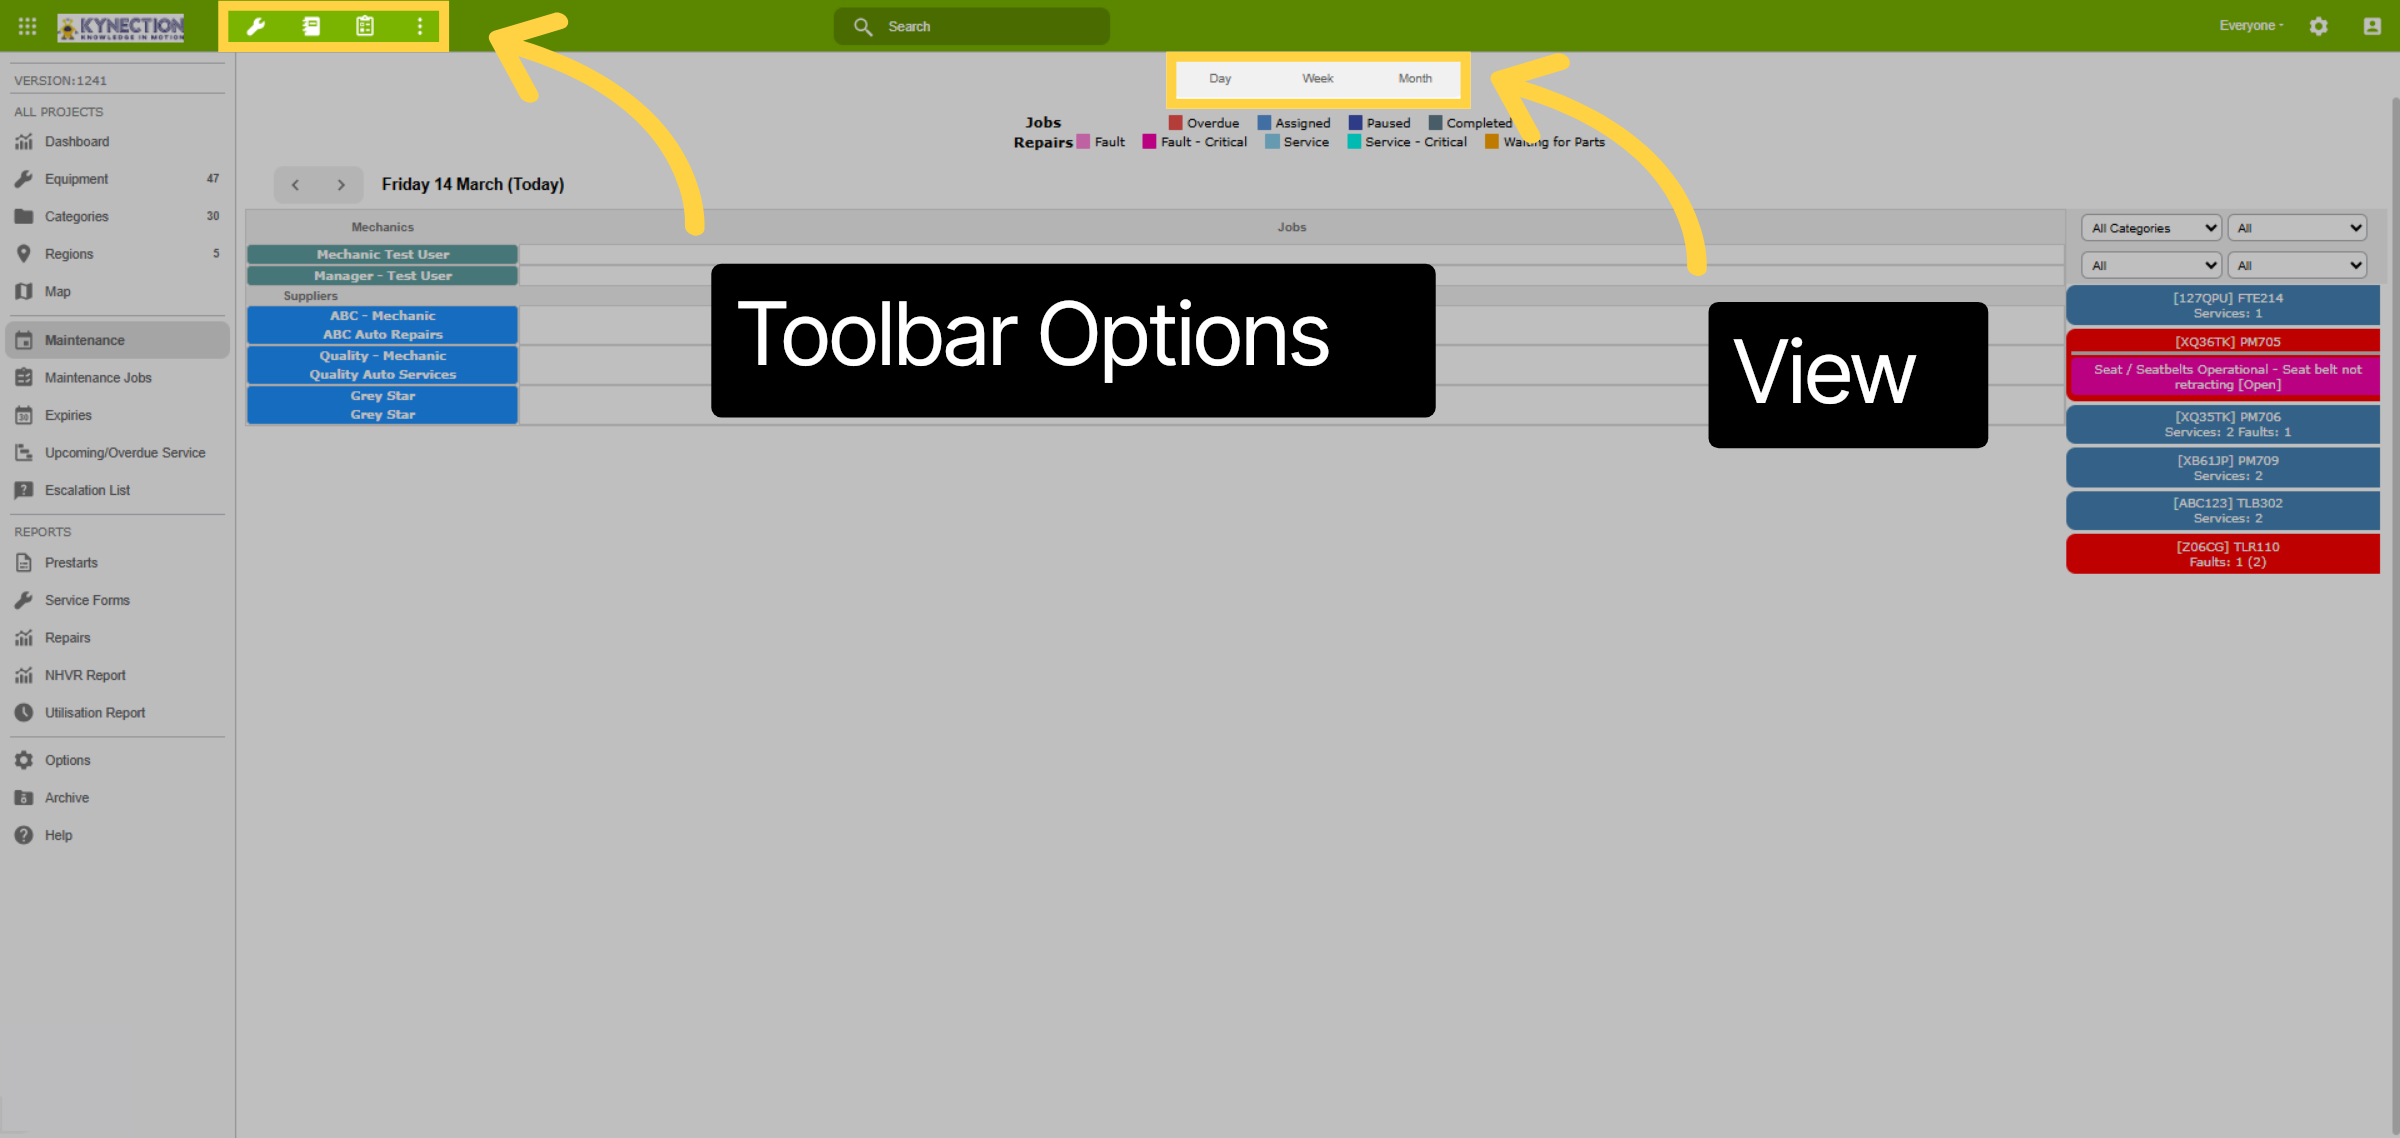
15. Scheduler Options
Easily switch between Day, Week, and Month views from the top centre. The toolbar offers quick actions for initiating ad-hoc services, modifying job views, and applying filters.
16. Job List
The job list displays equipment and number of jobs due. Click the item to expand and see job details. Utilise job list filters above the job list for streamlined allocation.

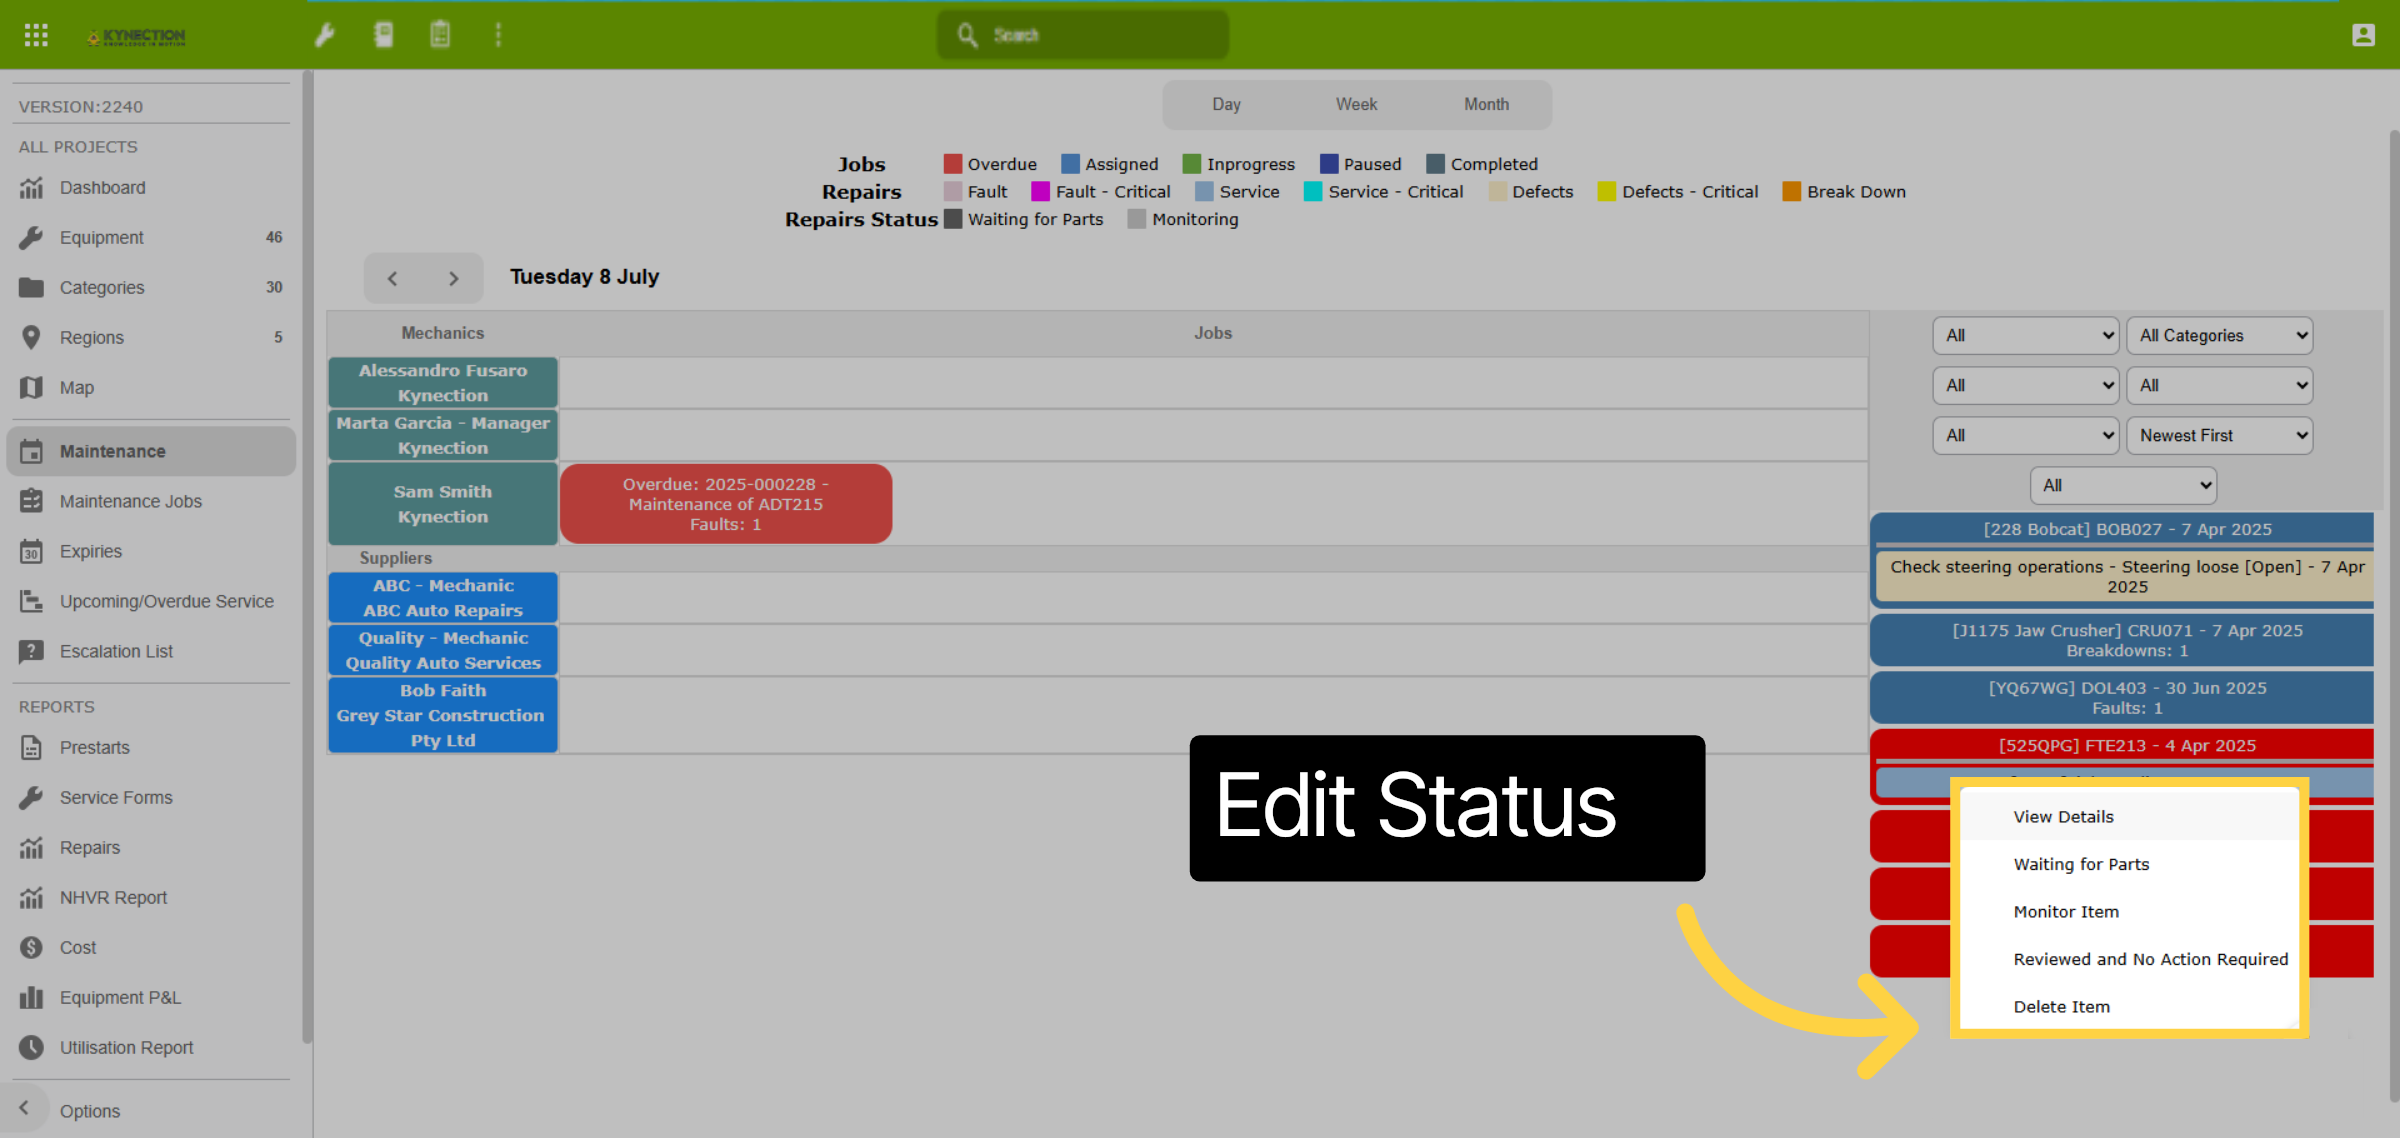
17. Job List Quick Actions
From the job list, right-click a job to view details or update job status. To allocate to a mechanic or supplier, click the job so it turns blue, then drag onto the sheduler.
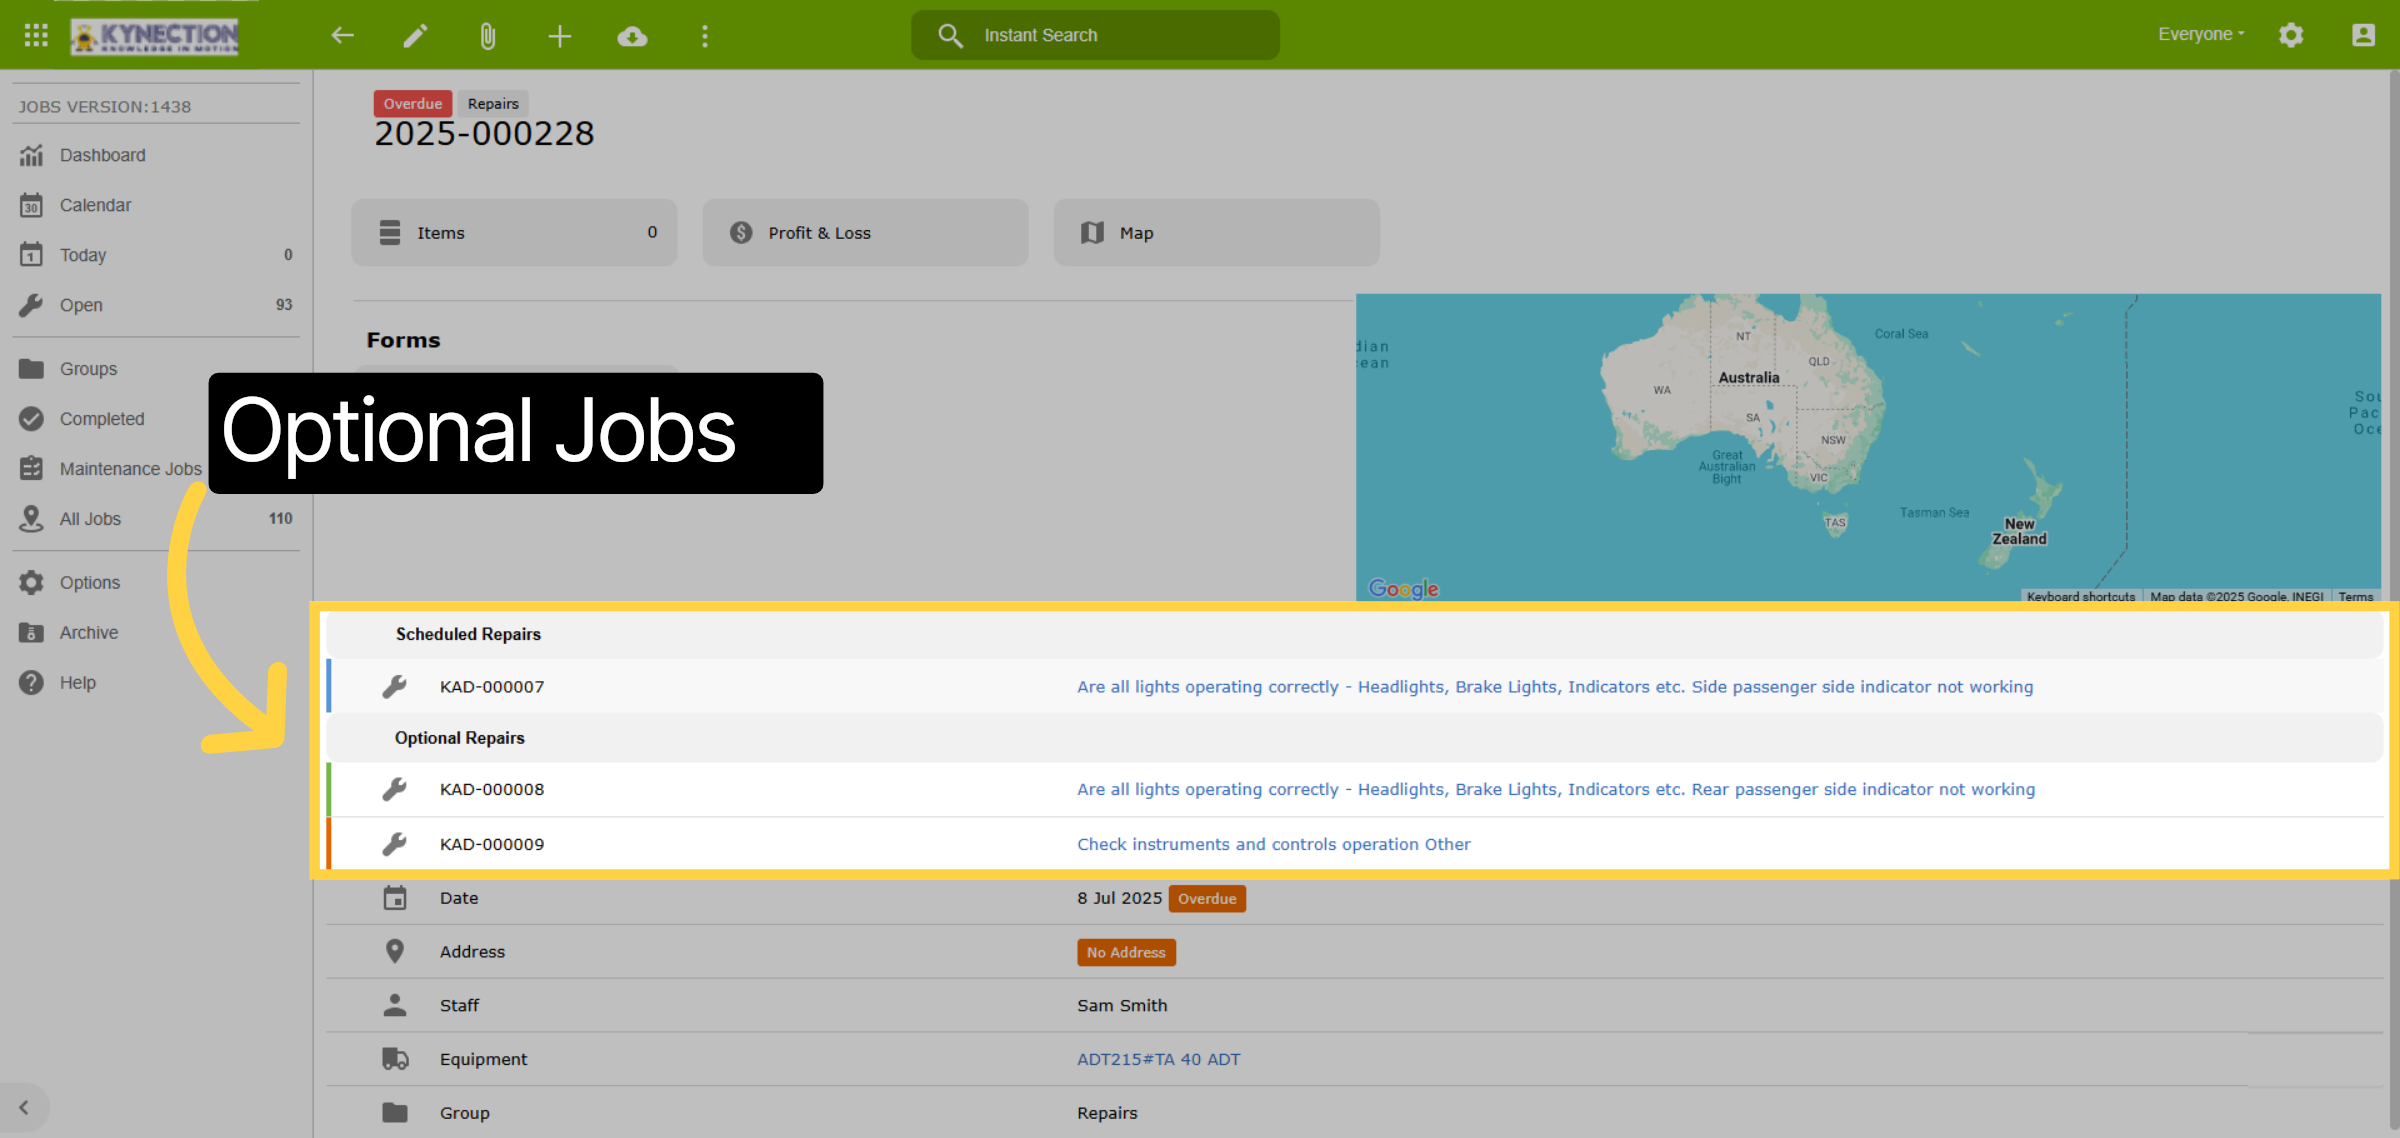
18. Optional Jobs
Left click on a scheduled job and select view job details. From here you can see one job has been scheduled, the other unscheduled jobs are available under the Optional Repairs section.
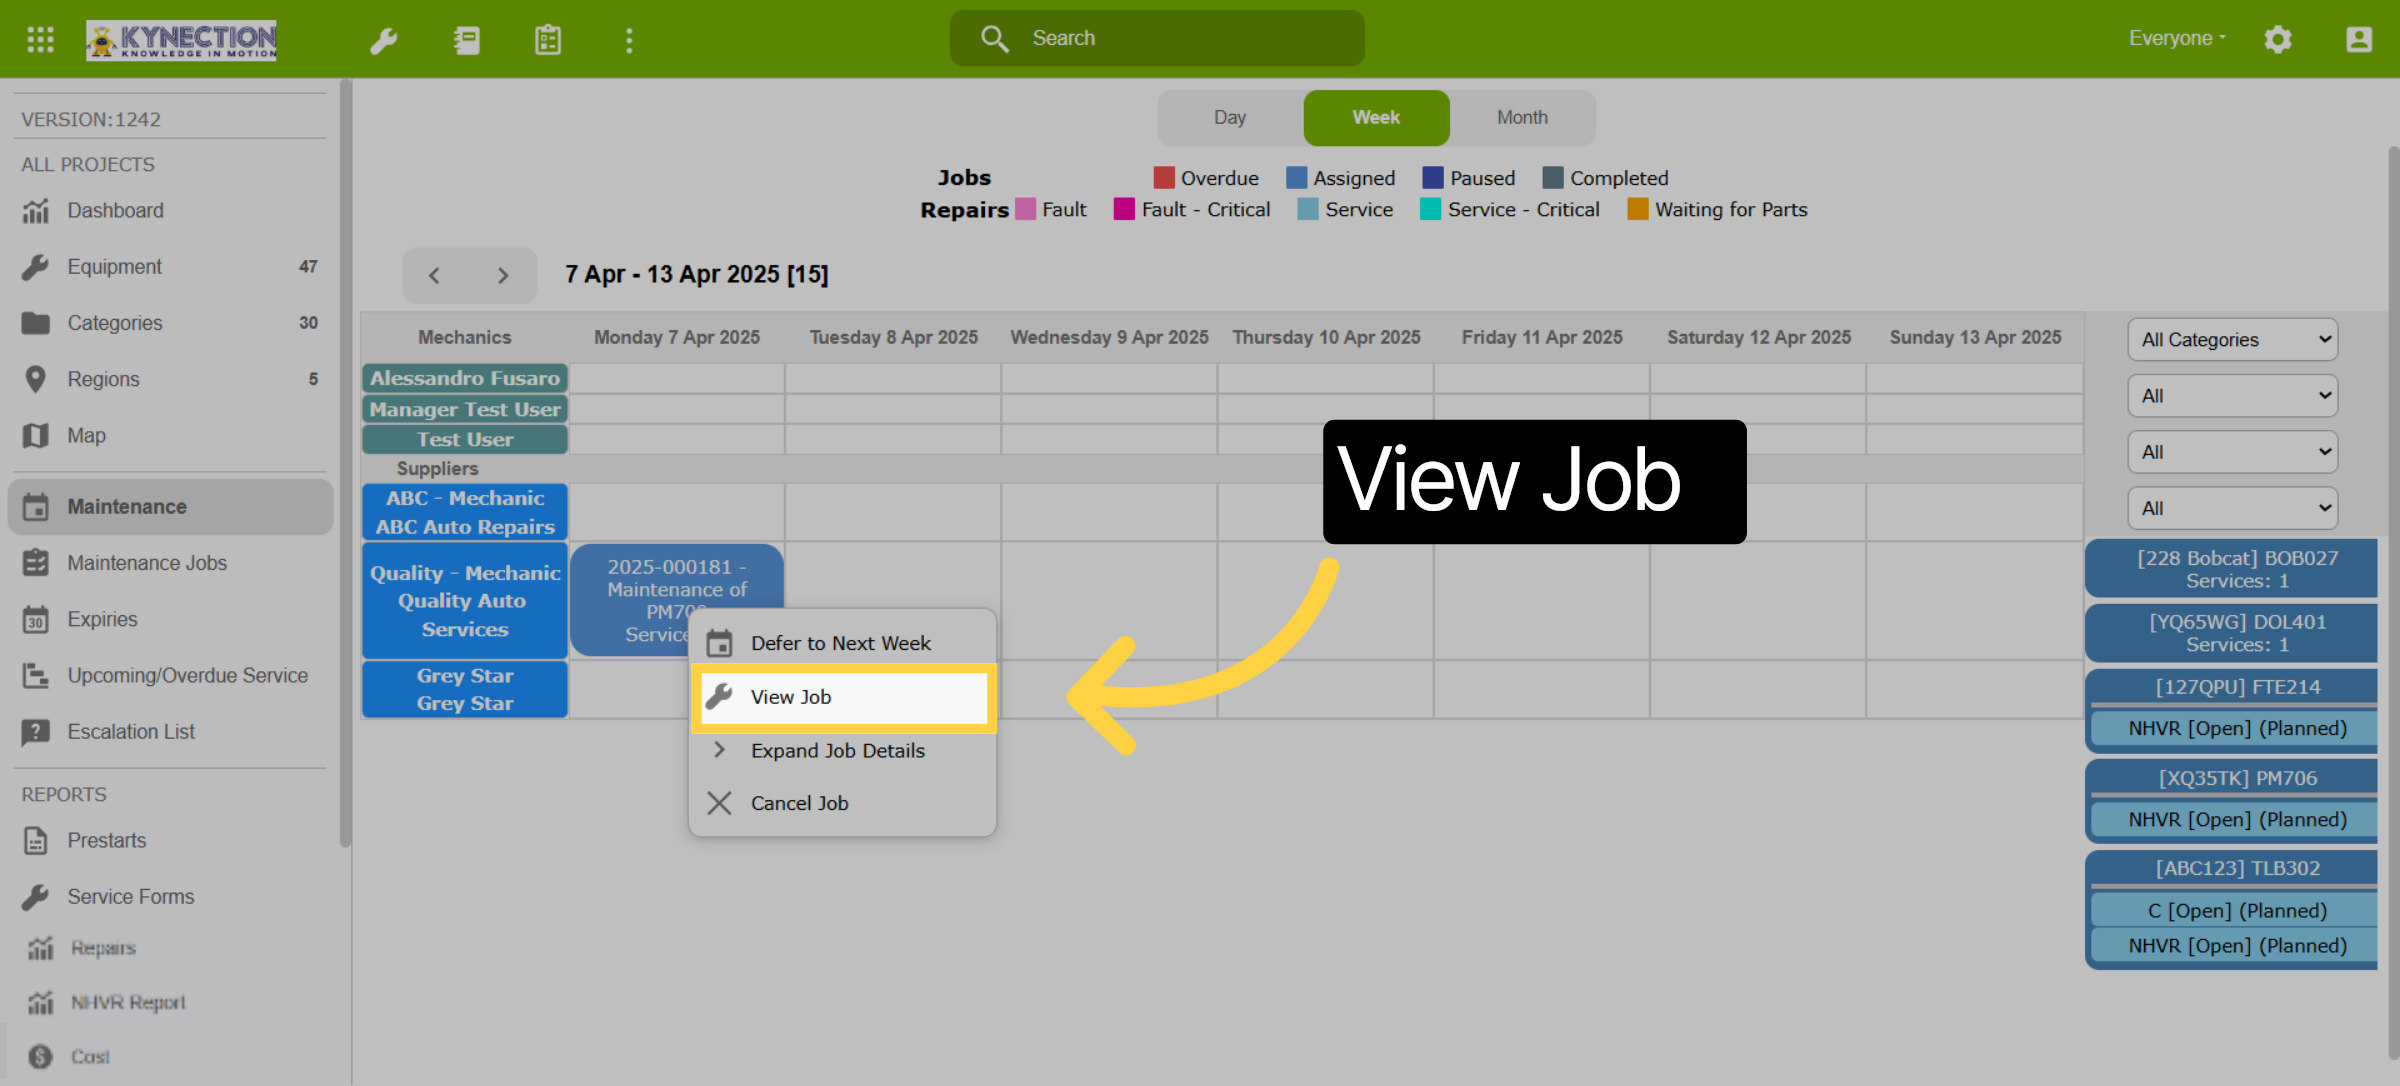
19. Scheduled Jobs Action Items
Left click scheduled jobs for action items. Options include view, edit, cancel and defer to next week.

20. External Jobs
Jobs completed by service suppliers need to be closed out to reset the service reminders. Open the scheduled job to begin.
21. Open Repair
Jobs for scheduled and optional repairs can be accessed by clicking the blue hyperlink.

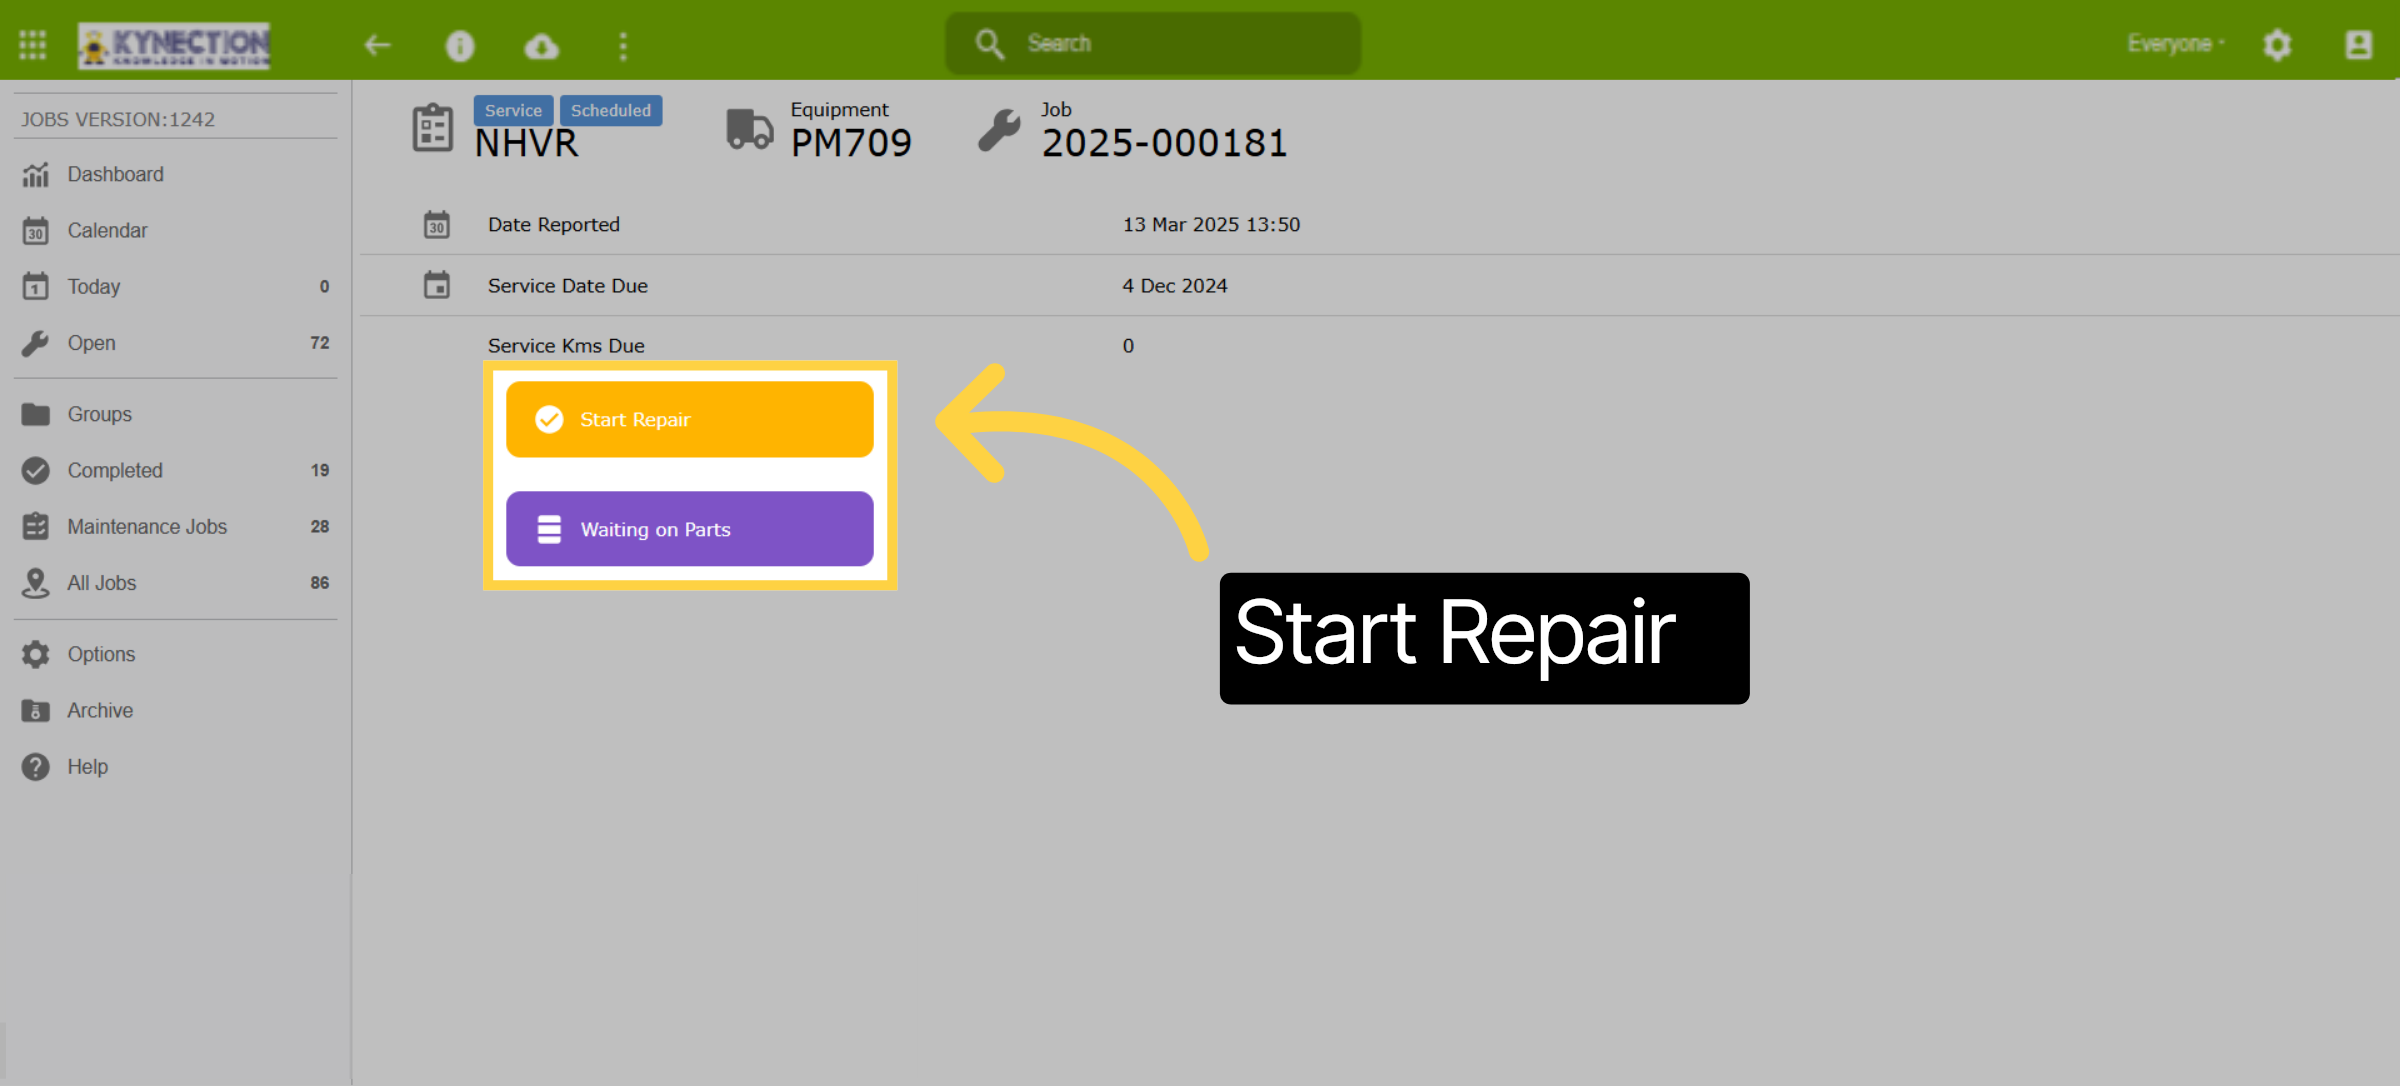
22. Start Repair
Select "Start Repair" to begin. If a service or repair is paused due to unavailable parts, select Waiting on Parts instead of Start Repair.
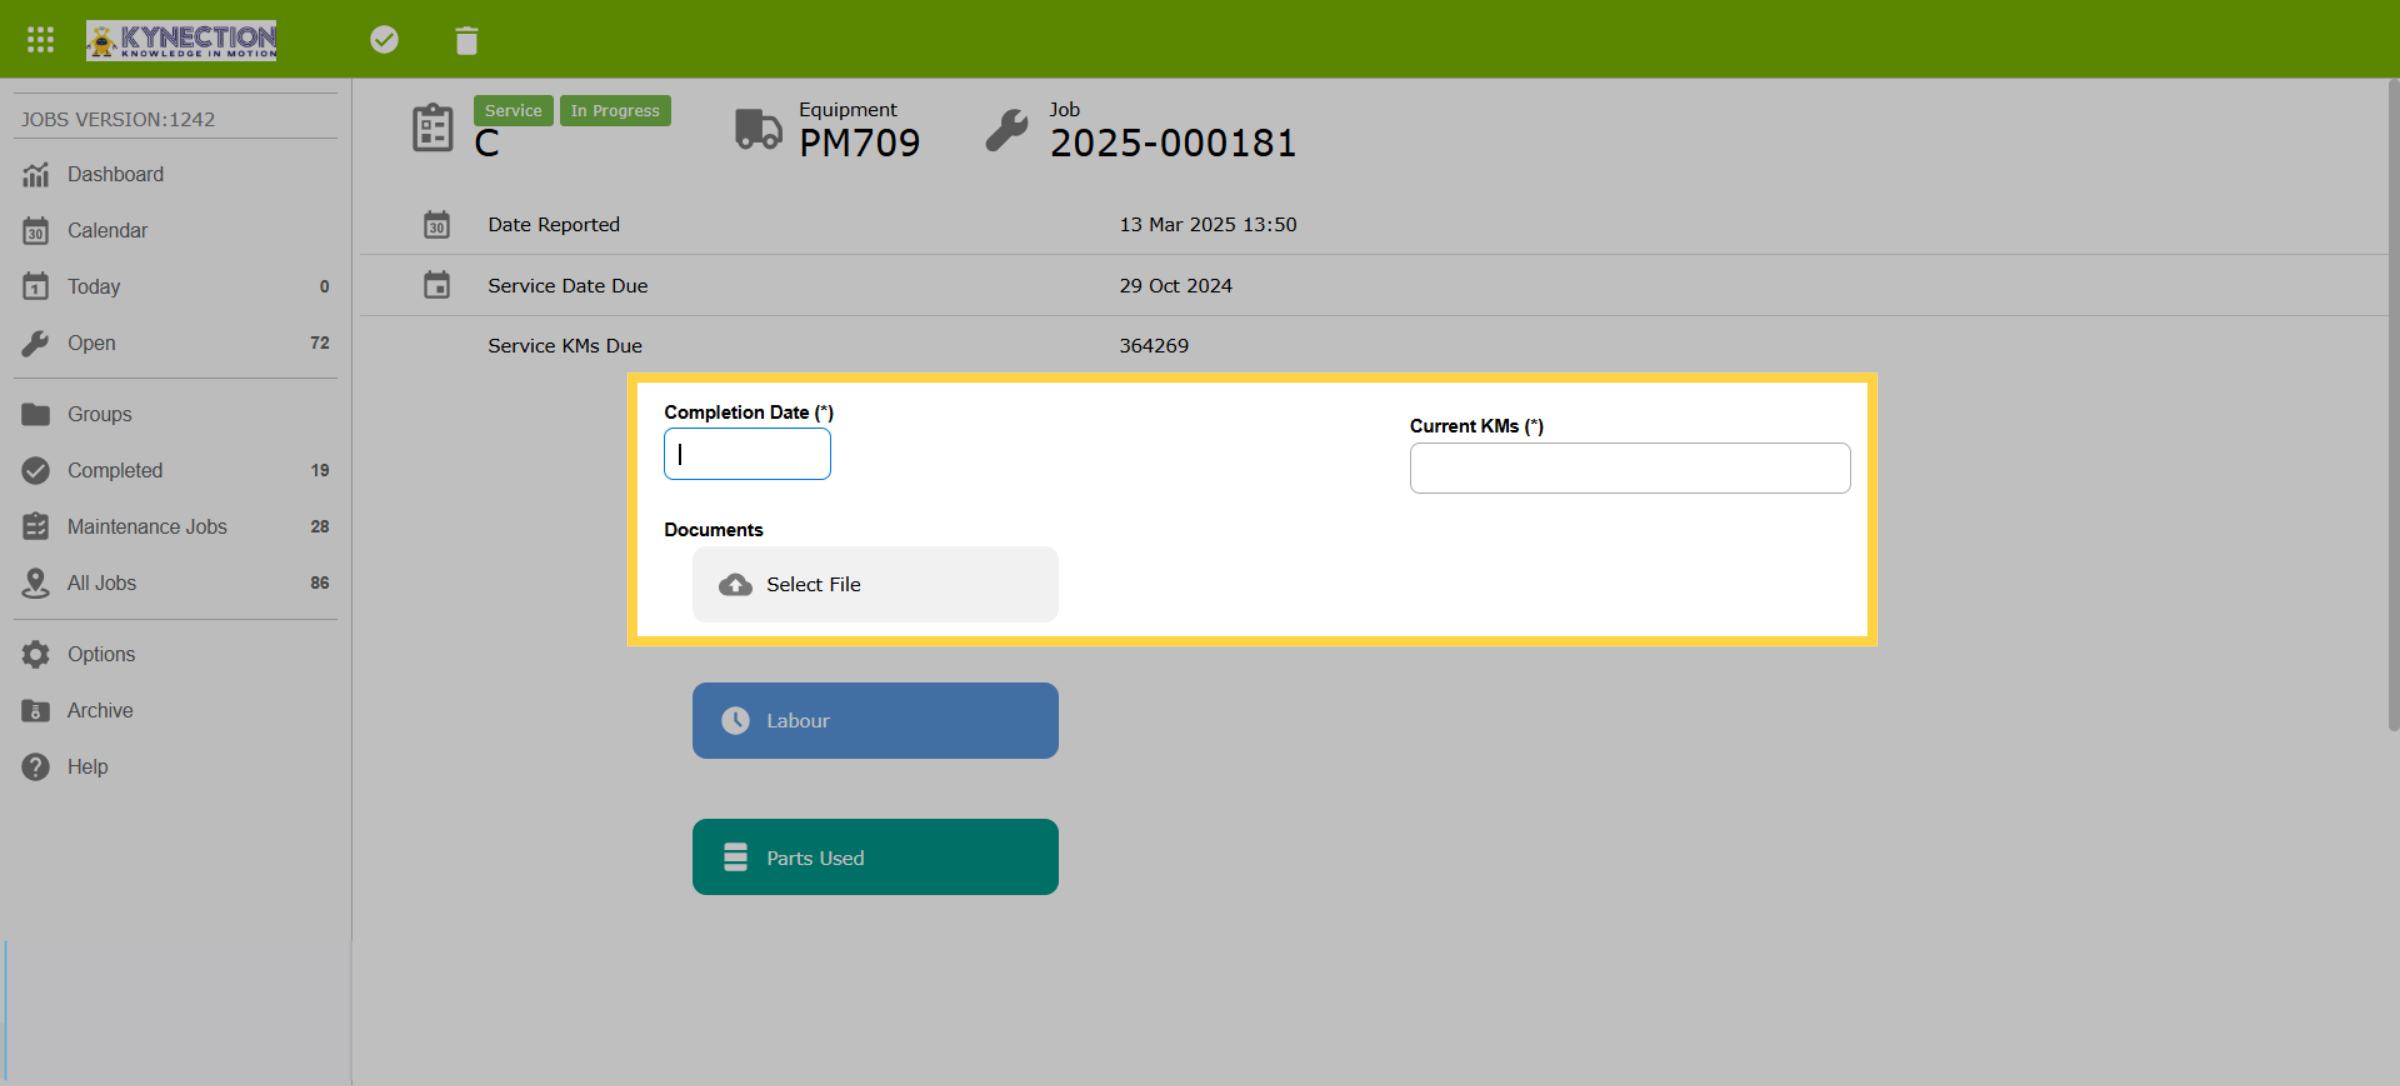
23. Enter Job Details
The job begins by entering the repair completion date and odometer reading. The odometer reading recorded on repair form will override readings recorded on prestarts. Supplier service documentation can be uploaded using the select file option.
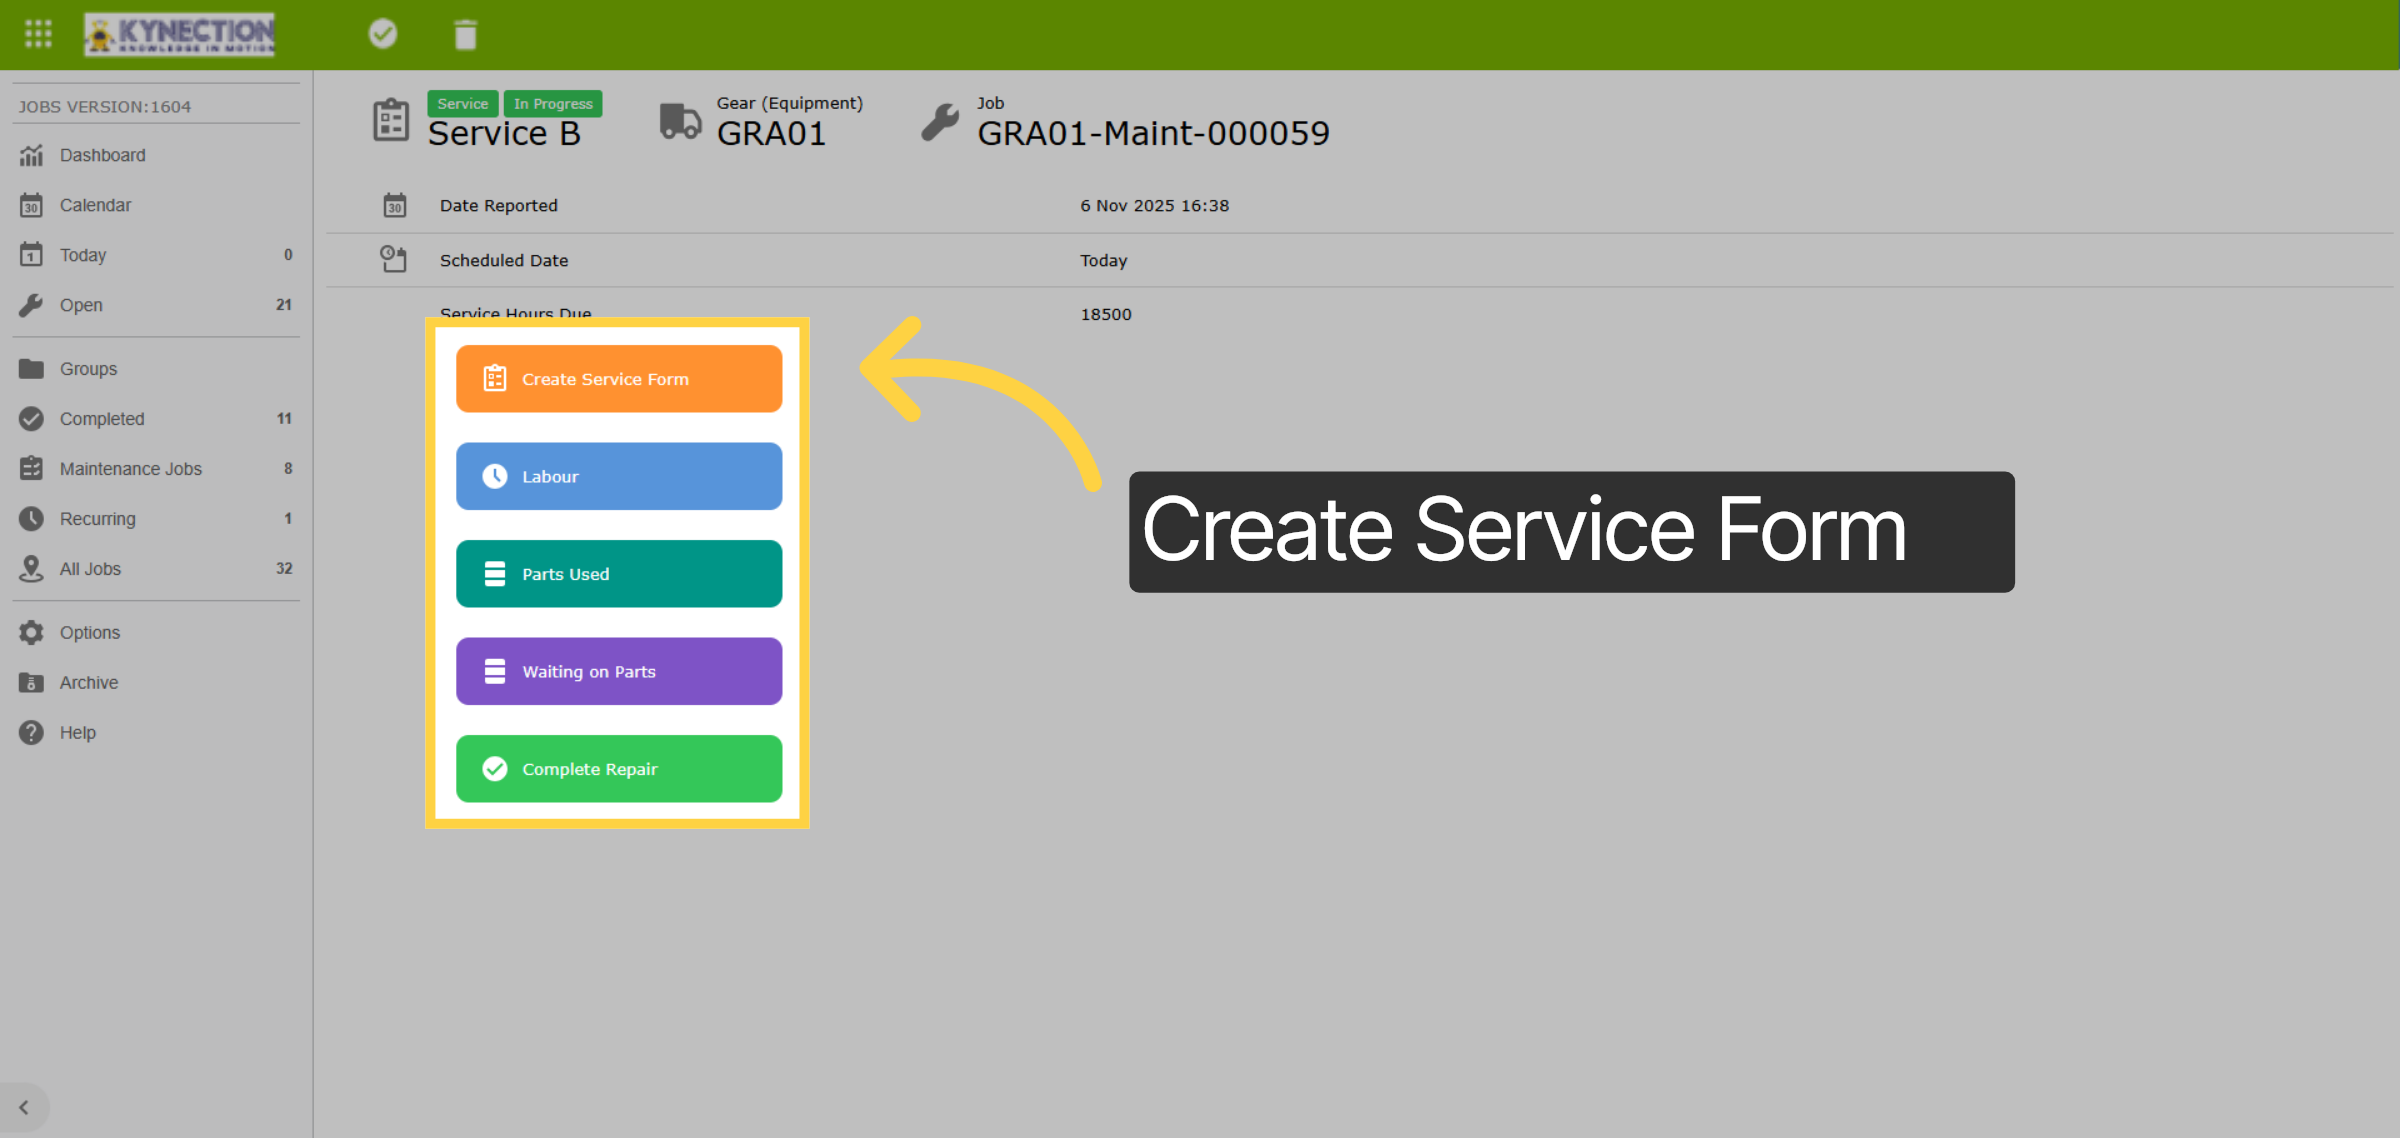
24. Service
"Labour" and "Parts Used" buttons record expenses against the equipment, and "Waiting on Parts" can be selected at any stage of the service completion. Select "Create Service Form" to start recording the service details.
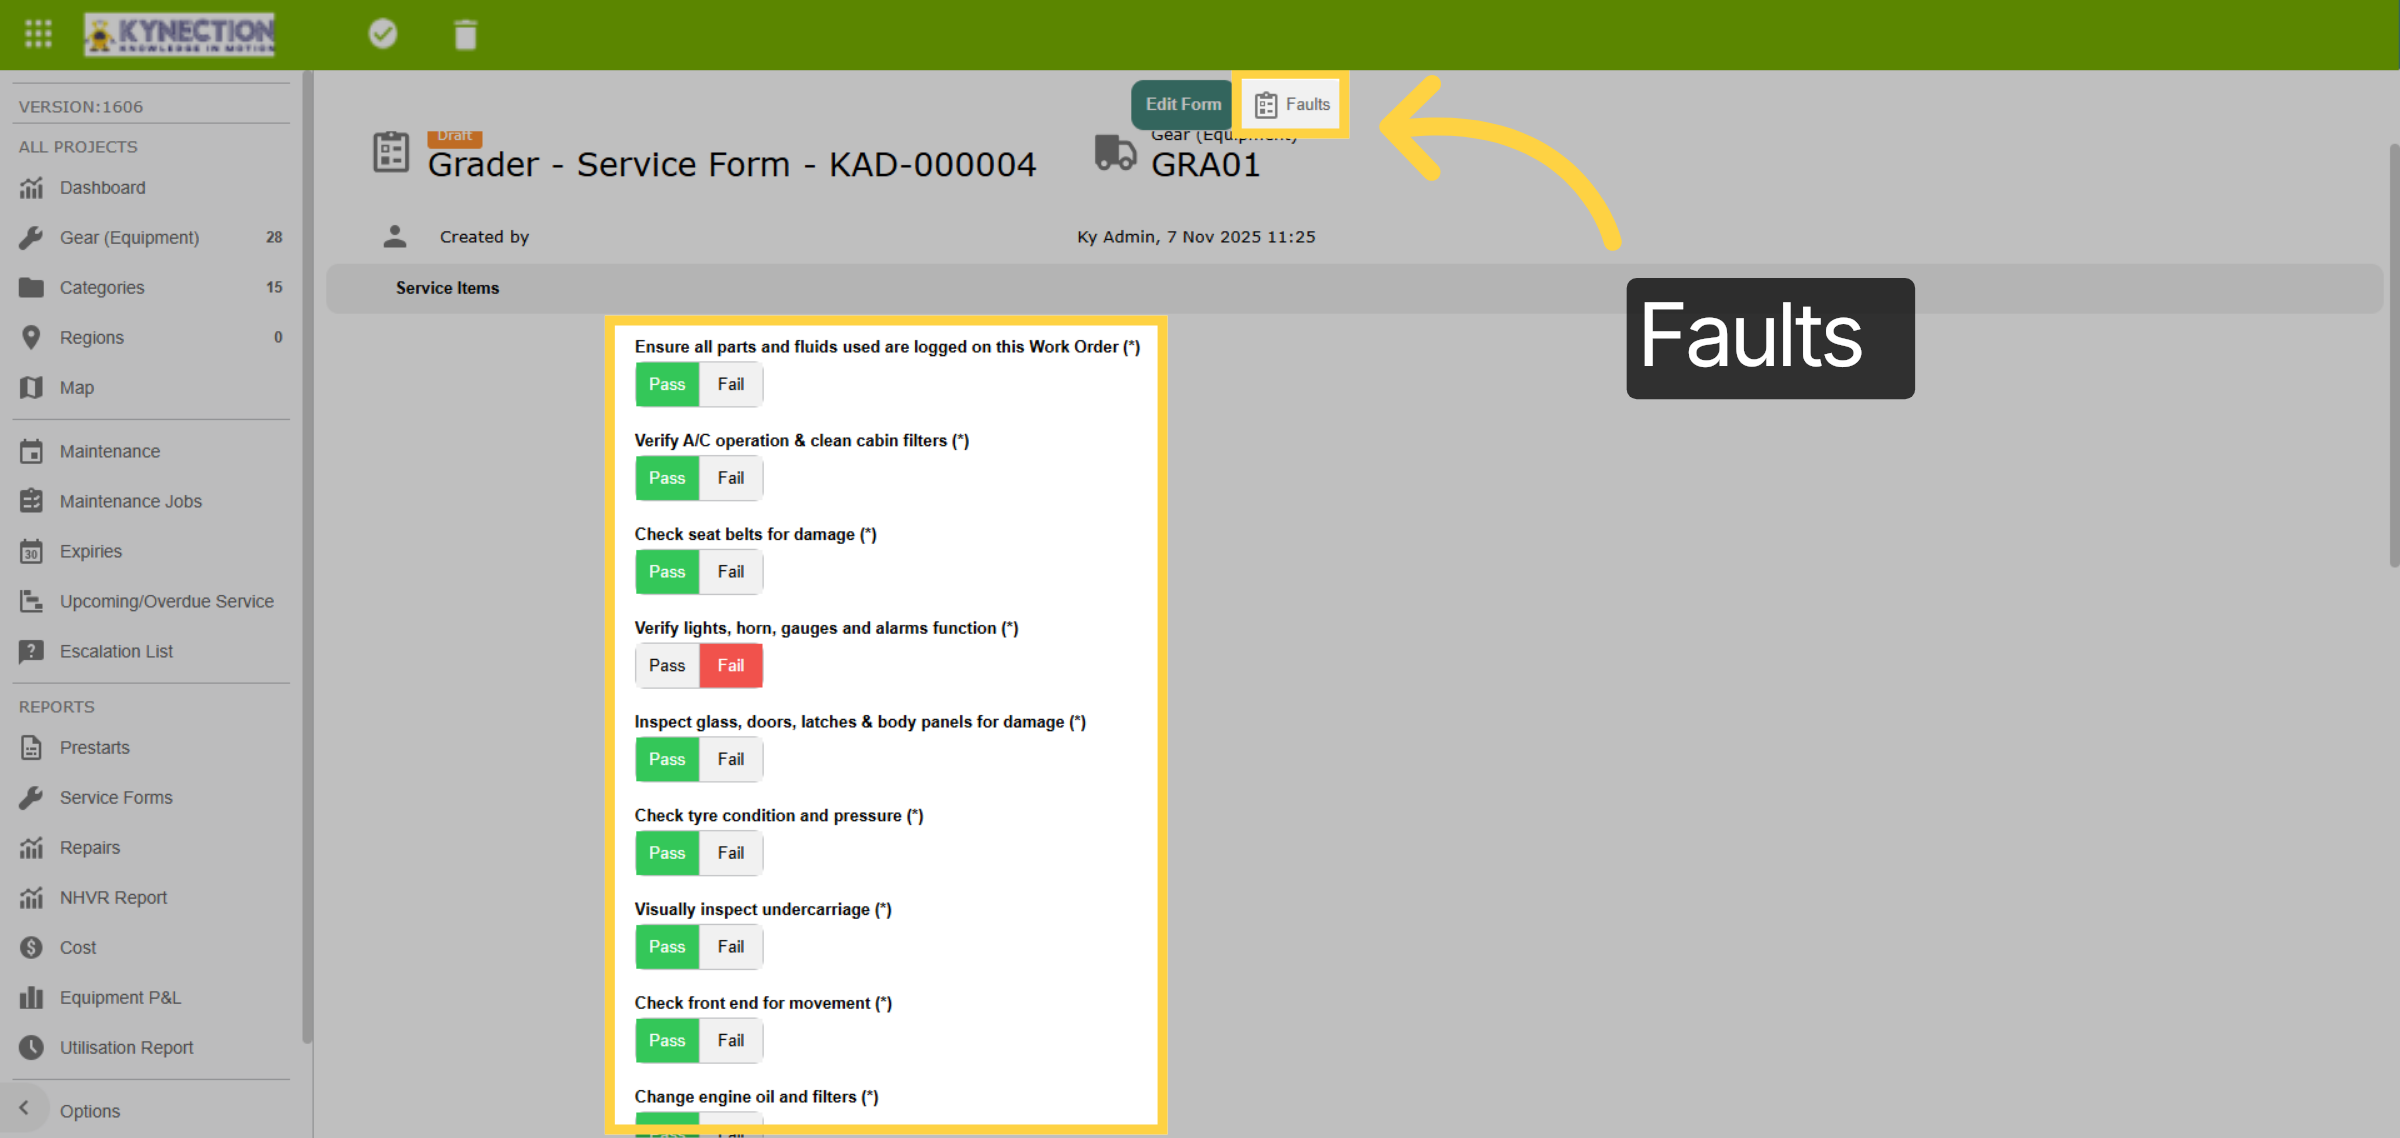
25. Faults
Complete the service by tapping the "Pass" or "Fail" buttons against the service items. "Fail" will open a sub-form to record the fault. Faults can be completed during the service or left open.
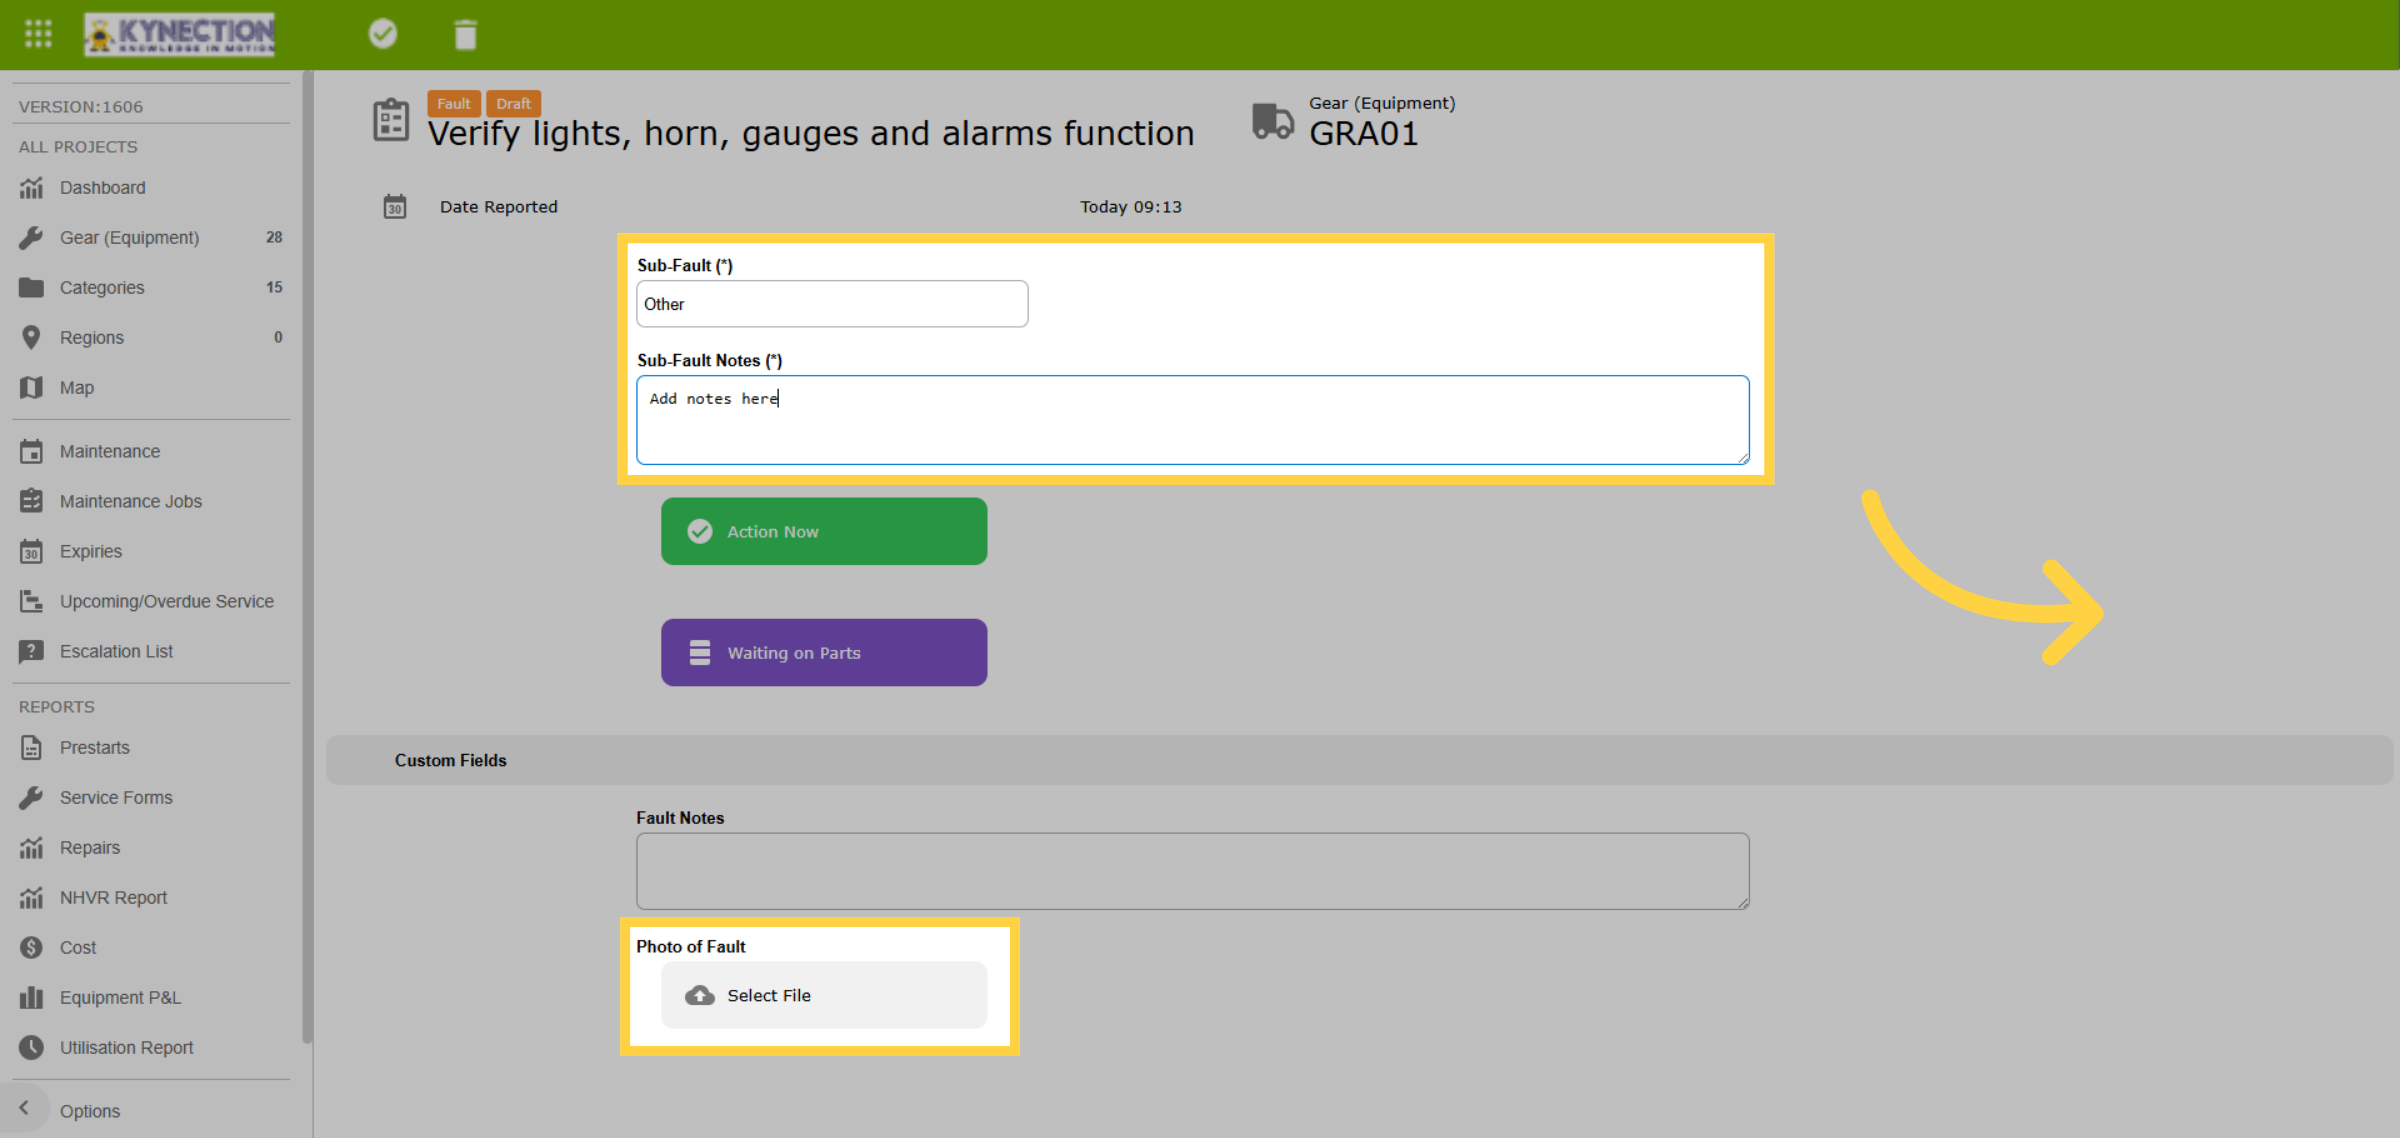
26. Sub-Fault and Status
Select the "Action Now" button to complete the service, or update the status to "Waiting on Parts". Faults can also be saved, leaving them open. If applicable,select the sub-fault , add notes and upload a photo. Use th tick in the toolbar to save.
27. Submit Fault
Whether you have completed the fault or left it open, the fault needs to be submitted to enable completion of the service. Select the submit button to return to the service.

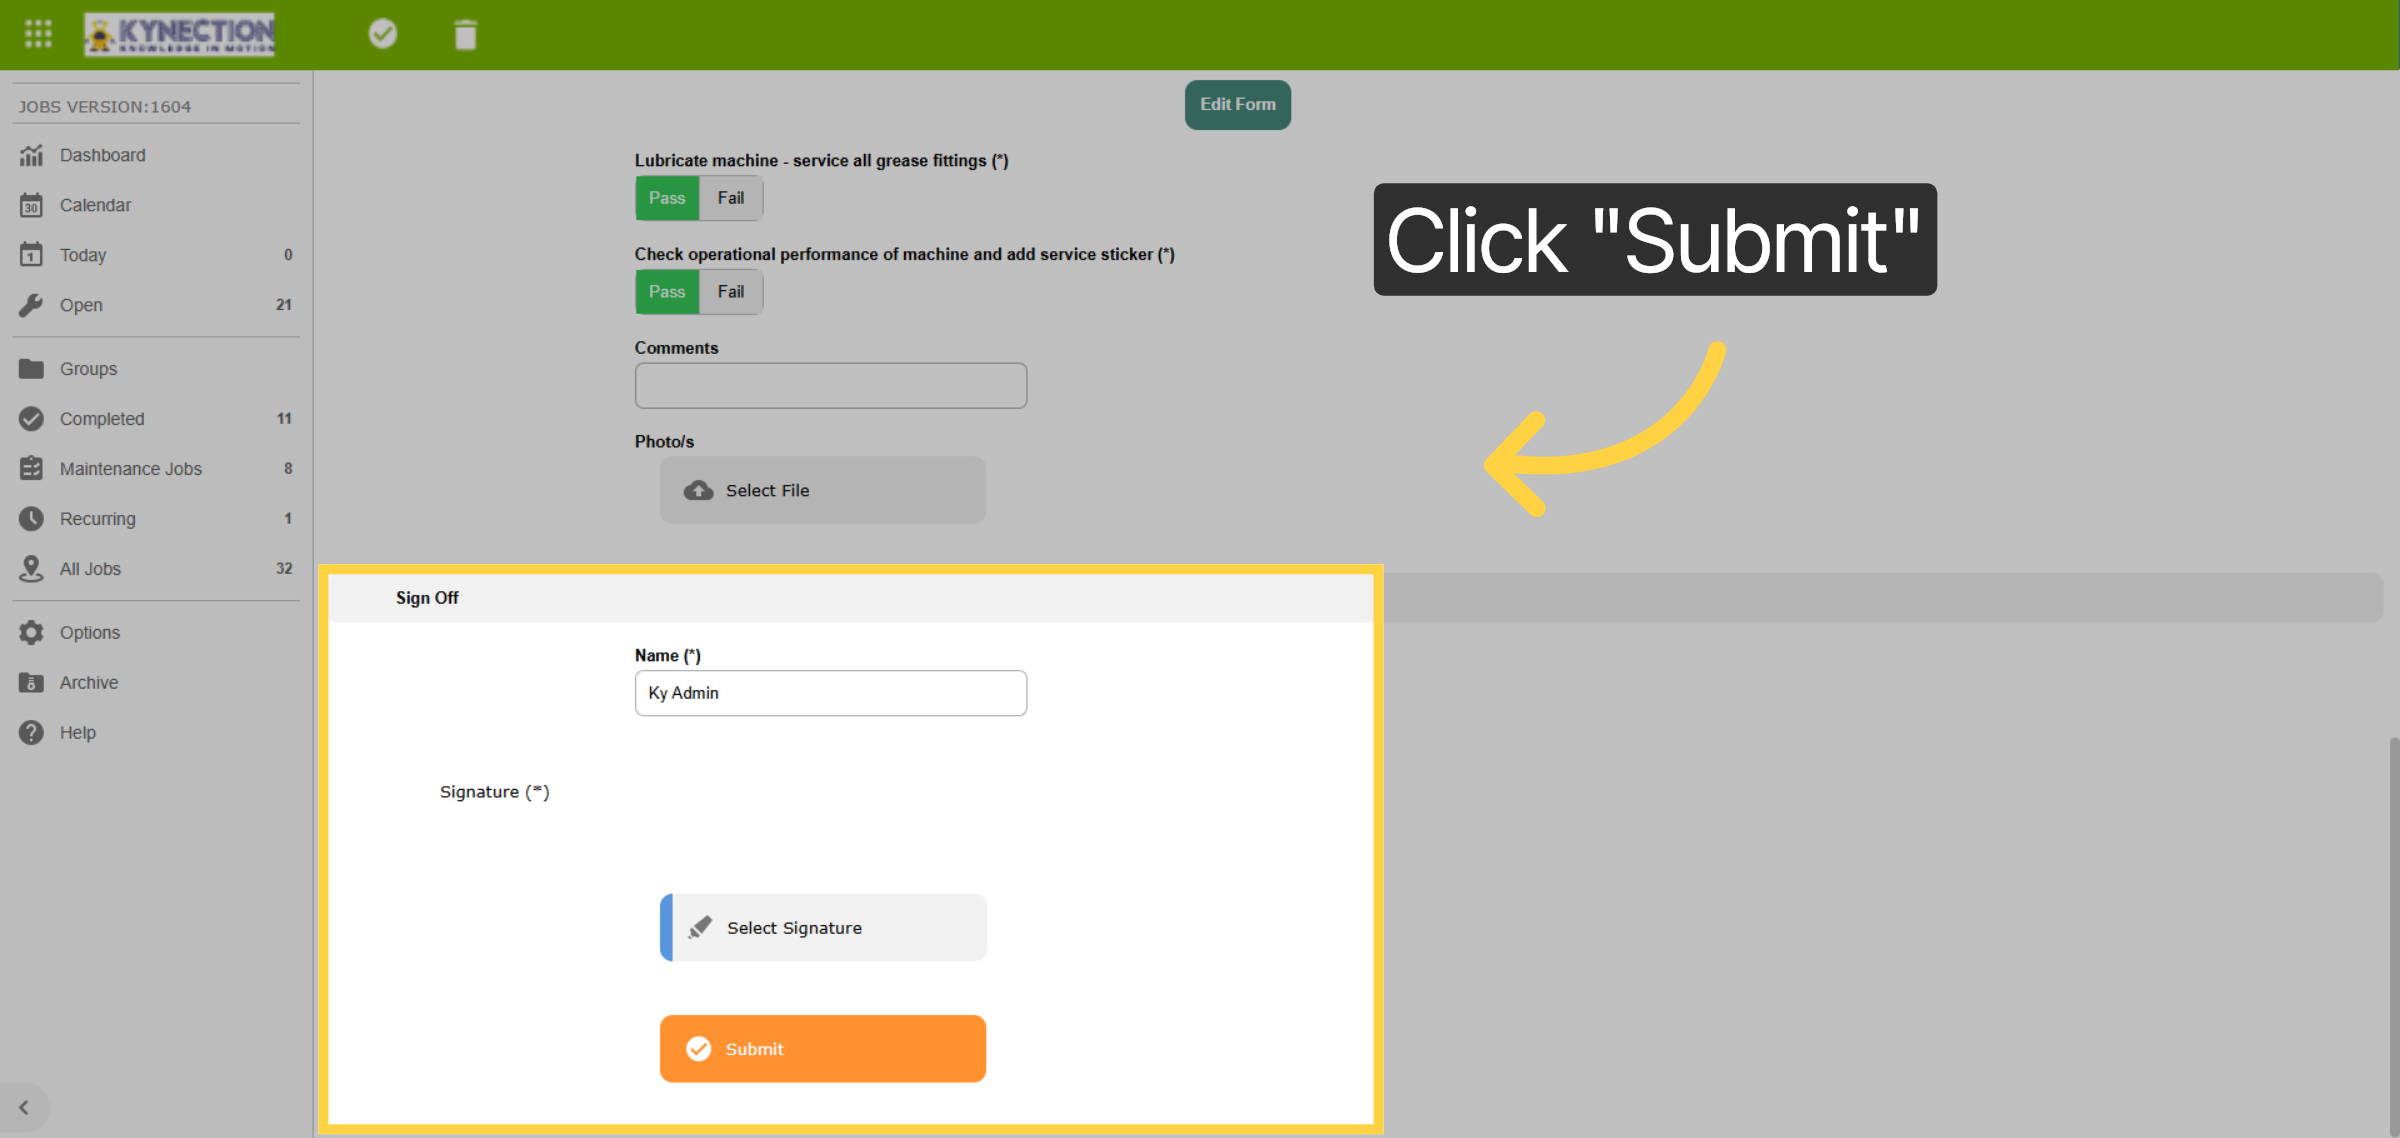
28. Service Completion
Sign off the service by adding your name and signature and then save via the toolbar "tick" icon.
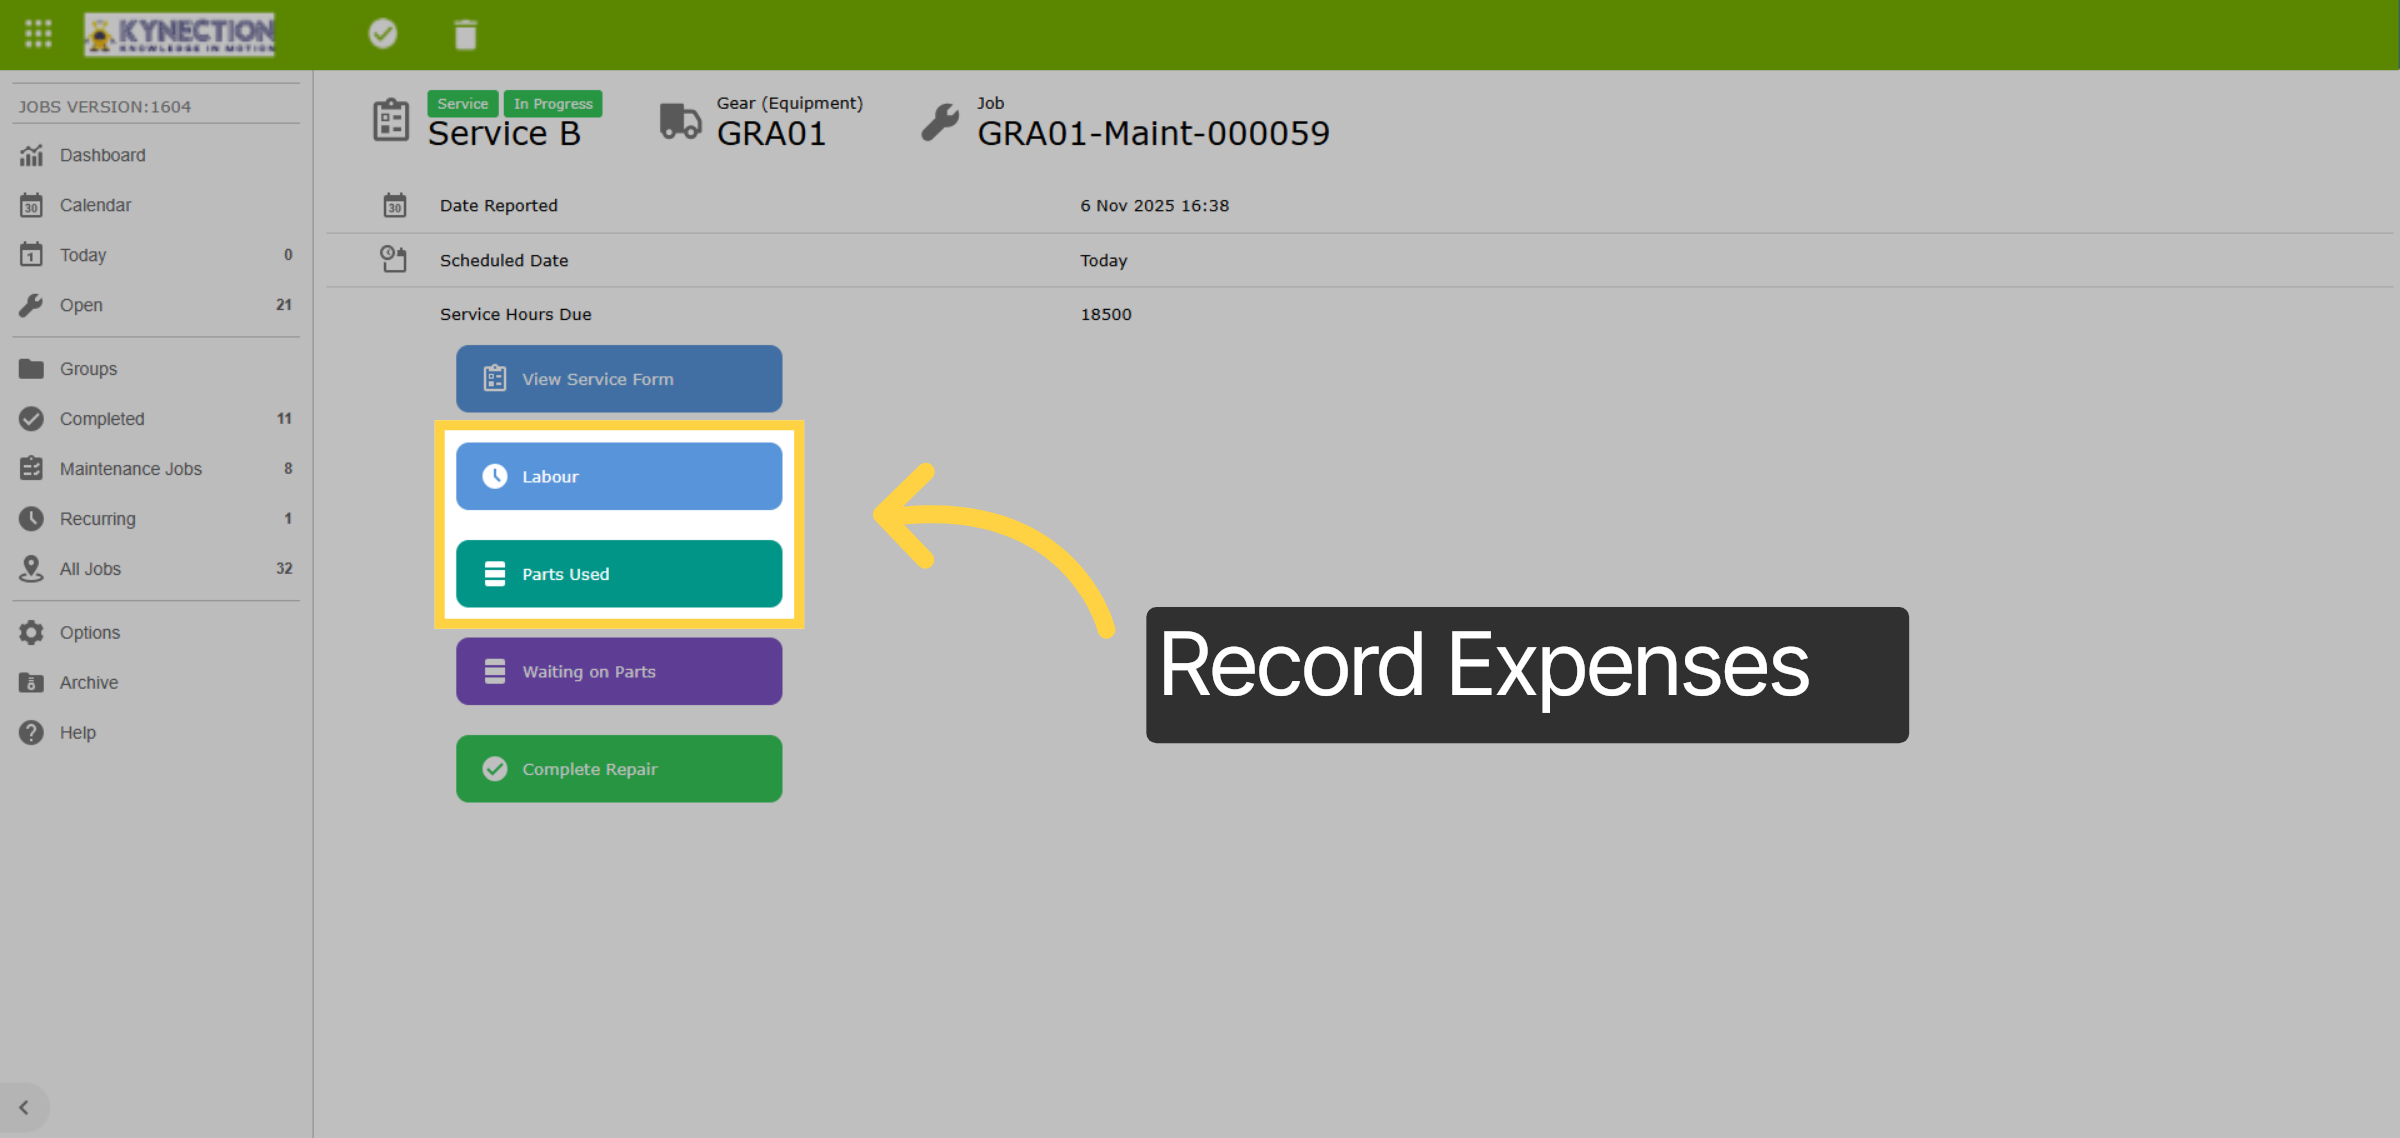
29. Record Expenses
Gear modules using expenses have "Labour" and "Parts Used" buttons on the service. Labour can also be linked to timesheets for verification and approval processes. Likewise, documenting the labour component of supplier services provides valuable data for comparing suppliers effectively.
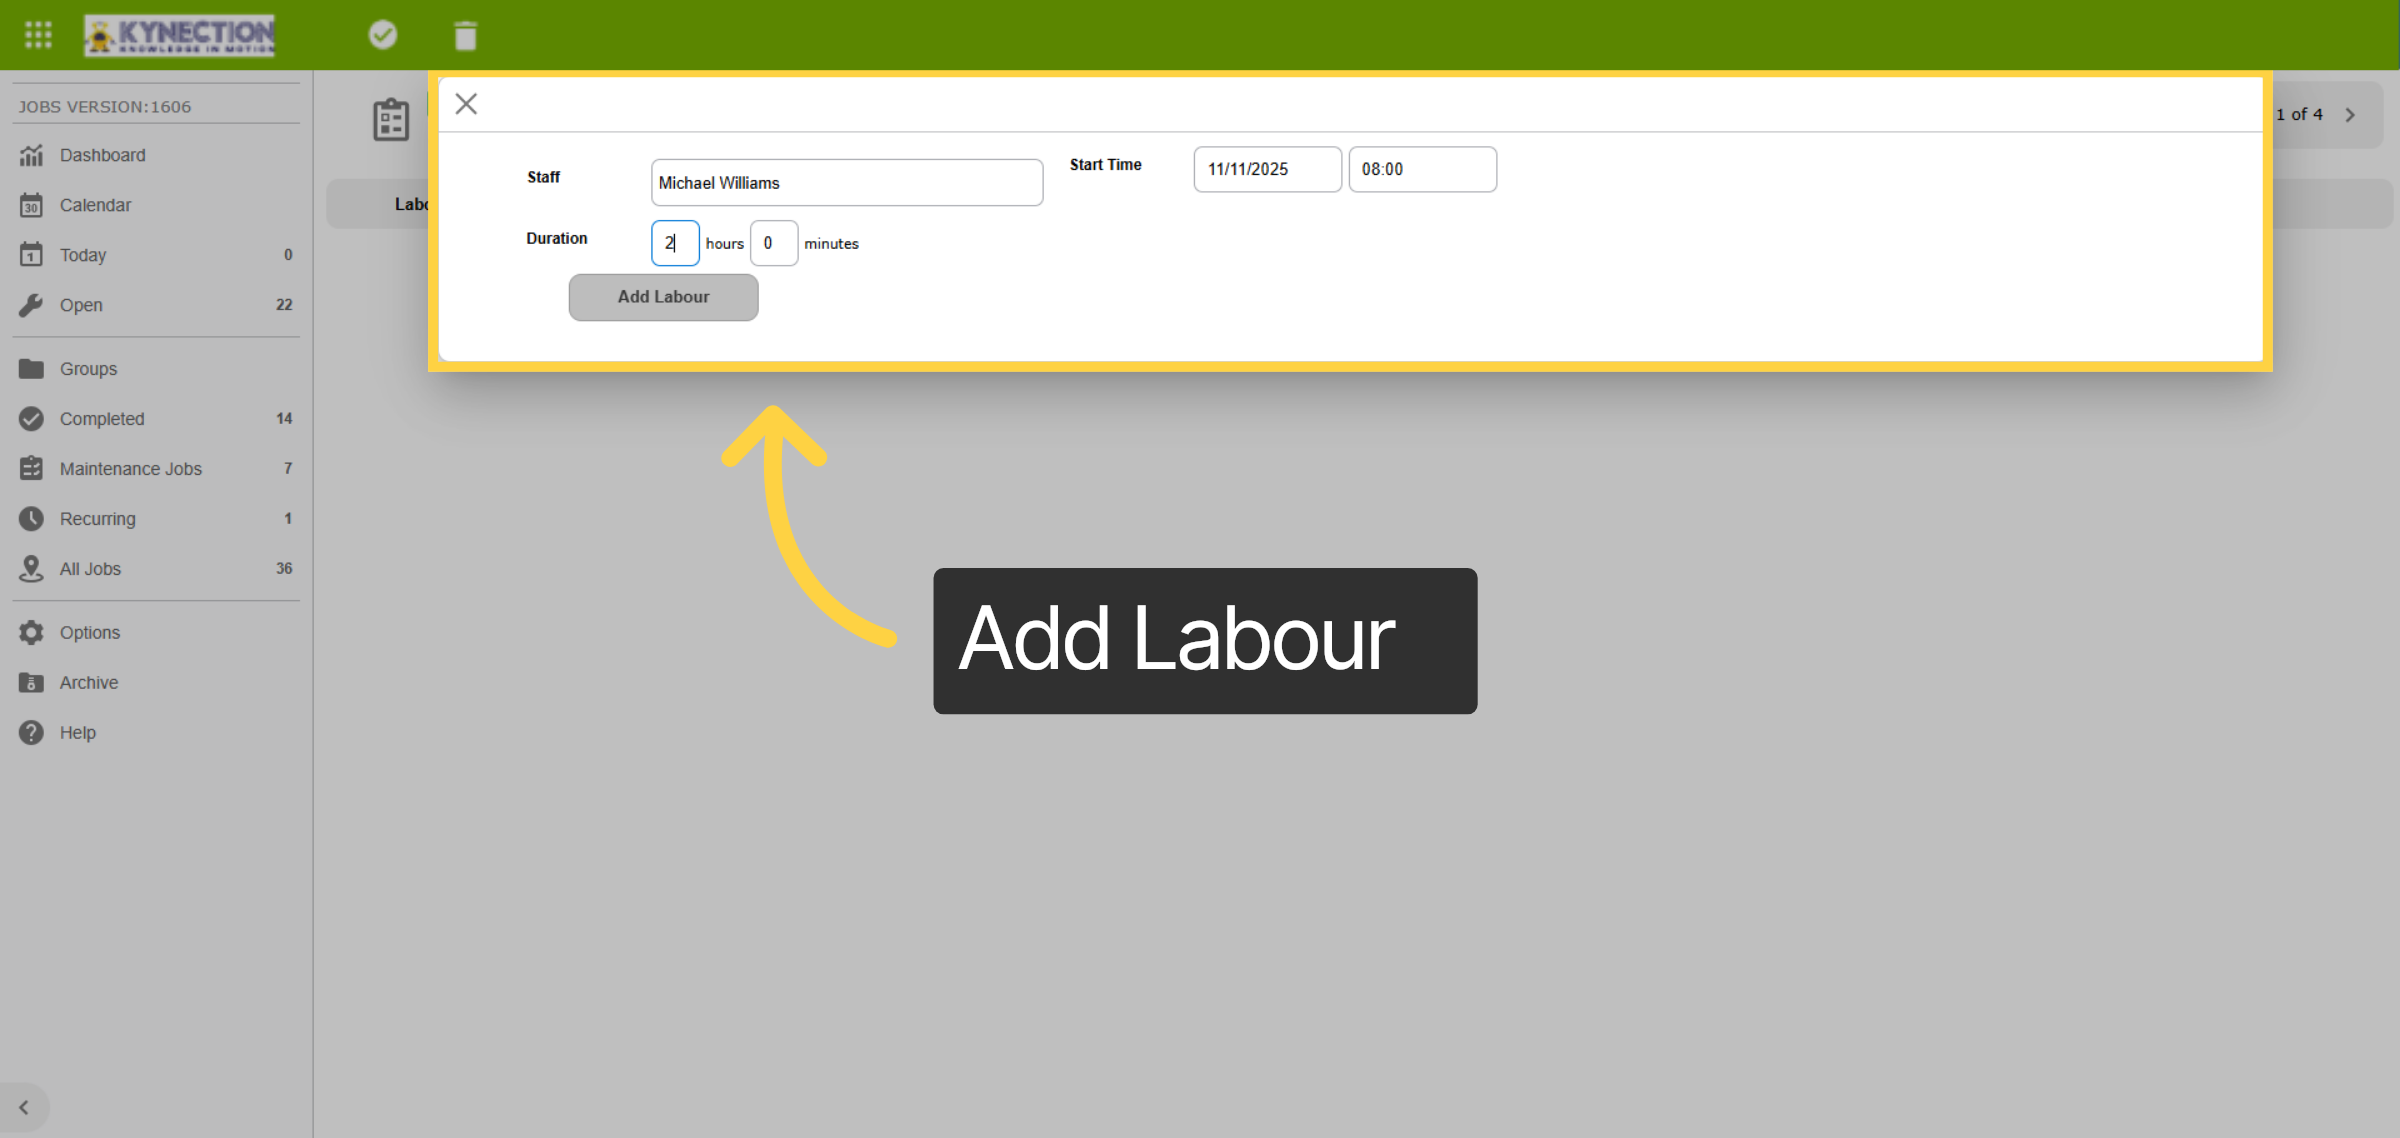
30. Add Labour
Add a labour record using the plus icon from the toolbar. This example records the start and duration, which will then update timesheets. Another options is to just record the duration. Multiple labour records may be added if required. Save and return via the tick icon in the toolbar.
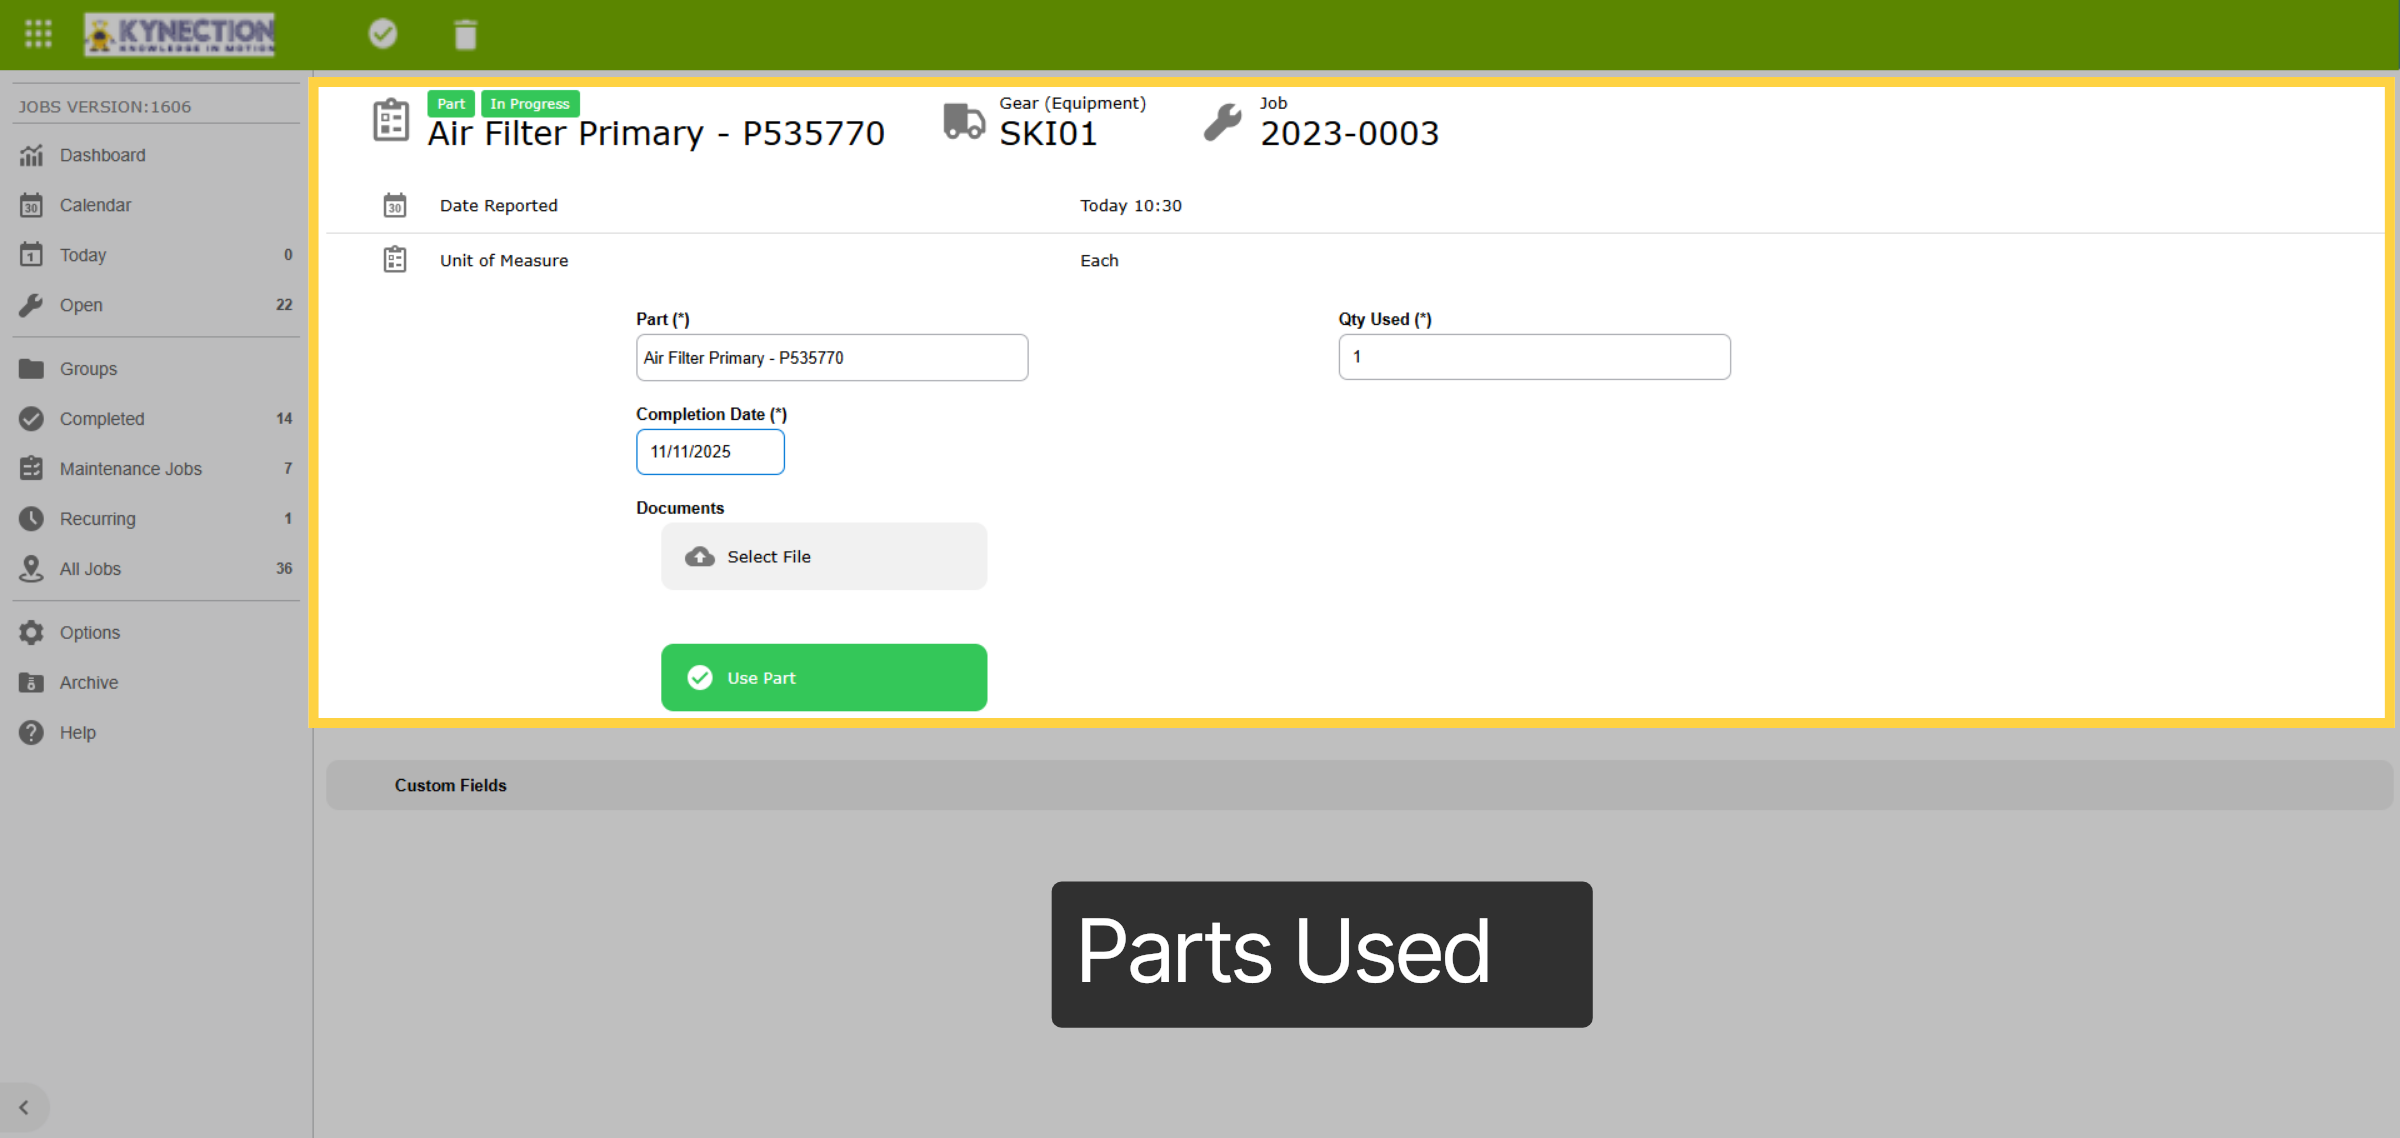
31. Parts Used
Click "Parts Used" and then use the drop-down menu to select the part to record as consumed. Standard items can also be recorded against the service type to automatically populate.
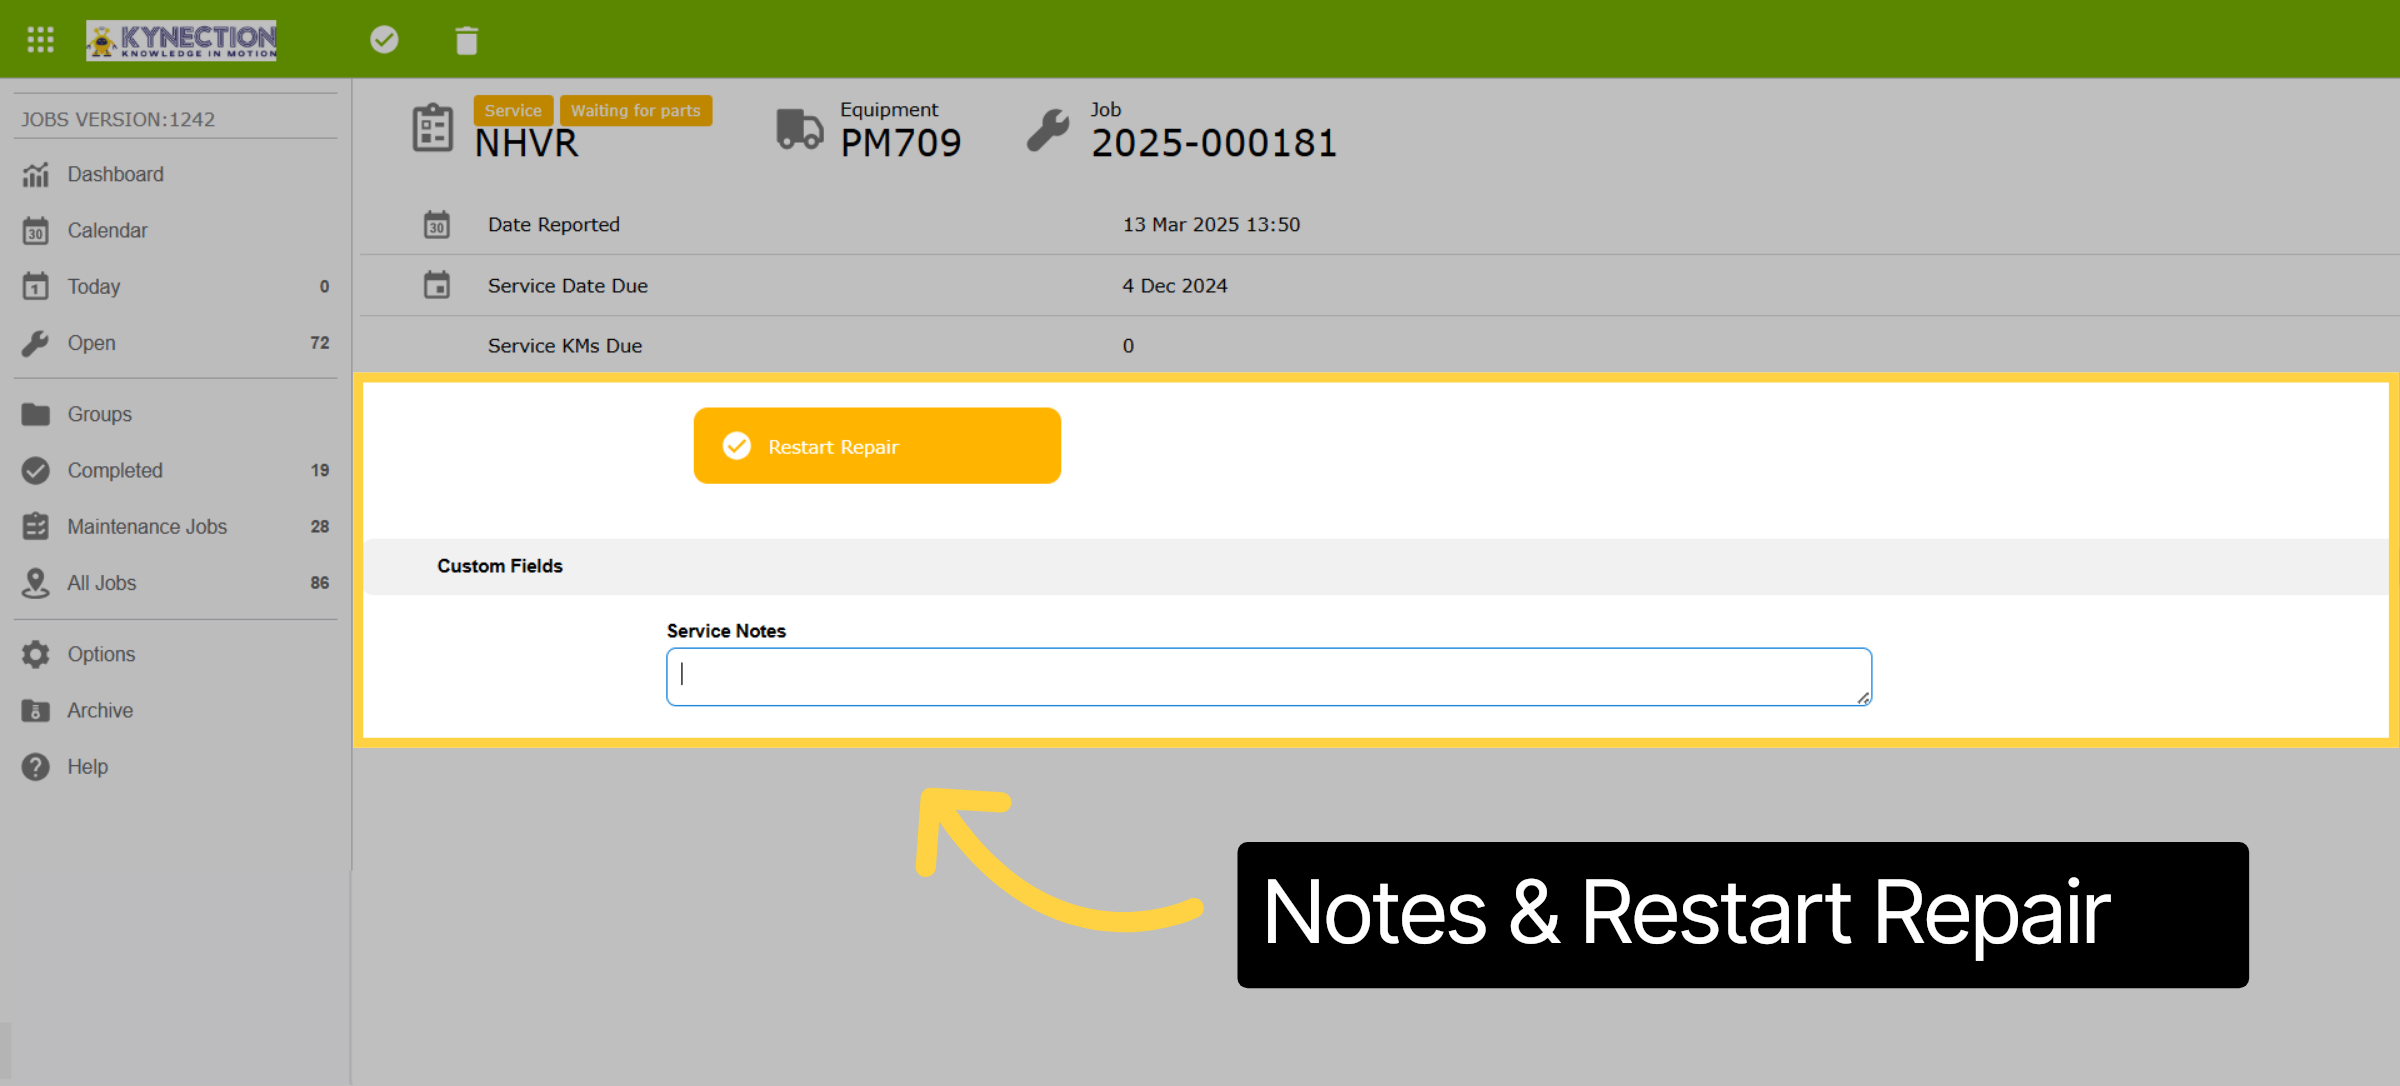
32. Waiting on Parts
Waiting on Parts has a section to record details of the parts on order and supplier details. To recommence the service the same process applies, however the "Start" button is replaced with "Restart Repair"
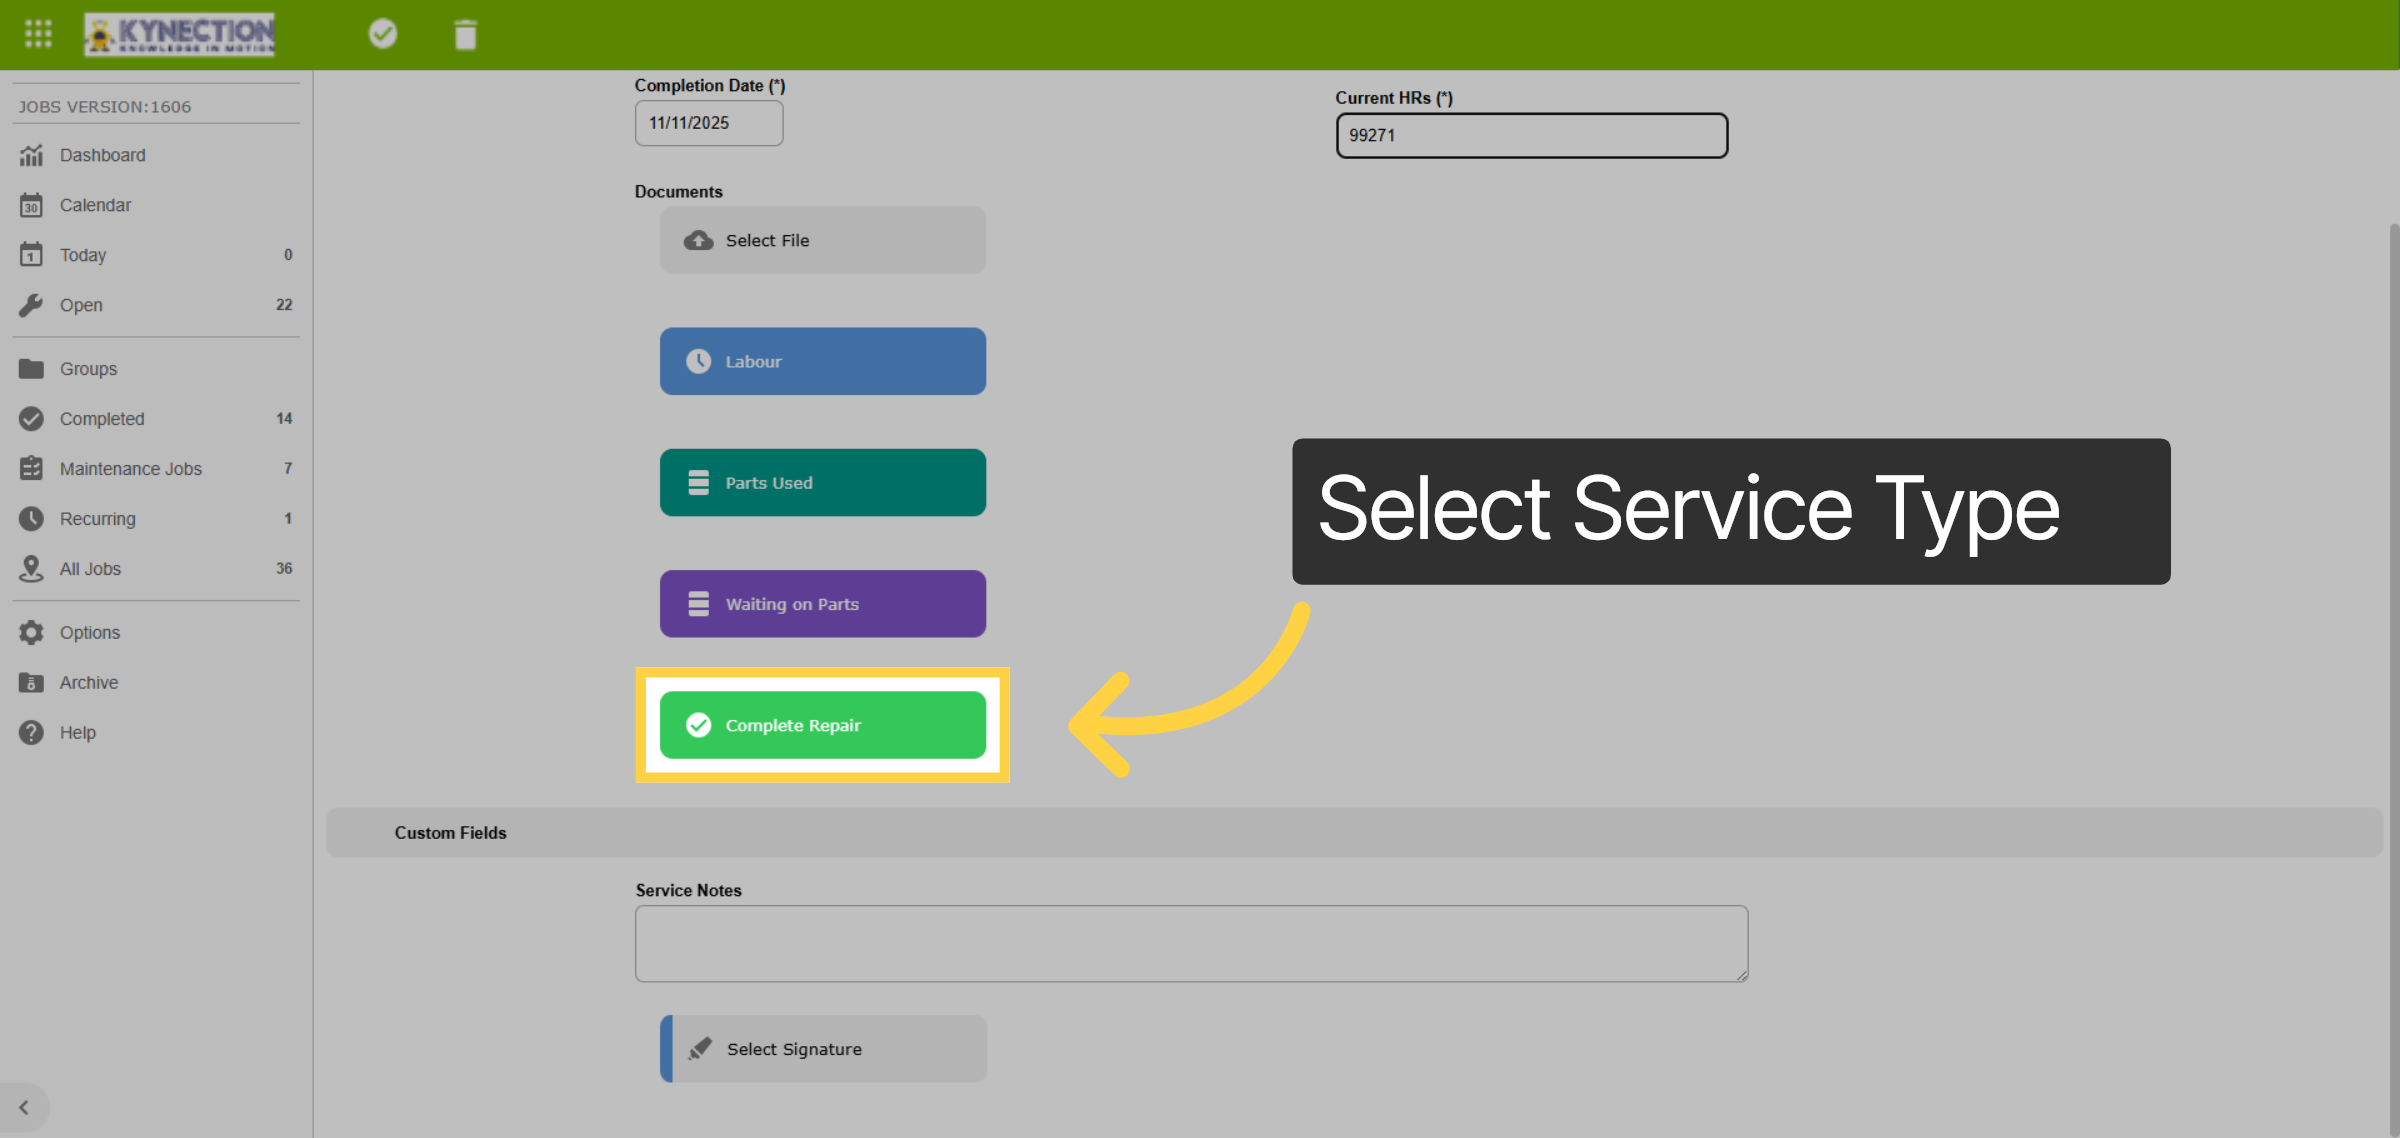
33. Complete Repair
Once all information has been documented select the Complete Repair button to finalise the service.
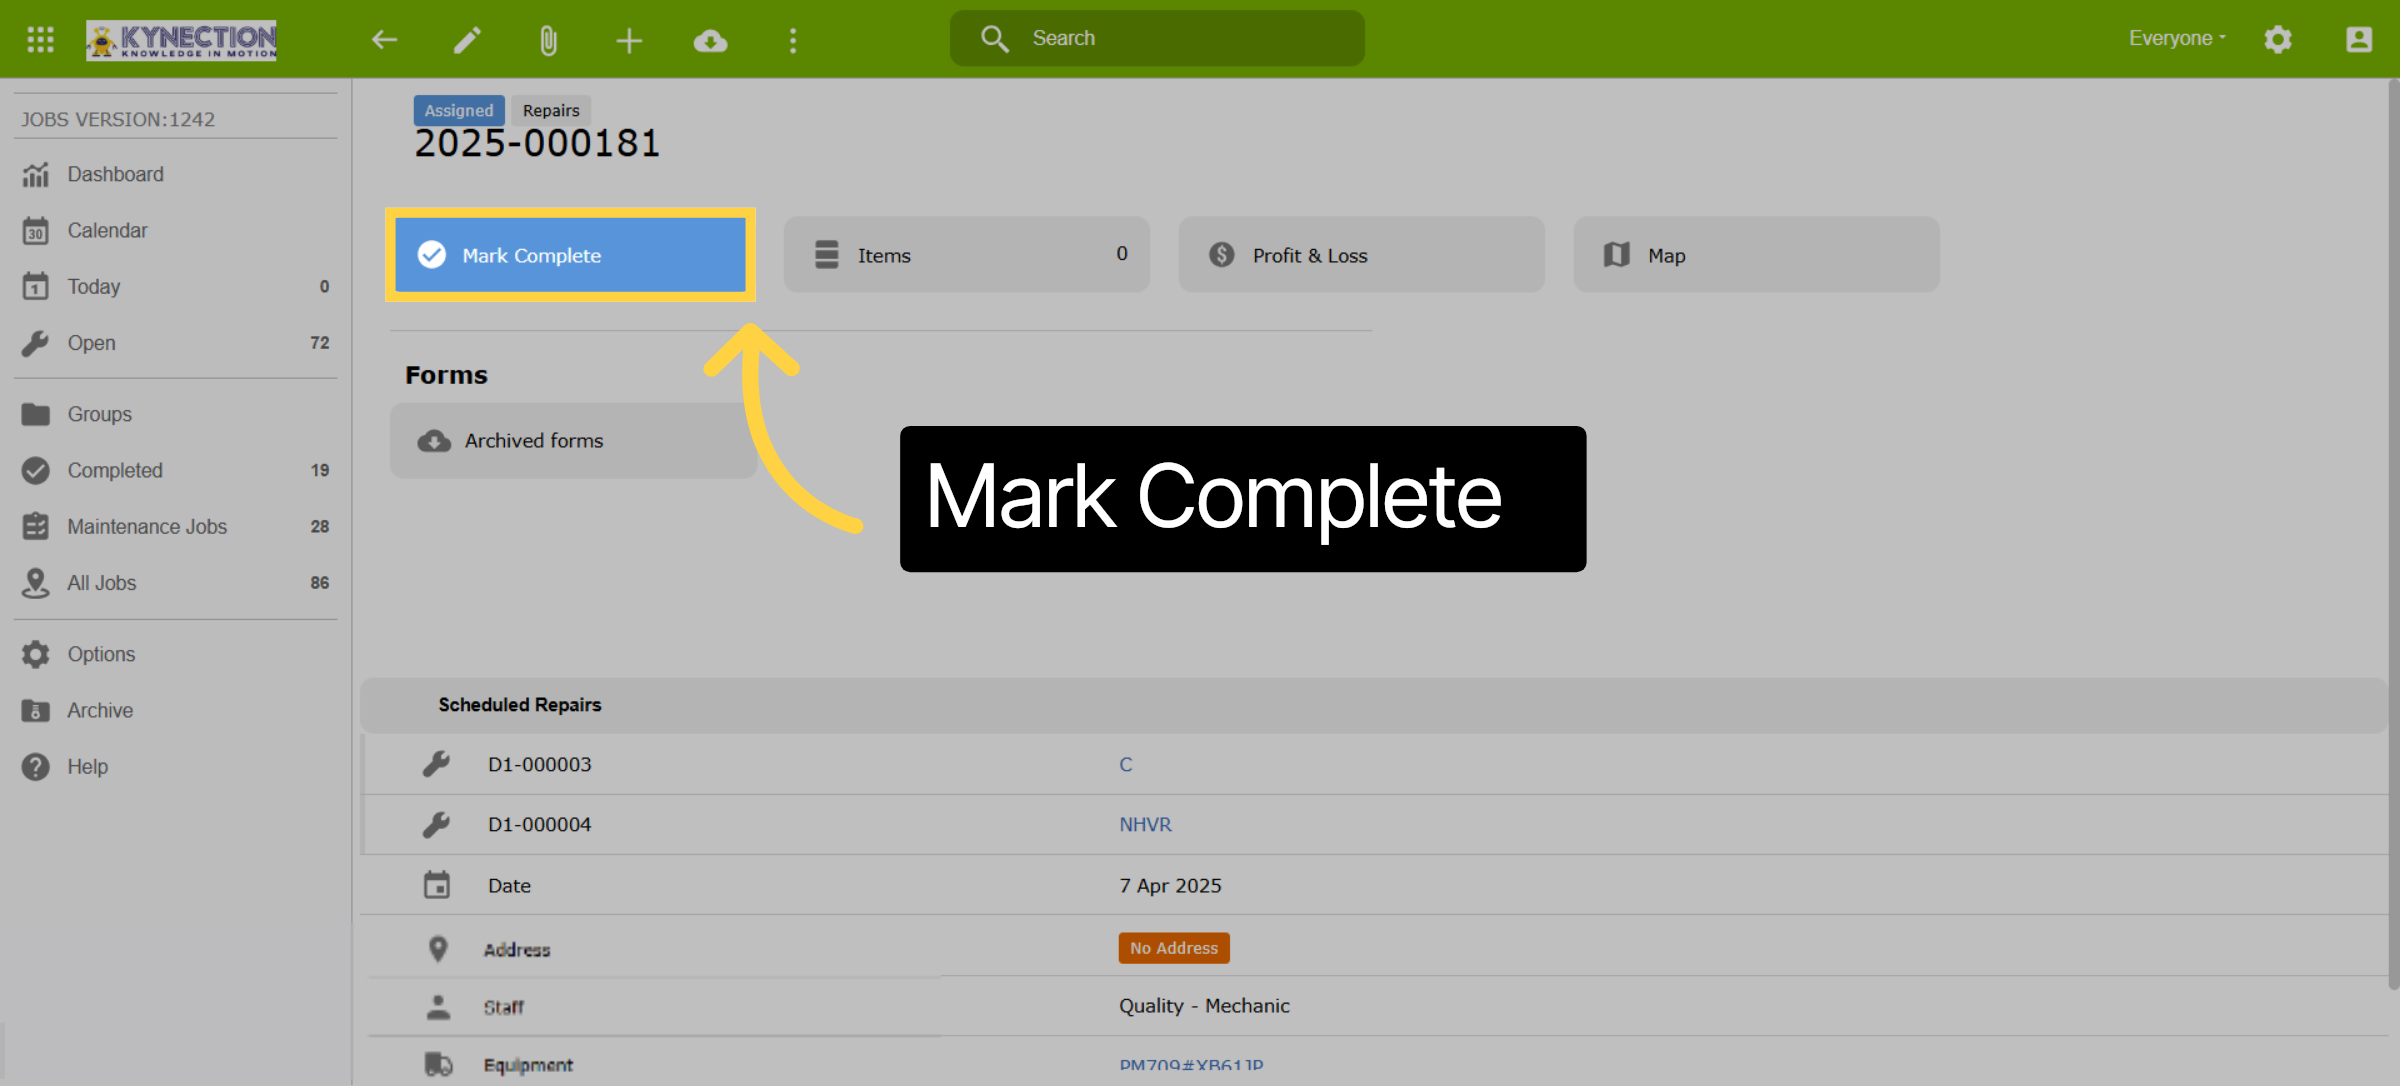
34. Mark Complete
Repeat the process for any other scheduled or optional repairs if required. Once all maintenance items have been updated, complete the job by selecting Mark Complete.
35. Additional Notes
Change the date to match the actual service date before selecting Save. Once you've completed this, the job will be ready for approval. Keep in mind that after approval, the job will be marked as closed.

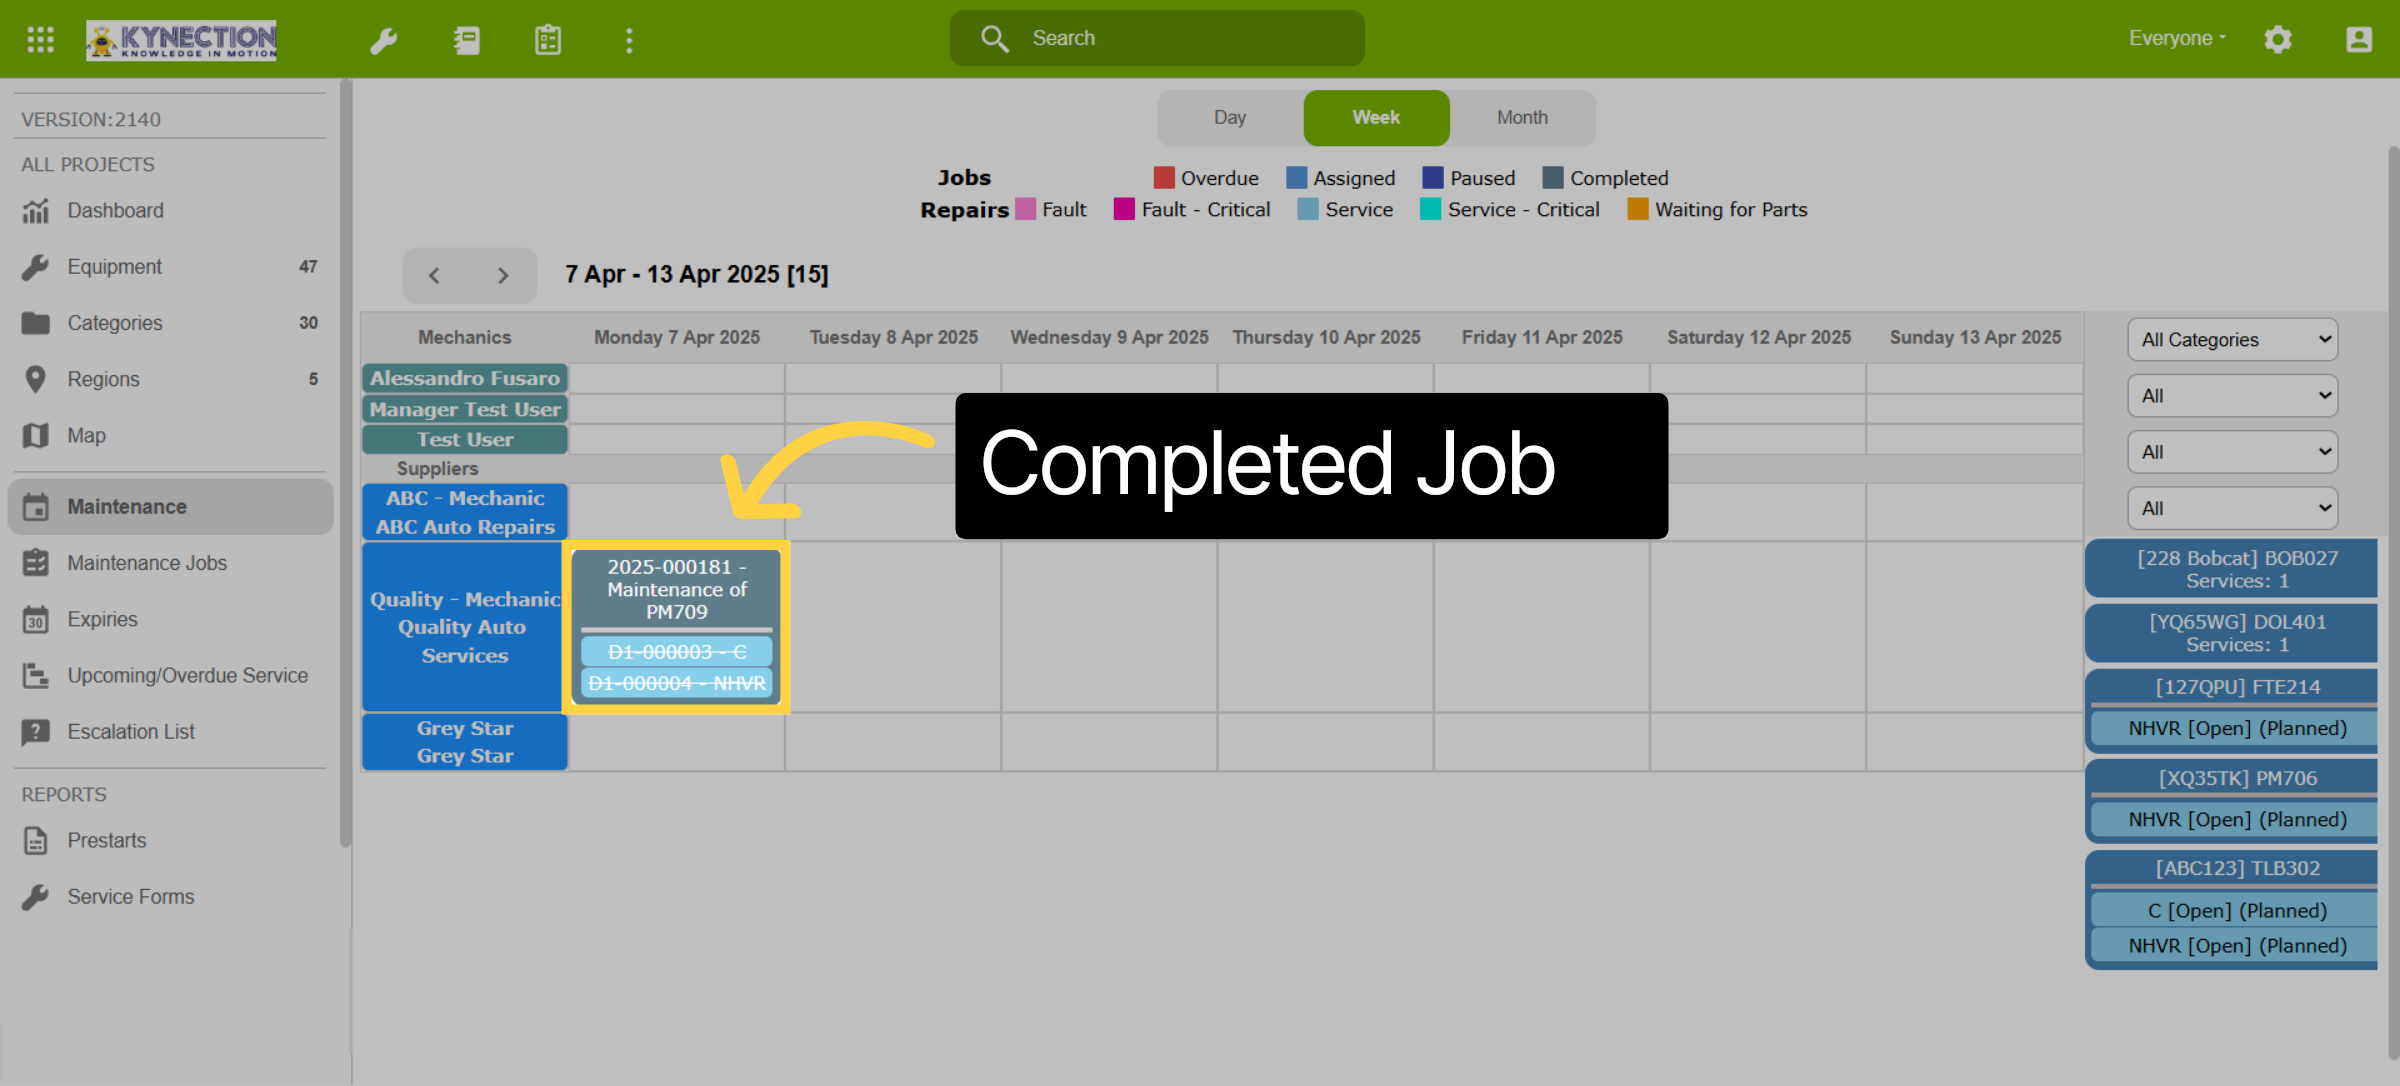
36. Completed Job
Completed jobs in the scheduler are identified easily as they are crossed out.
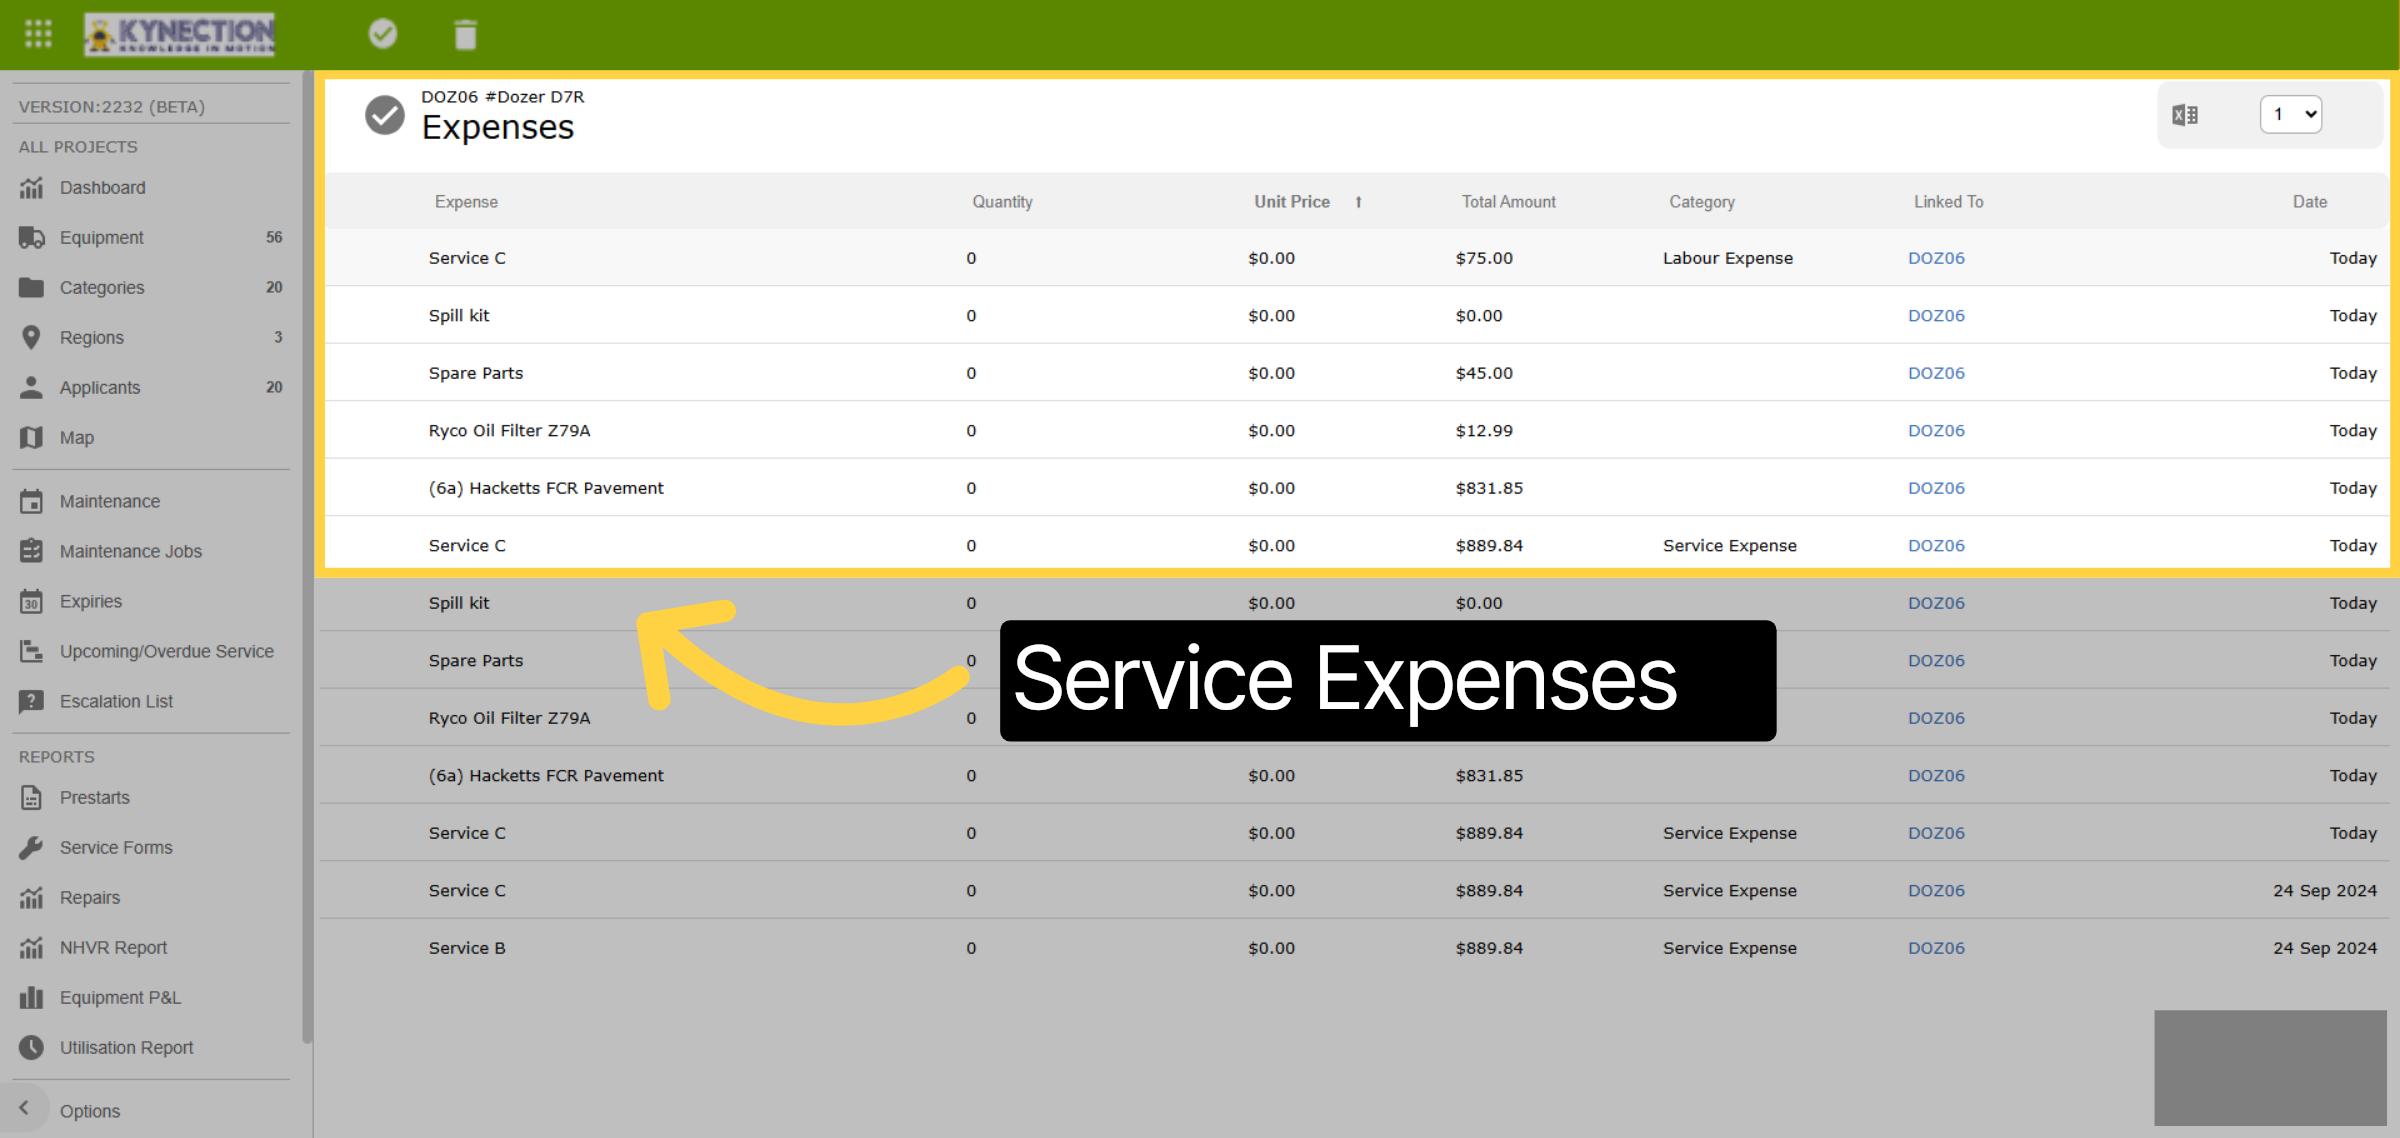
37. Service Expenses
All service expenses, including labour, are recorded against the equipment under the Expenses tab for full cost oversight.
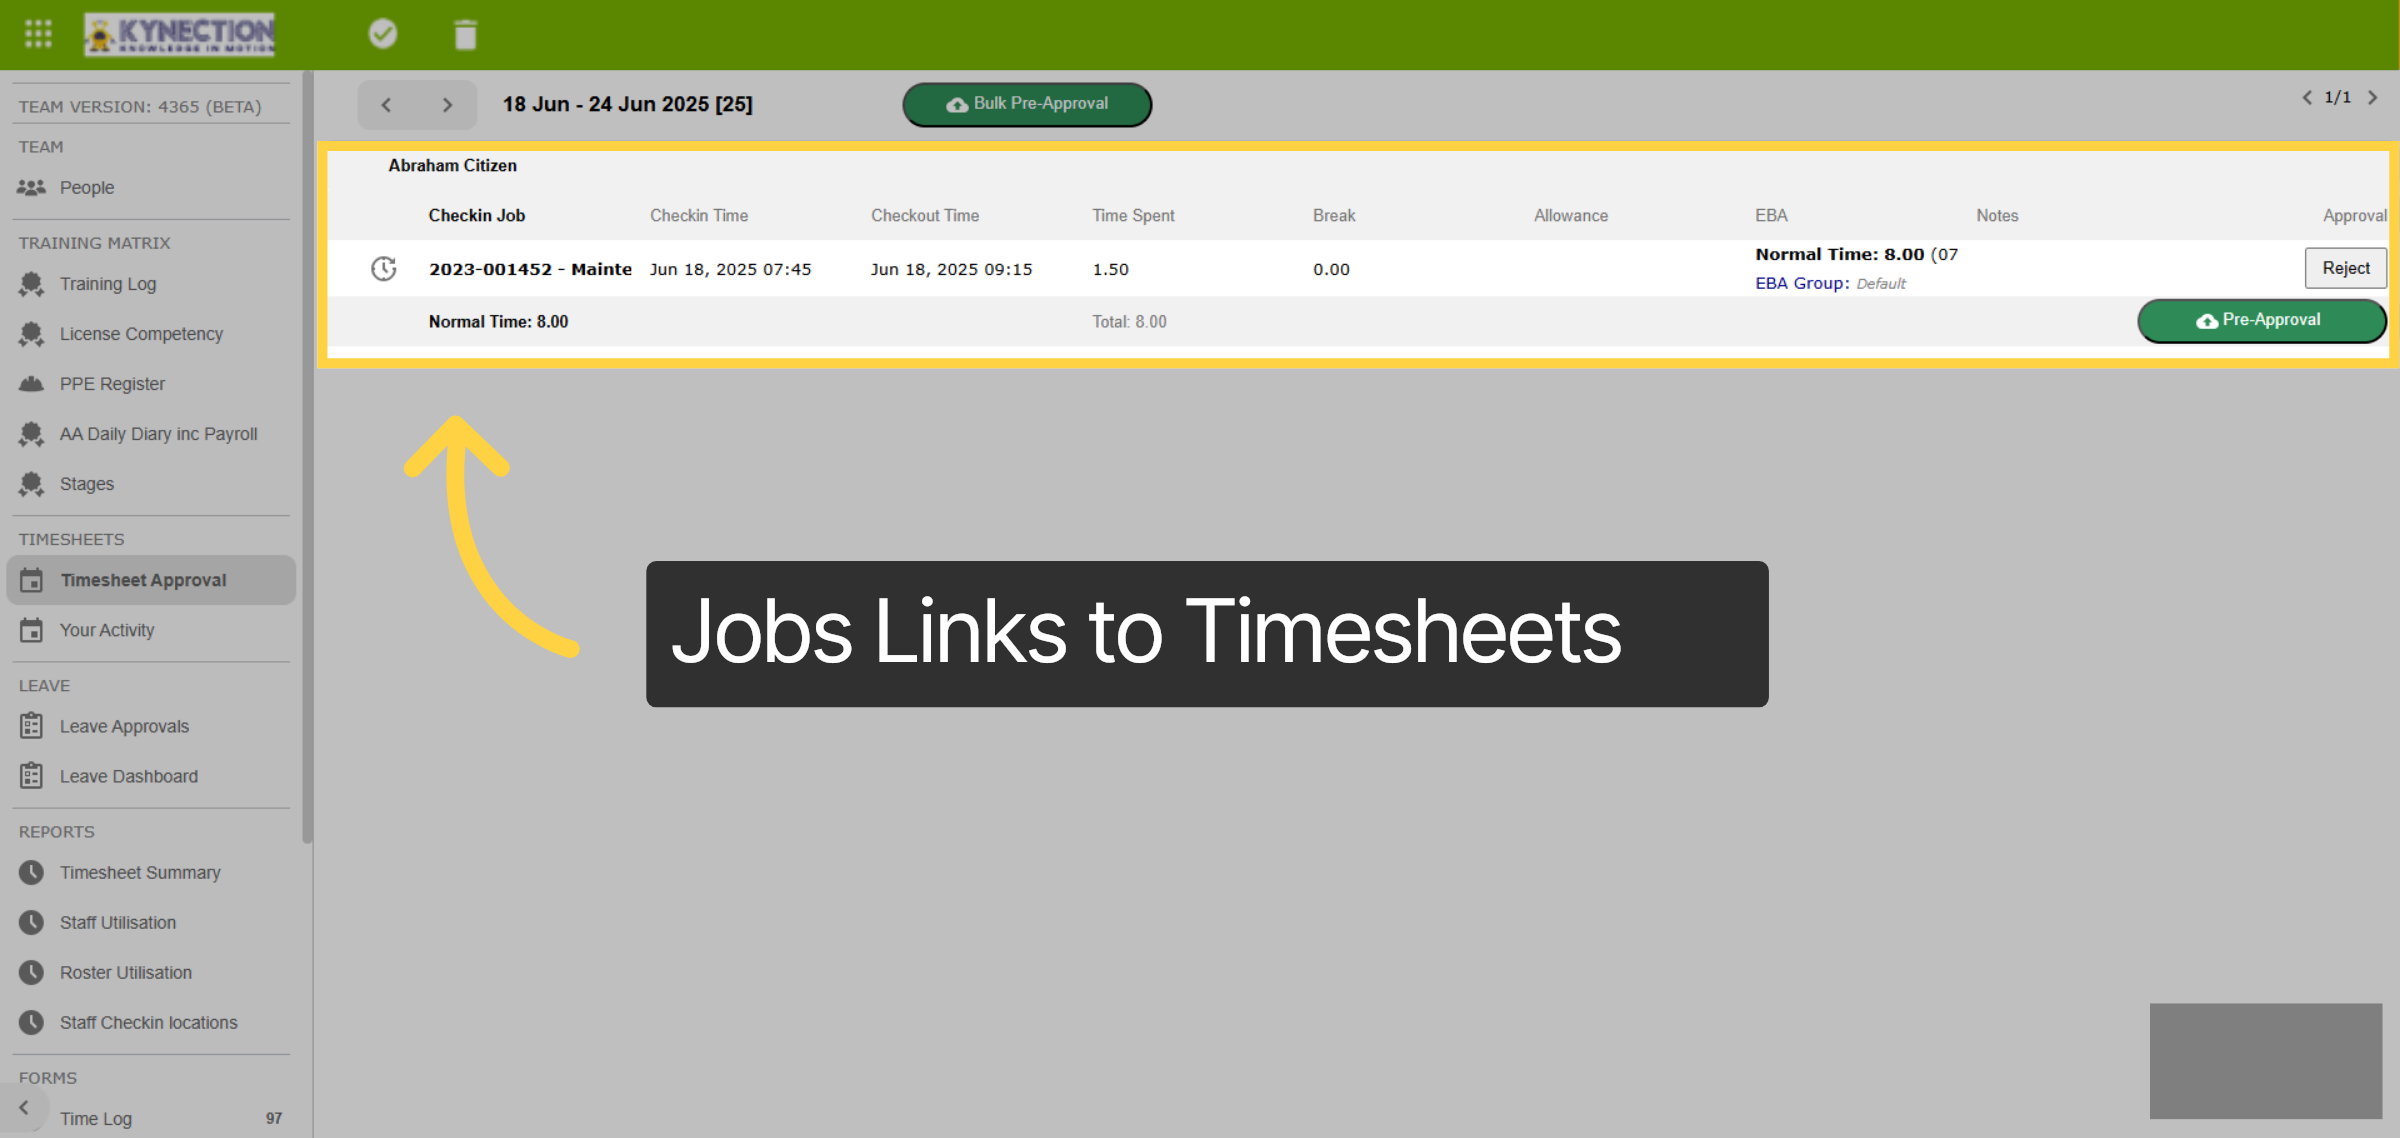
38. Job Links to Timesheet
If using the labour and duration option for expense, the time recorded for maintenance jobs automatically creates timesheet entry, streamlining your record-keeping.
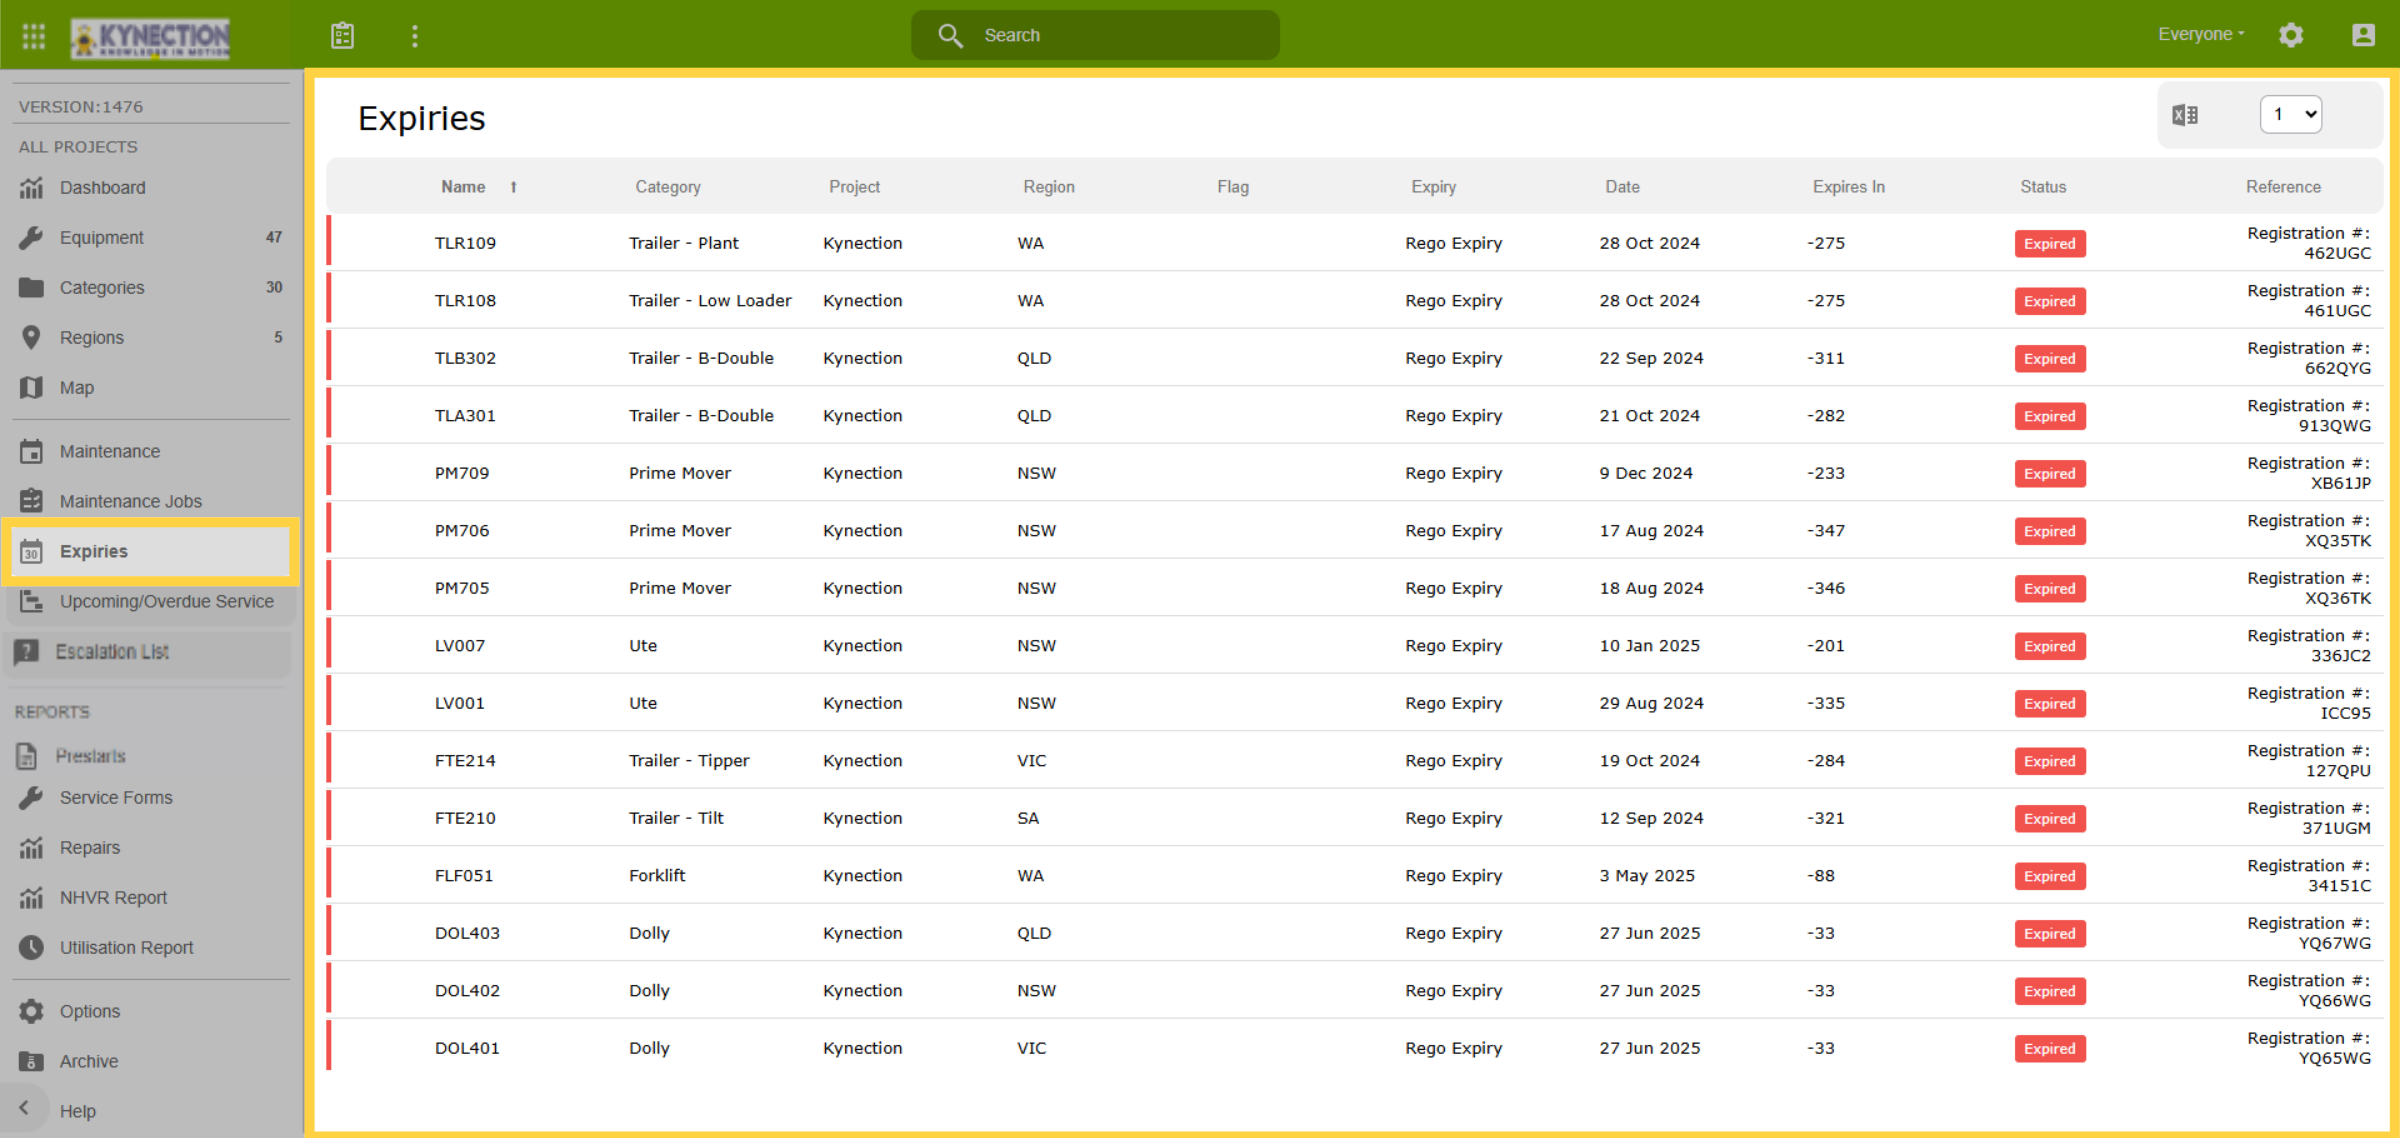
39. Expiries
Let's move on to Expiries. The expiry tab presents crucial information, including each vehicle's registration expiry date and inspection renewal dates. The subheadings are customisable to align with your organisation's needs and can be exported in Excel format.
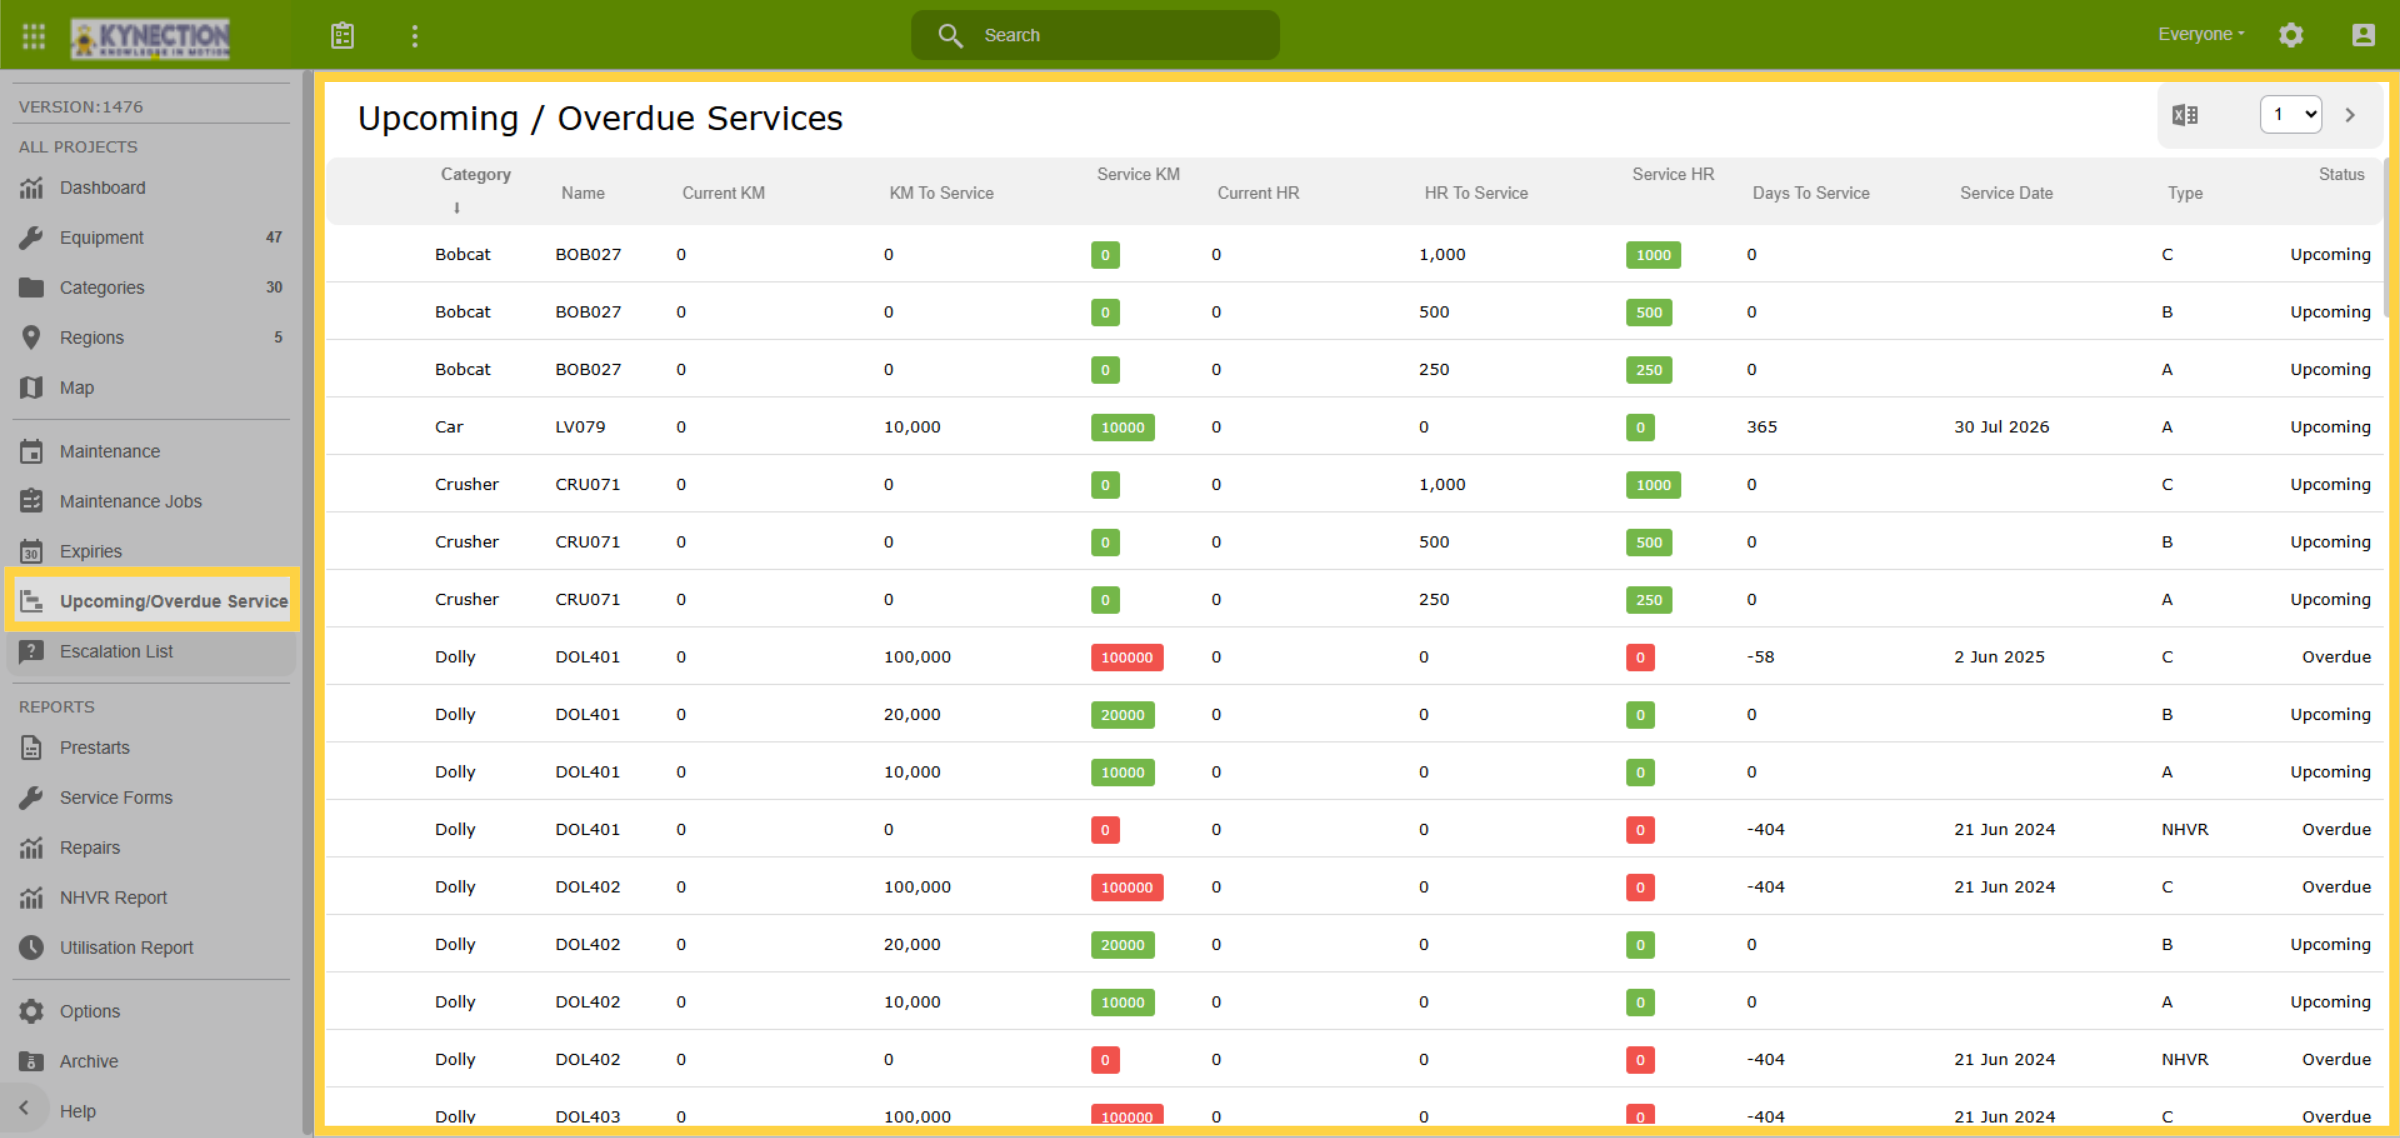
40. Upcoming and Overdue Services
Upcoming or overdue services provides oversight for planning. Note that the table does not display or calculate the next service information if a interval has not been configured. This prevents any services from being falsely flagged as overdue. Click on the Name to raise a service.
41. Escalation List
The Escalation List page provides visibility into the faults and defects that have been escalated within the organisation. For instance, it will bring attention to a Fault or Service raised but not scheduled for over 7 days, or a repair job initiated but not yet closed.

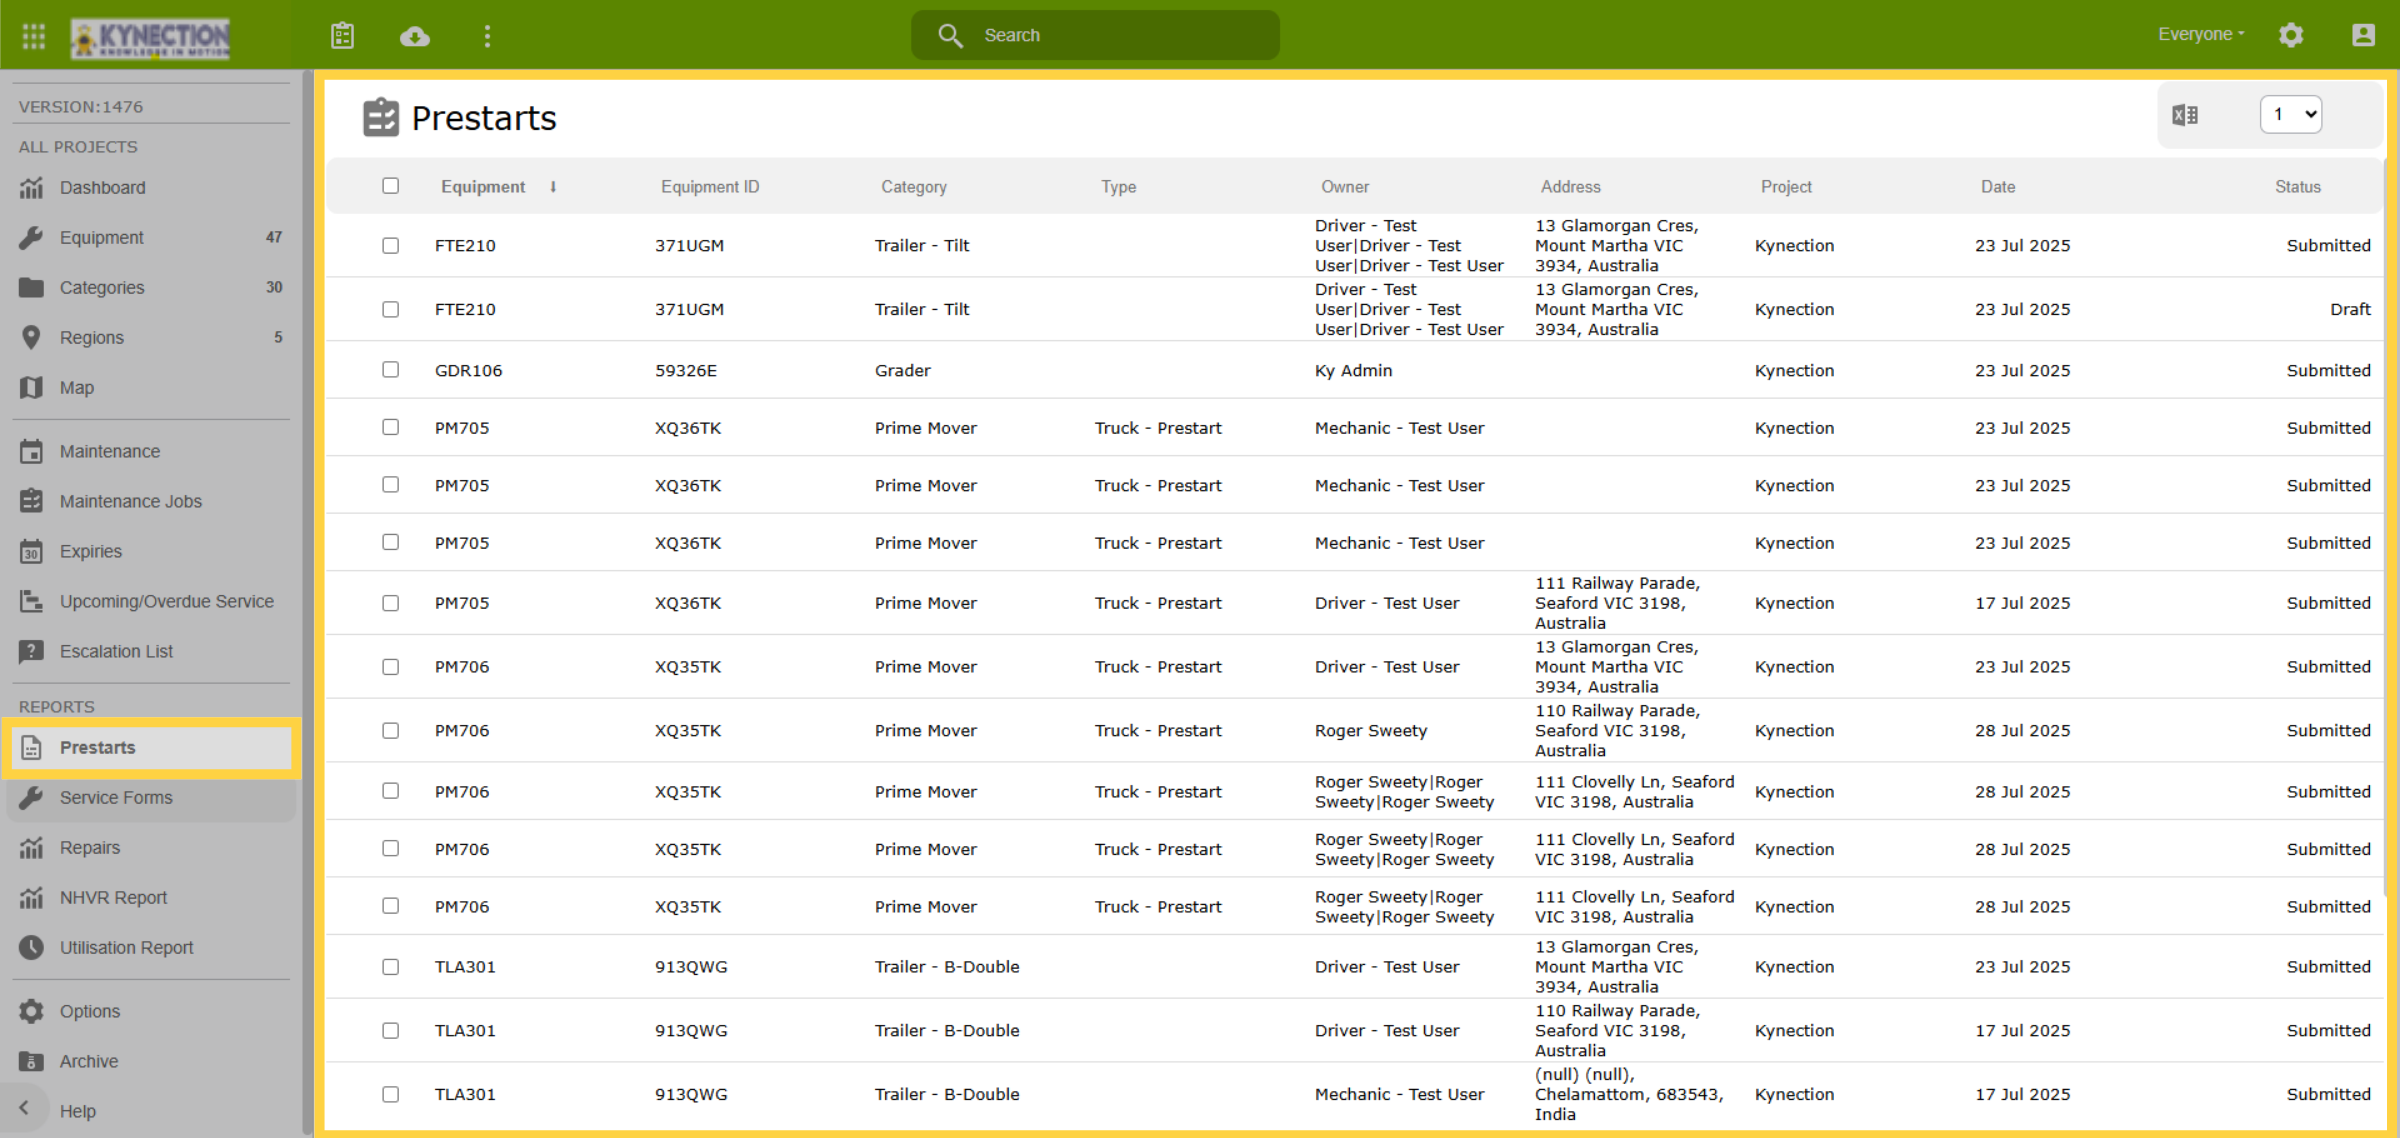
42. Prestarts
Conveniently view the prestarts from the last 7 days from the Prestarts tab.
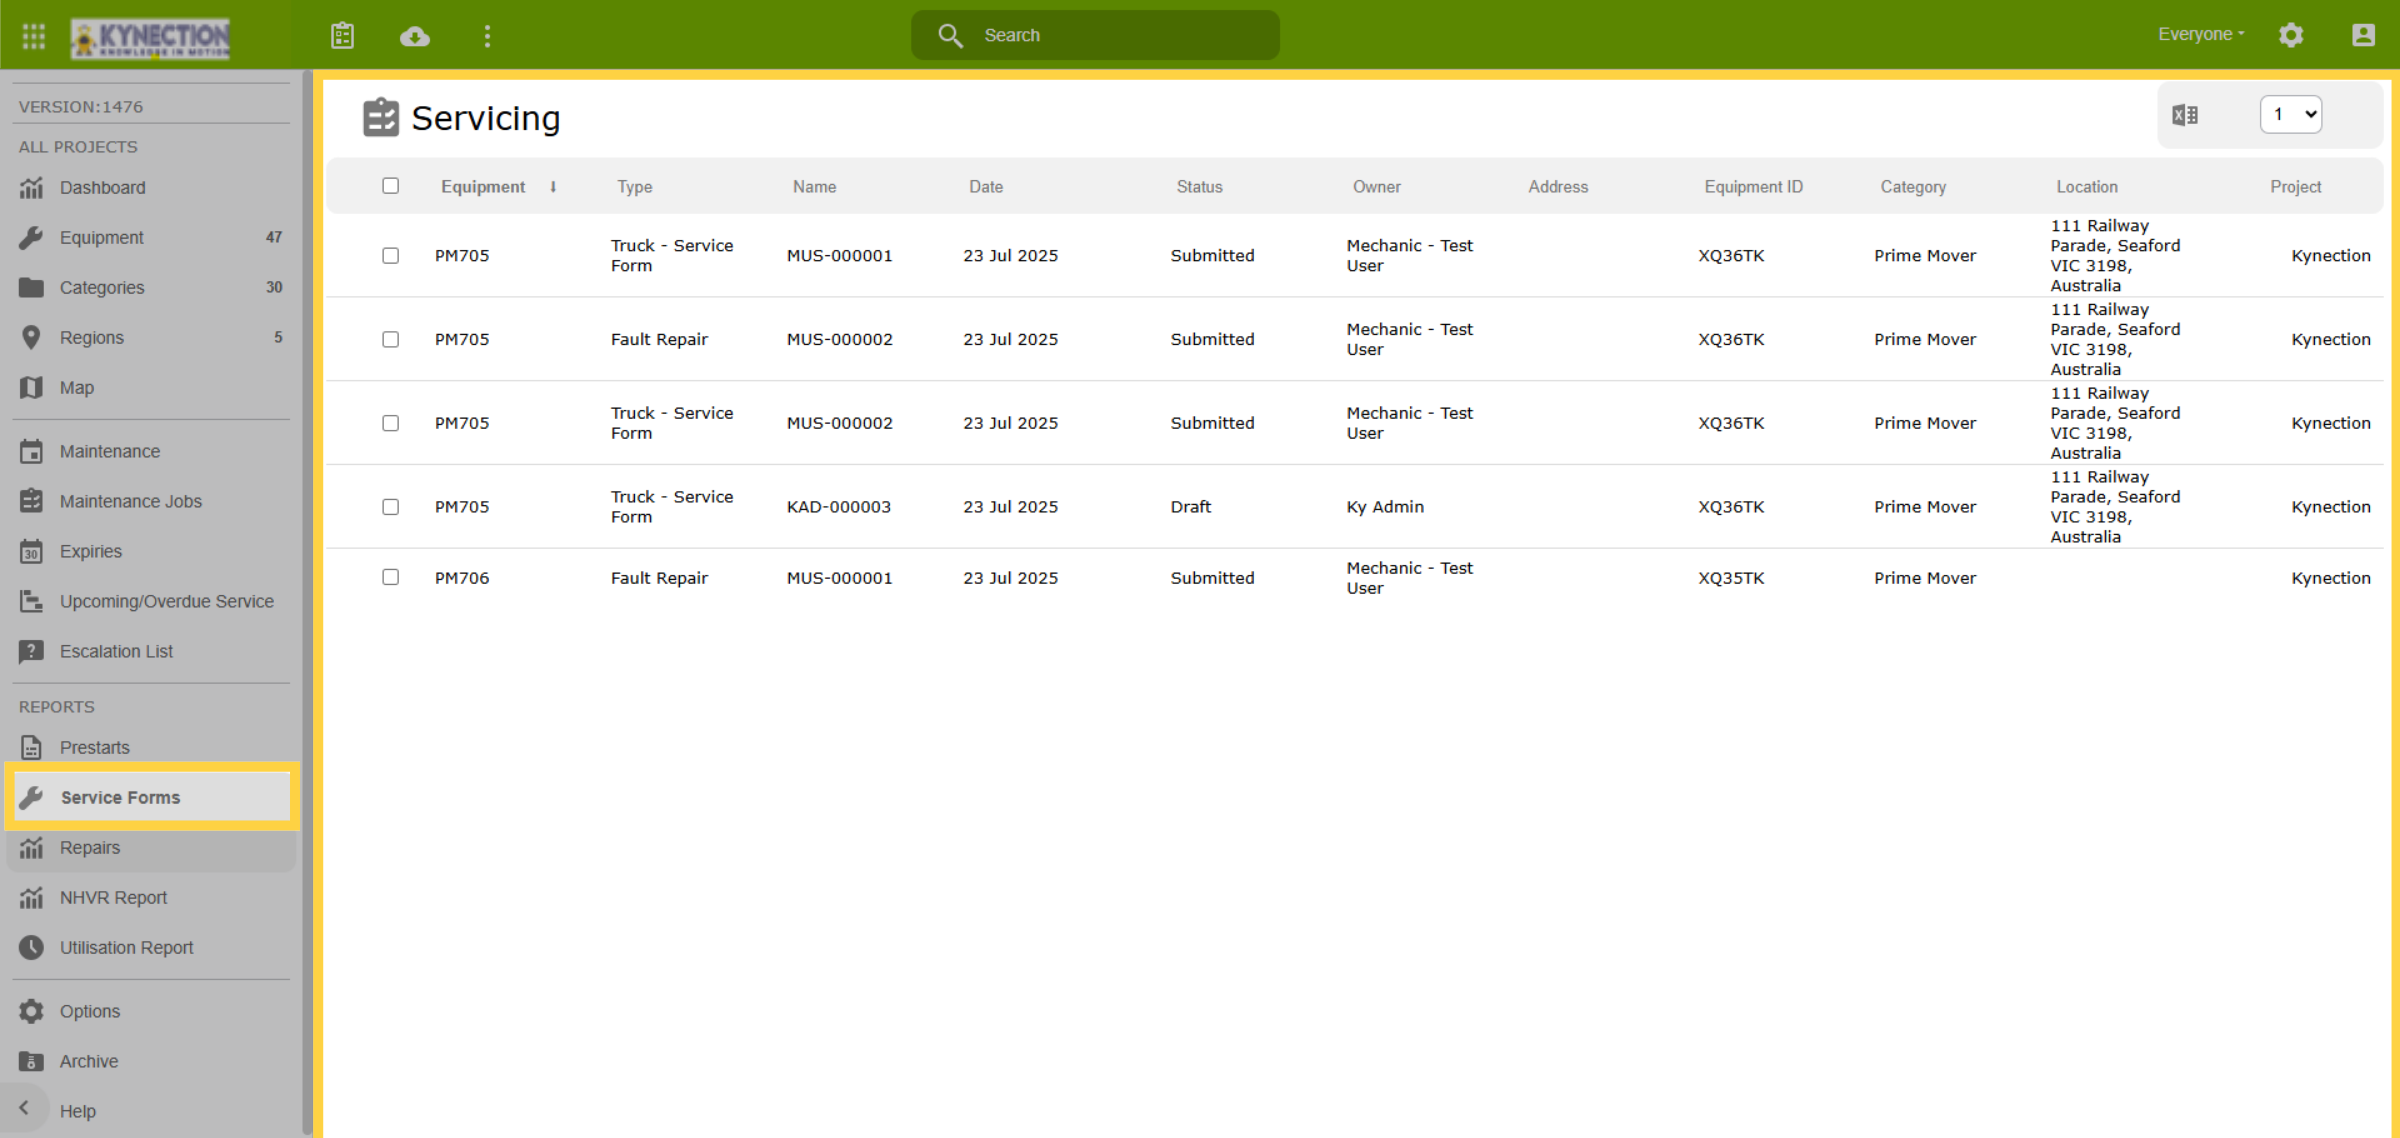
43. Service Forms
The service forms shortcut offers a streamlined and efficient way to manage your Service Forms.
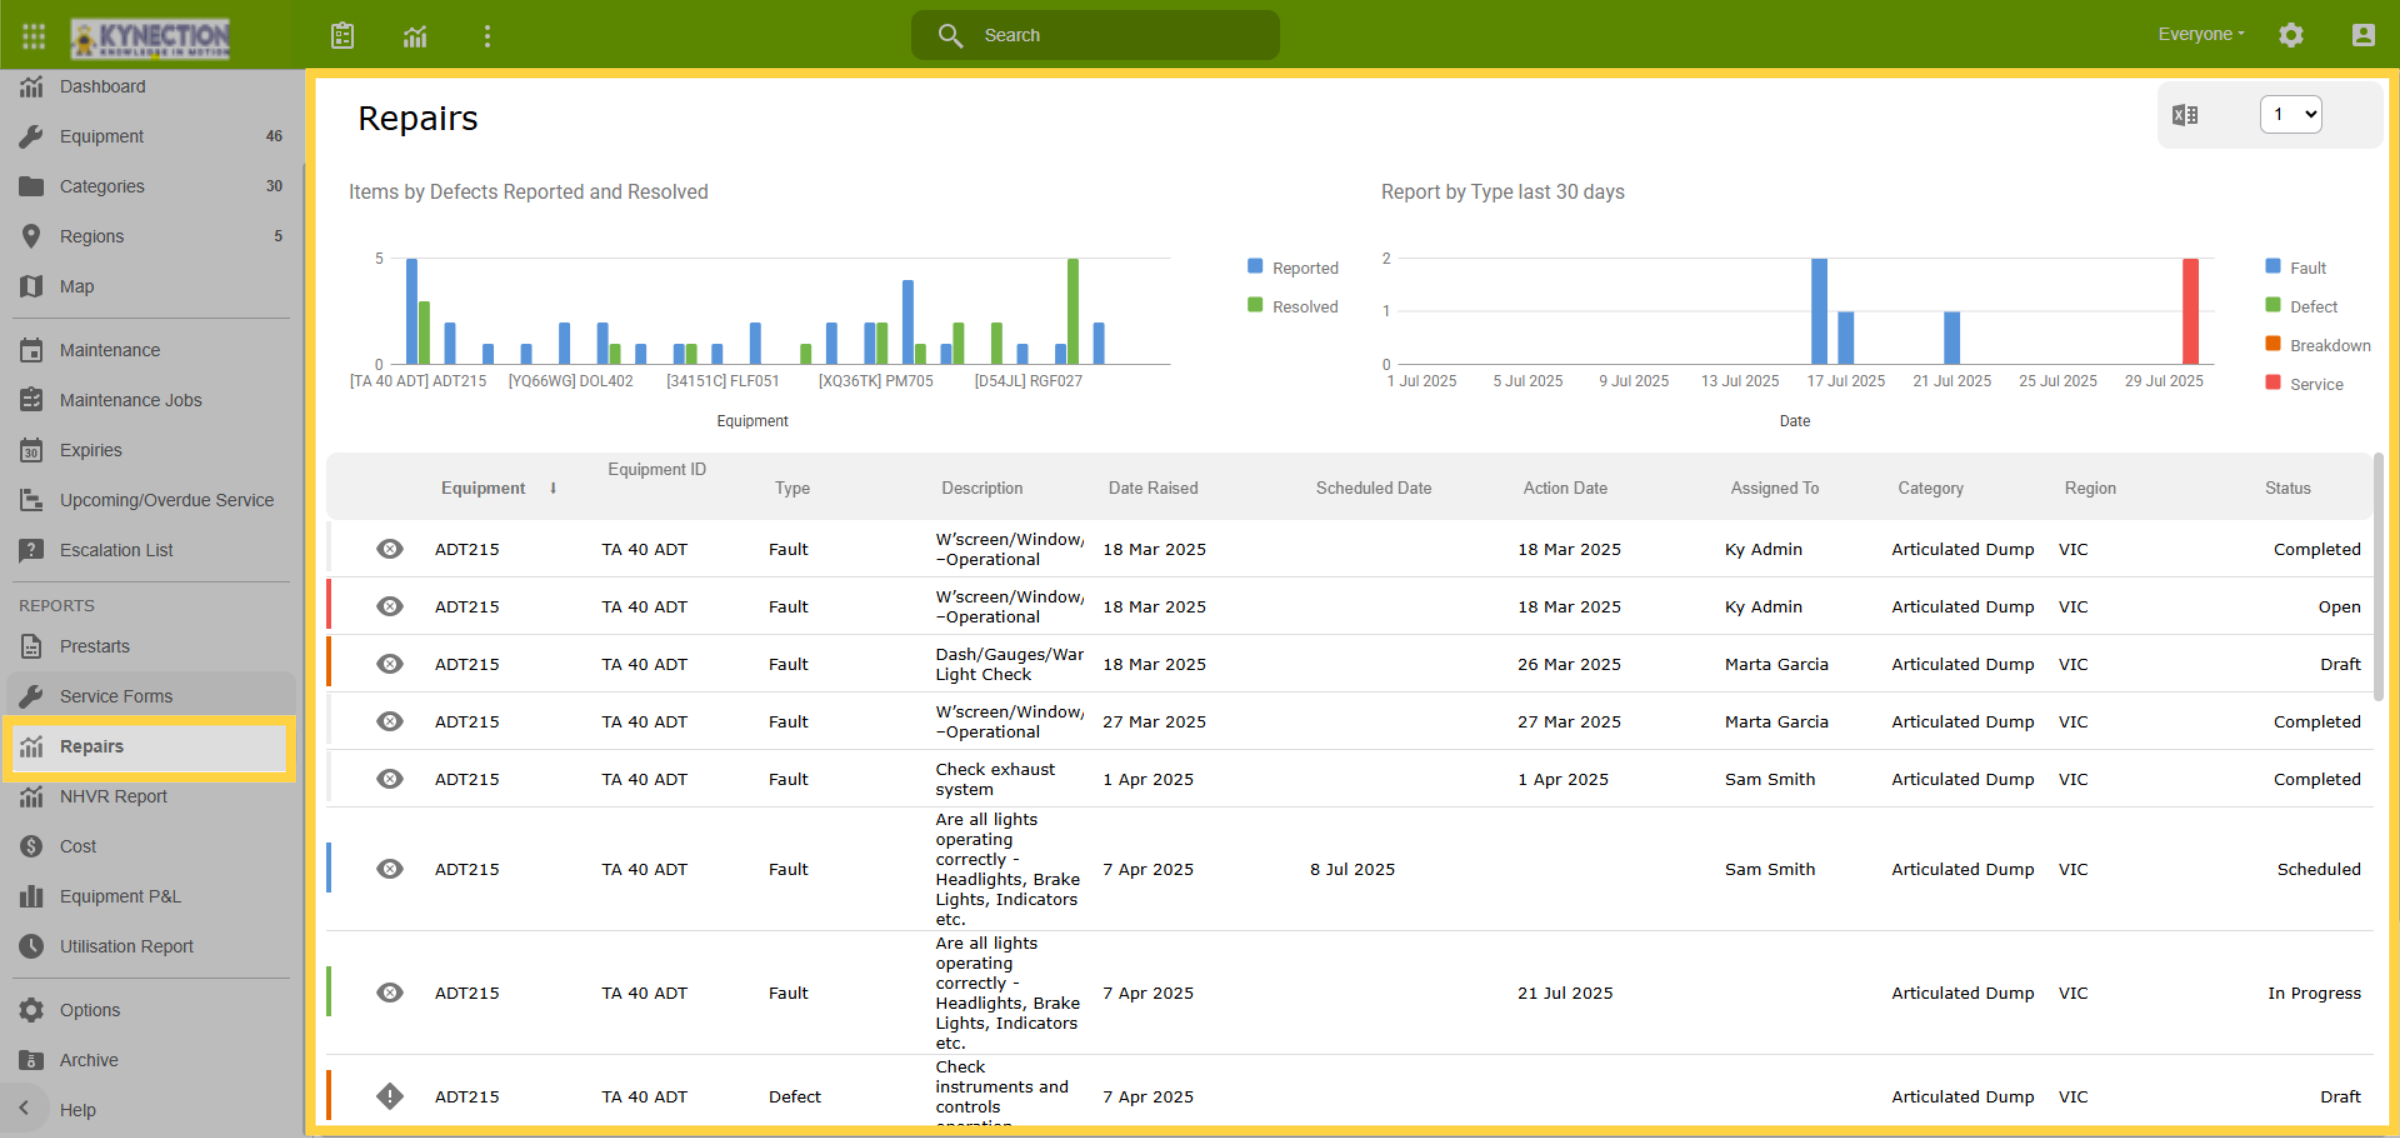
44. Repairs
Additionally, there's a shortcut for easy access to all your repairs displayed. Featuring reporting graphs for enhanced visualisation. Click the equipment to initiate the job.
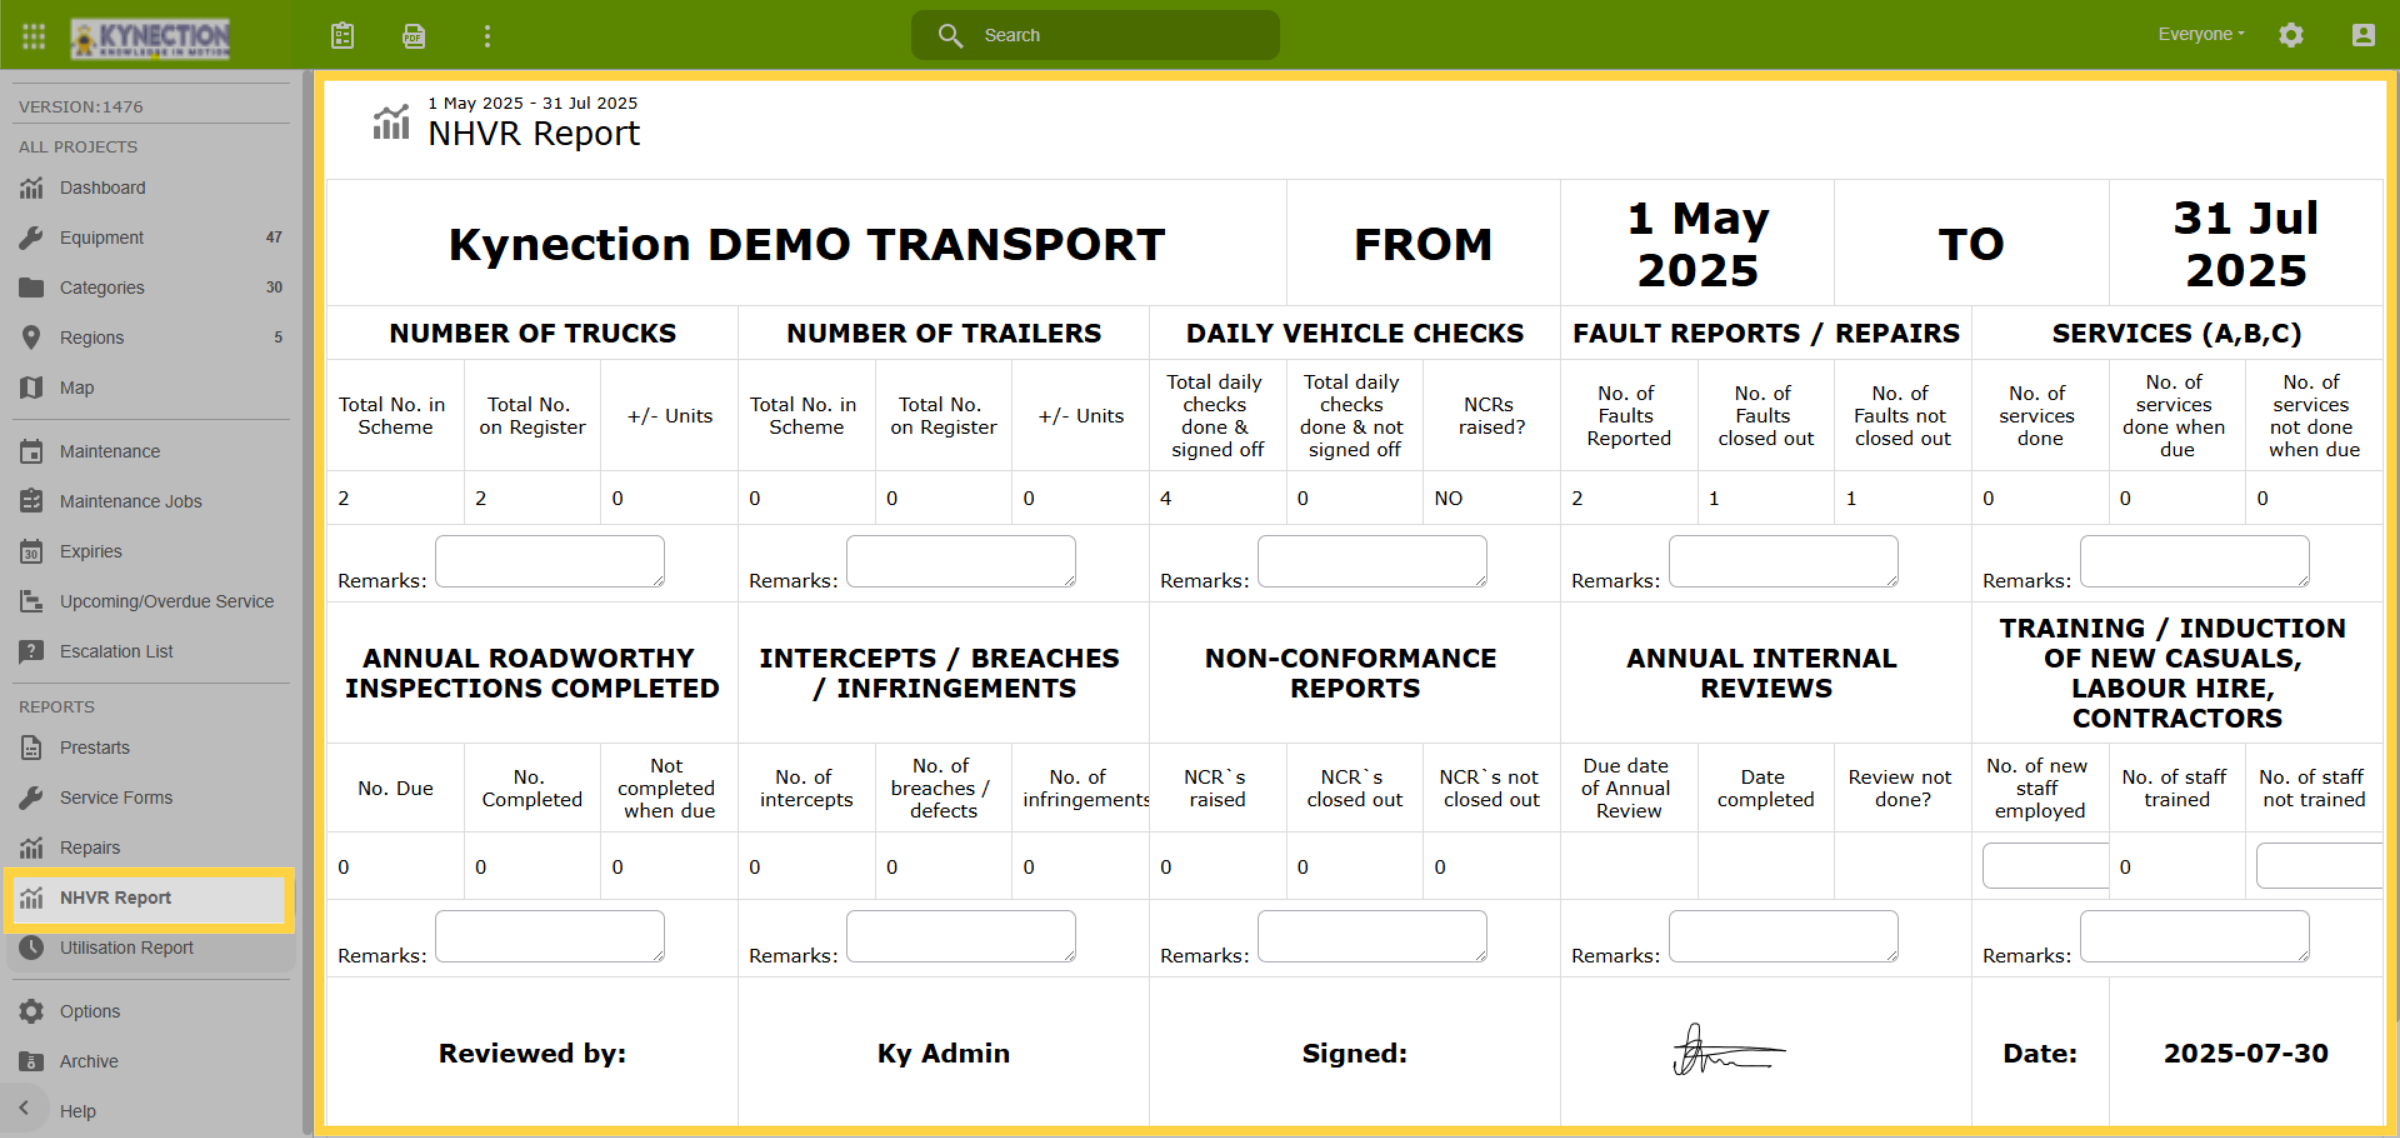
45. NHVR Report
Generate the NHVR report to maintain compliance and monitor vehicle performance, critical for operational integrity.
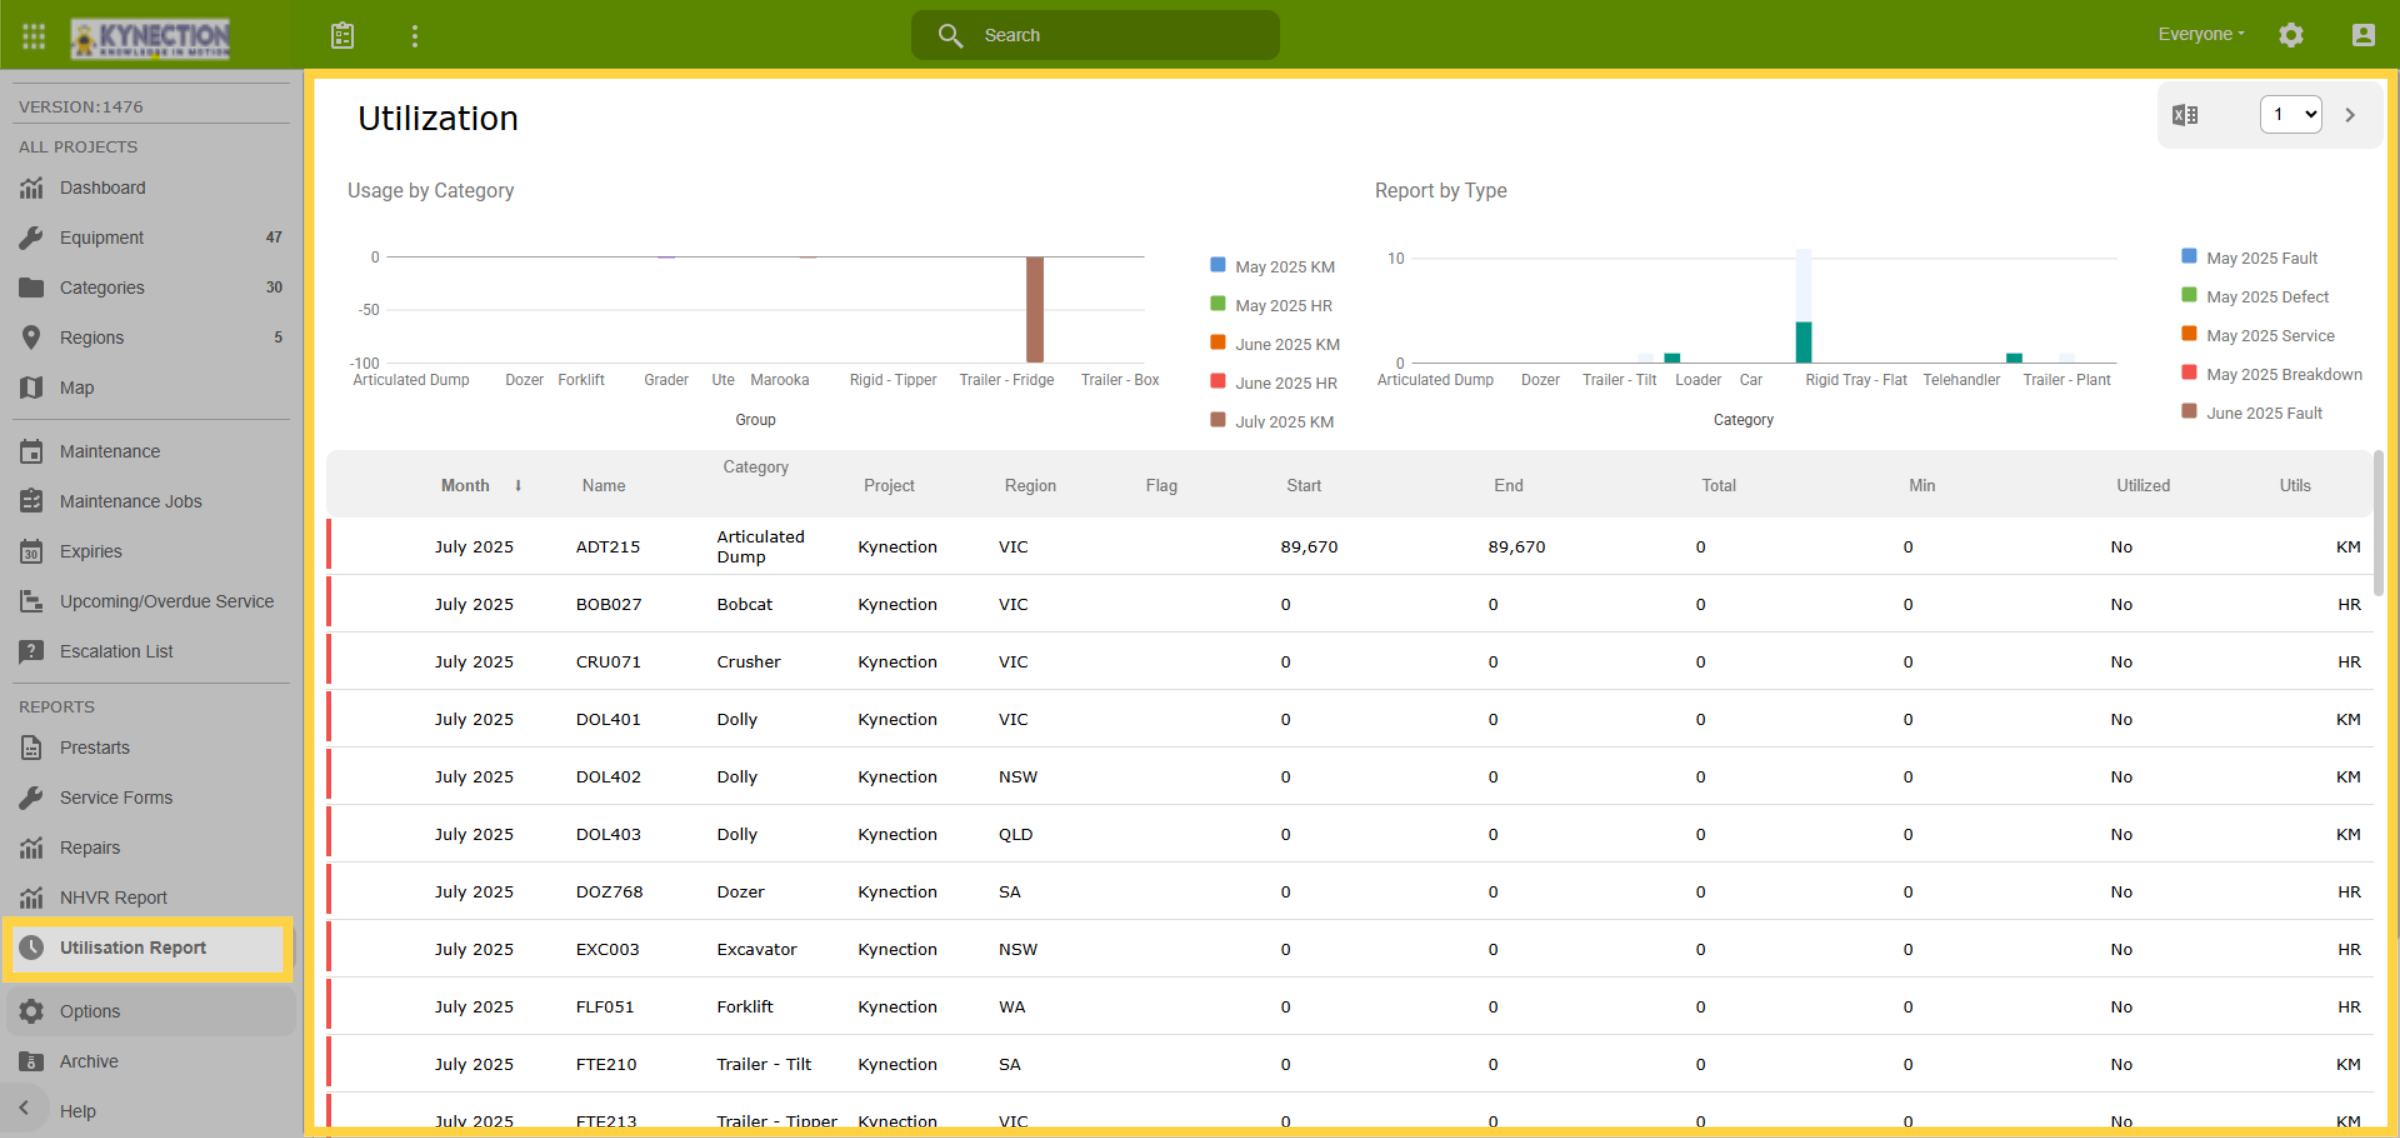
46. Utilisation Report
Create a utilisation report to analyse equipment usage patterns, supporting data-driven decisions.
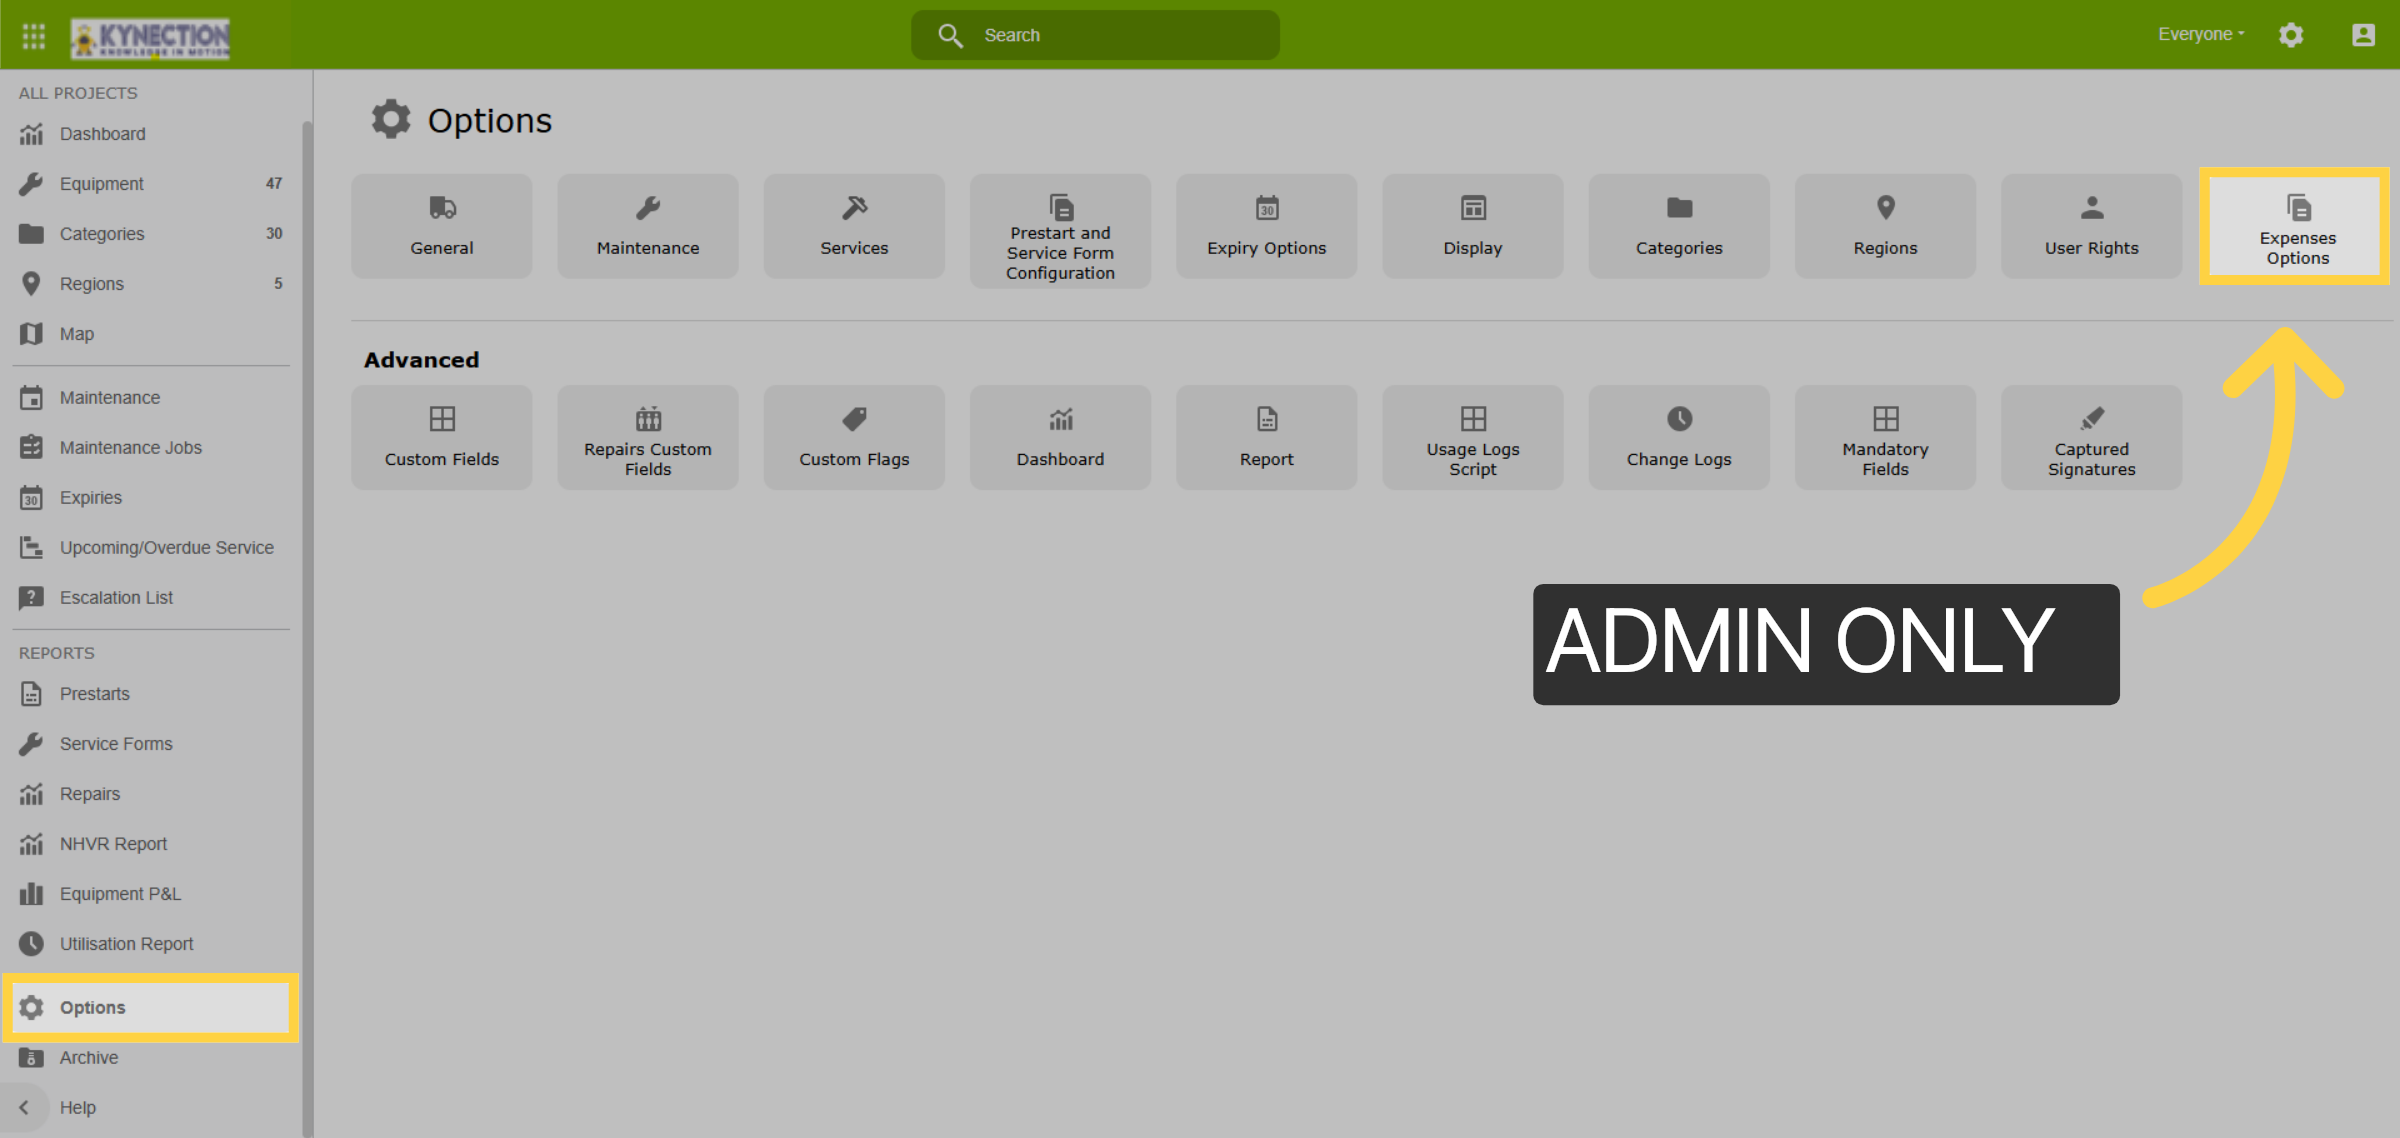
47. Recurring Expenses
The following items relating to expenses and adding services are strictly admin only tasks. Expenses can be added against equipment ensuring better financial management and oversight. To access recurring expenses, navigate to the Expense Options found within the Options menu.
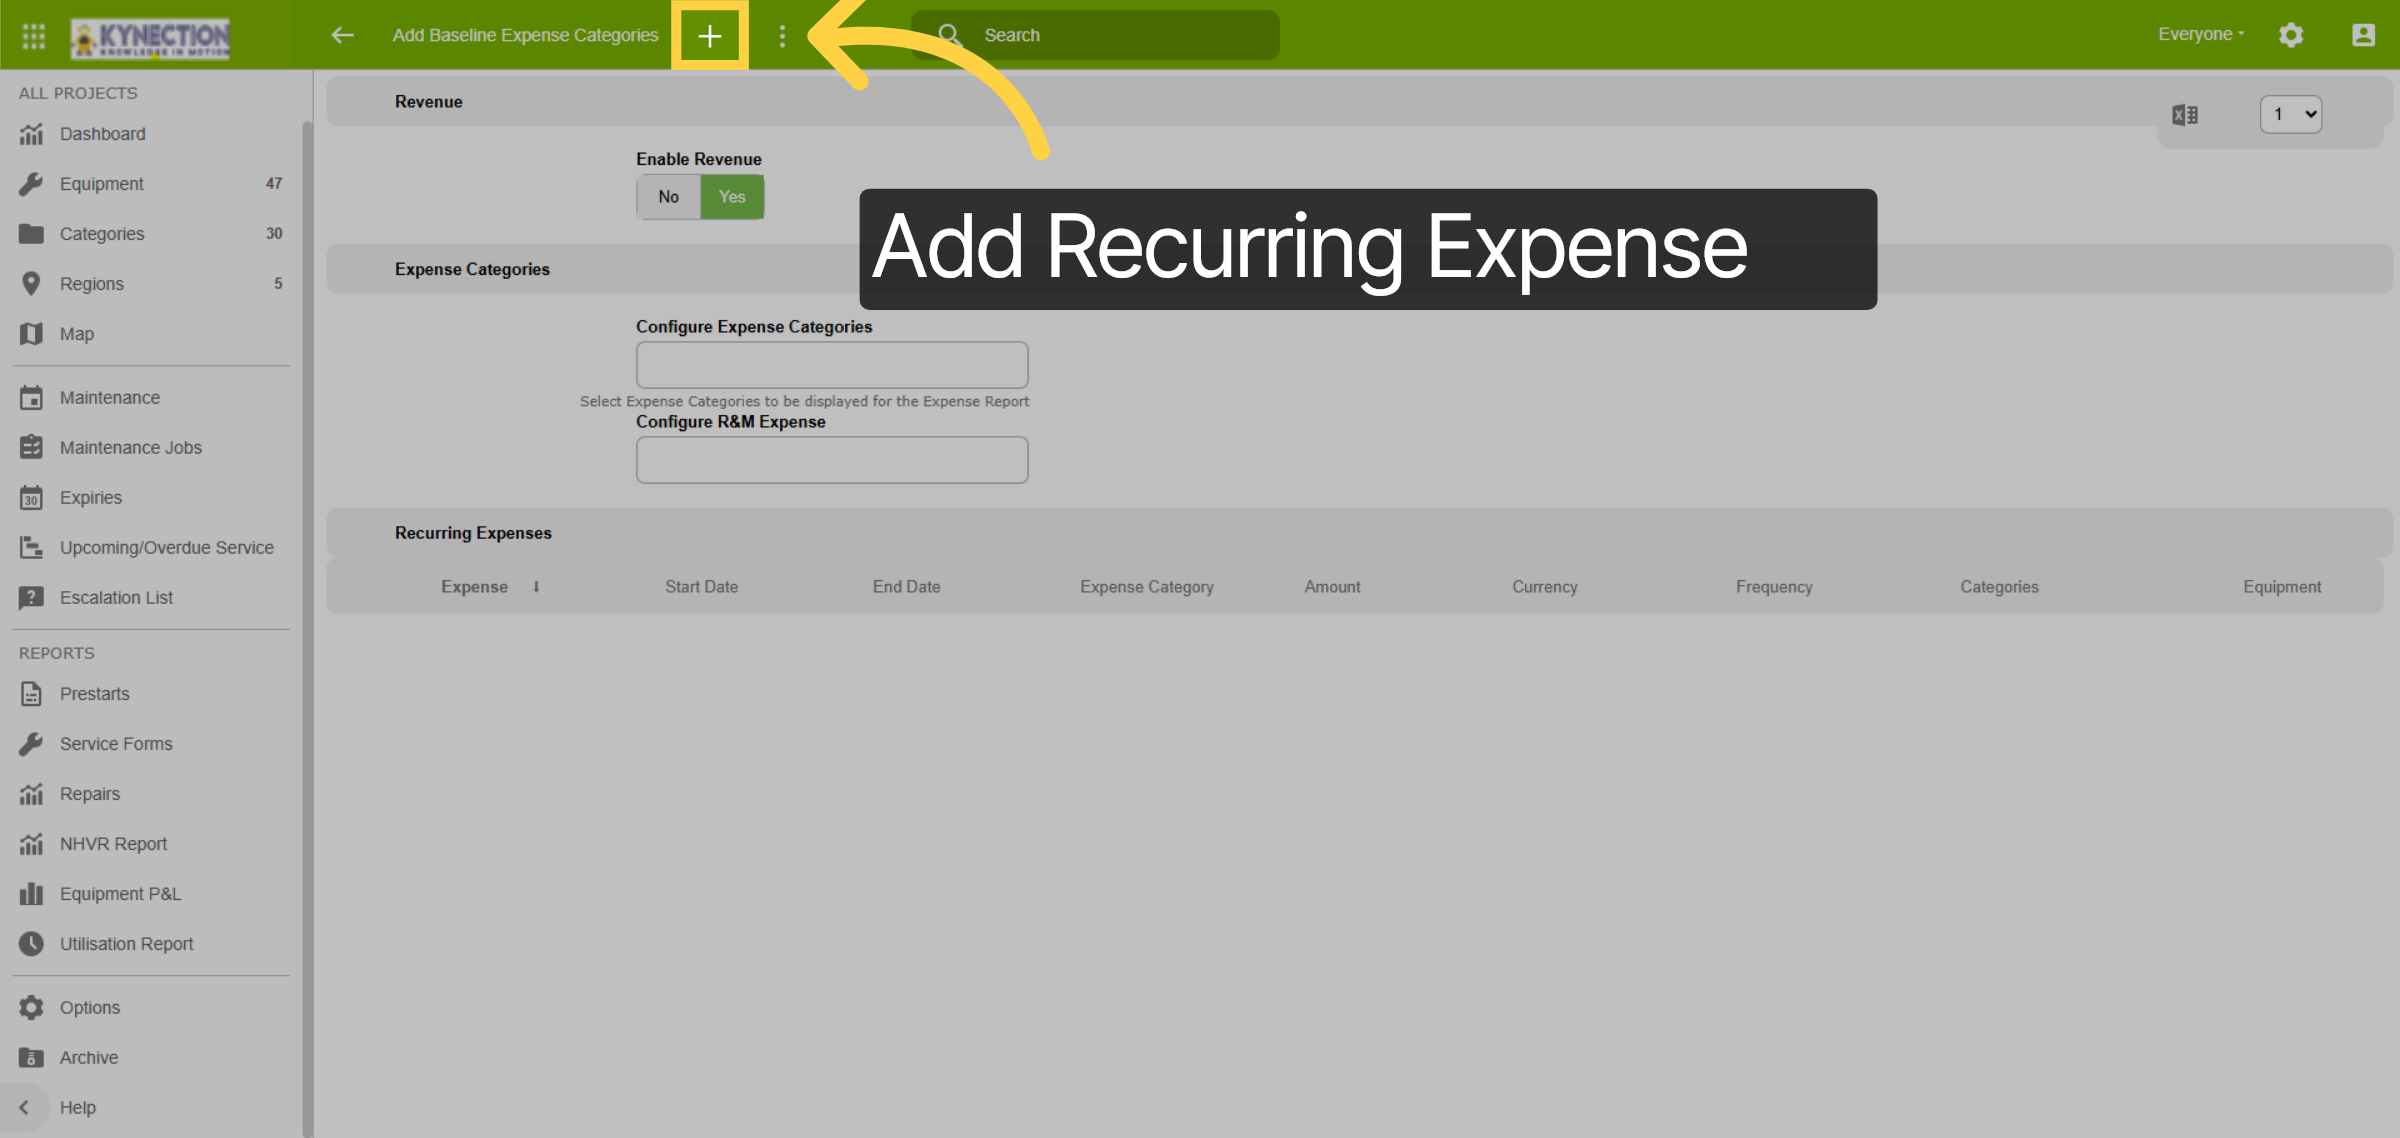
48. Add Recurring Expense
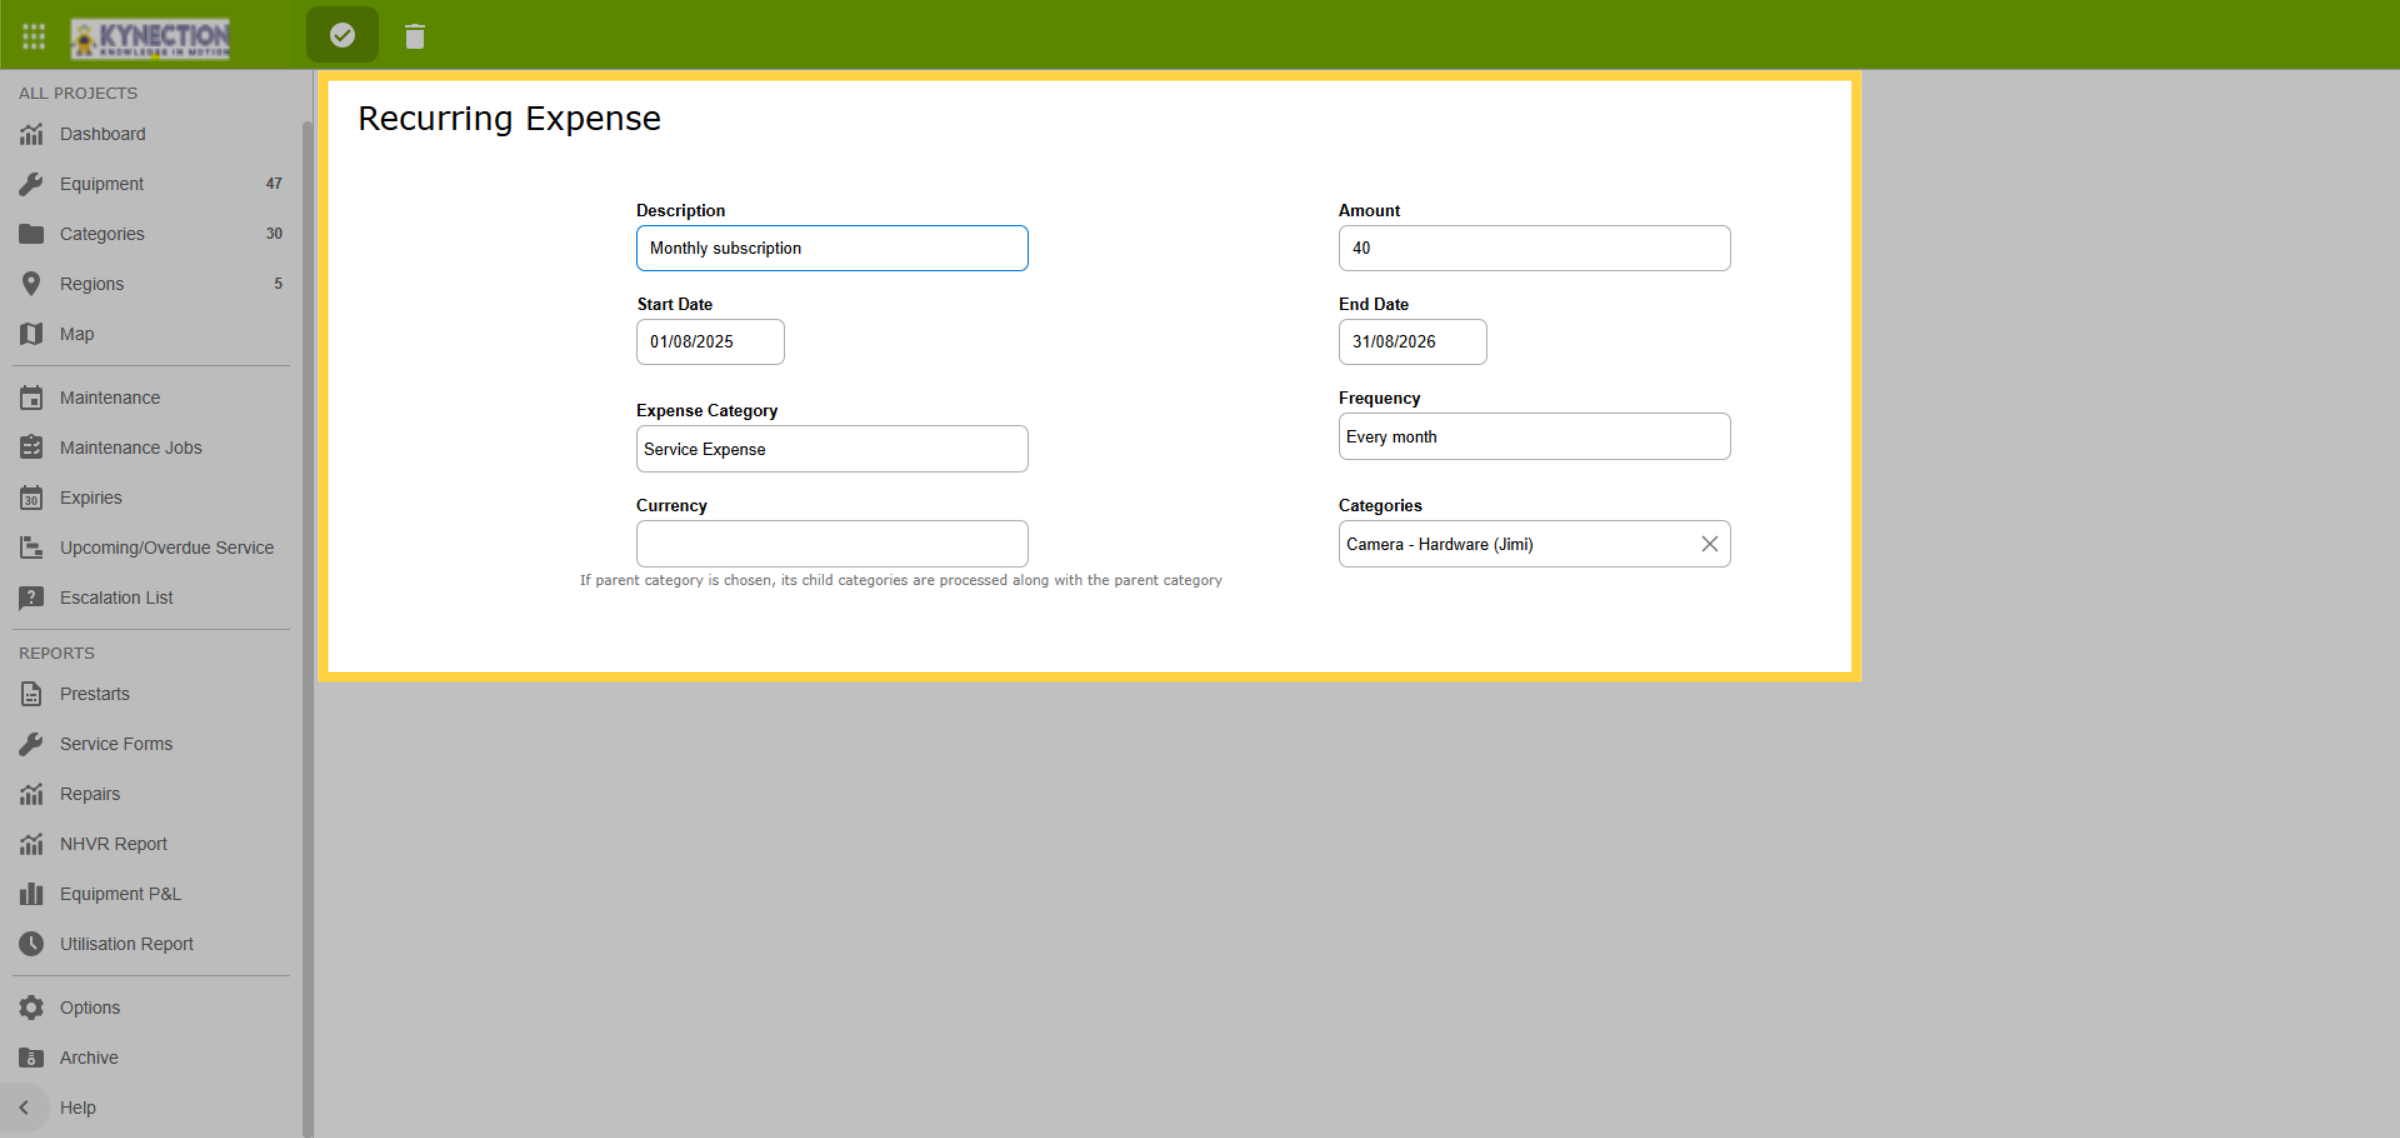
Use the plus icon in the top toolbar to add a new Recurring Expense. Note that if a parent category is chosen for a recurring expense, its child categories are processed along with the parent category.
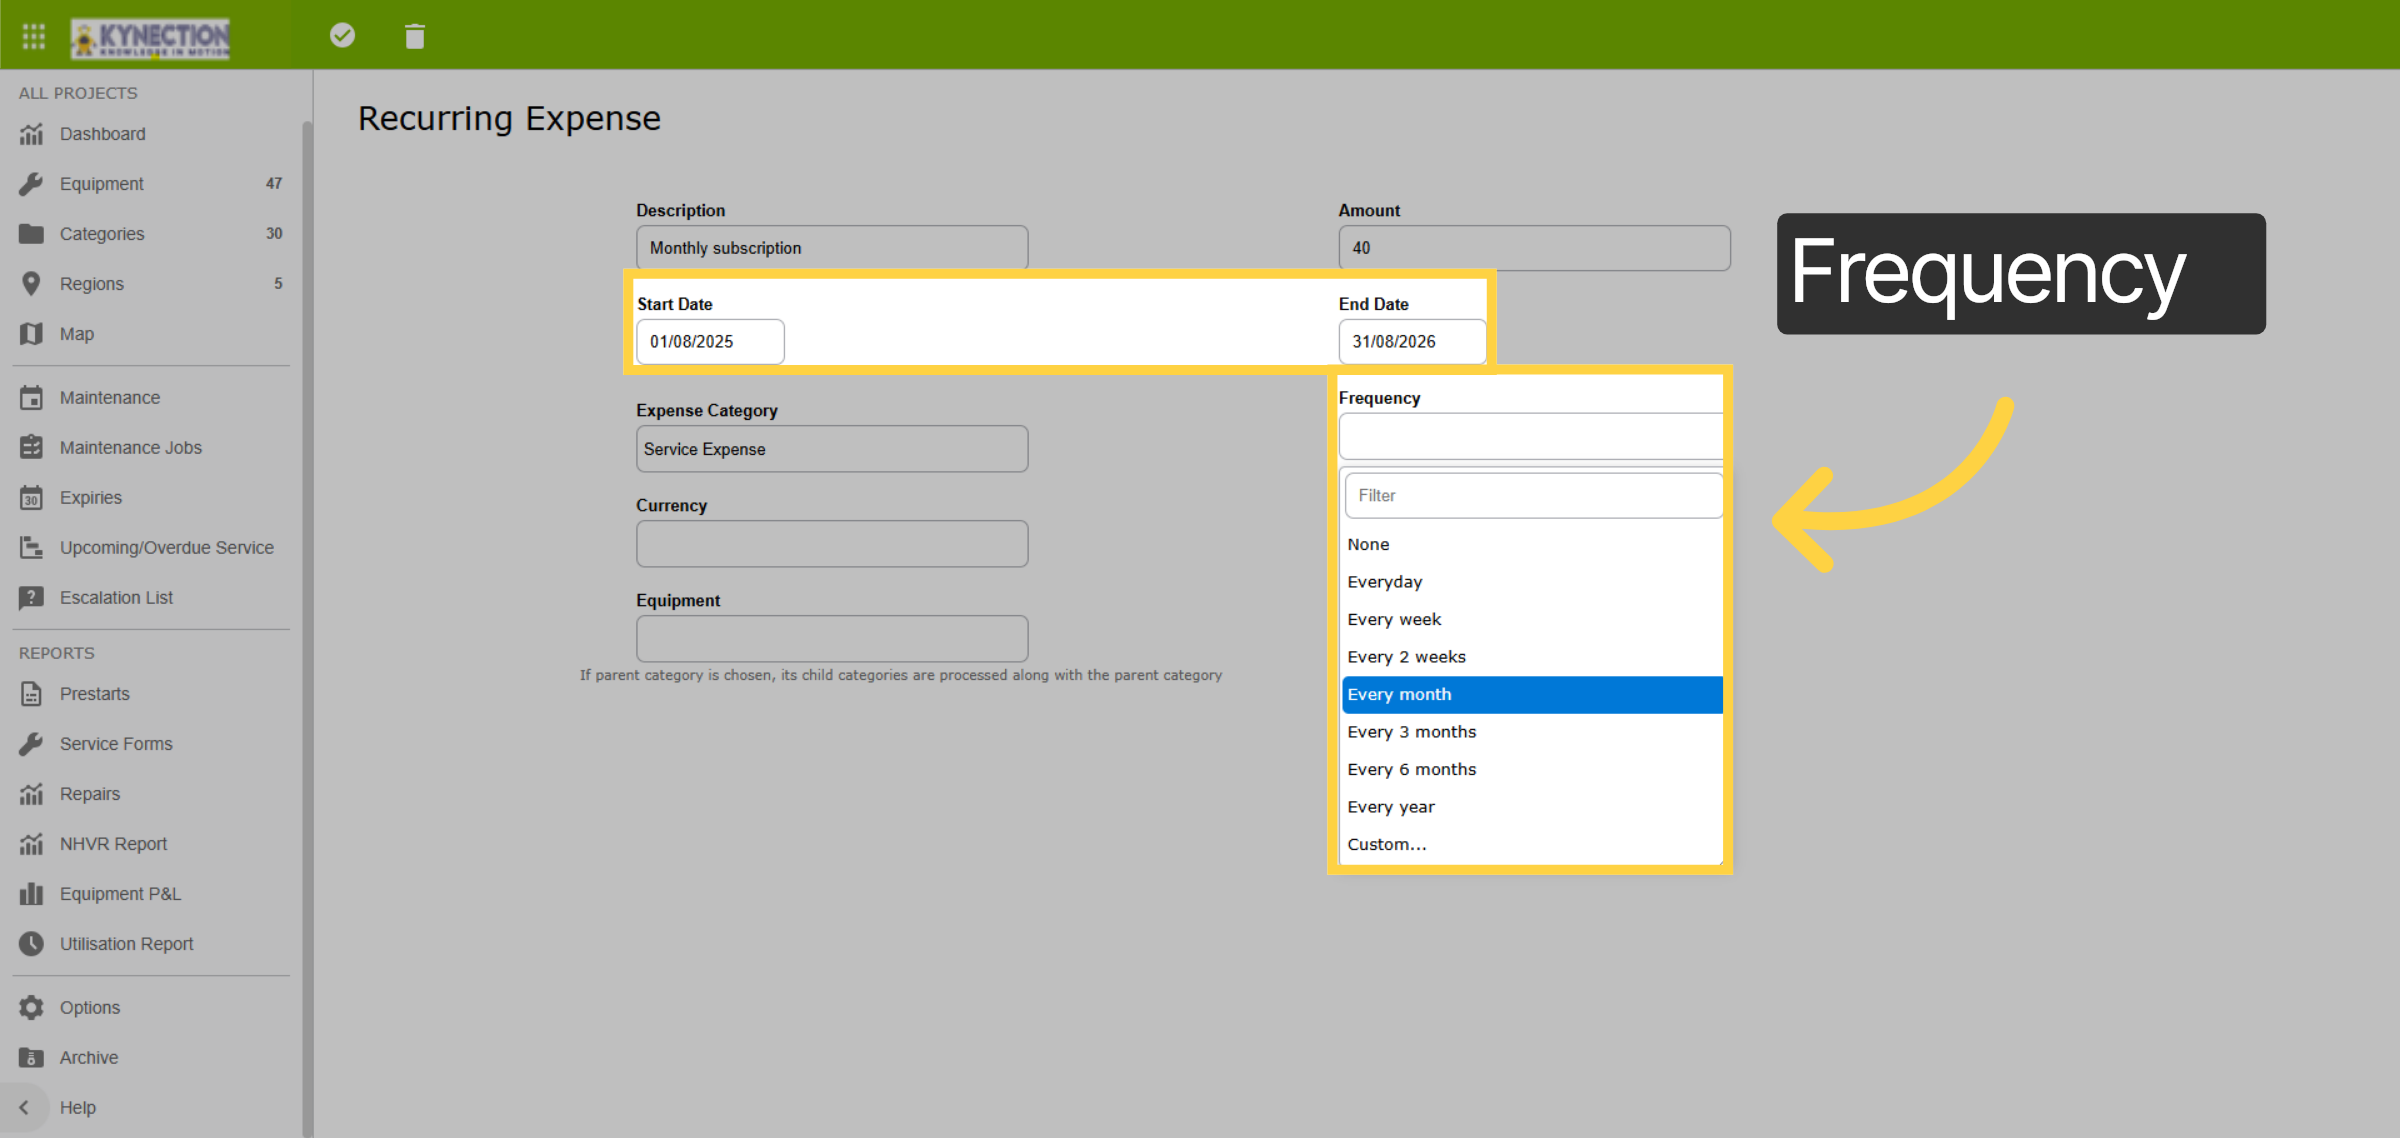
49. Frequency/Interval
The system generates an expense according to the configured frequency, drawing from the equipment or categories specified within the designated start and end periods. It's important to note that expenses are only created during this specified timeframe.
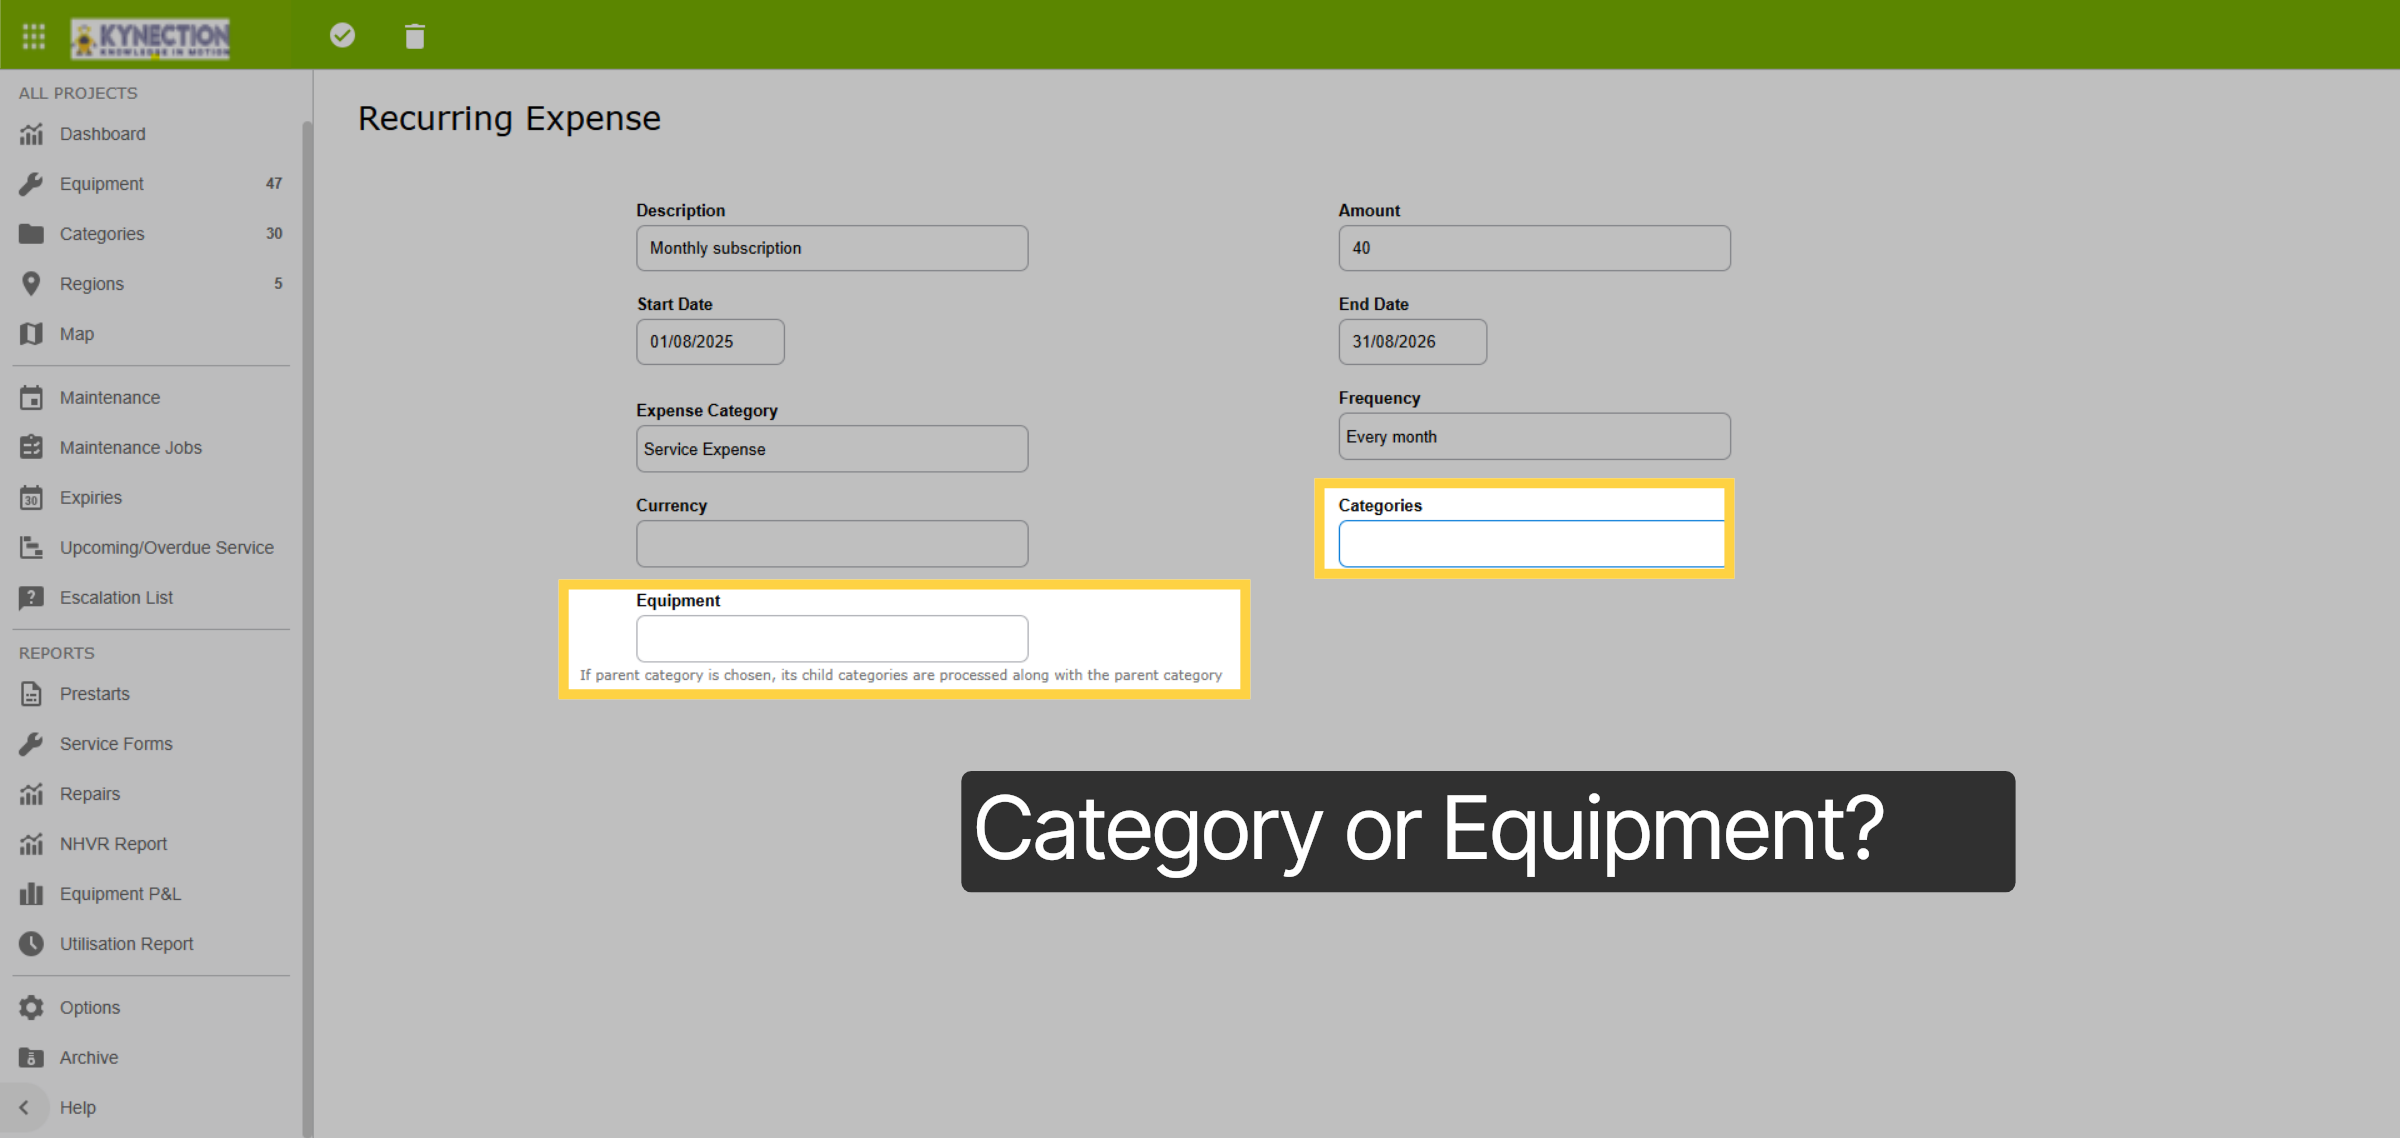
50. Category or Equipment?
Recurring Expenses can be configured against either Categories or specific Equipment. If the main Categories are selected, the expense will apply to child categories linked to them, removing the need to select multiple levels of Categories.
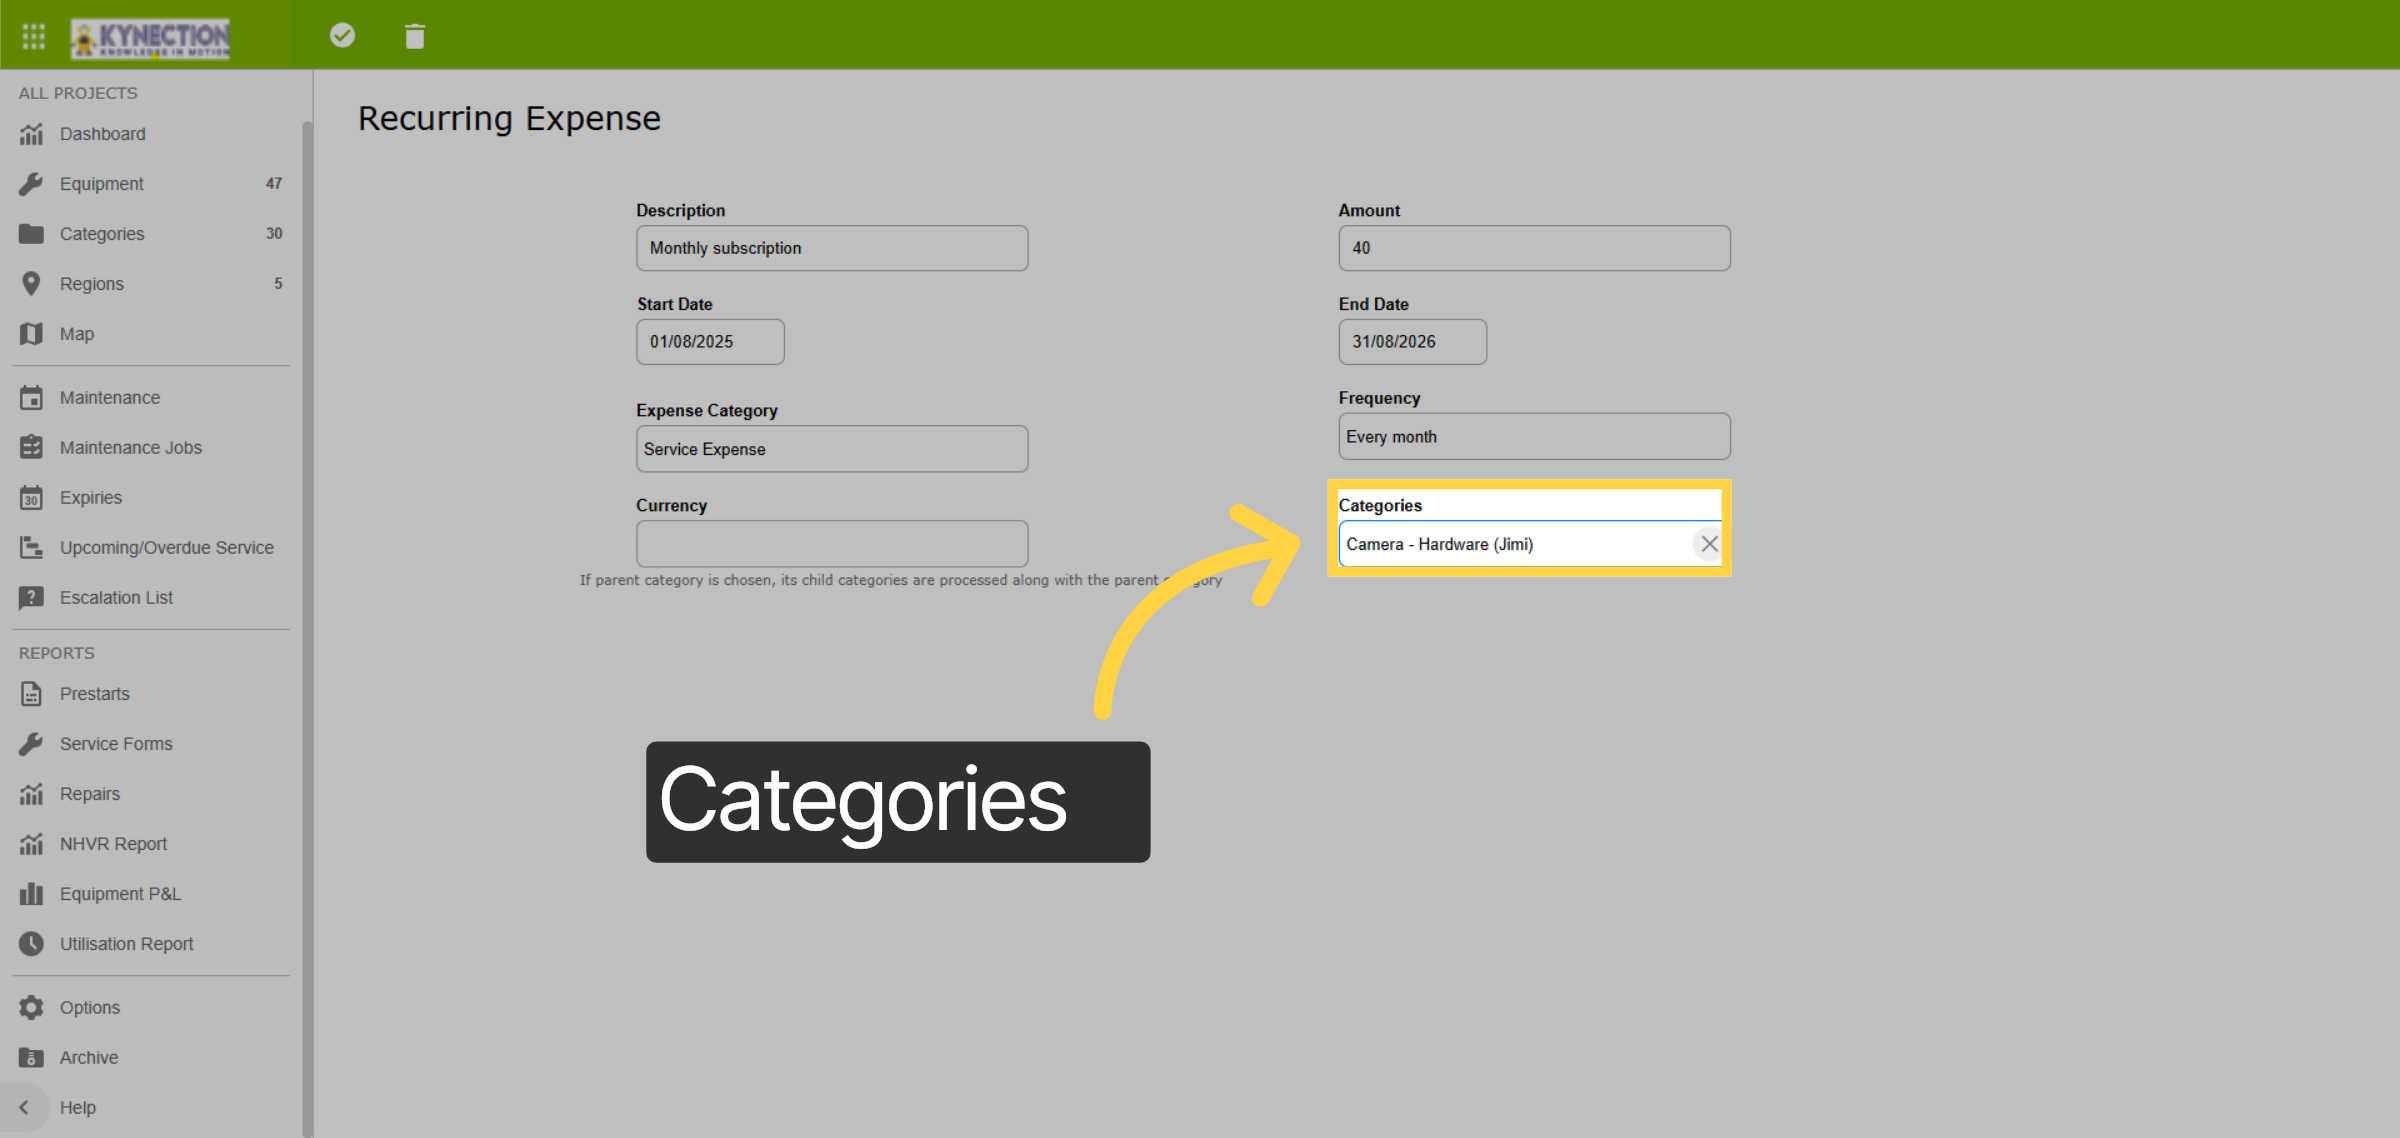
51. Categories
If the Categories field is chosen, the Equipment field is hidden. Similarly, if Equipment is chosen, Categories is hidden. Both fields return if the selection is removed.
52. Recurring Expense Template
According to the example shown on the screen, an expense will be generated for each Equipment in the selected Category or child categories. Based on the Start Date, an expense will be created for August for all Equipment per month until today's date or the End Date. If the End Date is not reached, the system will generate new expenses every month until the End Date is reached.
53. Enable Revenue
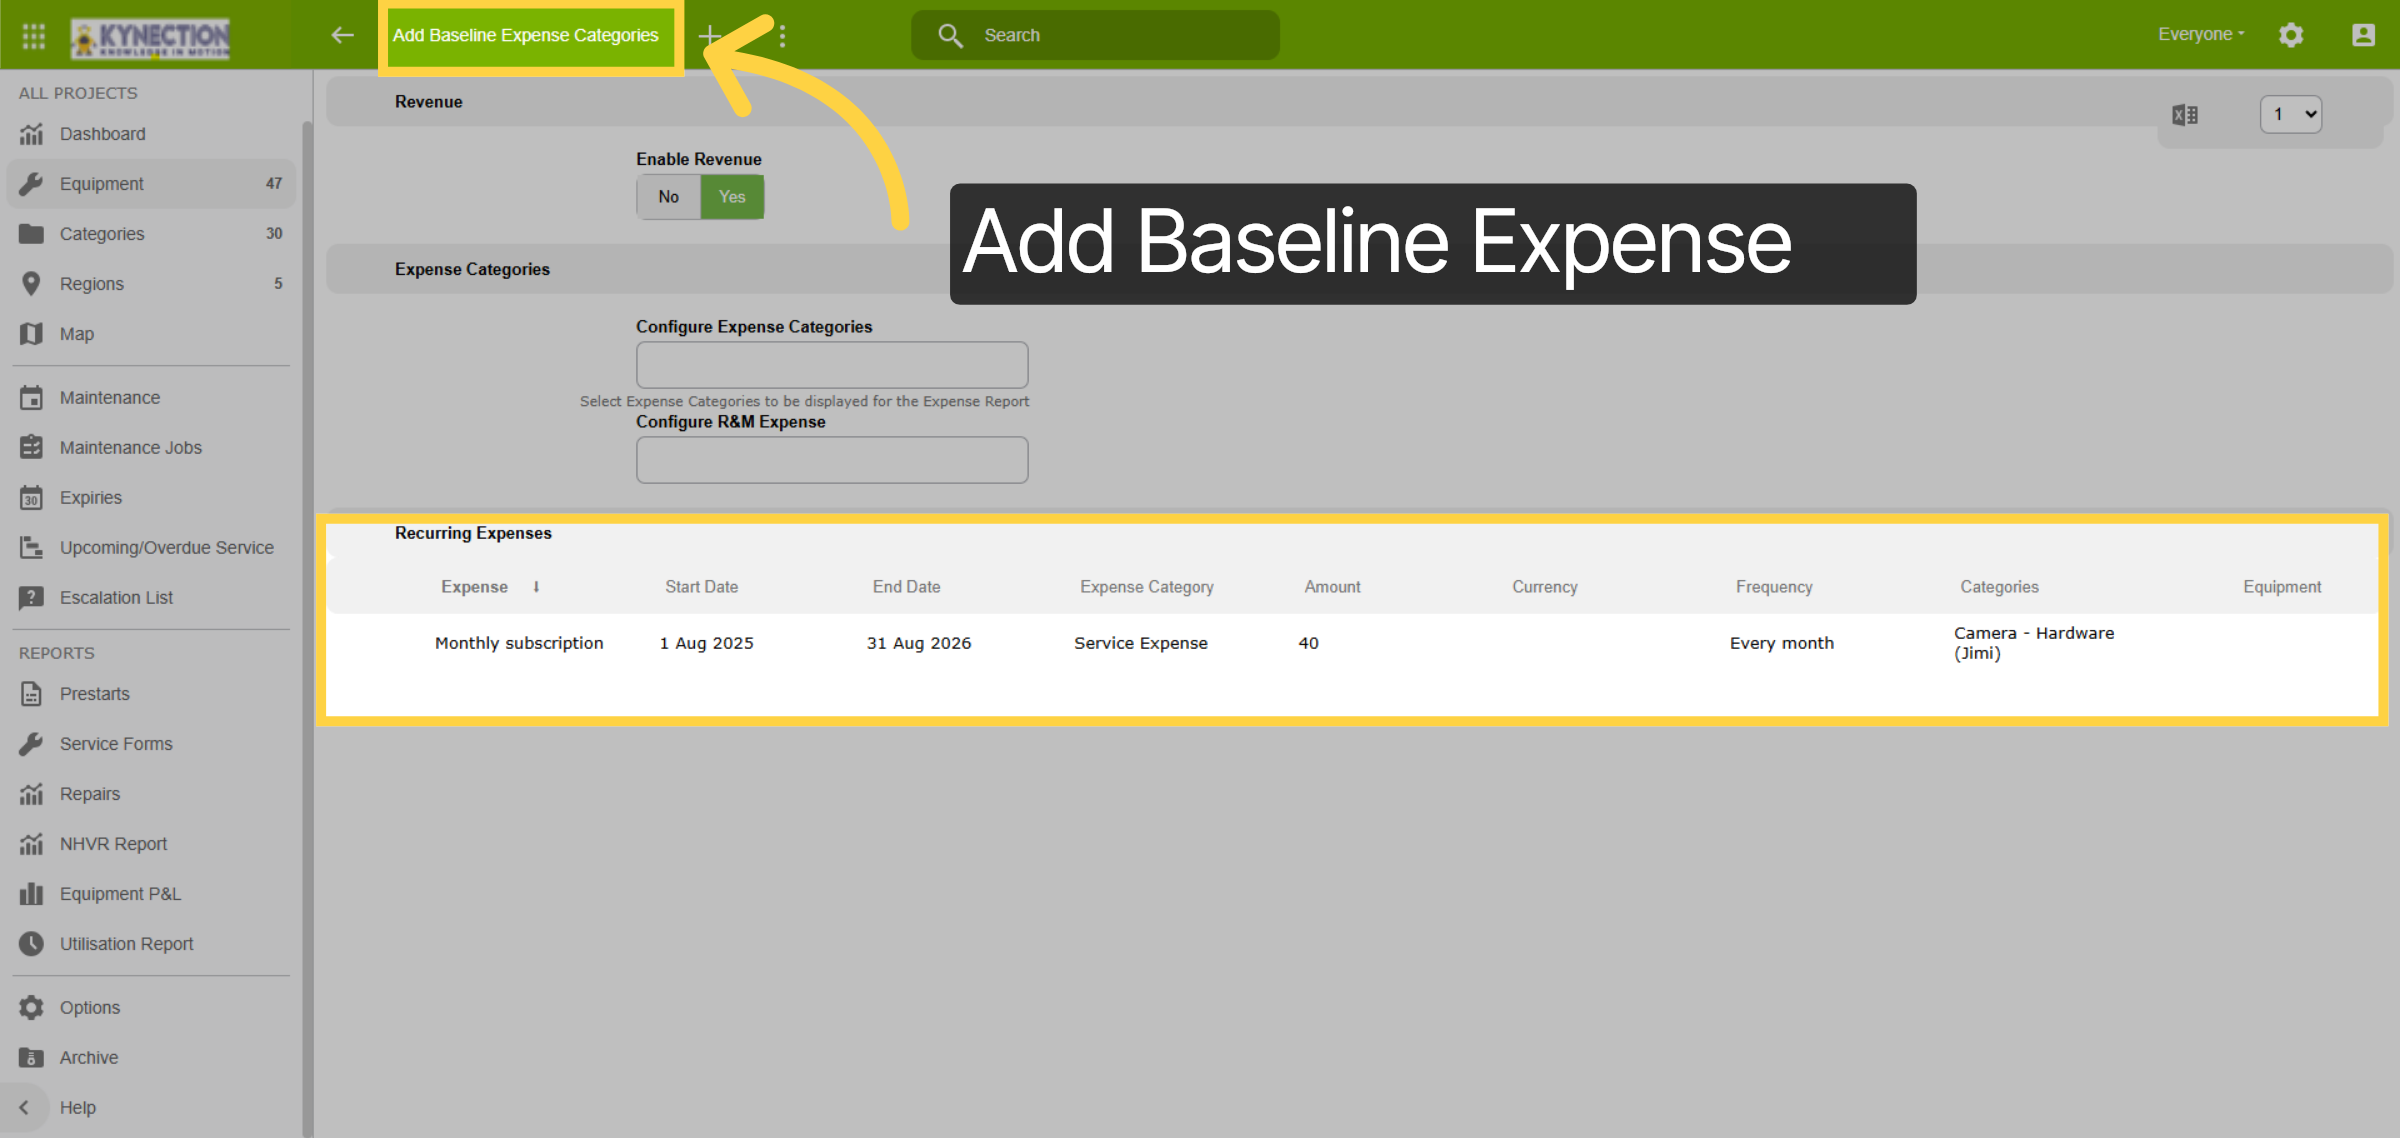
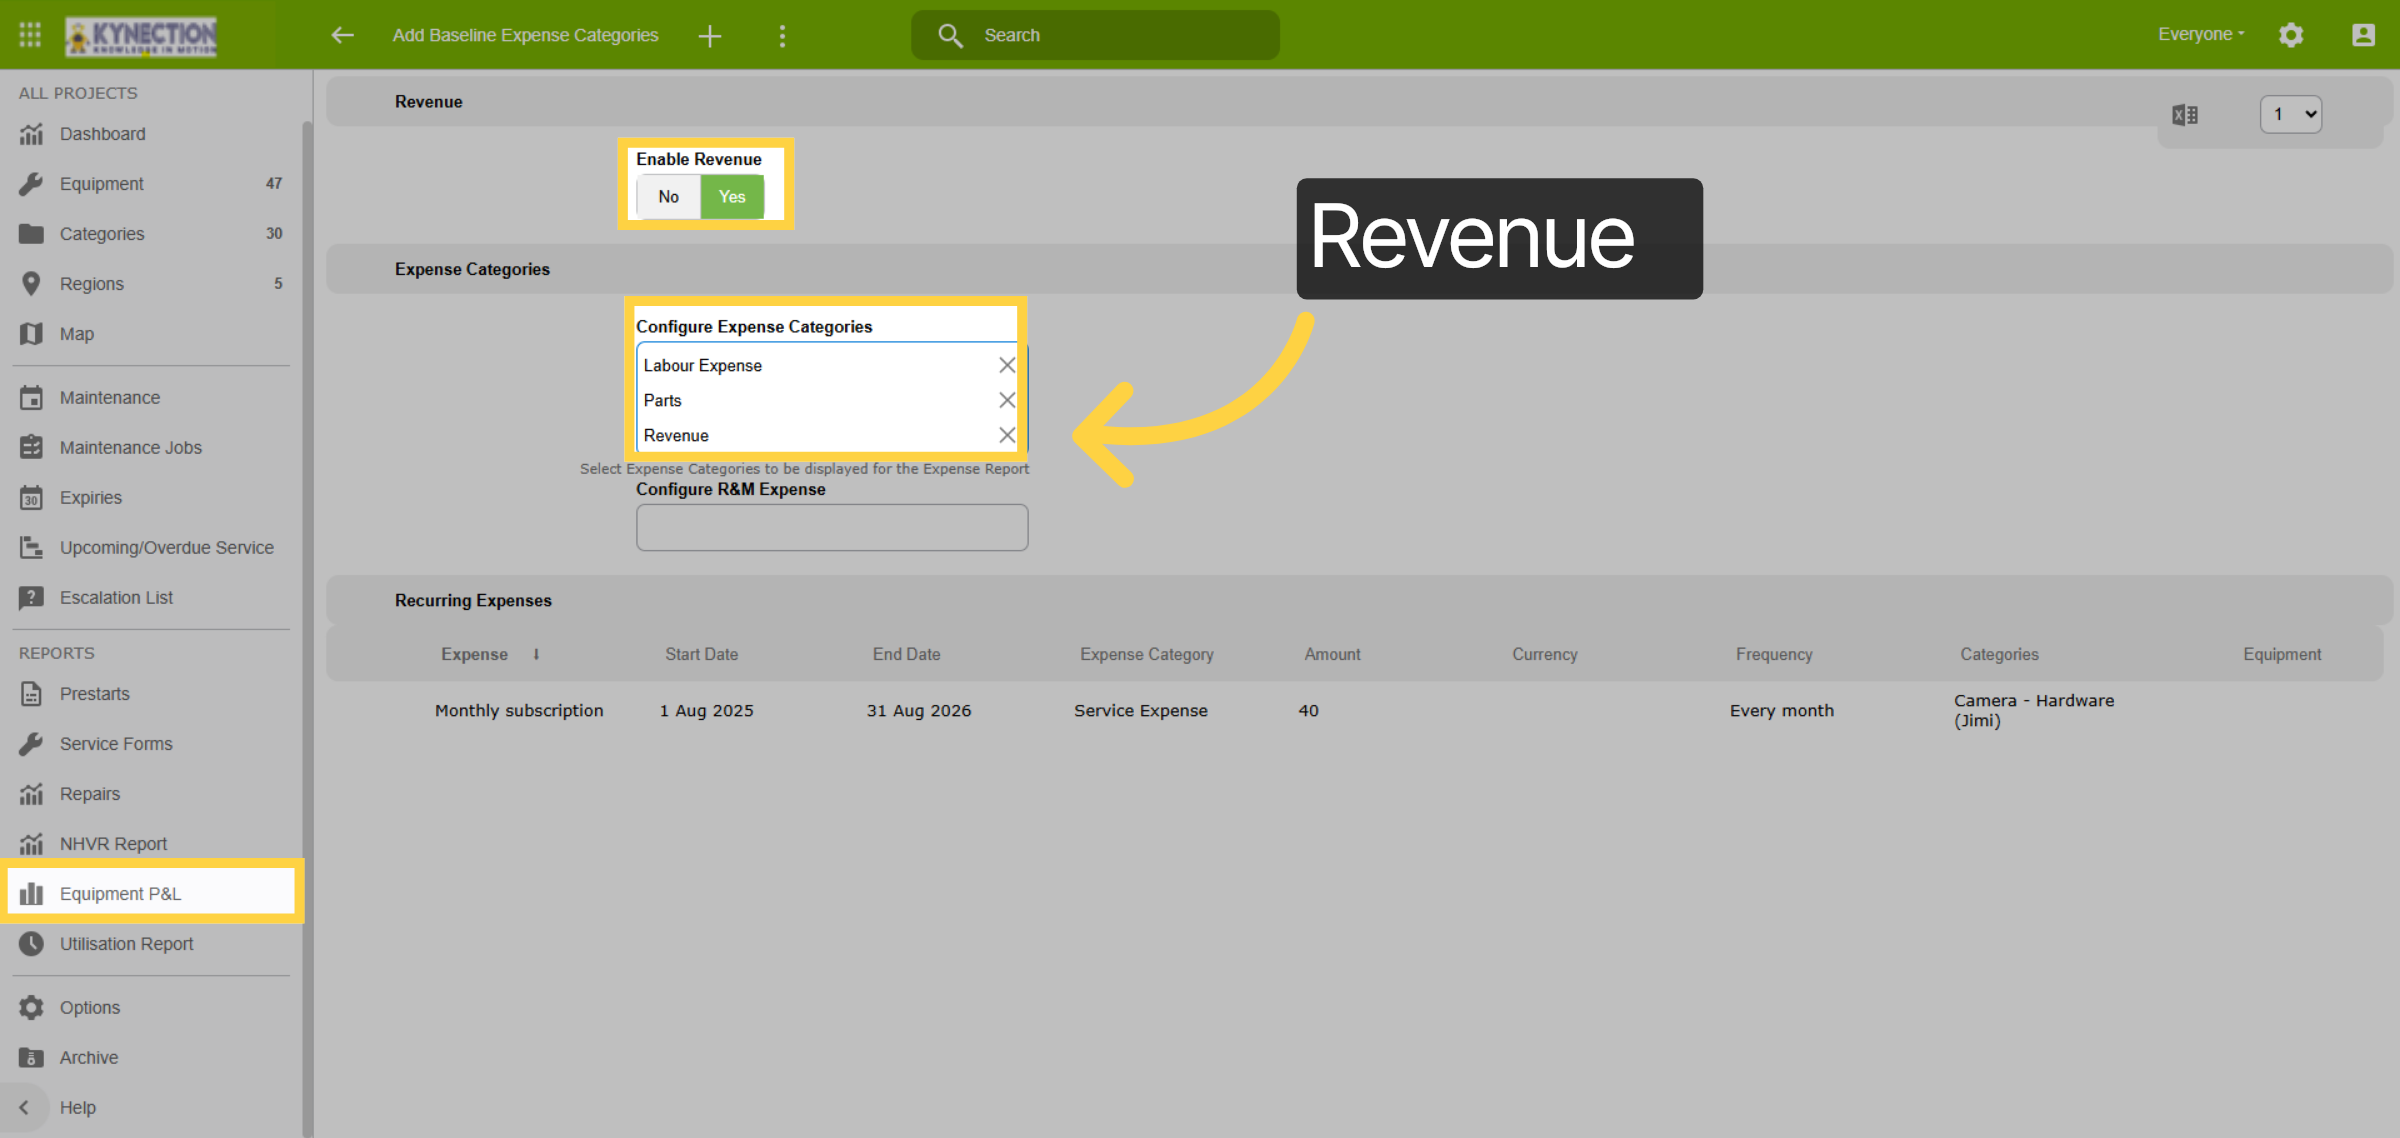
The new Recurring Expense appear under the Expense Options and the Equipment. Now let's configure revenue by selecting Add Baseline Expense Categories. Select yes to the confirmation pop-up box that appears.
54. Revenue Category
As a result, the Revenue Category is viewable in the Configure Expense Type combo box. This enables revenue to be chosen as an expense category.
55. Equipment P&L
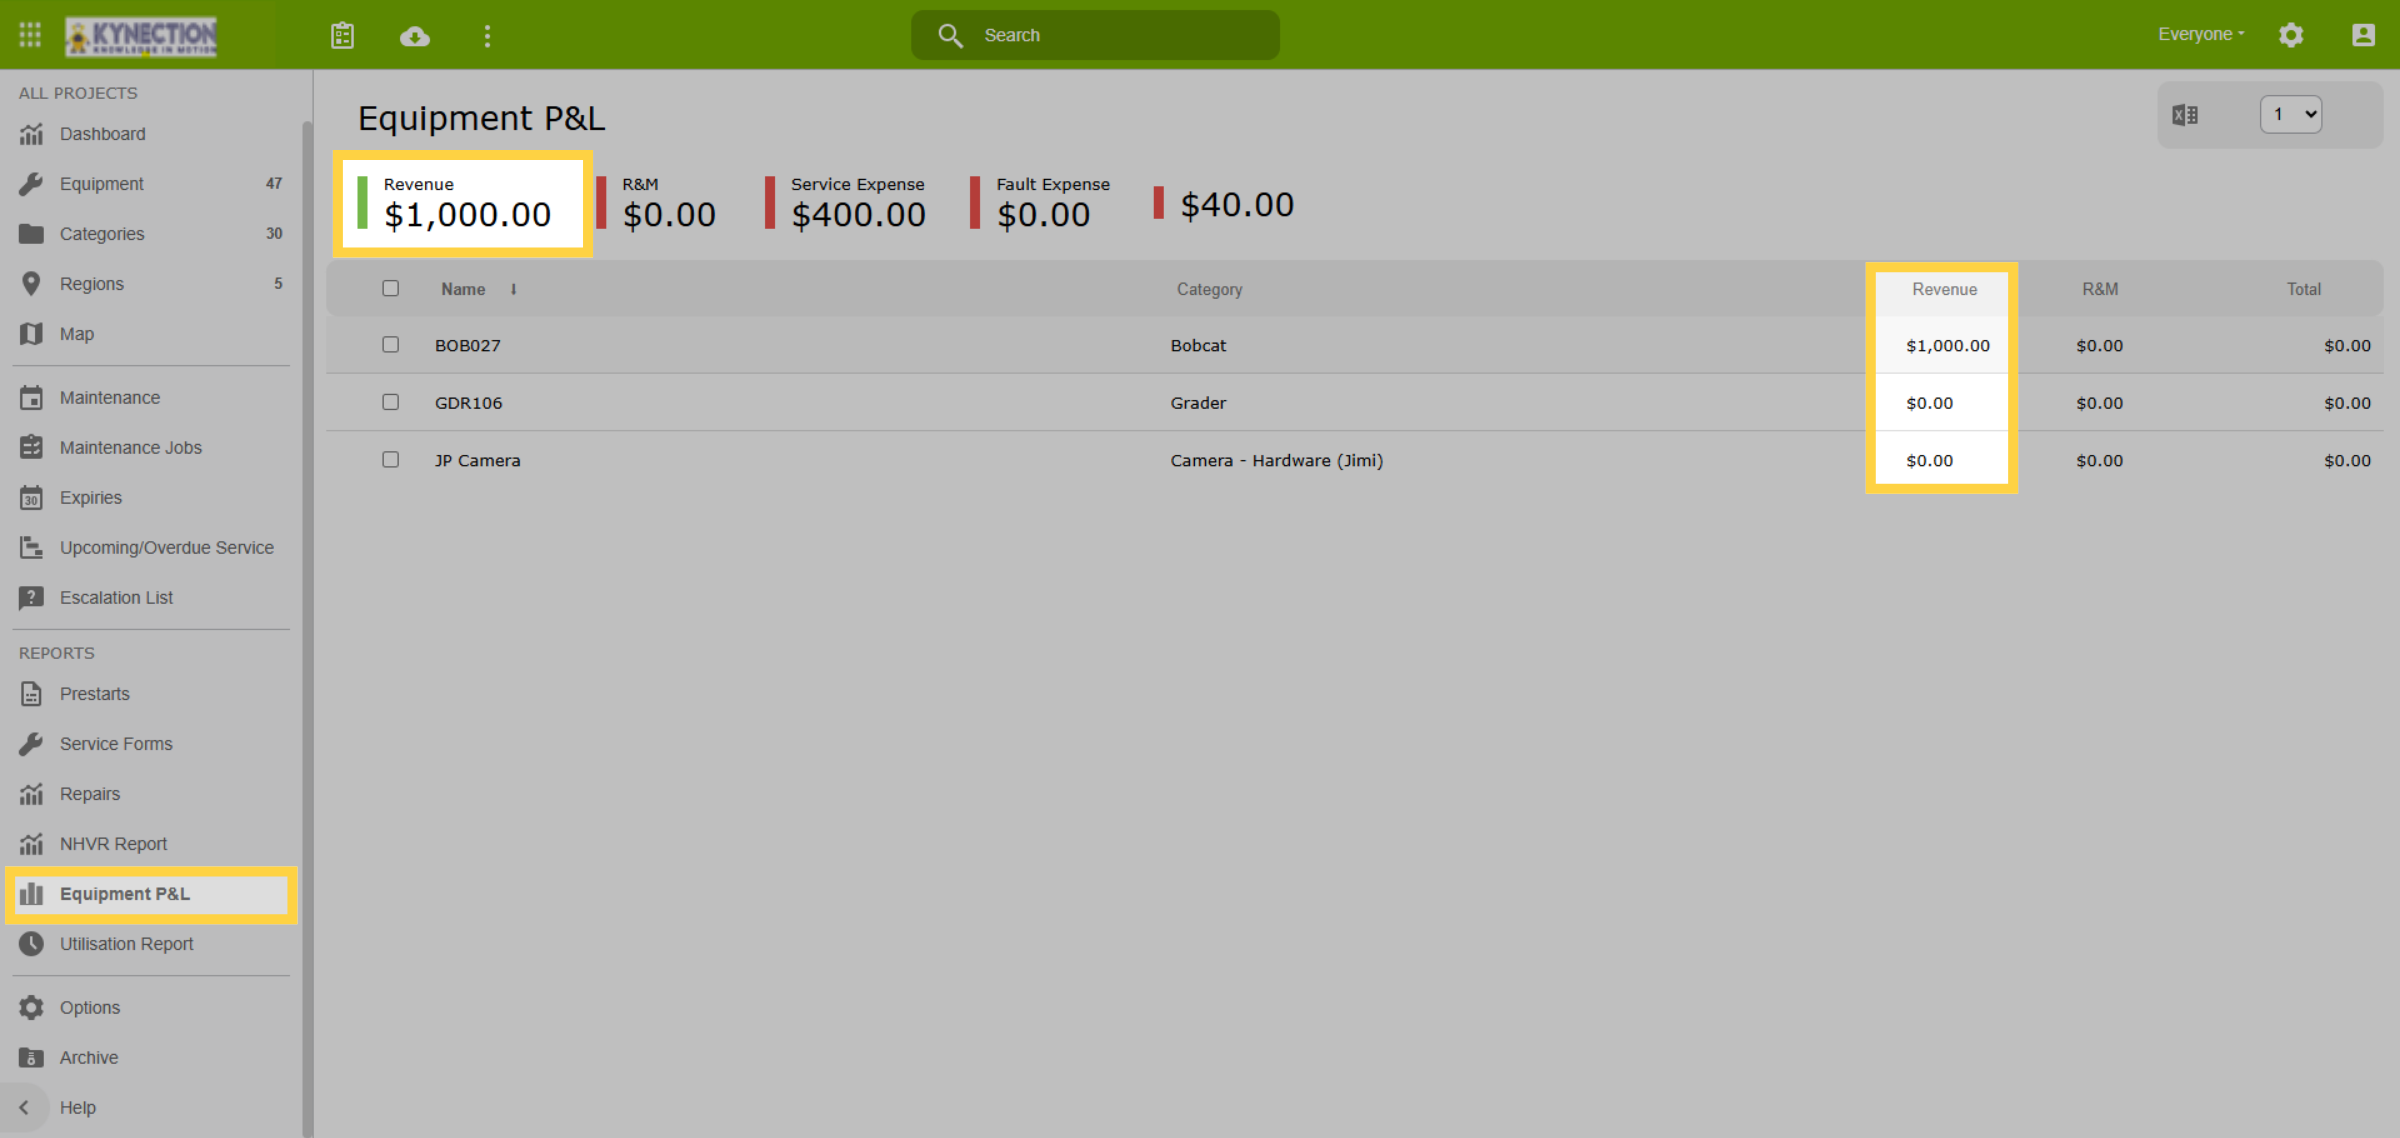
If the Revenue Amount is not entered, the Equipment P&L Total displays as the sum of all expenses per equipment. Now let's look at adding a service.
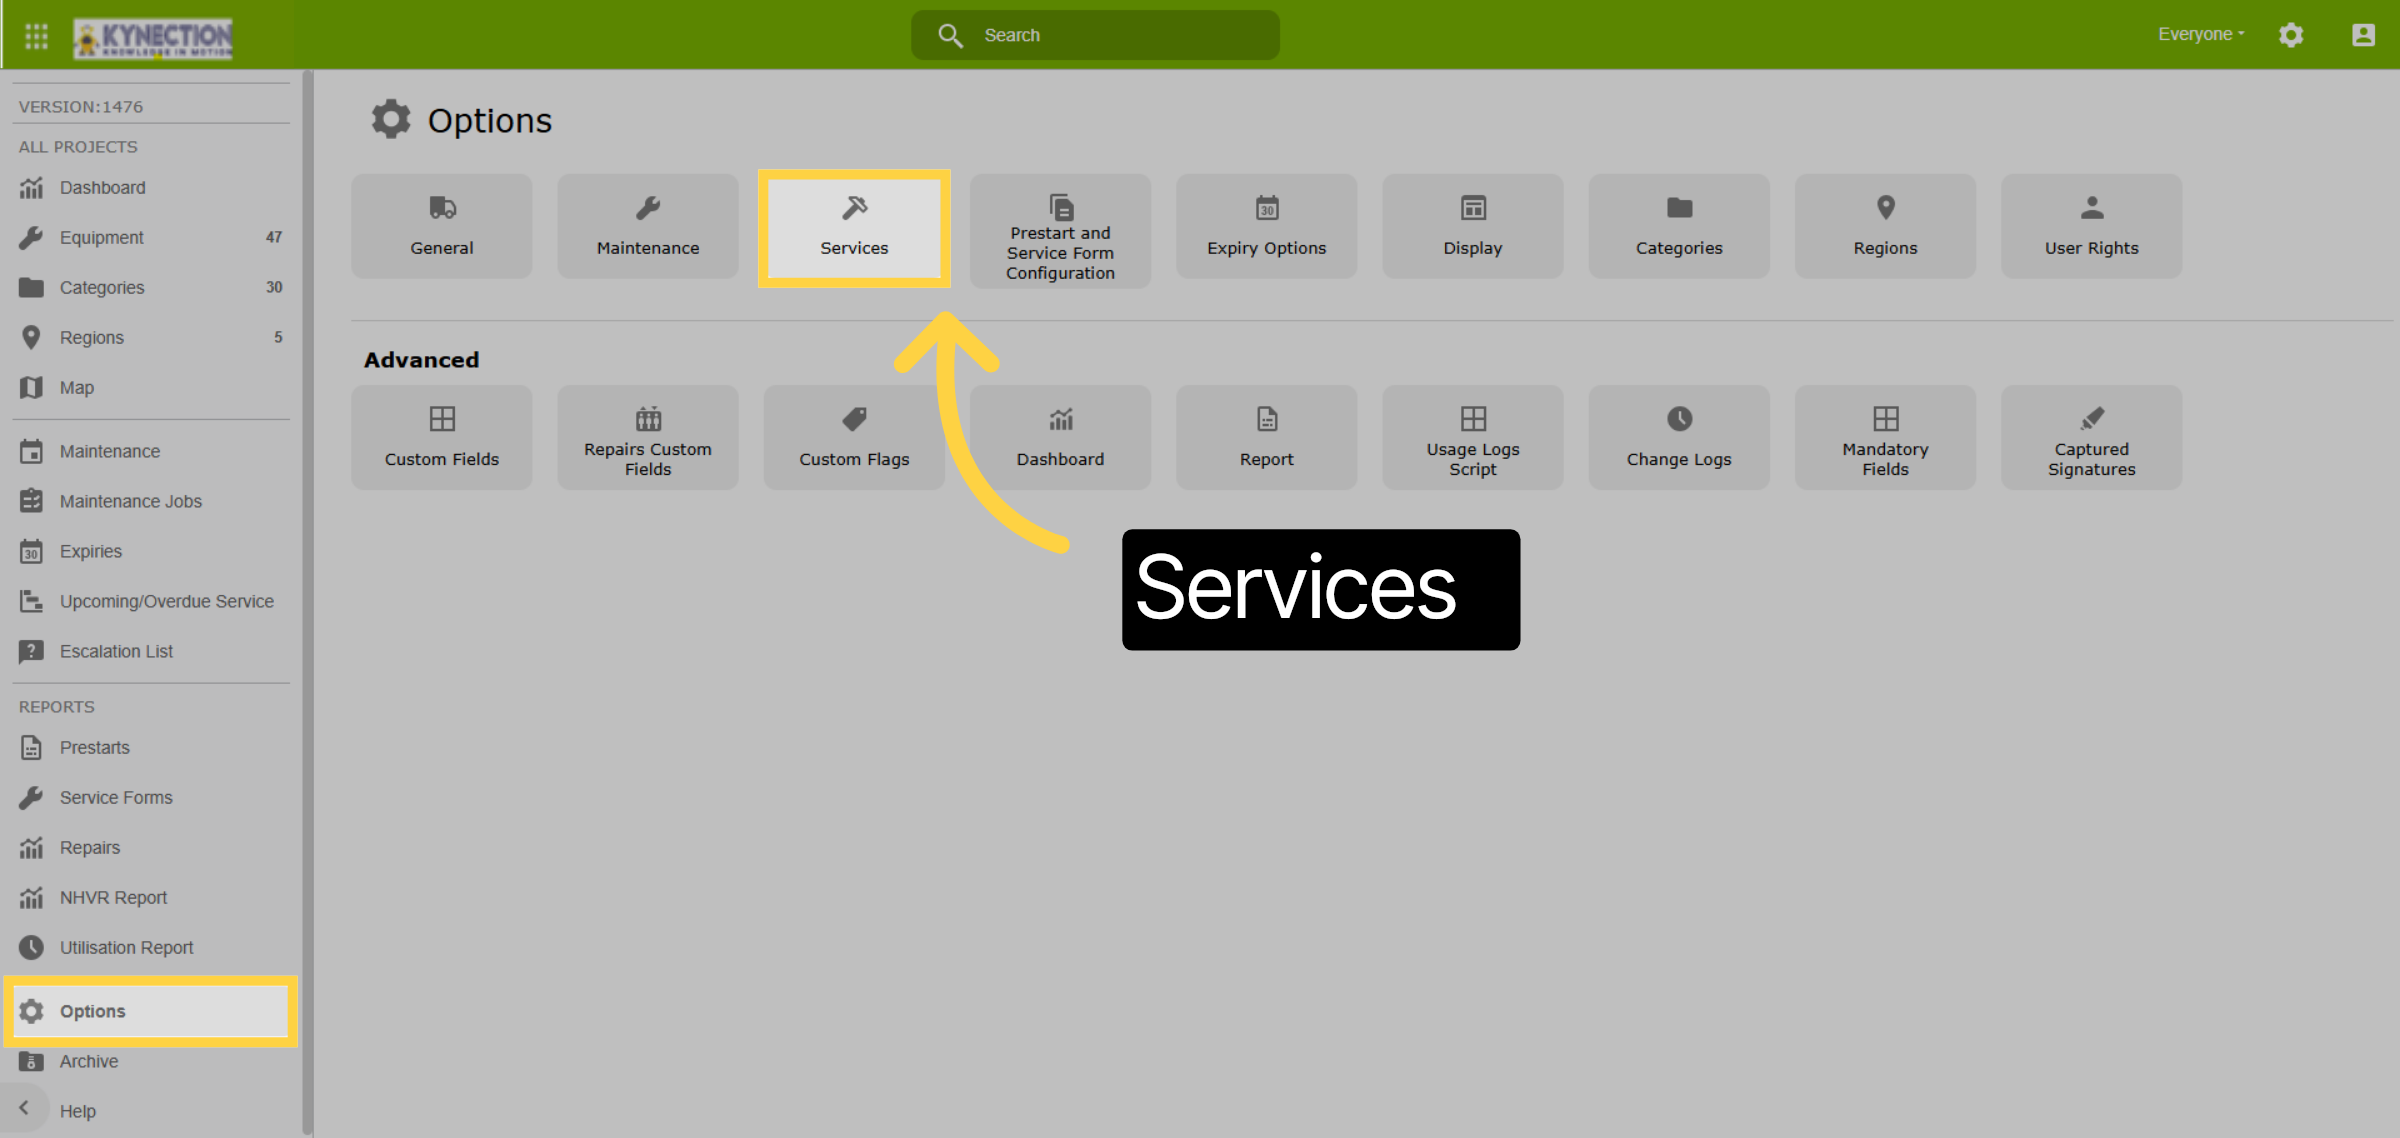
56. Services
From the Options menu, select Services. This feature facilitates the high-level setup of servicing information.
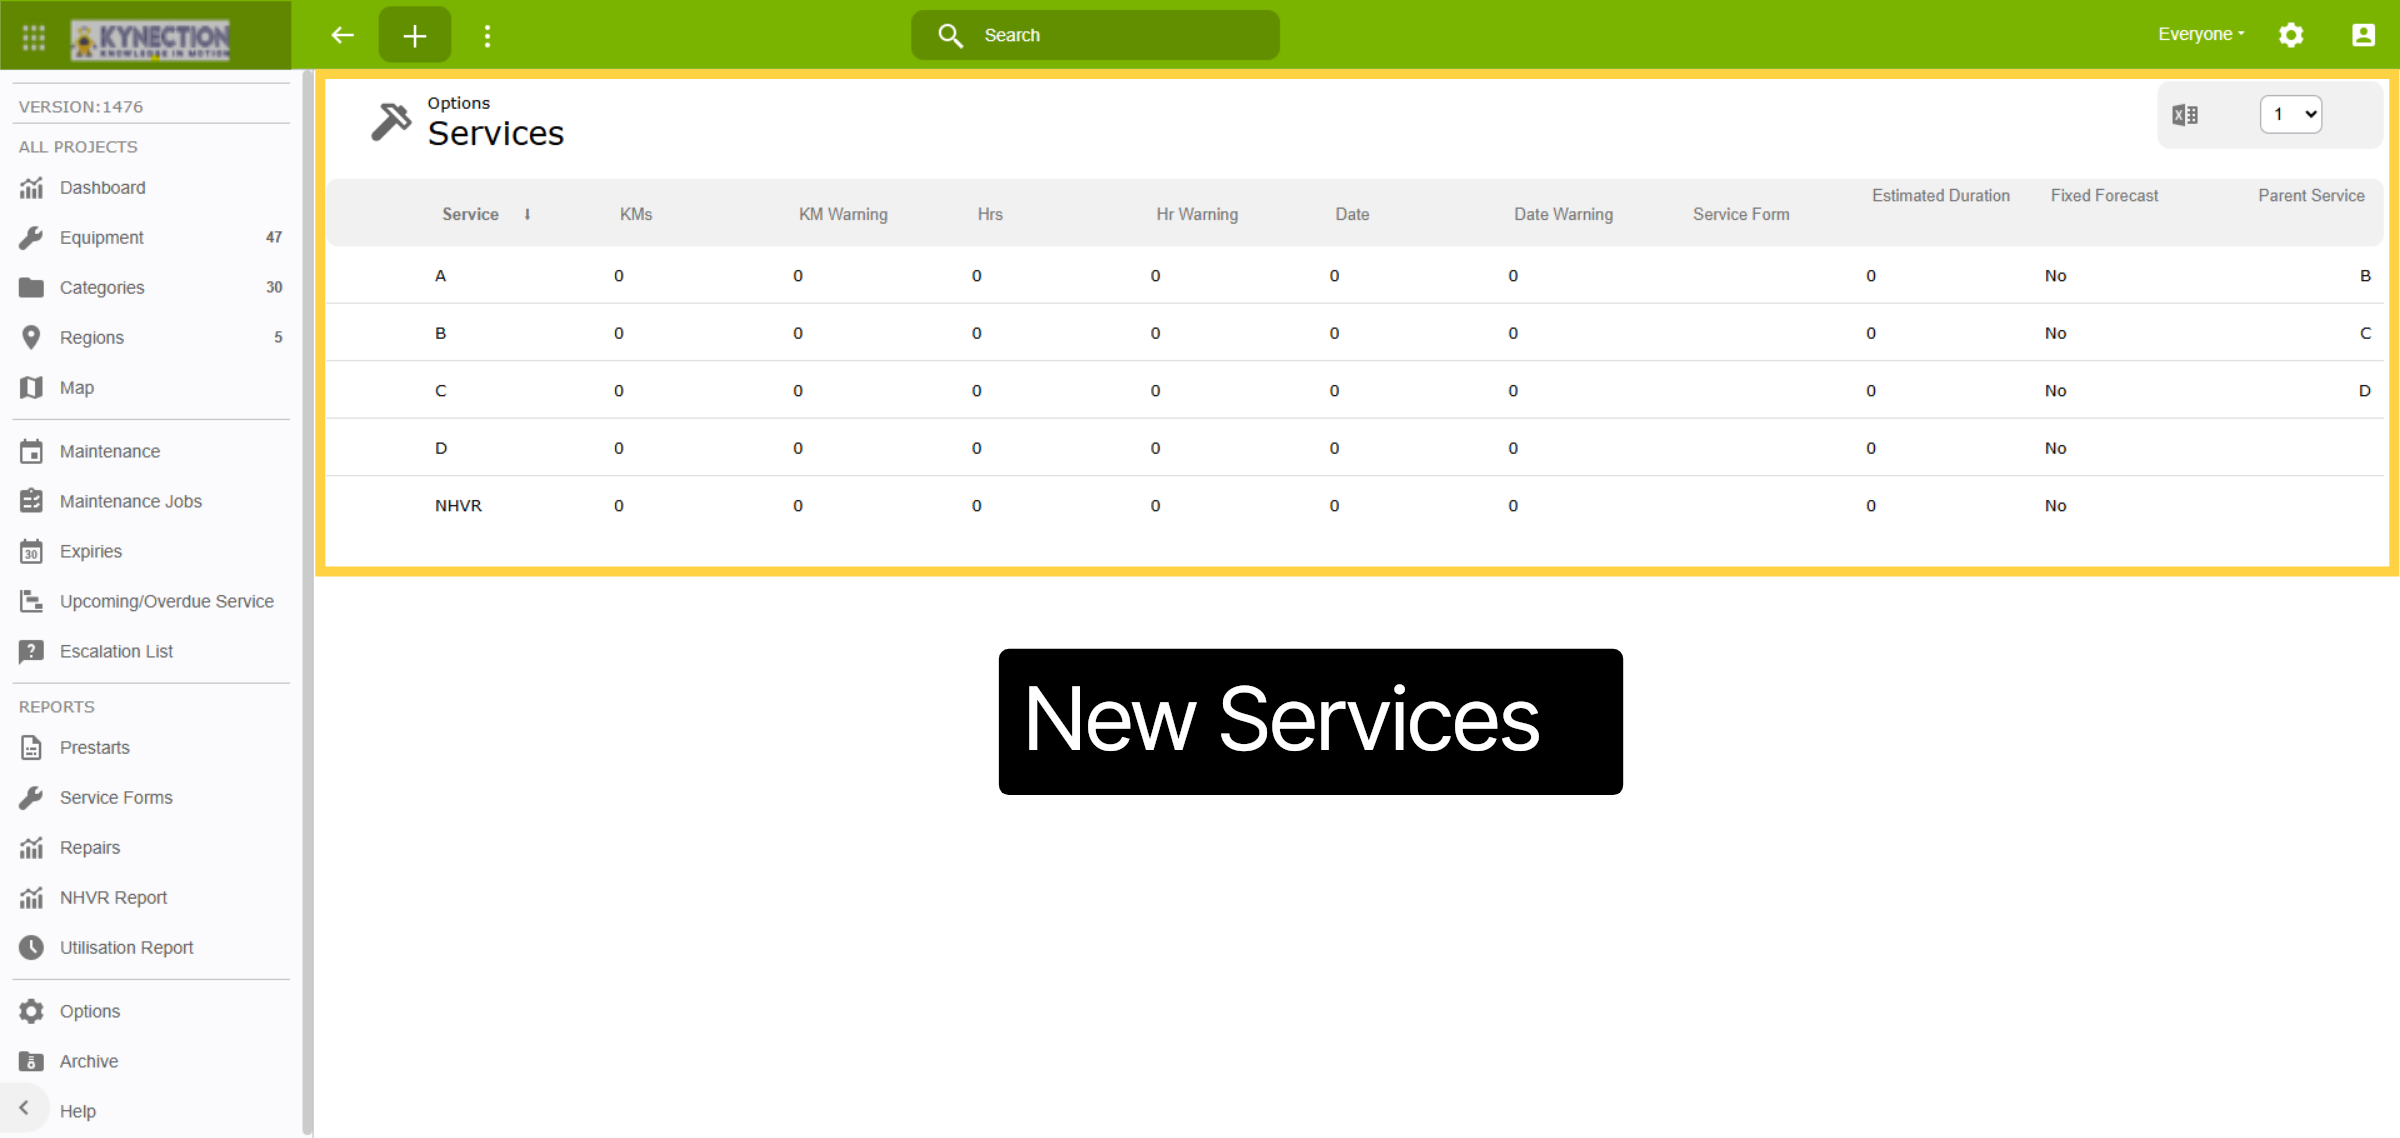
57. New Services
In the Services view, you'll encounter a table displaying all currently configured services. For a new setup, this table will be empty. This occurs because categories can have mixed servicing requirements, making it impossible to set baseline service information.
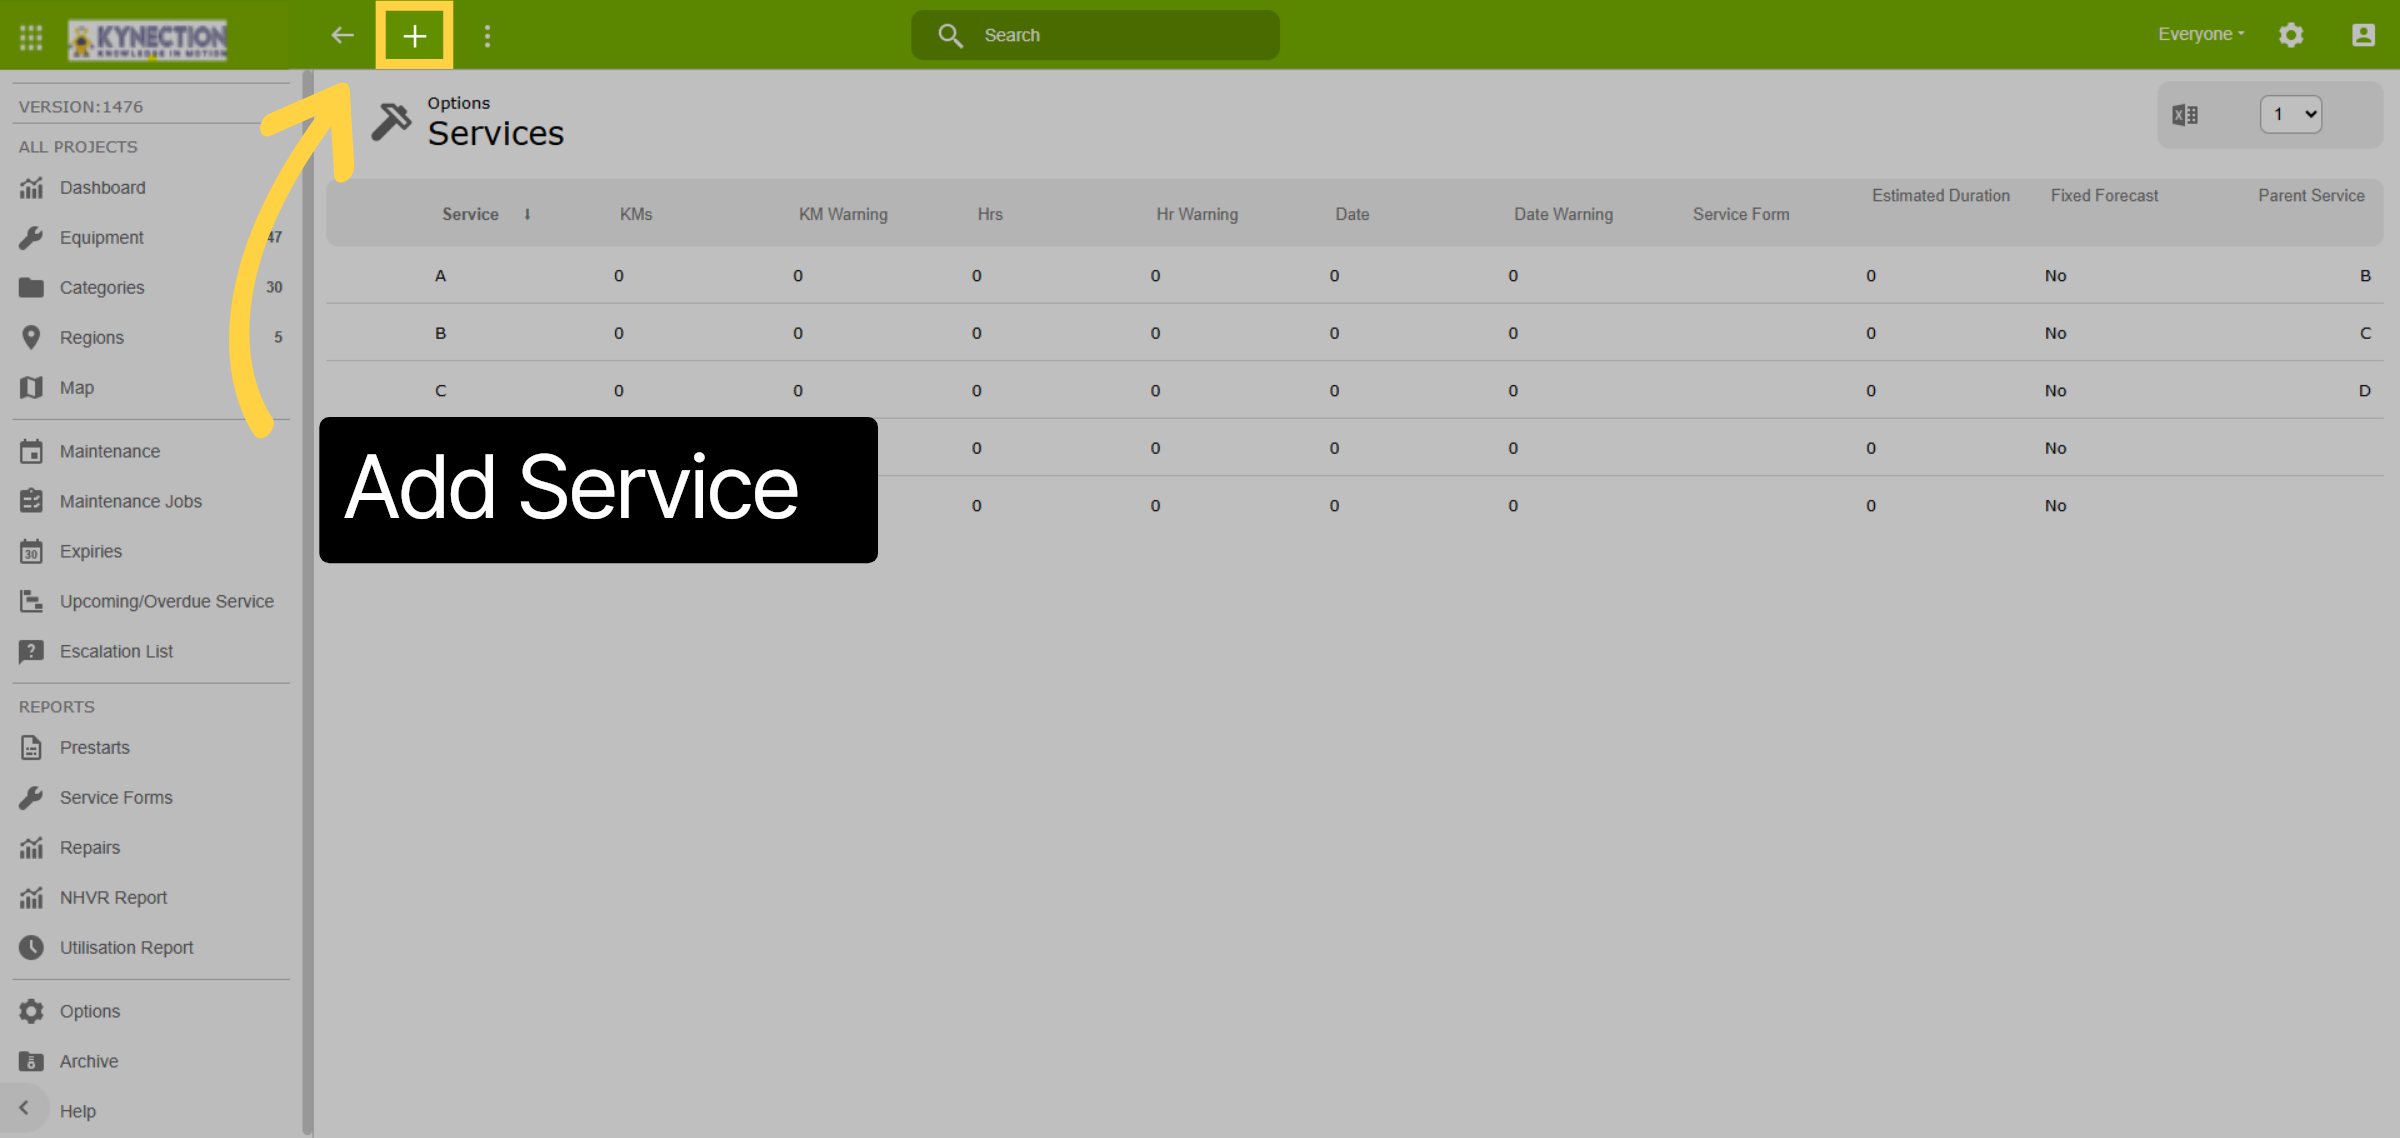
58. Add Service
To create a new service click on the plus icon in the toolbar. A popup will prompt for the service name. Enter the applicable name and click on the O.K. button to continue.
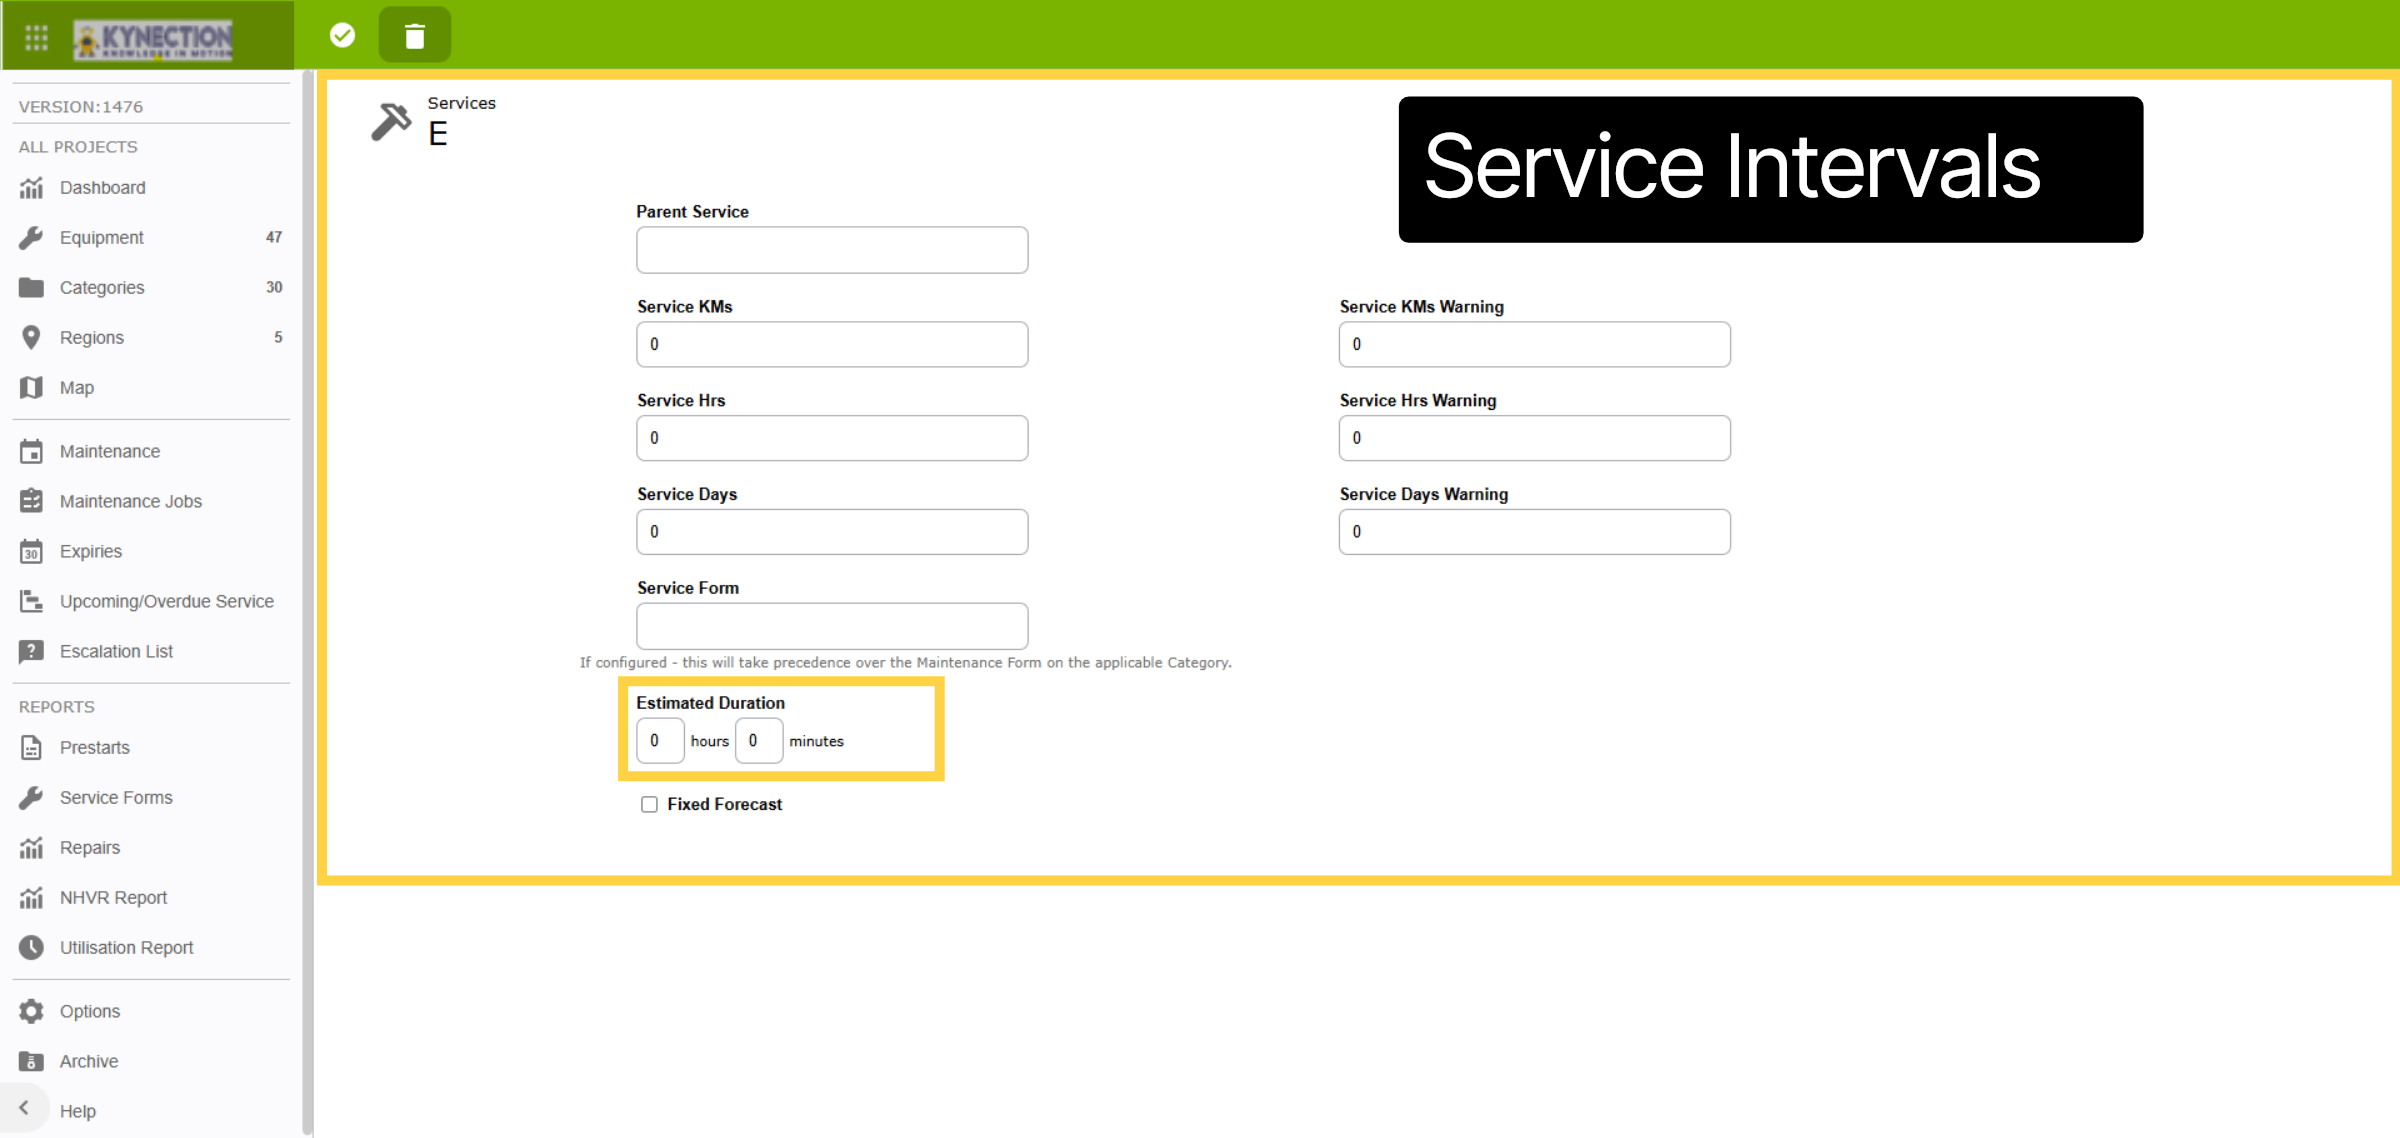
59. Service Intervals
On the Edit screen record intervals for kilometer, hour, and date servicing requirements. Warnings can also be configured to advise of upcoming services. Additionally, you can specify an expected duration for completing this service.
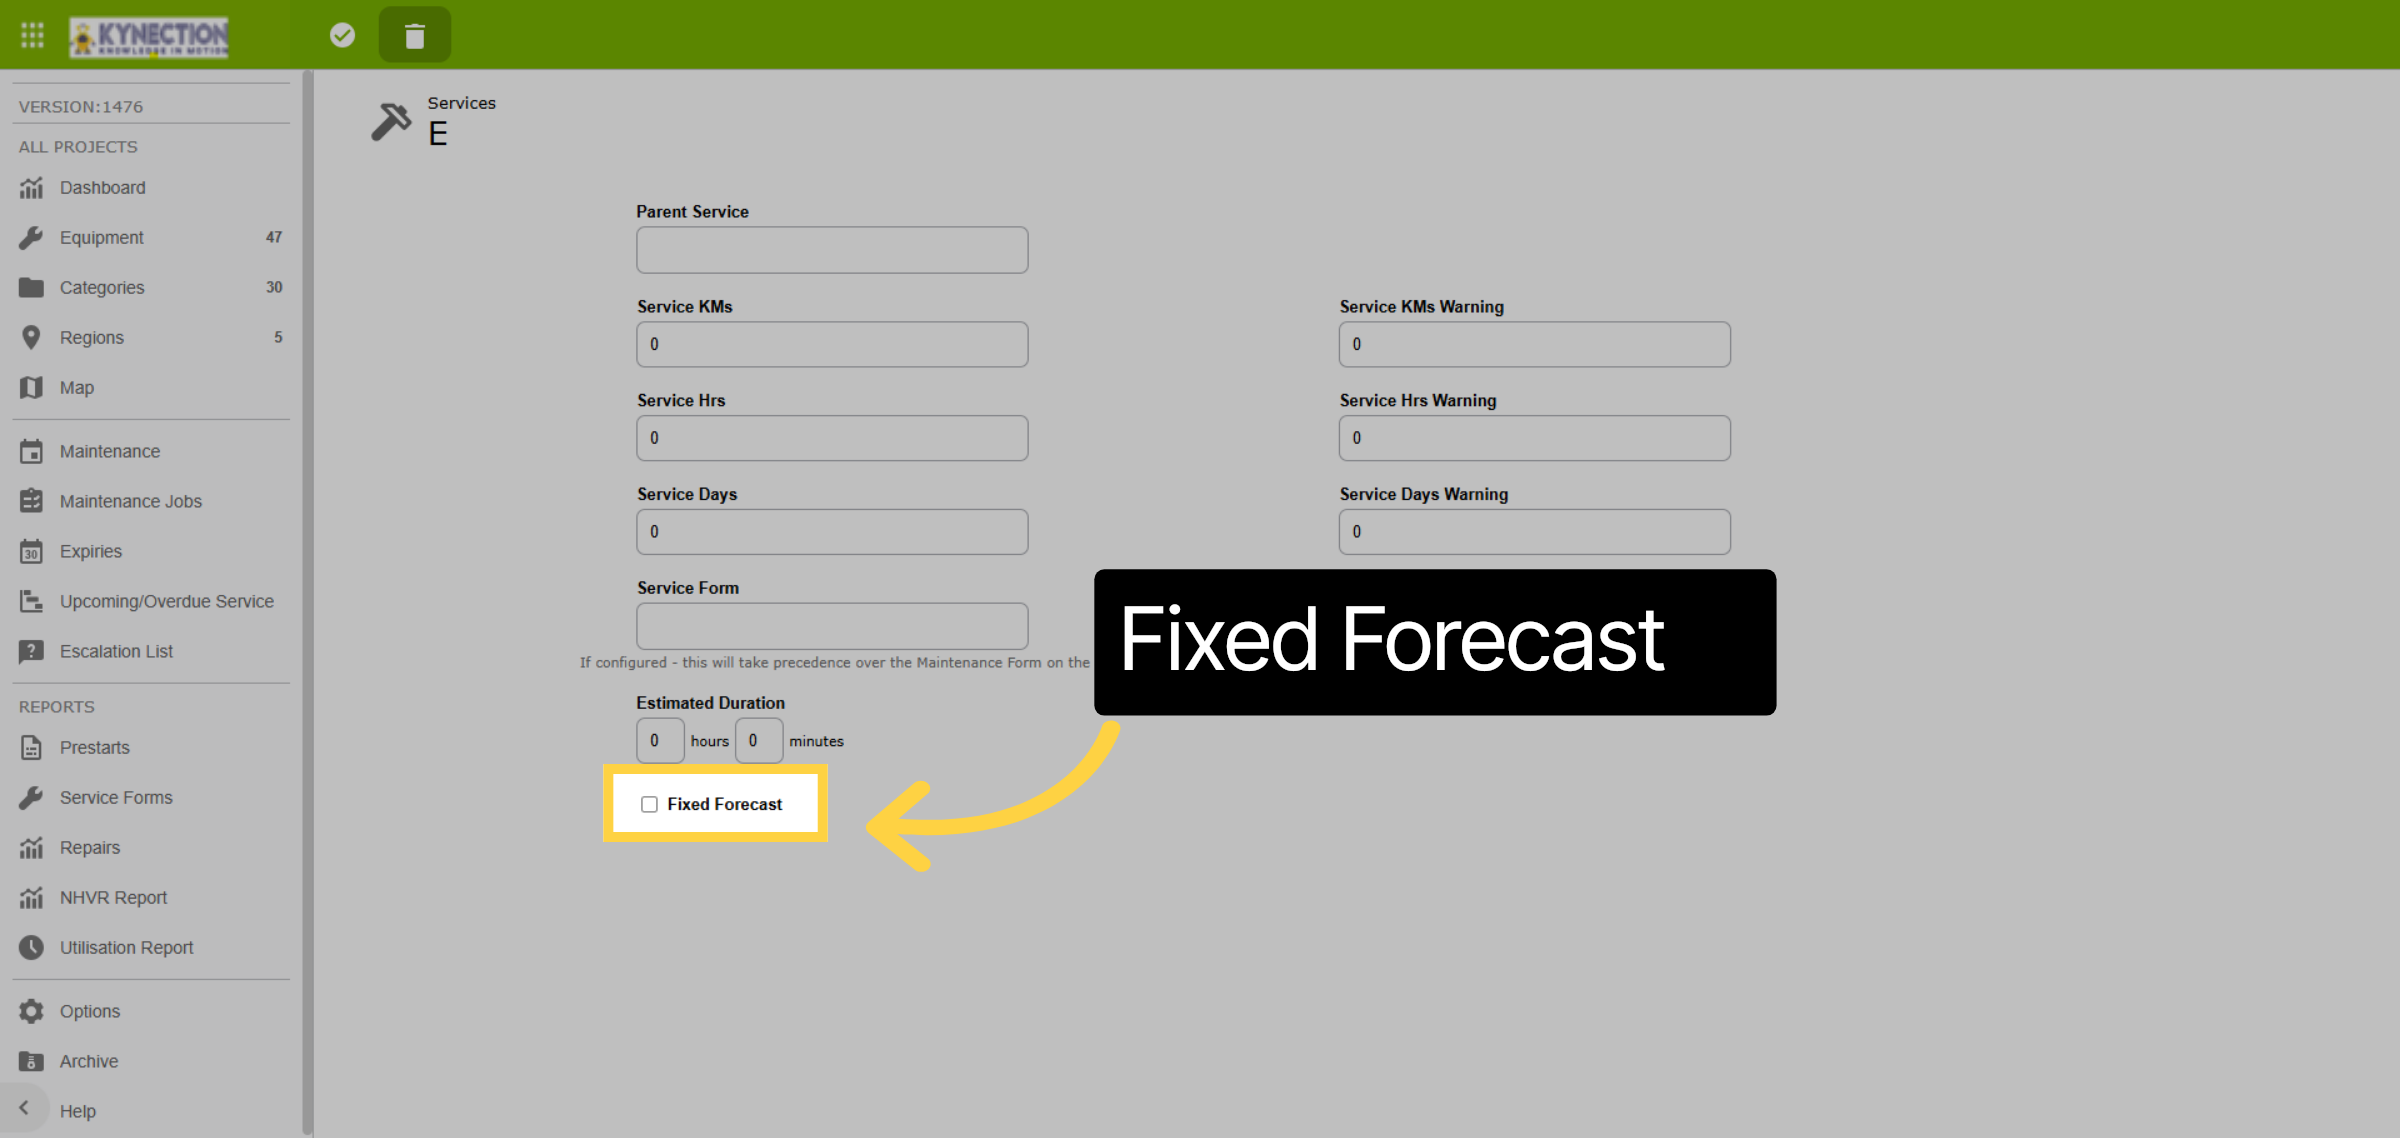
60. Fixed Forecast
The fixed forecast option if checked means that the next calculated service will align with the interval based on when the last service was due, rather than when the last service was completed.
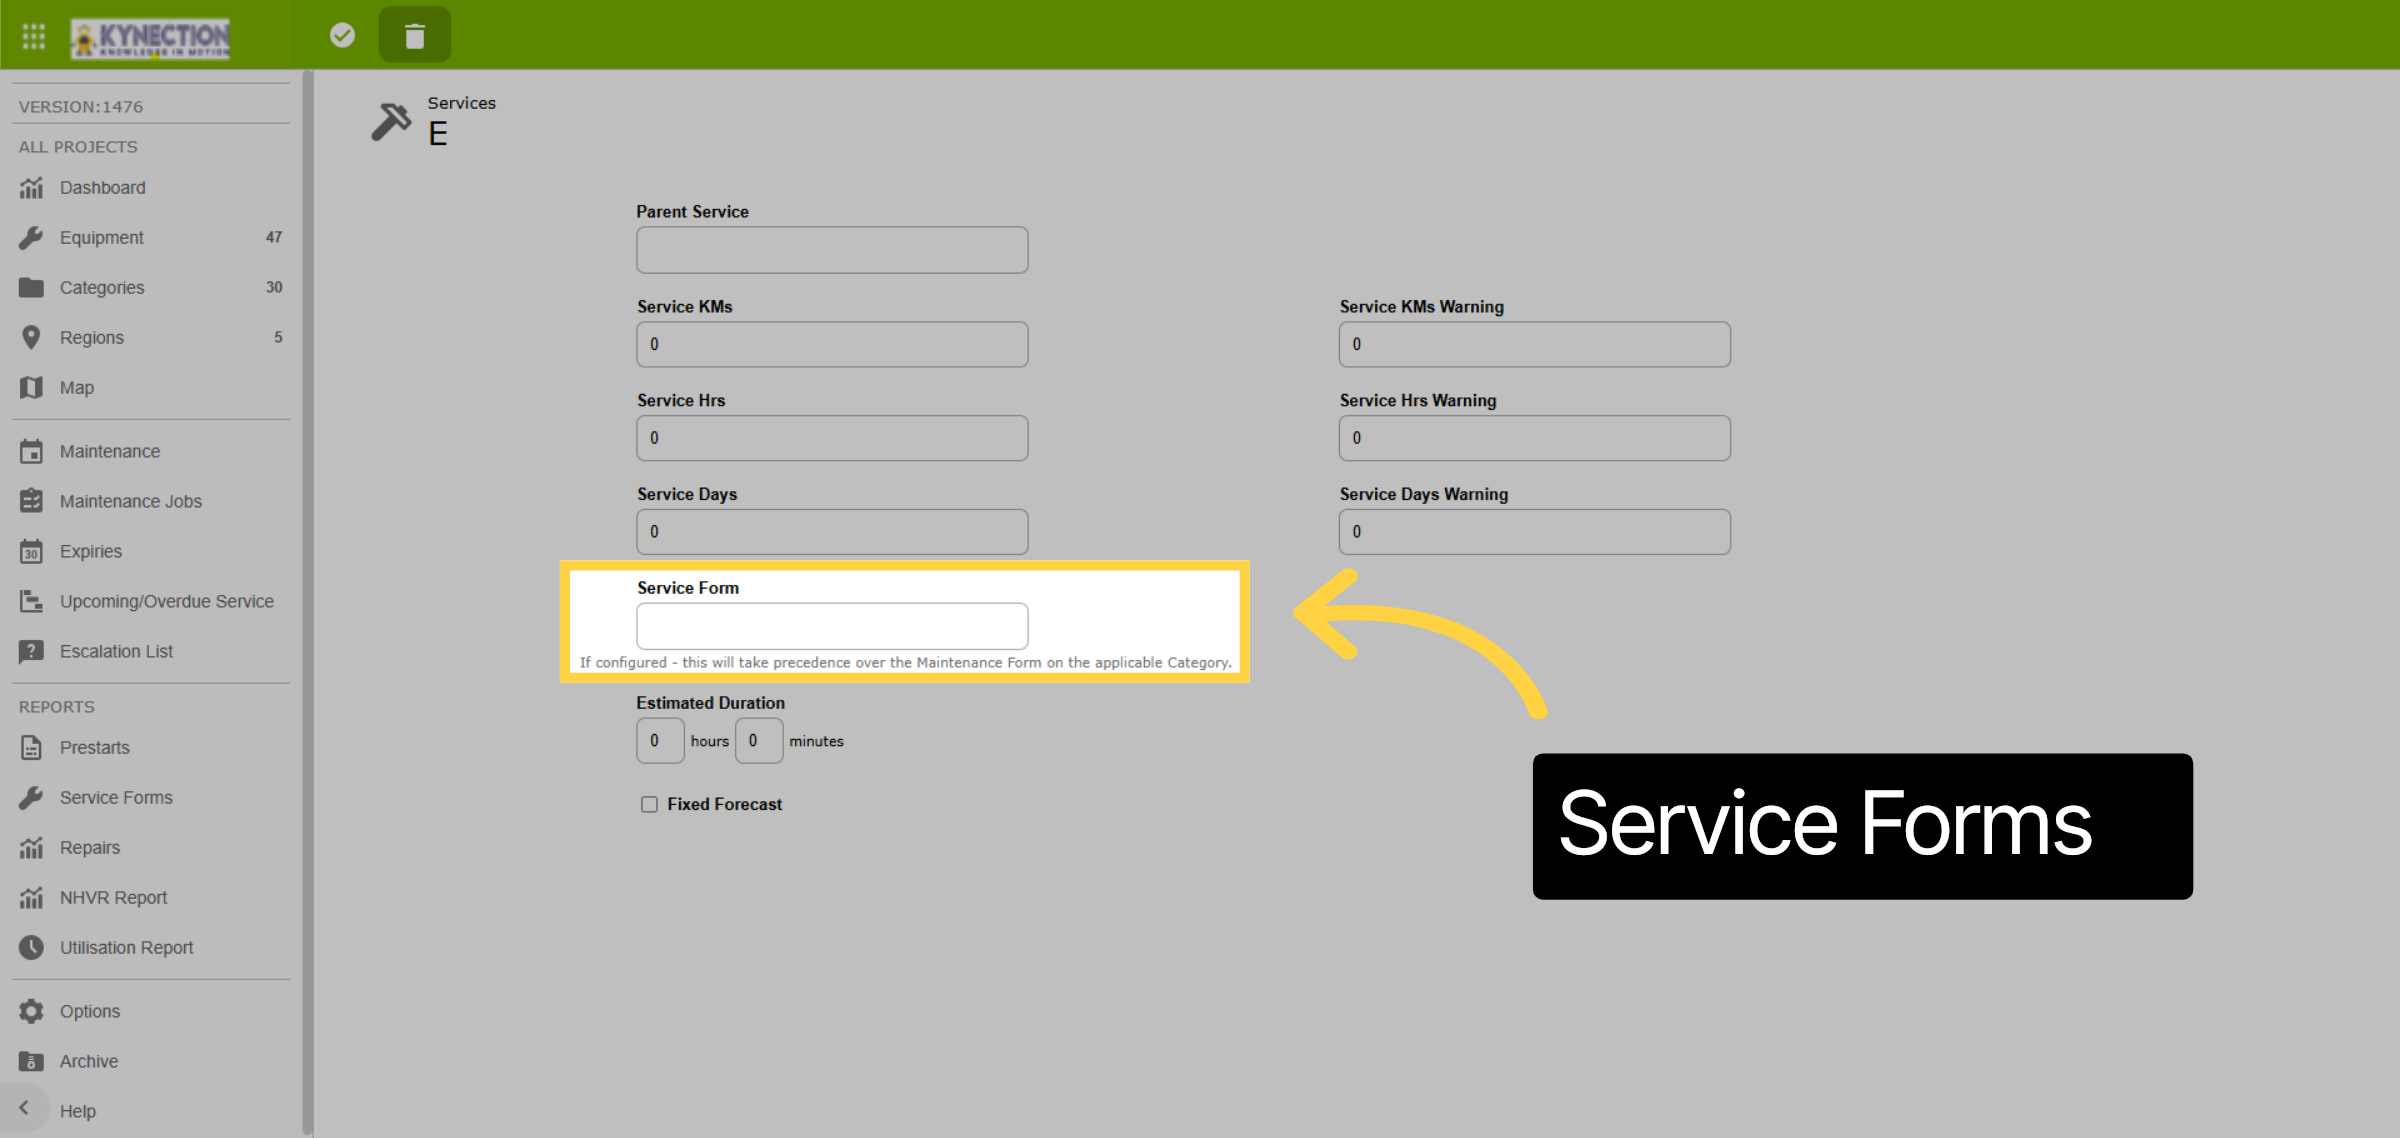
61. Service Forms
If a different service form is required, link the form template here. With the new Service configured - we can go to the Category view to add this new service to the applicable Categories. Click on the back arrow to continue.
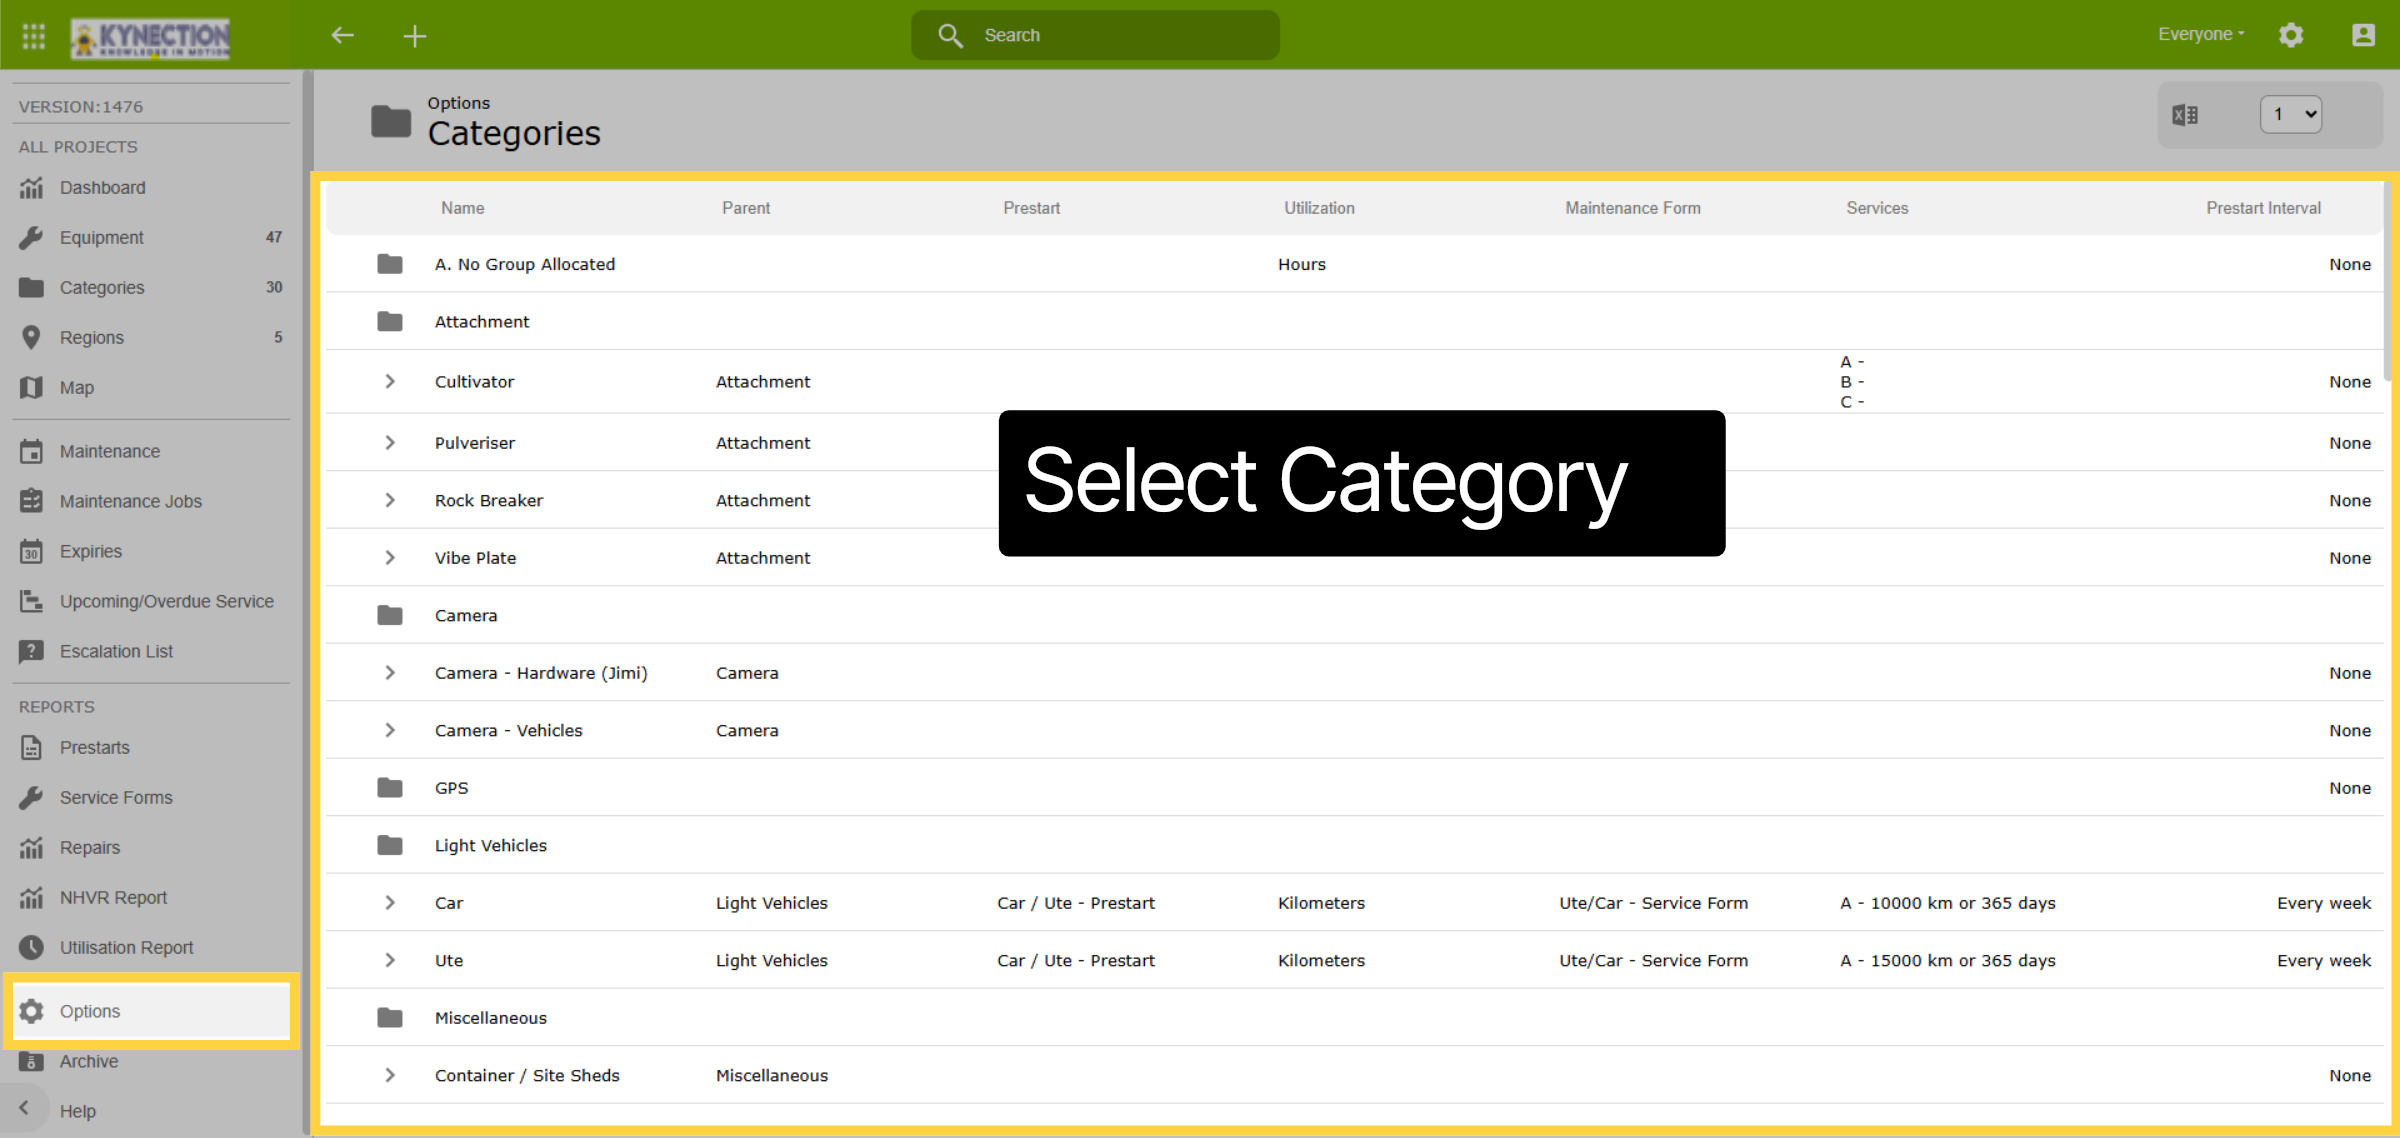
62. Select Category
From the options menu select Categories. The table view presents all services configured against the category along the Prestart Interval. Select the relevant category to proceed.
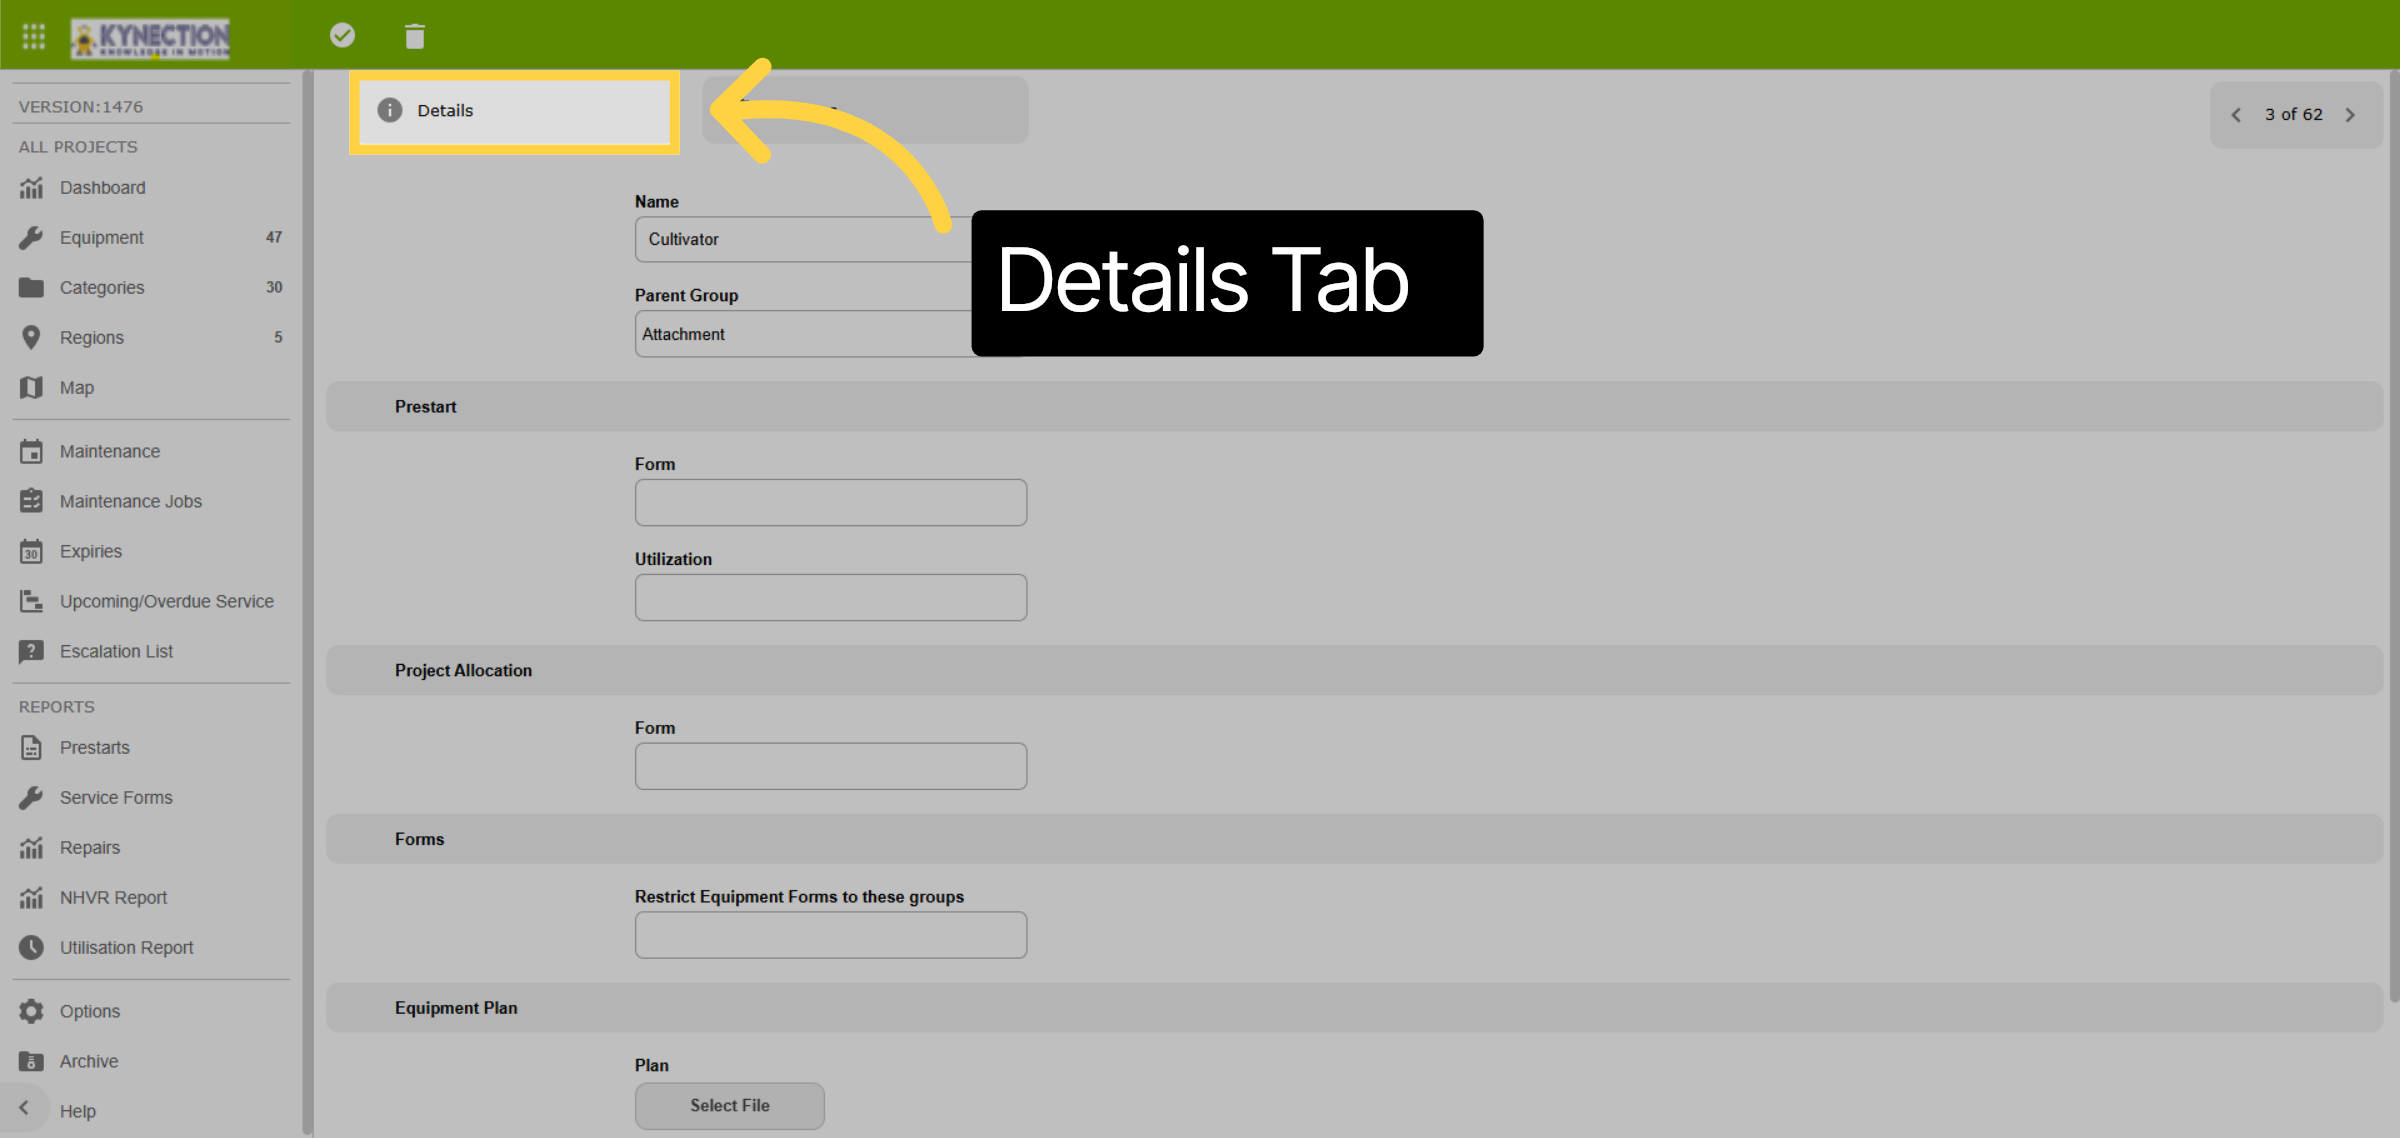
63. Details Tab
In the Details section, you will discover essential non-servicing information, including the parent group, prestart details, applicable prestart interval, and other customizable category information.
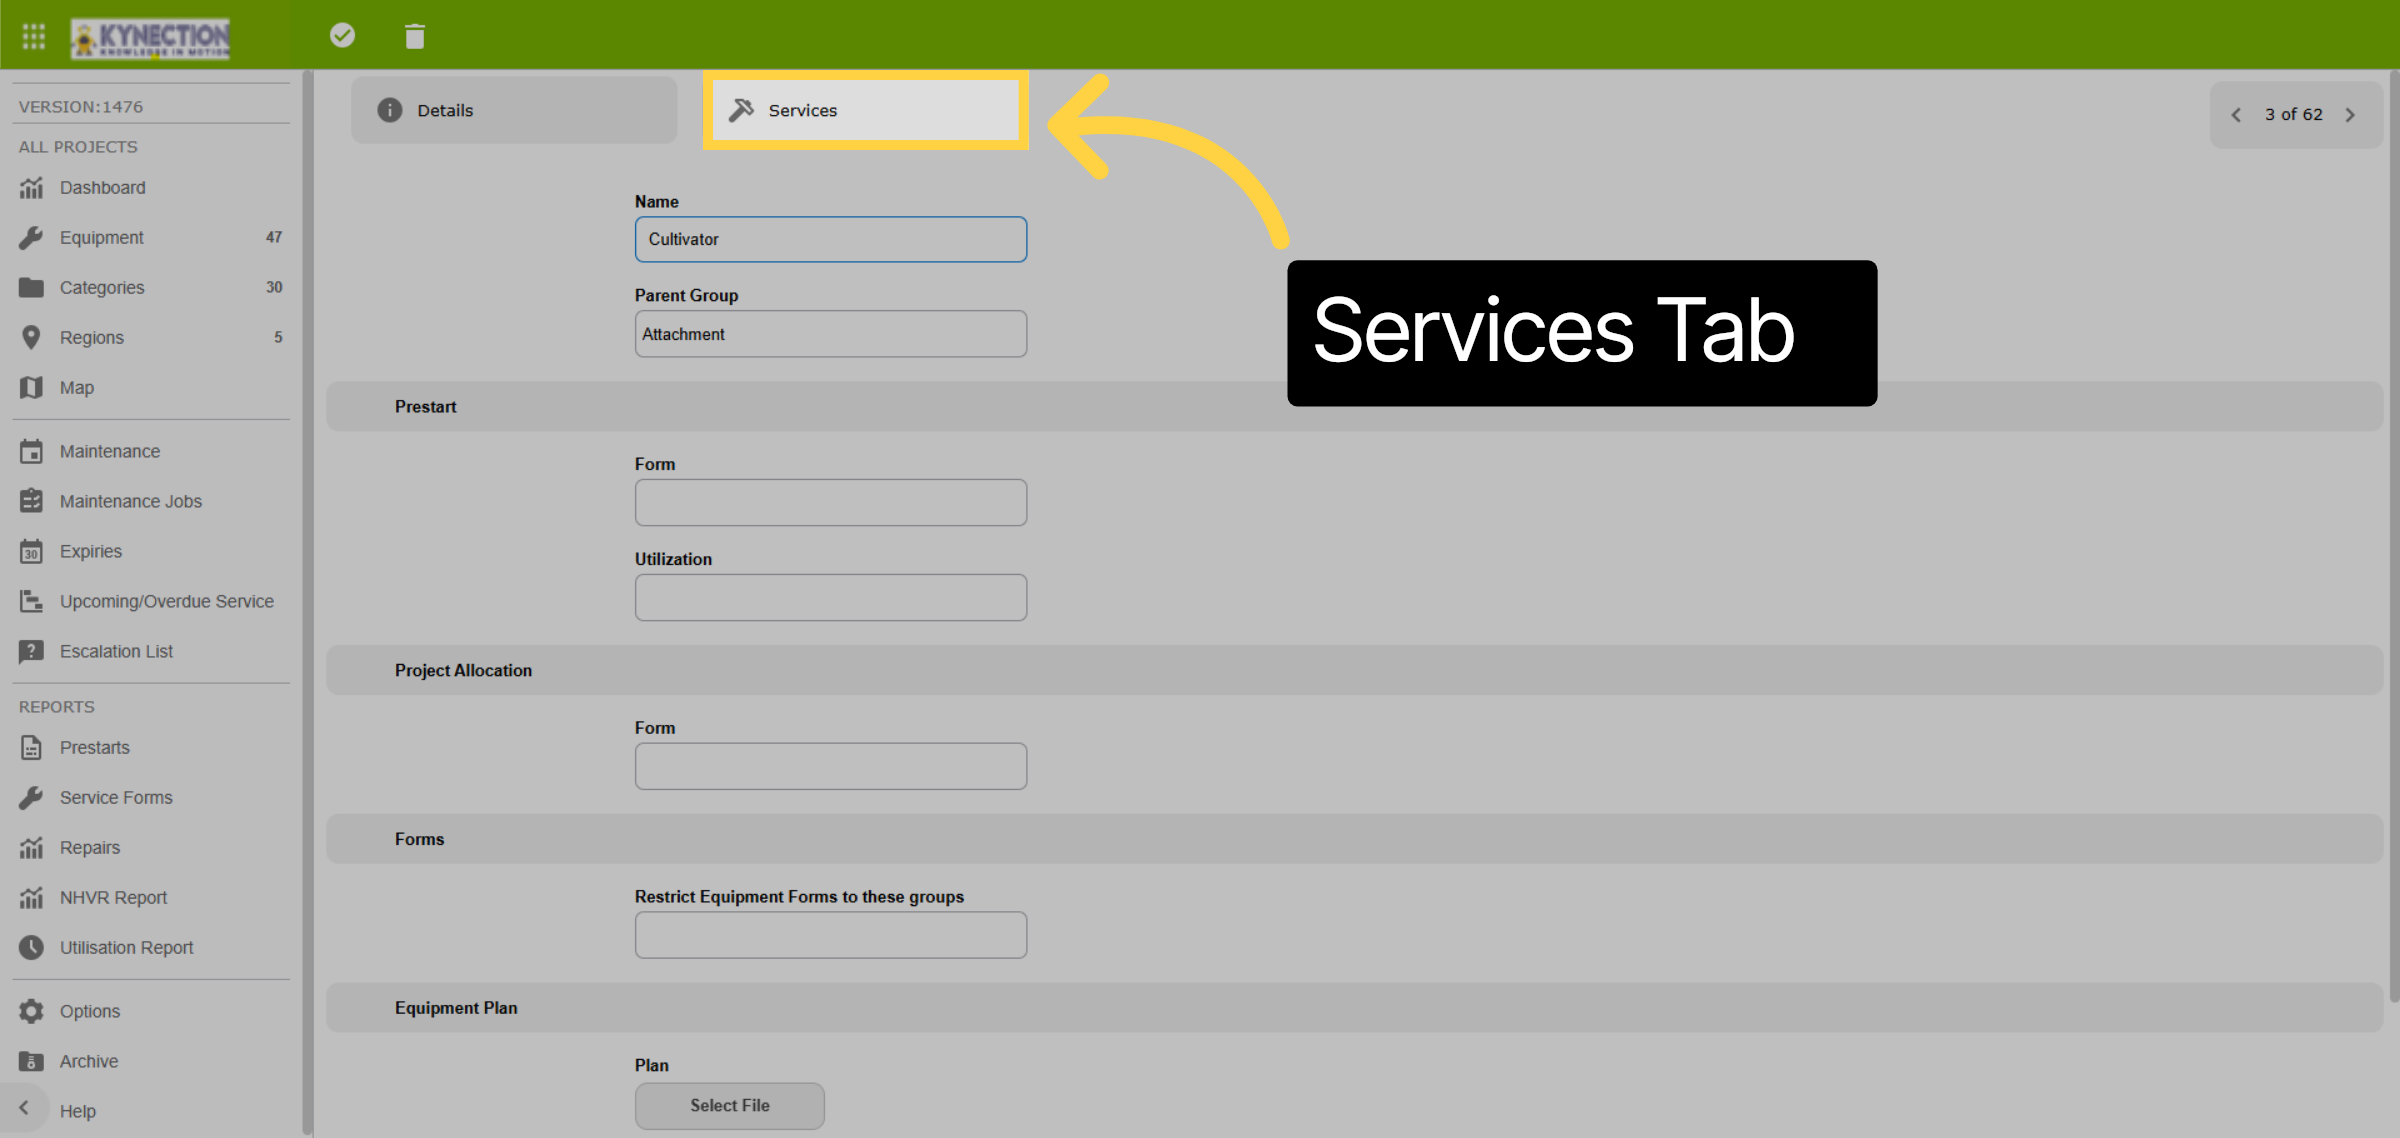
64. Services Tab
The Services section displays the currently configured services for this specific group, along with their respective intervals. Here, you have the option to add new services or link existing ones as required.
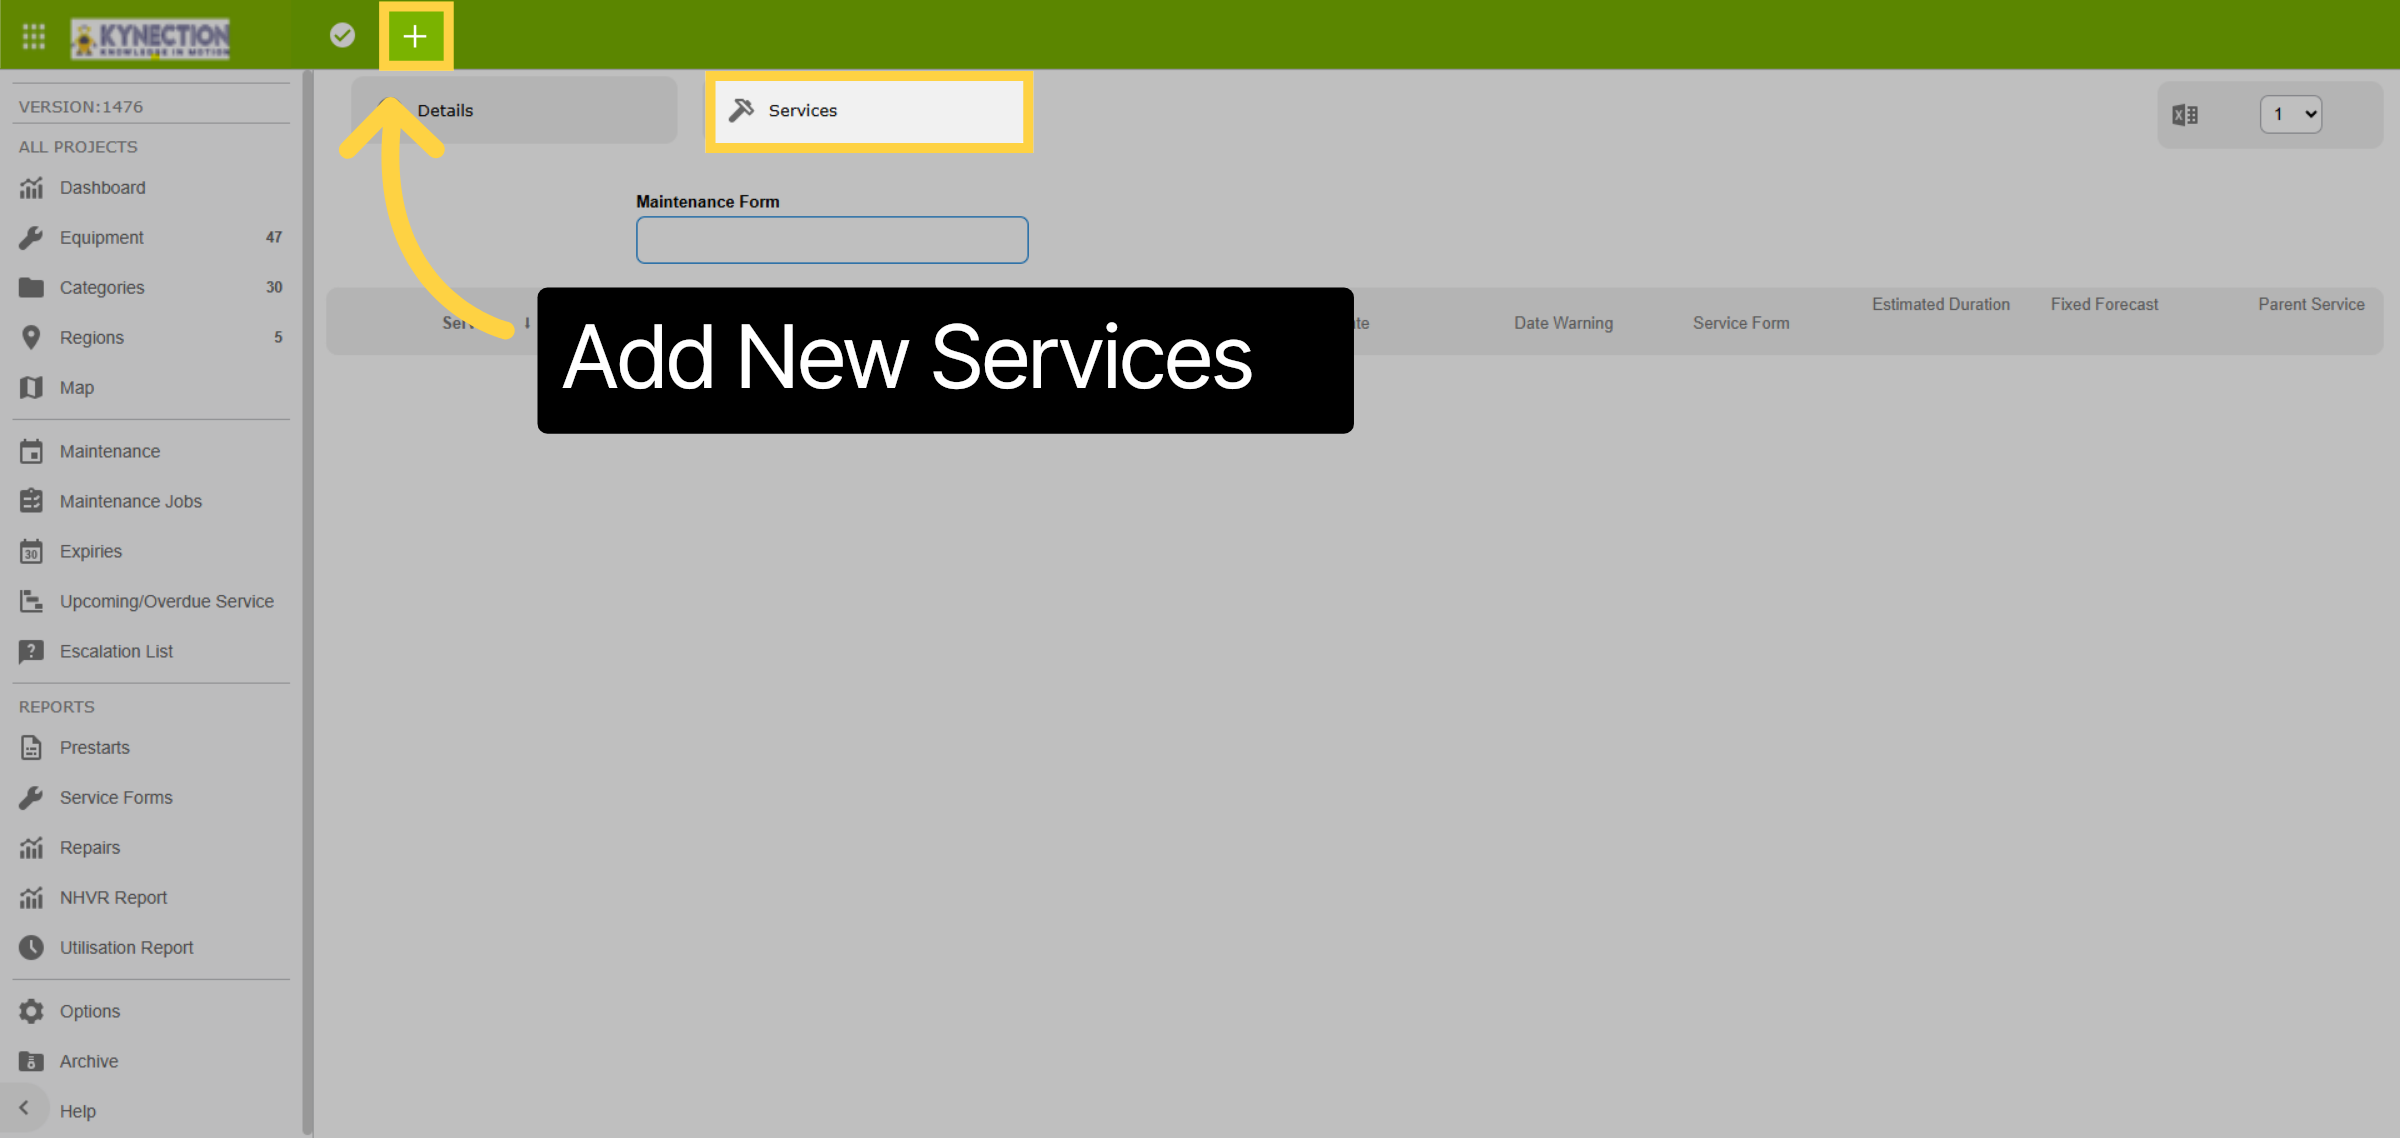
65. Add New Services
The Services section displays the currently configured services for this specific group, along with their respective intervals. Here, you have the option to add new services or link existing ones as required. To add a new Service to the Group select the plus icon in the toolbar.
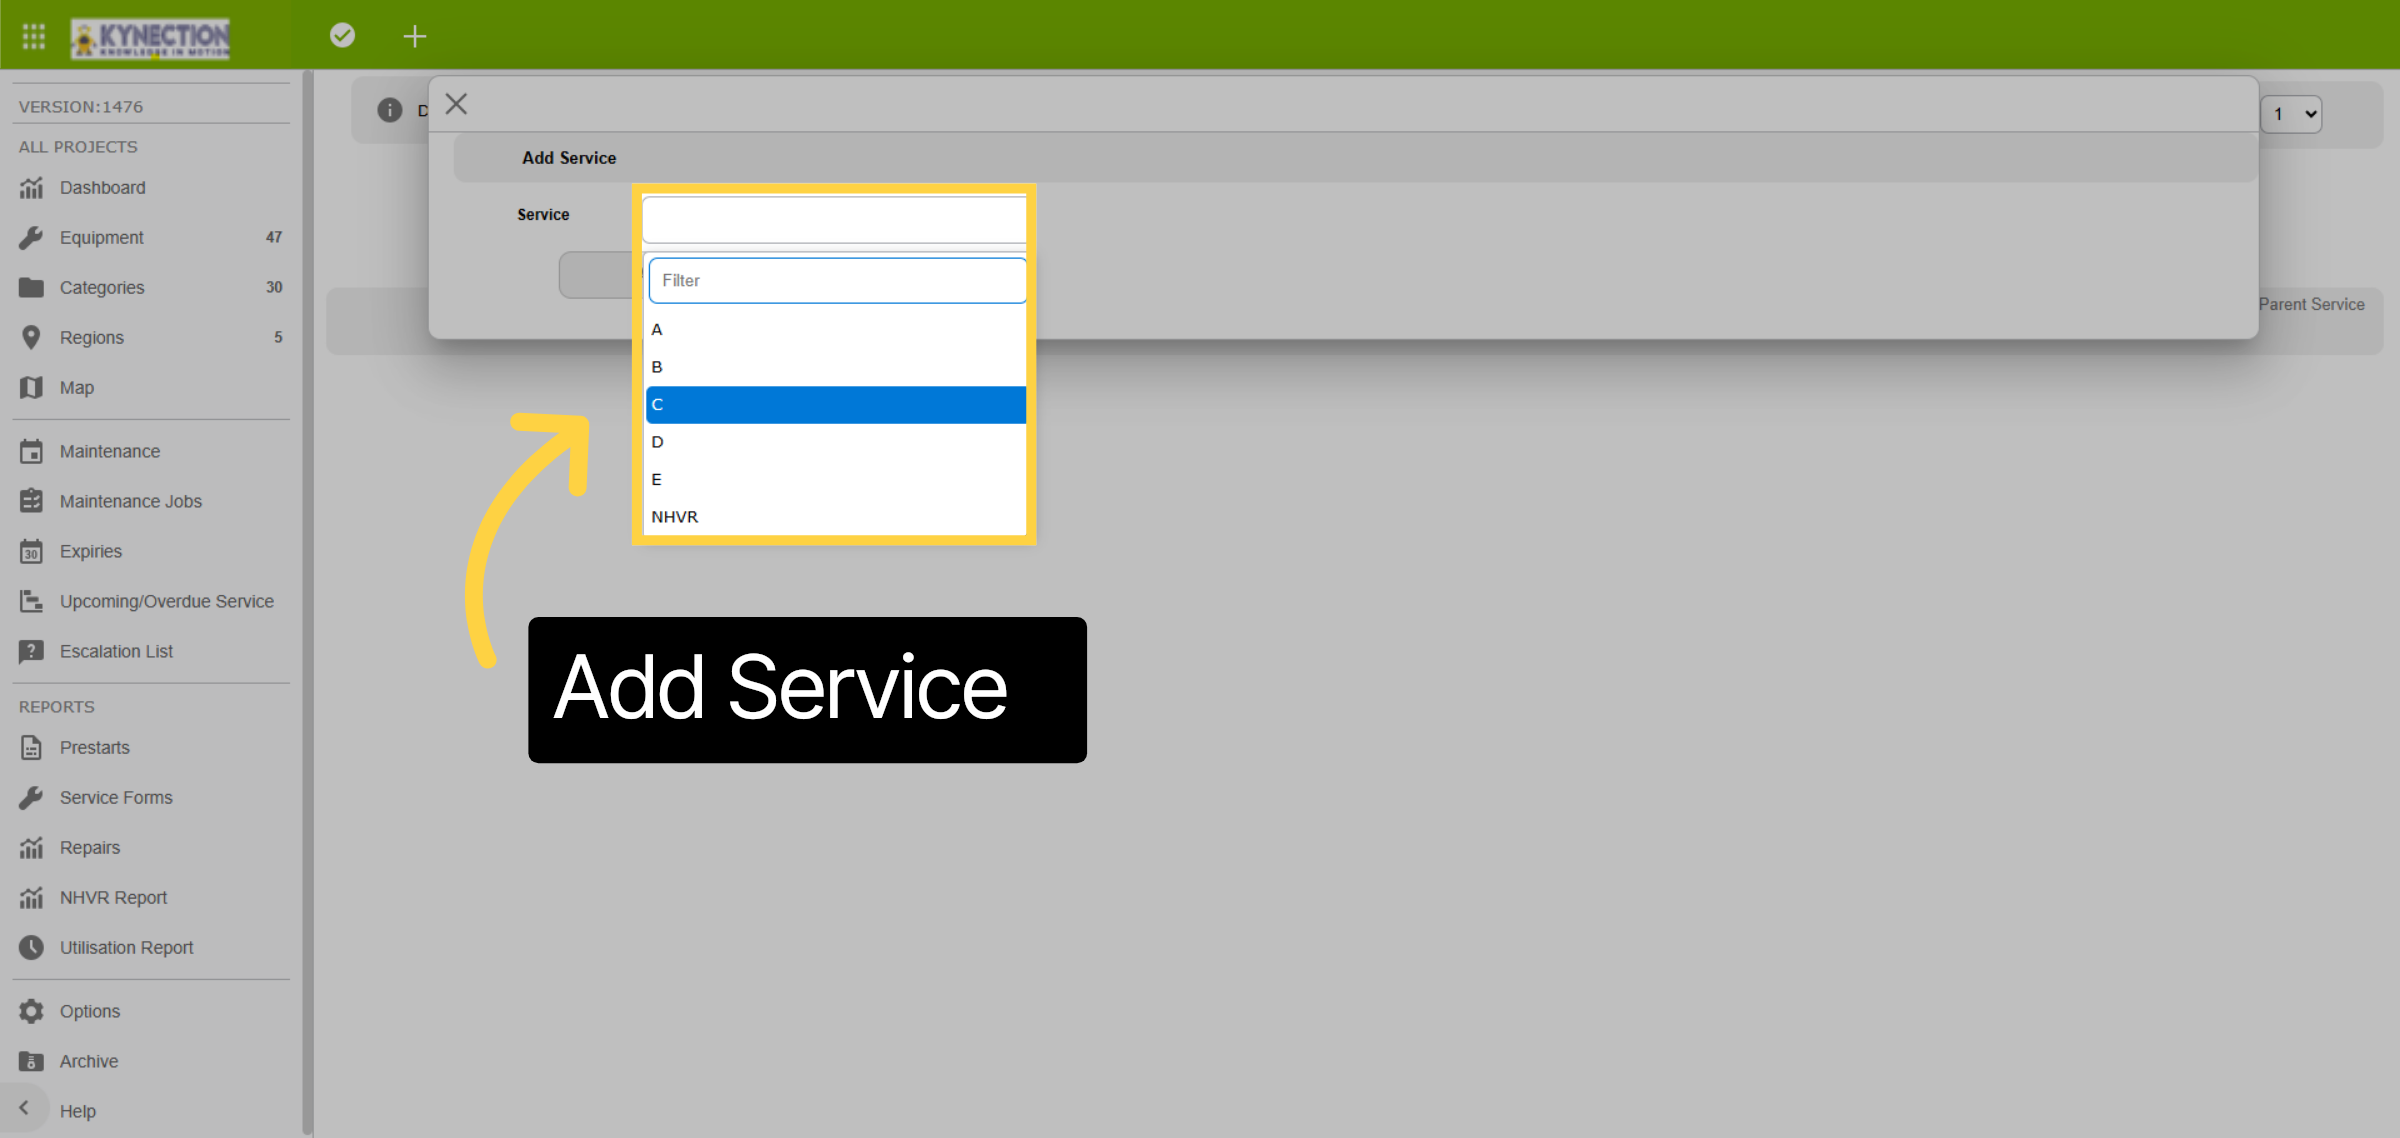
66. Add Service
Make a selection from a drop-down list of services that can be added to this category. The displayed services will only include those that have not yet been added to this group. Please select a service to proceed.
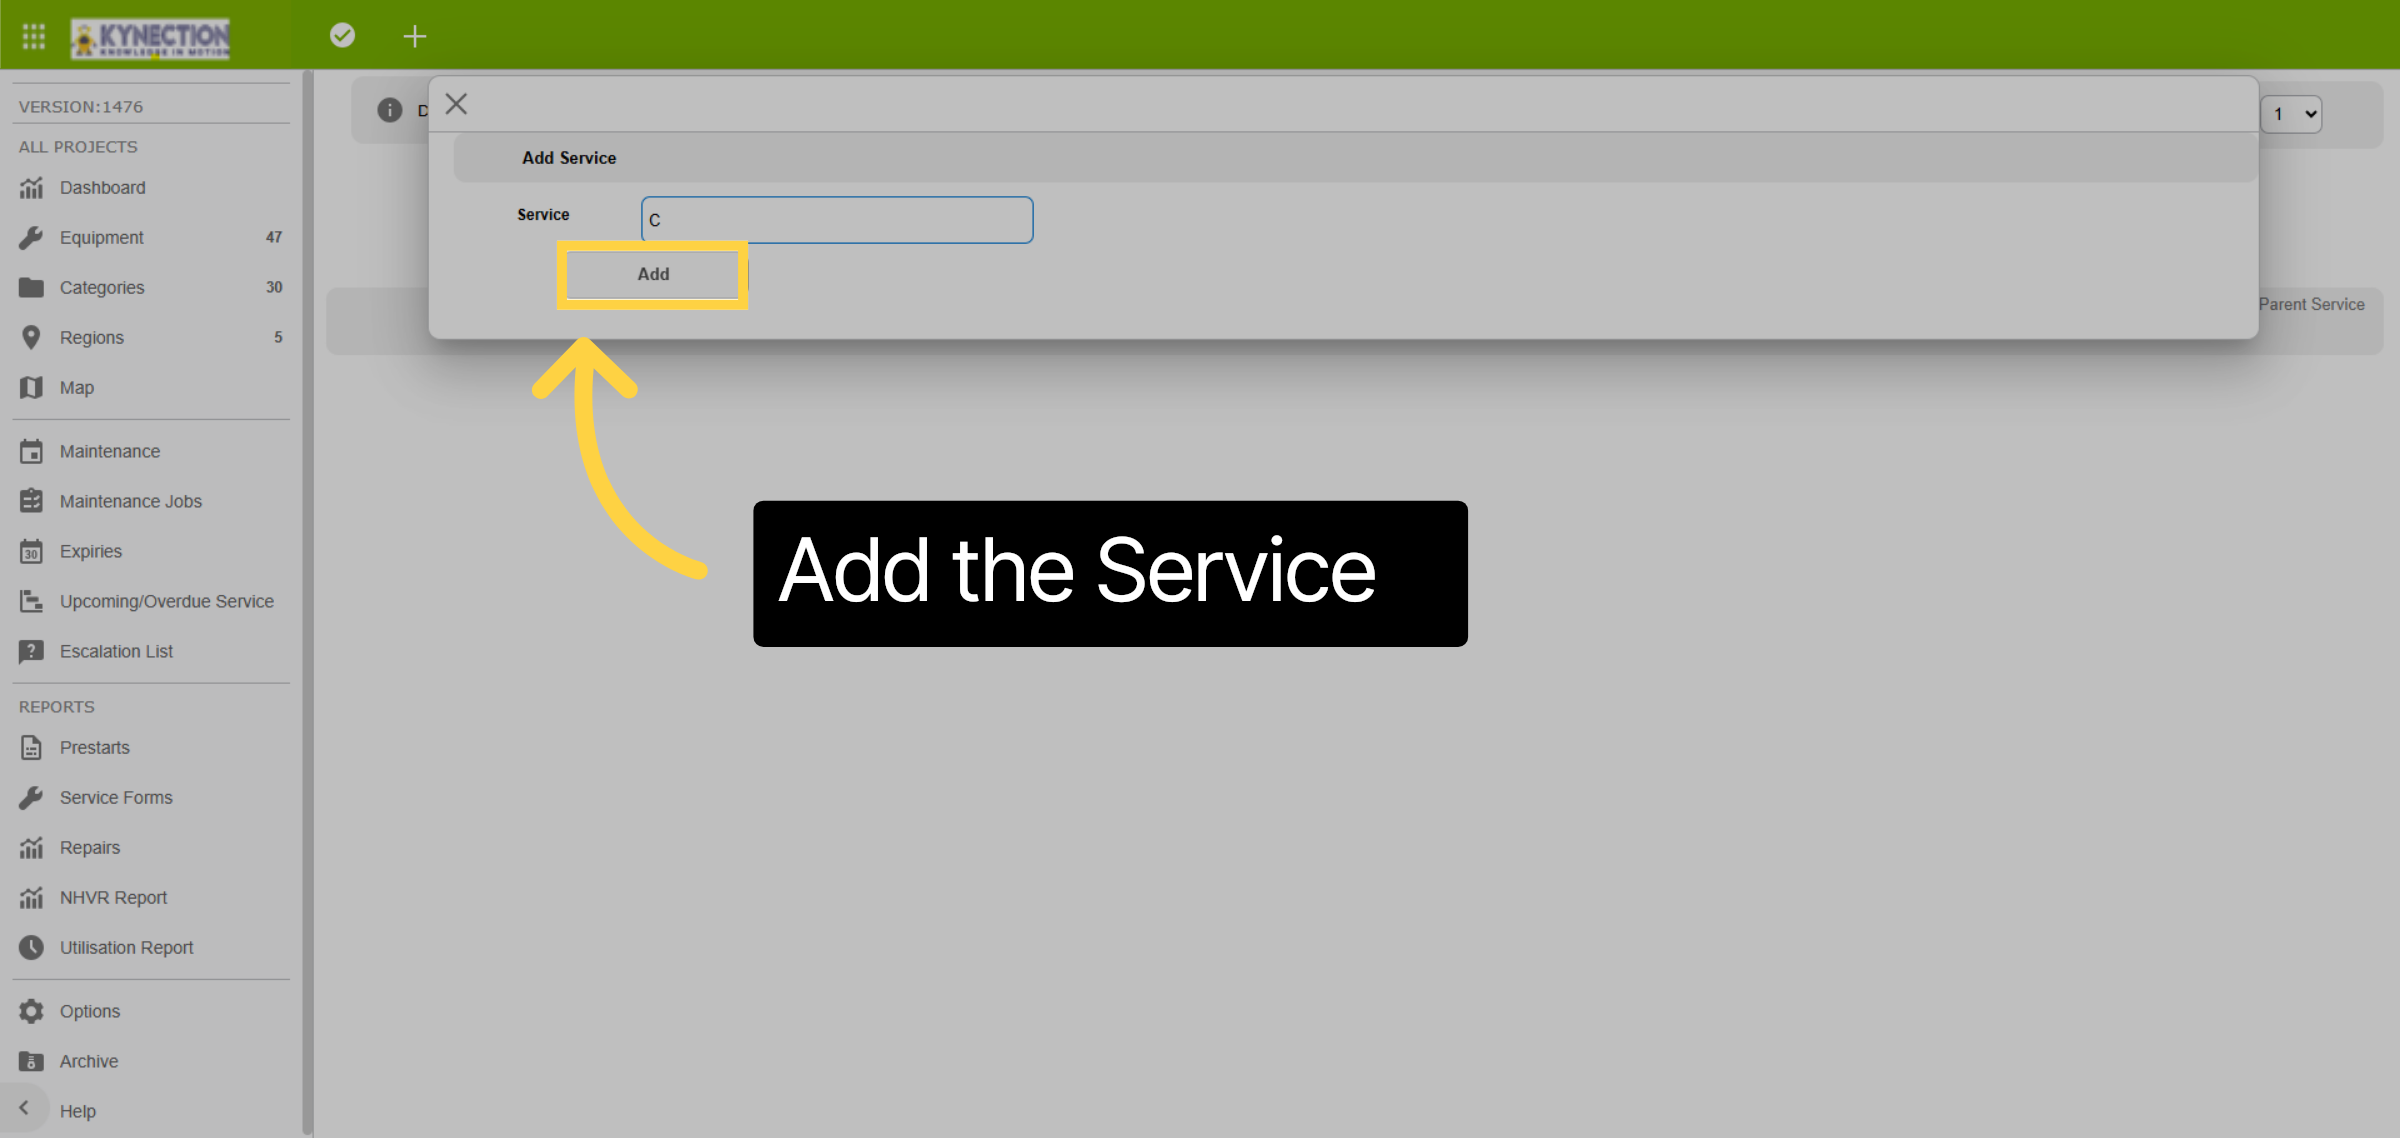
67. Add the Service
Click on the Add button to add the Service to the Group.
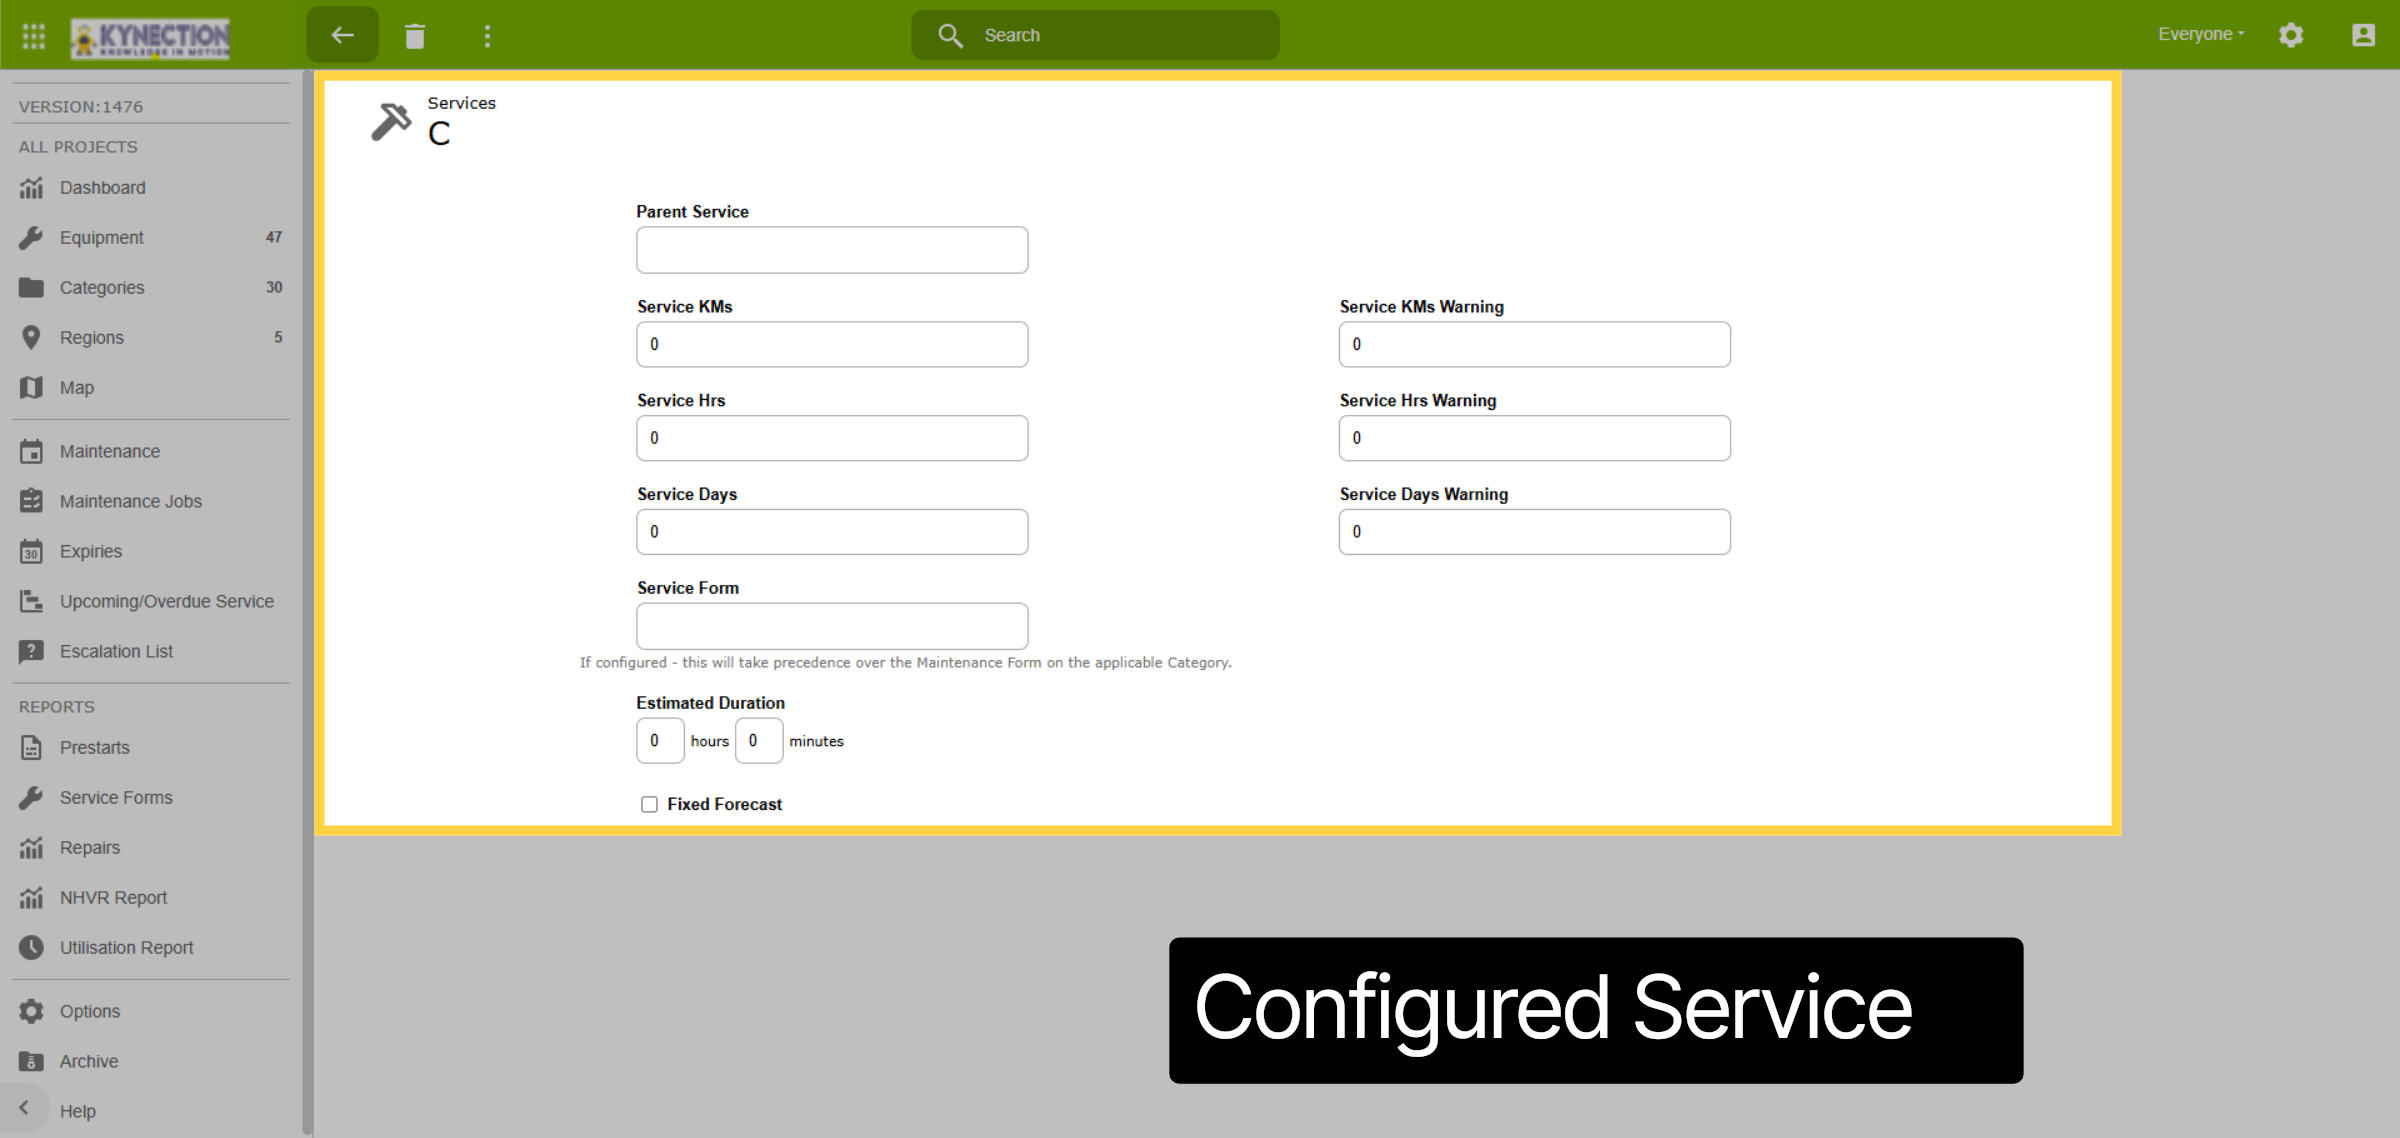
68. Configured Service
When you add a new service, previously configured baseline information is automatically transferred, so you don't have to re-enter it for categories using the same servicing details. If a category needs the service at a different interval, you can easily edit the servicing information at category level.
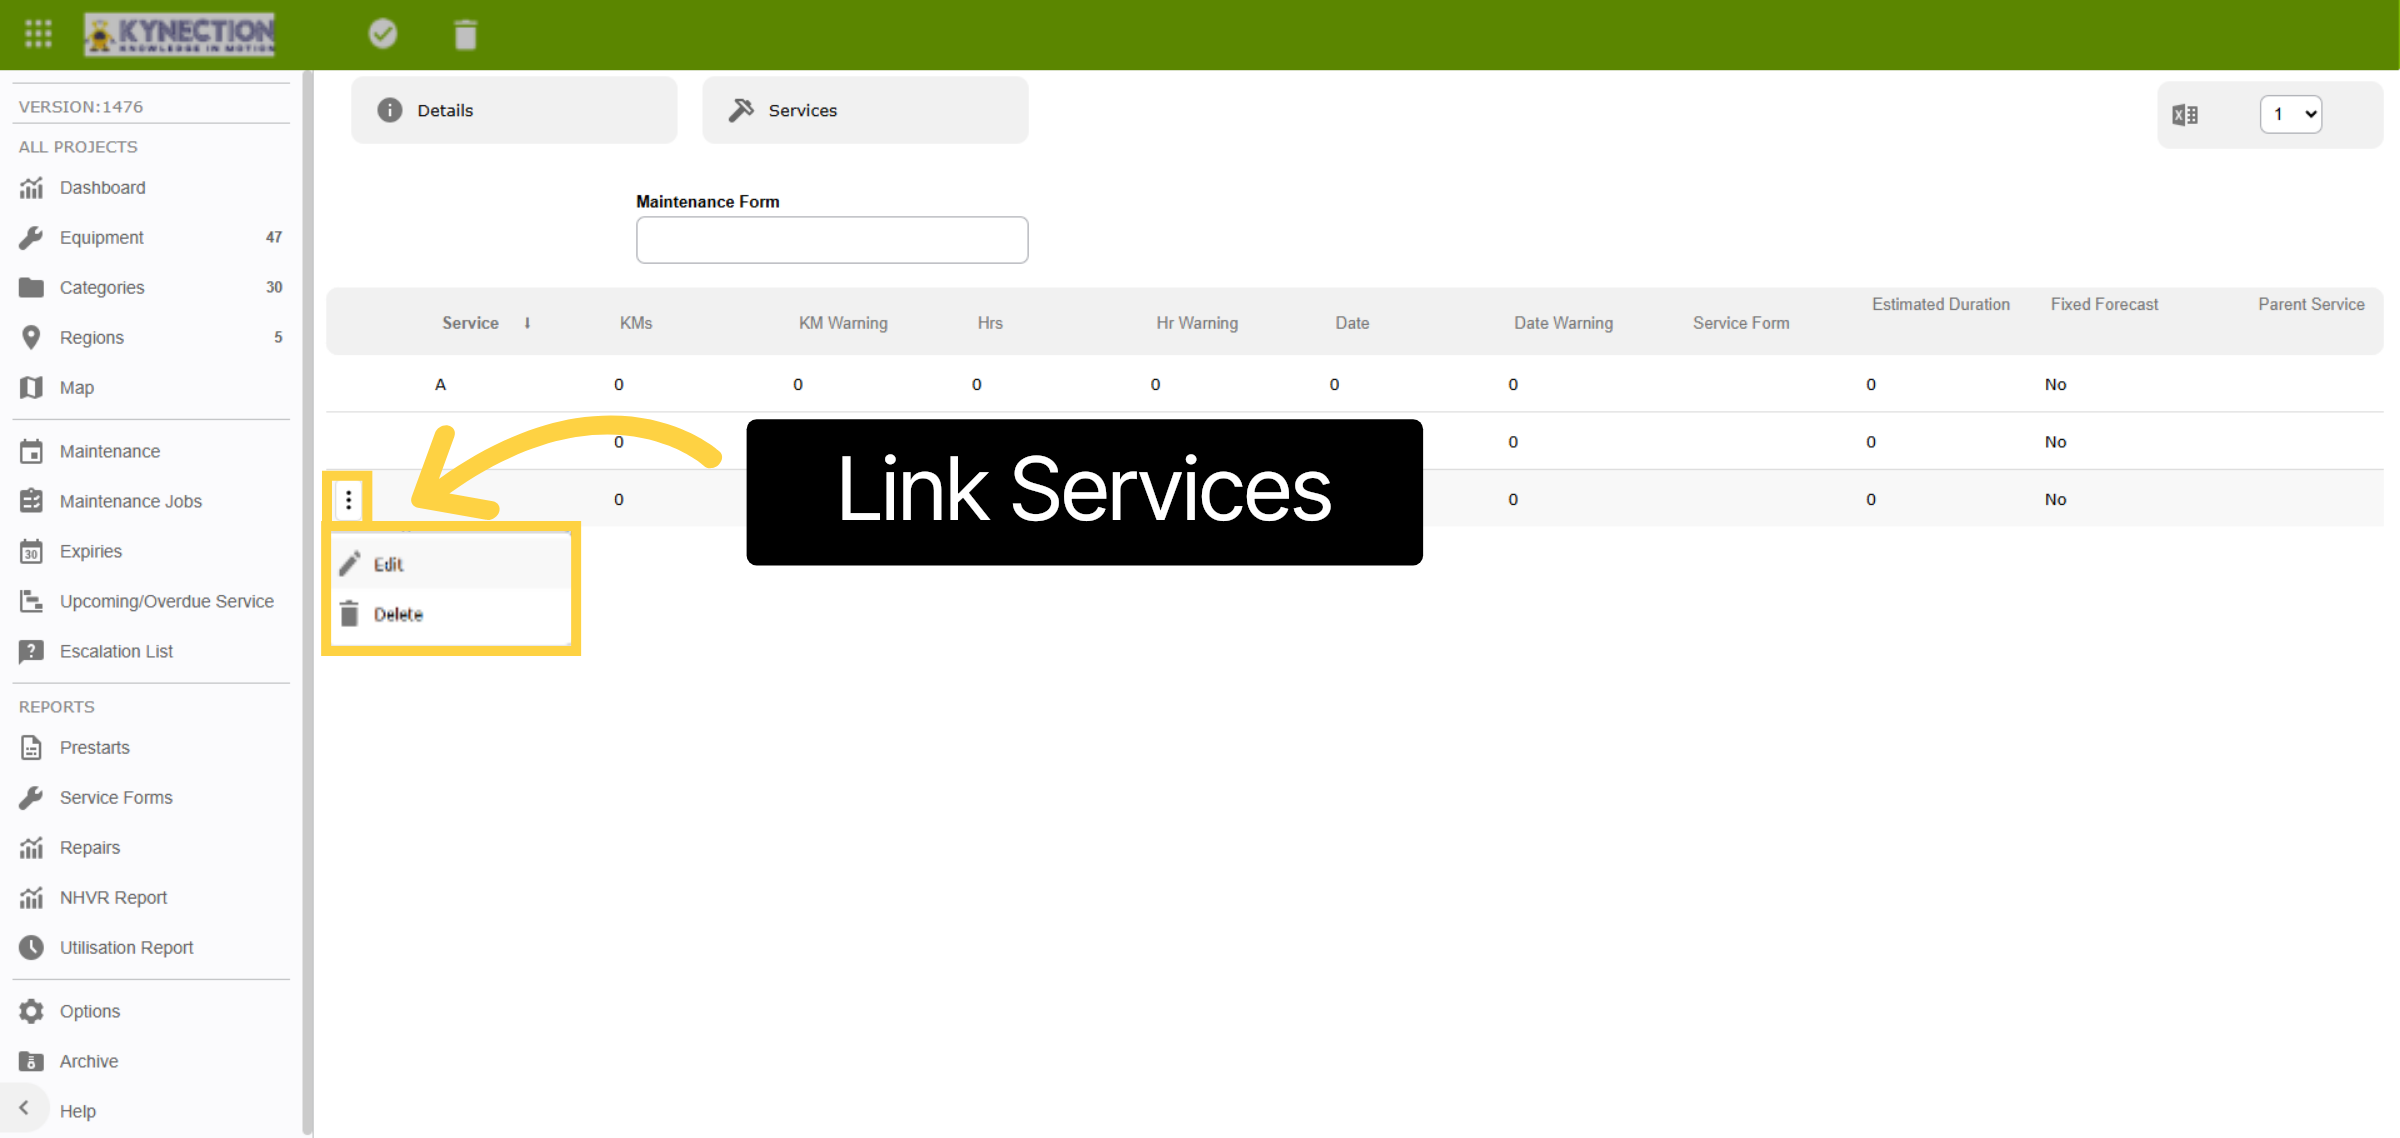
69. Dependancies
The updated Servicing Configuration allows you to connect services into a structured hierarchy, ensuring they are completed in a defined sequence. For example, to integrate Service B with Service C, giving Service C priority, click the three dots next to the service that should take precedence and select 'Edit.'
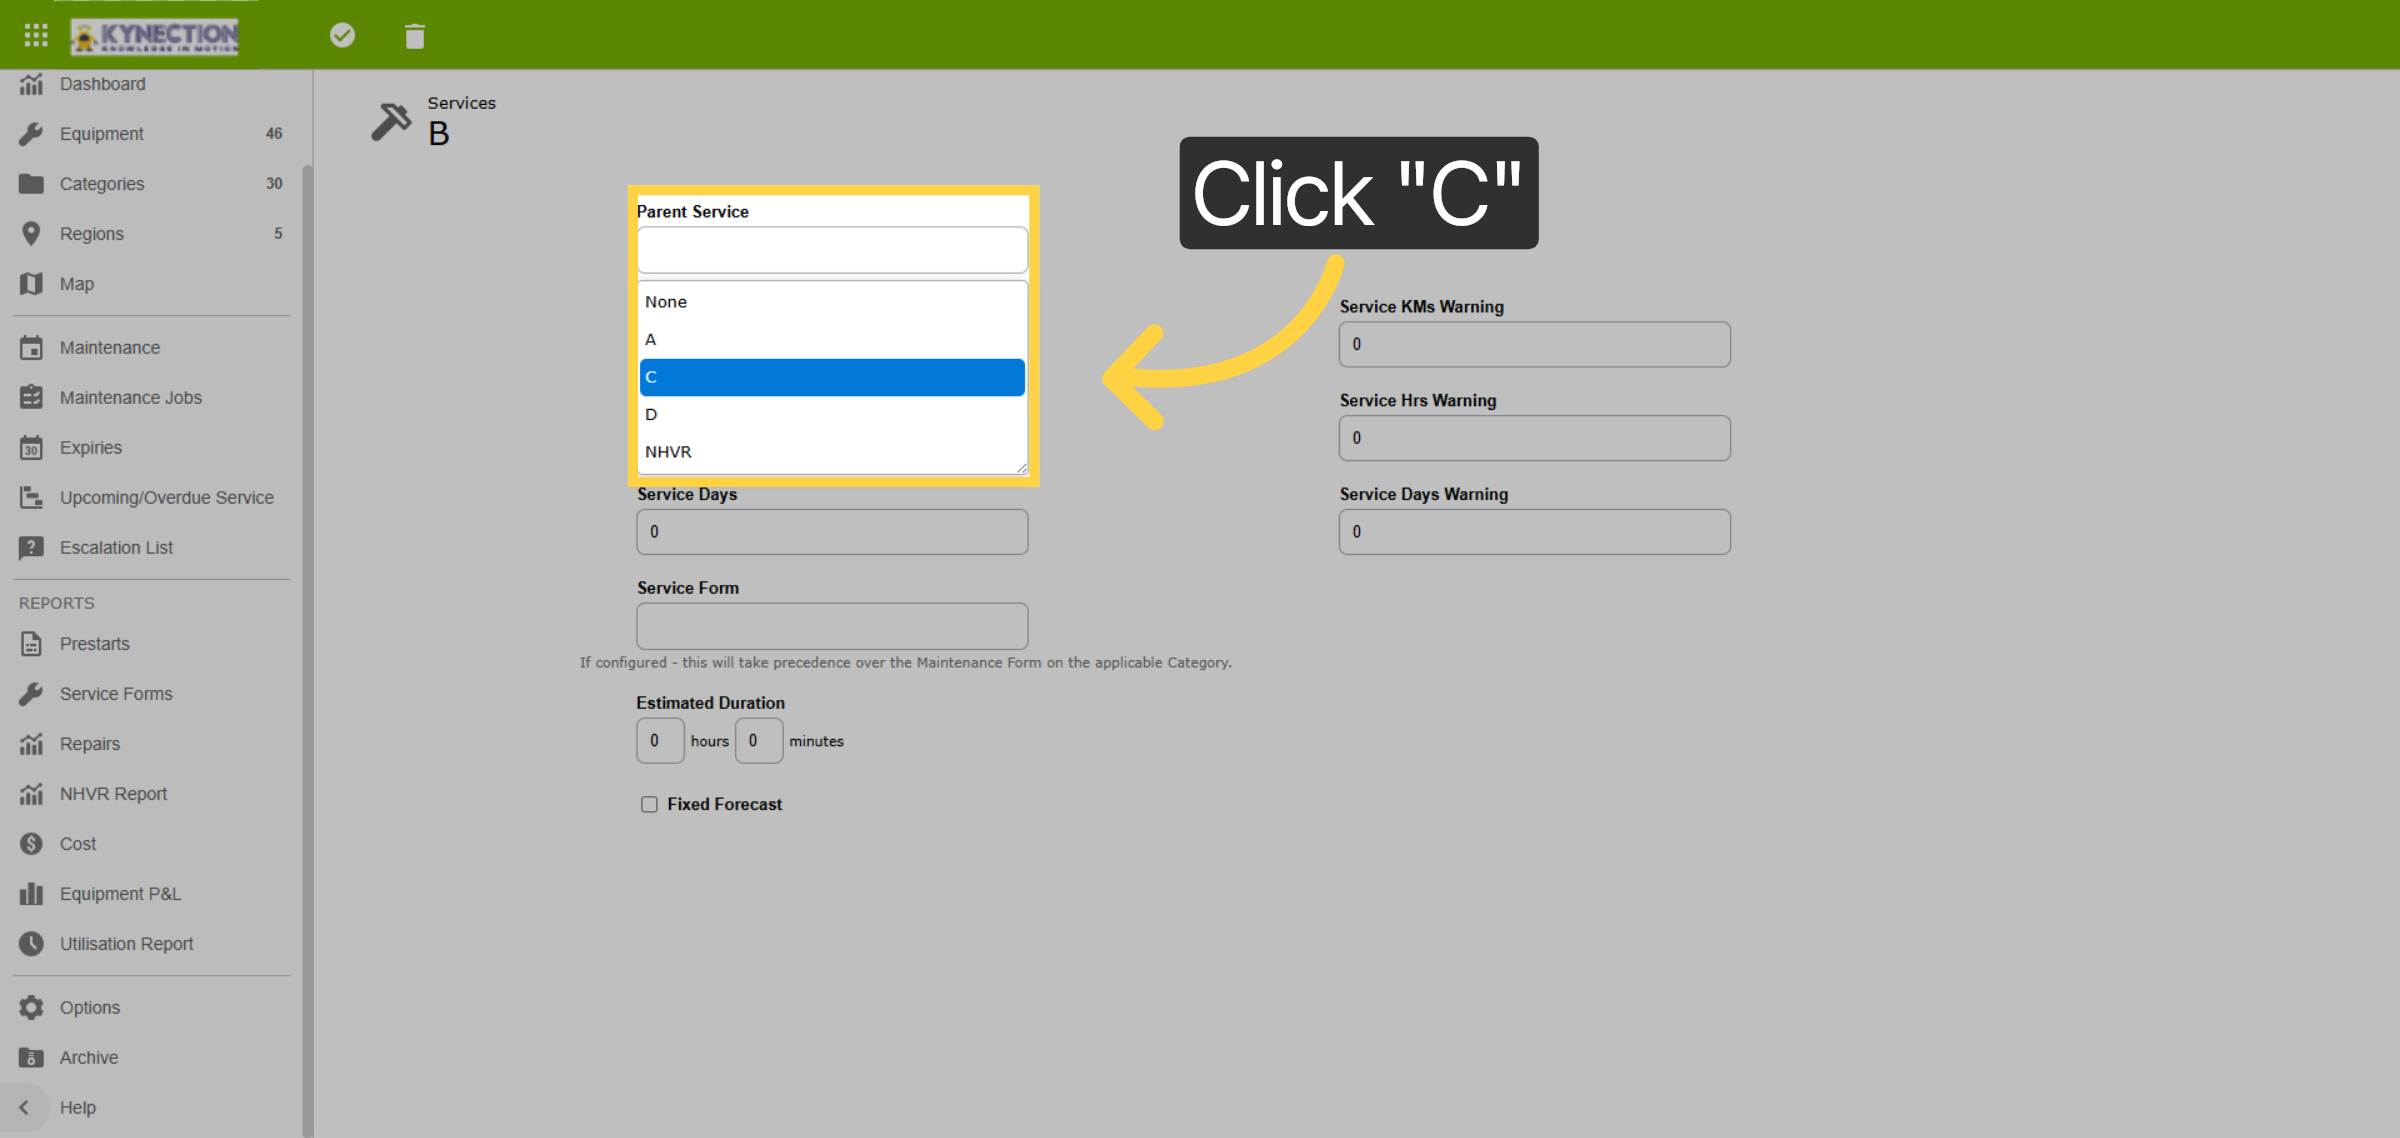
70. Parent Service
Tap on the Parent Service and a list of applicable services will be displayed. In this example, we aim to select Service C as the parent for our Service B in this category. Please select the applicable service to proceed and then use the back arrow when done.
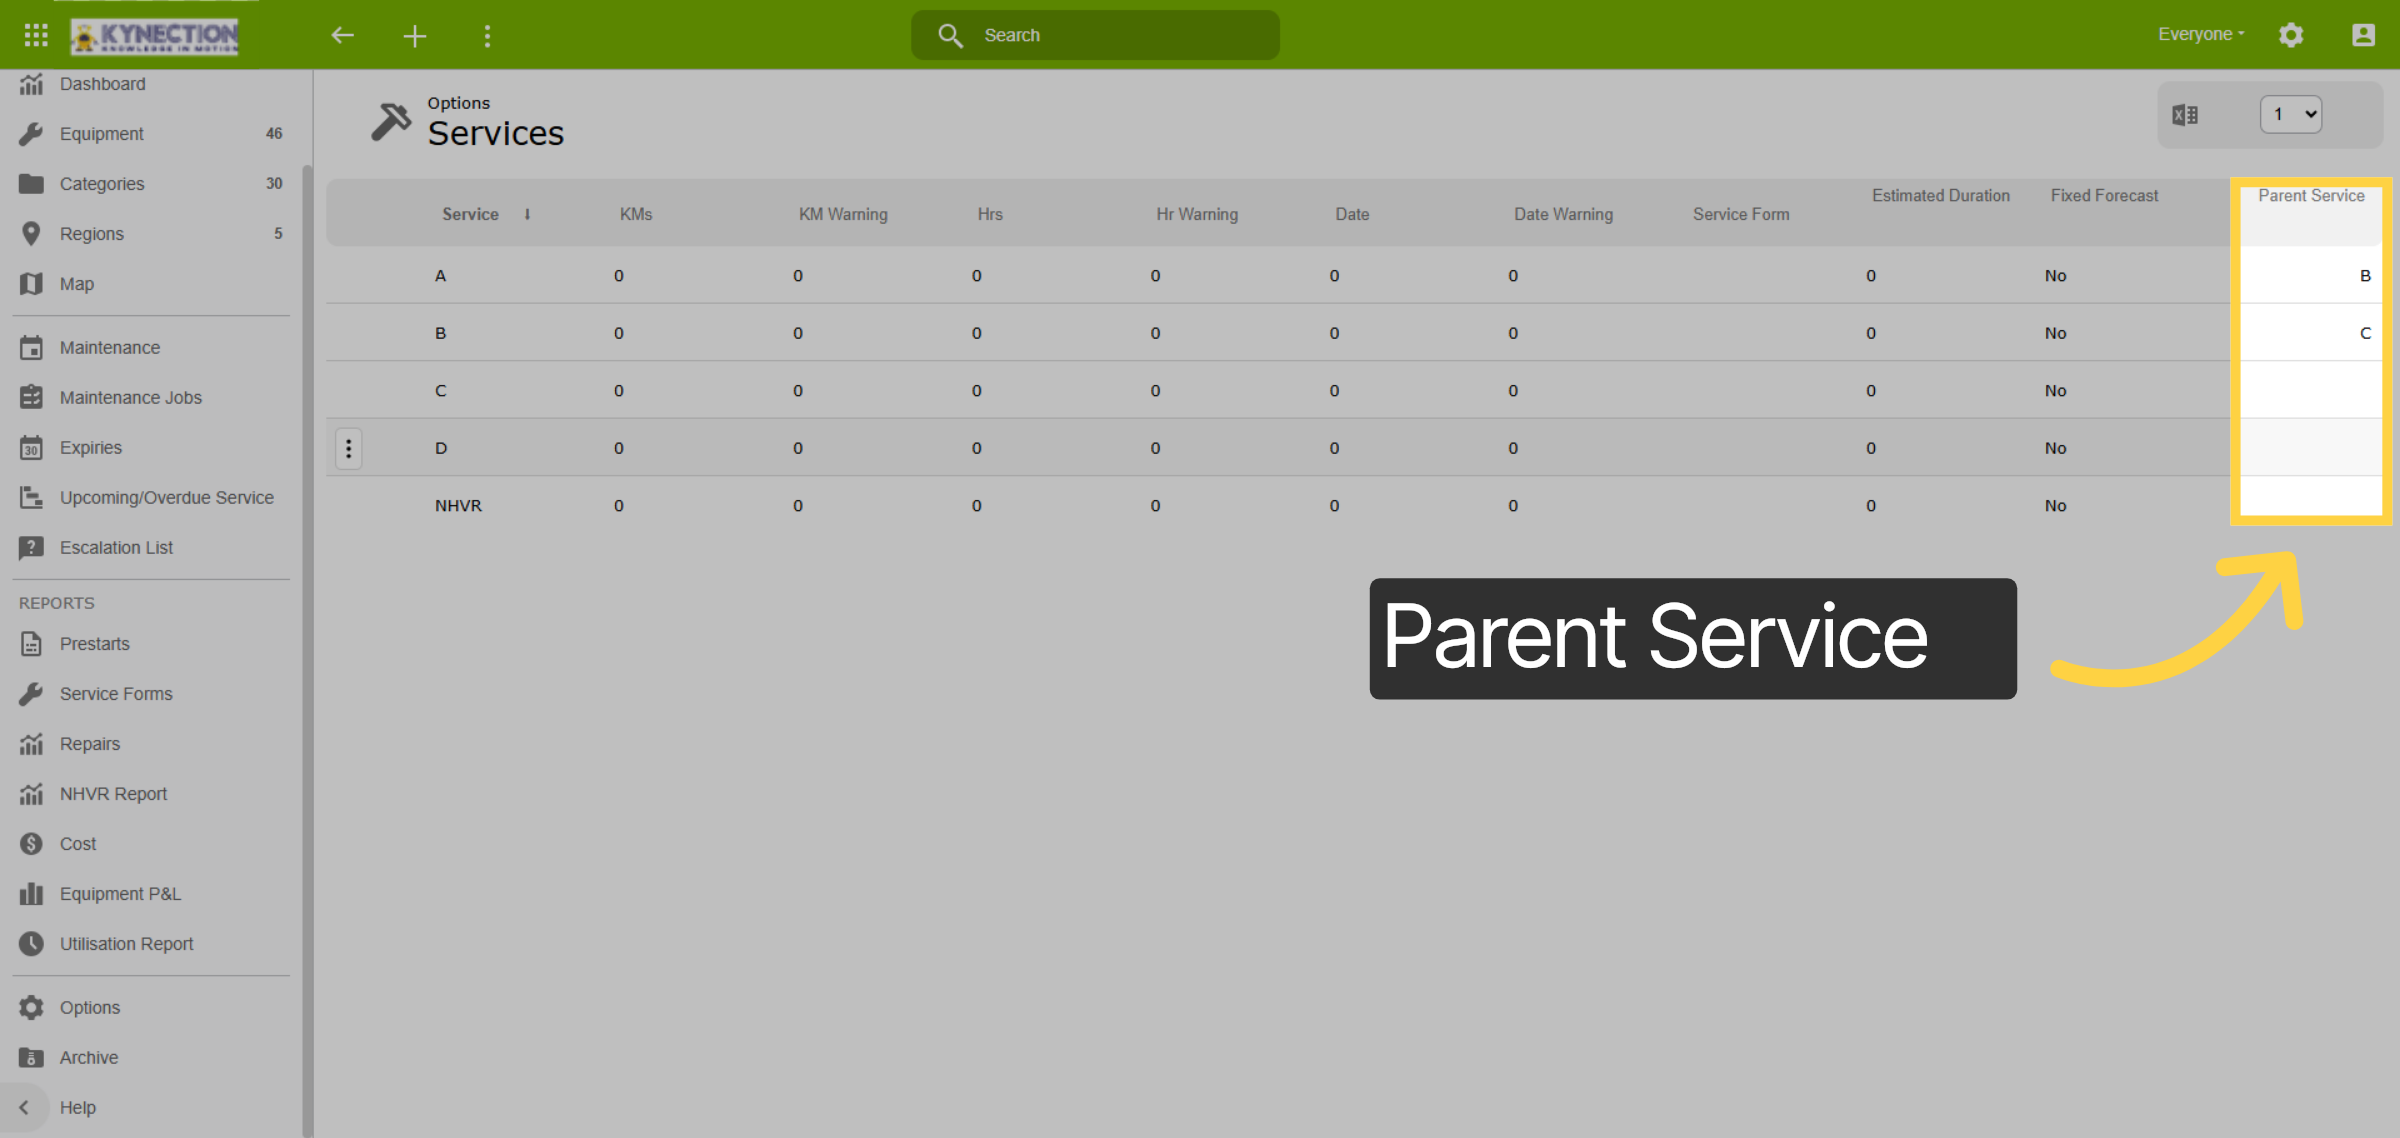
71. Updated Table
The table now shows the parent service of the modified service. The newly added service will take priority over the linked service, leading to the suppression of the linked service and any lower-tier services. If services are not linked, they will be treated independently and elevated as needed.
This training guide empowers users with the essential skills needed to effectively manage all aspects of equipment maintenance using Kynection web and mobile a.

