This training guide offers a thorough overview of Q-Control and the features available within the Quallogi application.
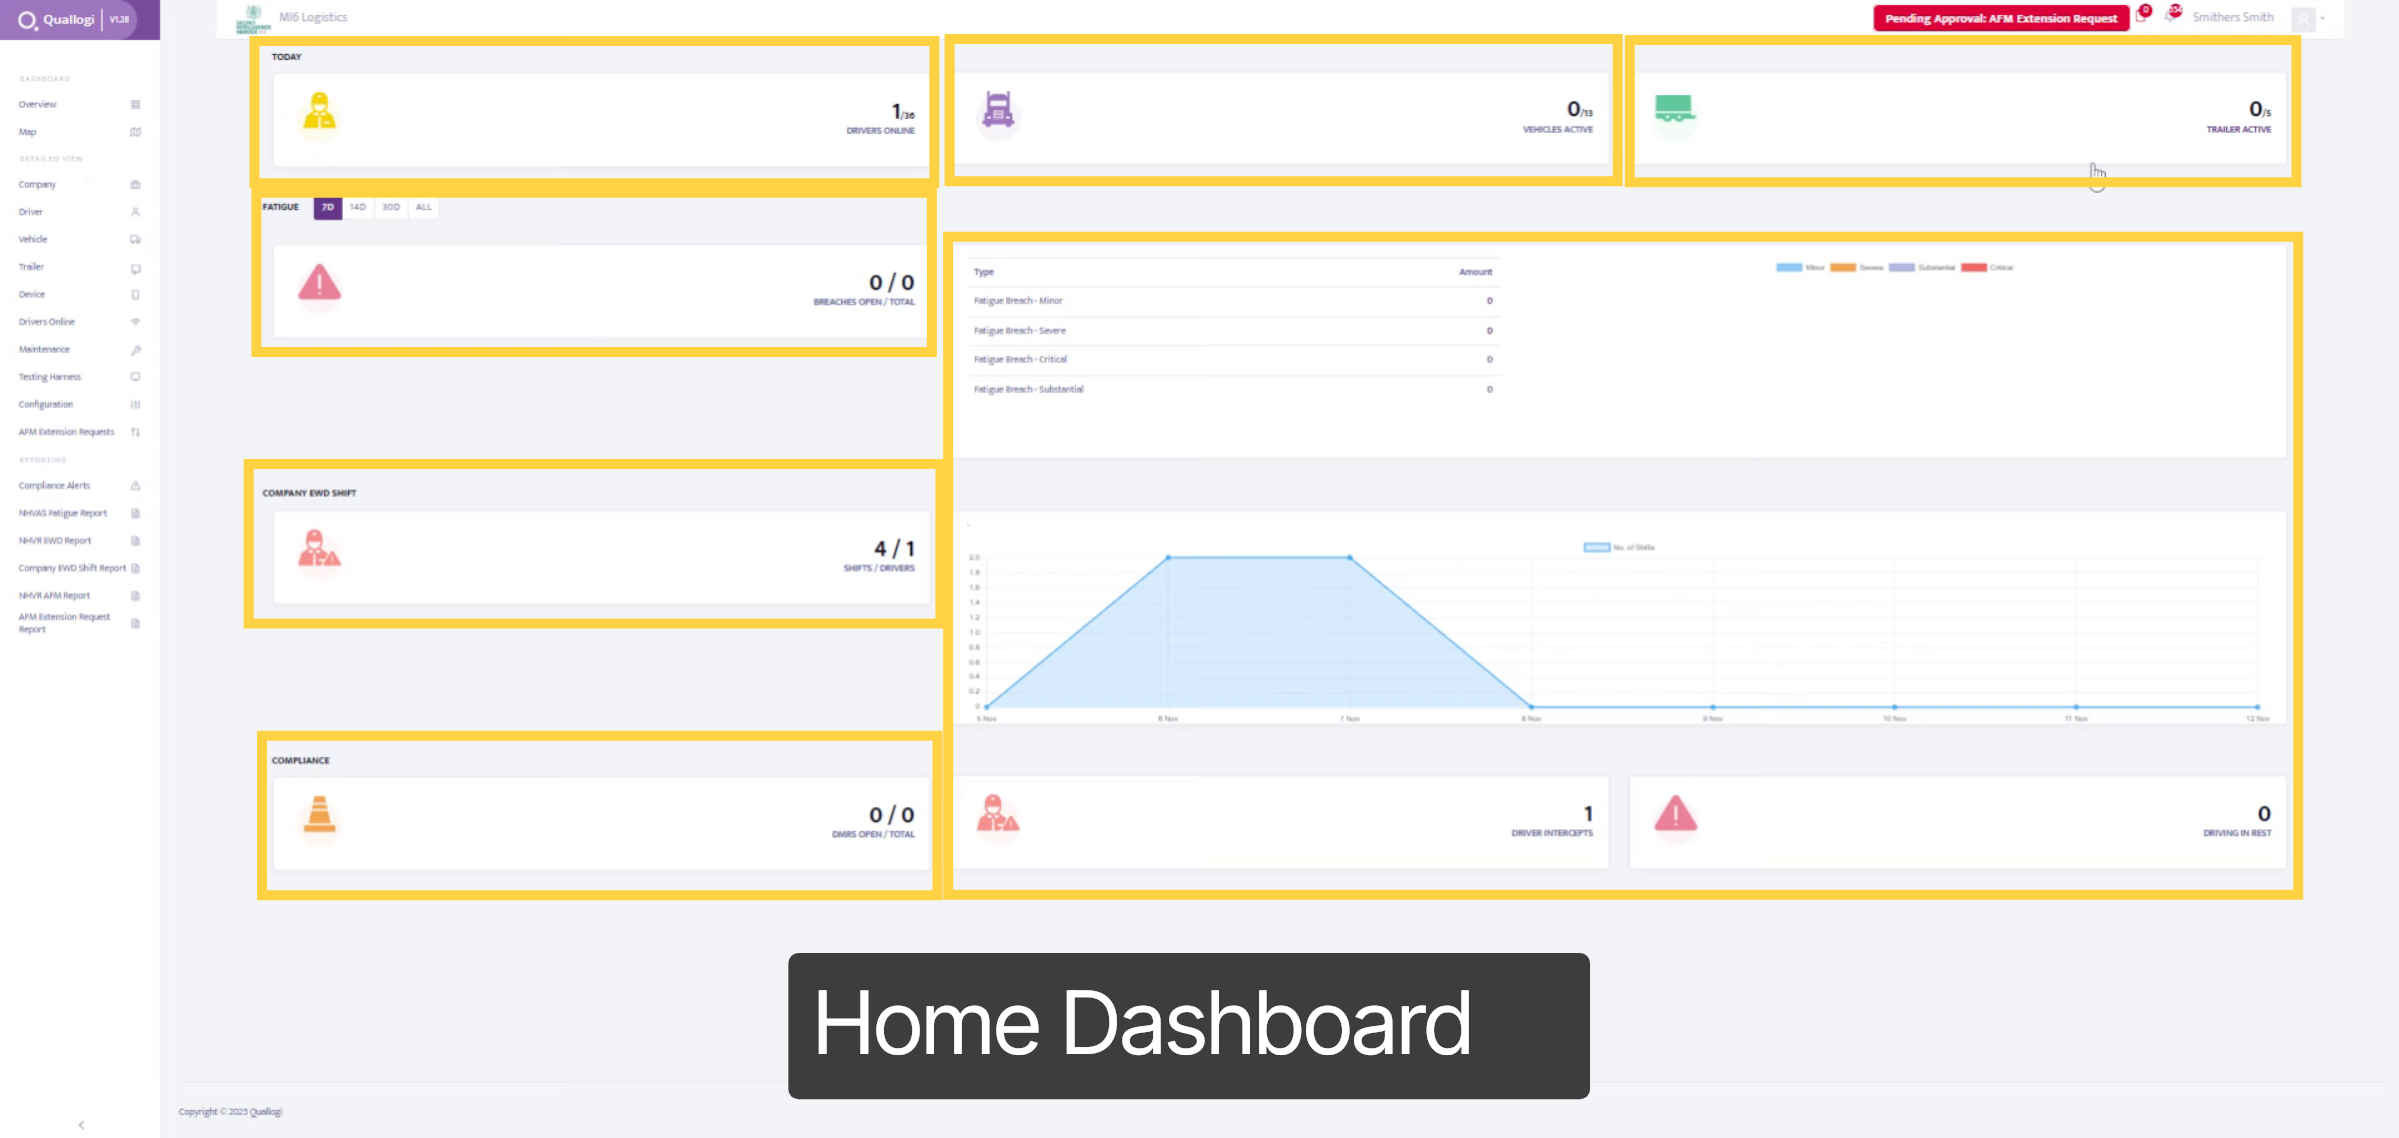
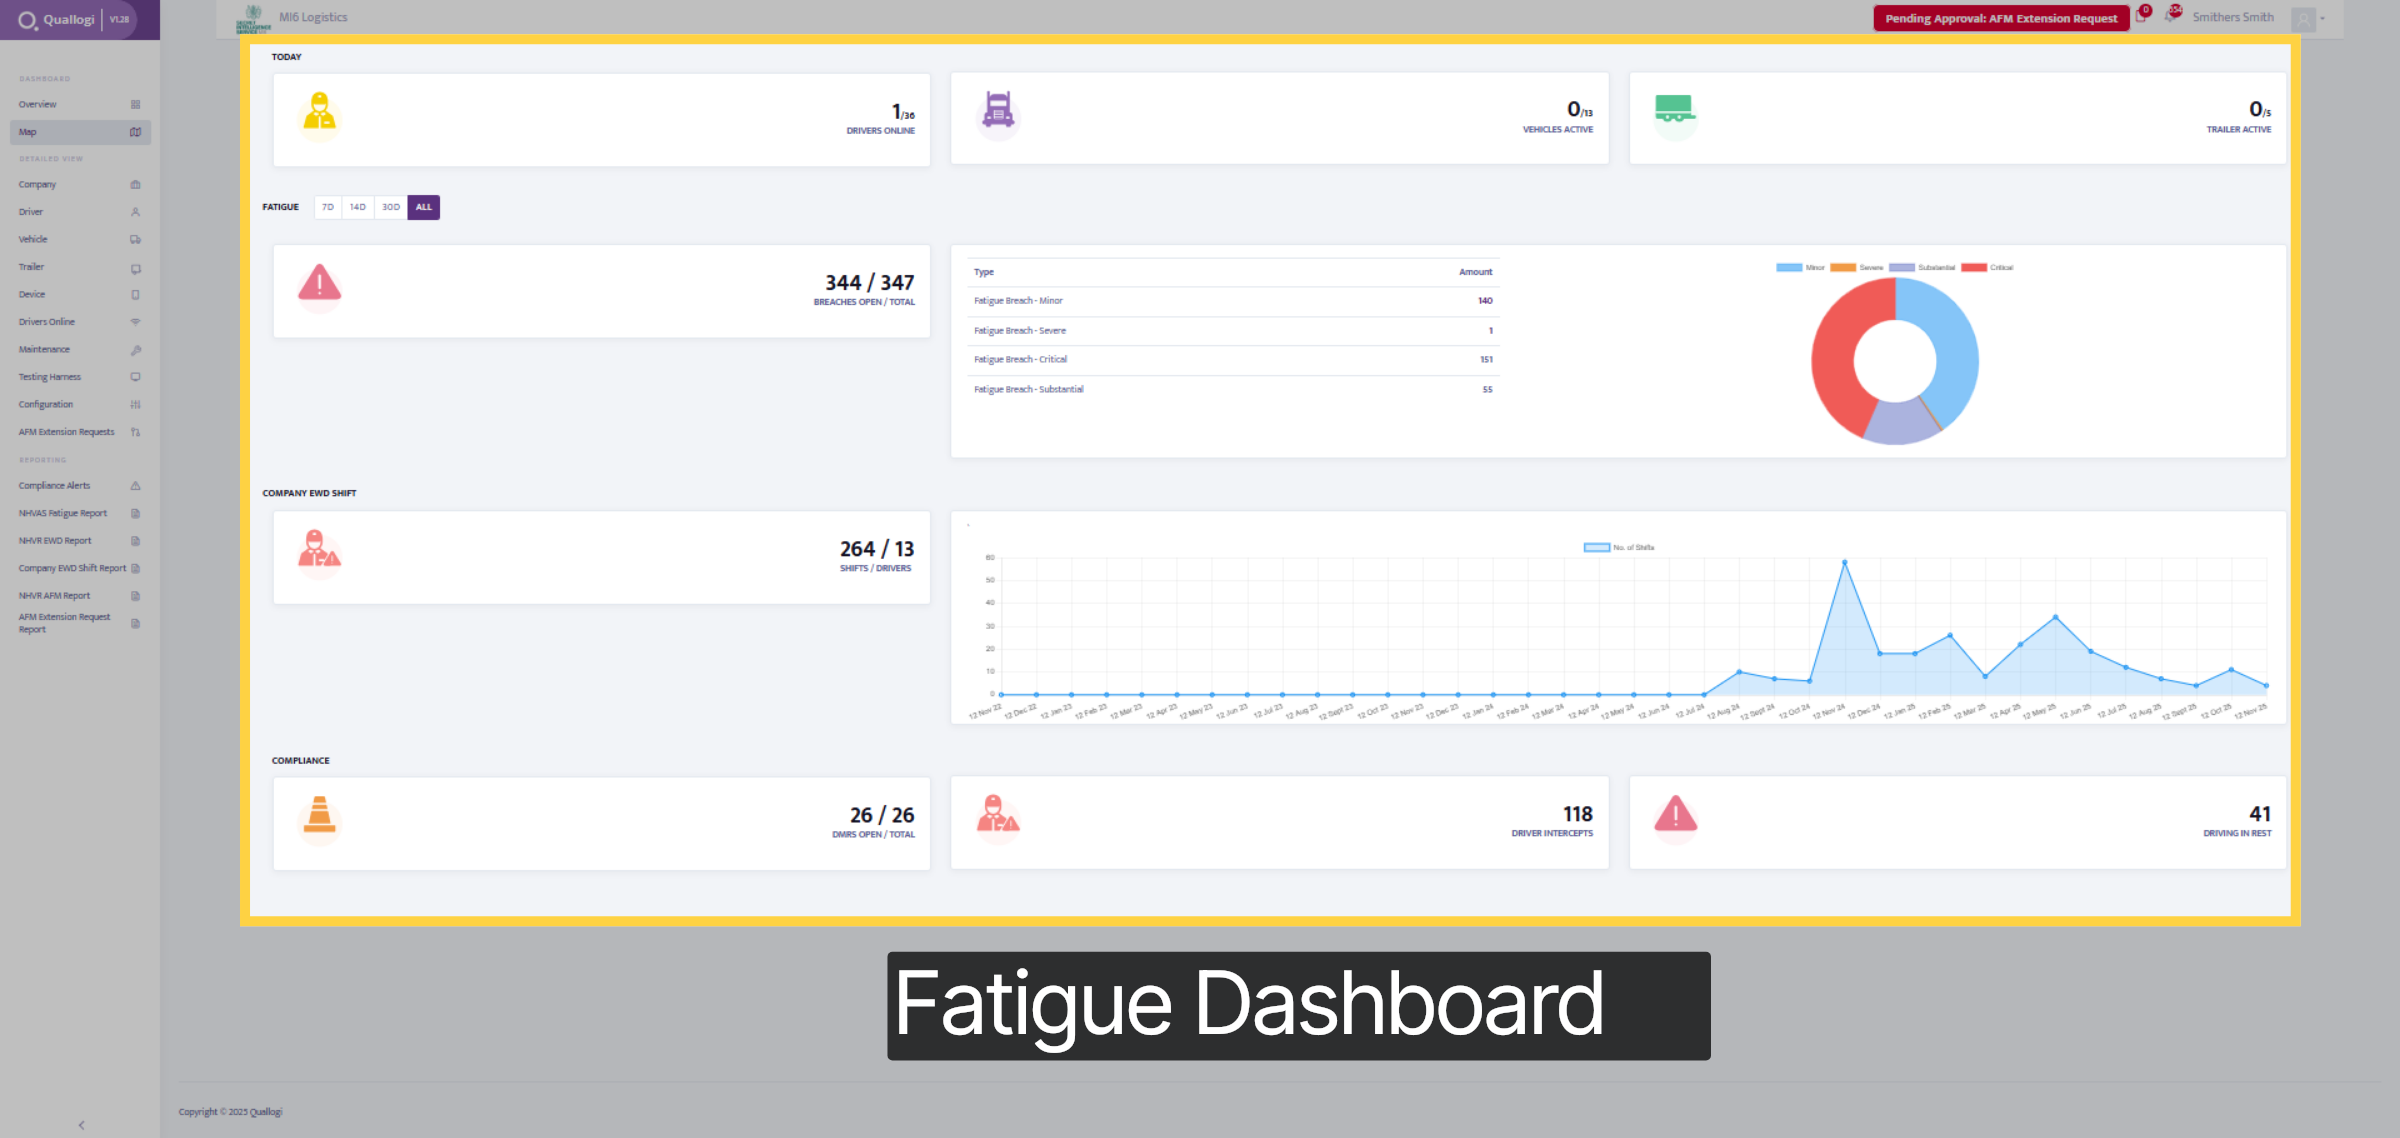
1. Home Dashboard
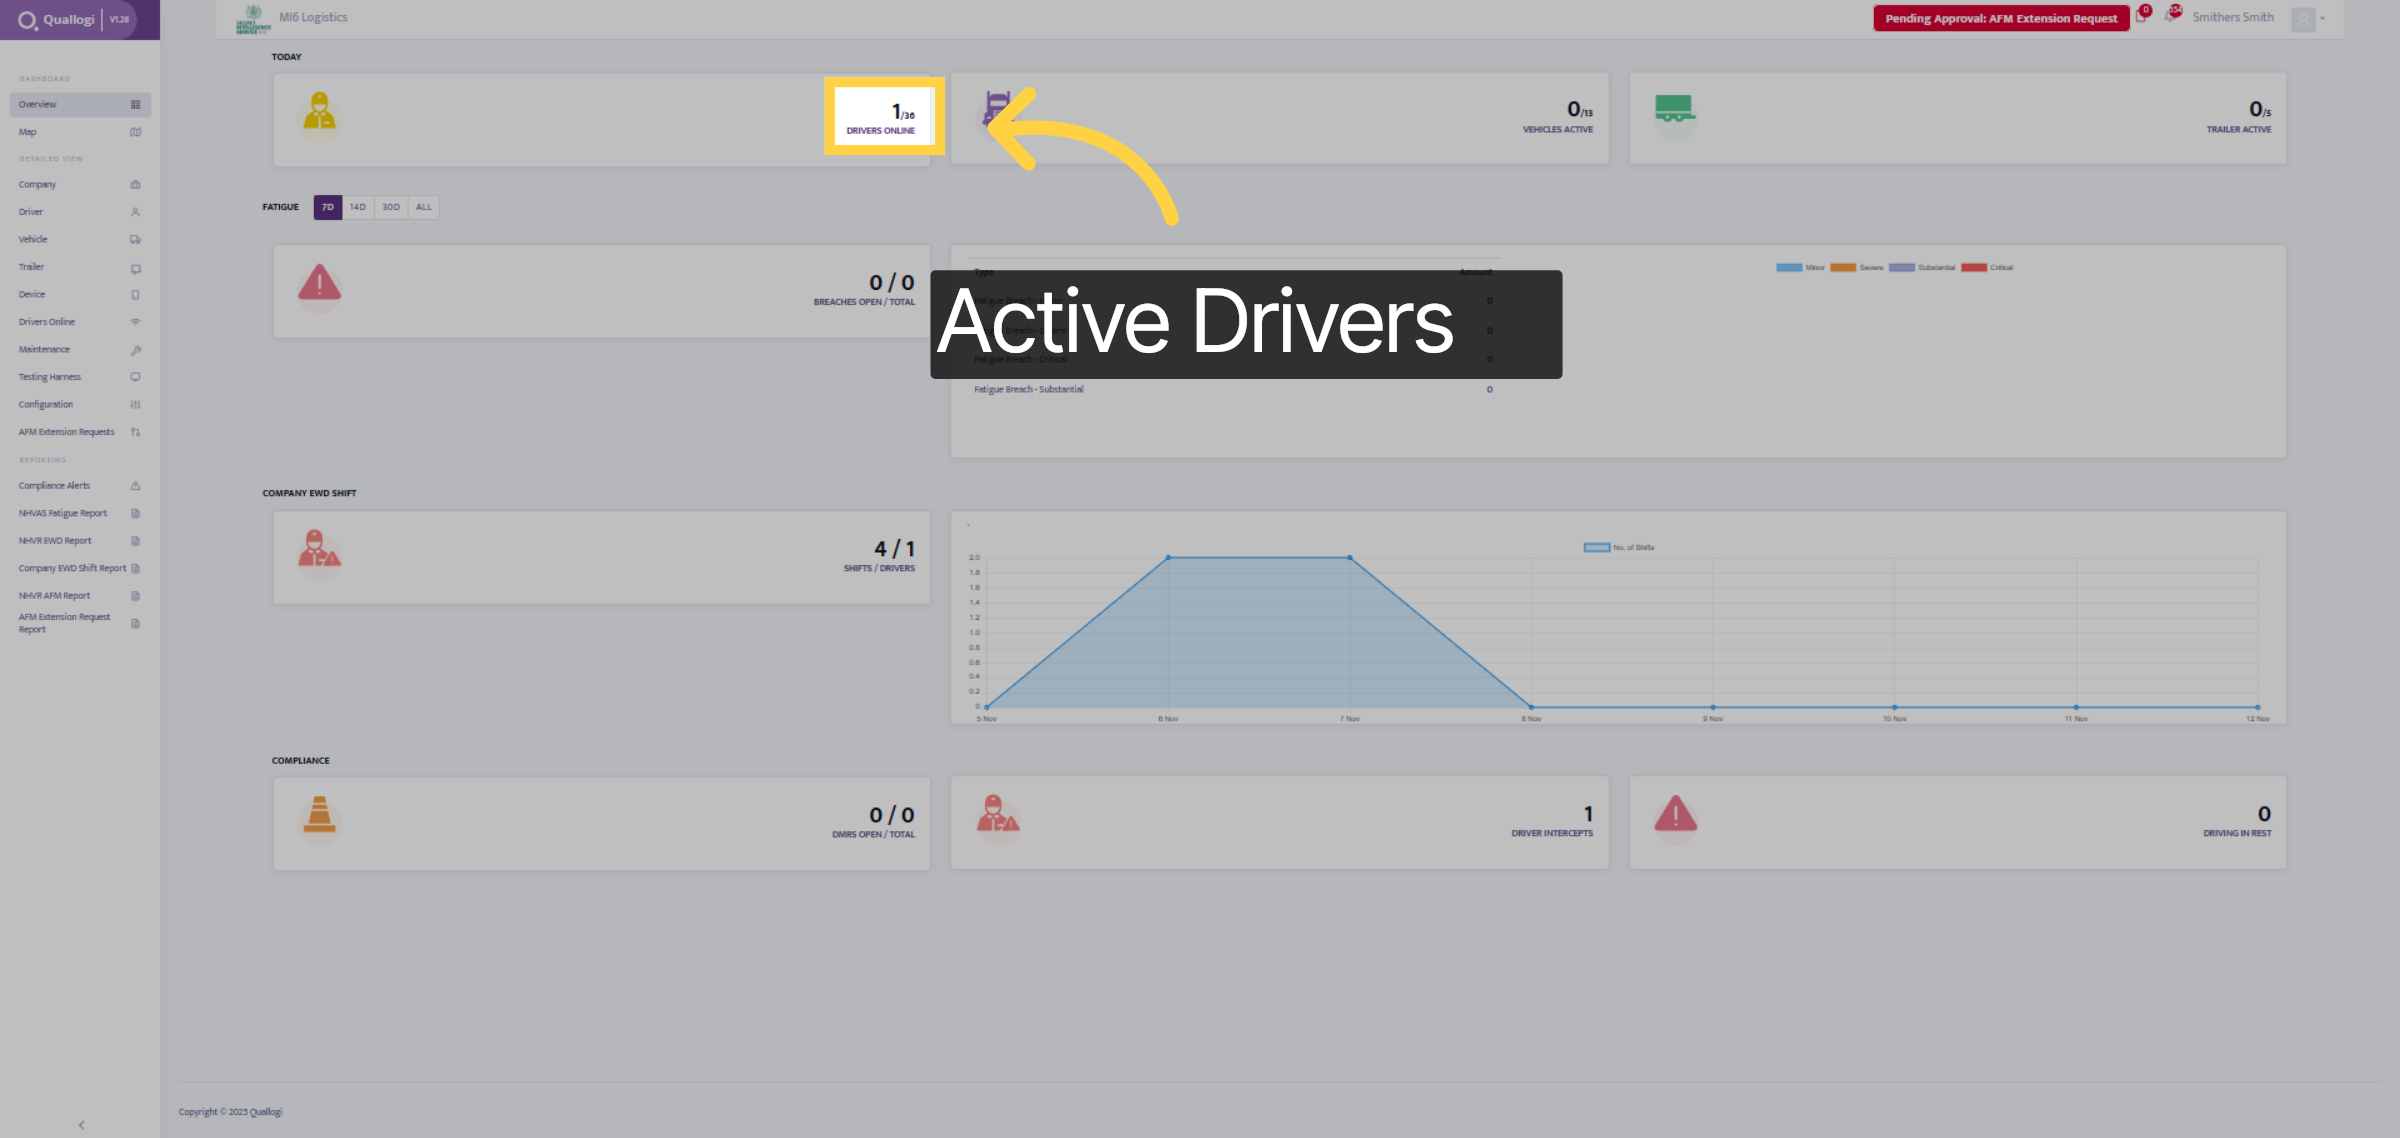
The home dashboard showcases a variety of information. You can view all drivers who logged in today, the number of active vehicles and trailers, and the total breaches incurred over the past 7, 14, and 30 days, as well as the overall total. Additionally, a tab displays all EWD shifts, any compliance NCRs raised, and a chart illustrating the breaches and interceptions that have occurred.
2. Driver Tab
Let's first explore the Drivers tab.
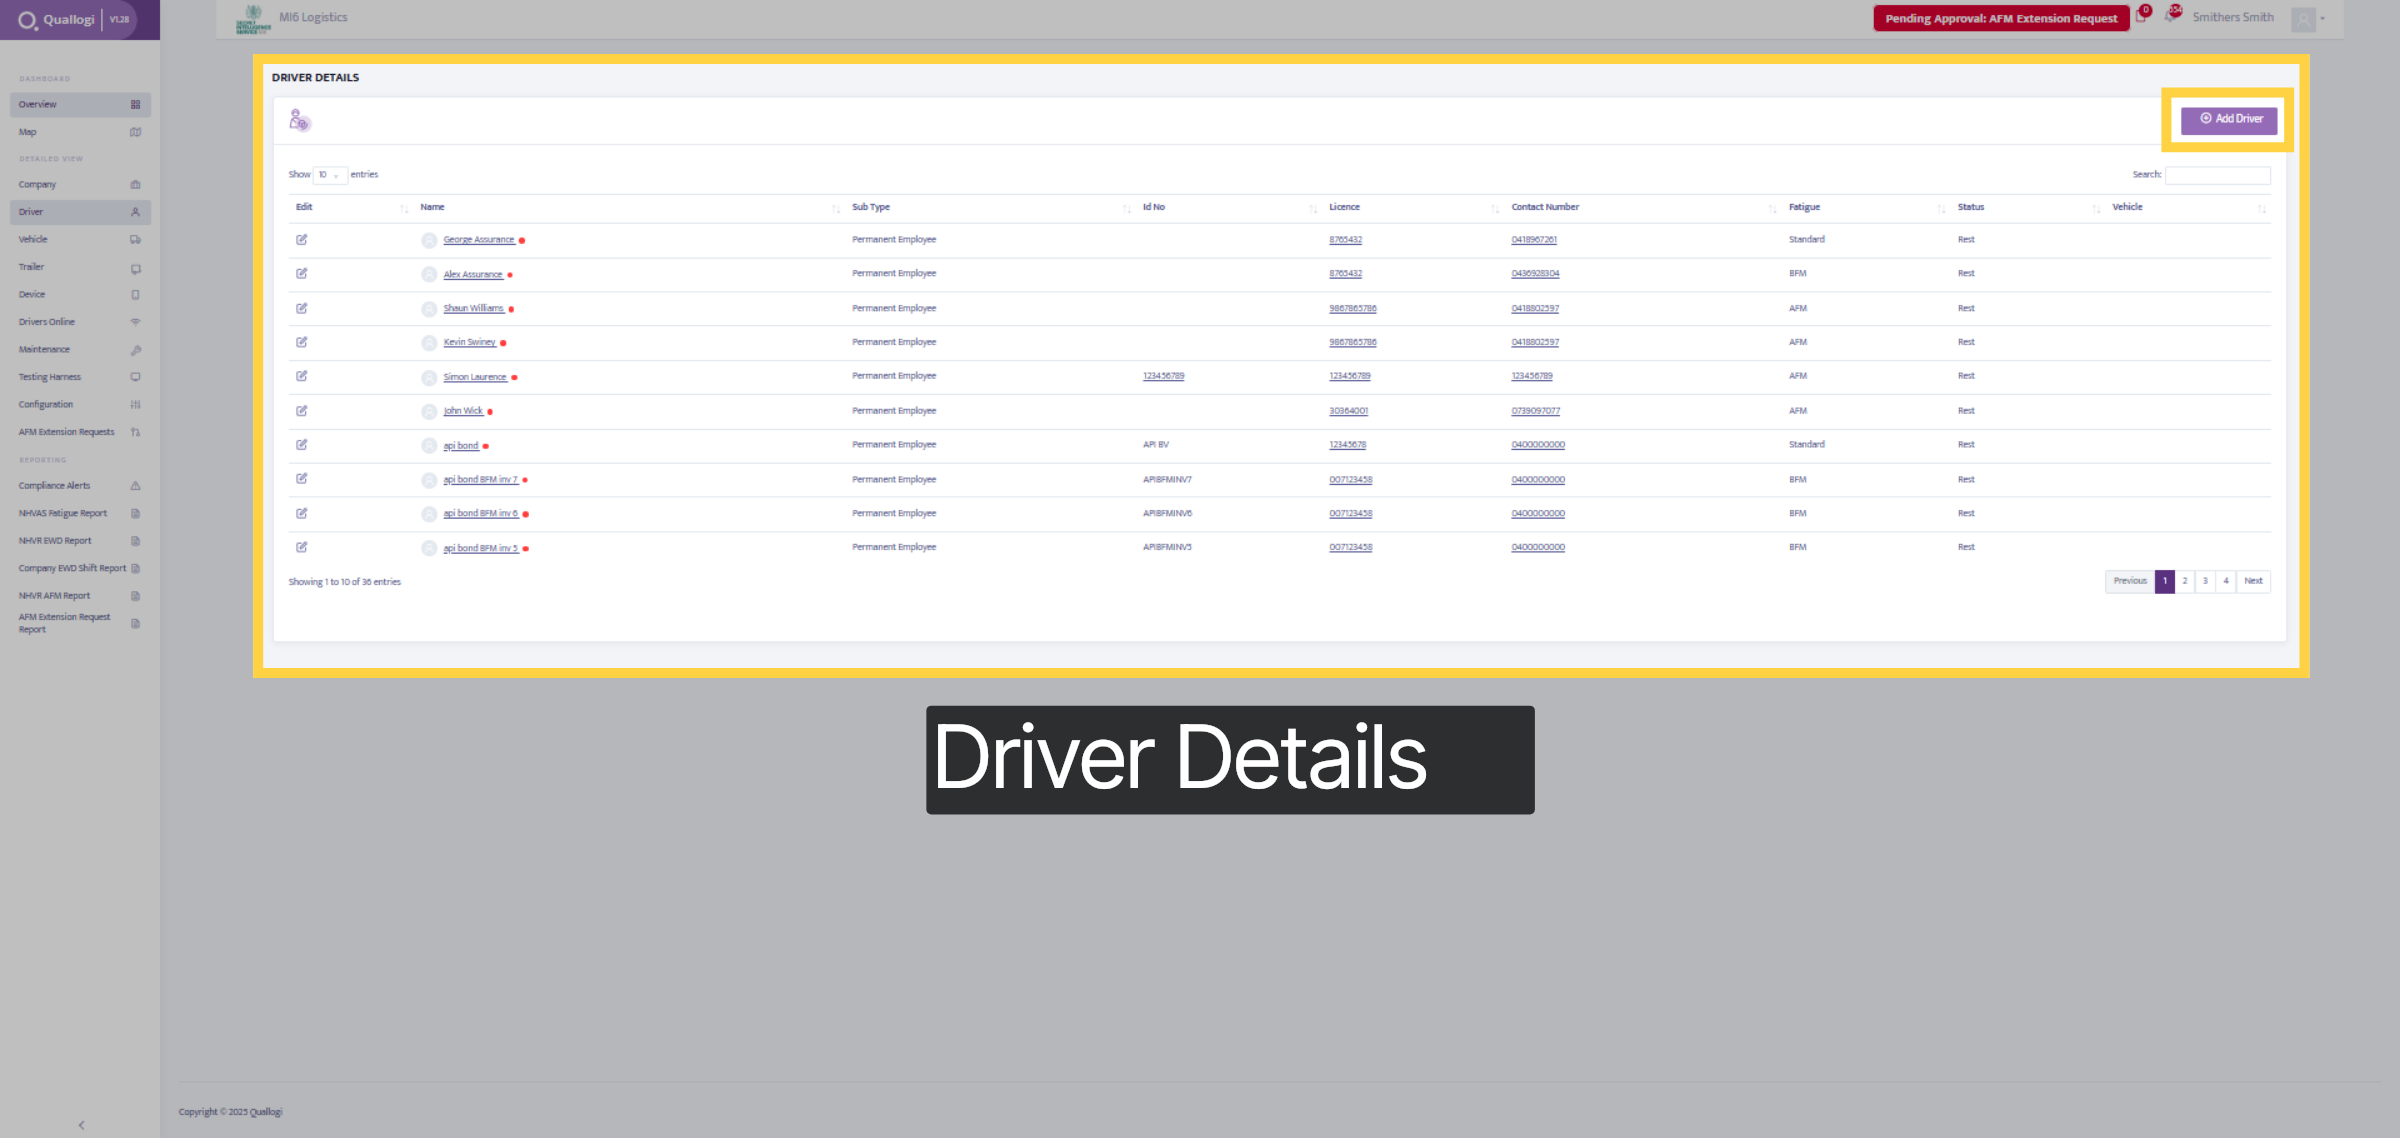
3. Driver Details
In this section, you can view all your drivers, including their names, employee type, licenses, contact numbers, fatigue schedule, and current status. To add a new driver, select the "Add Driver" button in the top right corner and fill in their details.
4. Fatigue Tab
Let's explore the fatigue tab.
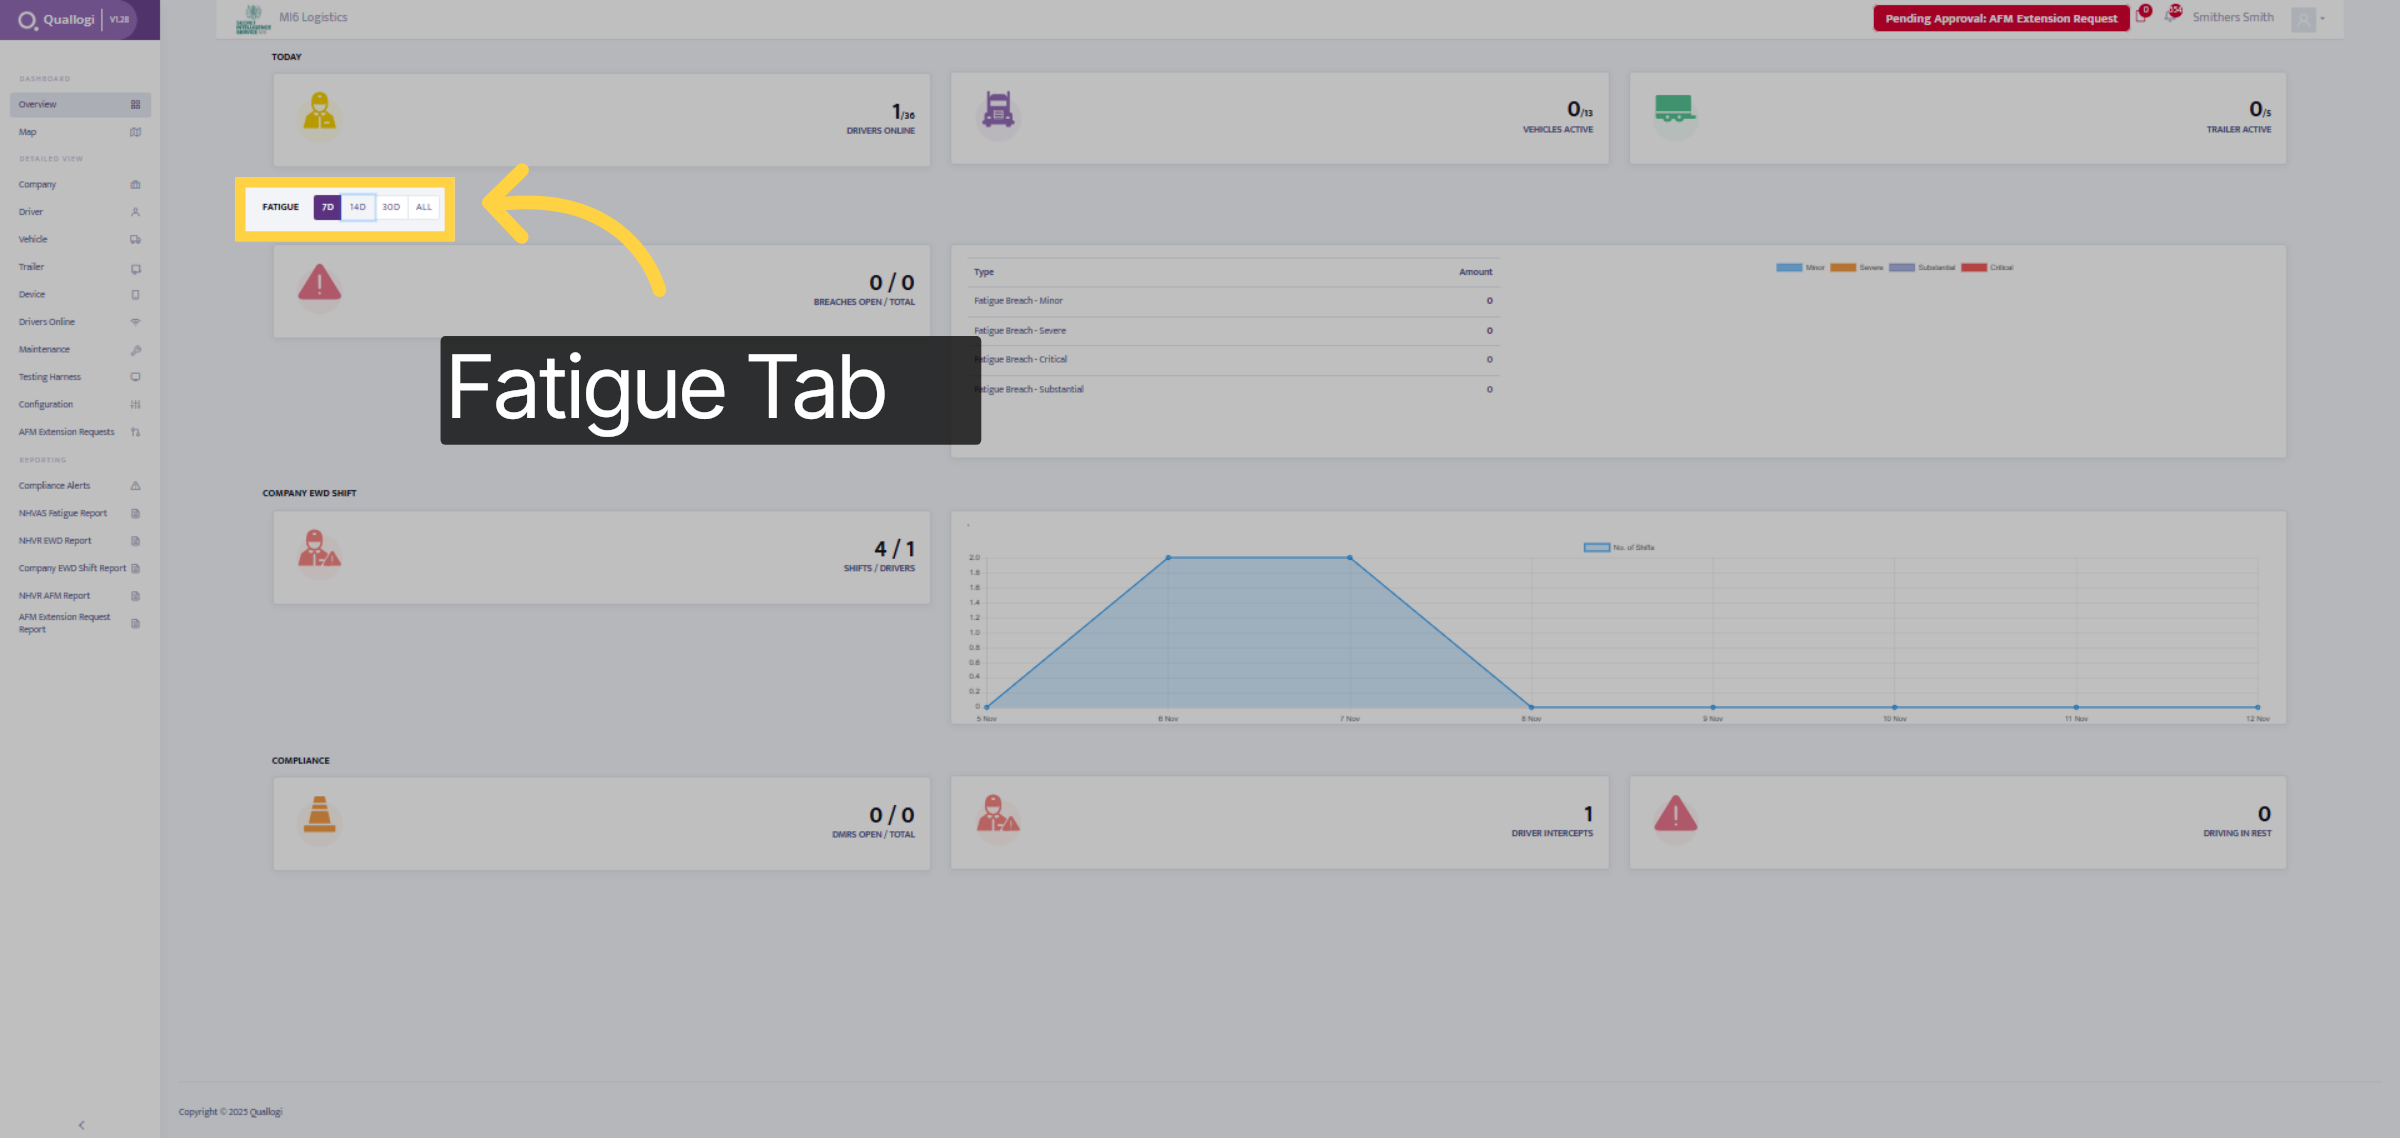
5. Fatigue Details
Within this section, you are able to view all the drivers, trucks and trailer that are online, the total number of breaches that have occurred, the total of EWD shifts, and the total DMRs that are open for compliance measures. Furthermore, there is a list of types of fatigue breaches that have occurred, categorized as minor, severe, critical, or substantial.
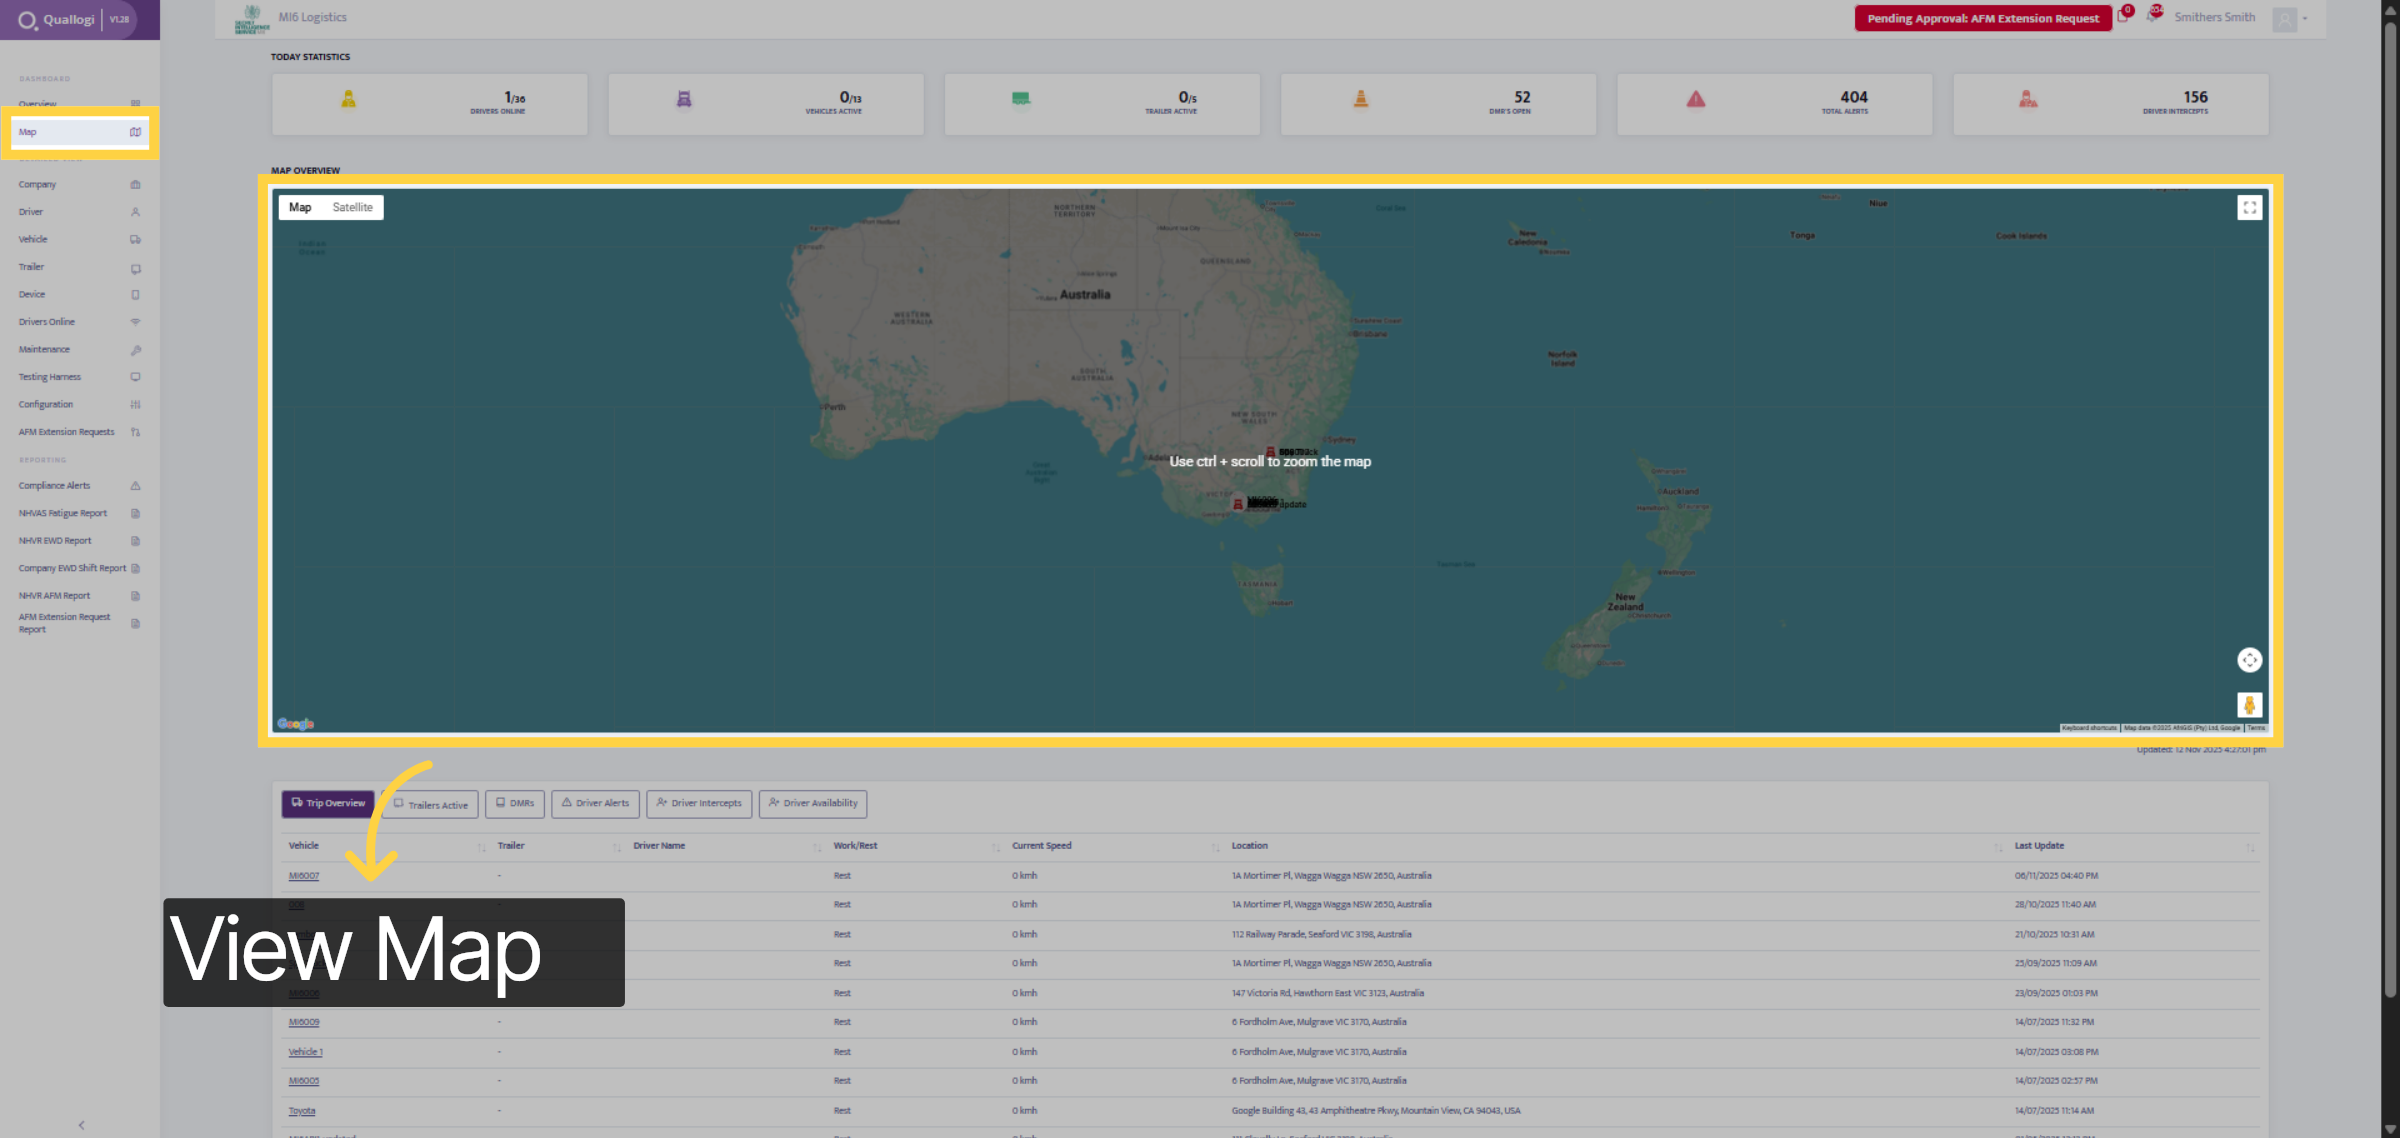
6. Map Details
On the map tab, you can view all your trucks and drivers on a live map. You can see which drivers are actively working or resting, along with their current speed and location.
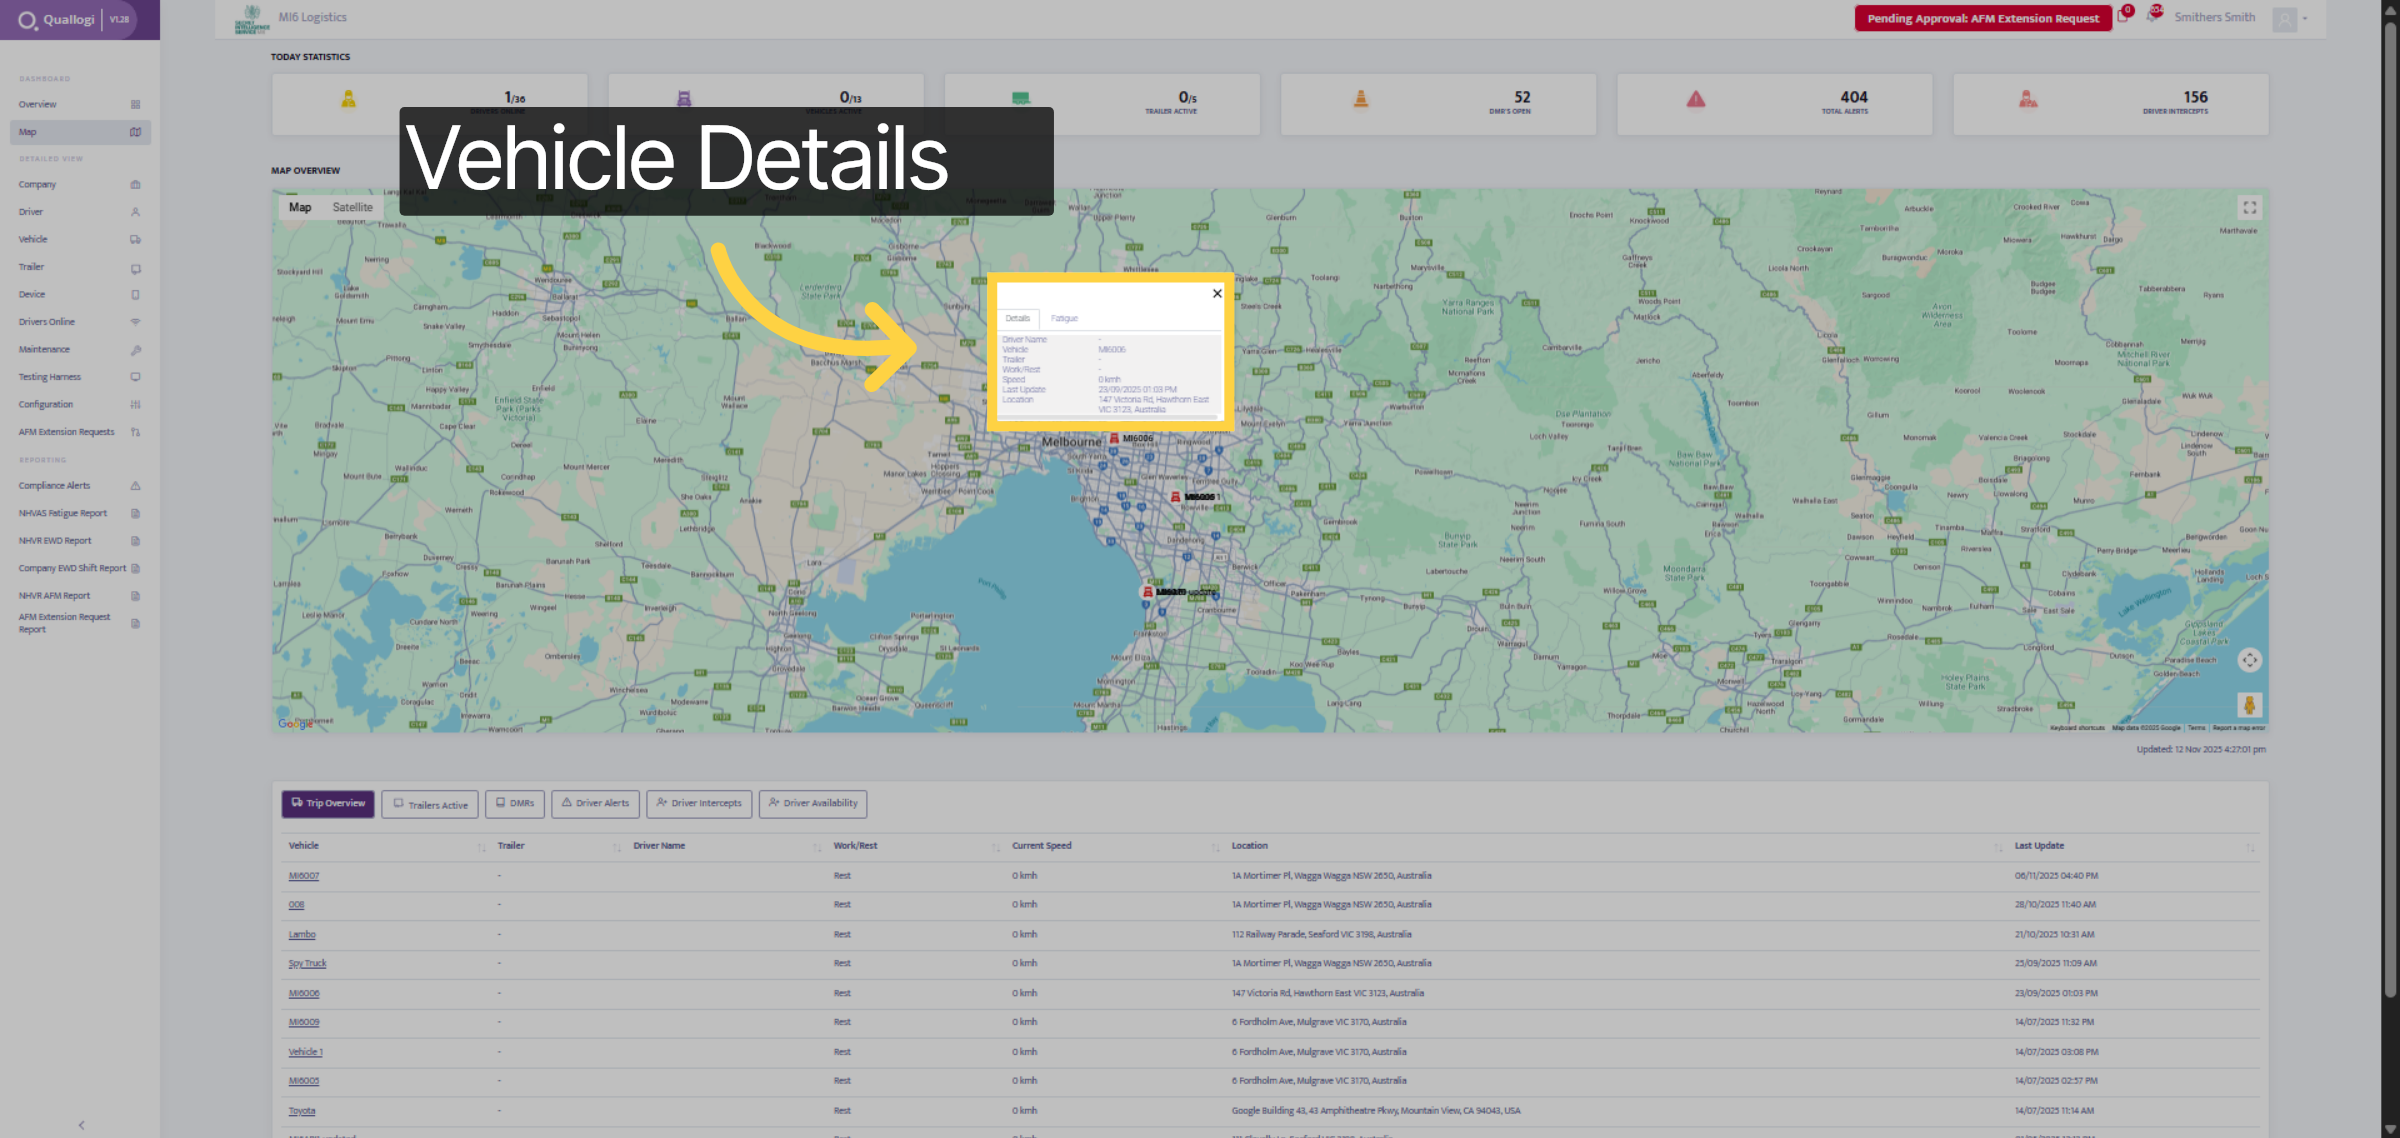
7. Vehicle Details
Once you select a vehicle from the map, further details are displayed, such as their work/rest status, speeds, location, and their name.
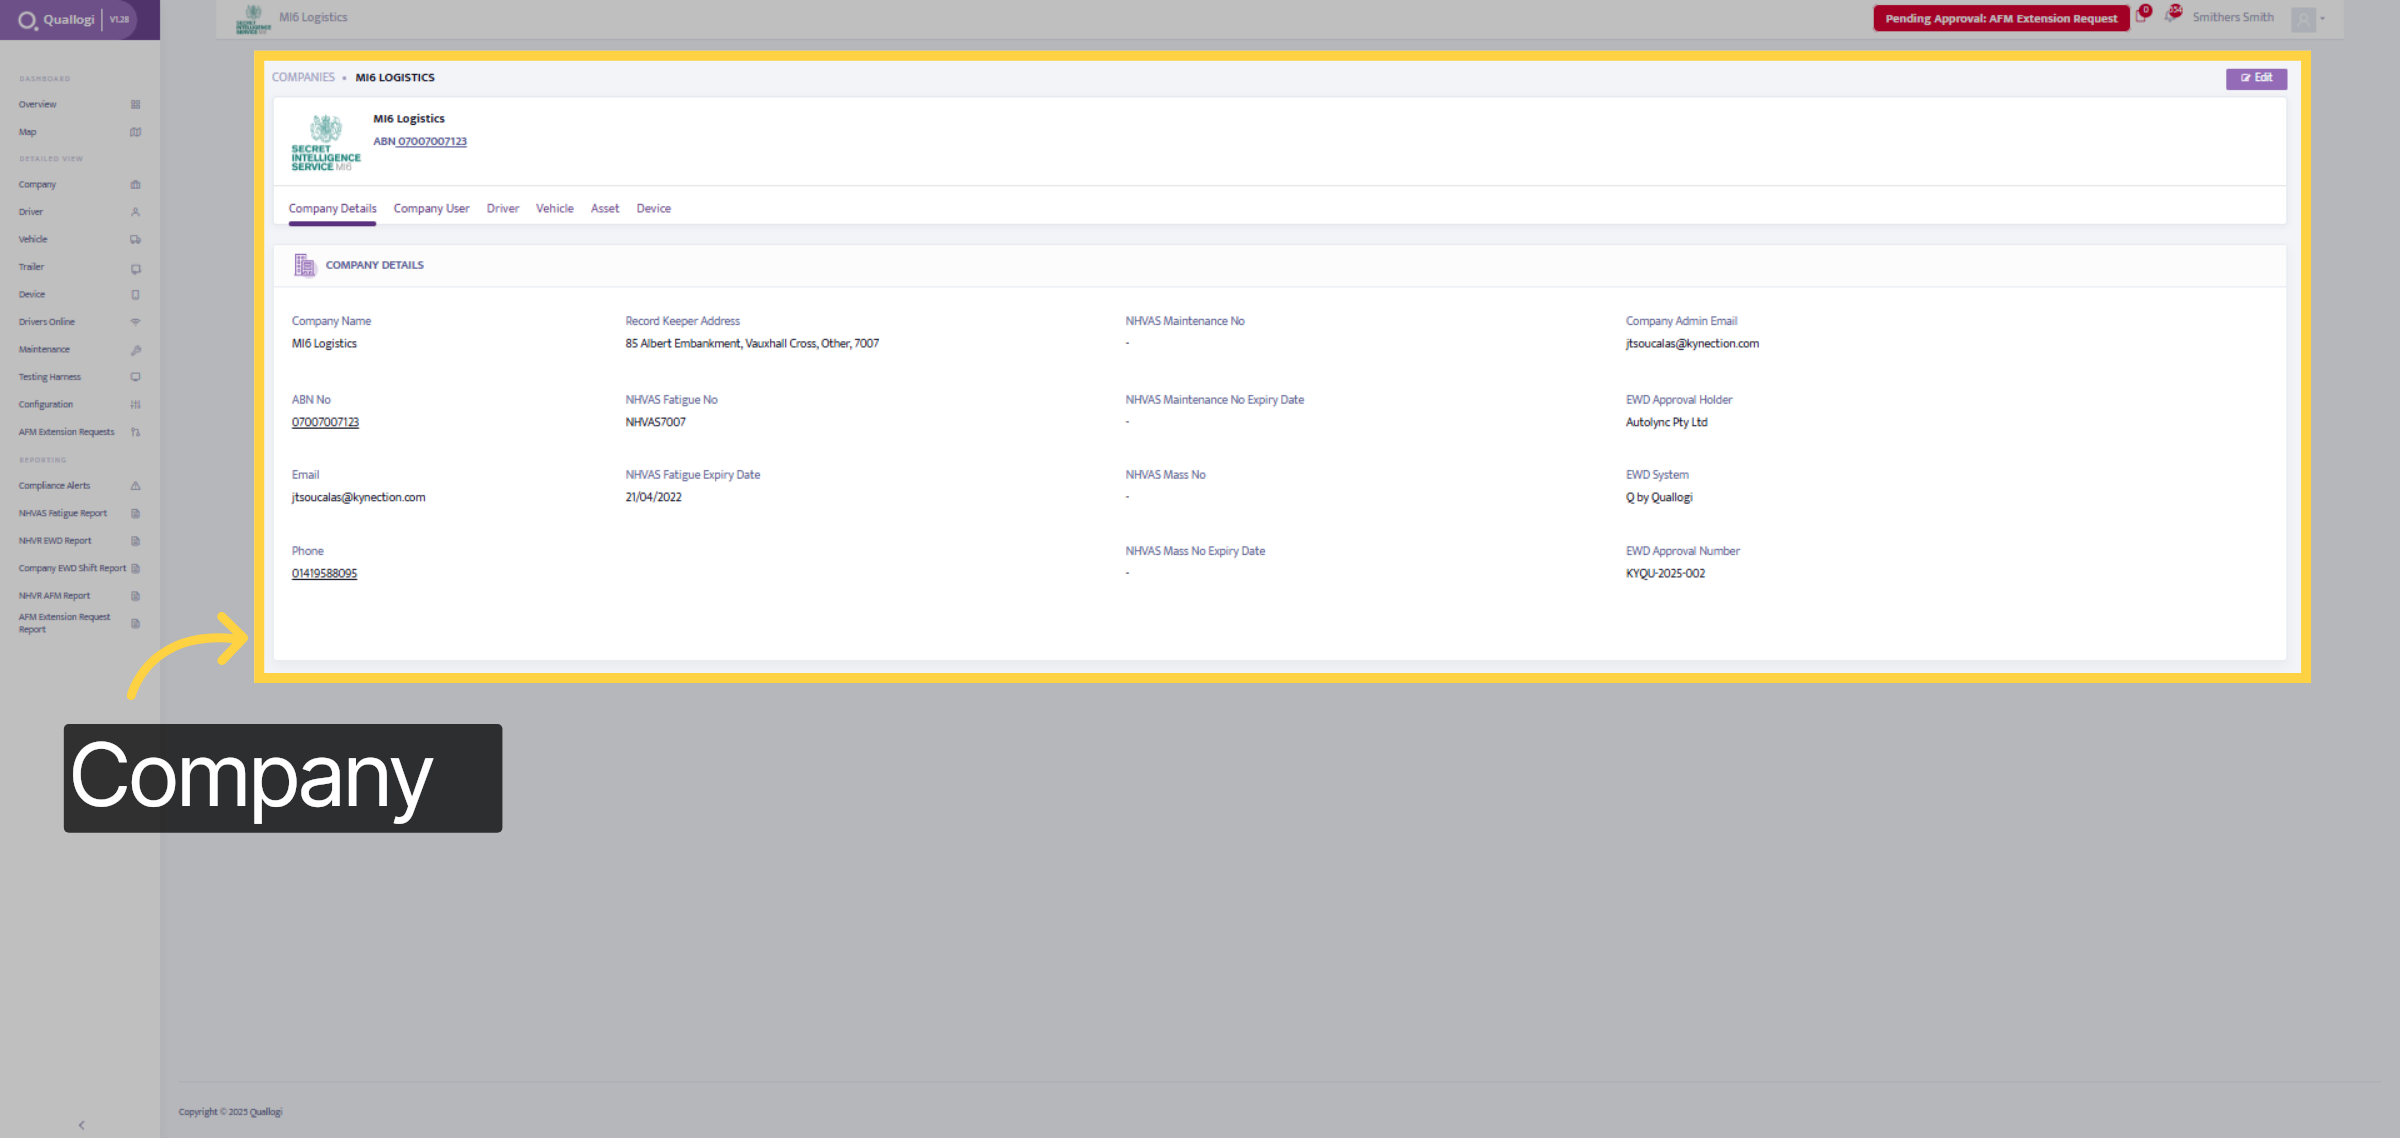
8. Company Tab
Within the Company tab, you can view all details about your company, including ABN, number, email, phone, address, NHVS fatigue number, and expiry.
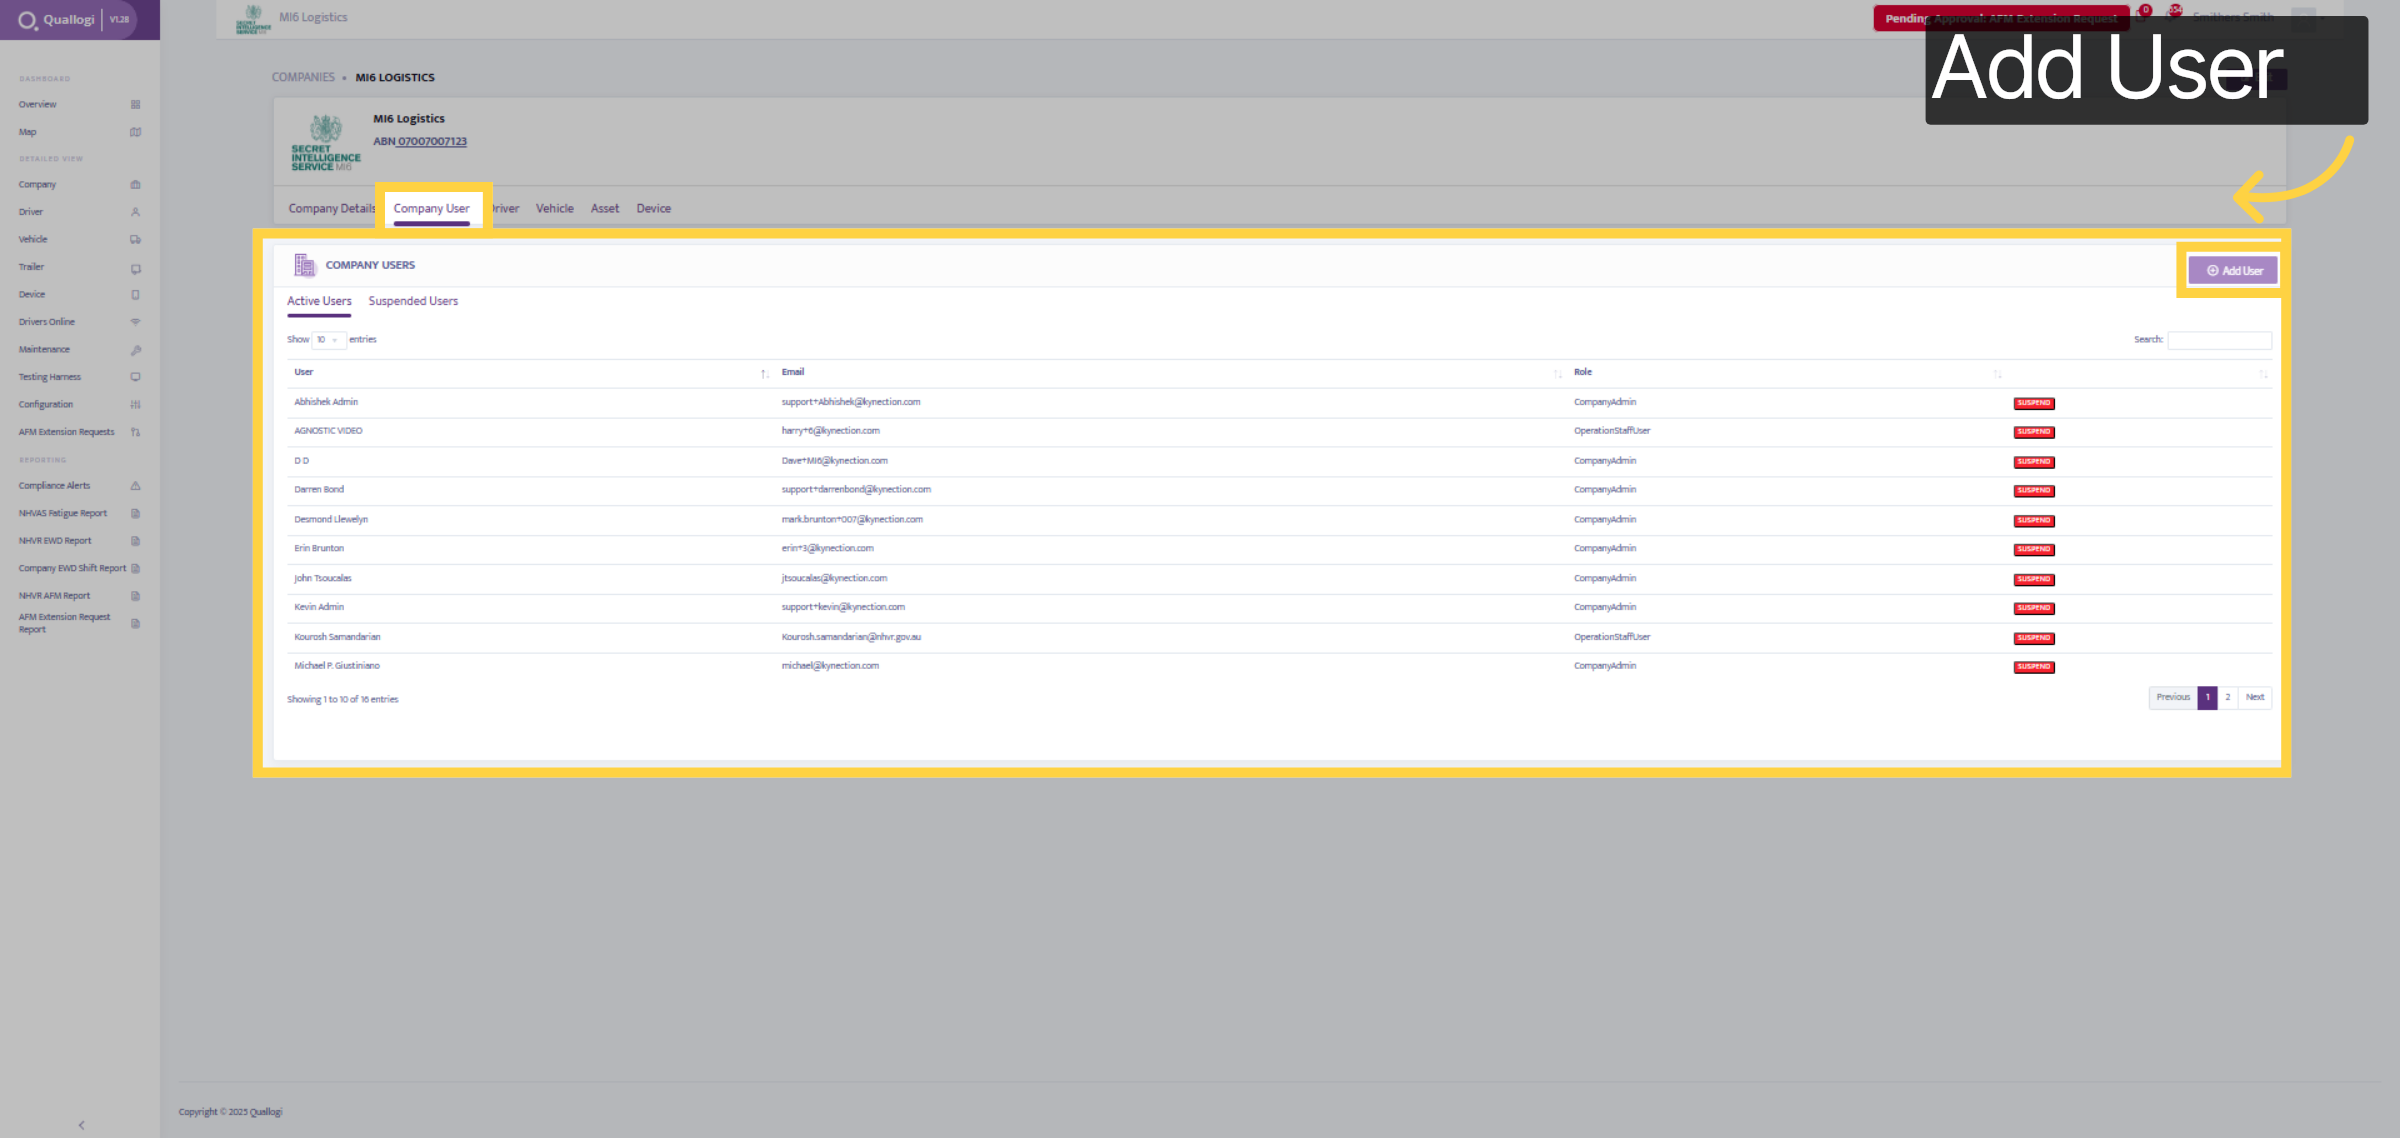
9. Company User
By selecting the company user tab, we can view all company users and their details. To add more users, click the add user tab in the top right corner.
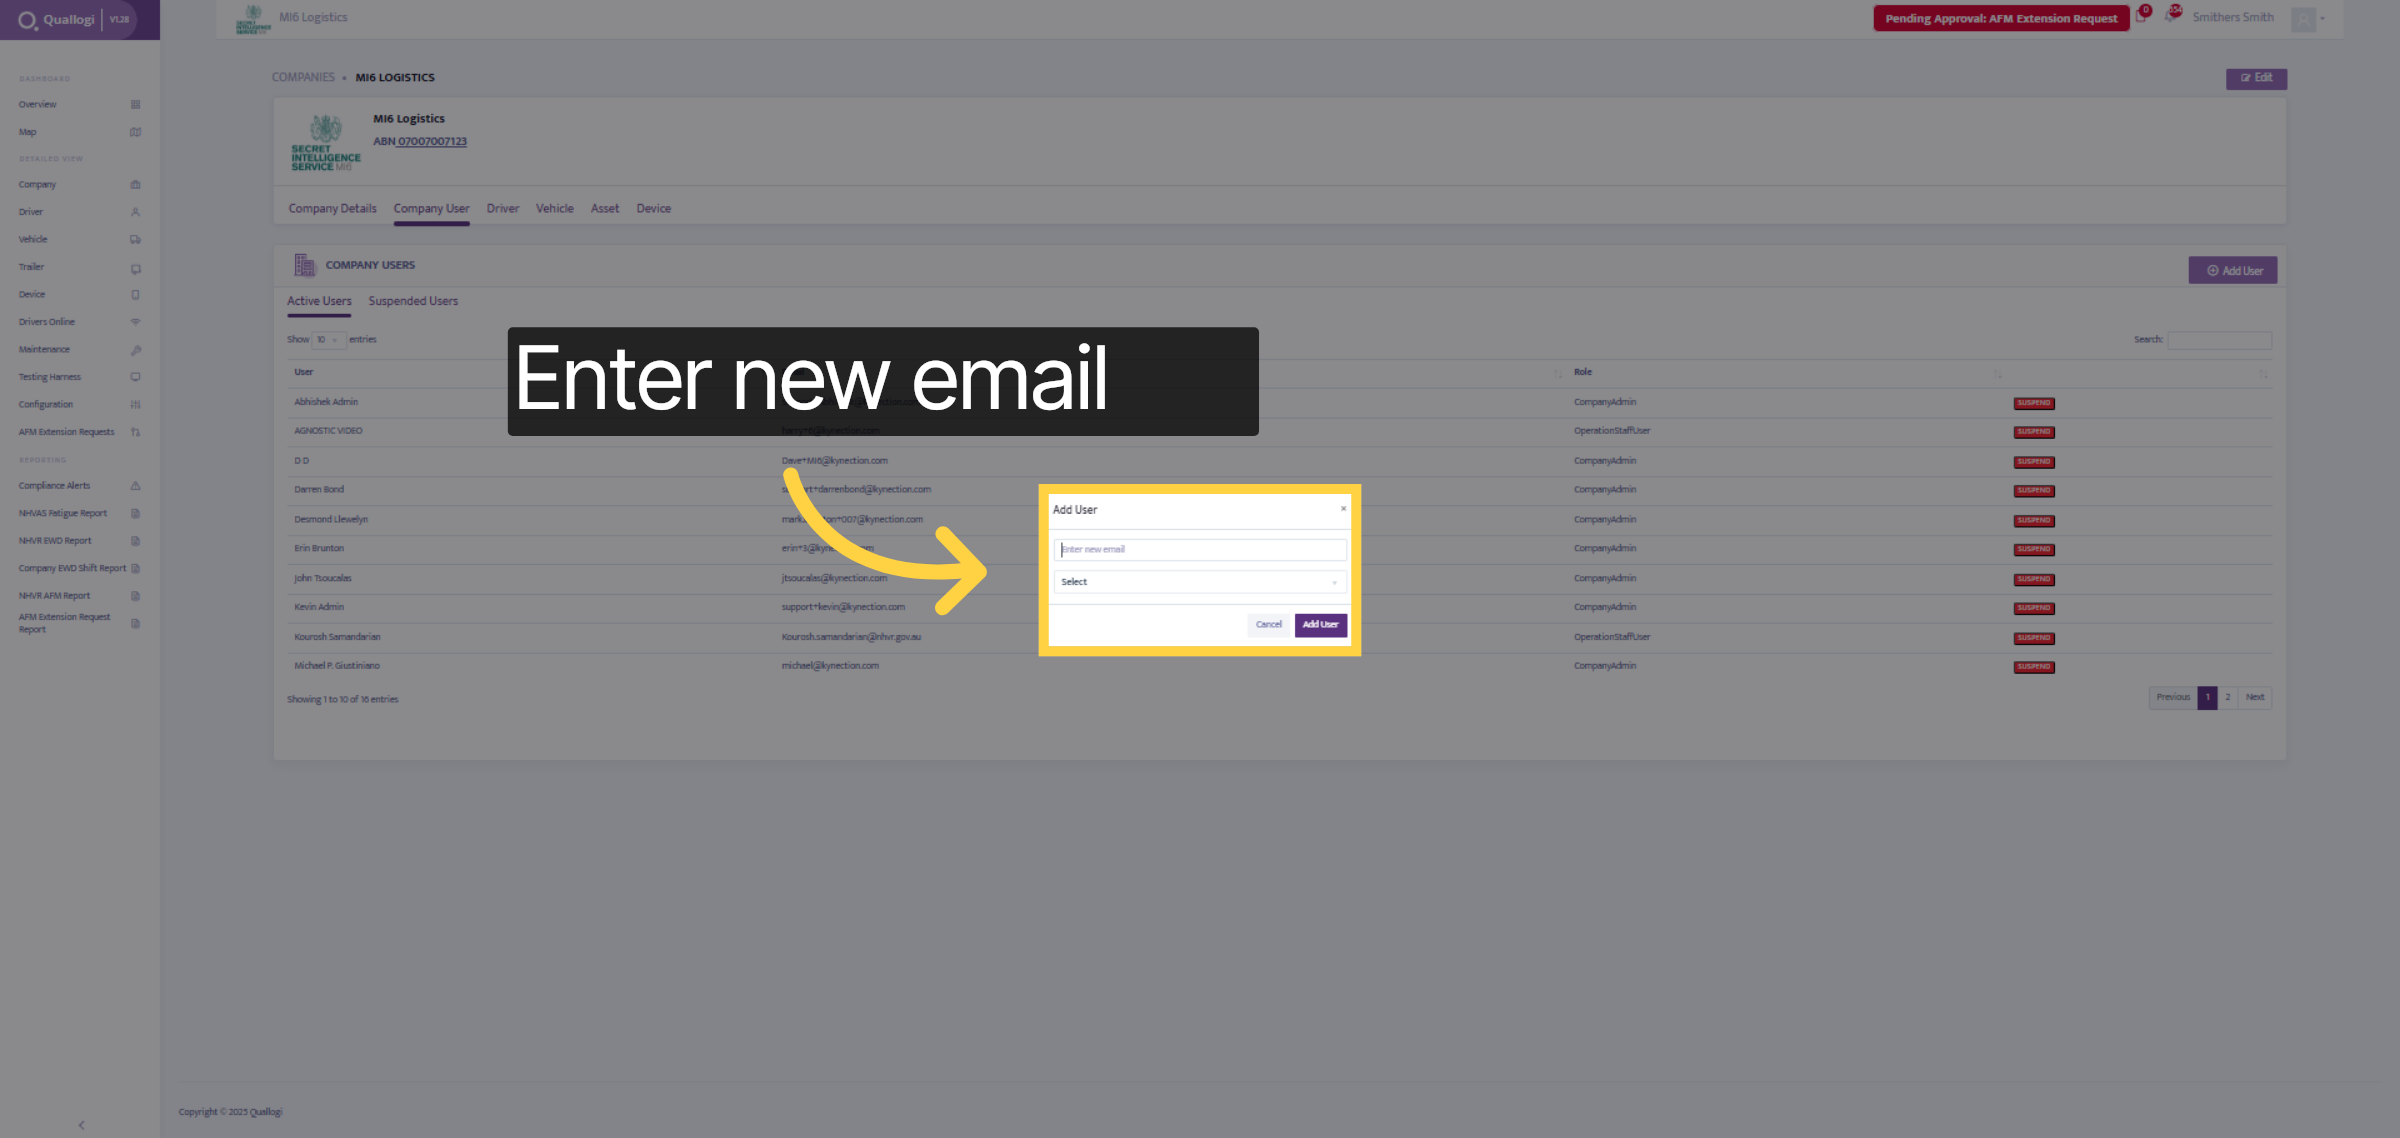
10. Enter Details
Please enter the email address to assign it to the new user account.
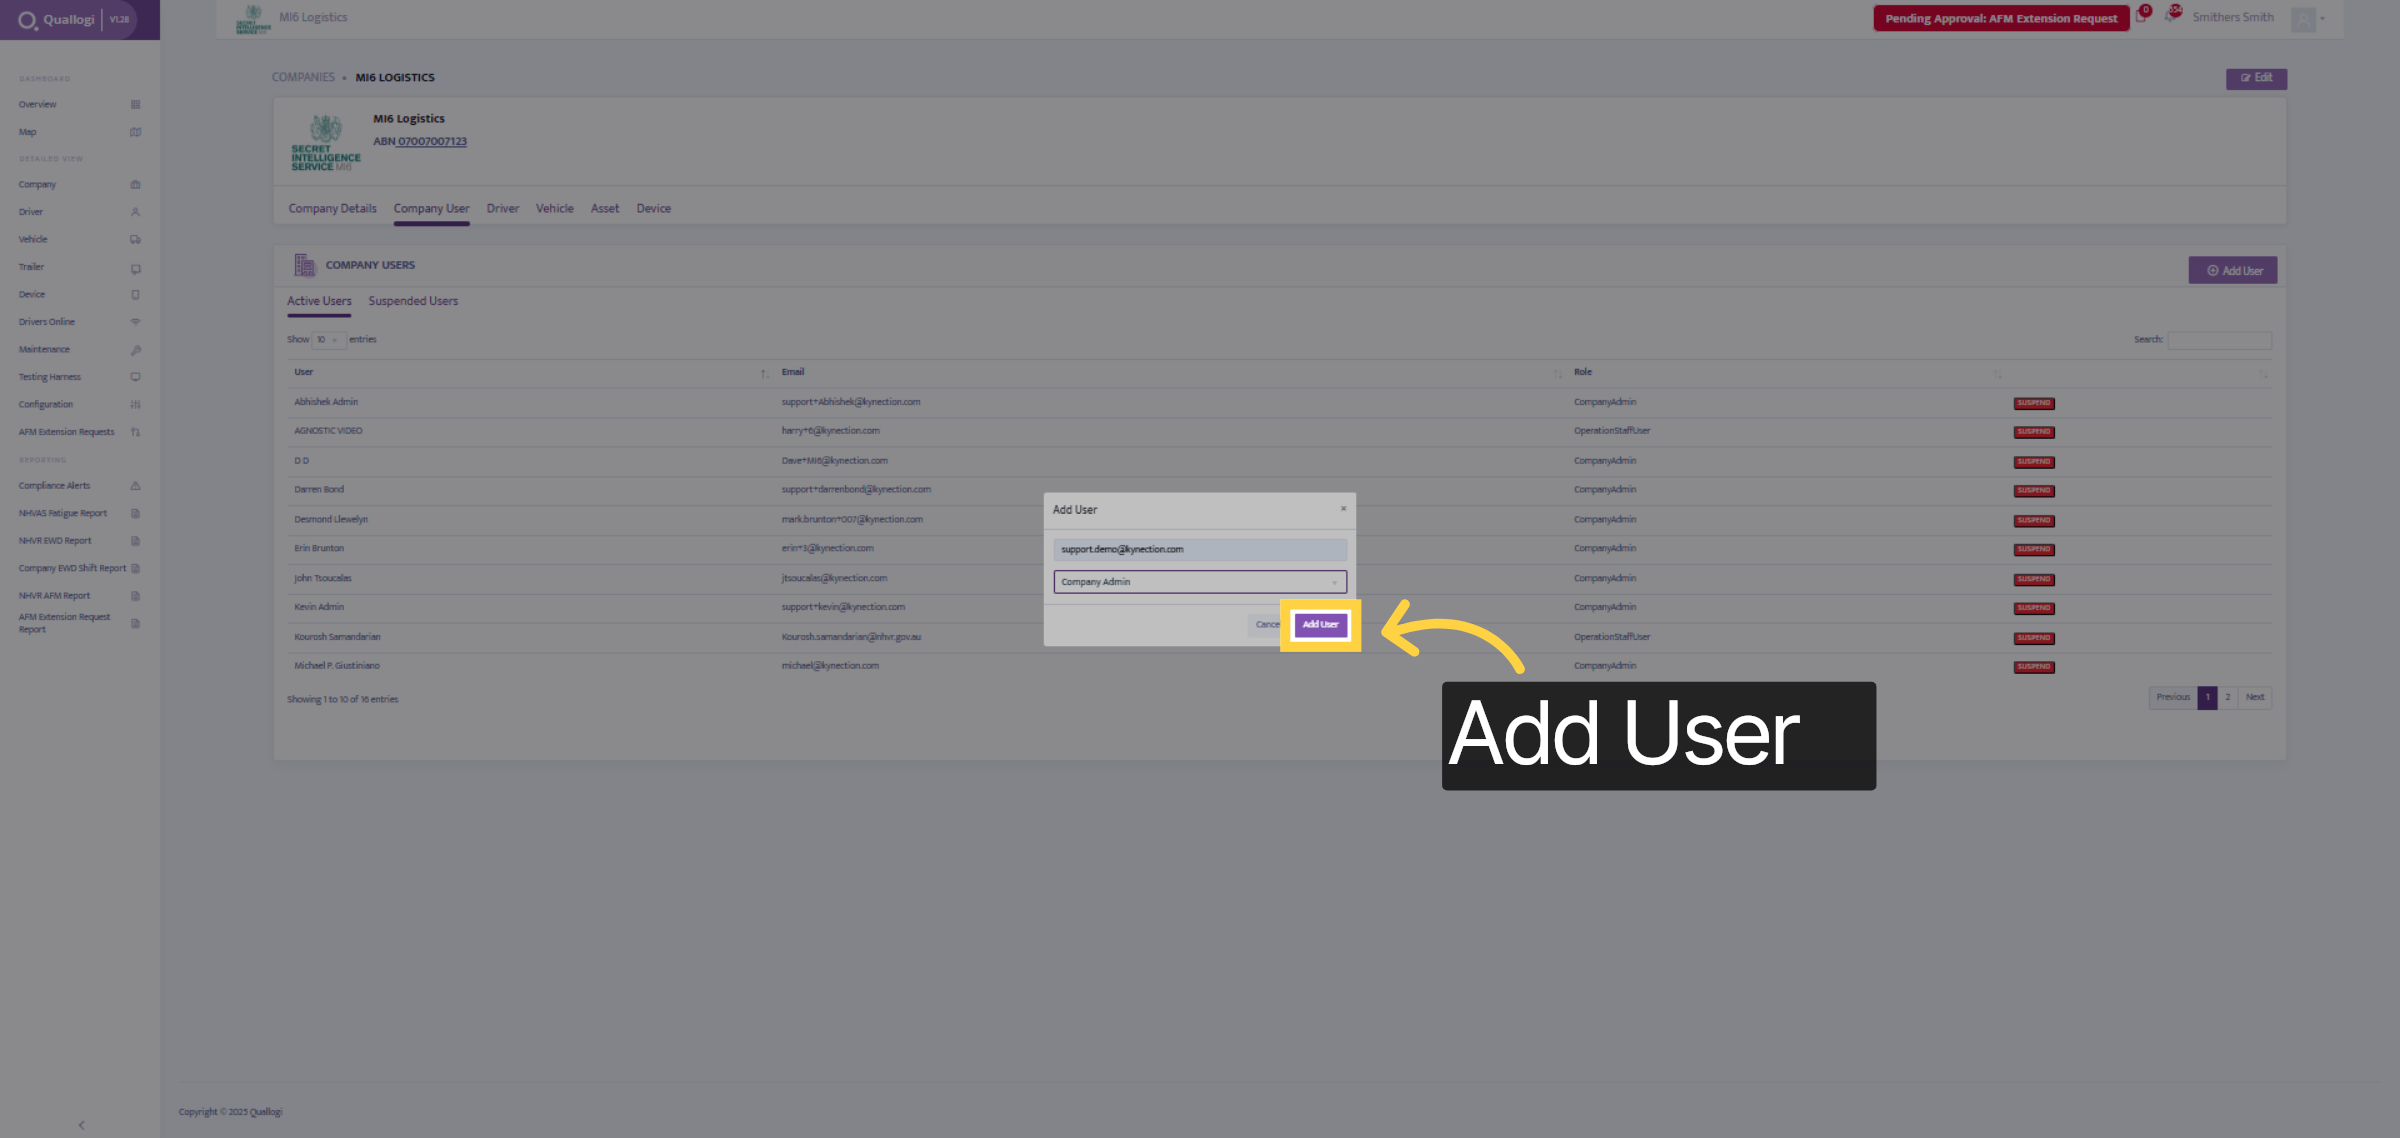
11. Finalise to add User
Click "Add User" to close the add user window after completing the process.
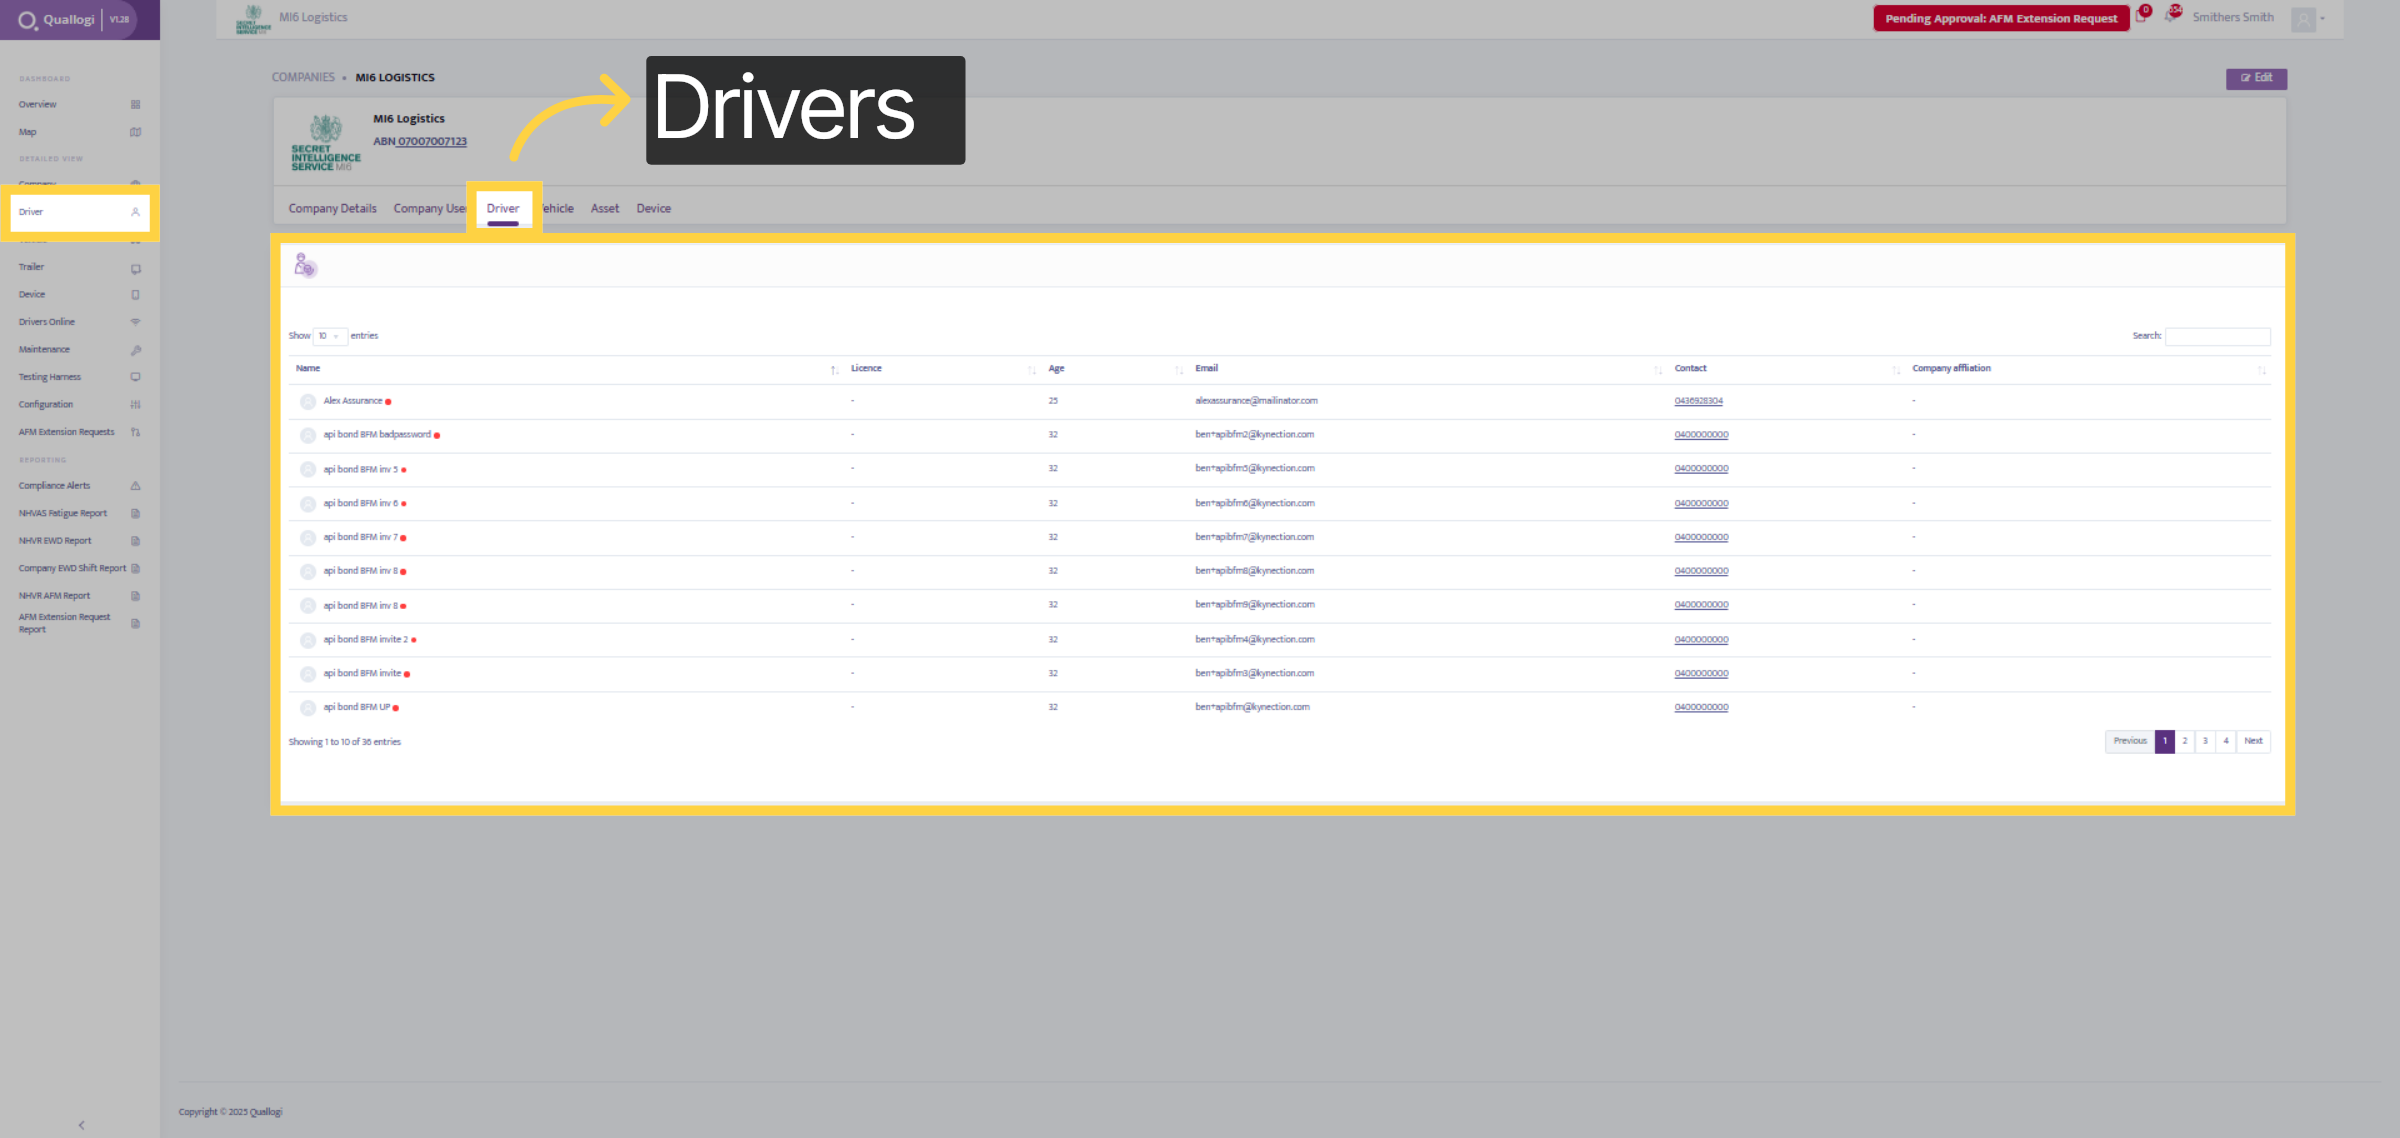
12. Driver Dashboard
The Driver Tab provides a complete list of all your drivers along with their details. To add new drivers, select the Driver Tab on the left-hand side panel.
13. Vehicle Dashboard
The vehicle dashboard displays a comprehensive list of all your vehicles along with their details. To add new vehicles, select the Driver Tab on the left-hand side panel.

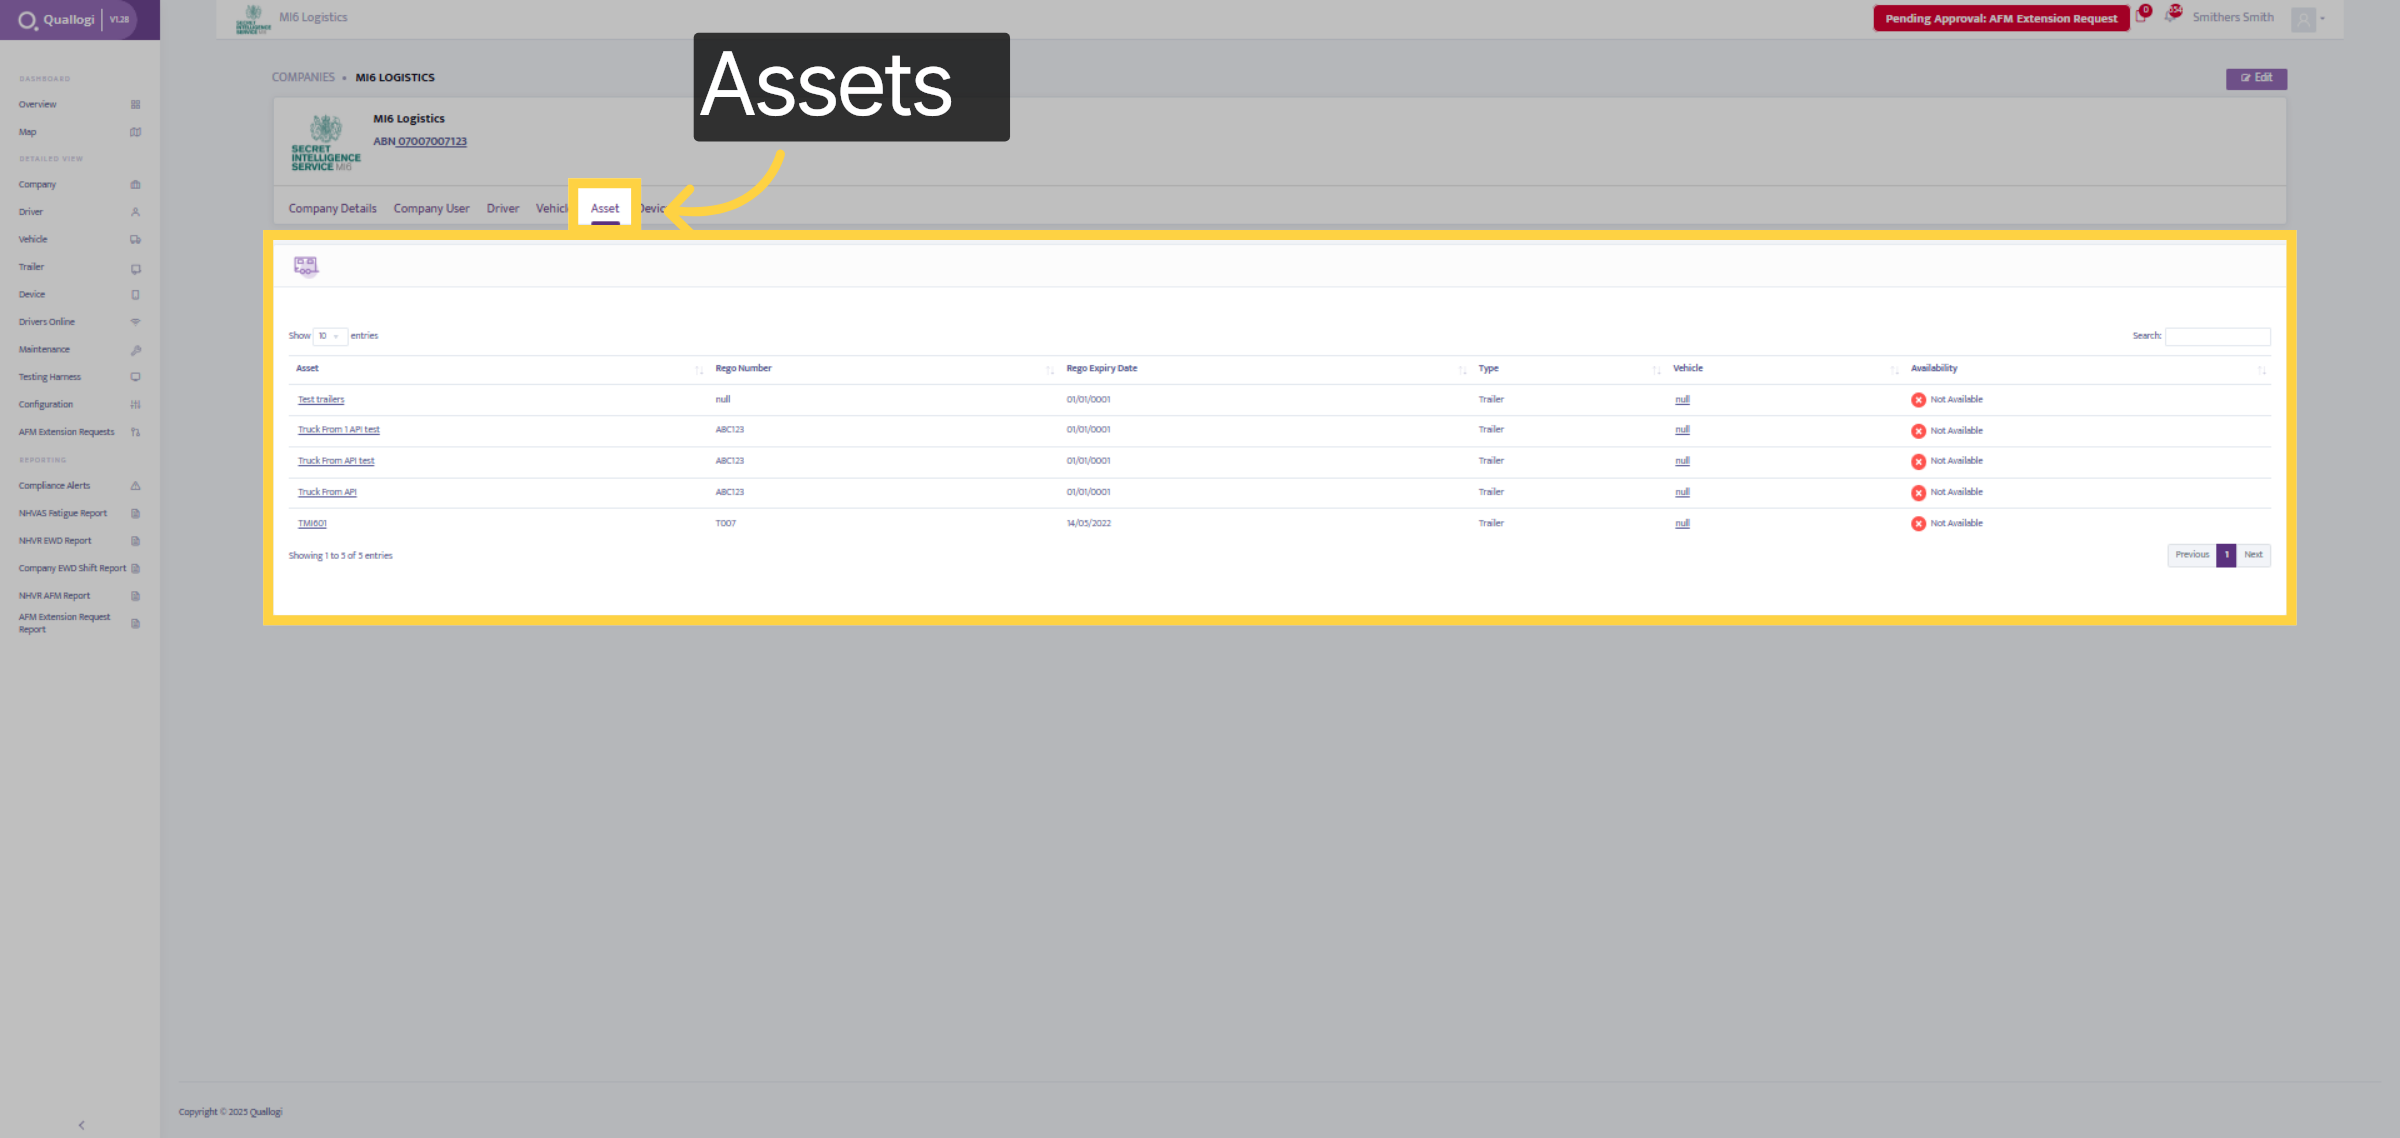
14. Asset Dashbord
The Asset dashboard provides a comprehensive list of all your assets, typically trailers, along with their details.
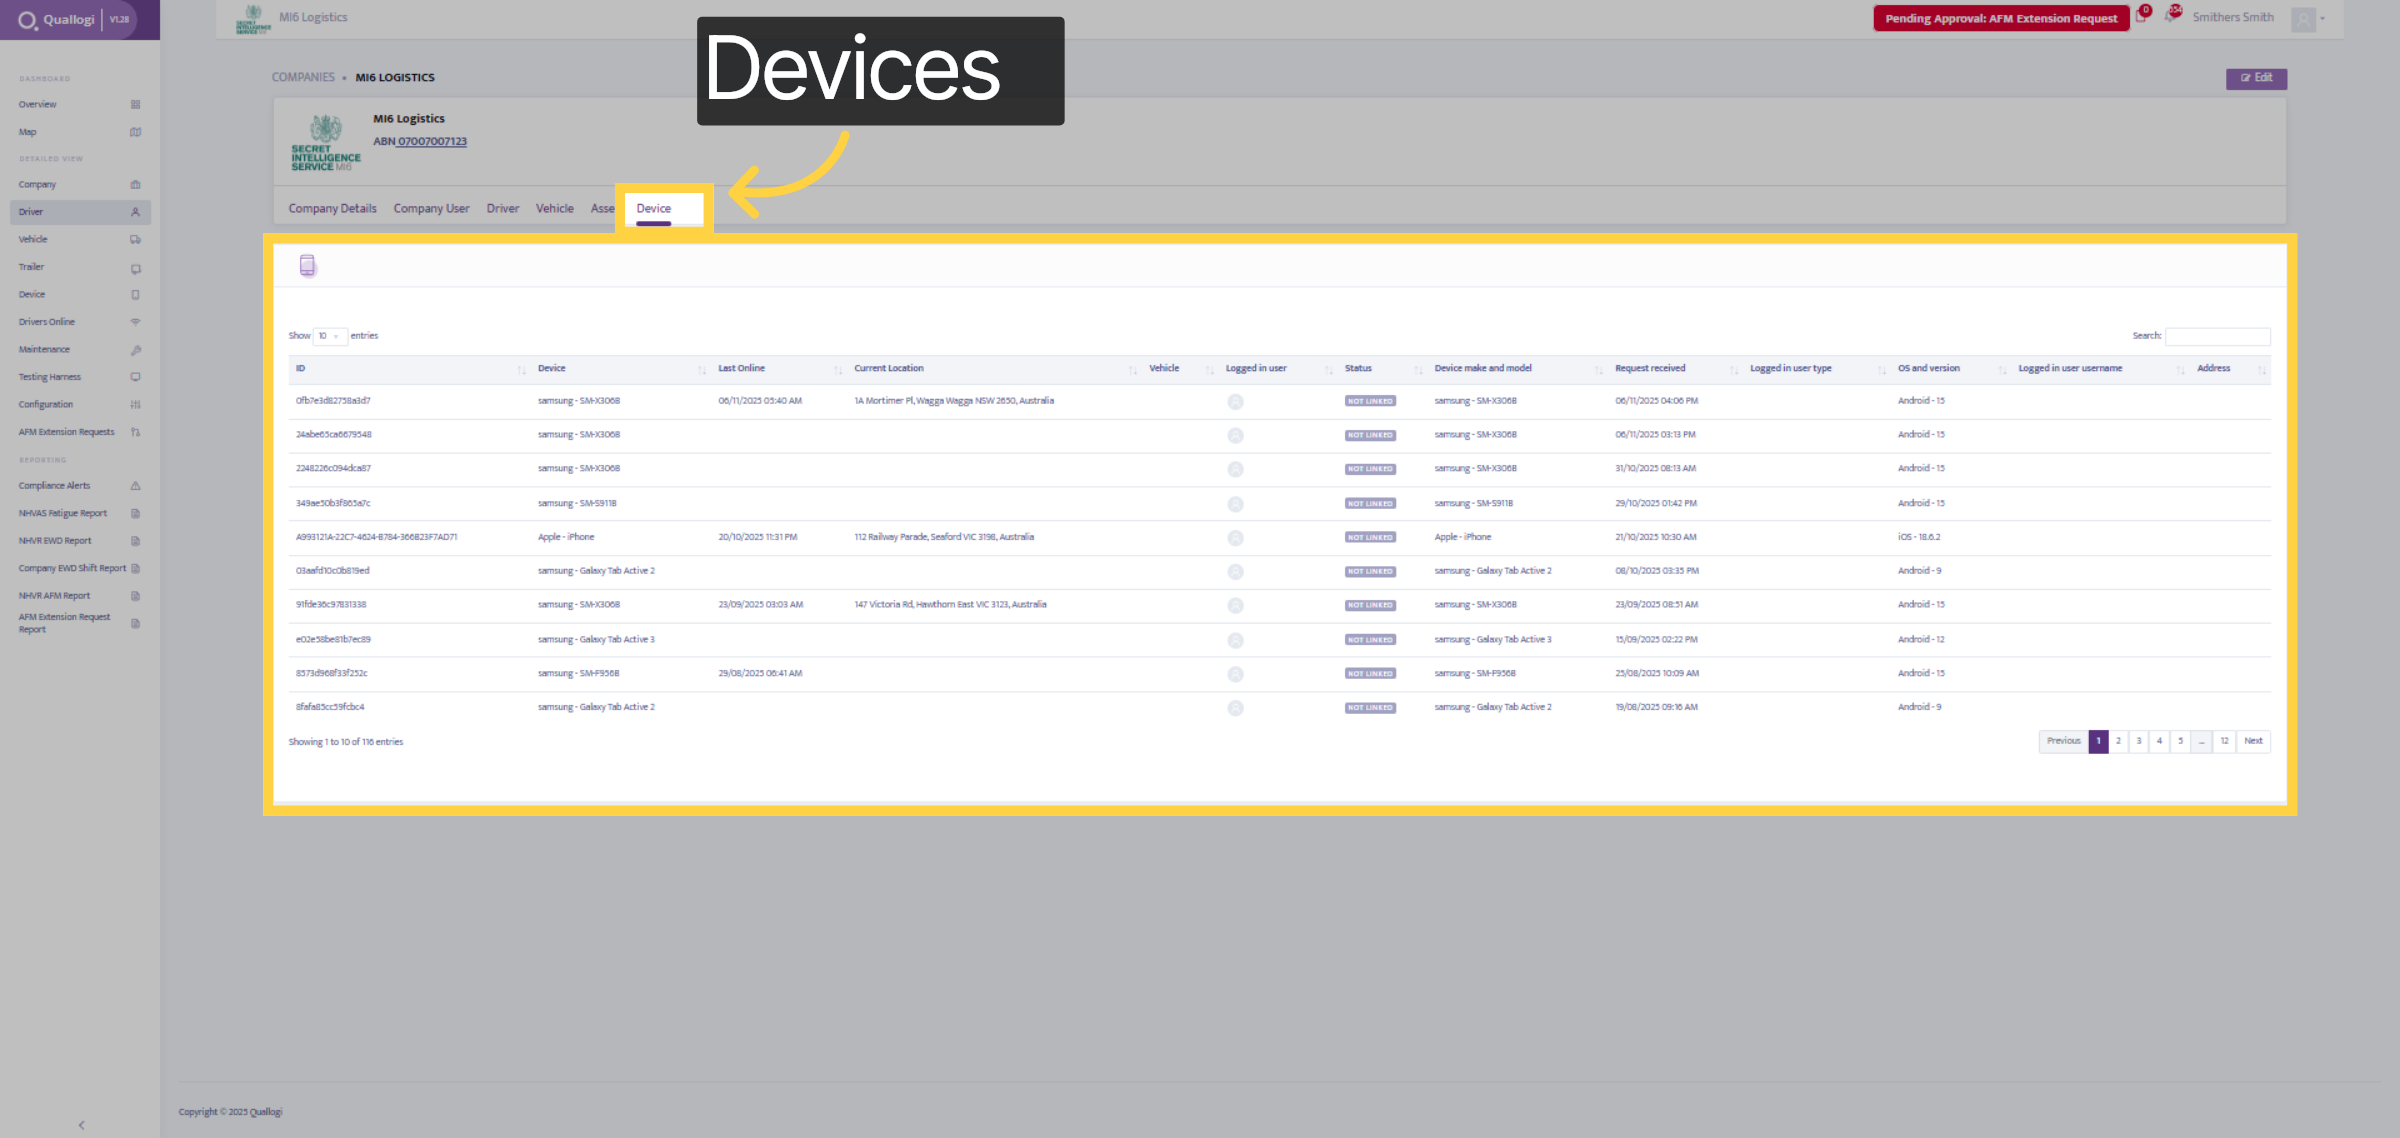
15. Device Dashboard
The device dashboard displays a comprehensive list of all your devices, including phones and tablets, along with all relevant details. To add new device, select the Driver Tab on the left-hand side panel.
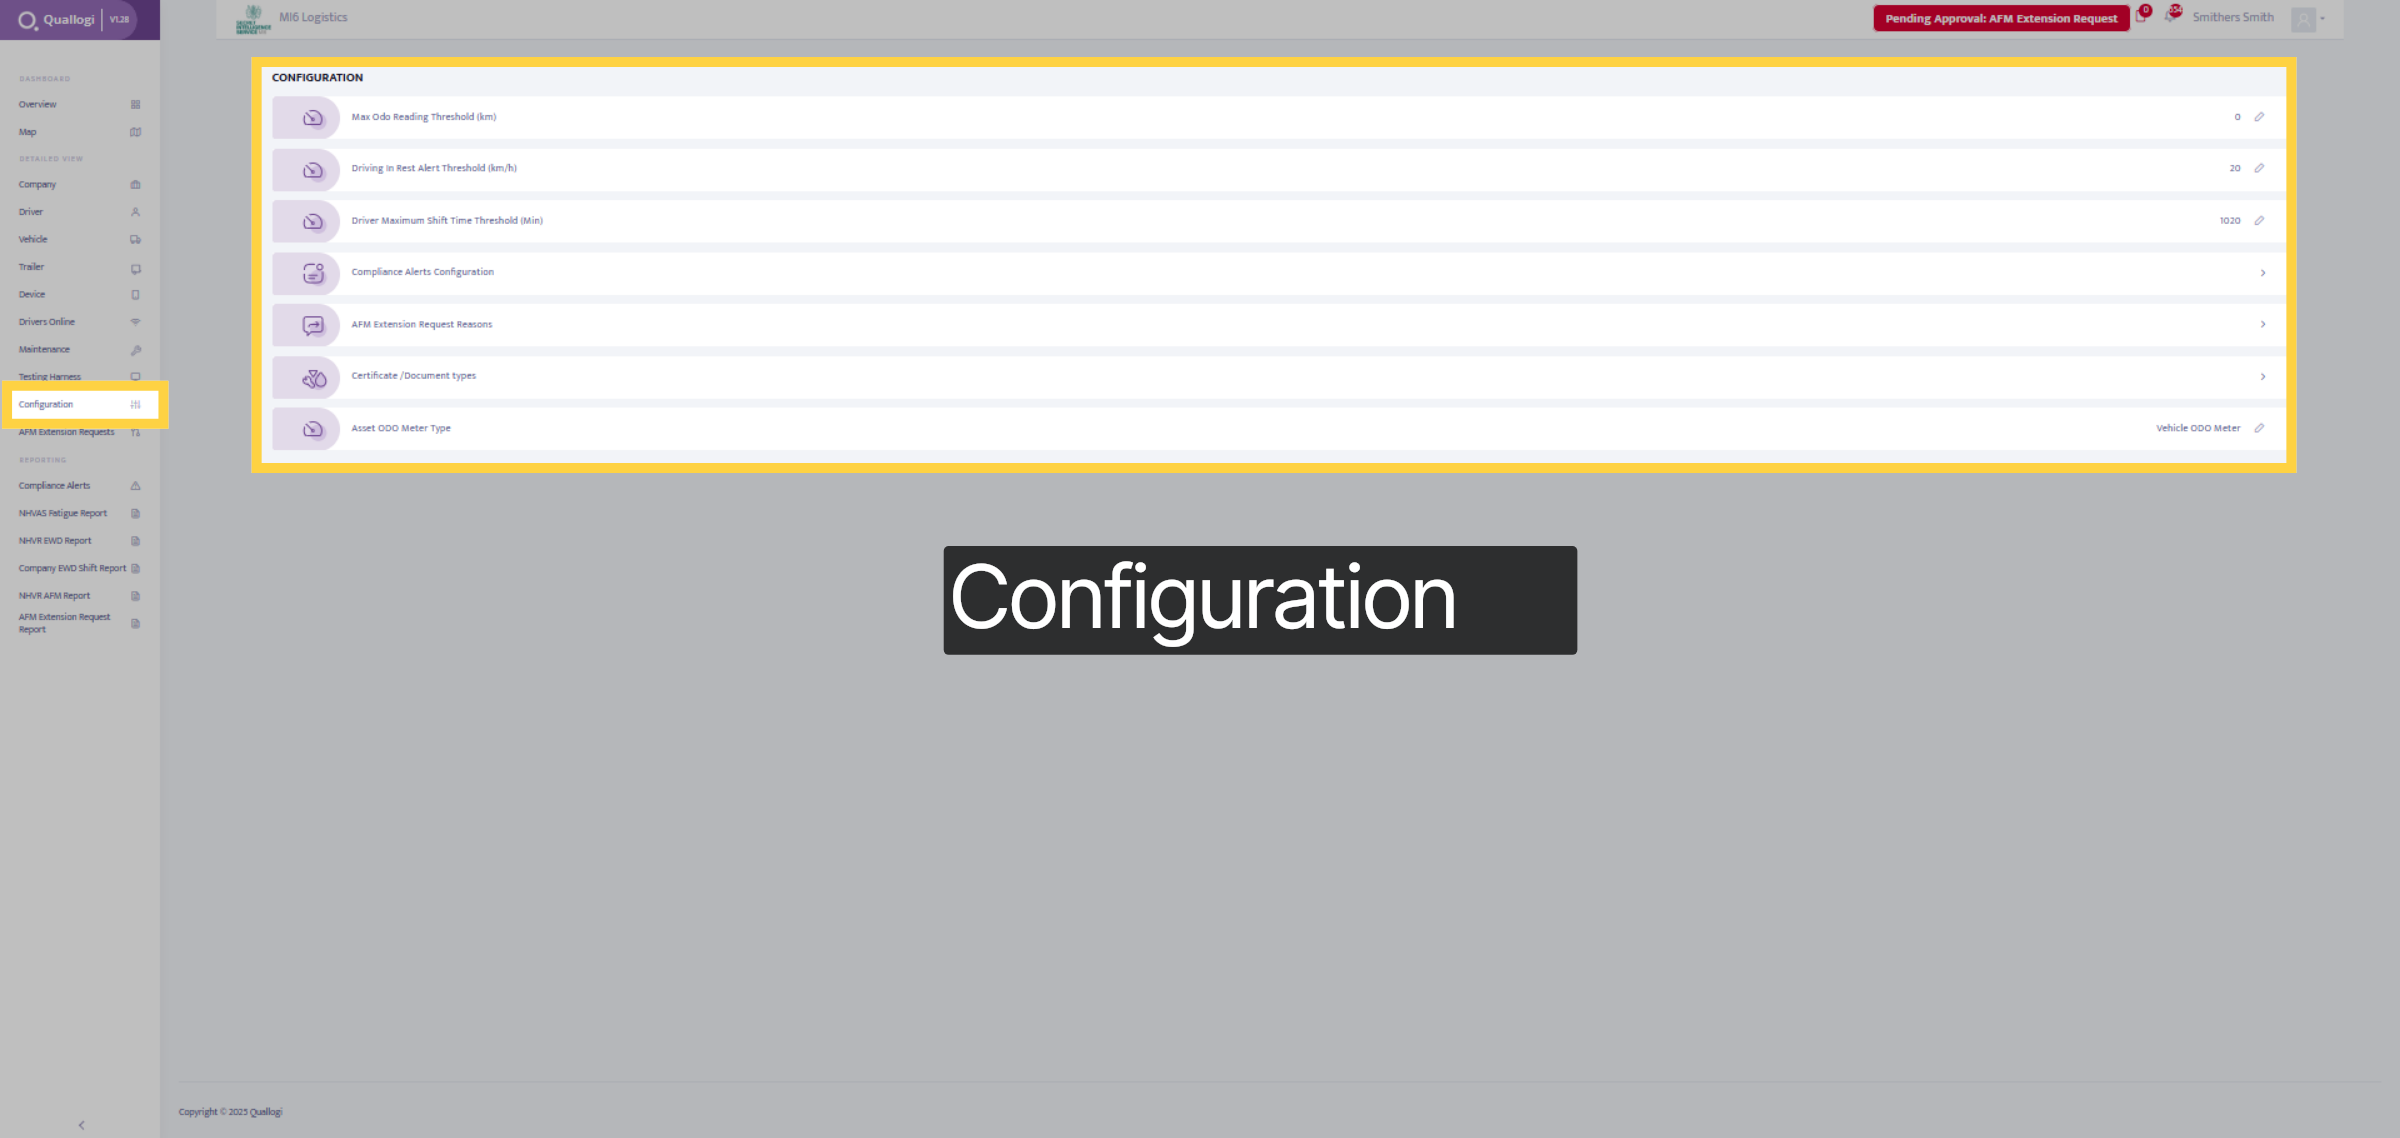
16. Configuration Tab
Within the Configuration tab, you can make various changes, such as configuring the Mac Odo Reading threshold, setting the driving in-rest alerts, adjusting the driver maximum shift time, managing compliance alerts, and much more.
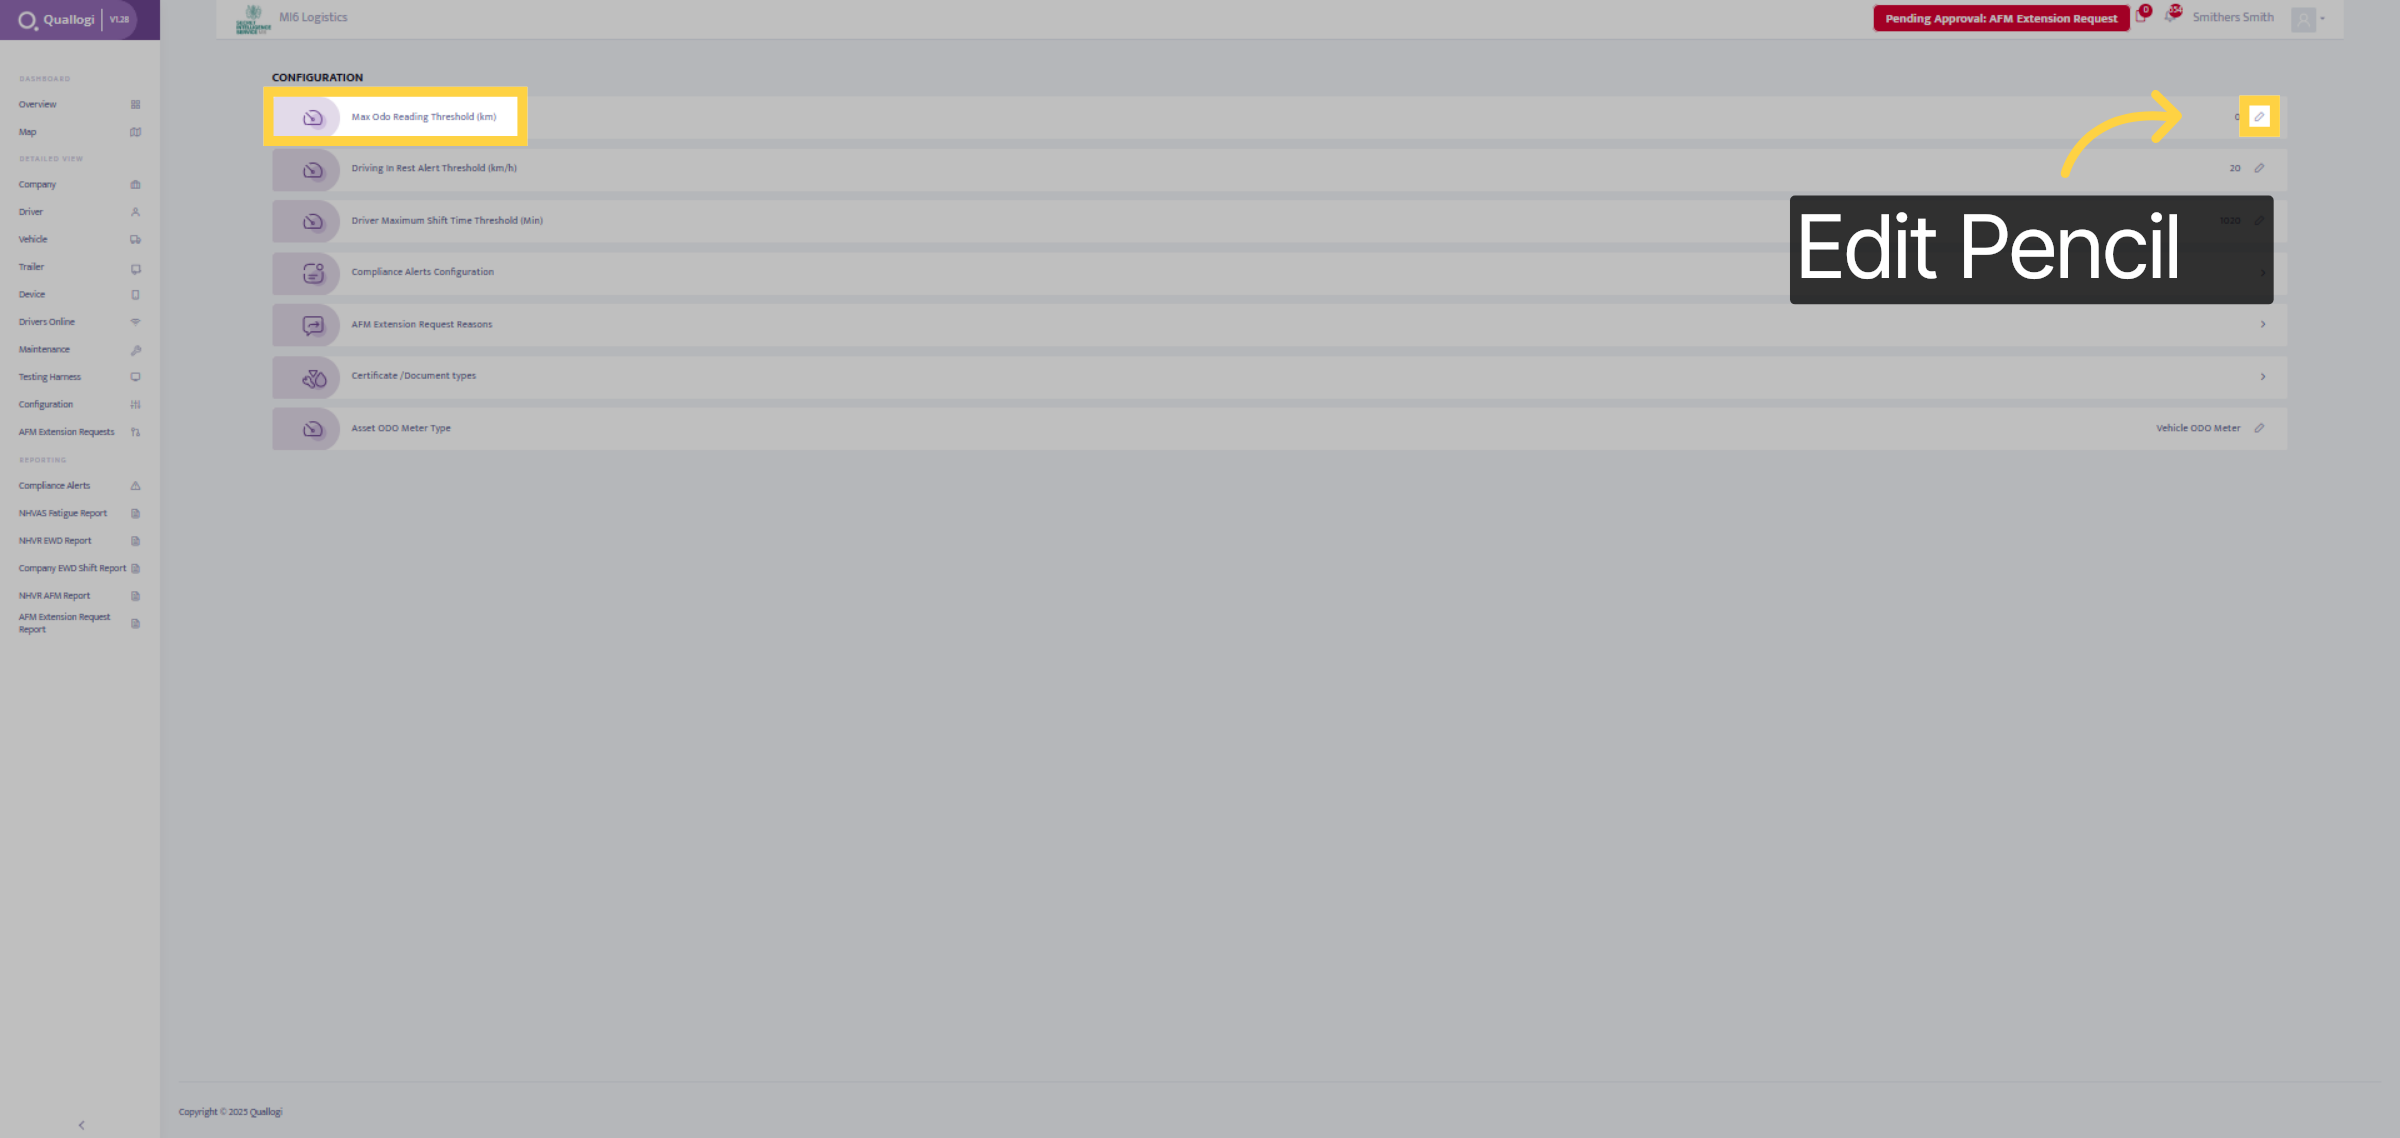
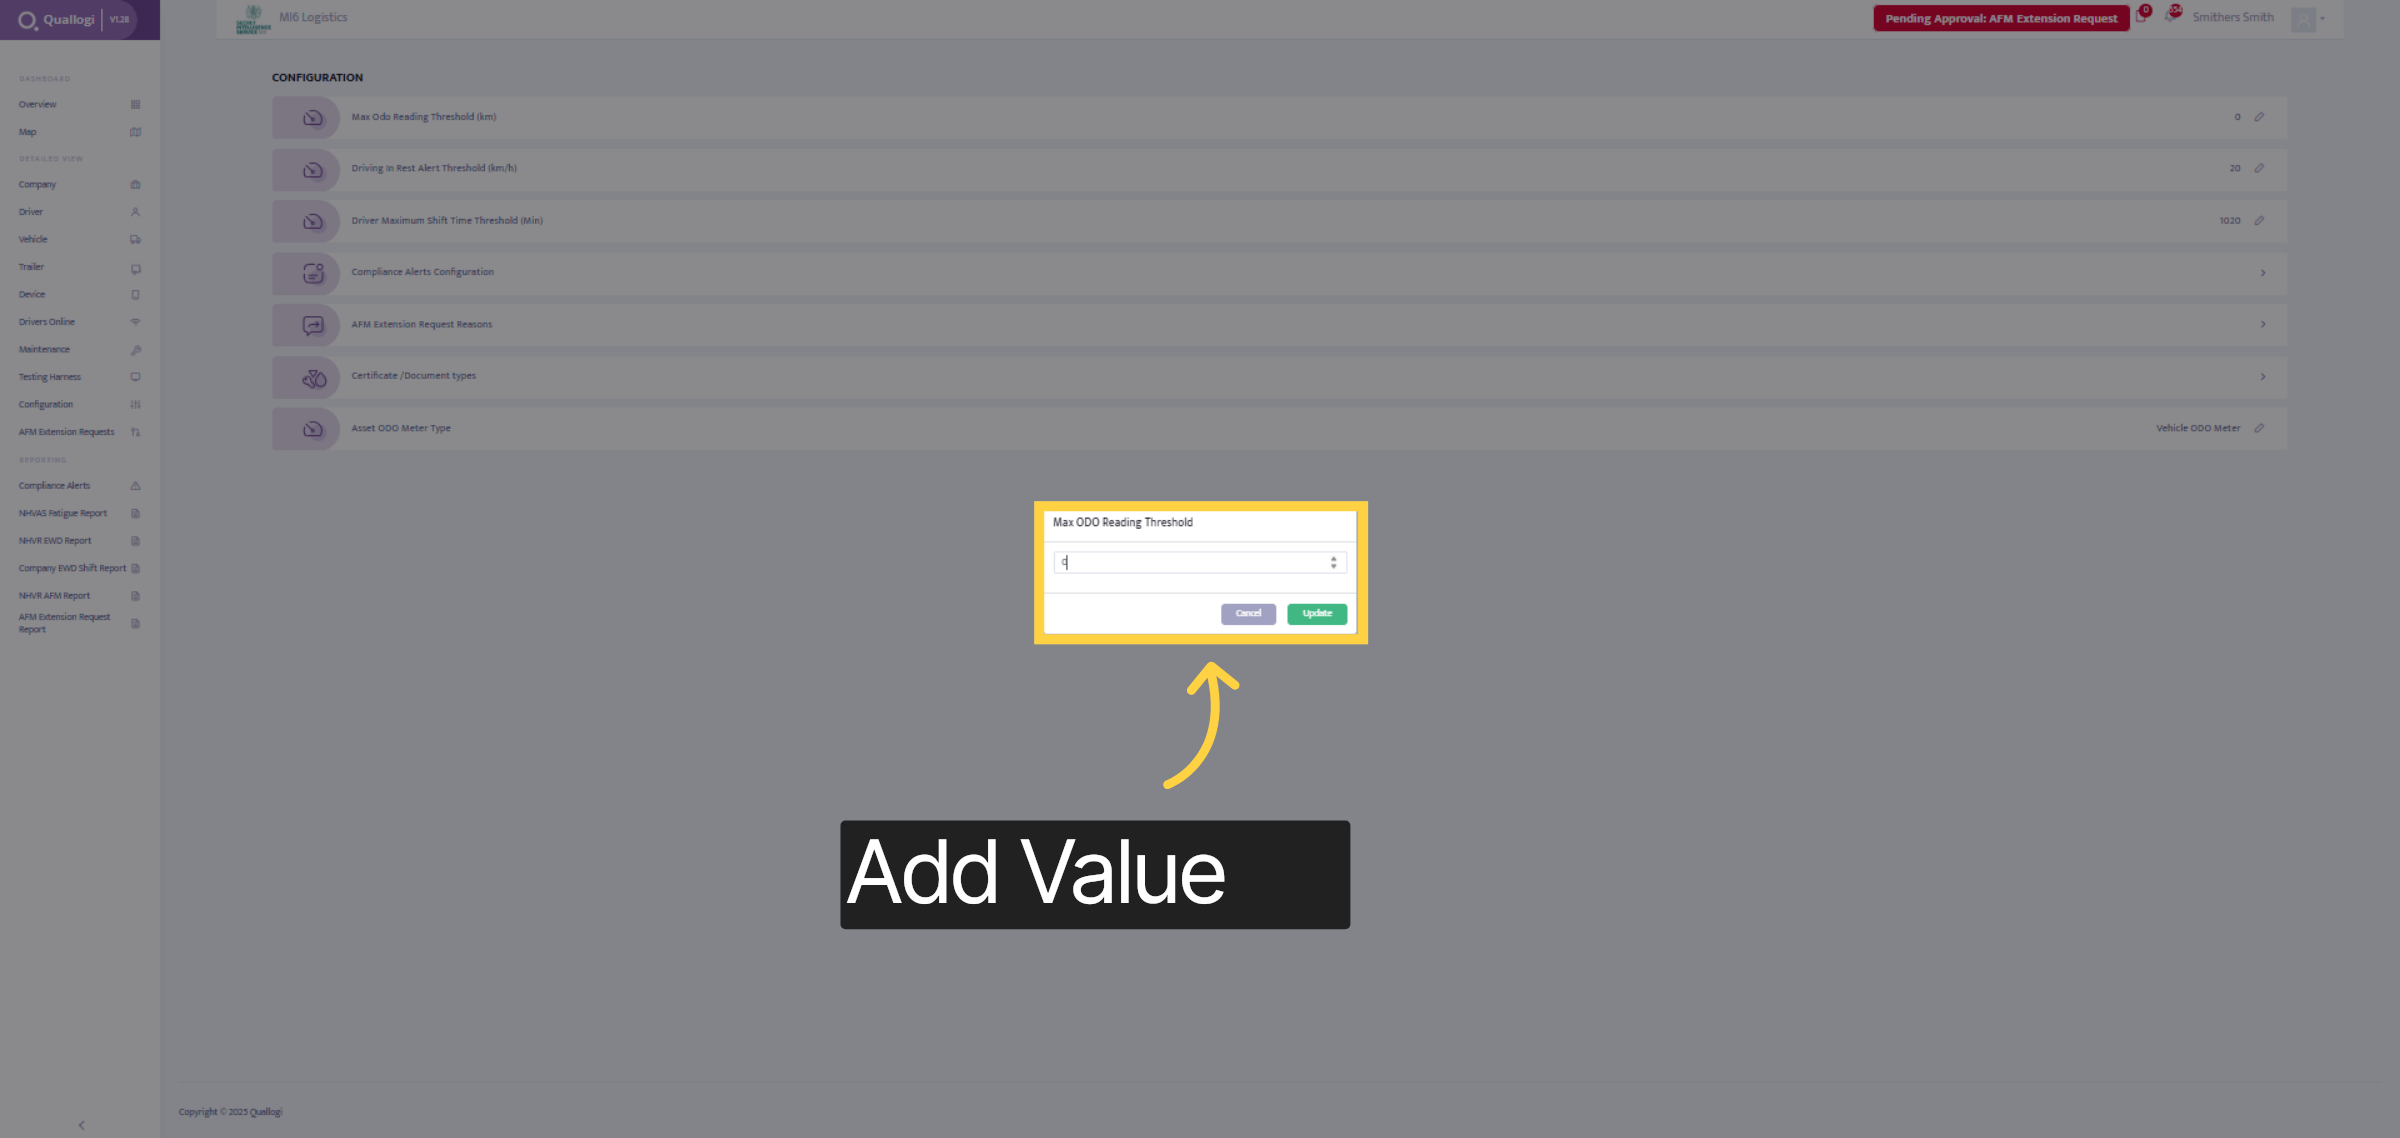
17. Select Threshold Value
To configure the Max Odo Reading Threshold, select the edit pencil in the top right-hand corner.
18. Add Value
Add the value and select update.
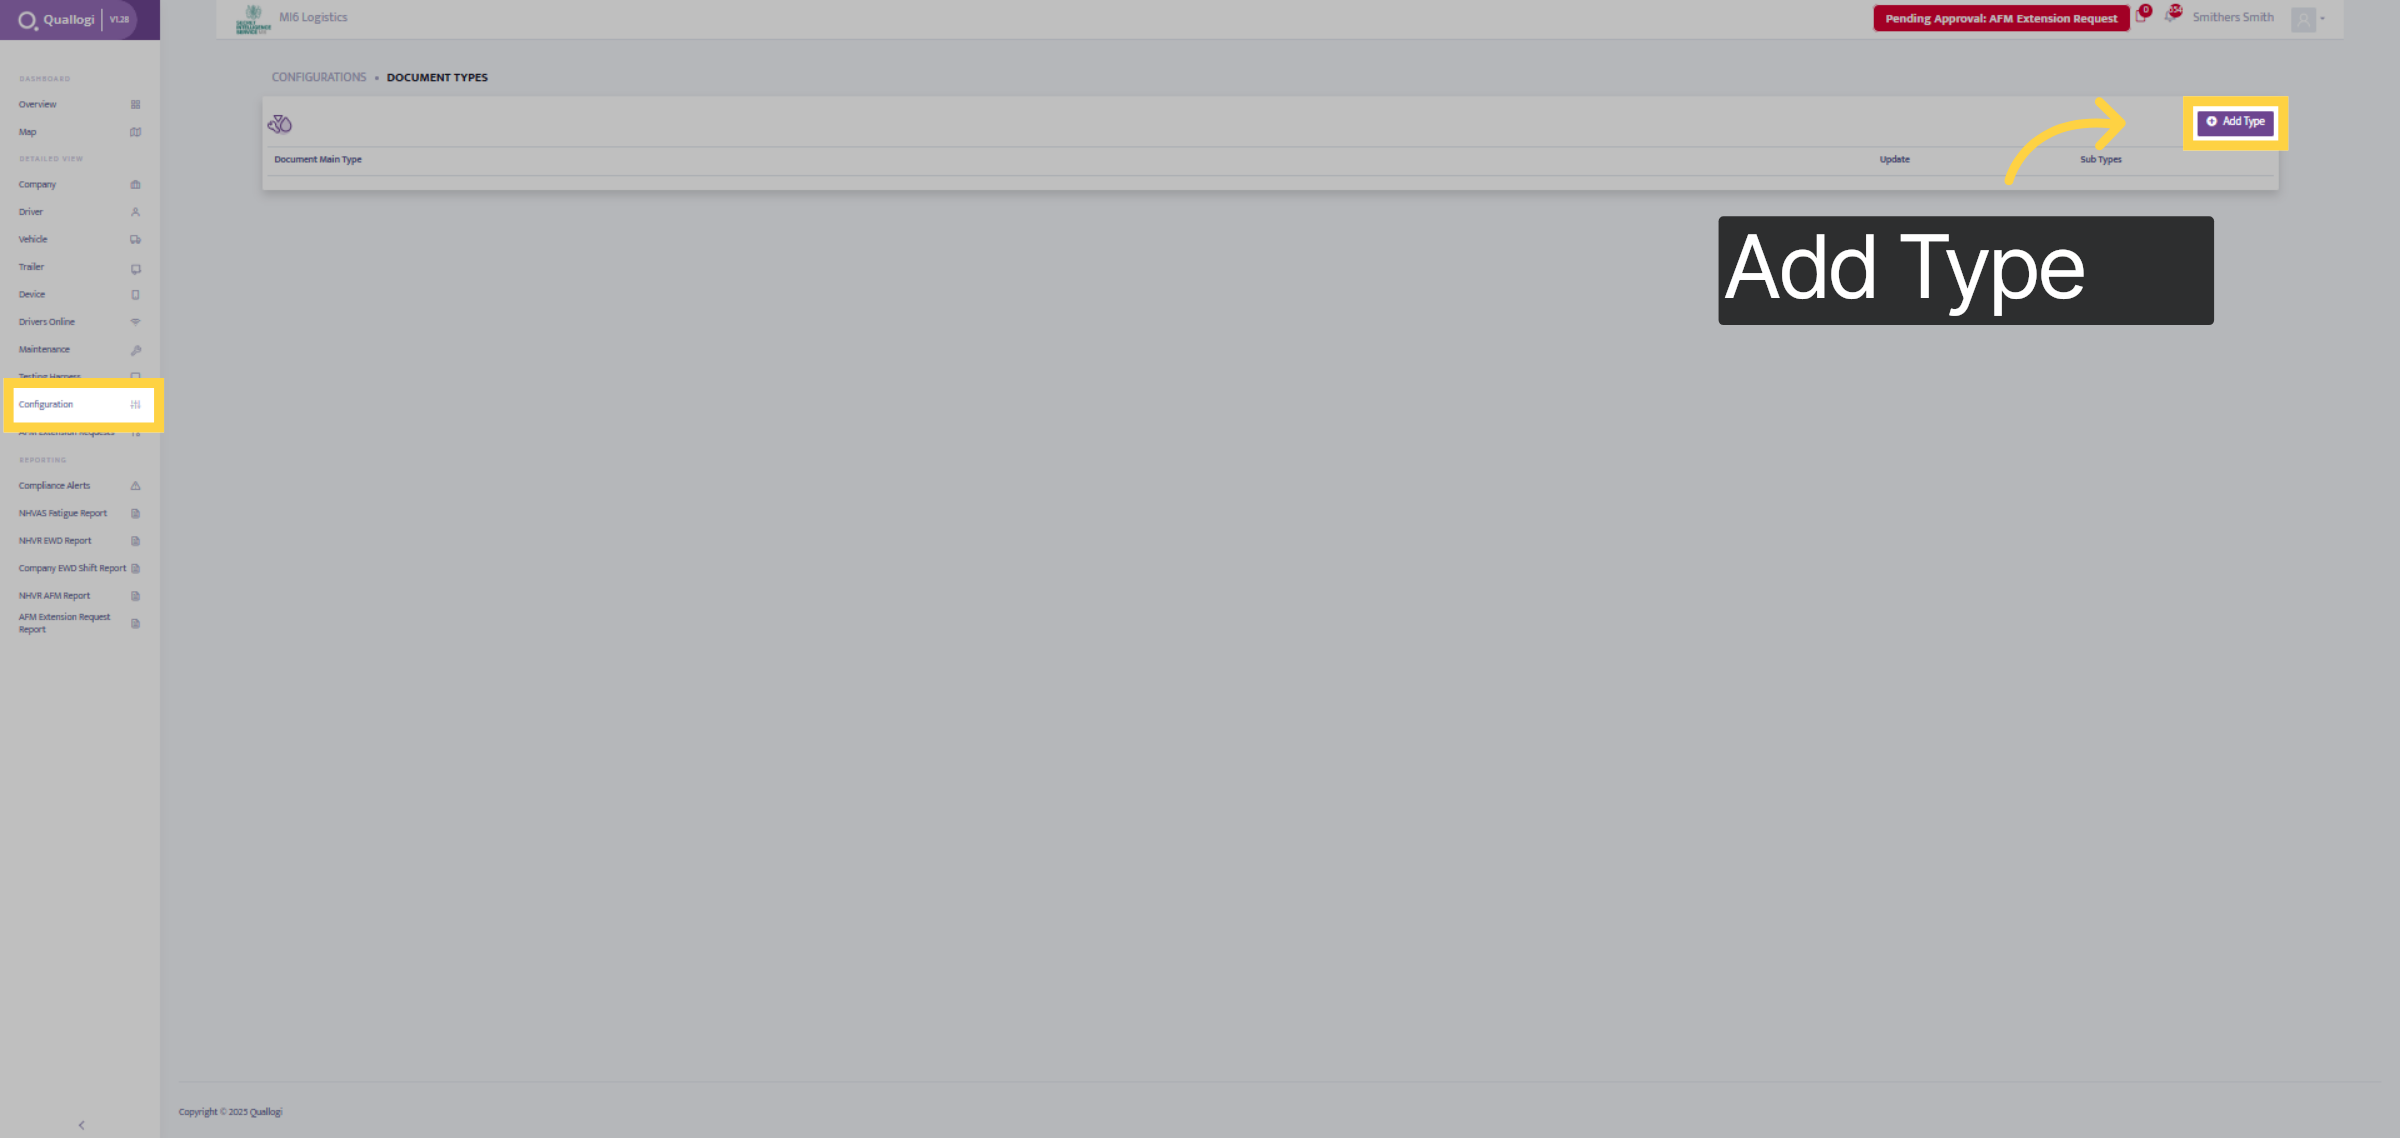
19. Document Types
To add a document, select document types under the configuration tab and click the add type button in the top right-hand corner.
20. Add Document Type
Input in the Document type name
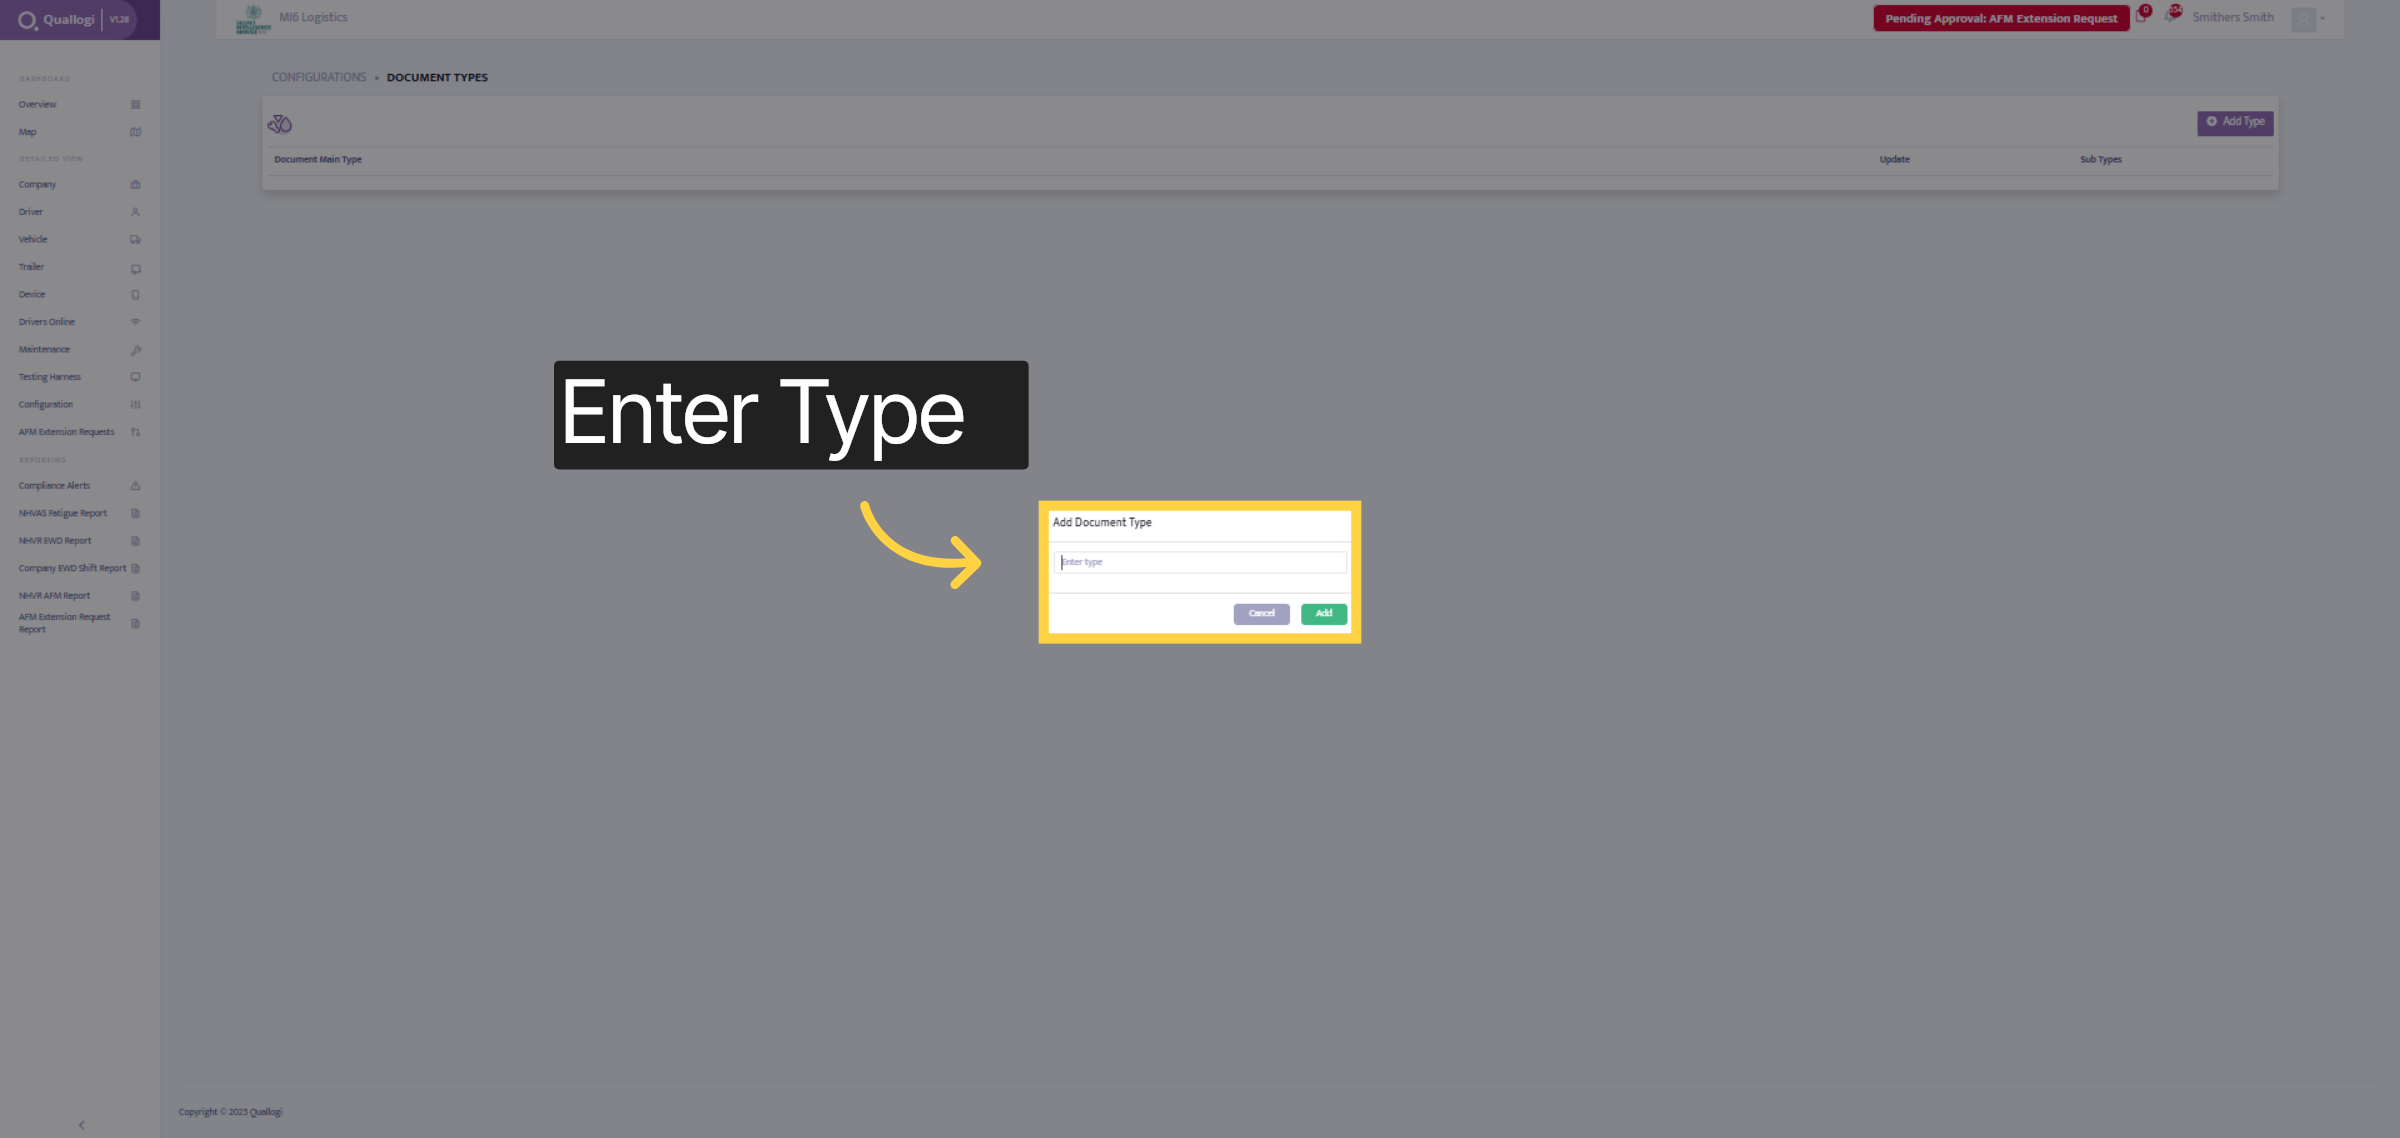
21. Input Details
Enter all the details for the document or license and certification fields, then select the add button.

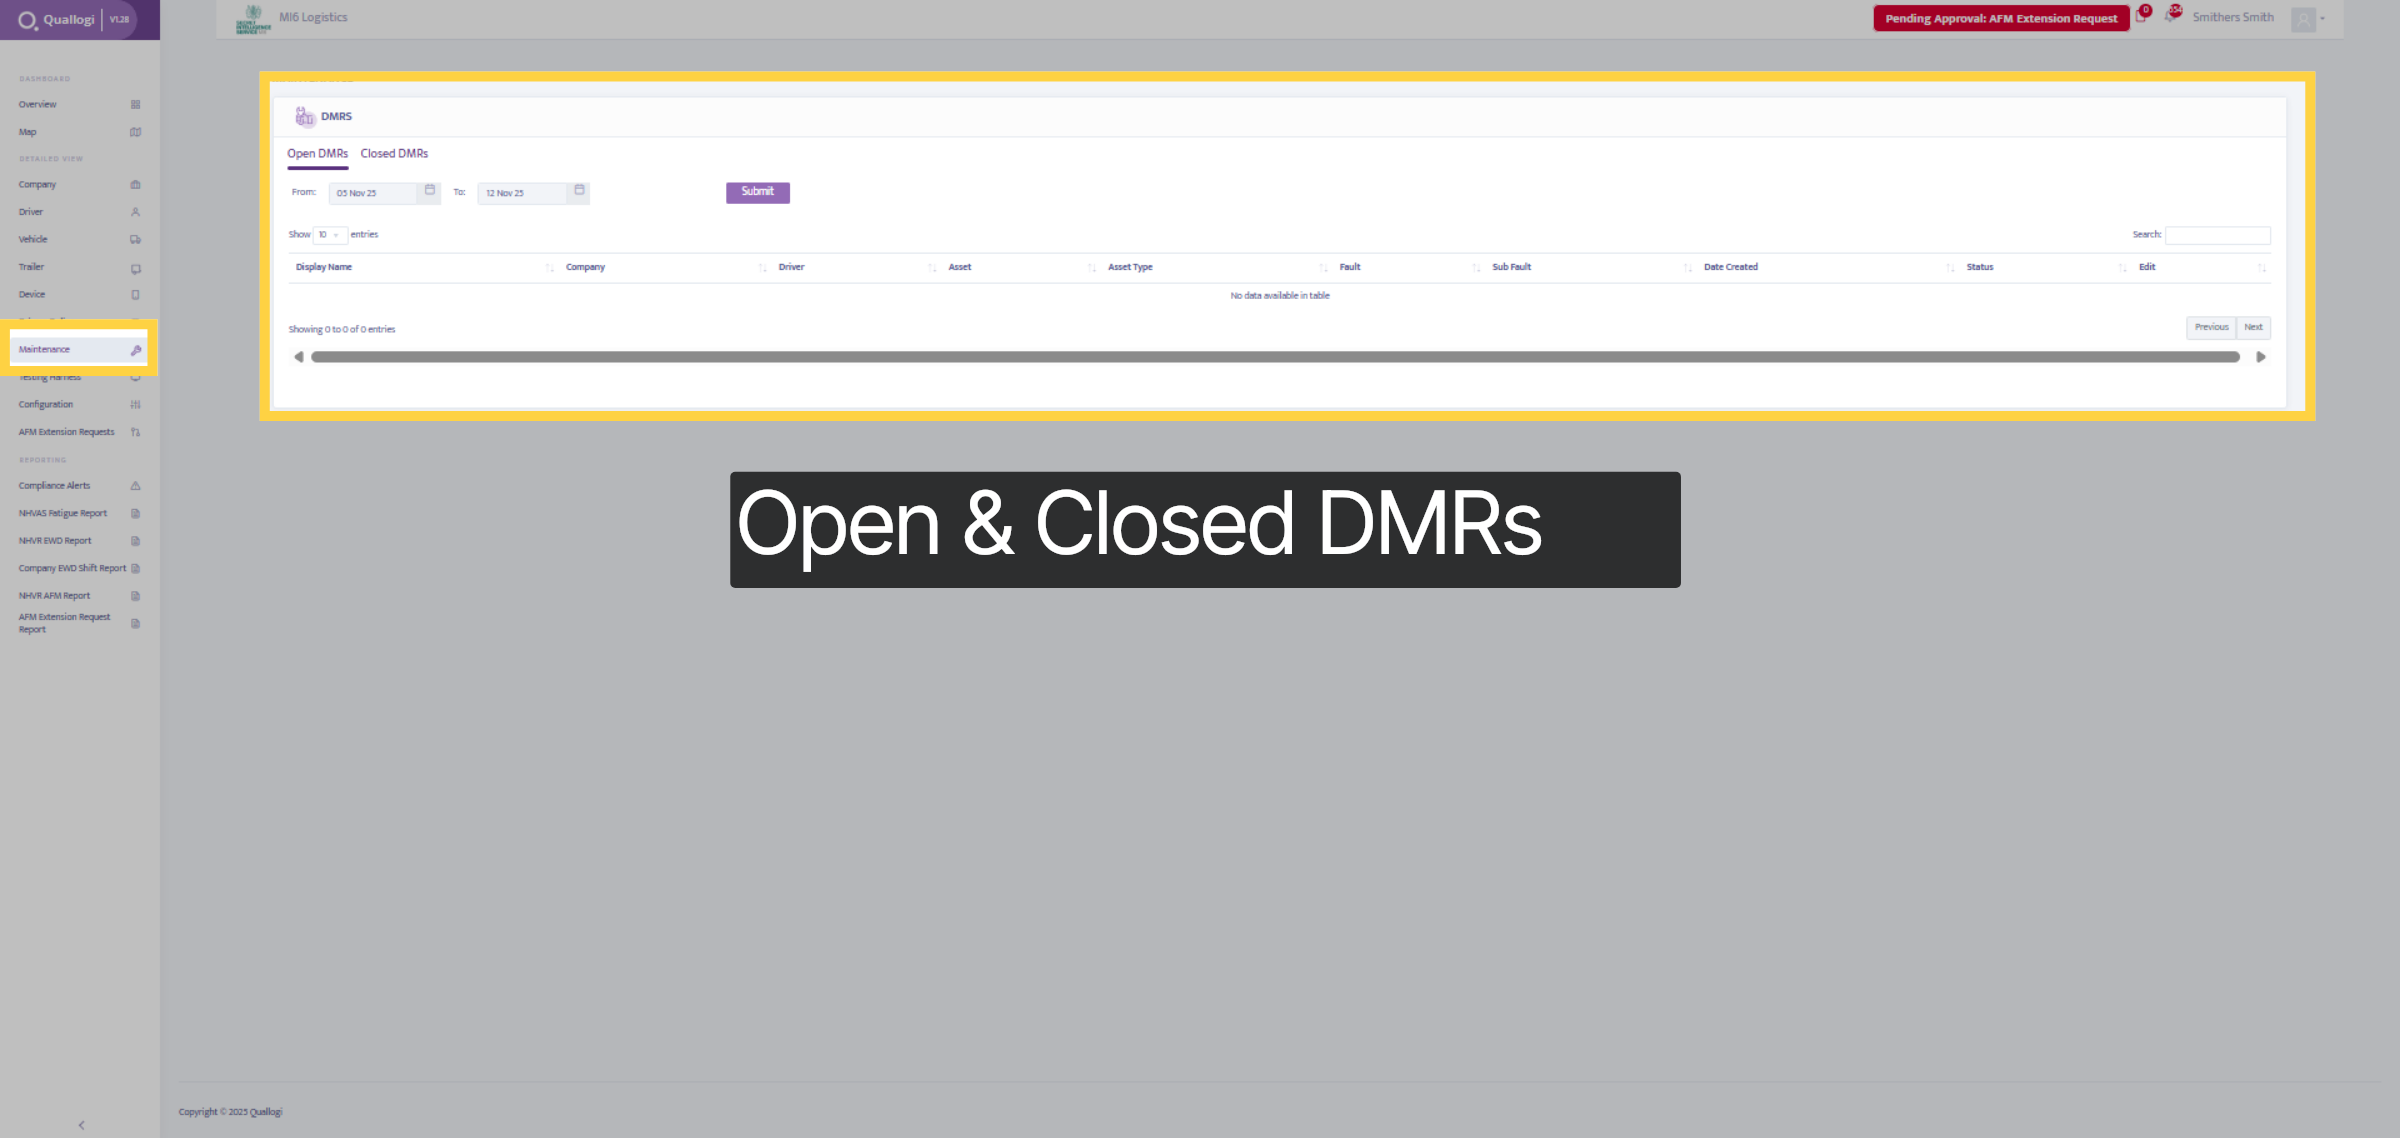
22. Maintenance Tab
Within the Maintenance tab, you can view all open and closed DMRs, along with the details of the company, driver, asset, faults, sub-faults, and their status.
Thanks for watching

