Welcome to Kynection! This guide will help Managers navigate our platform. We
recommend watching the introductory presentation before accessing the training
materials, as it offers essential insights and lays the groundwork for your learning.
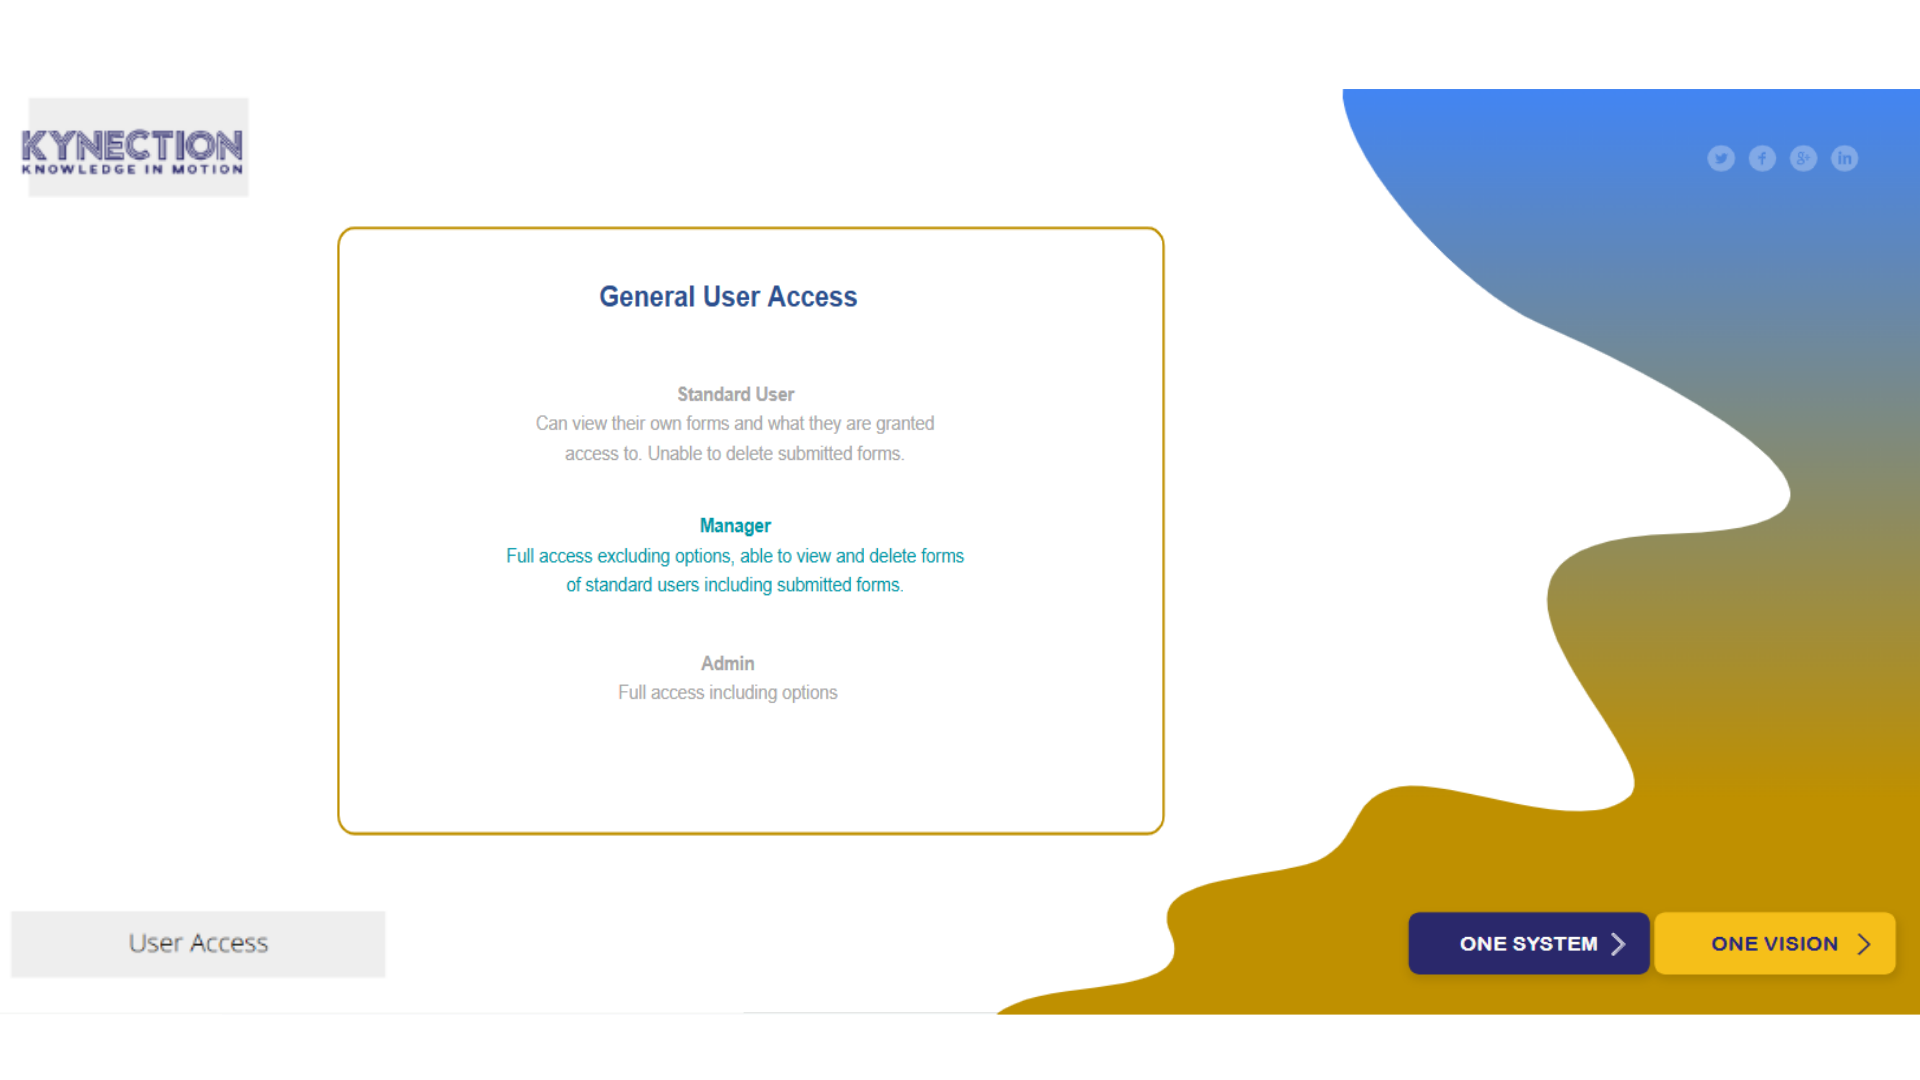
1. User Access
Access is determined by user type, role configuration, and permissions. Each
module features specific settings that enable you to customise access beyond
the standard role configurations, allowing you to tailor the access levels to
meet your business needs effectively.
2. Home Dashboard
After signing in, you'll see the home dashboard. The top banner serves as the
toolbar for your Kynection needs, displaying relevant options based on the task.
Click the logo on the left to return to the dashboard anytime, while the right
side features icons for settings and your account.
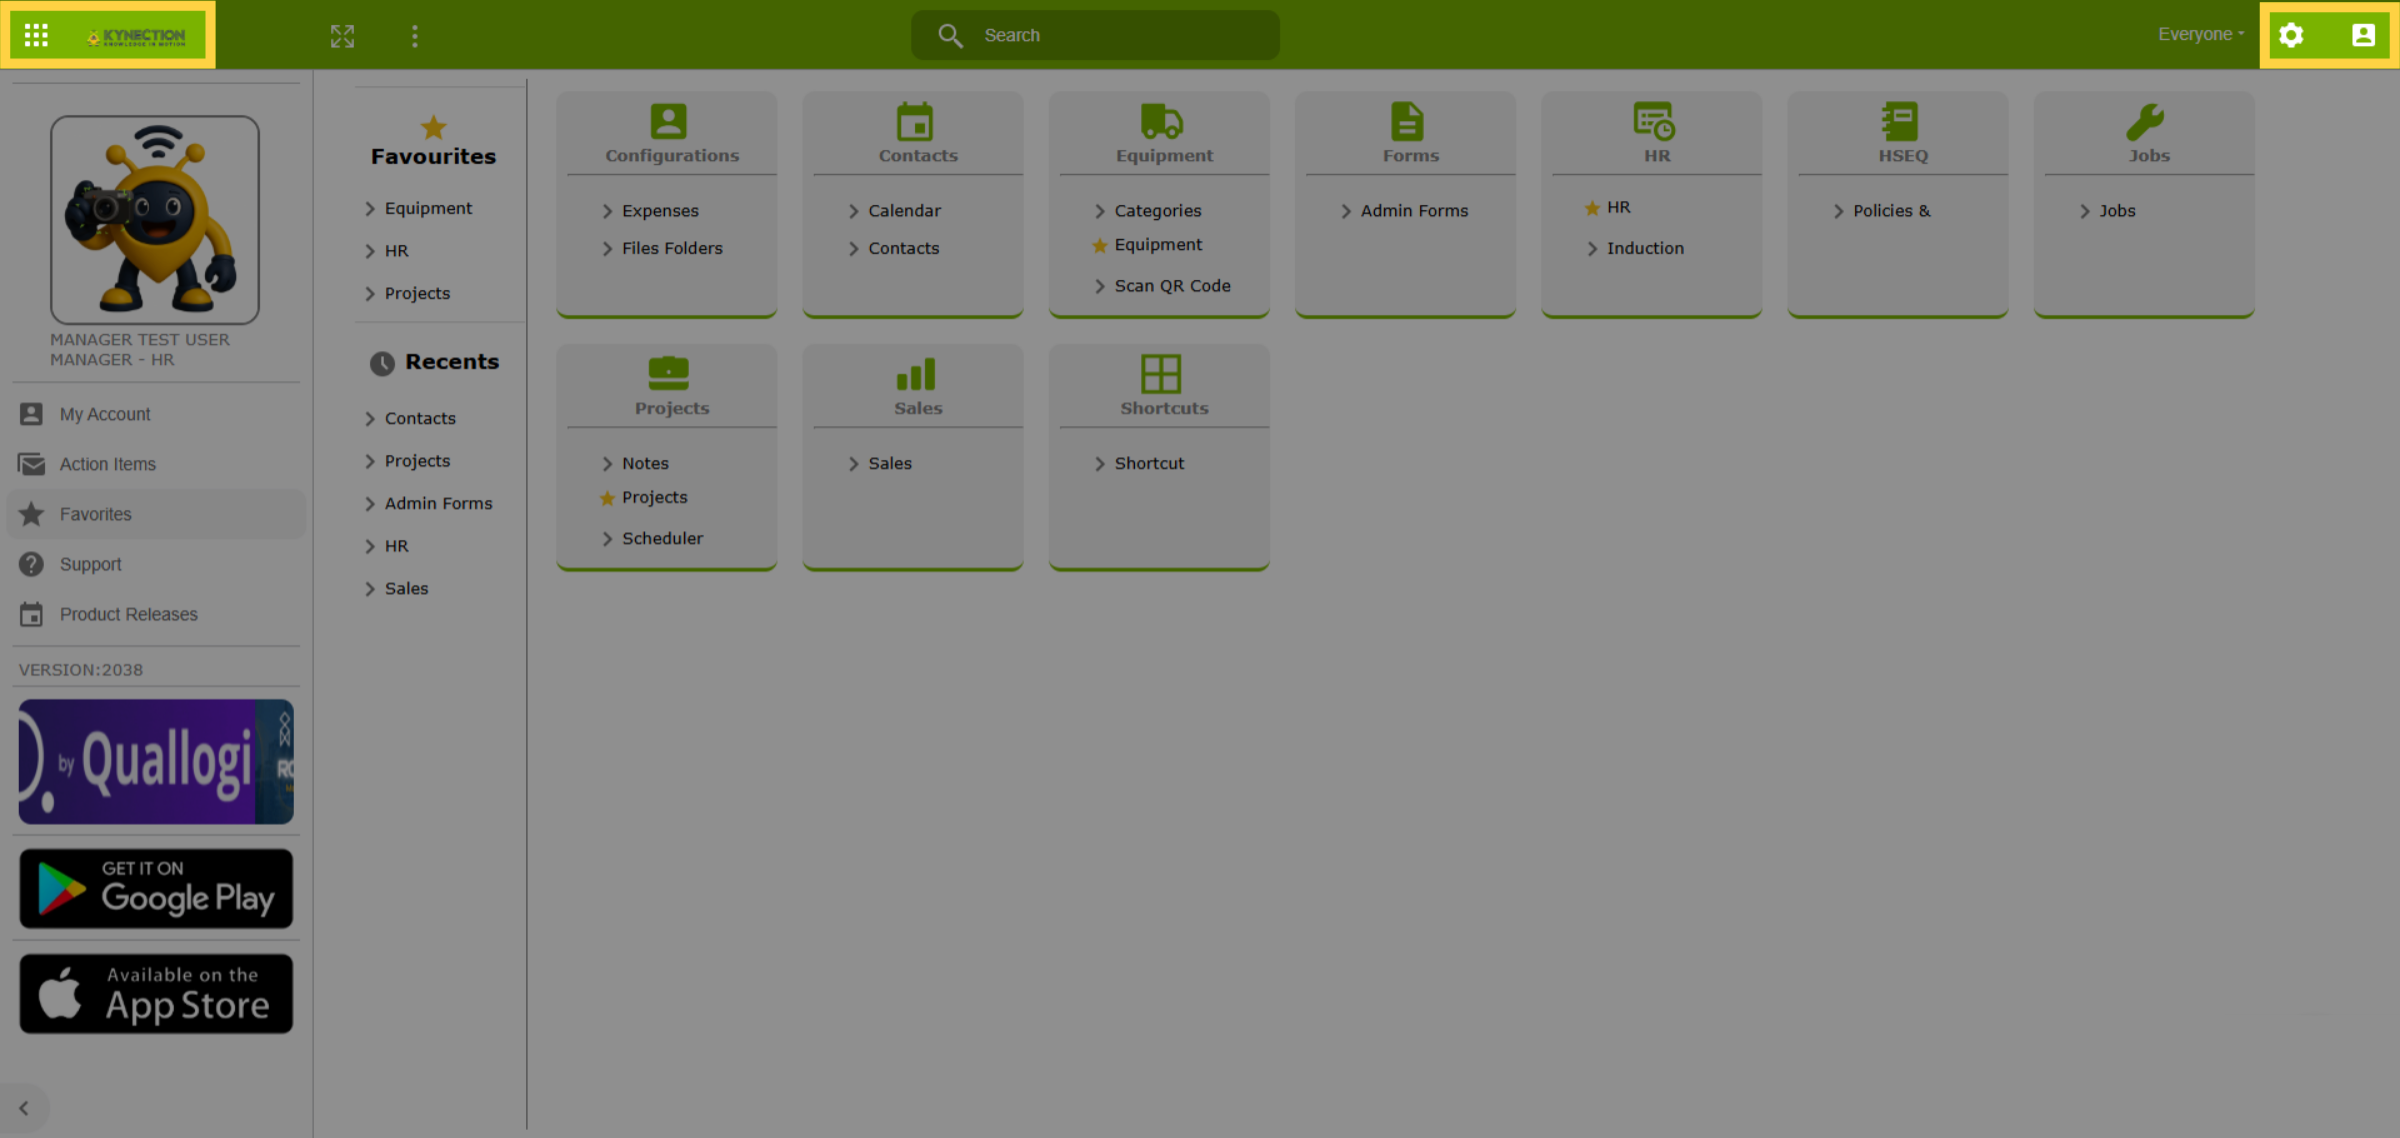
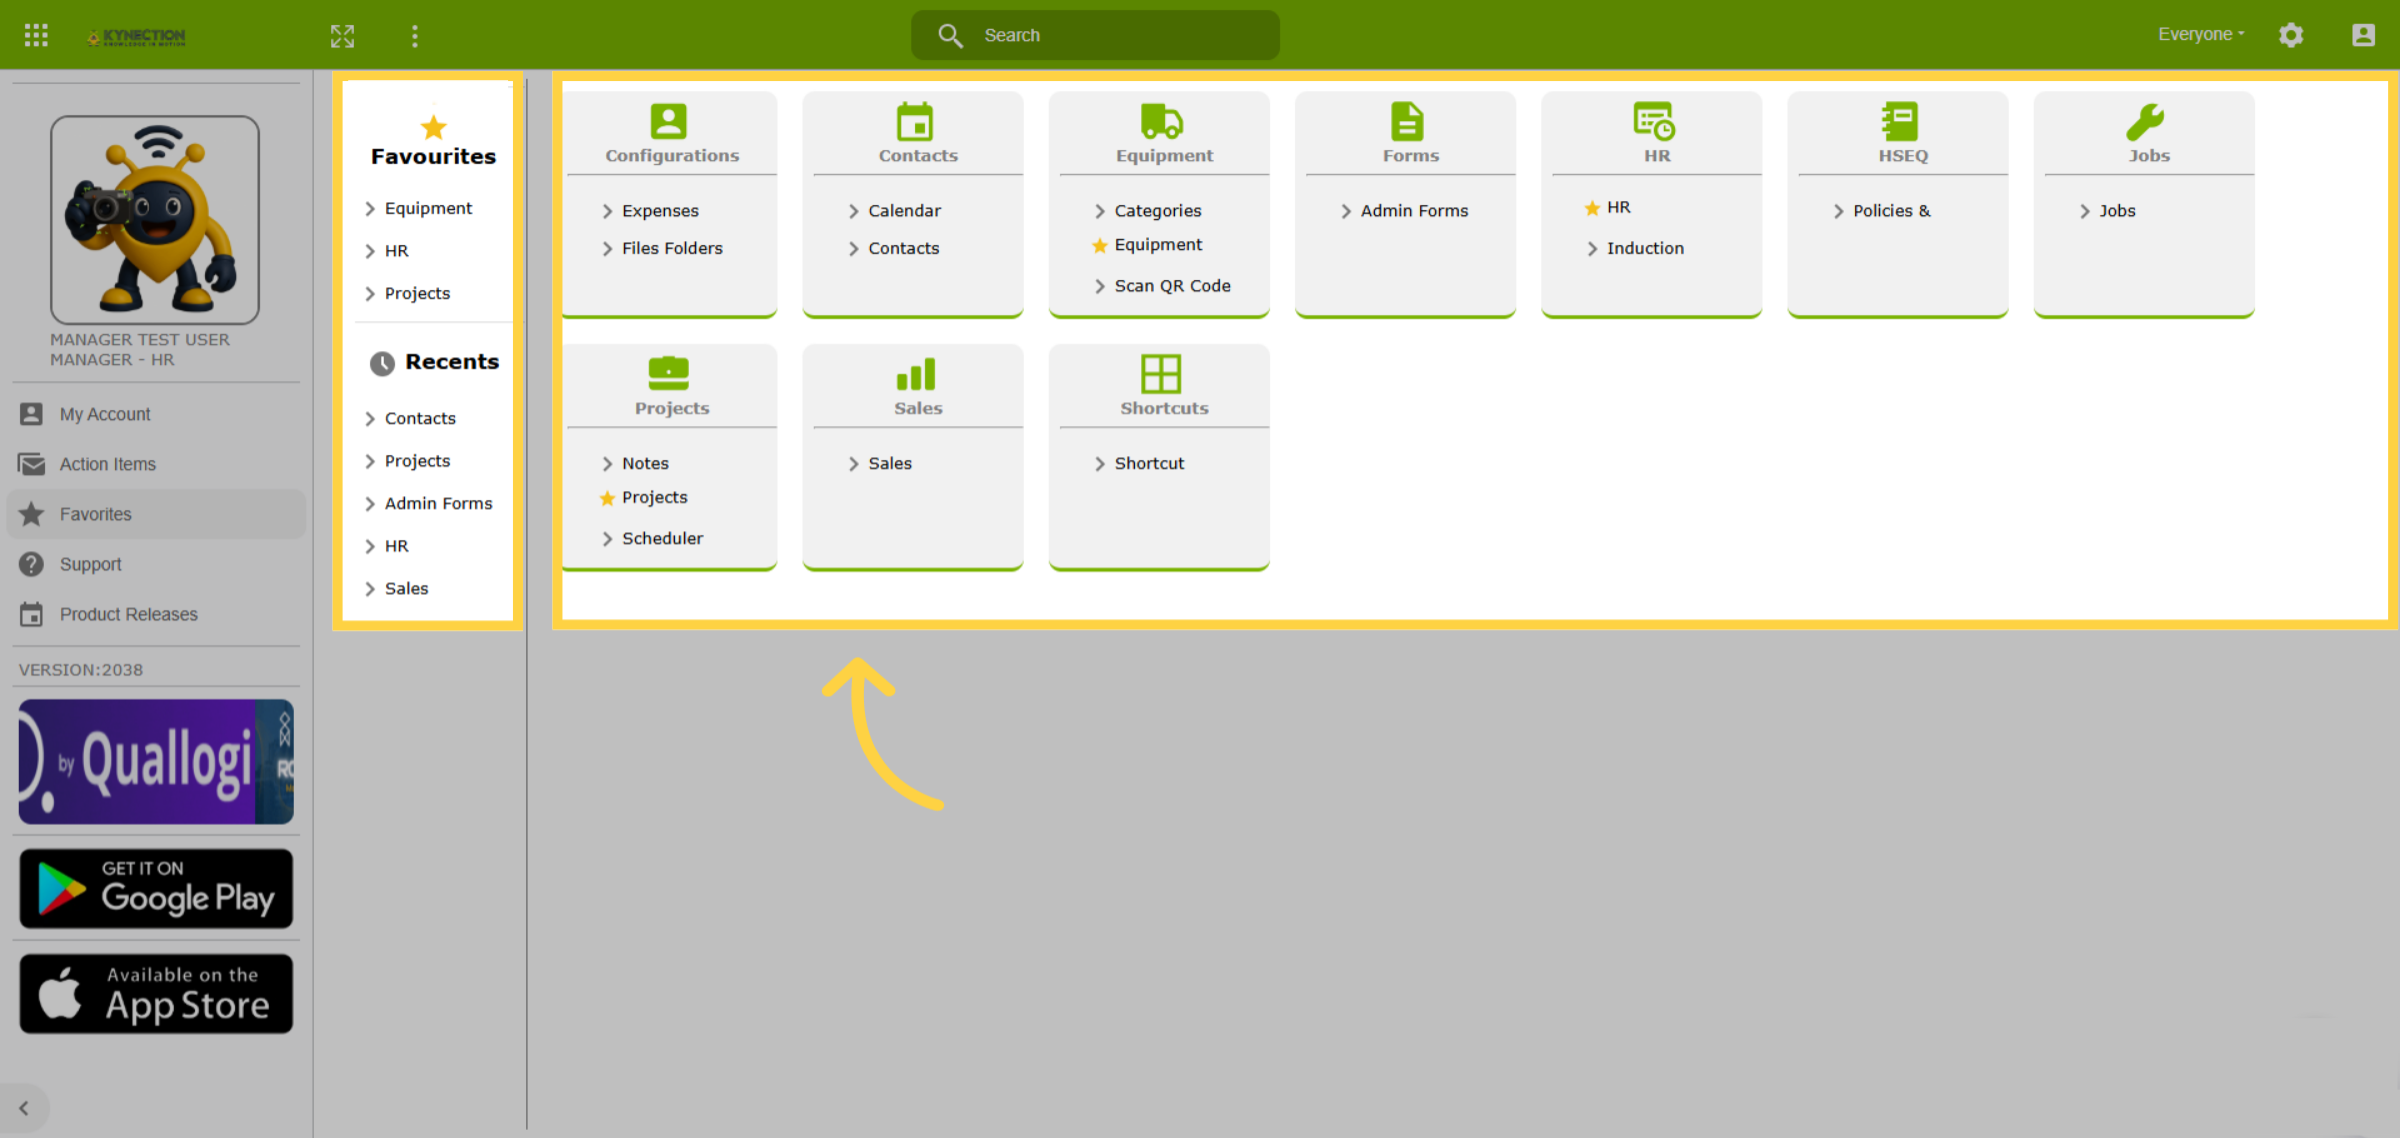
3. Modules
The modules presented on this page are customised based on user access. Click
on any module to get started. To the left of the modules, you'll find convenient
links to your Favorites and Recent activities.
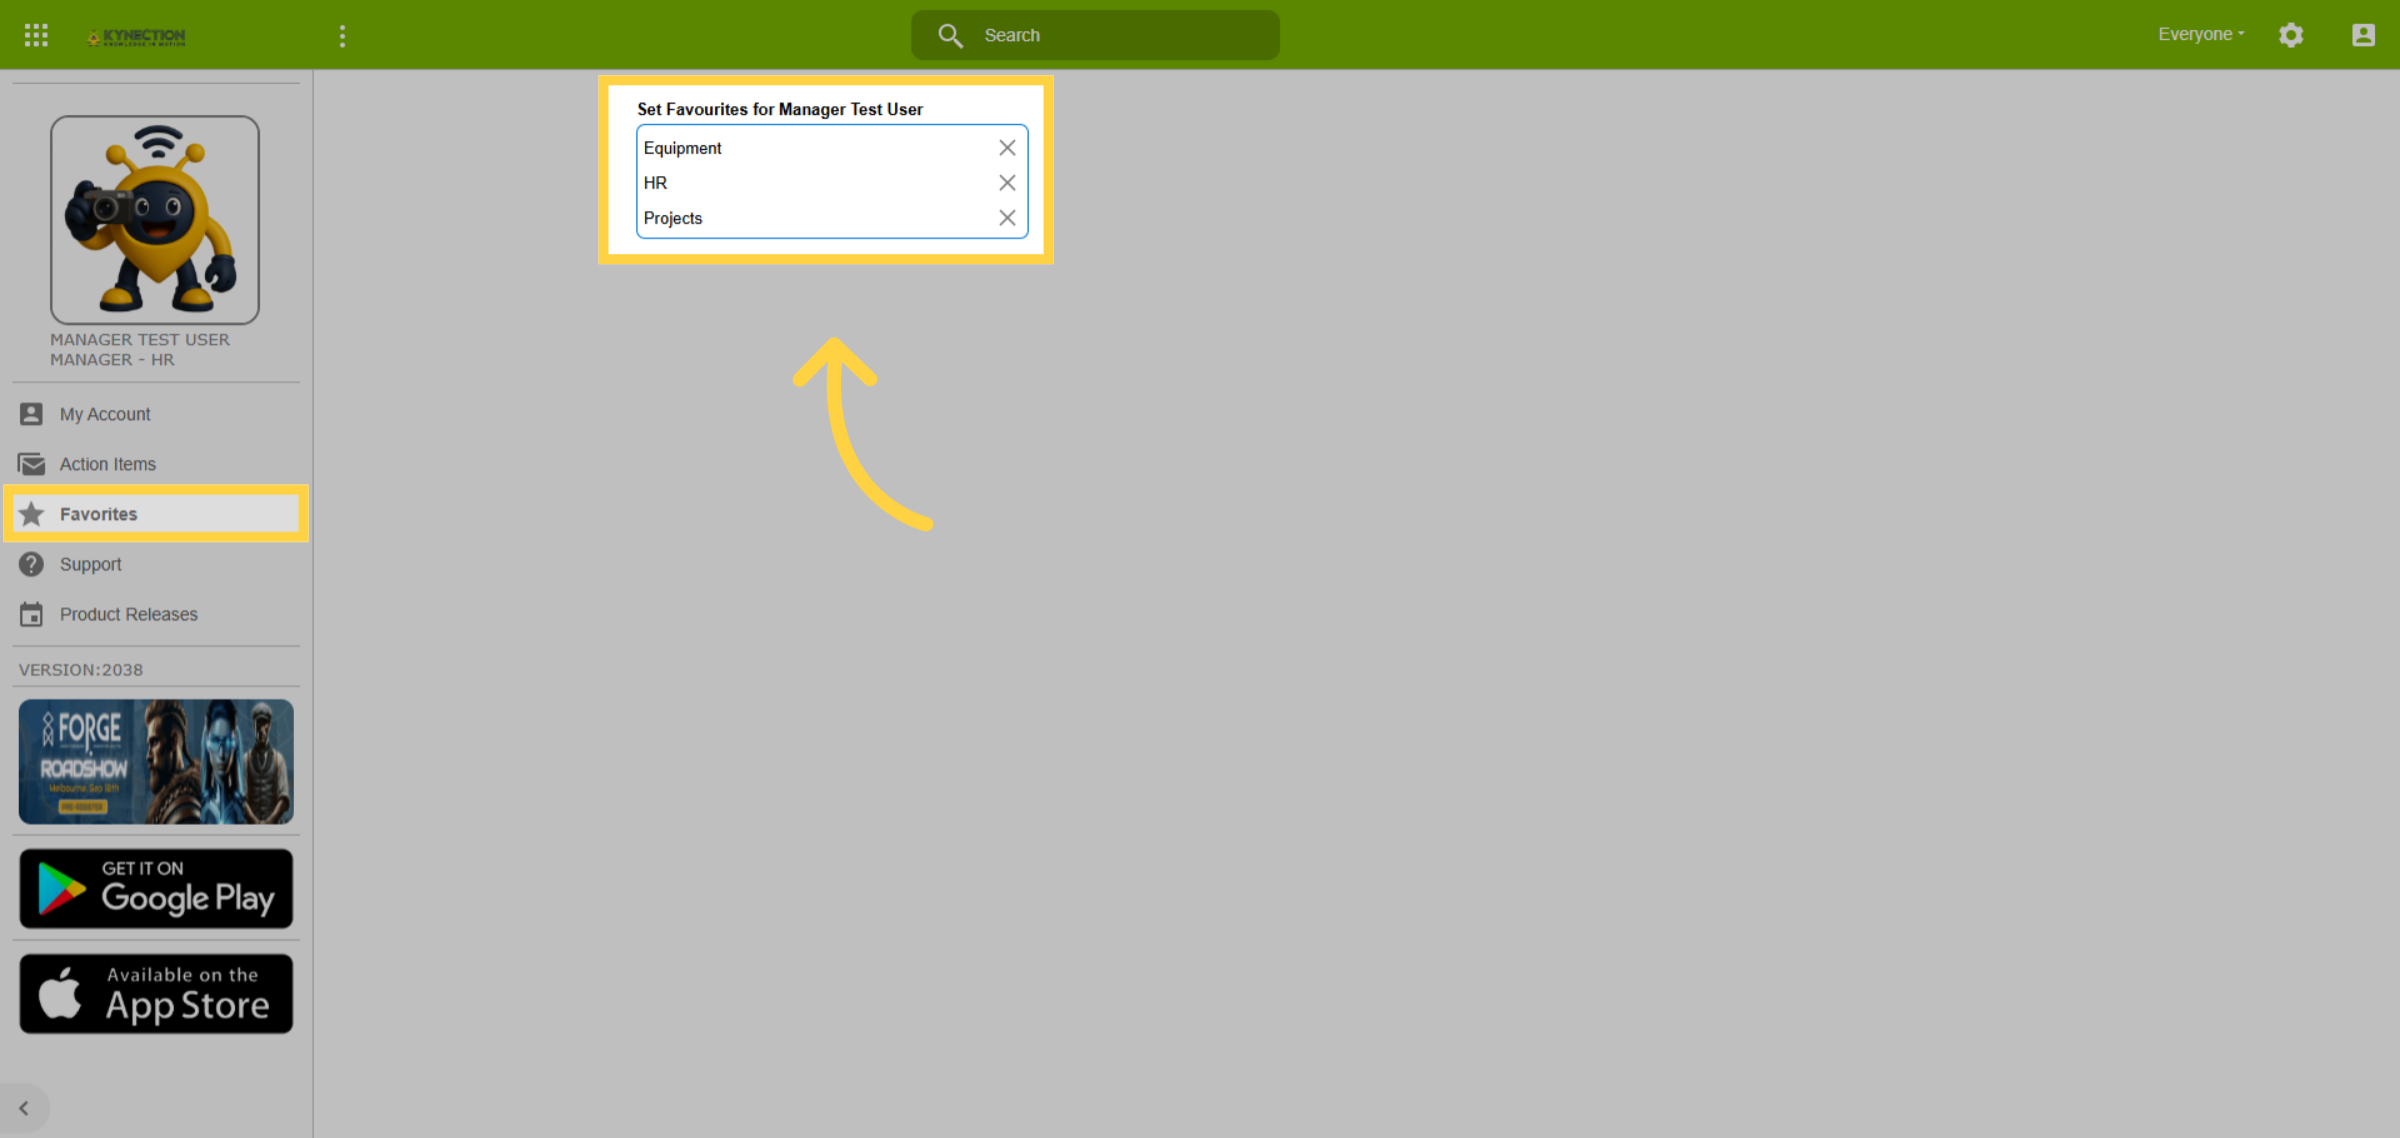
4. Favourites
To add items to your favorites list on the home screen, start by selecting Favorites
from the left-hand pane. Then, browse through the displayed list and choose the
items you wish to add, thereby creating your personalised Favorites list.
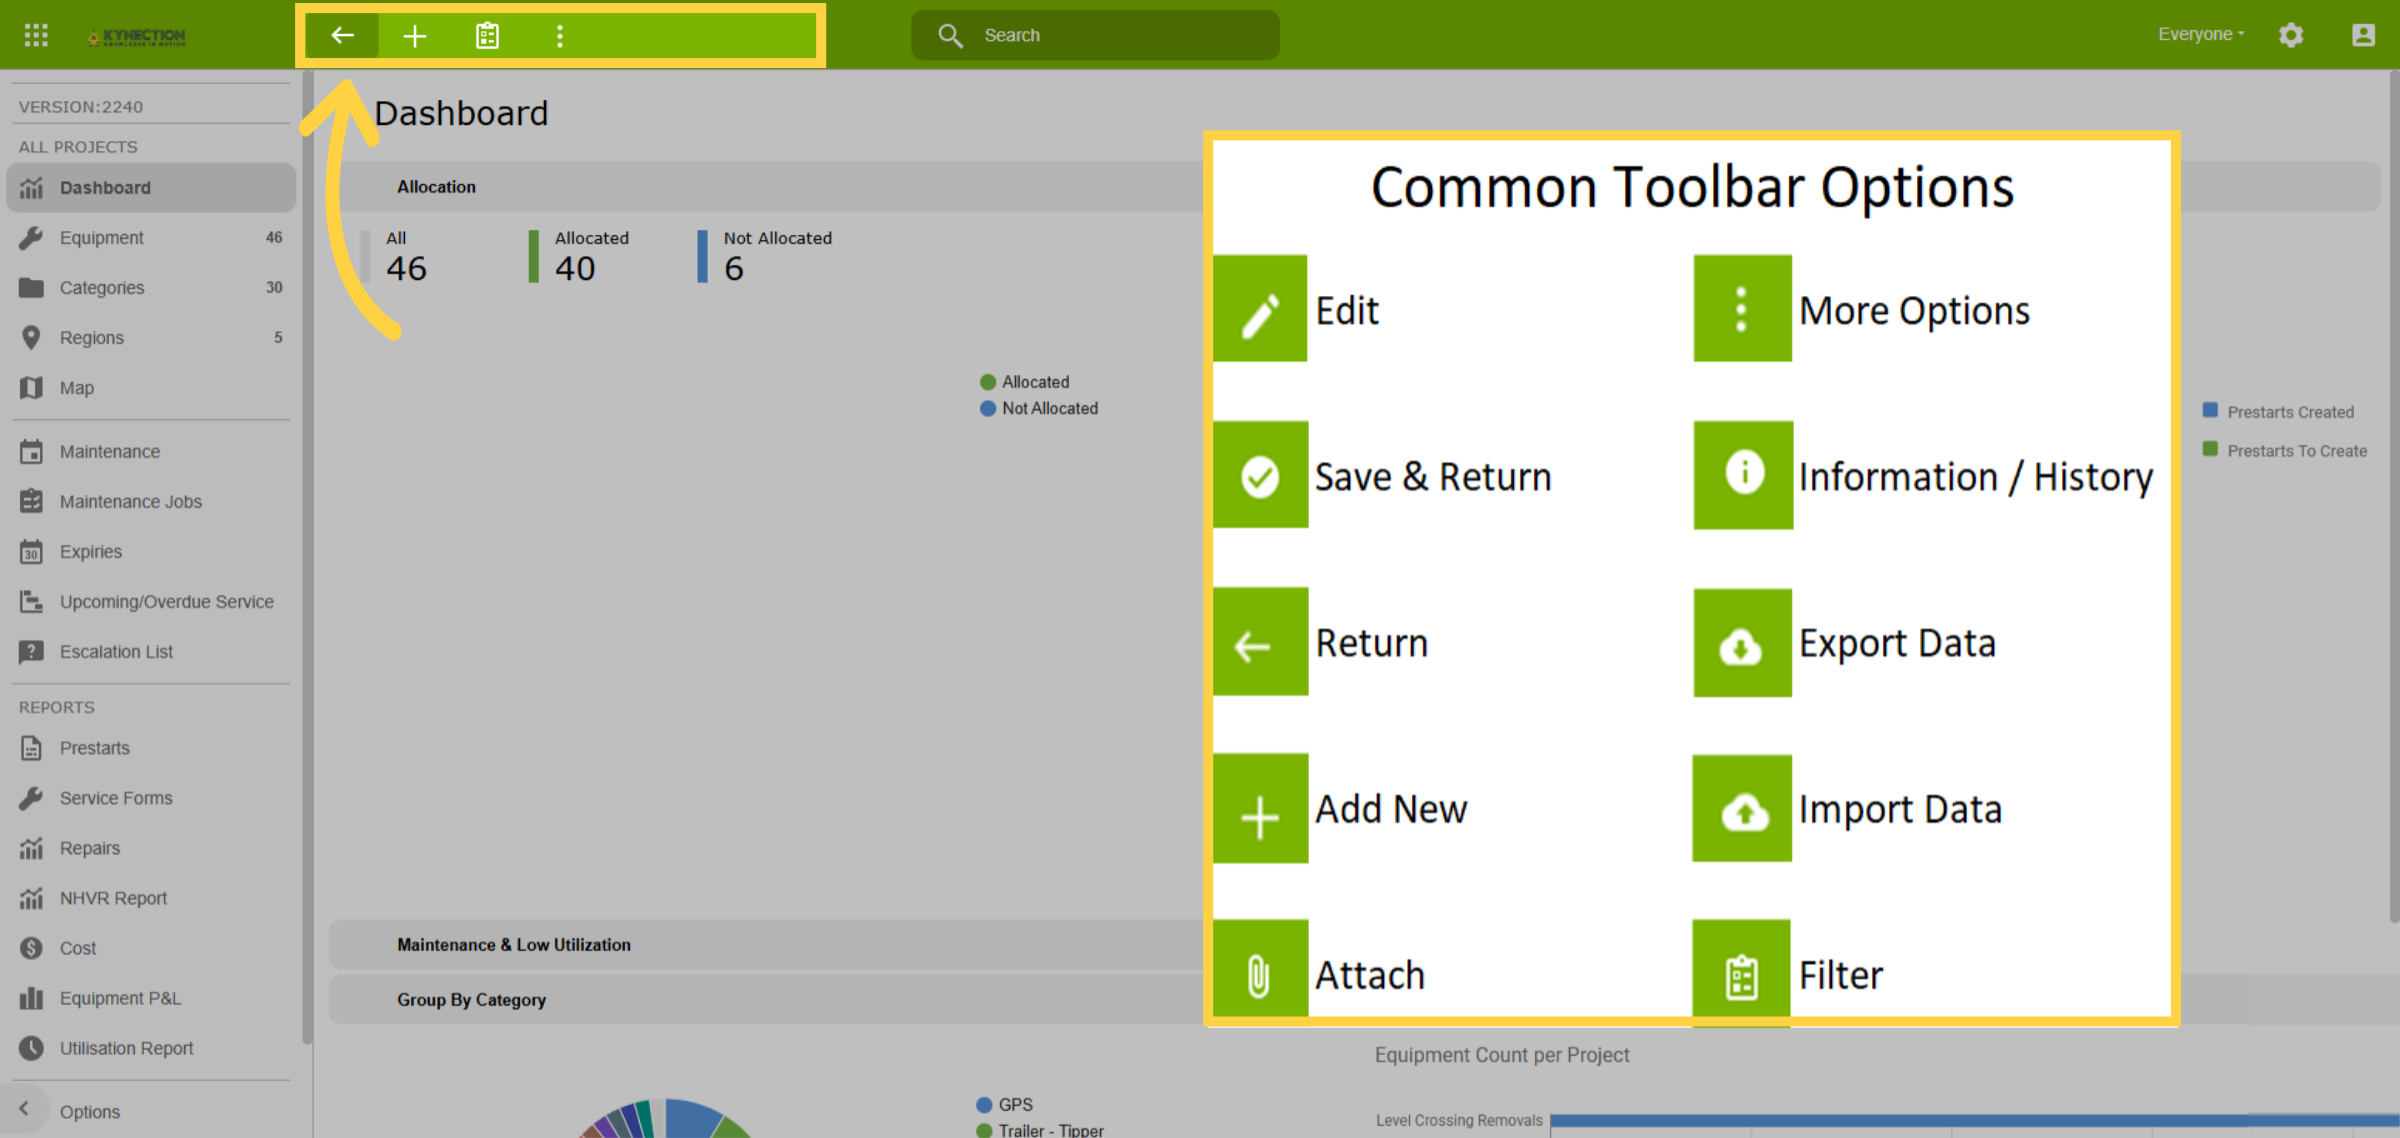
5. Toolbar Options
Toolbar options are positioned to the left of the search bar. A list of commonly
used icons, along with their respective functionalities, are displayed here for
your reference.
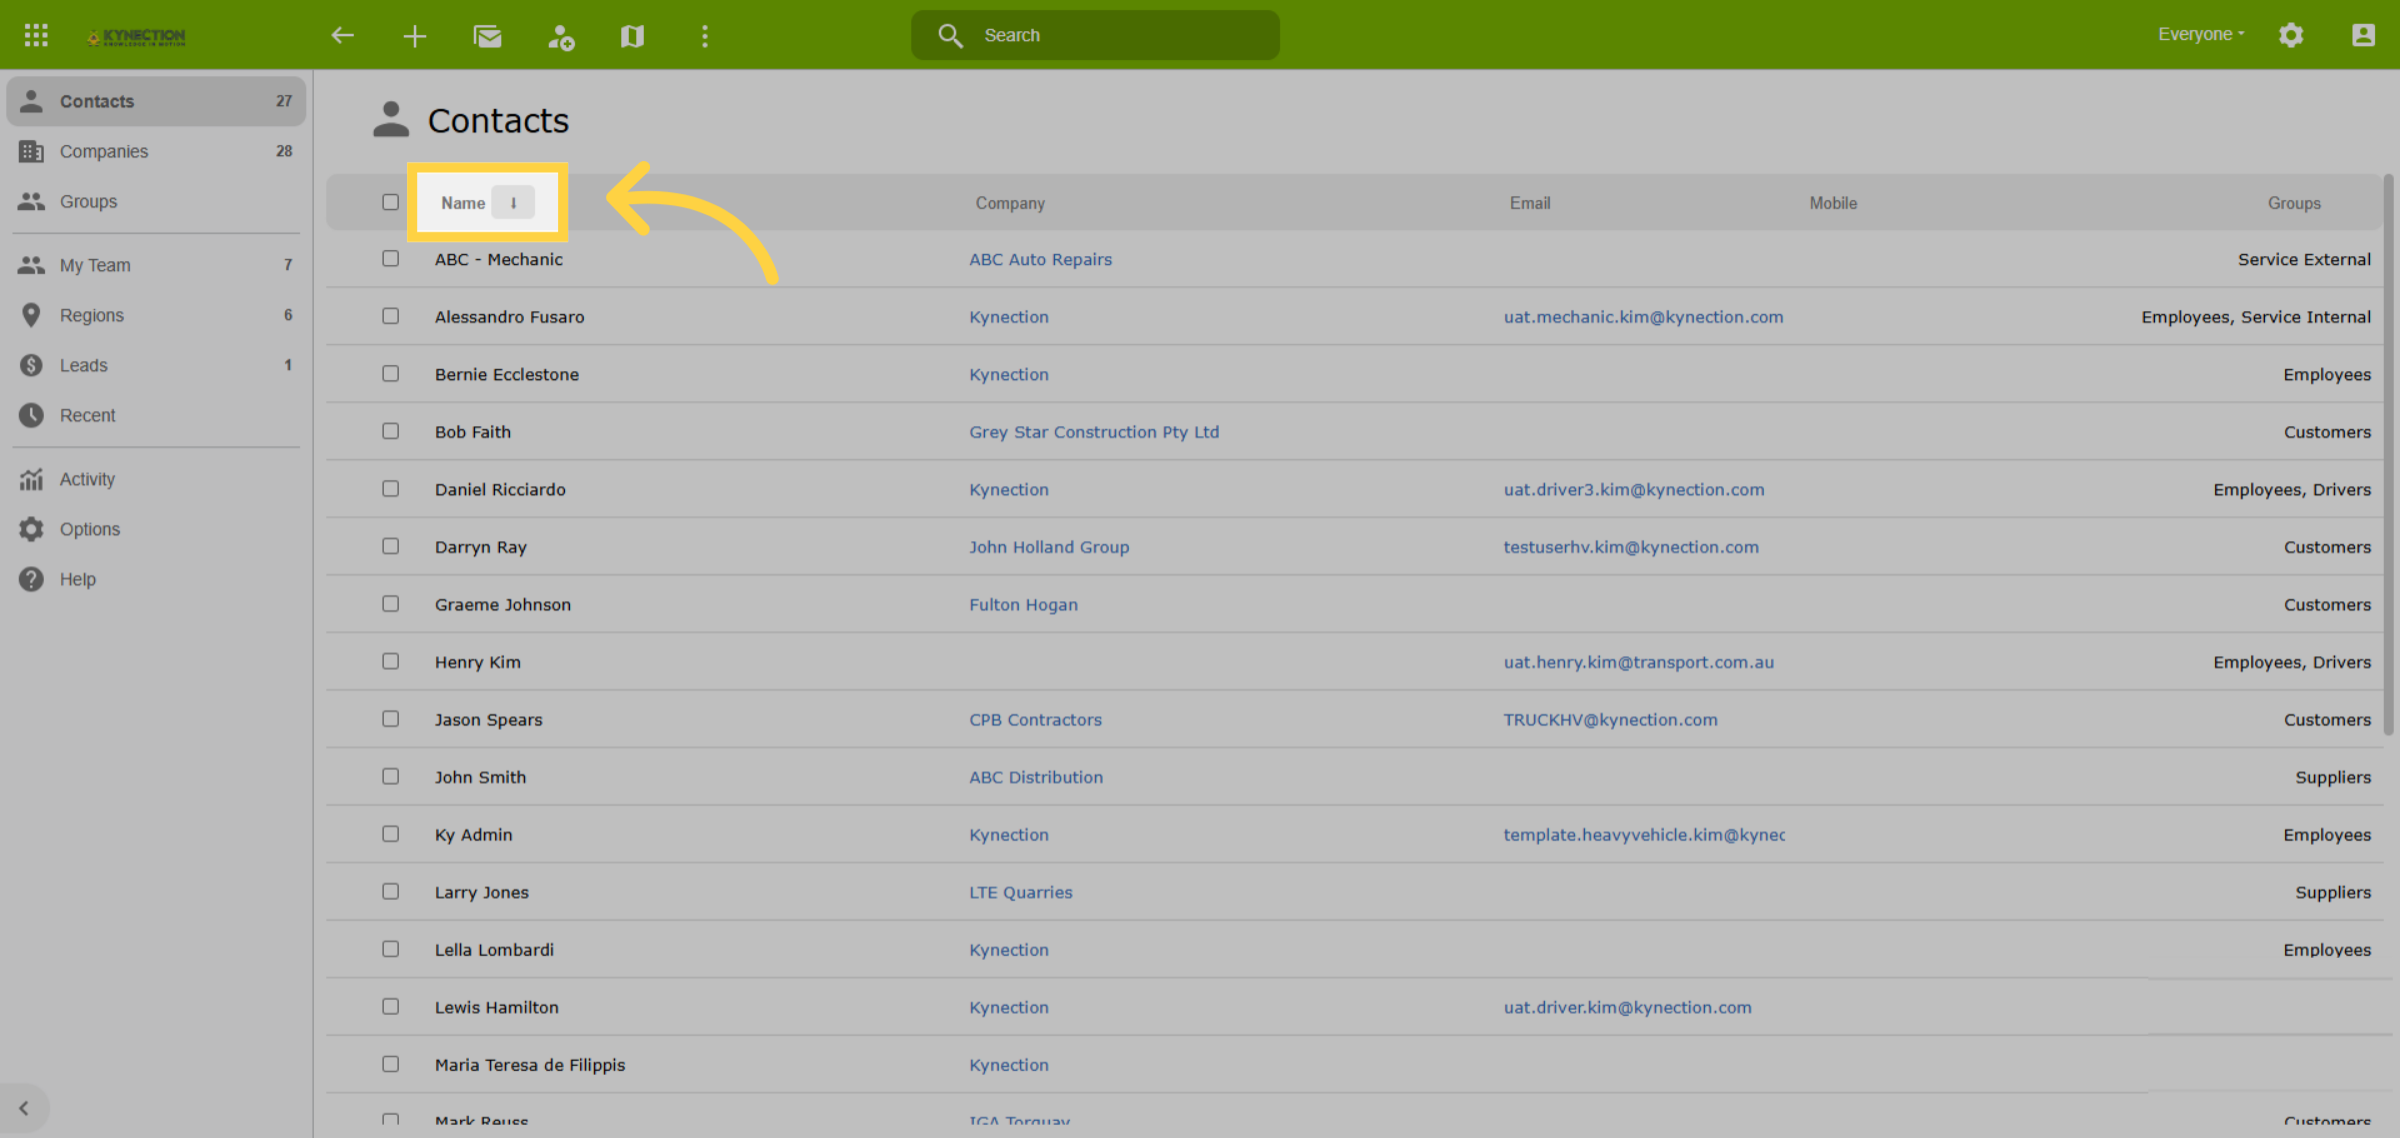
6. Table Filter and Sort
Use the column headers in tables to filter and sort data. Click a header to filter,
or click the arrow icon next to the header to sort. You can apply filters across
multiple columns for more precise results.
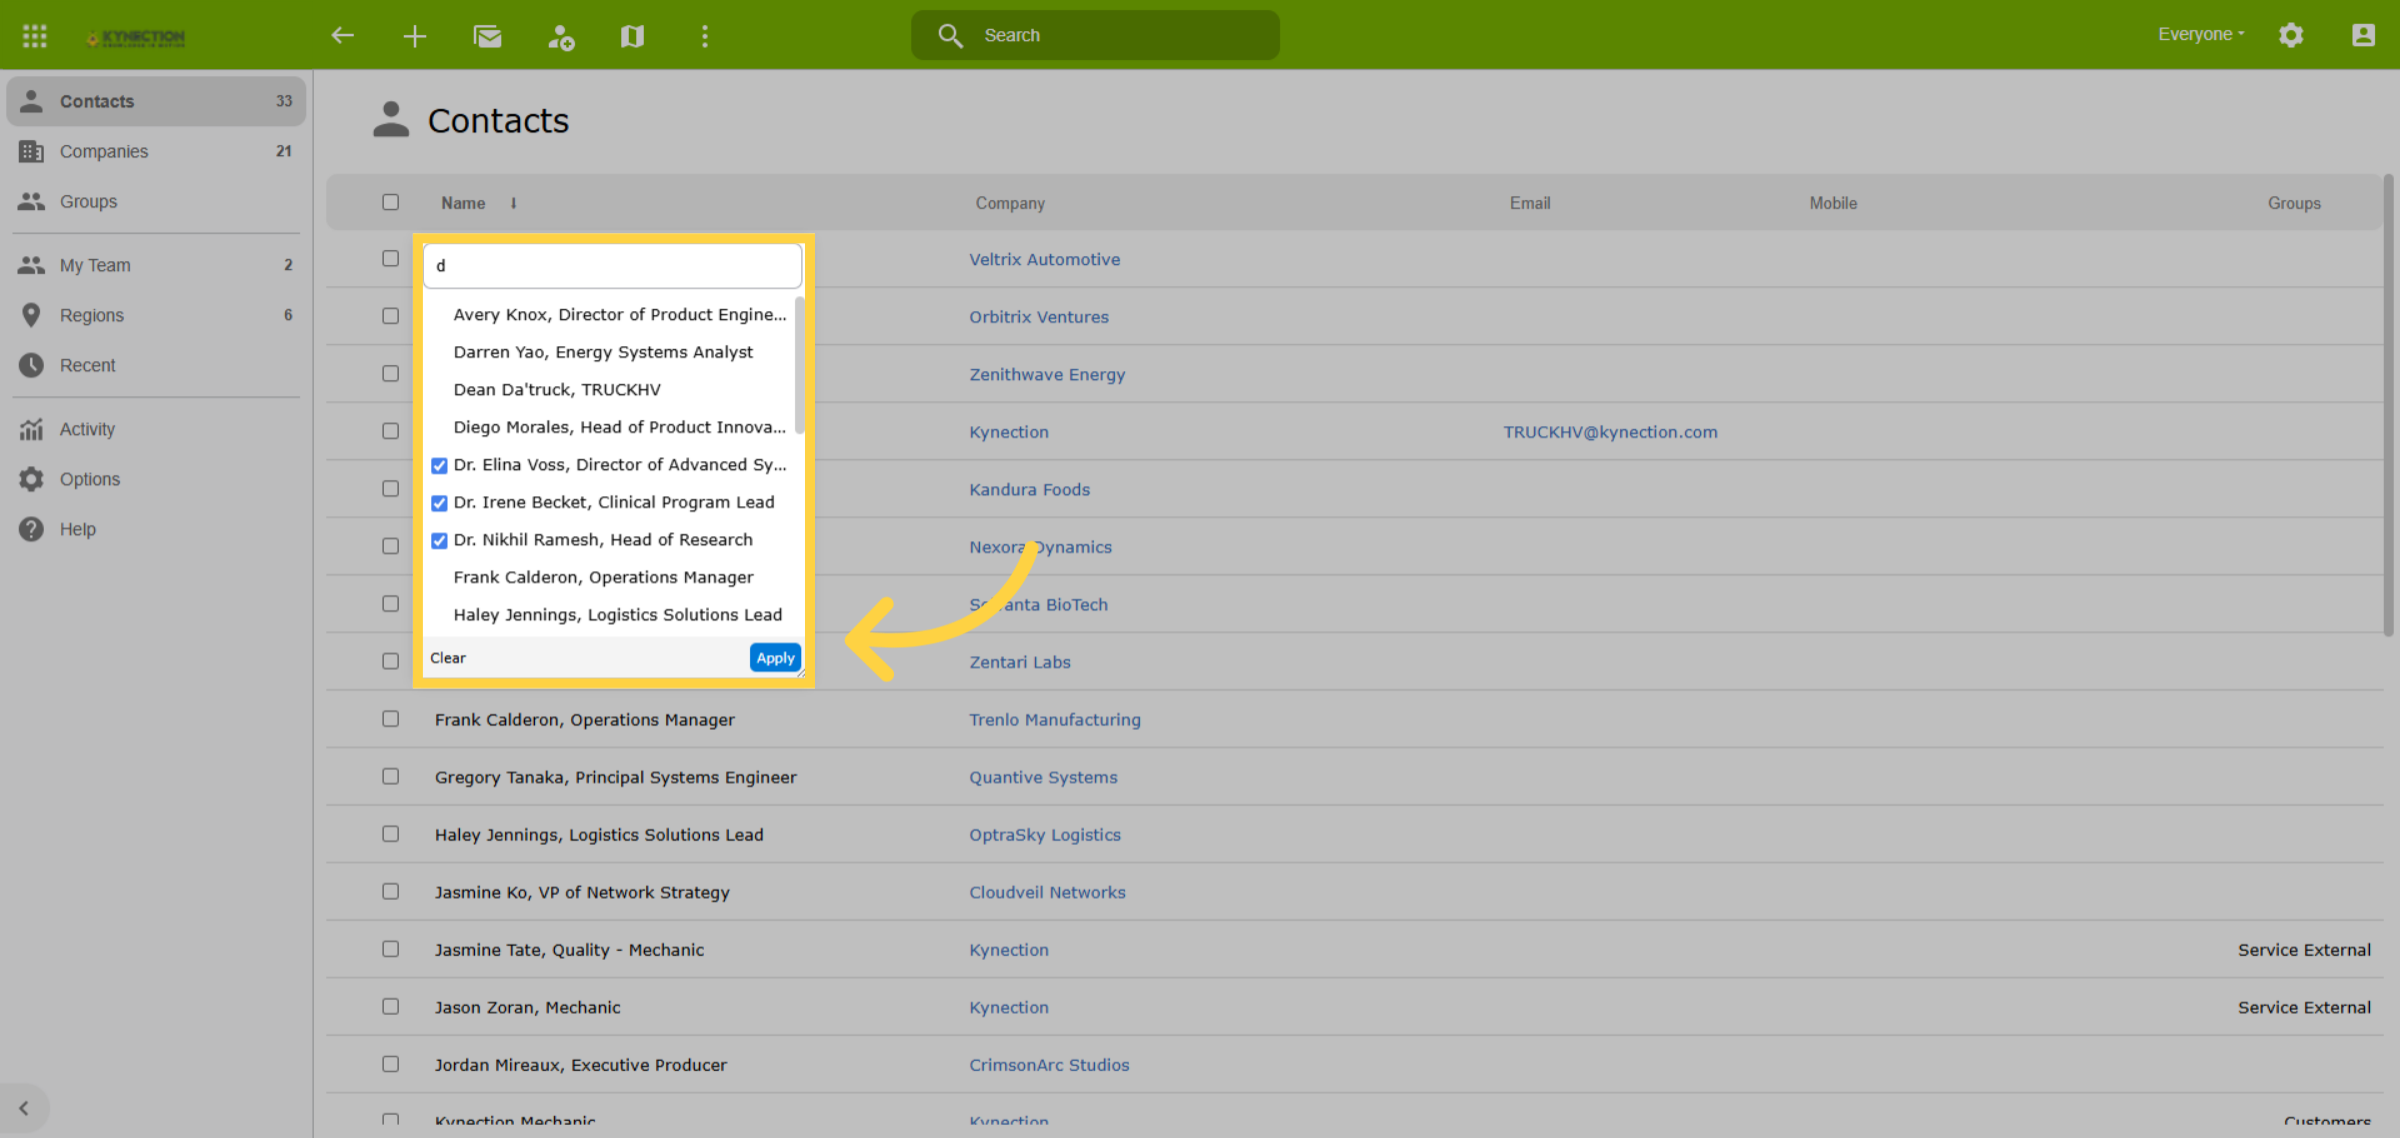
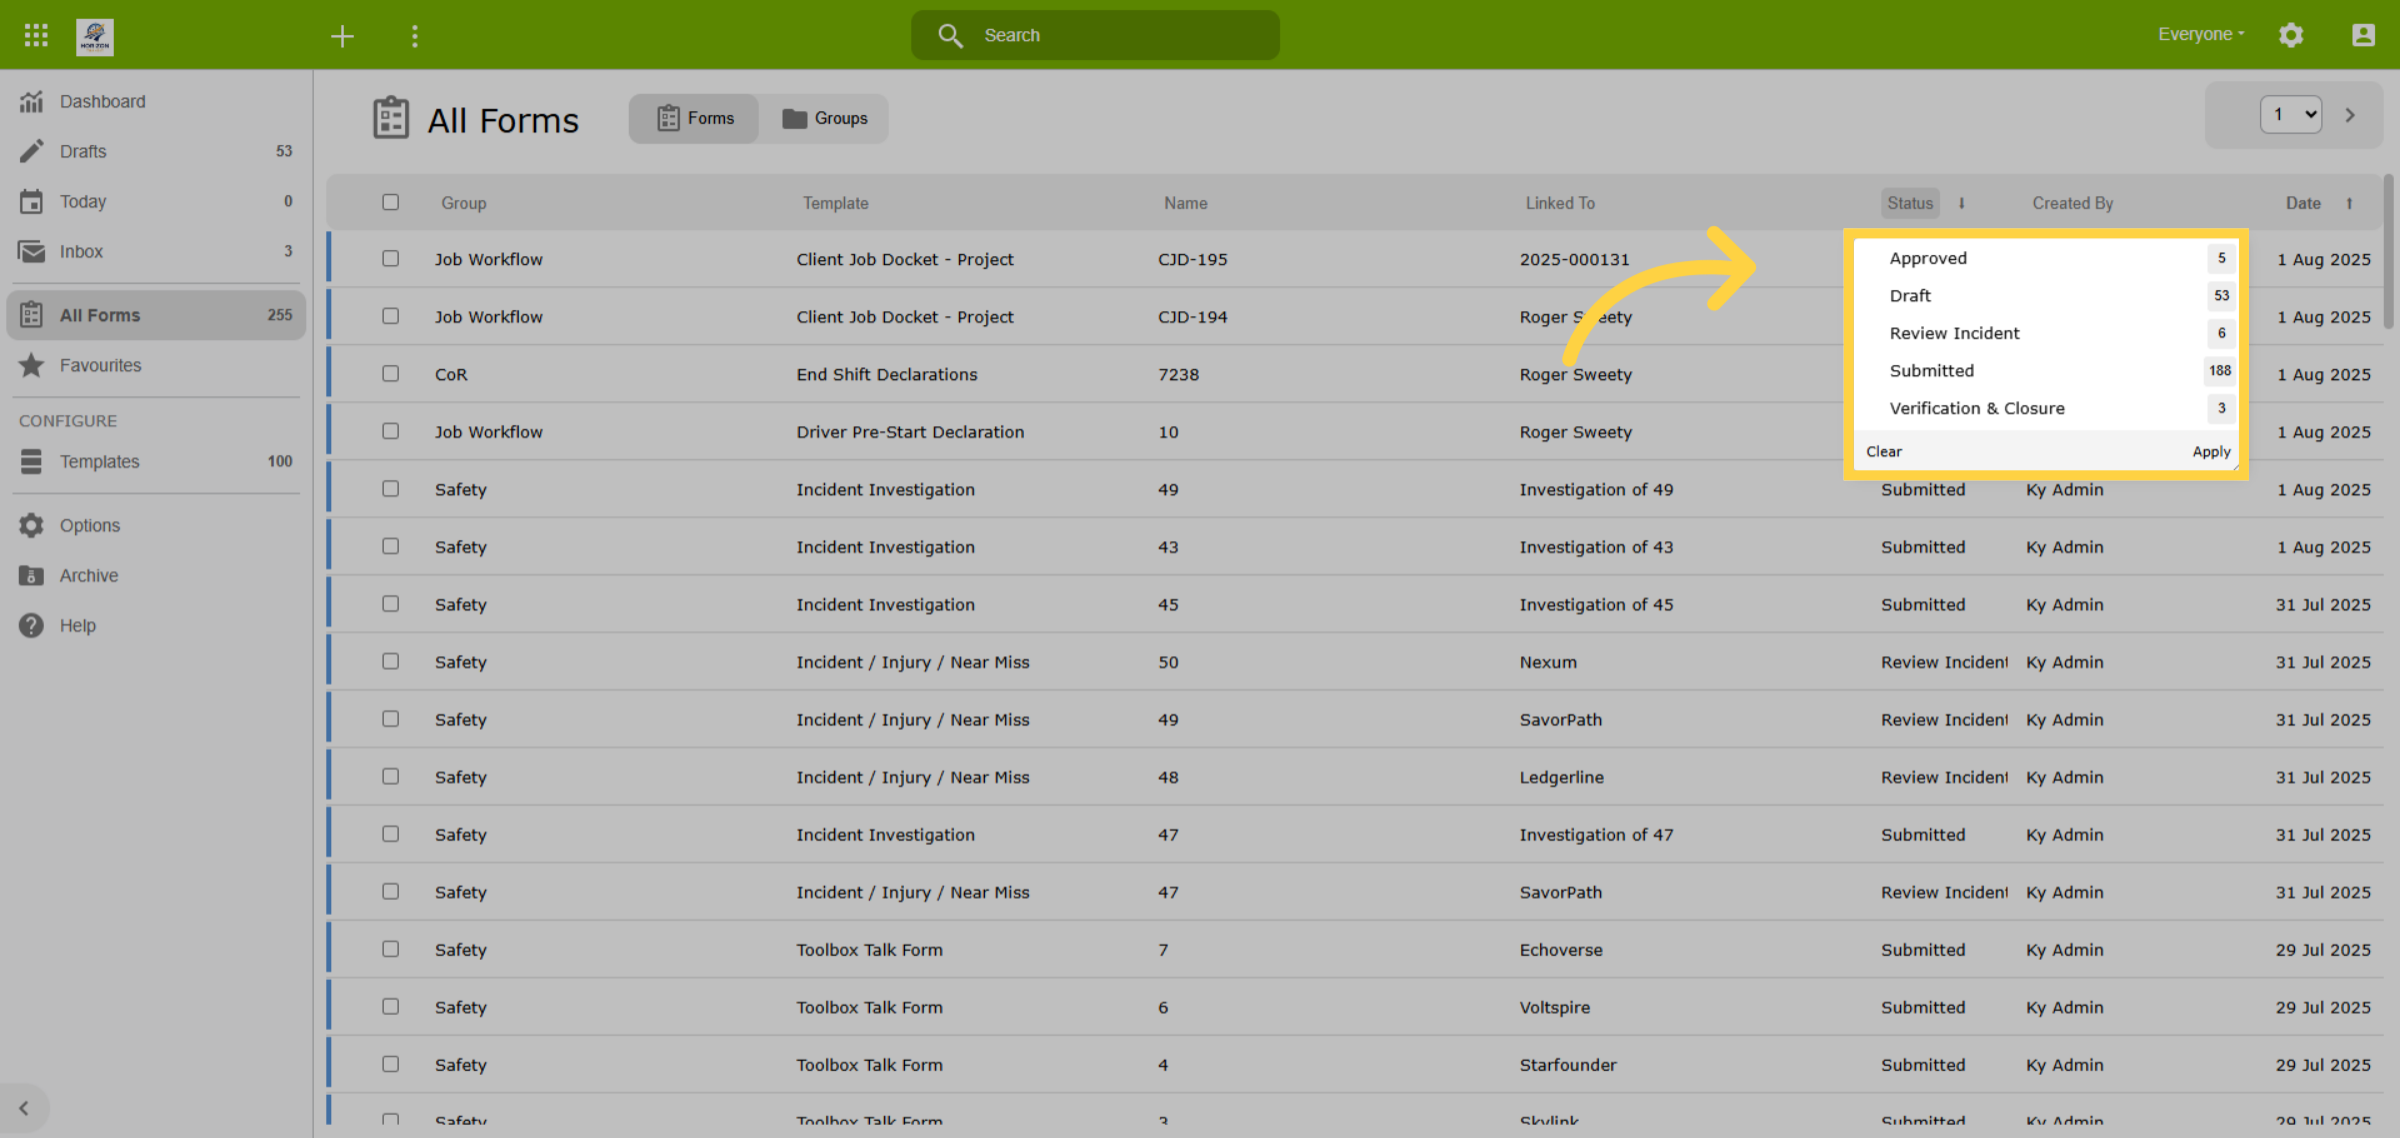
7. Filter Data
The filter function allows you to select either a single result or multiple results
at once. To view a single result, simply click on the desired item. If you wish
to select multiple results, check the corresponding boxes and then click Apply
to finalise your selection.
8. Clear Filter
Columns with filtered data are easily identifiable, as their headings are highlighted
blue. To remove the filter, click on the column heading and select Clear from
the bottom of the filter drop-down menu. Alternatively, you can right-click on
the column header to remove the filter.

9. Data Integrity
Kynection’s one company one system approach interconnects data across different
modules. Consequently, deleting data may inadvertently affect other areas of
the business. We recommend utilising the archive function instead of deletion
to preserve data links. Forms are set to automatically archive after 3 months
and can be restored at any stage.
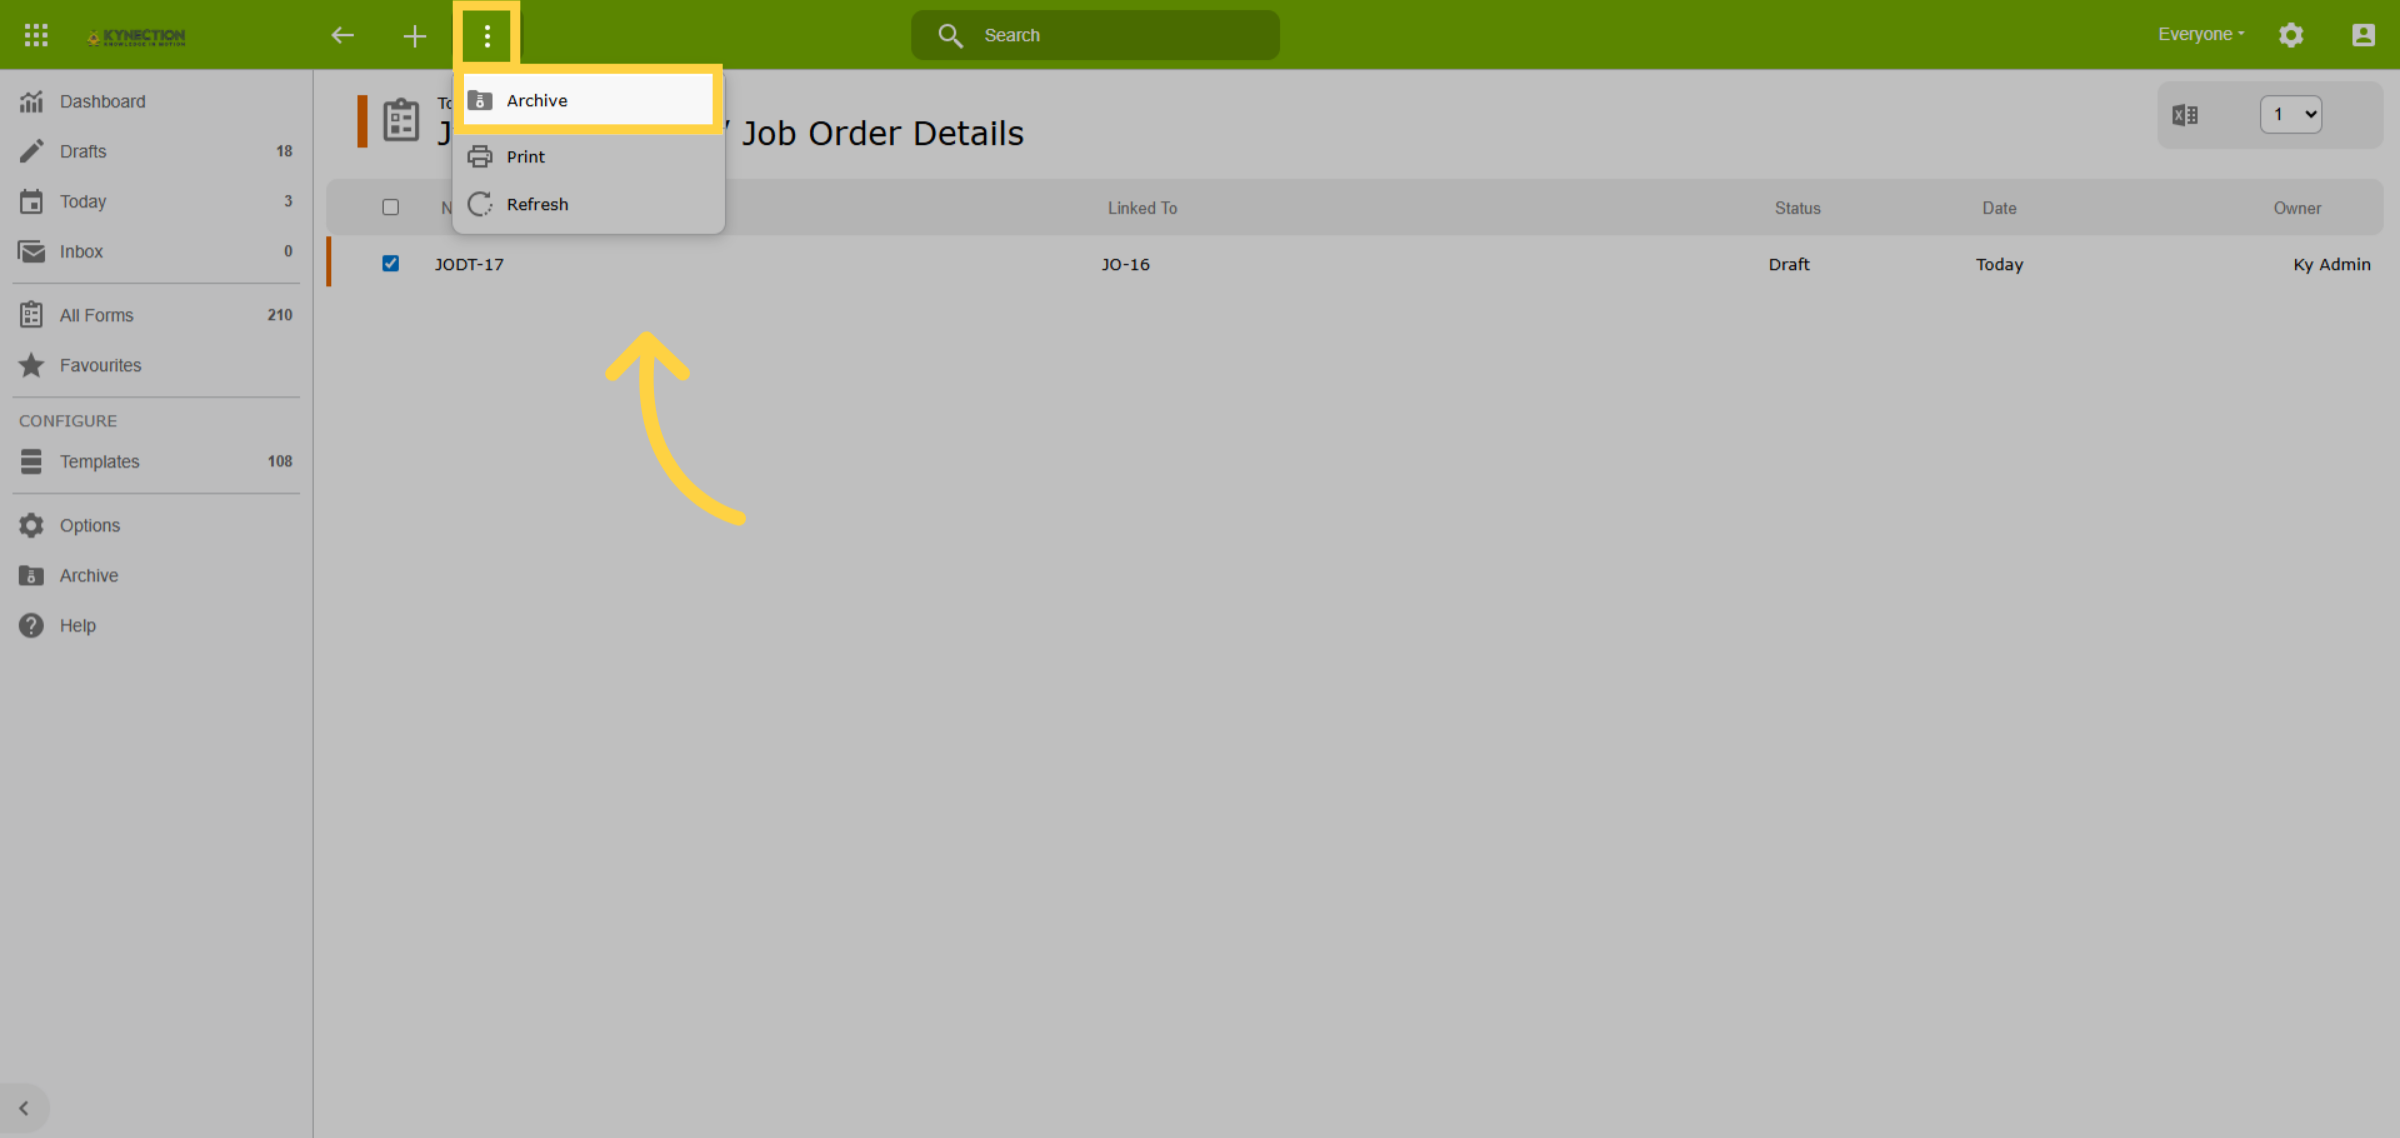
10. Form Status
Draft forms can be deleted without any repercussions. However, it is recommended
to archive submitted forms instead. Since submitted forms may be integral to
ongoing workflows, their deletion could disrupt the processes they support.
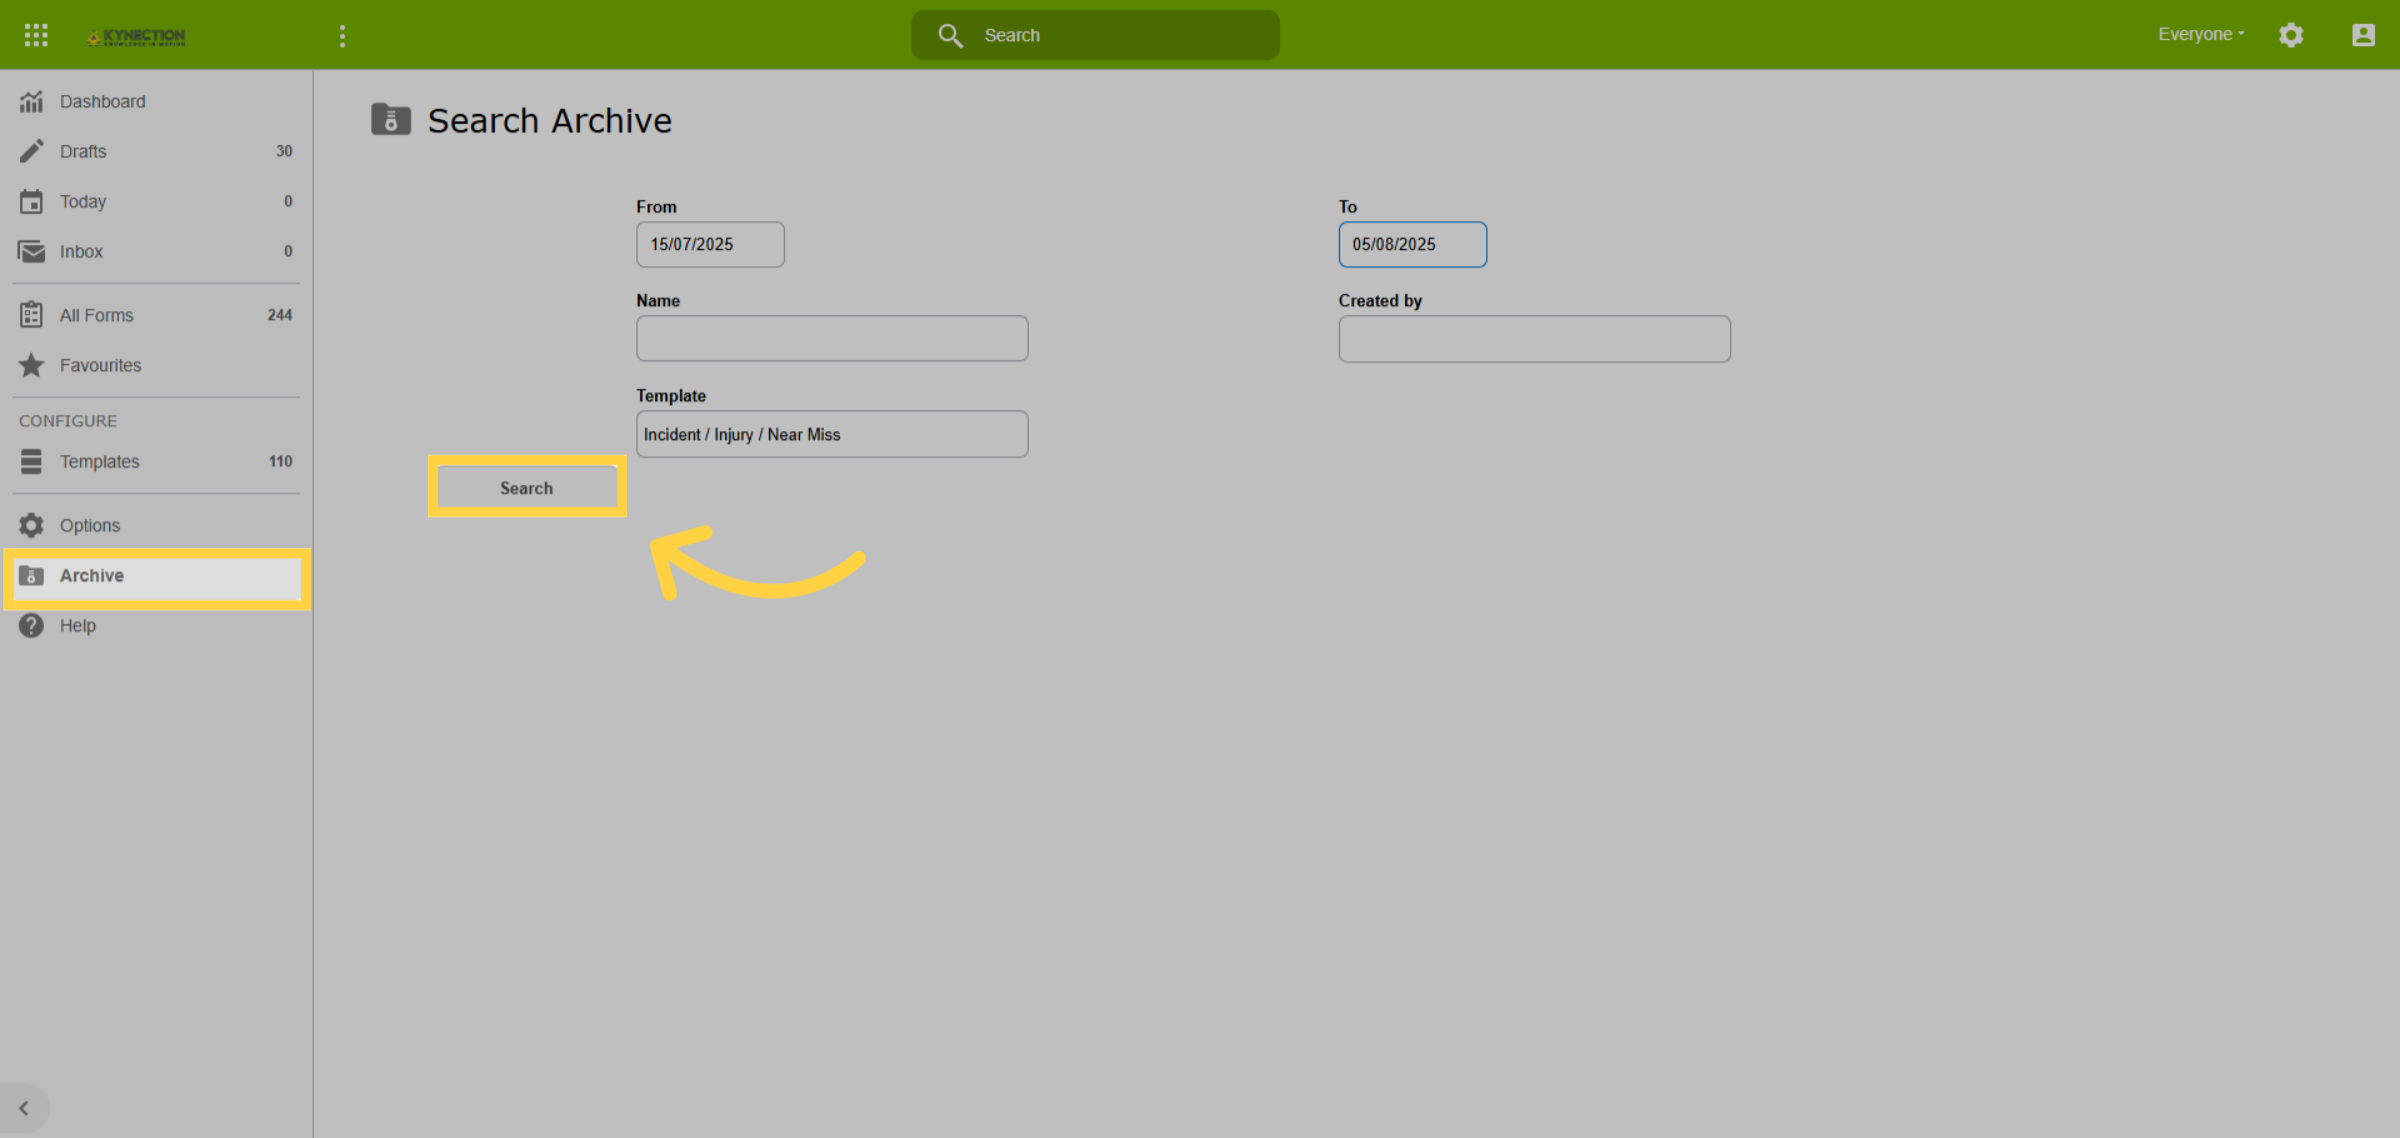
11. Search Archives
To locate archived items, simply head to the Archive section of the relevant
module. There's no need to complete every field; in fact, providing fewer details
will yield a wider array of search results. After entering your criteria, click
the Search button to view the results.
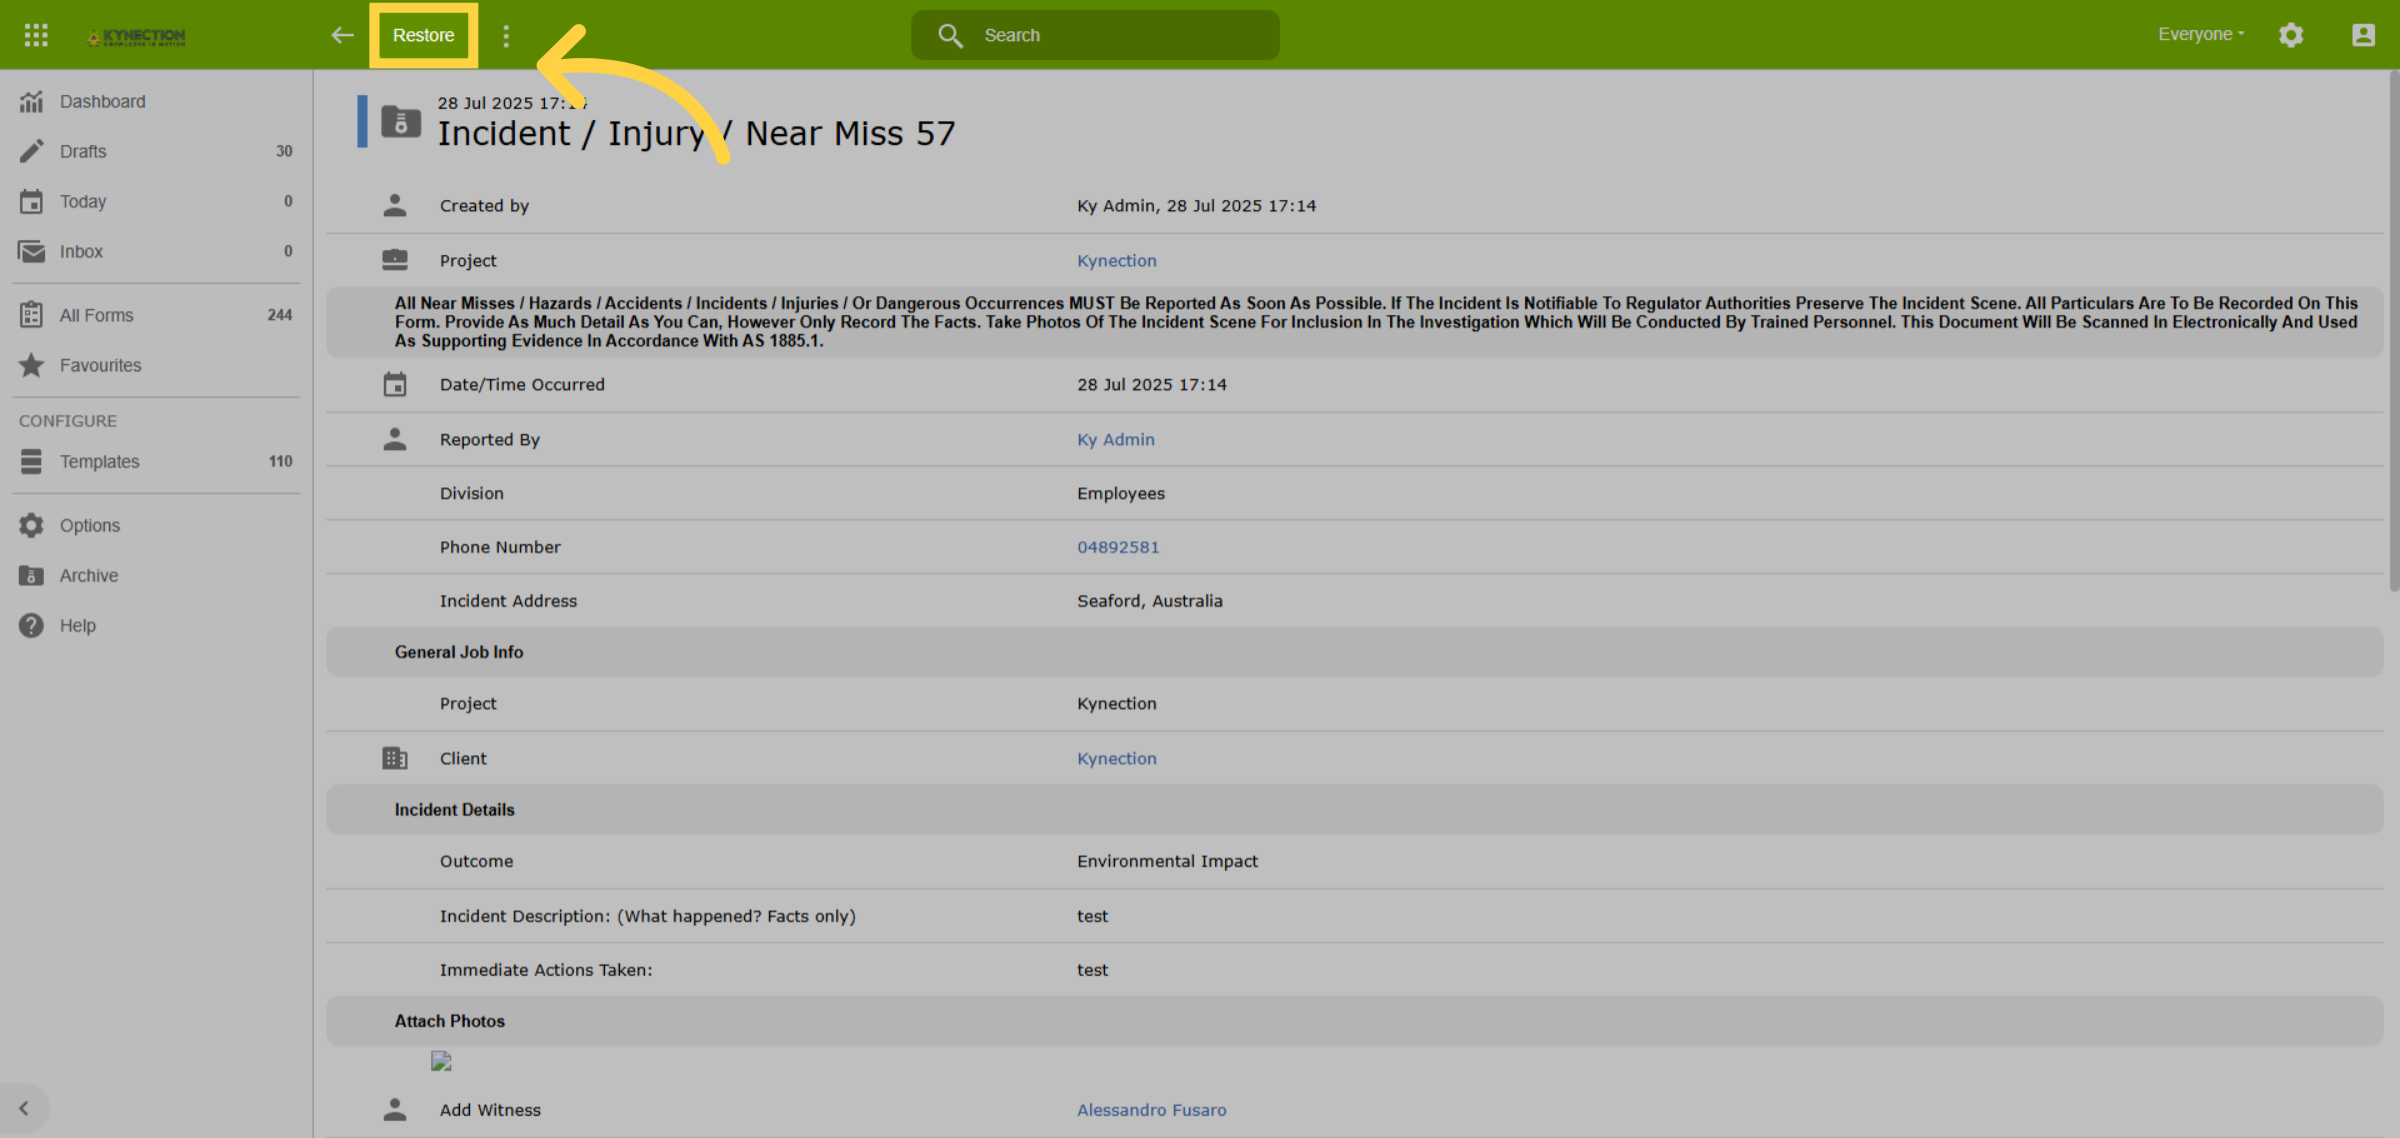
12. Restore Archive
Once you find your record, click on Restore to reinstate it. Please note that
if the record was archived due to automatic archiving settings, it will return
to the archive during the next nightly sweep.
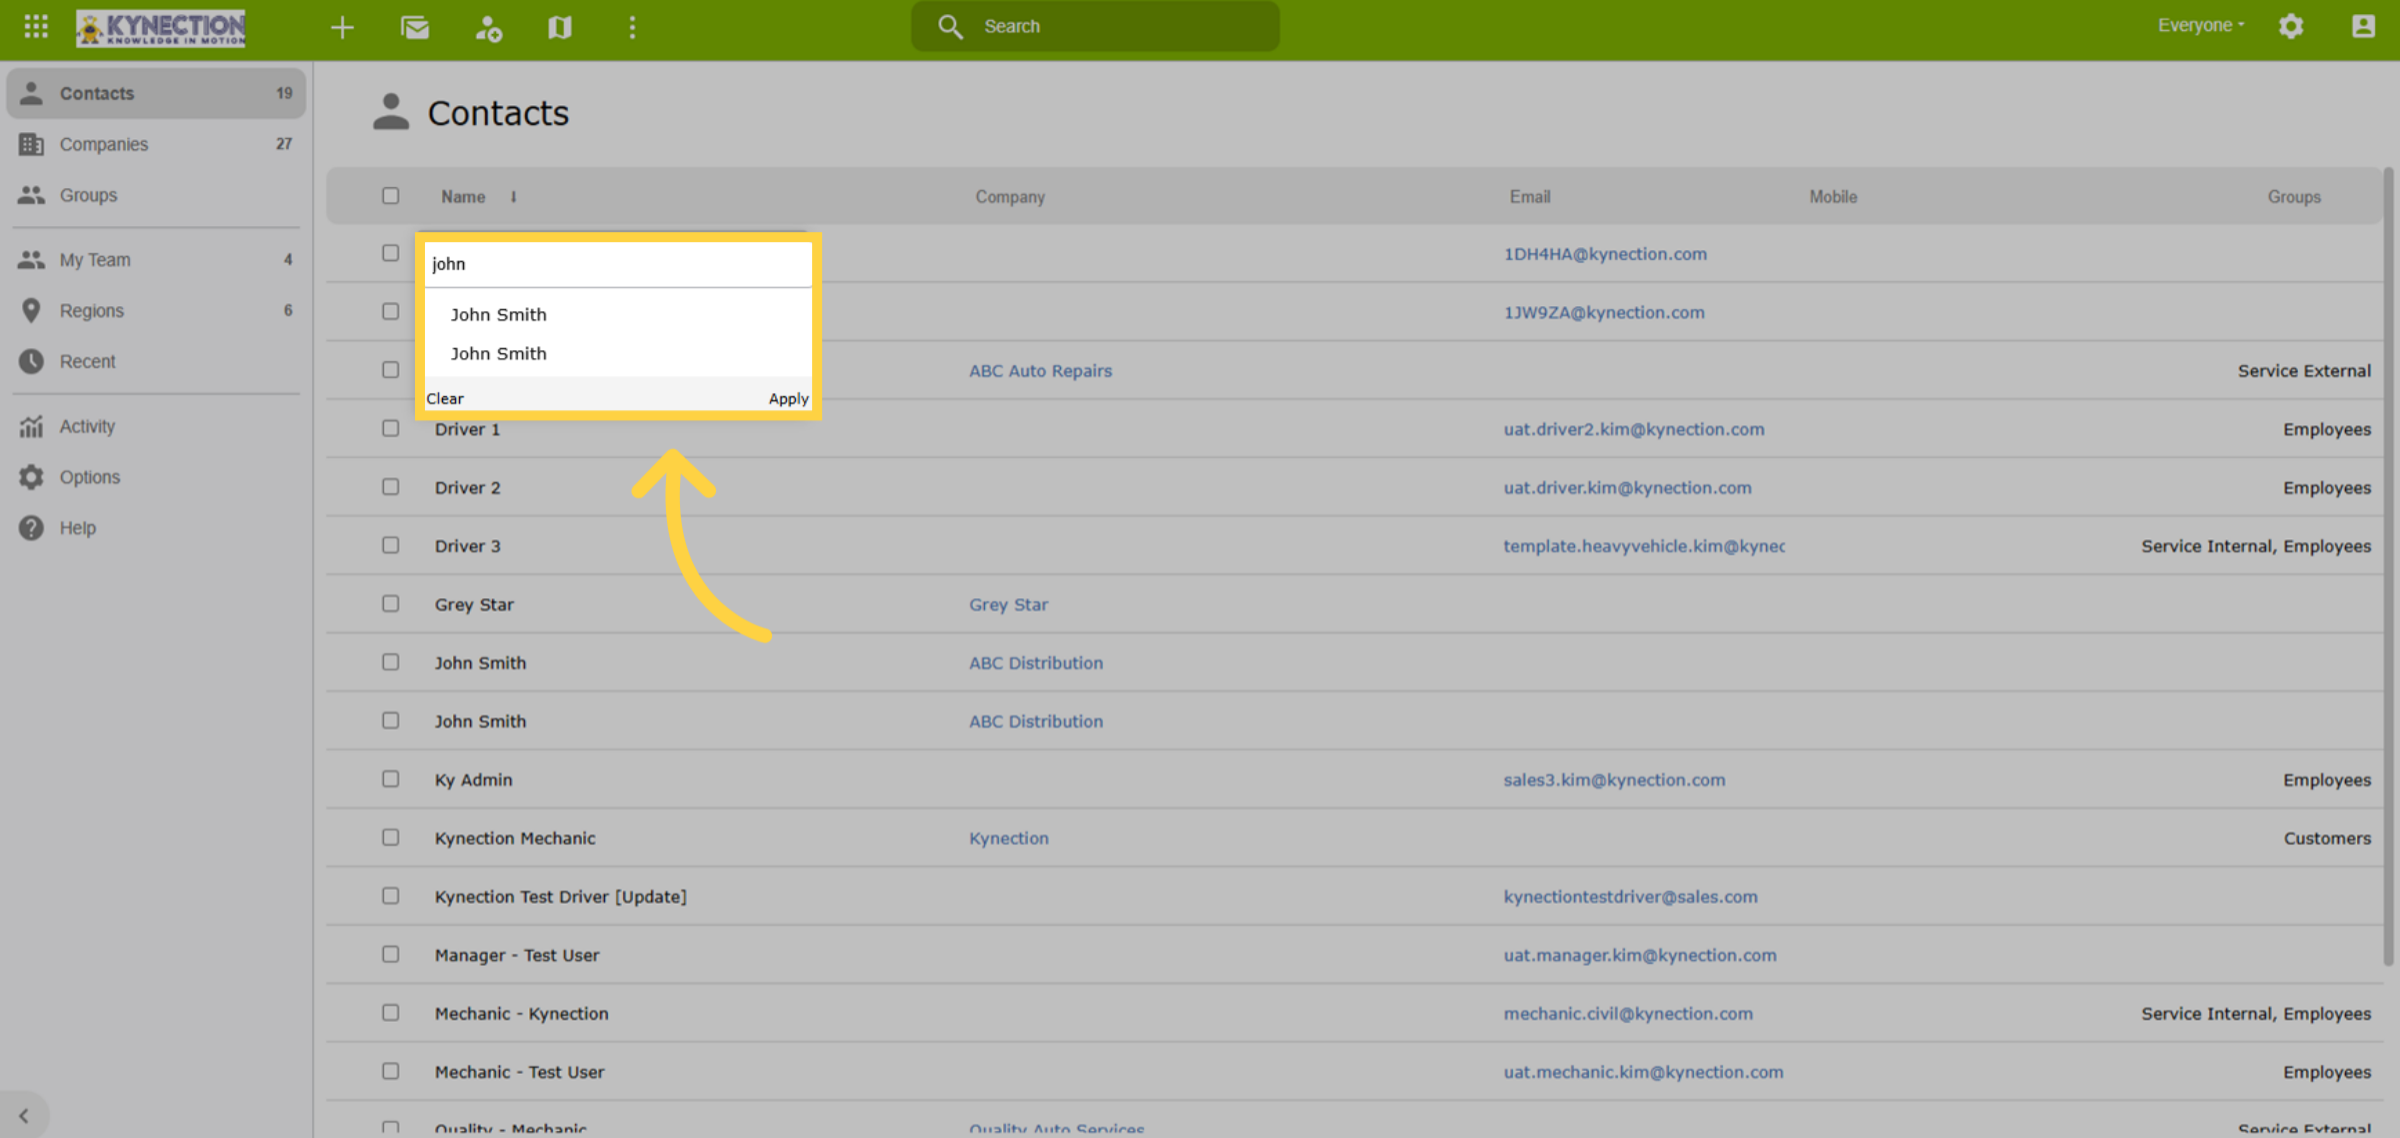
13. Duplicates
To maintain system integrity, all records must have unique names. Duplicates
can cause errors and inconsistencies. Avoid adding a space after an item, as
this creates a unique entry. For example, John Smith with a space would be treated
as a separate identity from John Smith without a space.
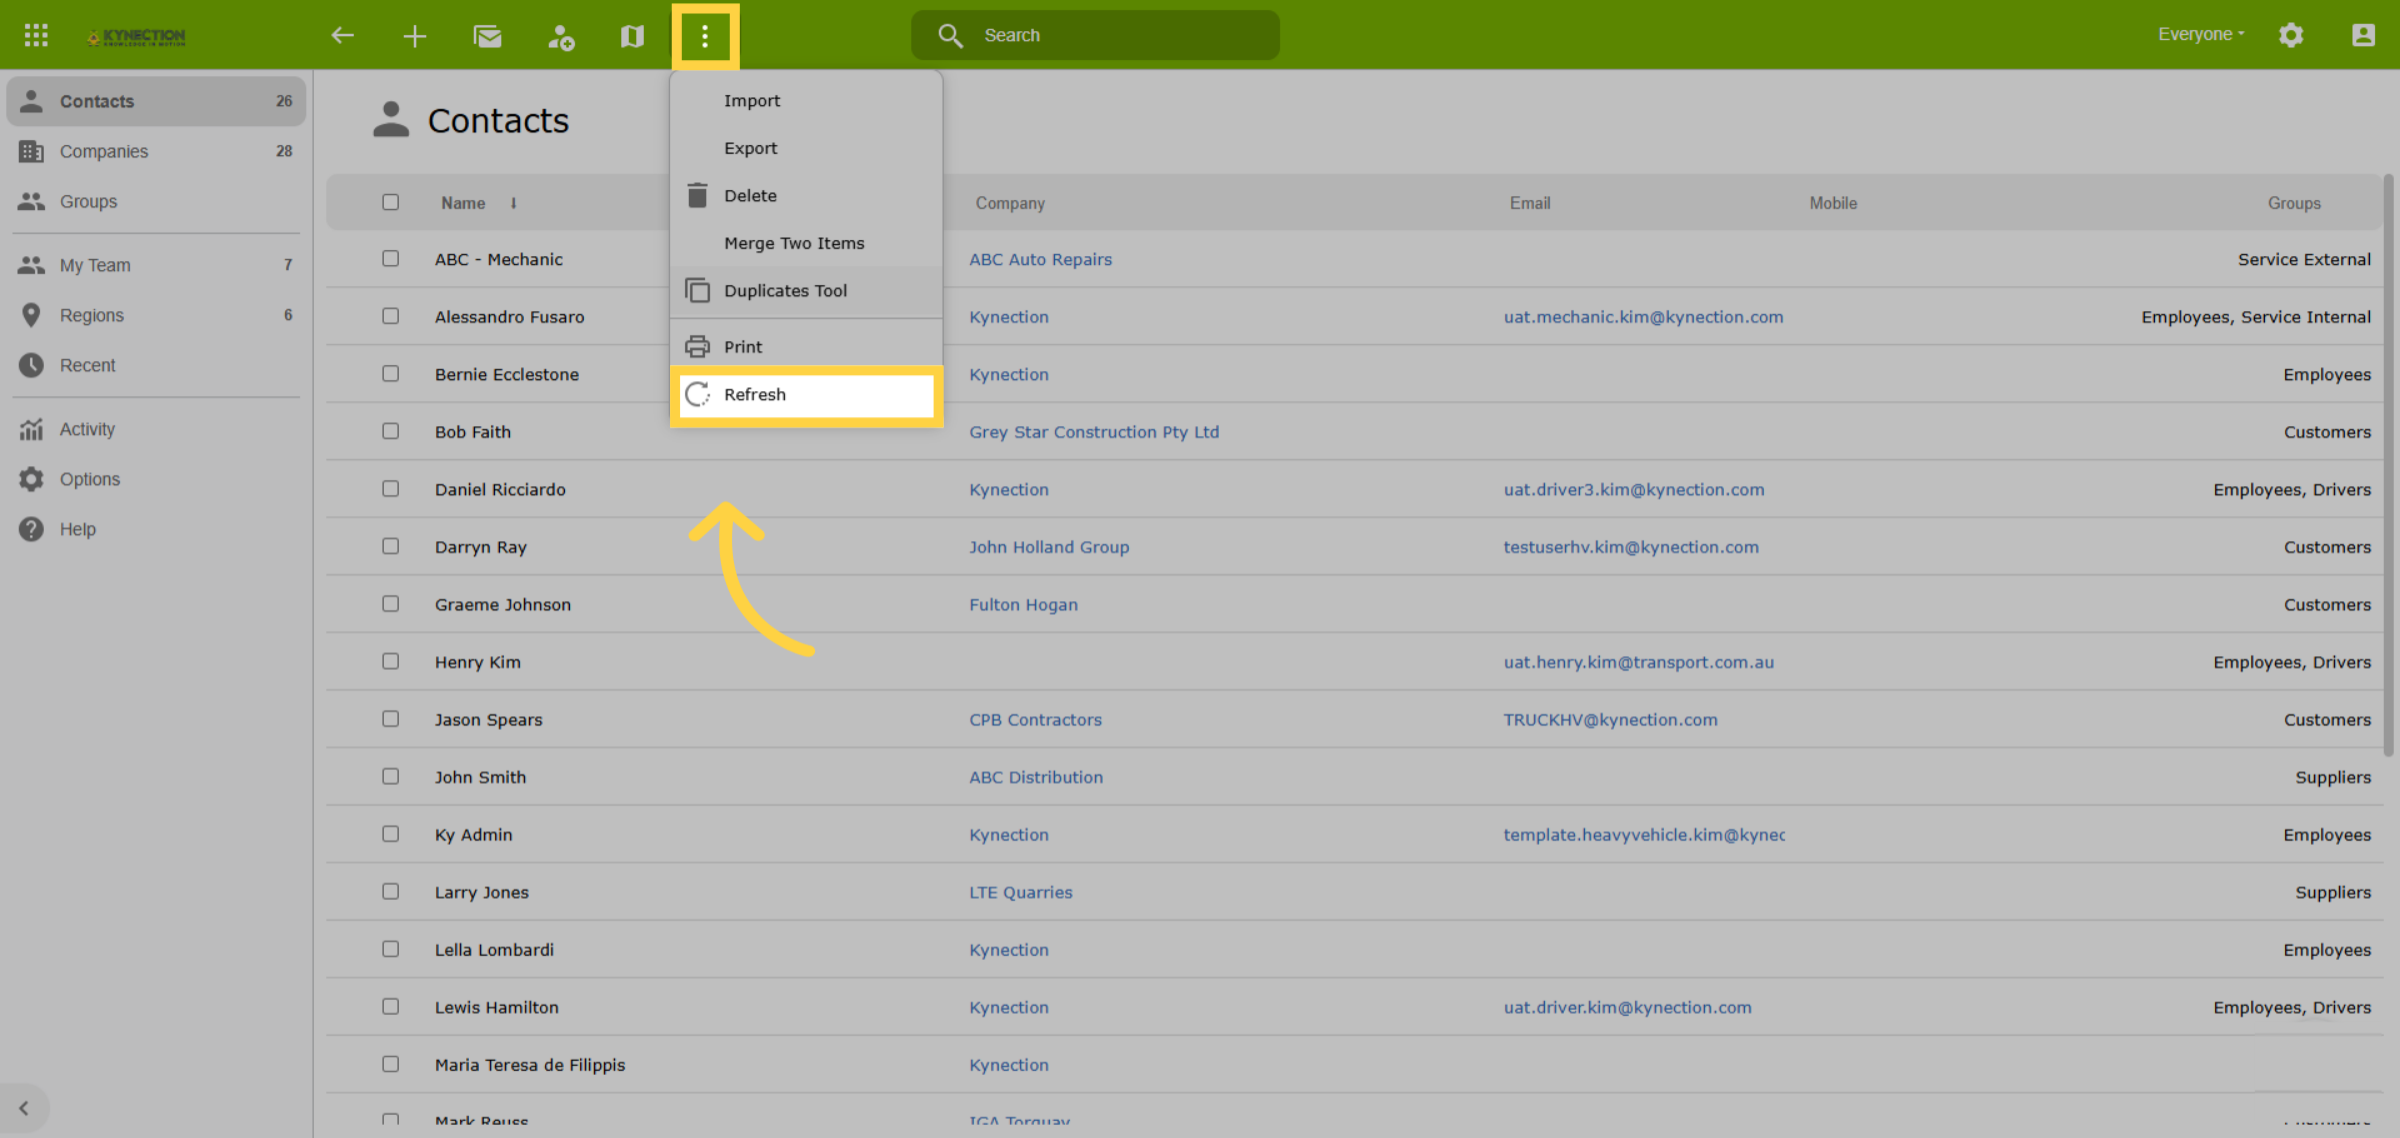
14. Refresh Data
Access the Refresh feature via the three-dot icon in all modules. Use it to seamlessly
update your data while switching tabs in Kynection, without logging out like
a traditional browser refresh.
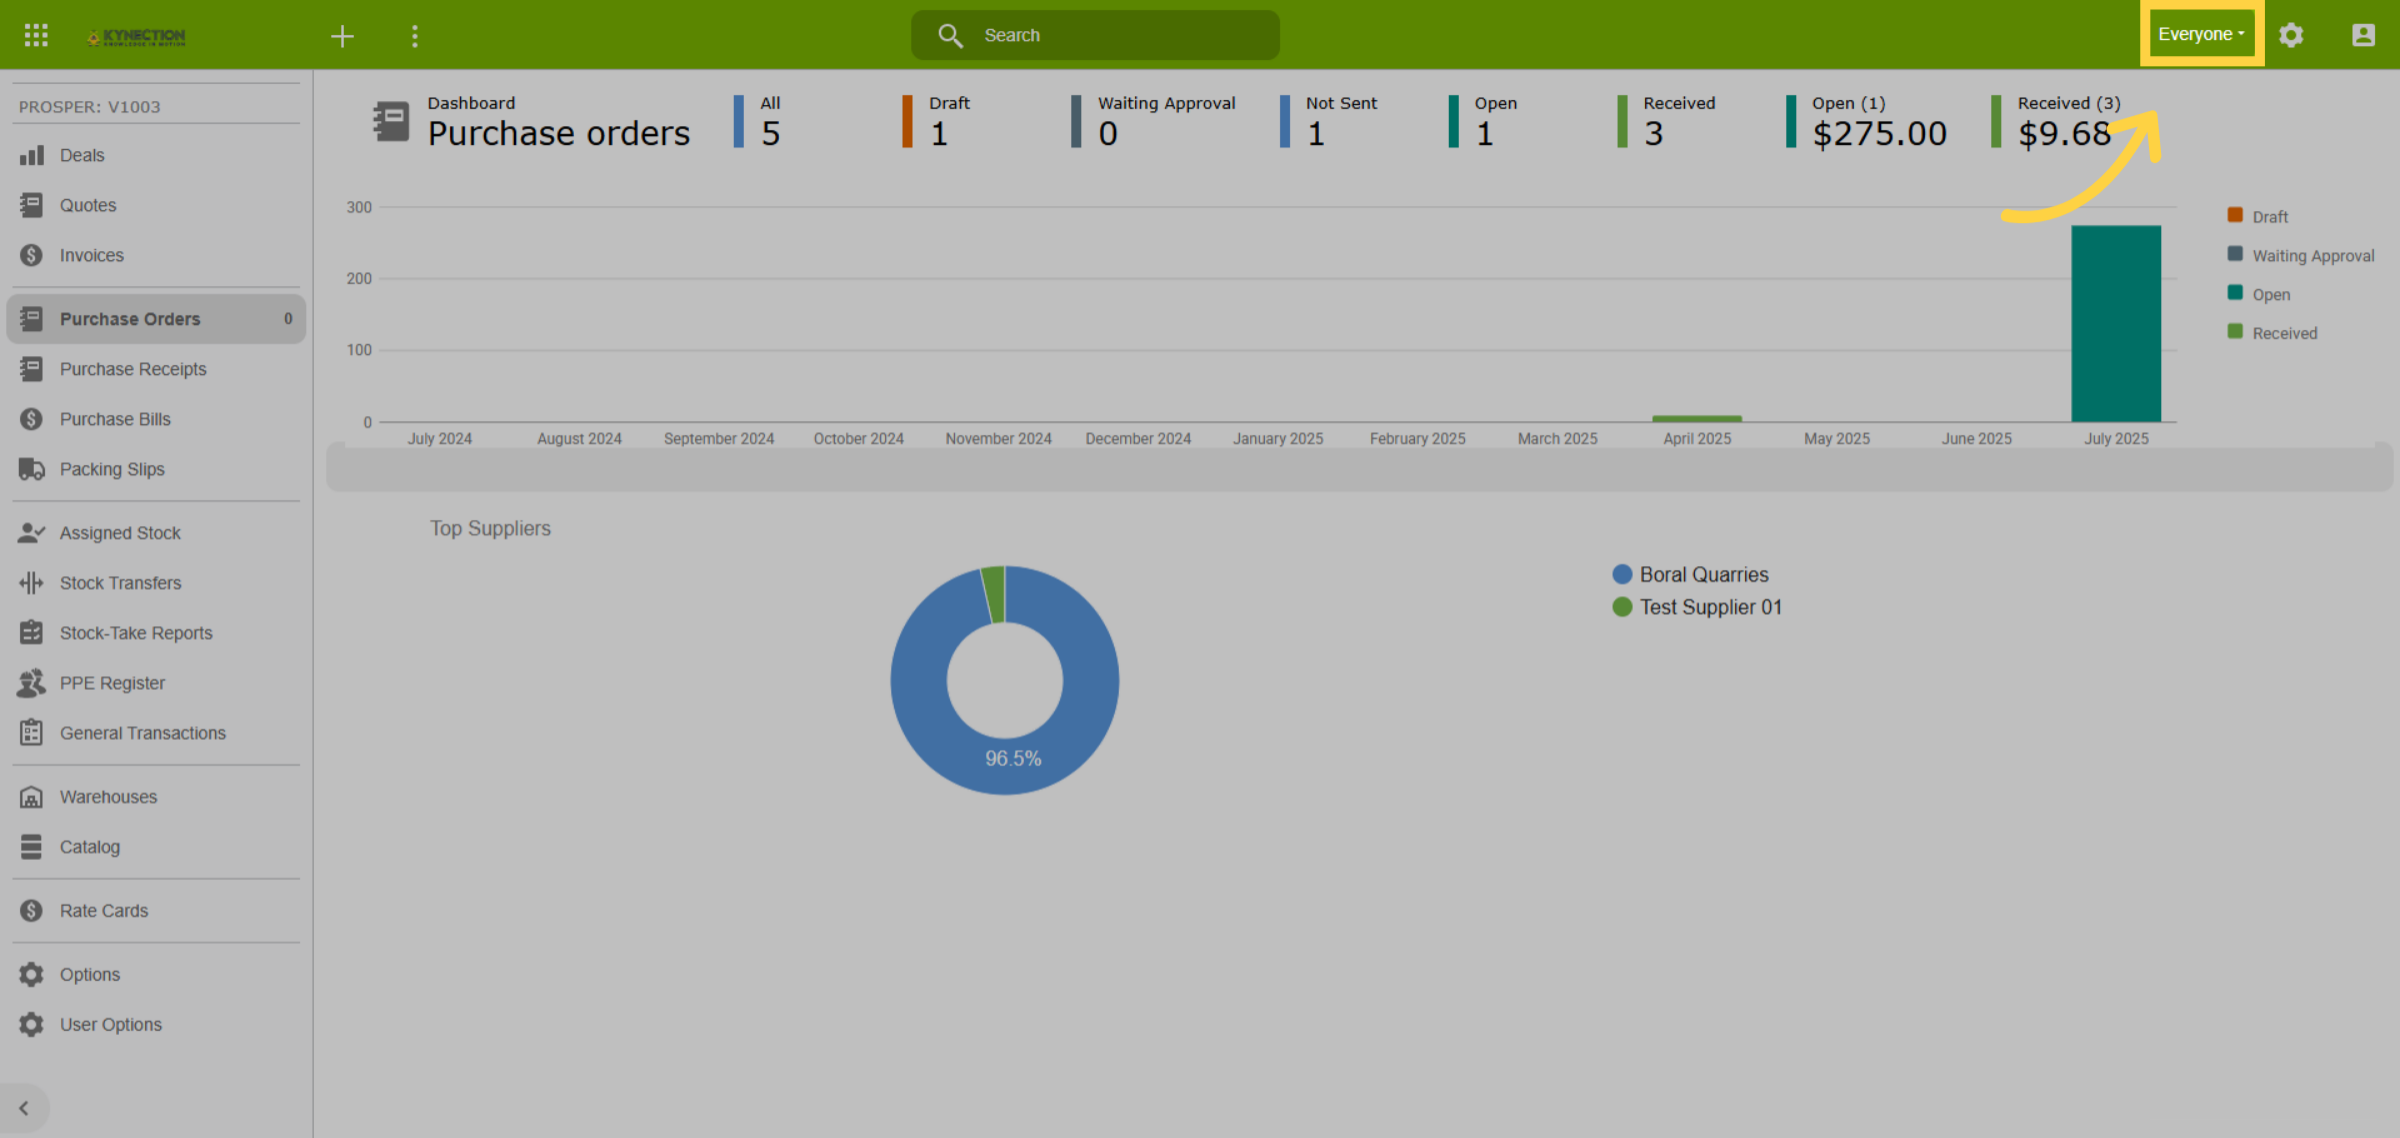
15. View Everyone
In Kynection, the default view shows contributions from all users. To display
entries for an individual, use the dropdown menu to select the person. This can
be helpful in areas such as quotes or purchase orders. When you exit the module
your view will return to everyone
16. Export Data
In the toolbar, the export function is a cloud icon with a downward arrow, allowing
you to export all data to Excel. Some modules also offer an option for exporting
filtered data results, represented by the Excel workbook icon.

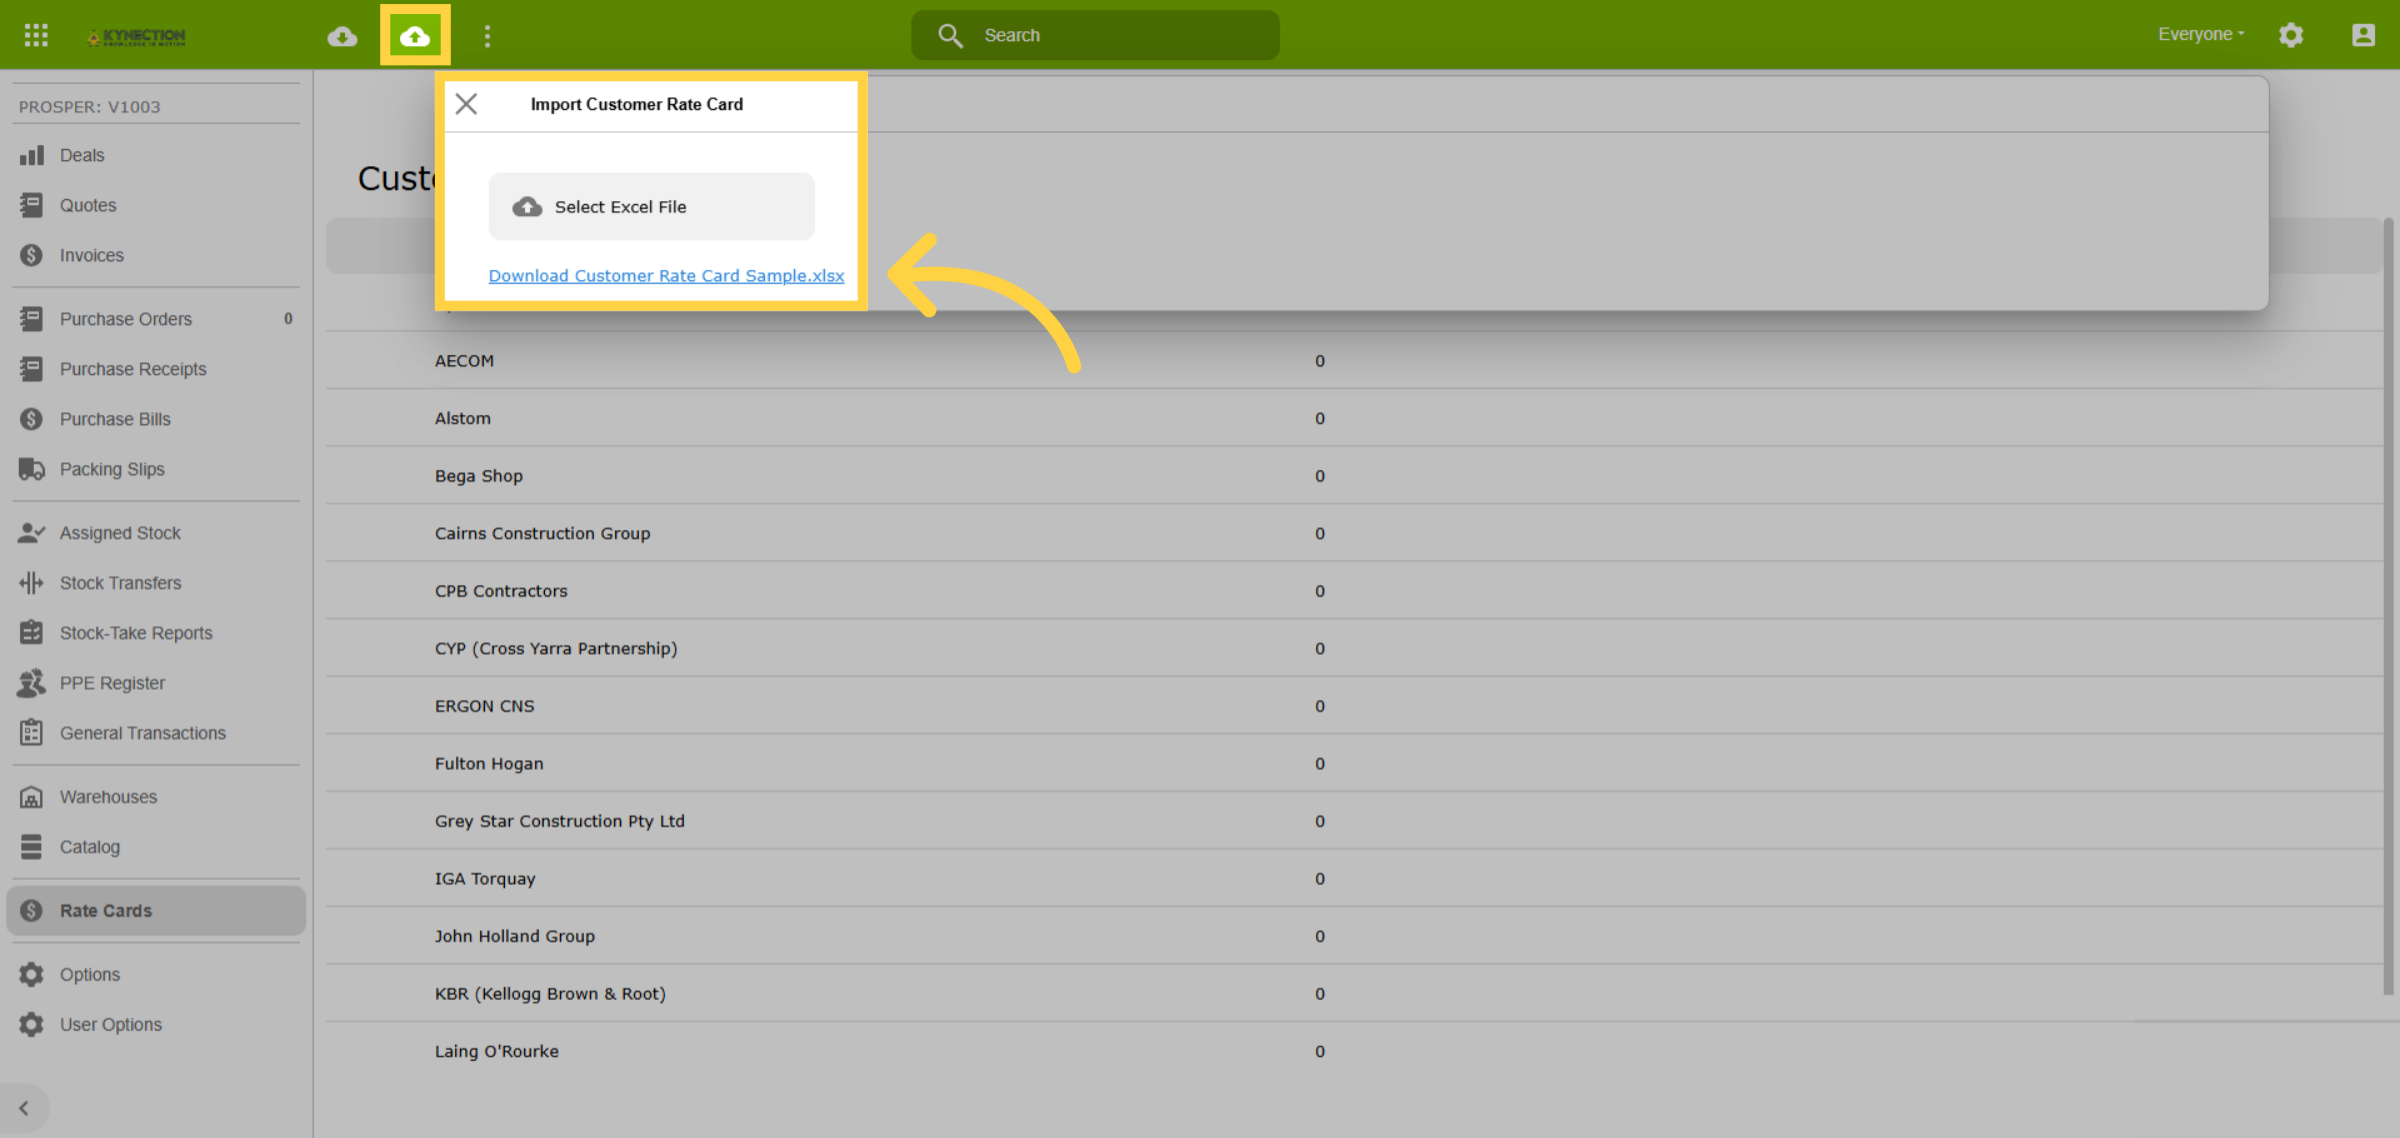
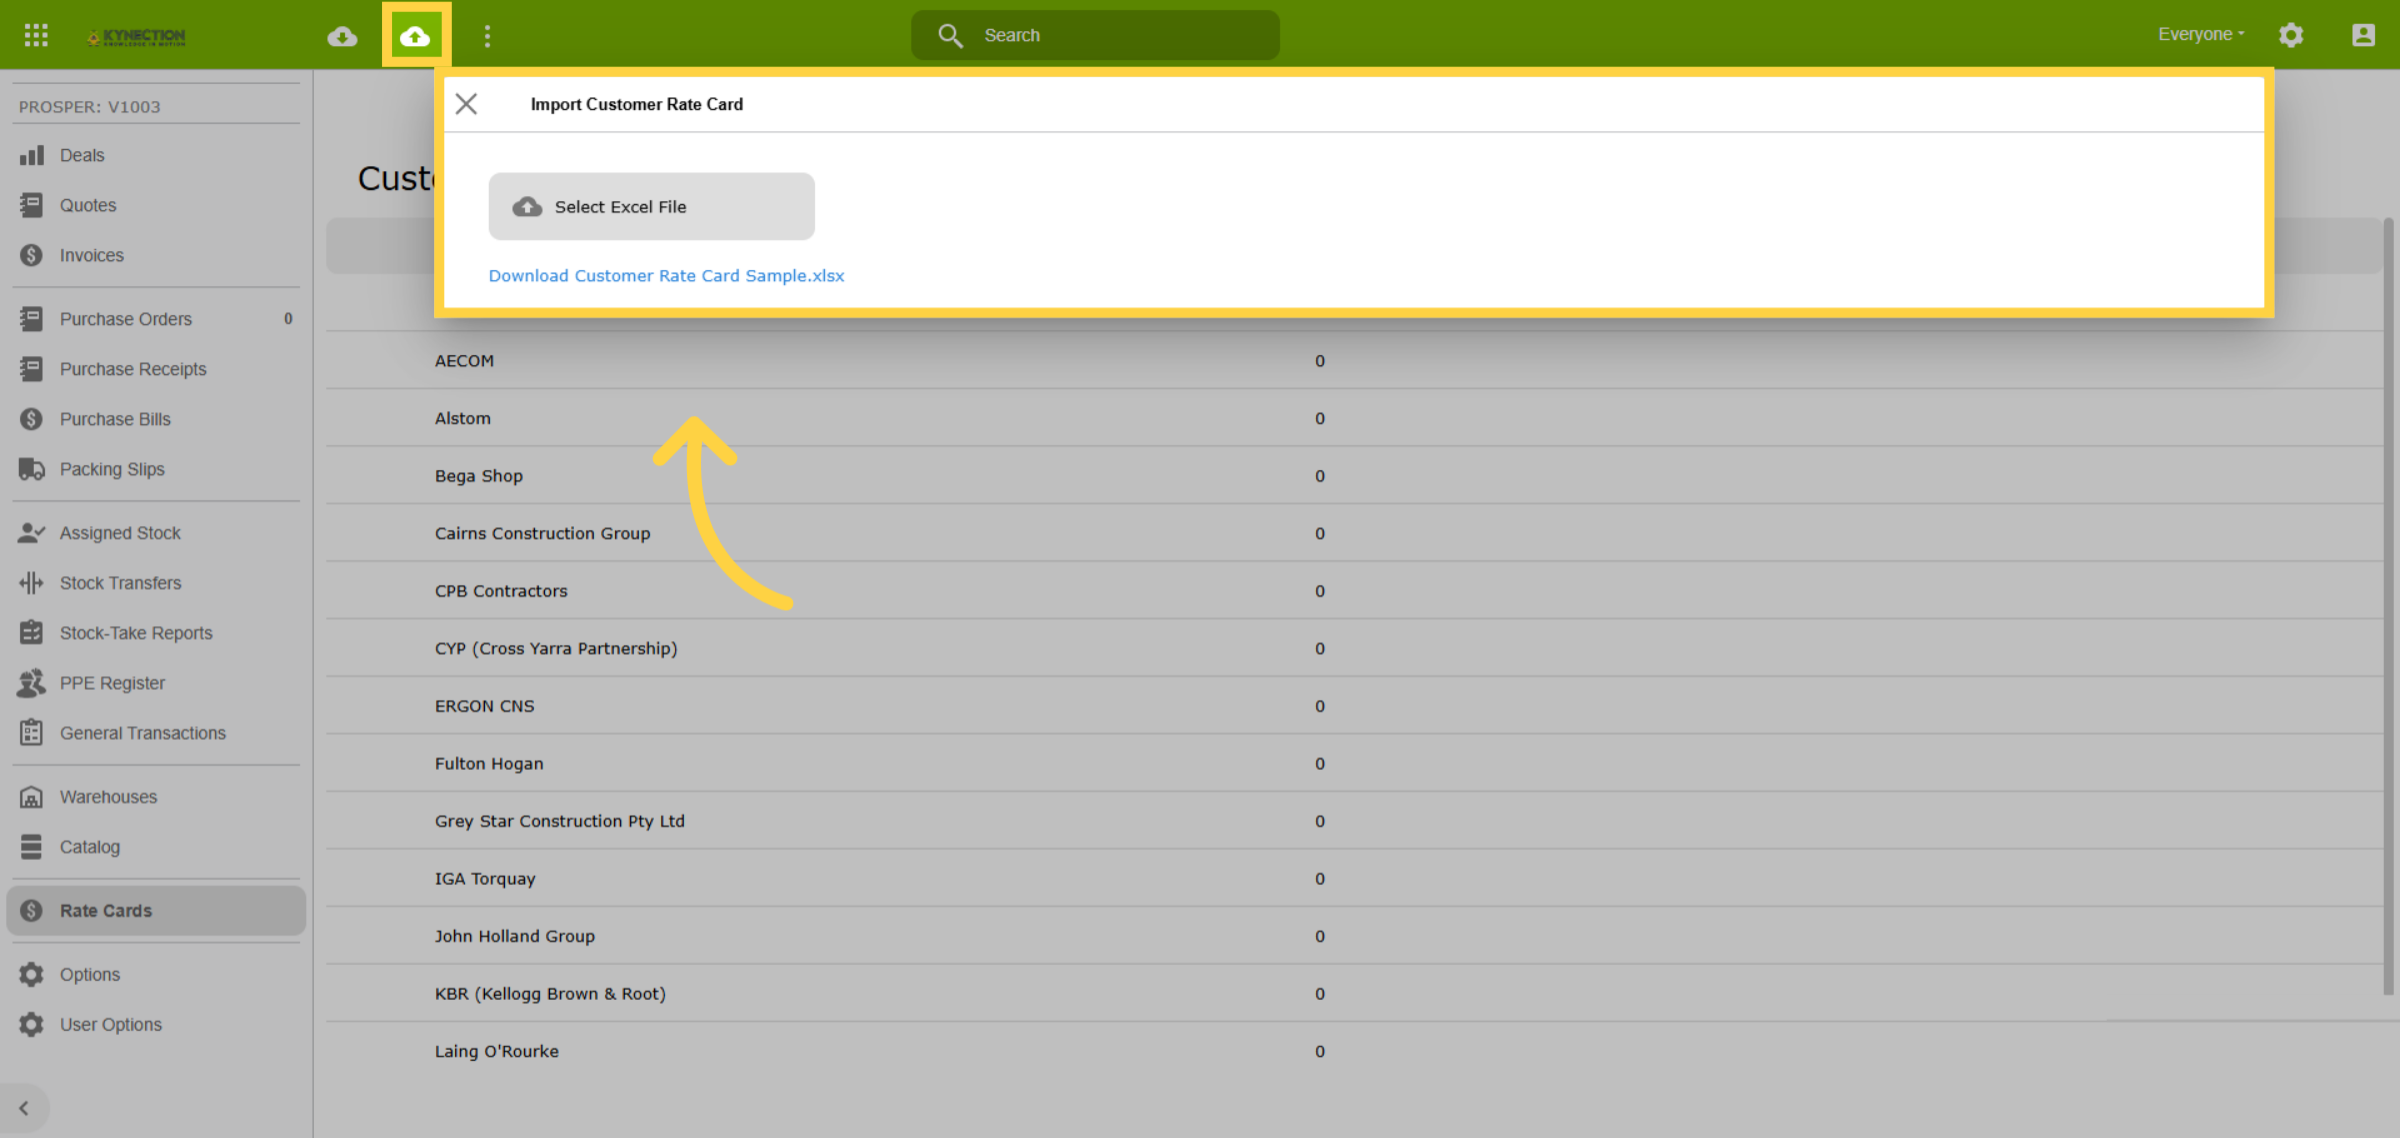
17. Bulk Data
Use the import function for bulk data management. Begin by downloading the correct
template, either by exporting existing data or obtaining a sample template. The
headings from your export will form the import template.
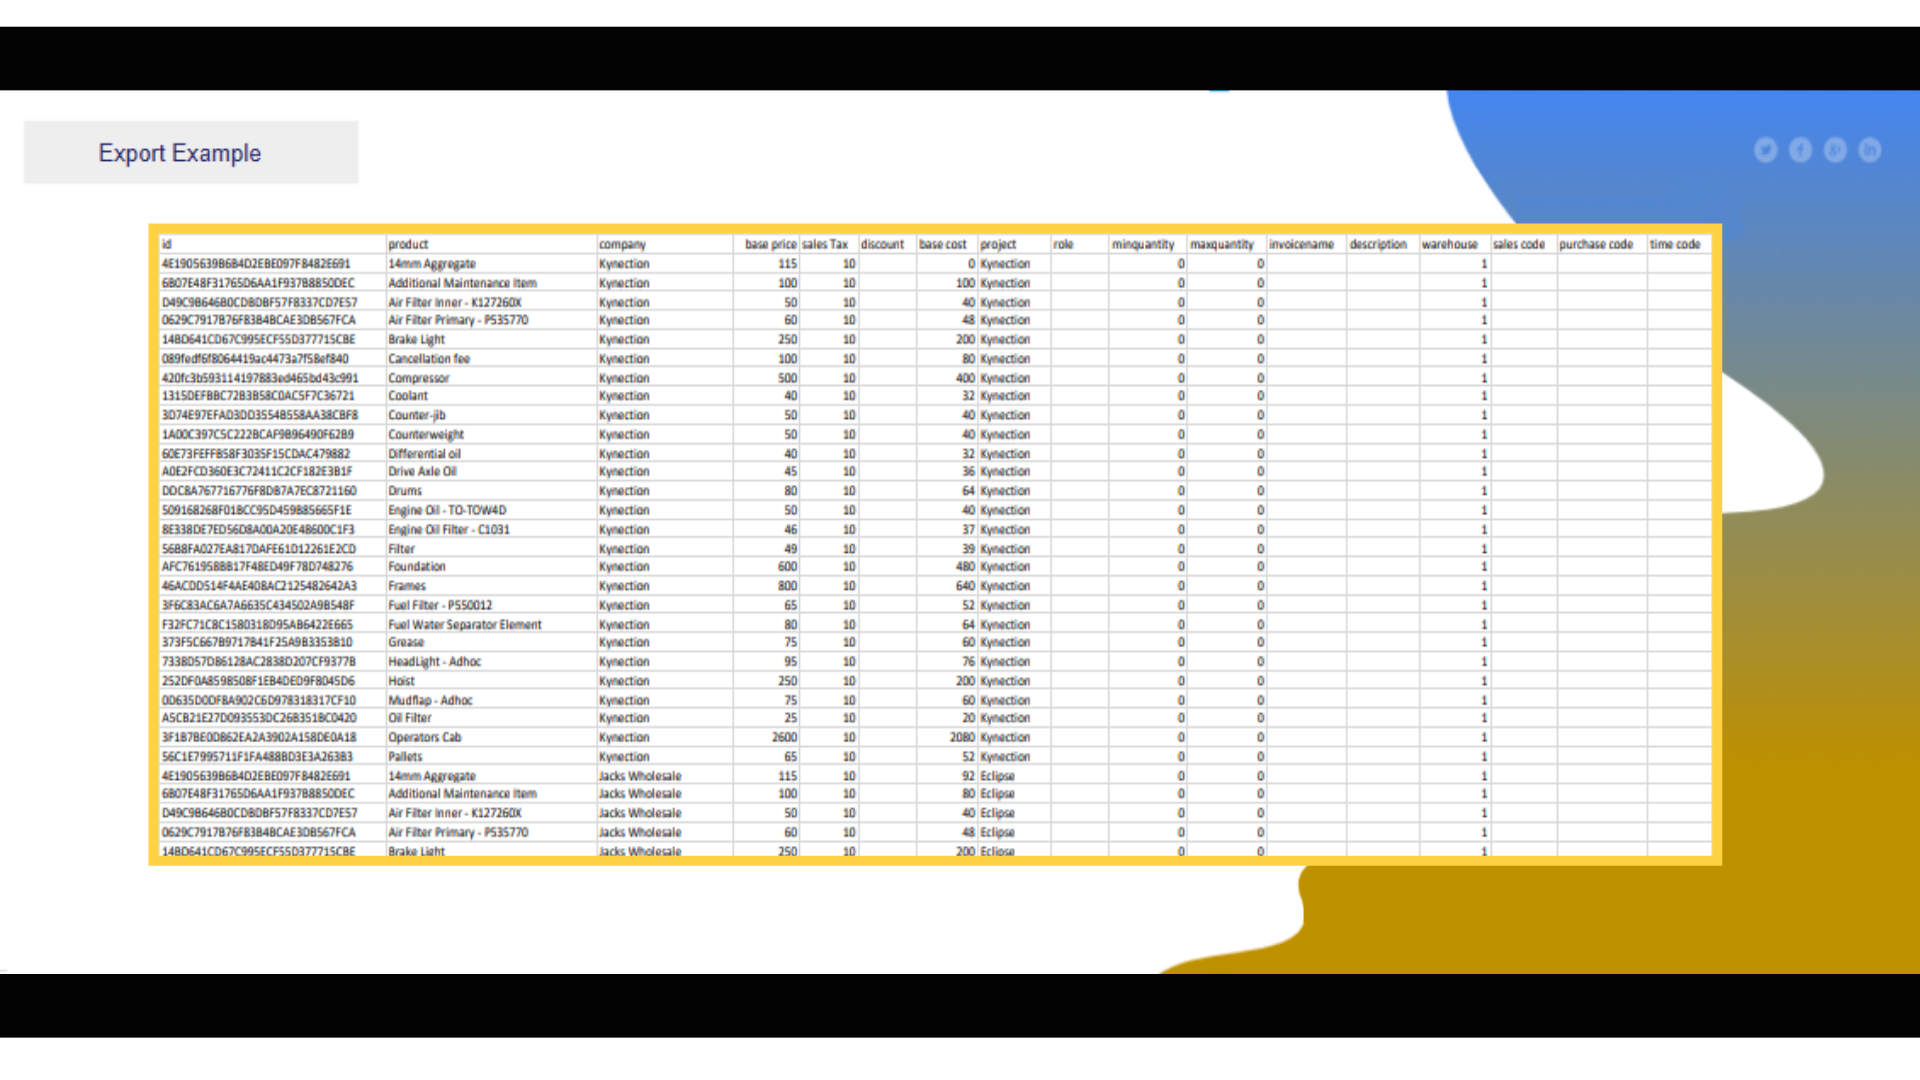
18. Import Template
When exporting data to Excel, each line item is assigned a unique I.D. number.
If you're uploading new data, it's advisable to delete all existing data along
with the I.D. column. However, if you're editing existing data, do not alter
or delete the I.D. column, as changes will cause errors.
19. Import Data
To prevent duplication, ensure data accuracy when importing. Begin by testing
with a single line of data. The import function only scans the first sheet of
your Excel file, so you can test using the first sheet with data stored on the
second sheet. Once the test upload is accurate, move your data to the first sheet
and proceed with the full import.
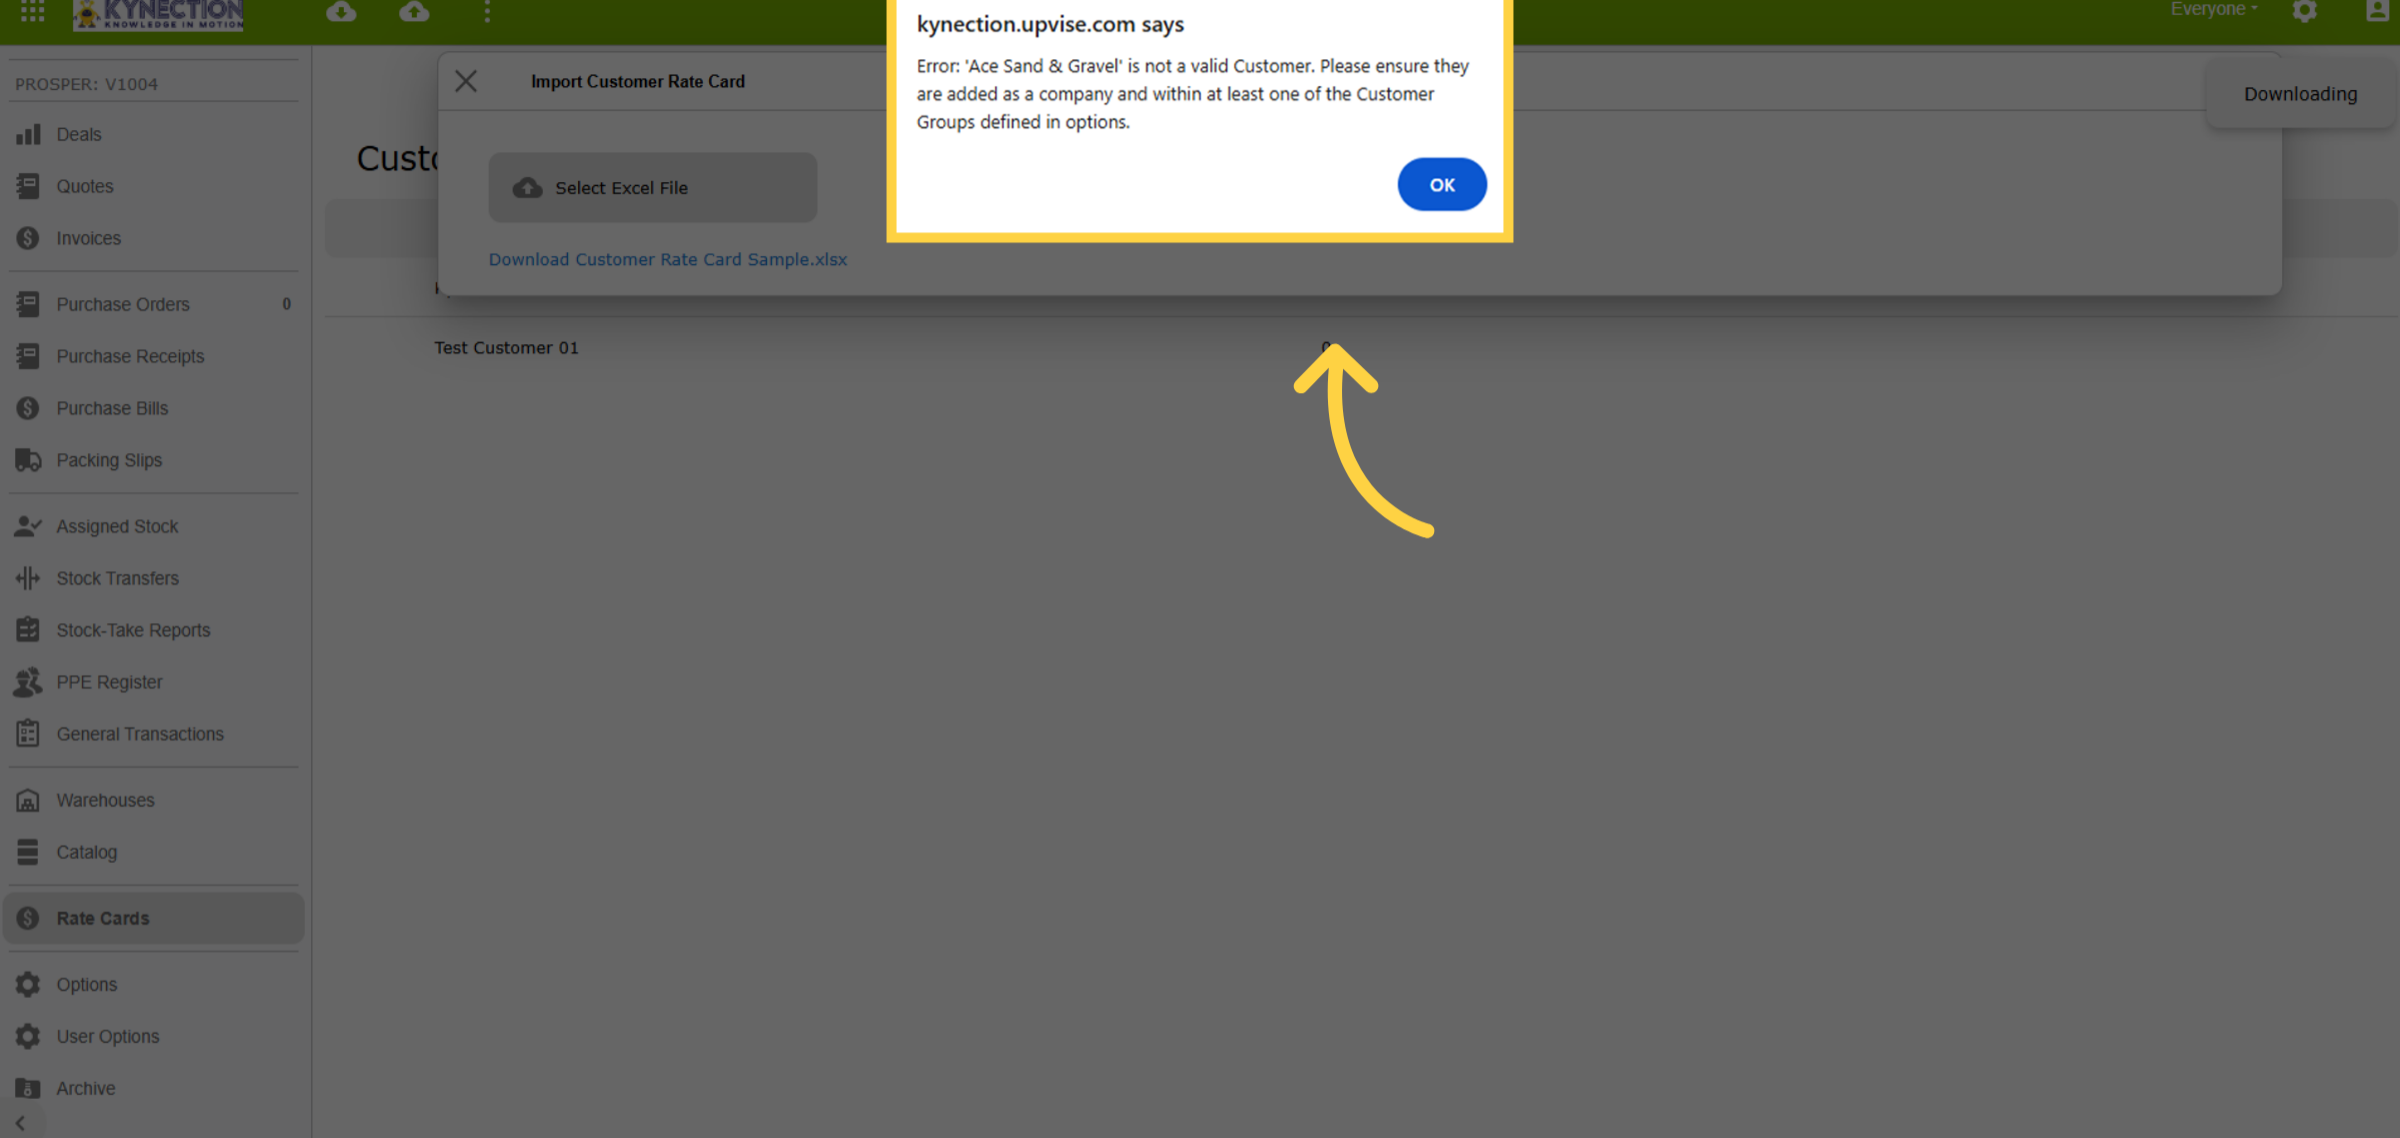
20. Import Error Report
If your upload contains items not present in the system, or spelt differently
to what is in the system, an error report will be generated to help you identify
and fix issues. If the import data looks identical to data saved in the system,
check both for an extra space after the name.
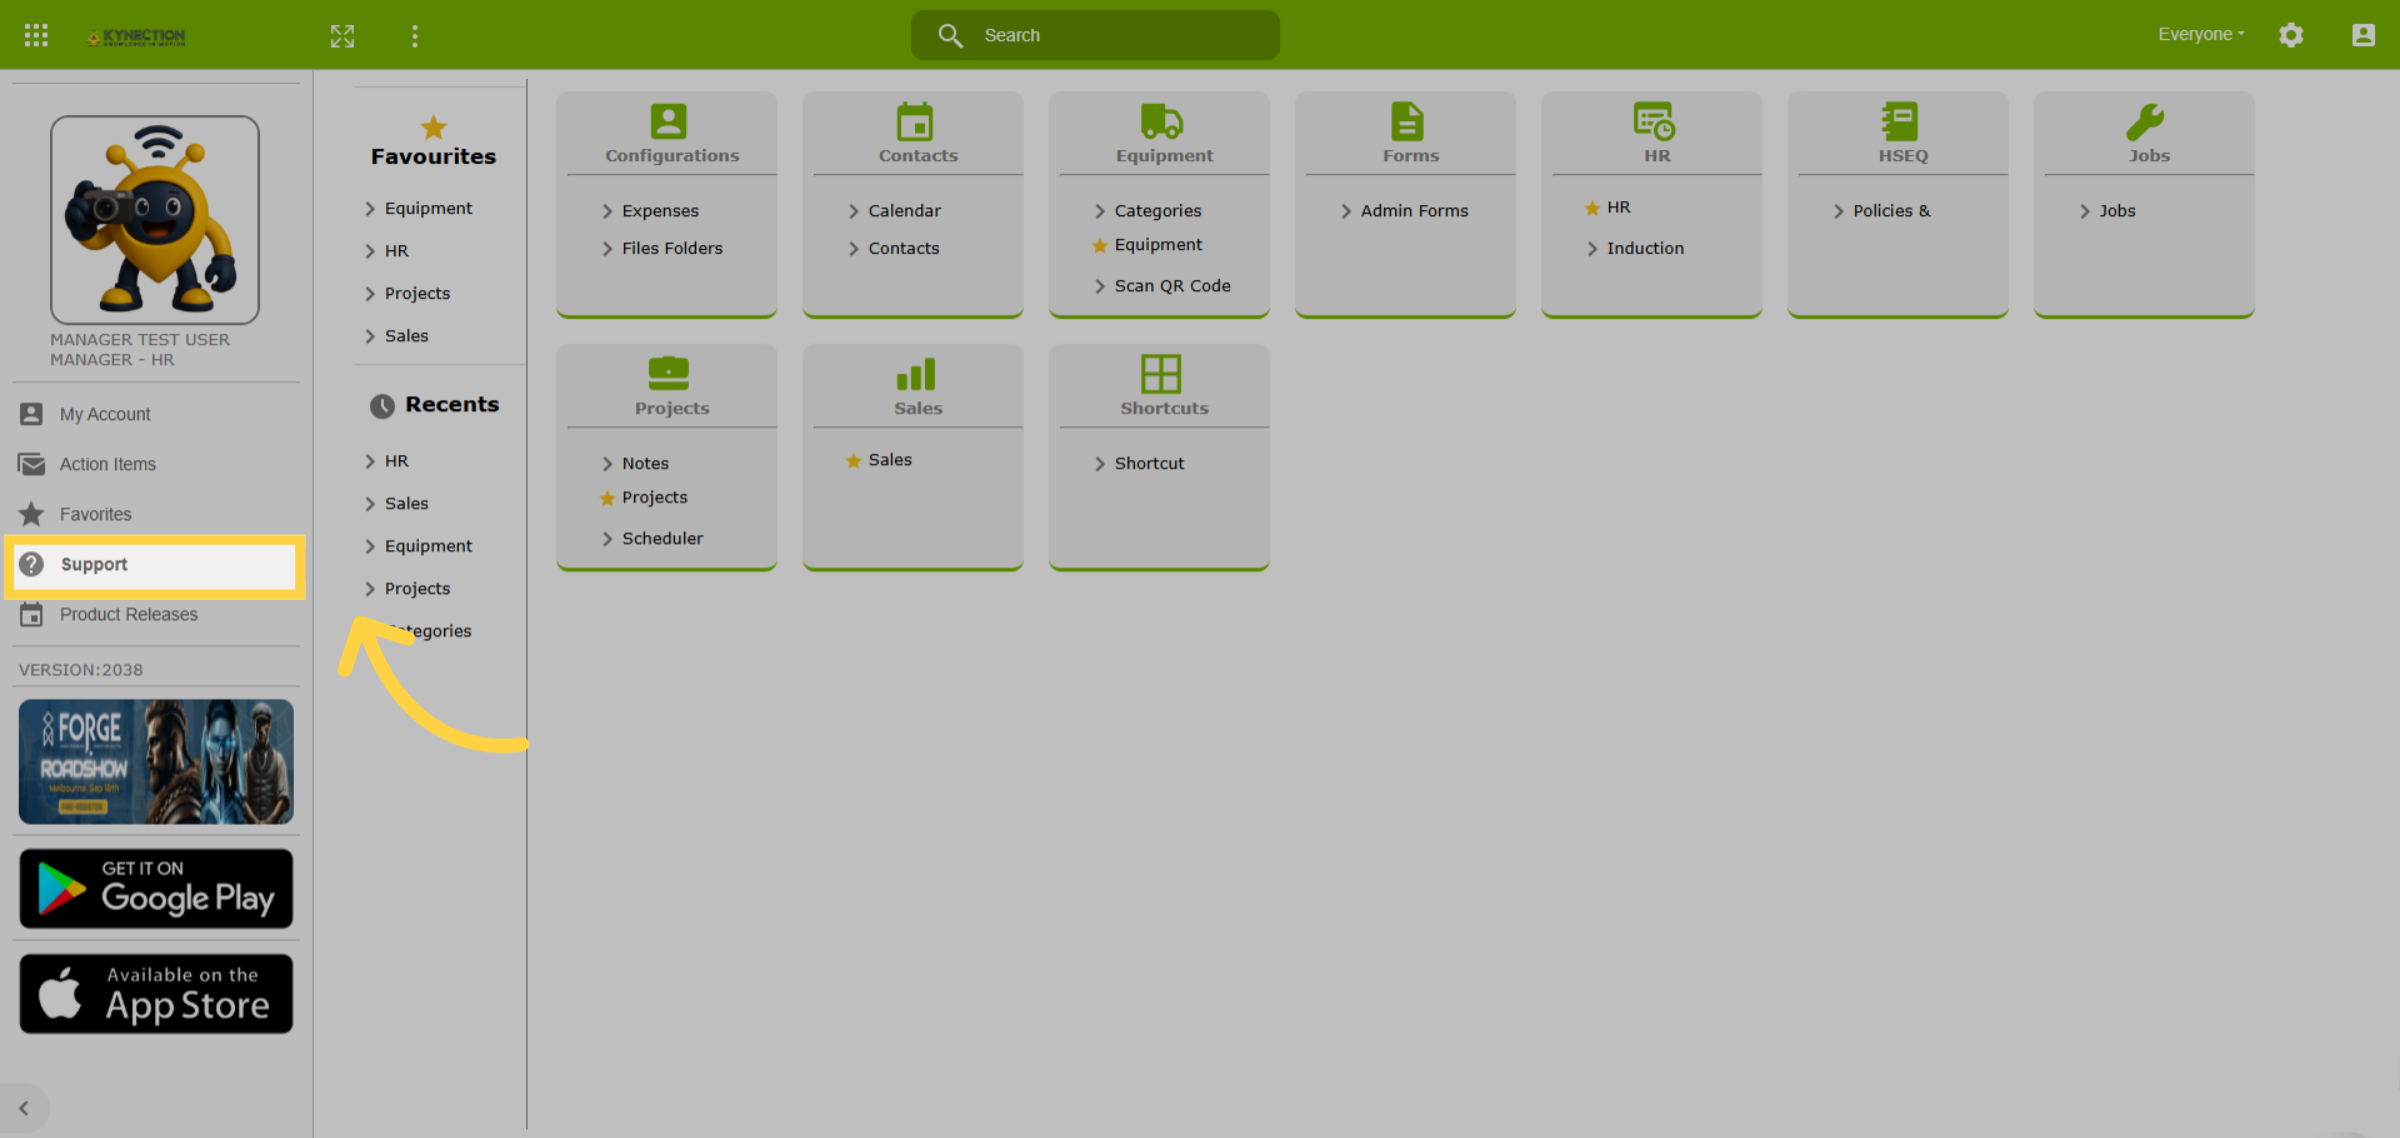
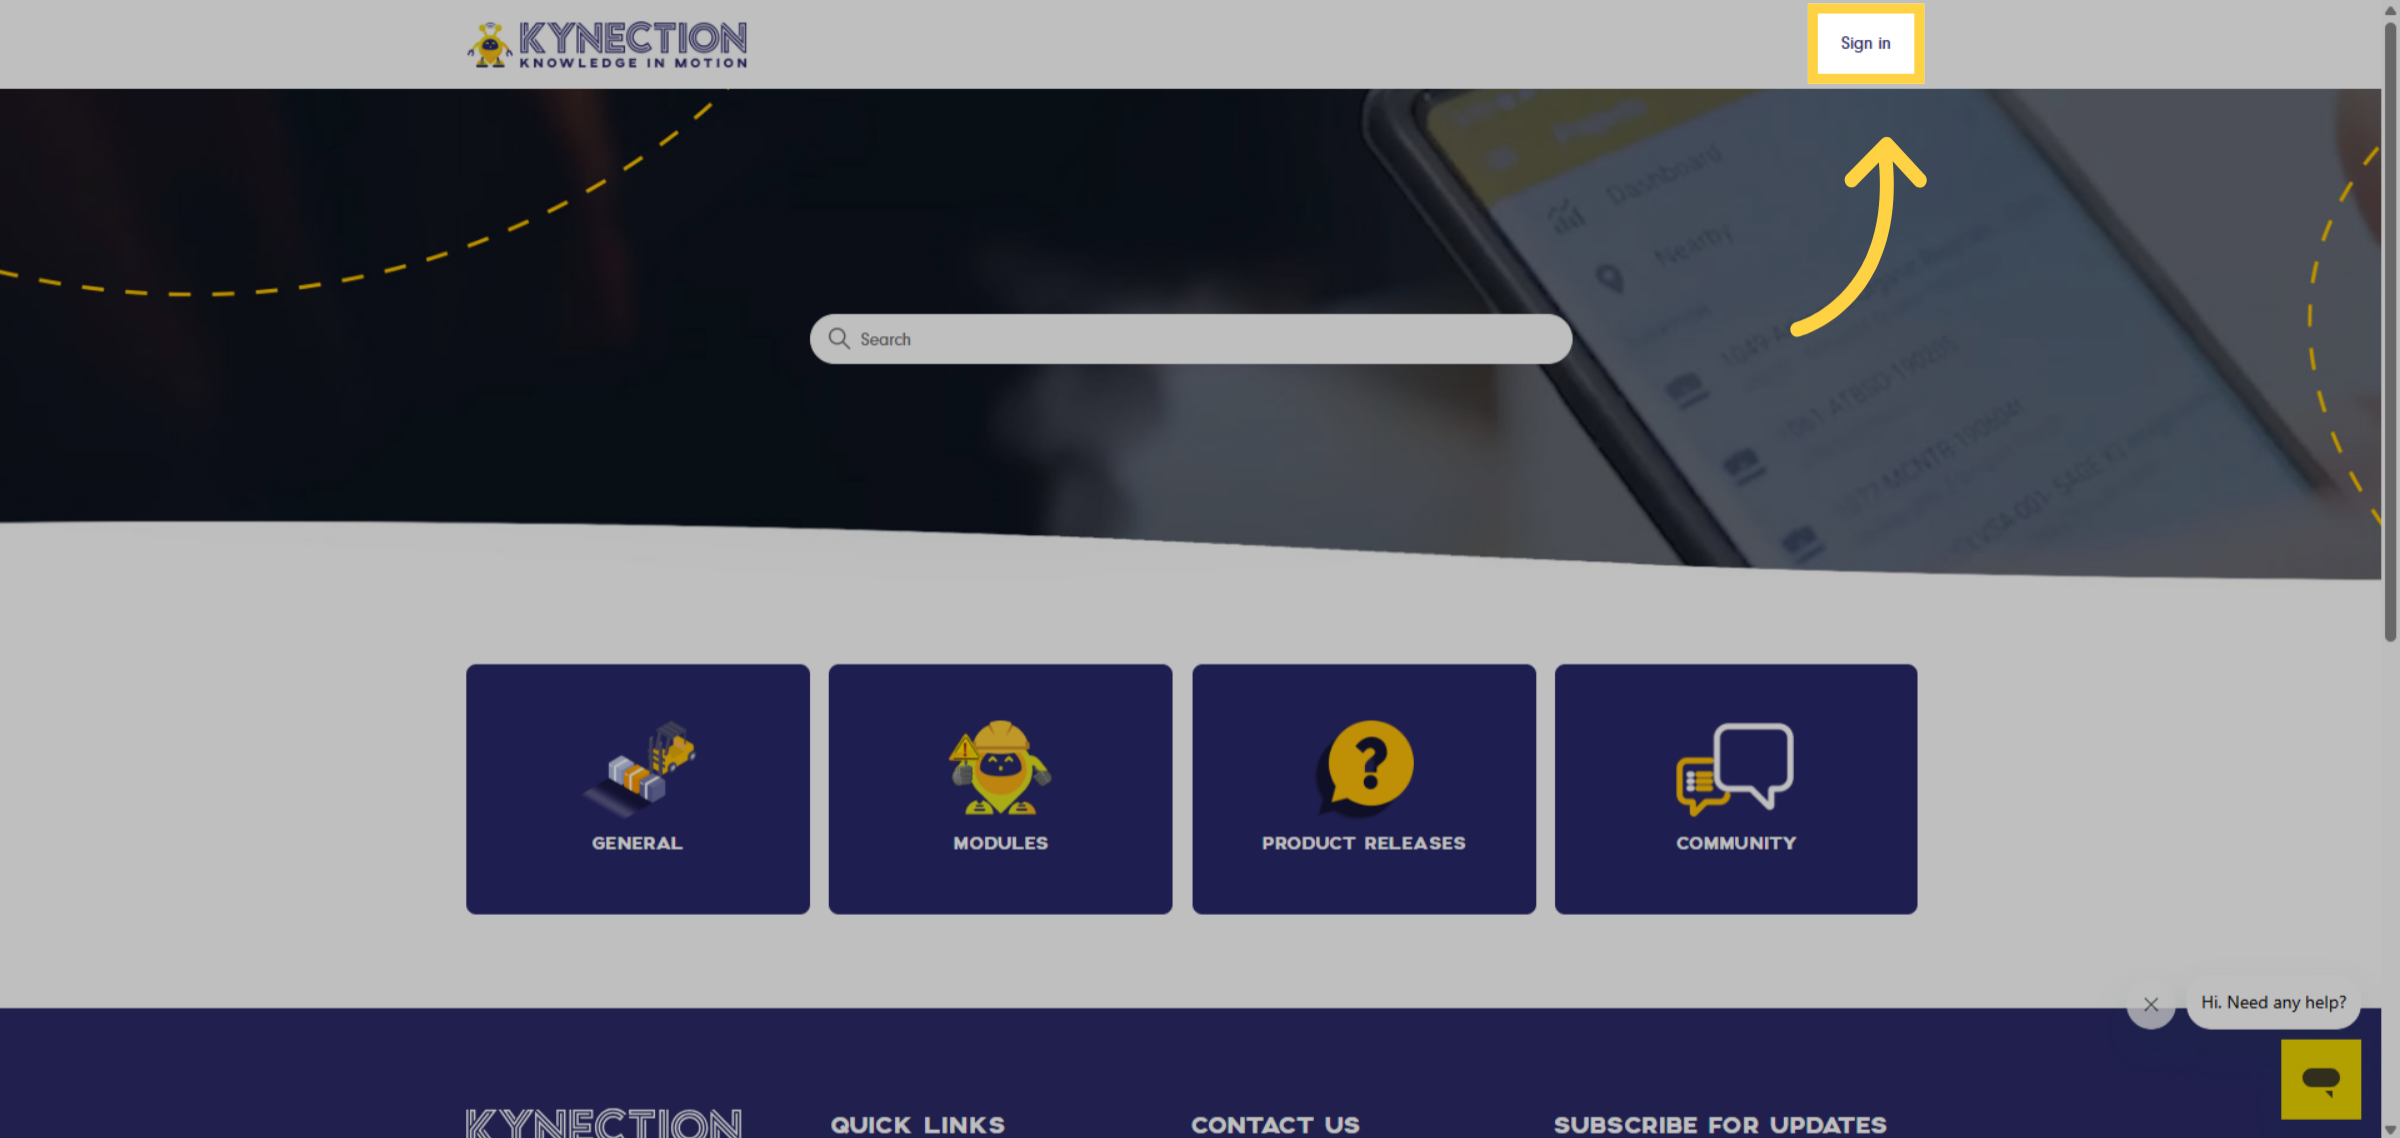
21. Support Link
Looking for assistance? Simply click on the Support tab, and you will be directed
to our website. There, you can explore a range of helpful topics and submit a
support ticket for any specific inquiries.
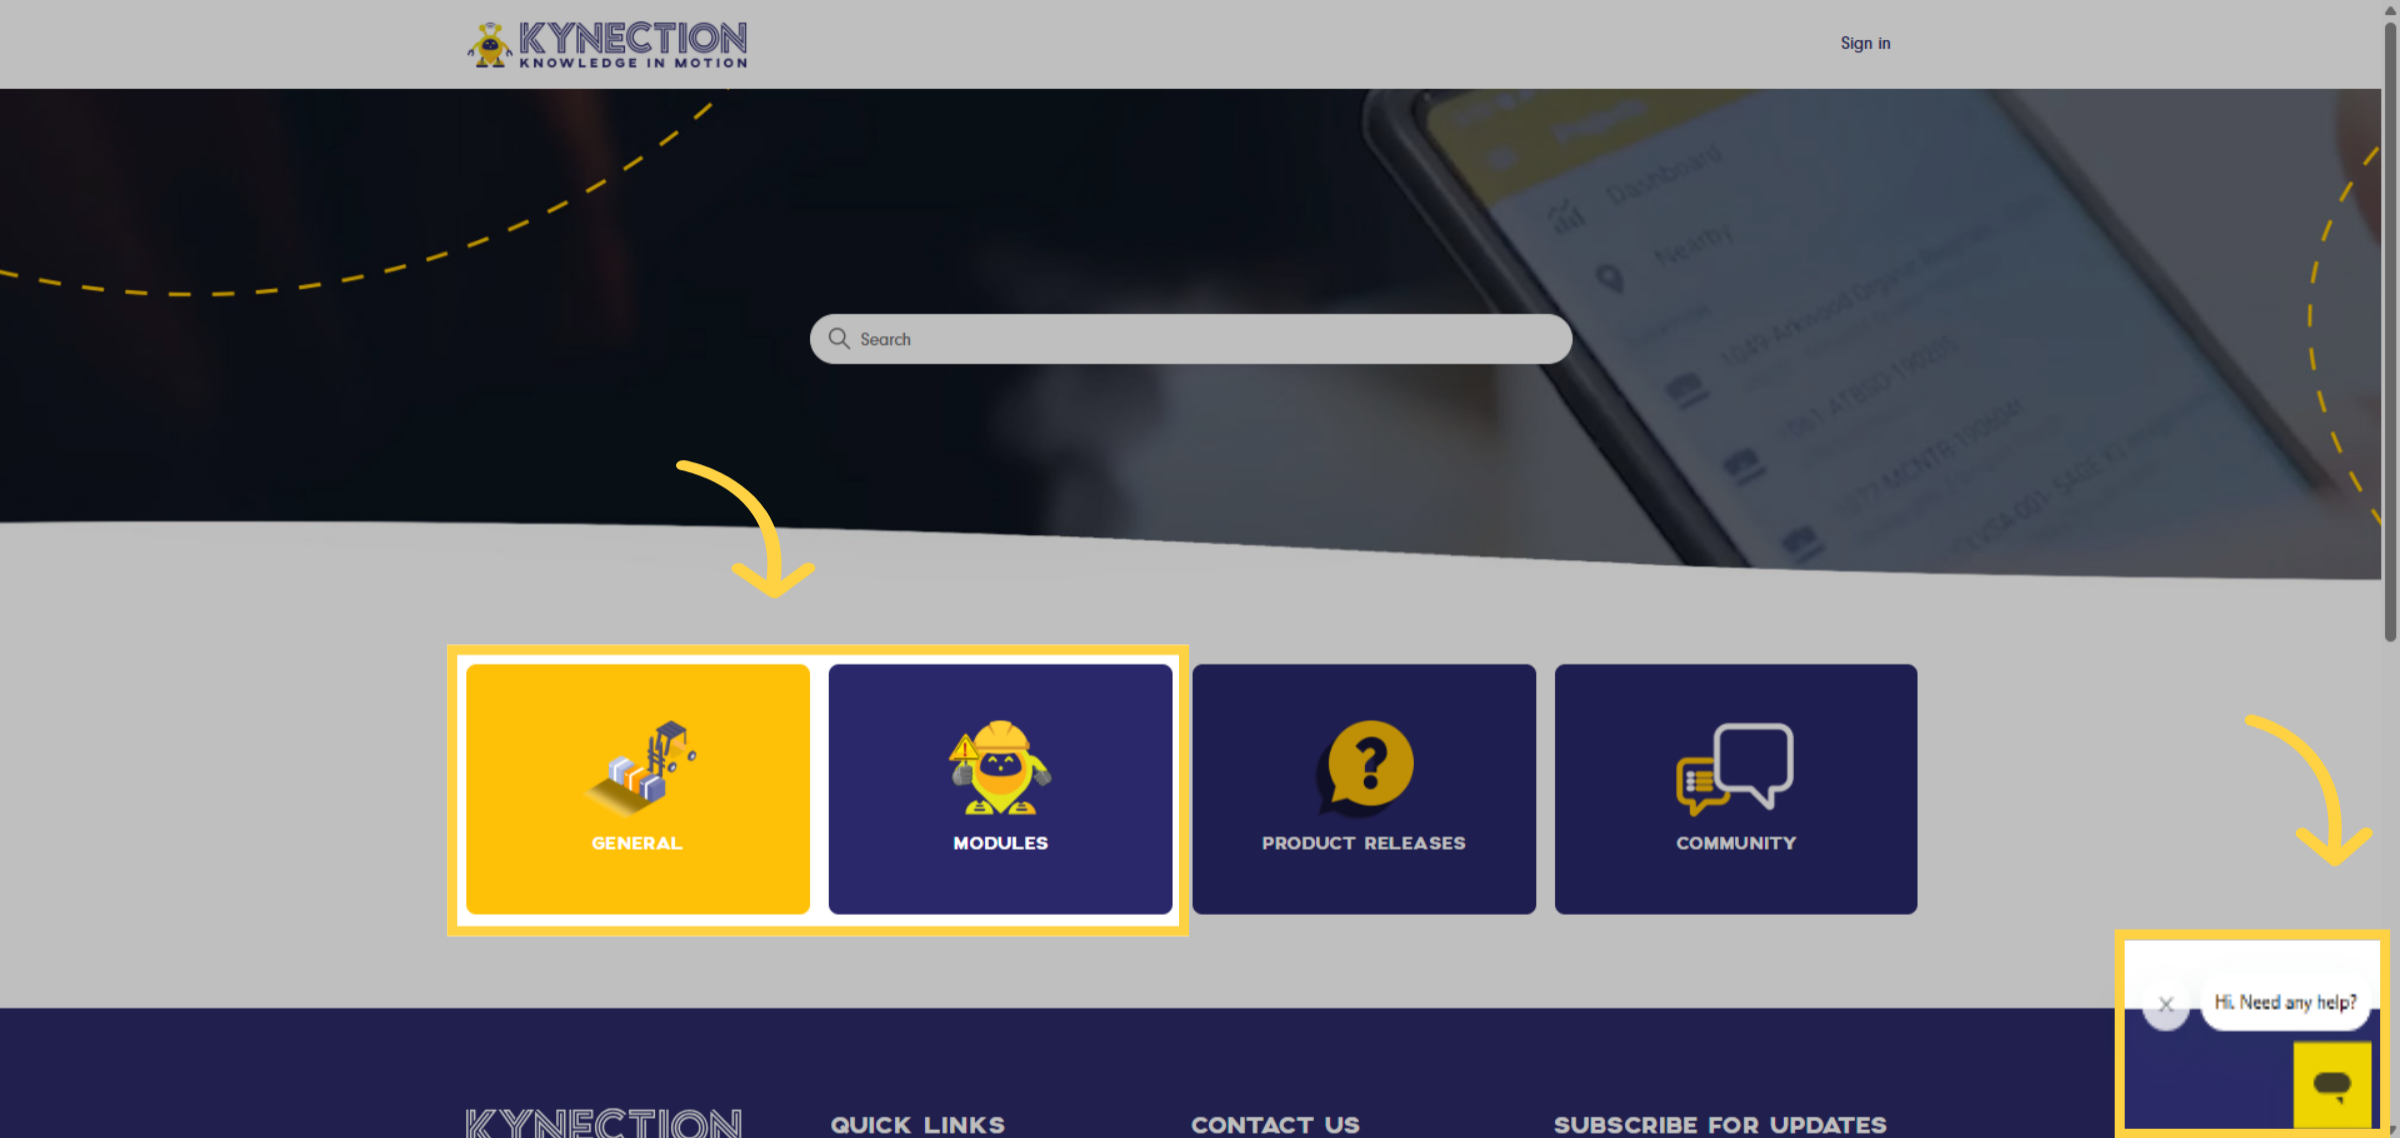
22. Support Portal
The Support tab directs you to "support.kynection.com" in a new browser tab.
Here, you can explore a variety of help topics, complete with detailed instructions,
by clicking on the General and Modules buttons. Additionally, for personalised
assistance, chat with our KIM Assistant, conveniently located in the bottom right
corner of your screen.
23. Support Ticket
If you can't resolve your issues using the help topics or have a feature or hardware
request, please sign in and submit a support ticket. Only employees nominated
by your company can raise tickets. Before submitting, refresh your browser and
log back in to check if the issue persists.
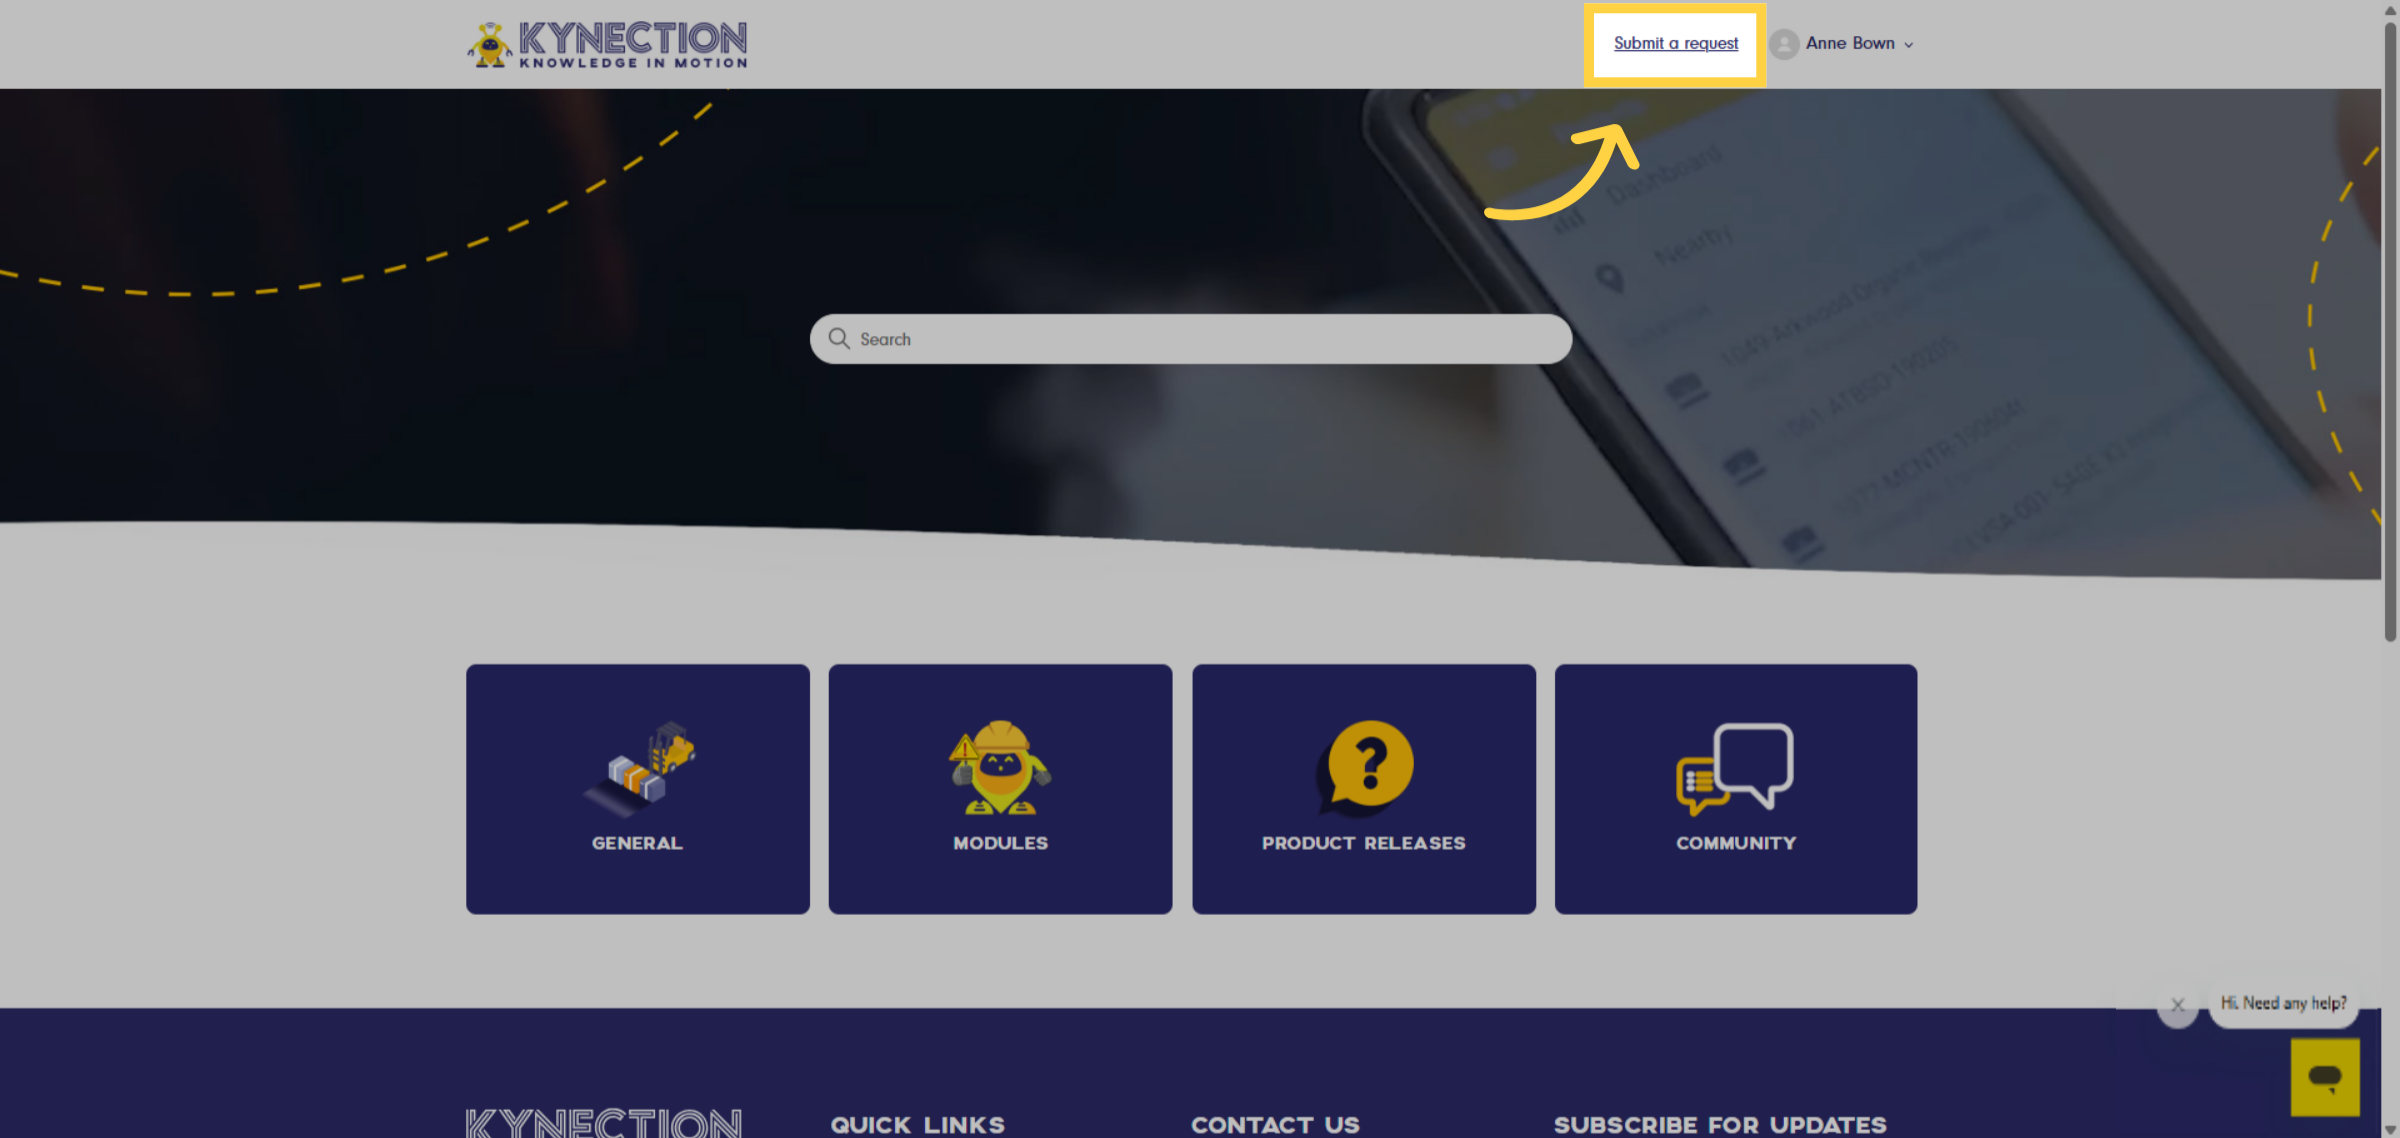
24. Submit a Request
Once you are signed in, you will see the Submit a Request option prominently
displayed. Click on this link, and you can choose from several request types:
KIM, hardware, or feature requests.
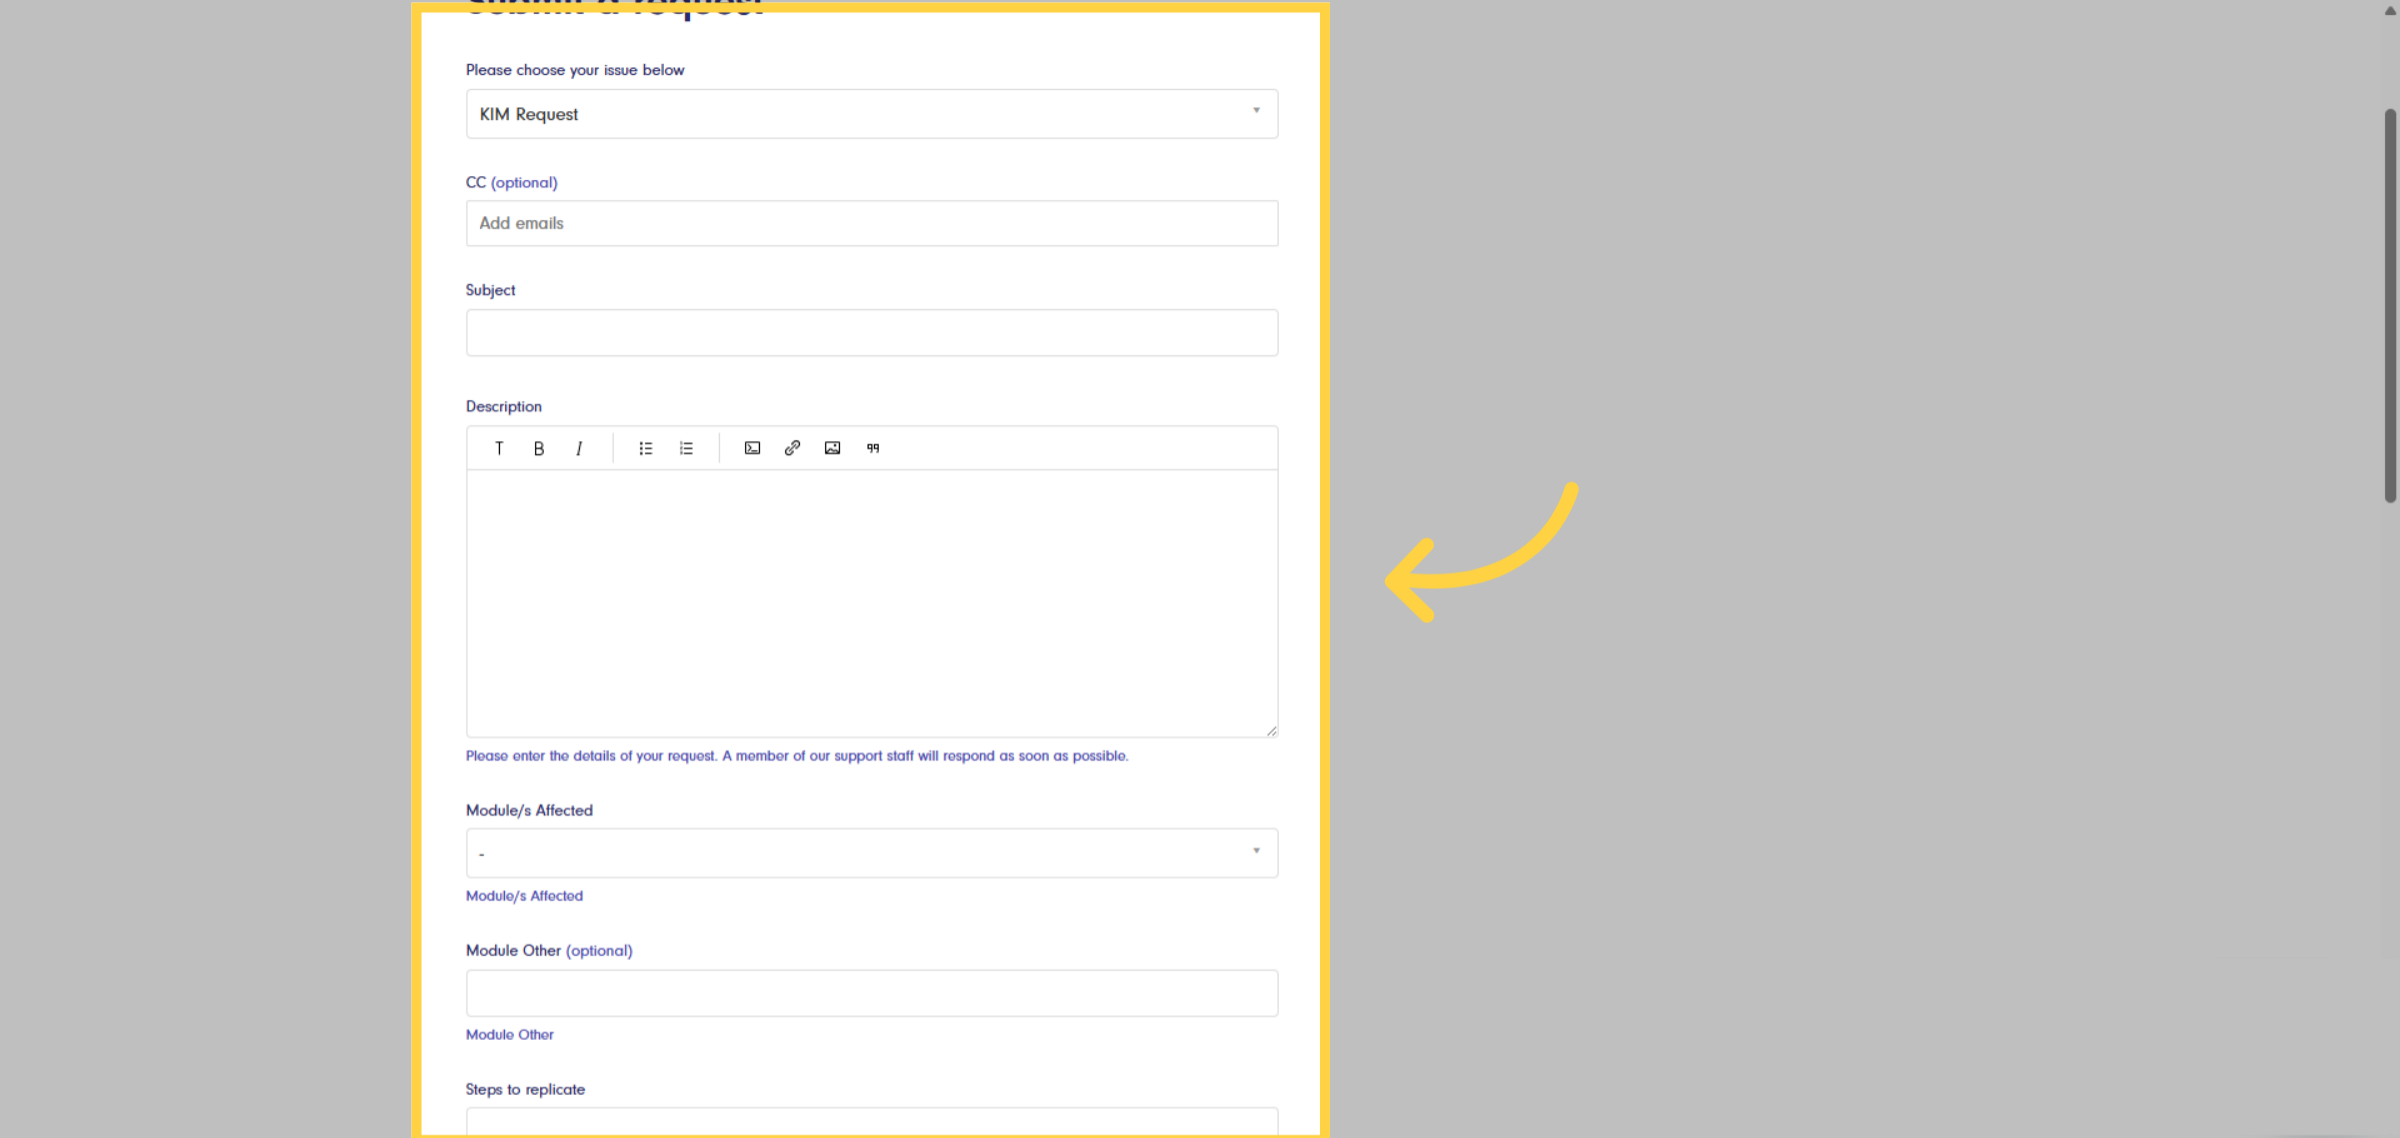
25. Completing a Ticket
If you experience an issue, please provide detailed information in the description
box. Document the steps leading to the issue to help our team replicate it for
diagnosis. Upload screenshots and relevant attachments to expedite resolution.
This guide covered navigating Kynection efficiently, from accessing favorite
items to managing projects and tracking sales. Master the application's features
with these engaging instructions.

