This training guide offers a step-by-step walkthrough of the Inventory Module on Mobile.
1. Home Screen
Once you've signed in from the home screen, select the sales module.
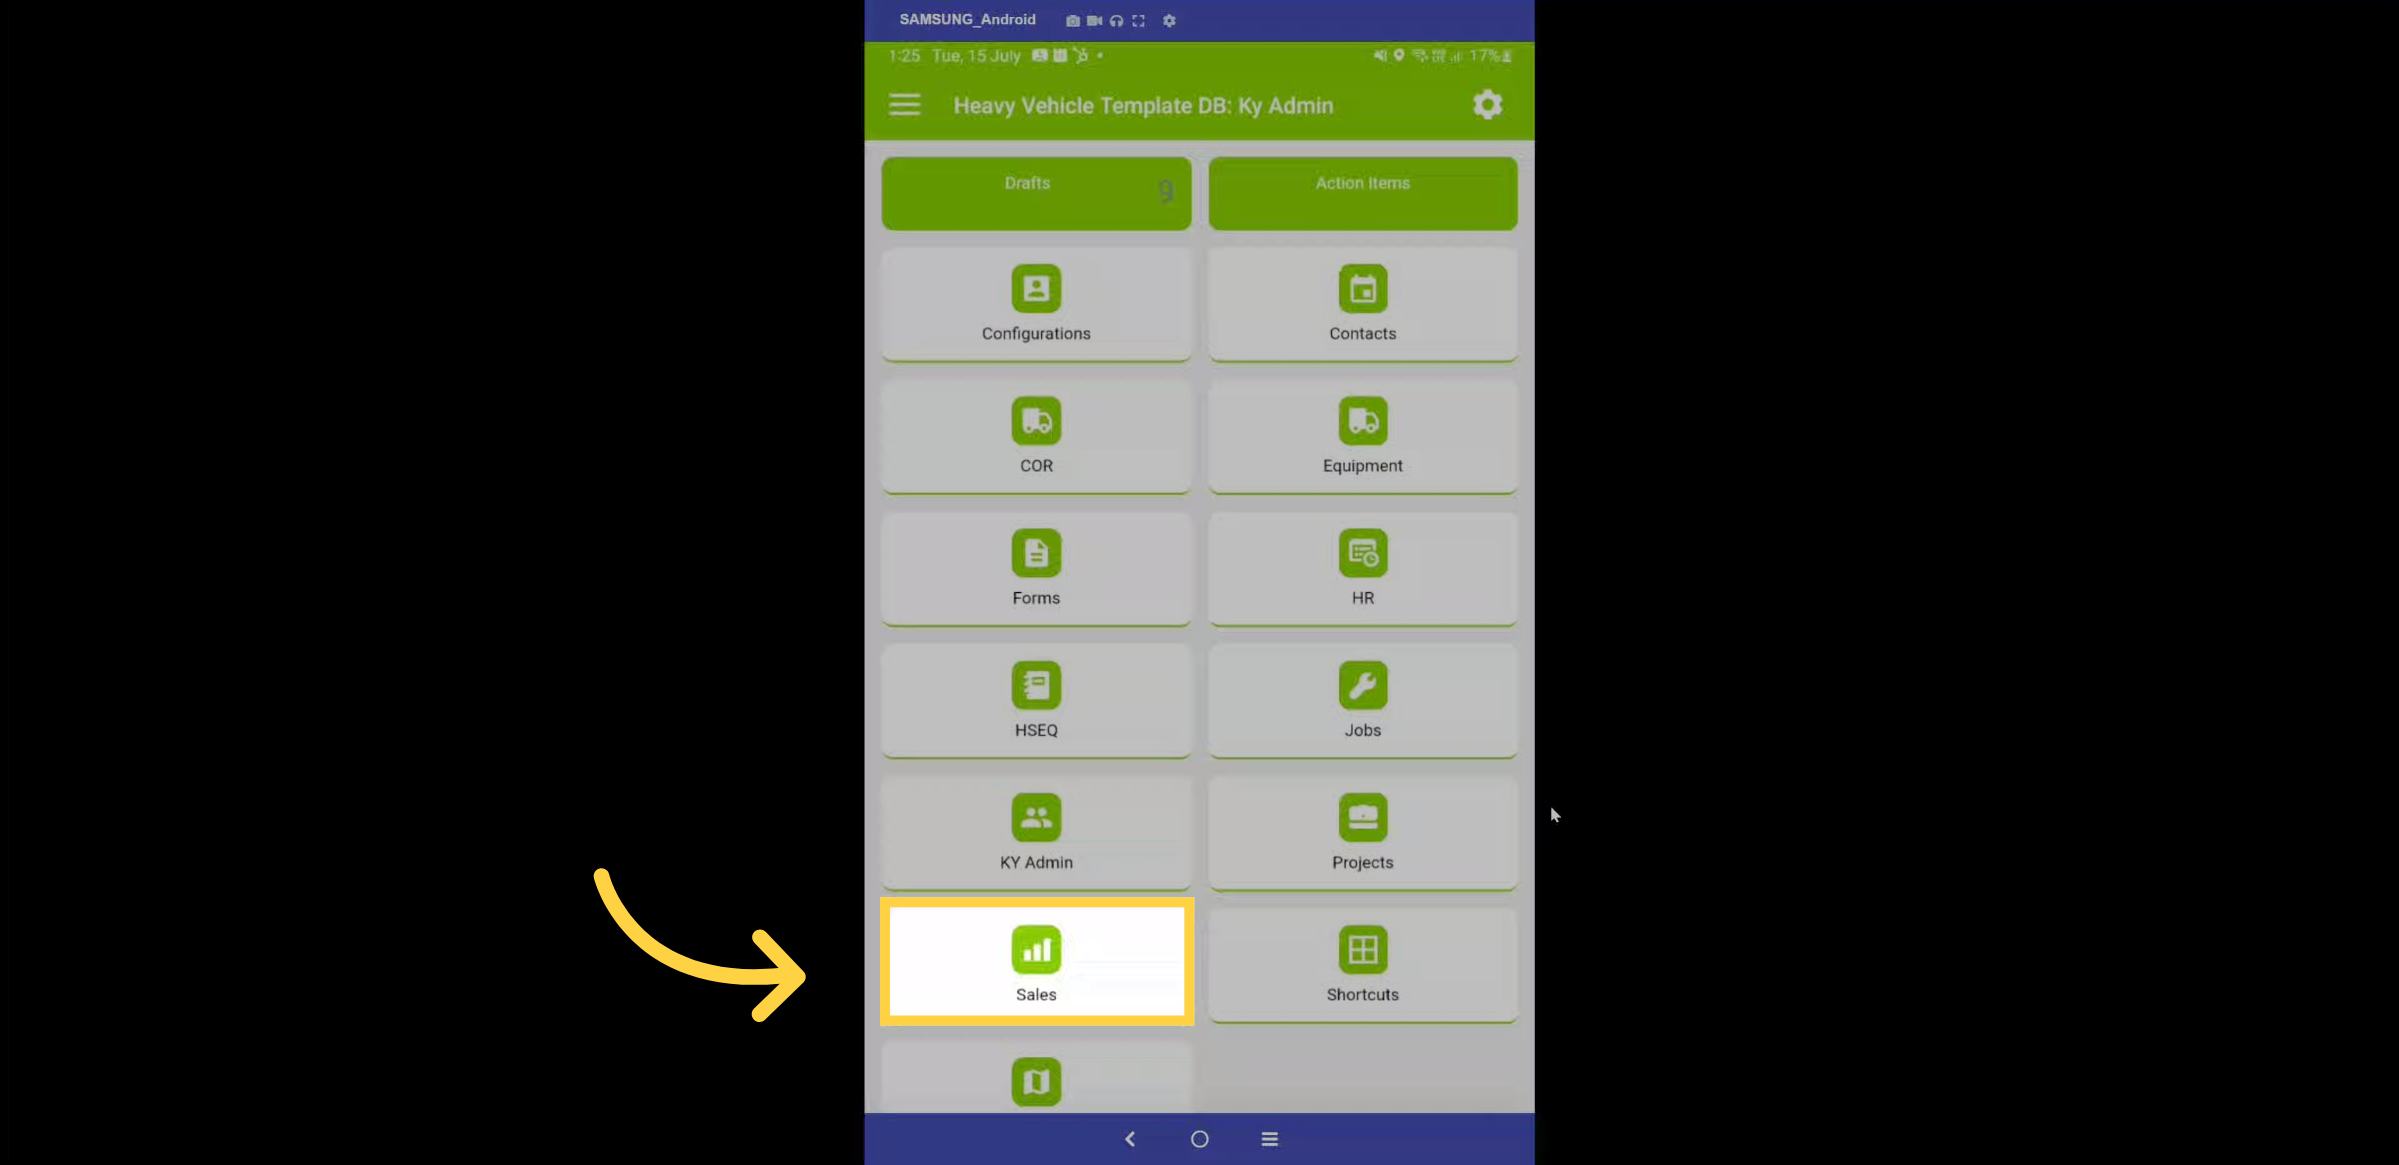
2. Dashboard
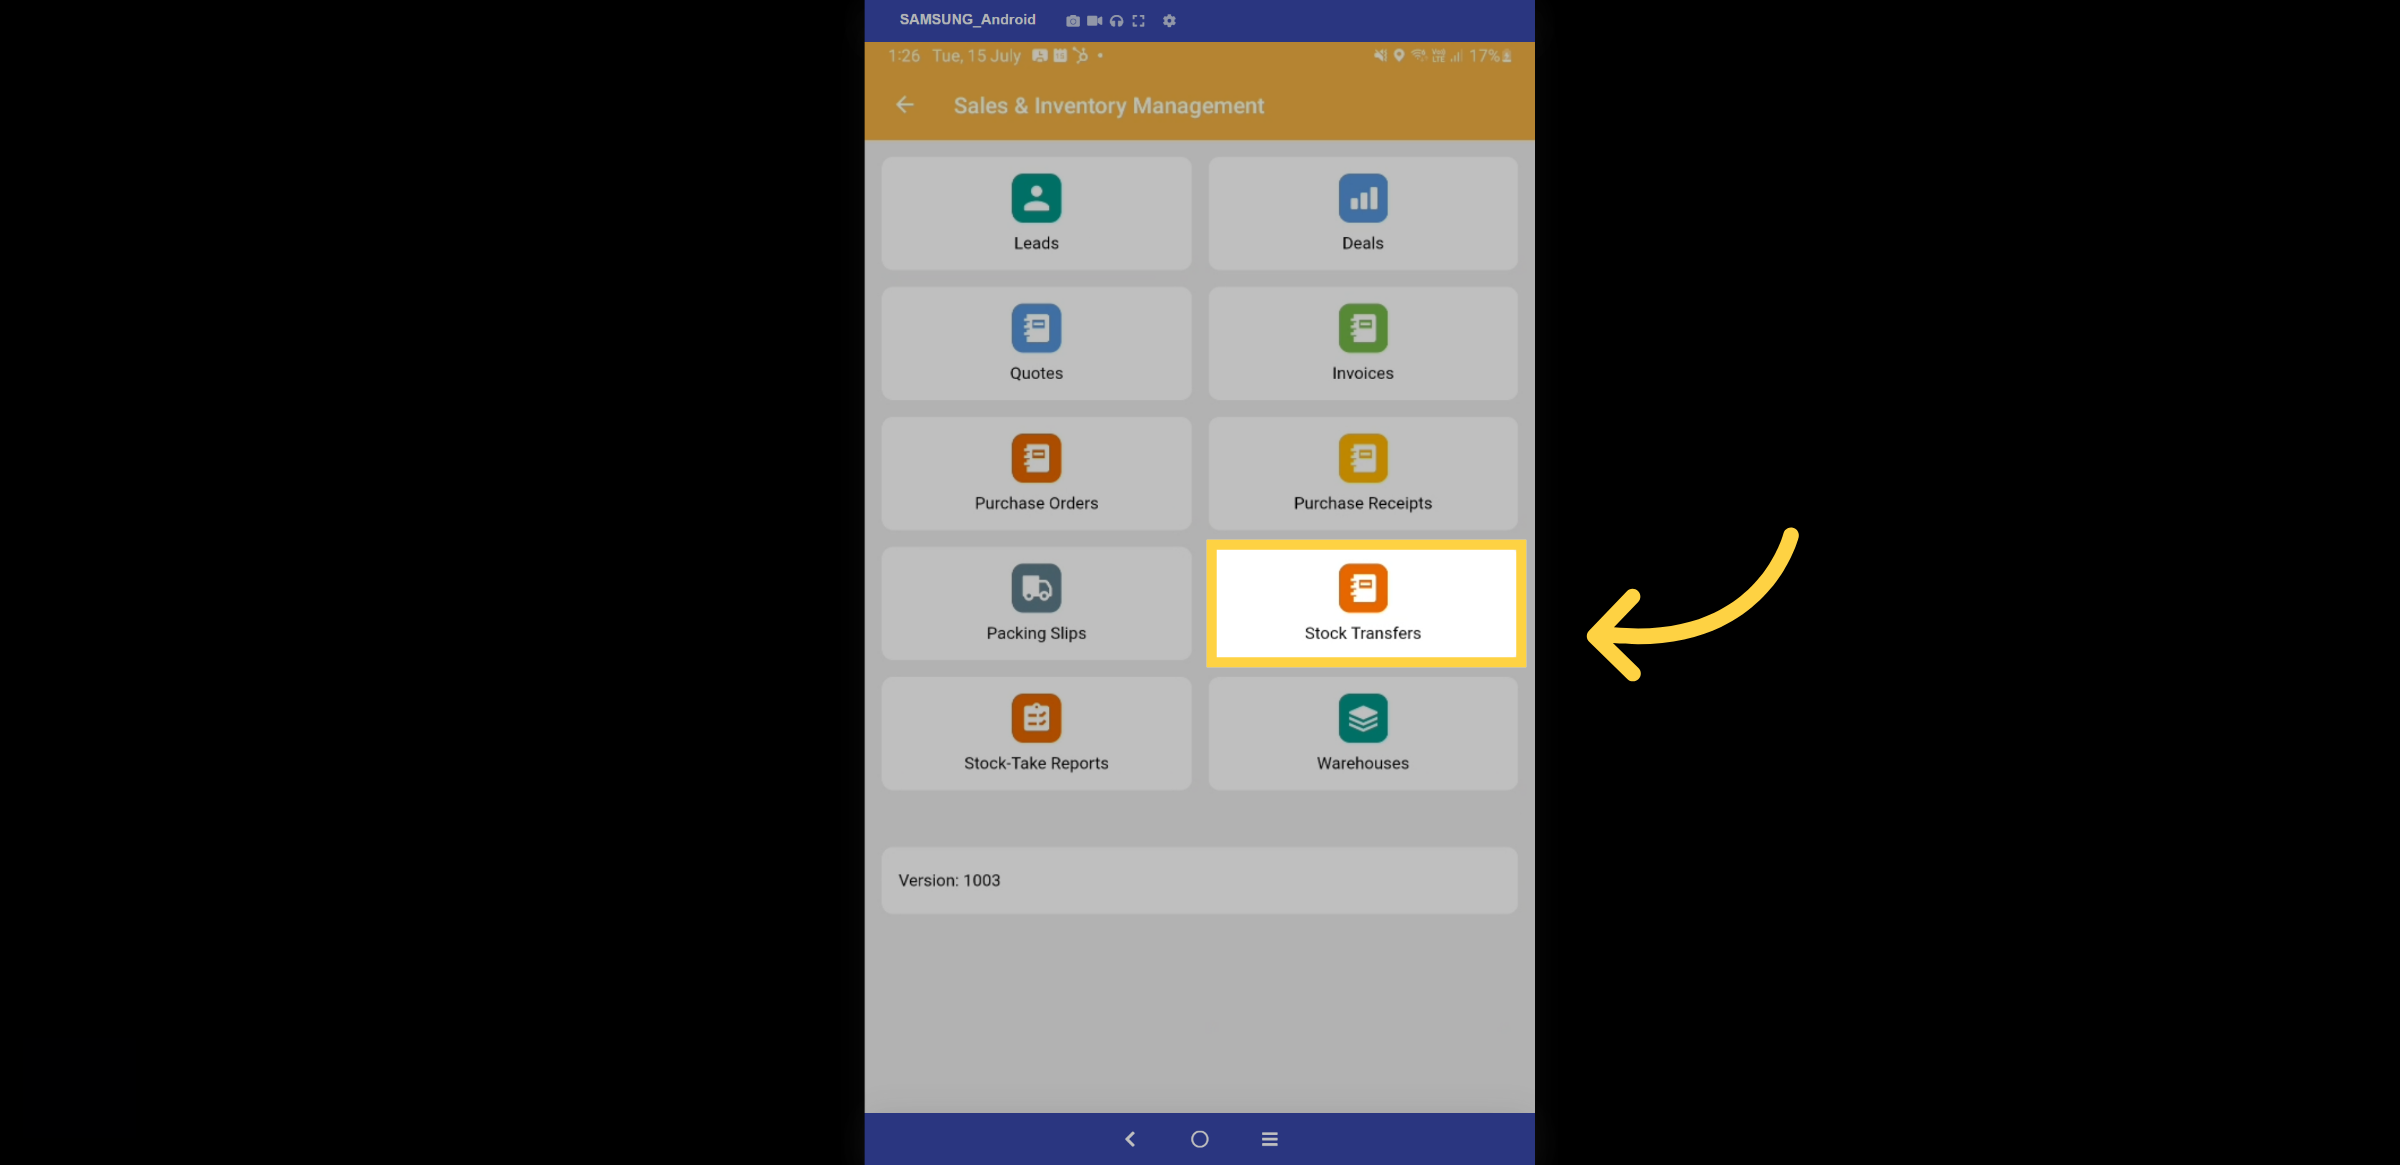
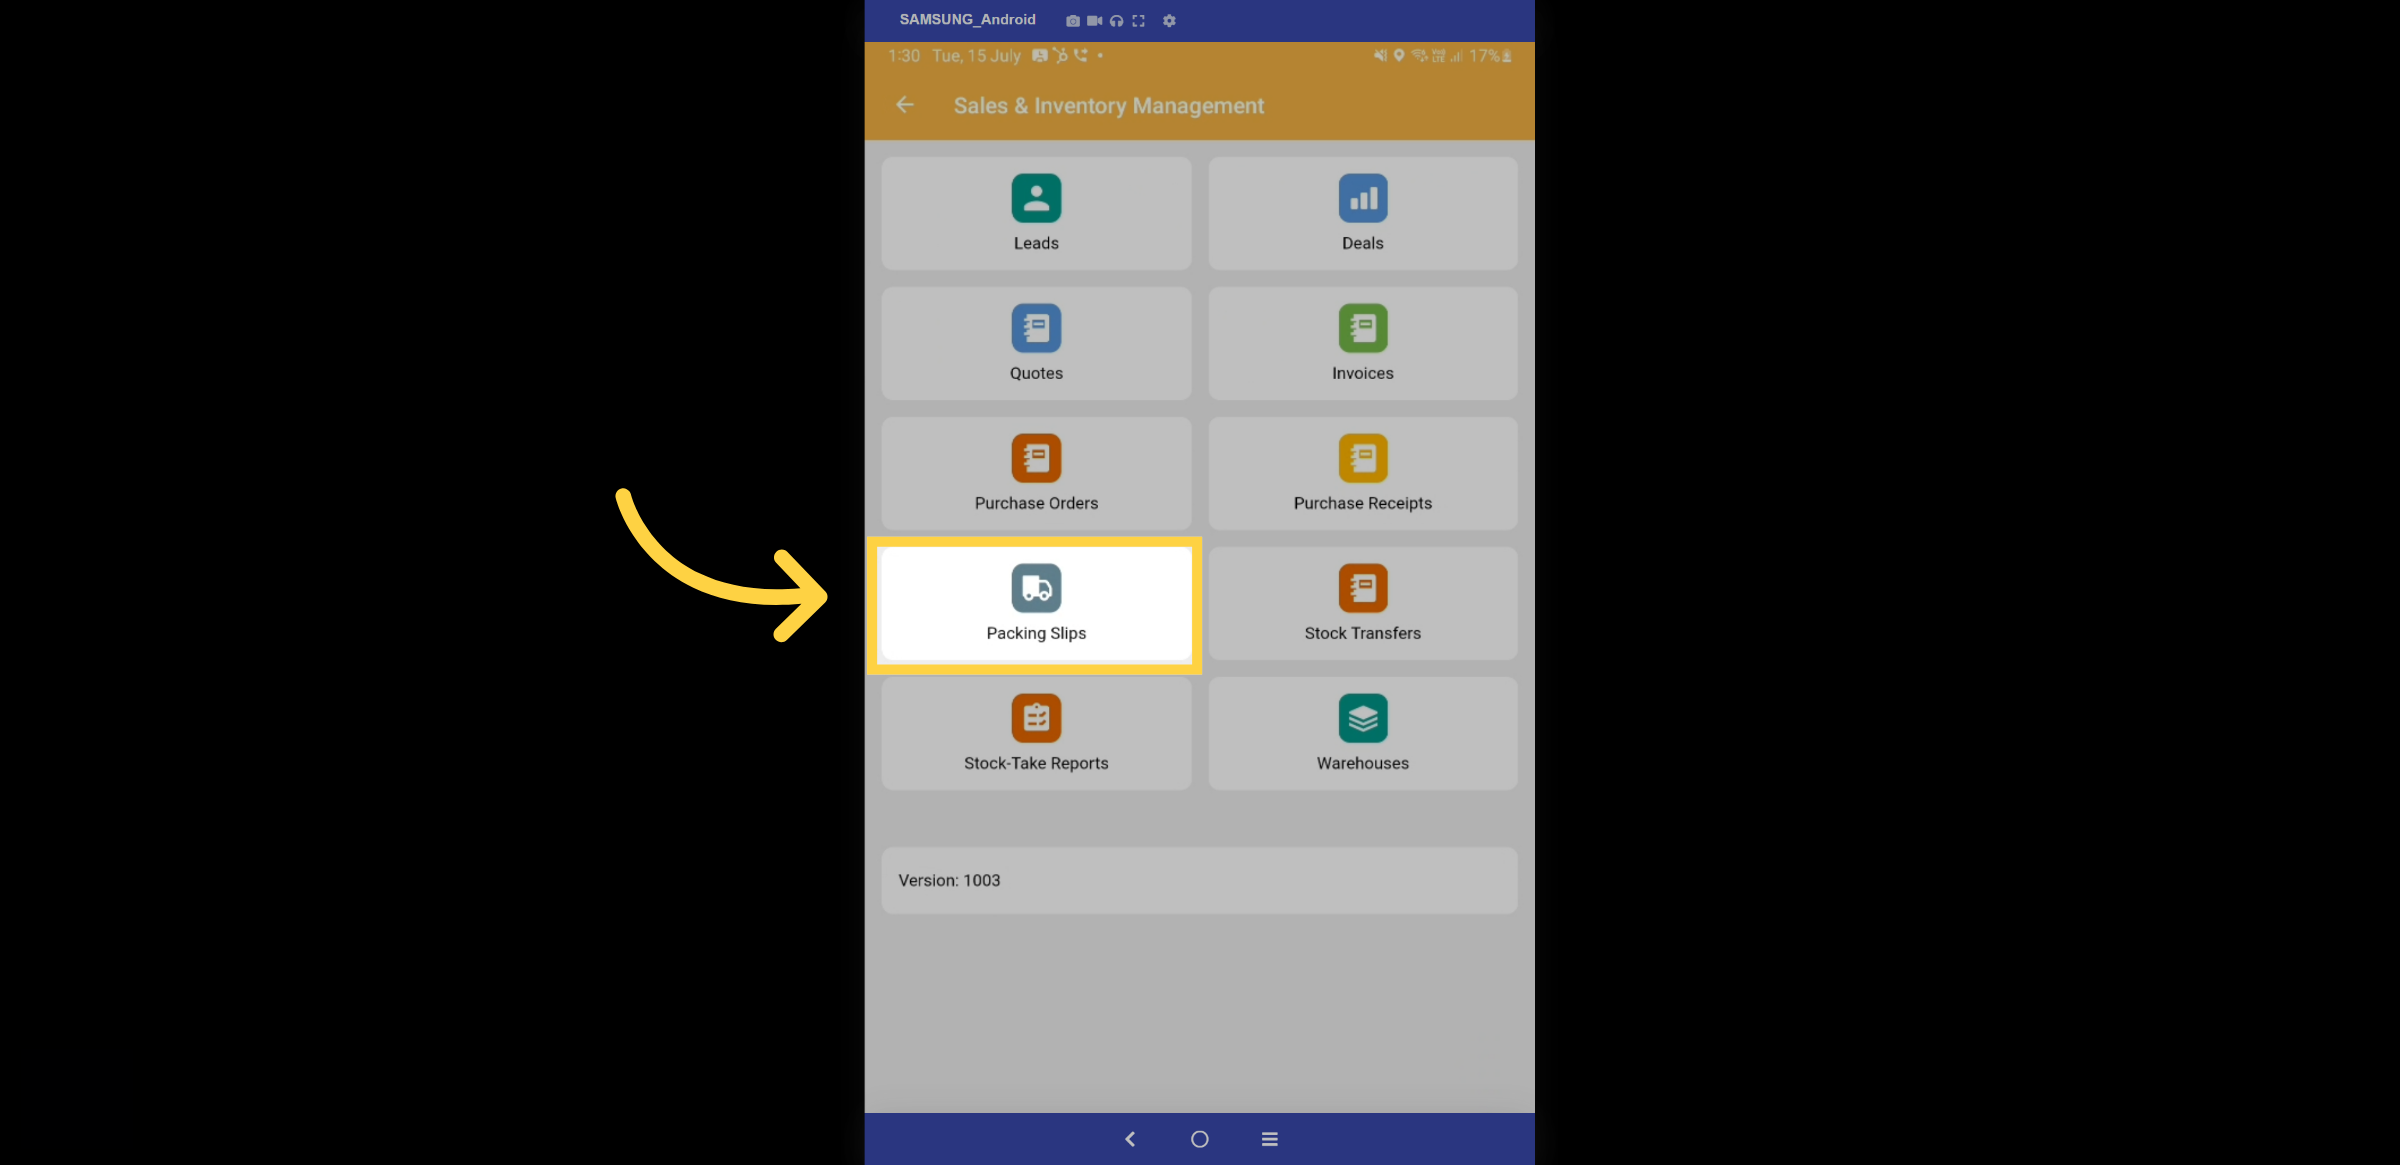
From this point, you can access features from both the sales and inventory modules. The inventory module includes four distinct features: Warehouses, Stock-take Reports, Stock Transfers, and Packing Slips. Let's explore Warehouses.
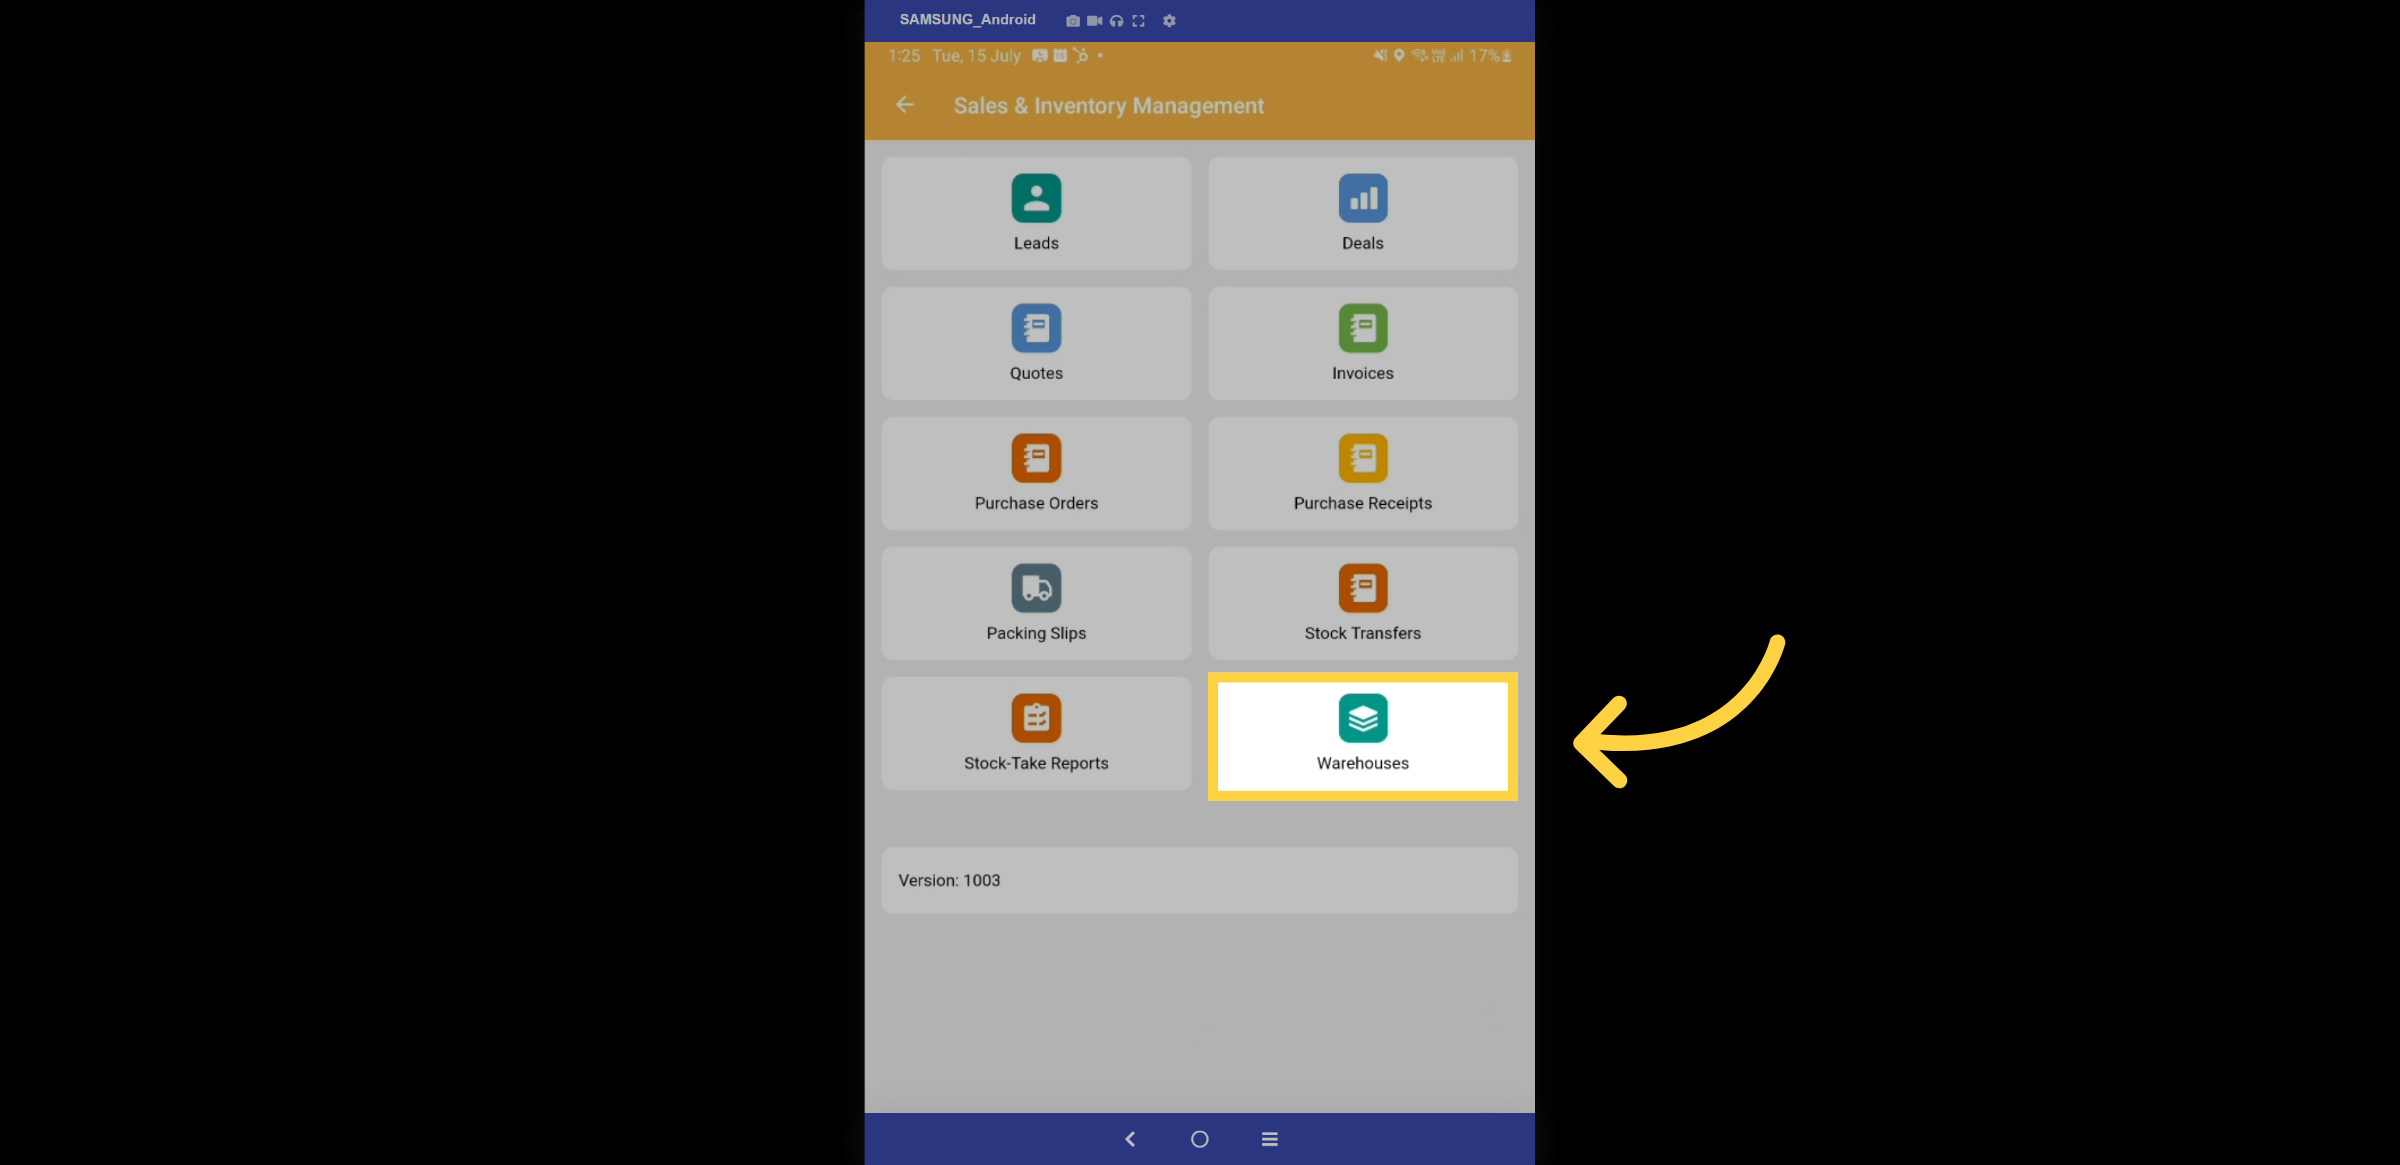
3. Warehouse List
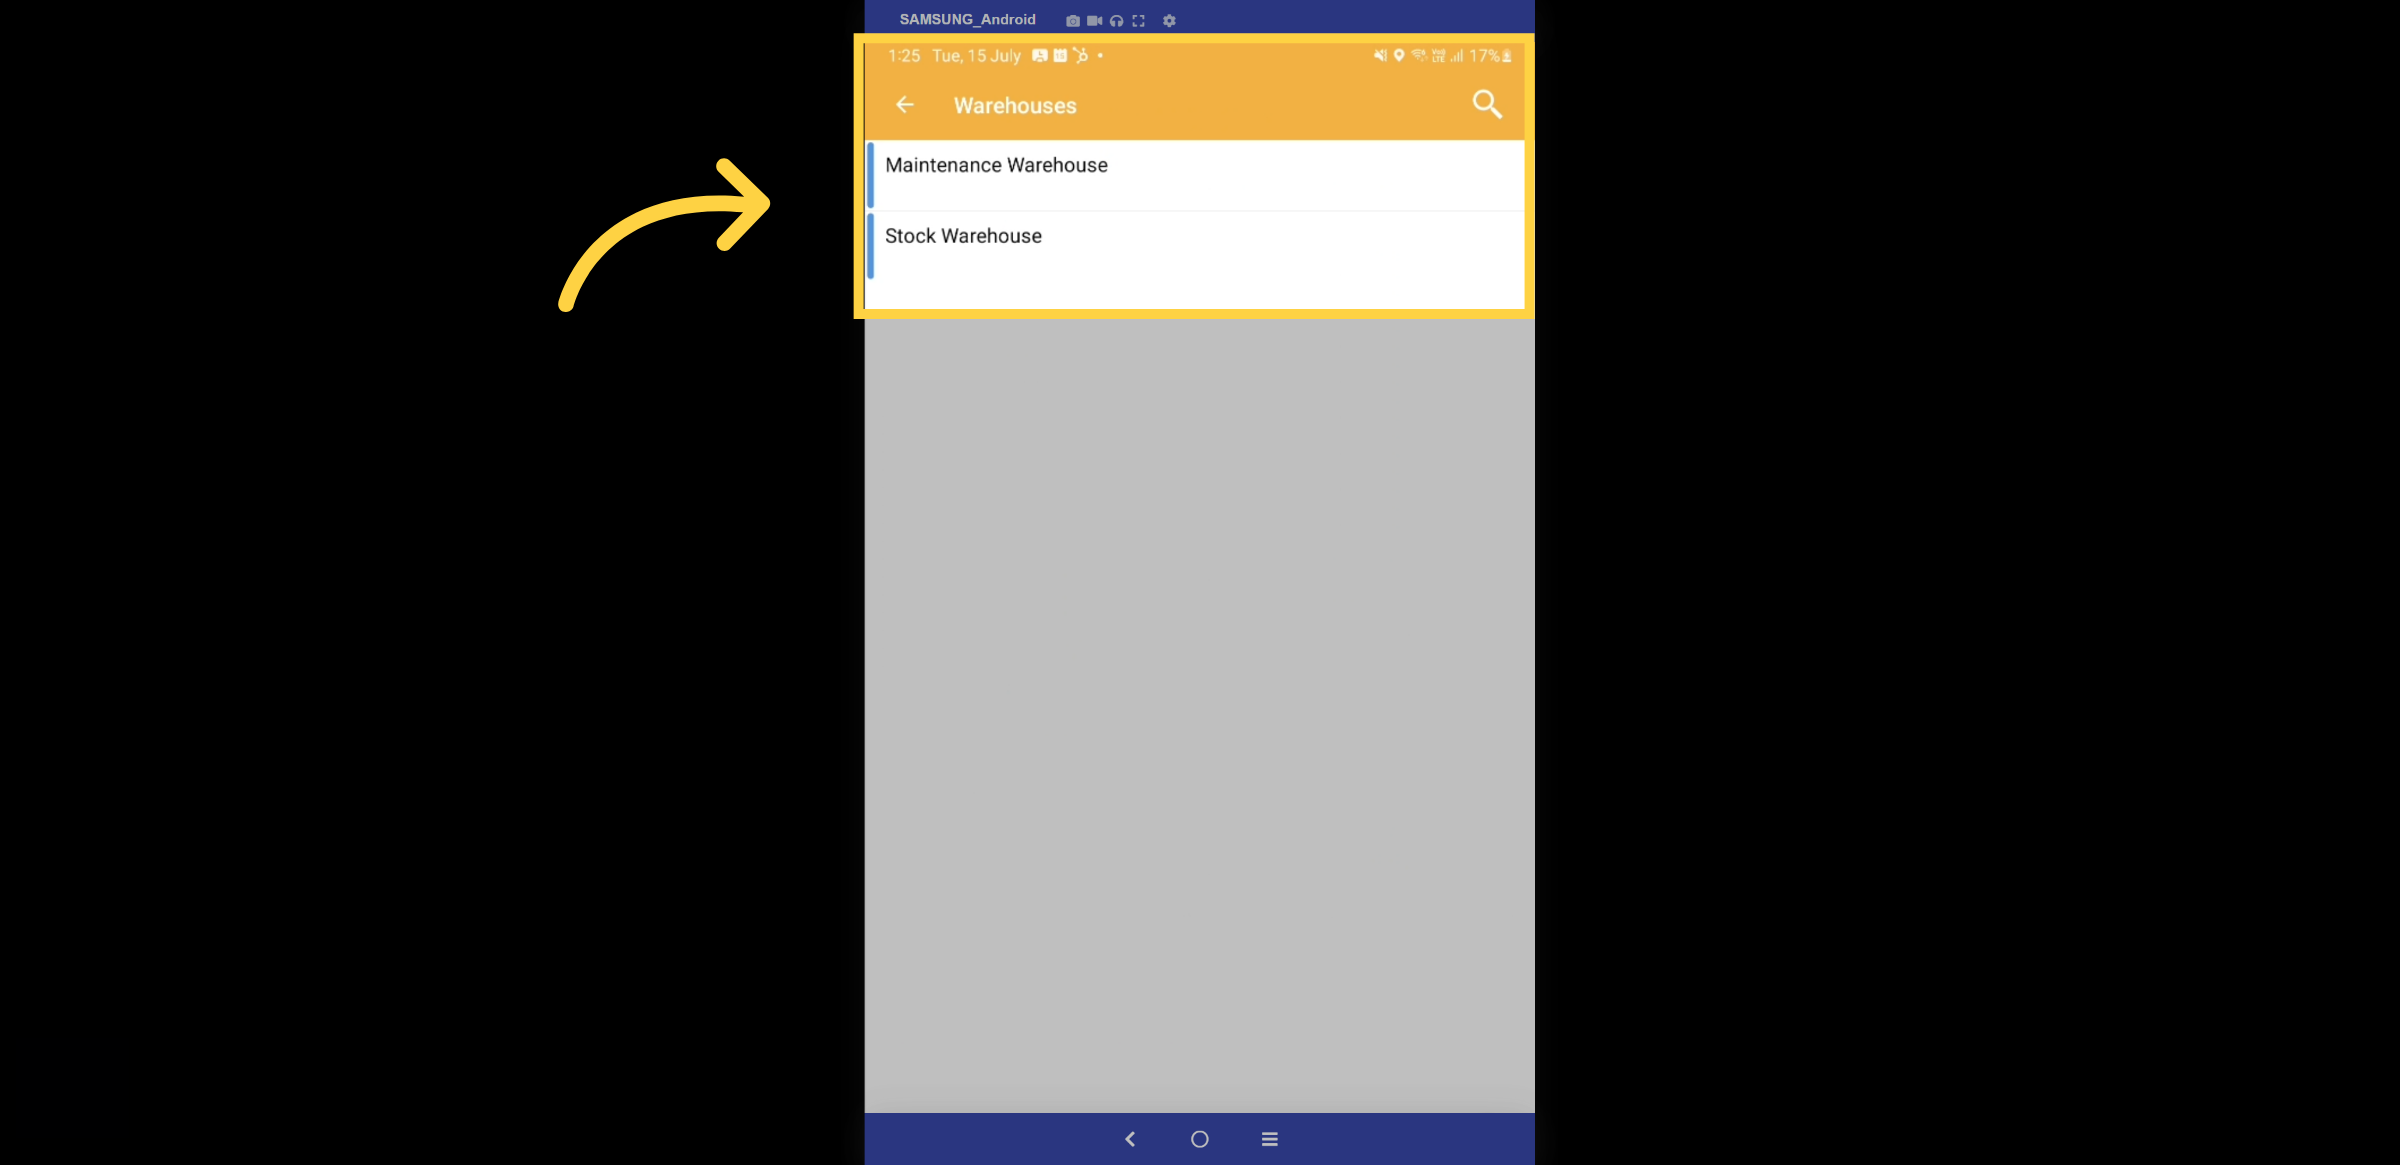
Here is a list of all your warehouses, which may also include mobile inventory locations such as utilities and vans. Select a warehouse.
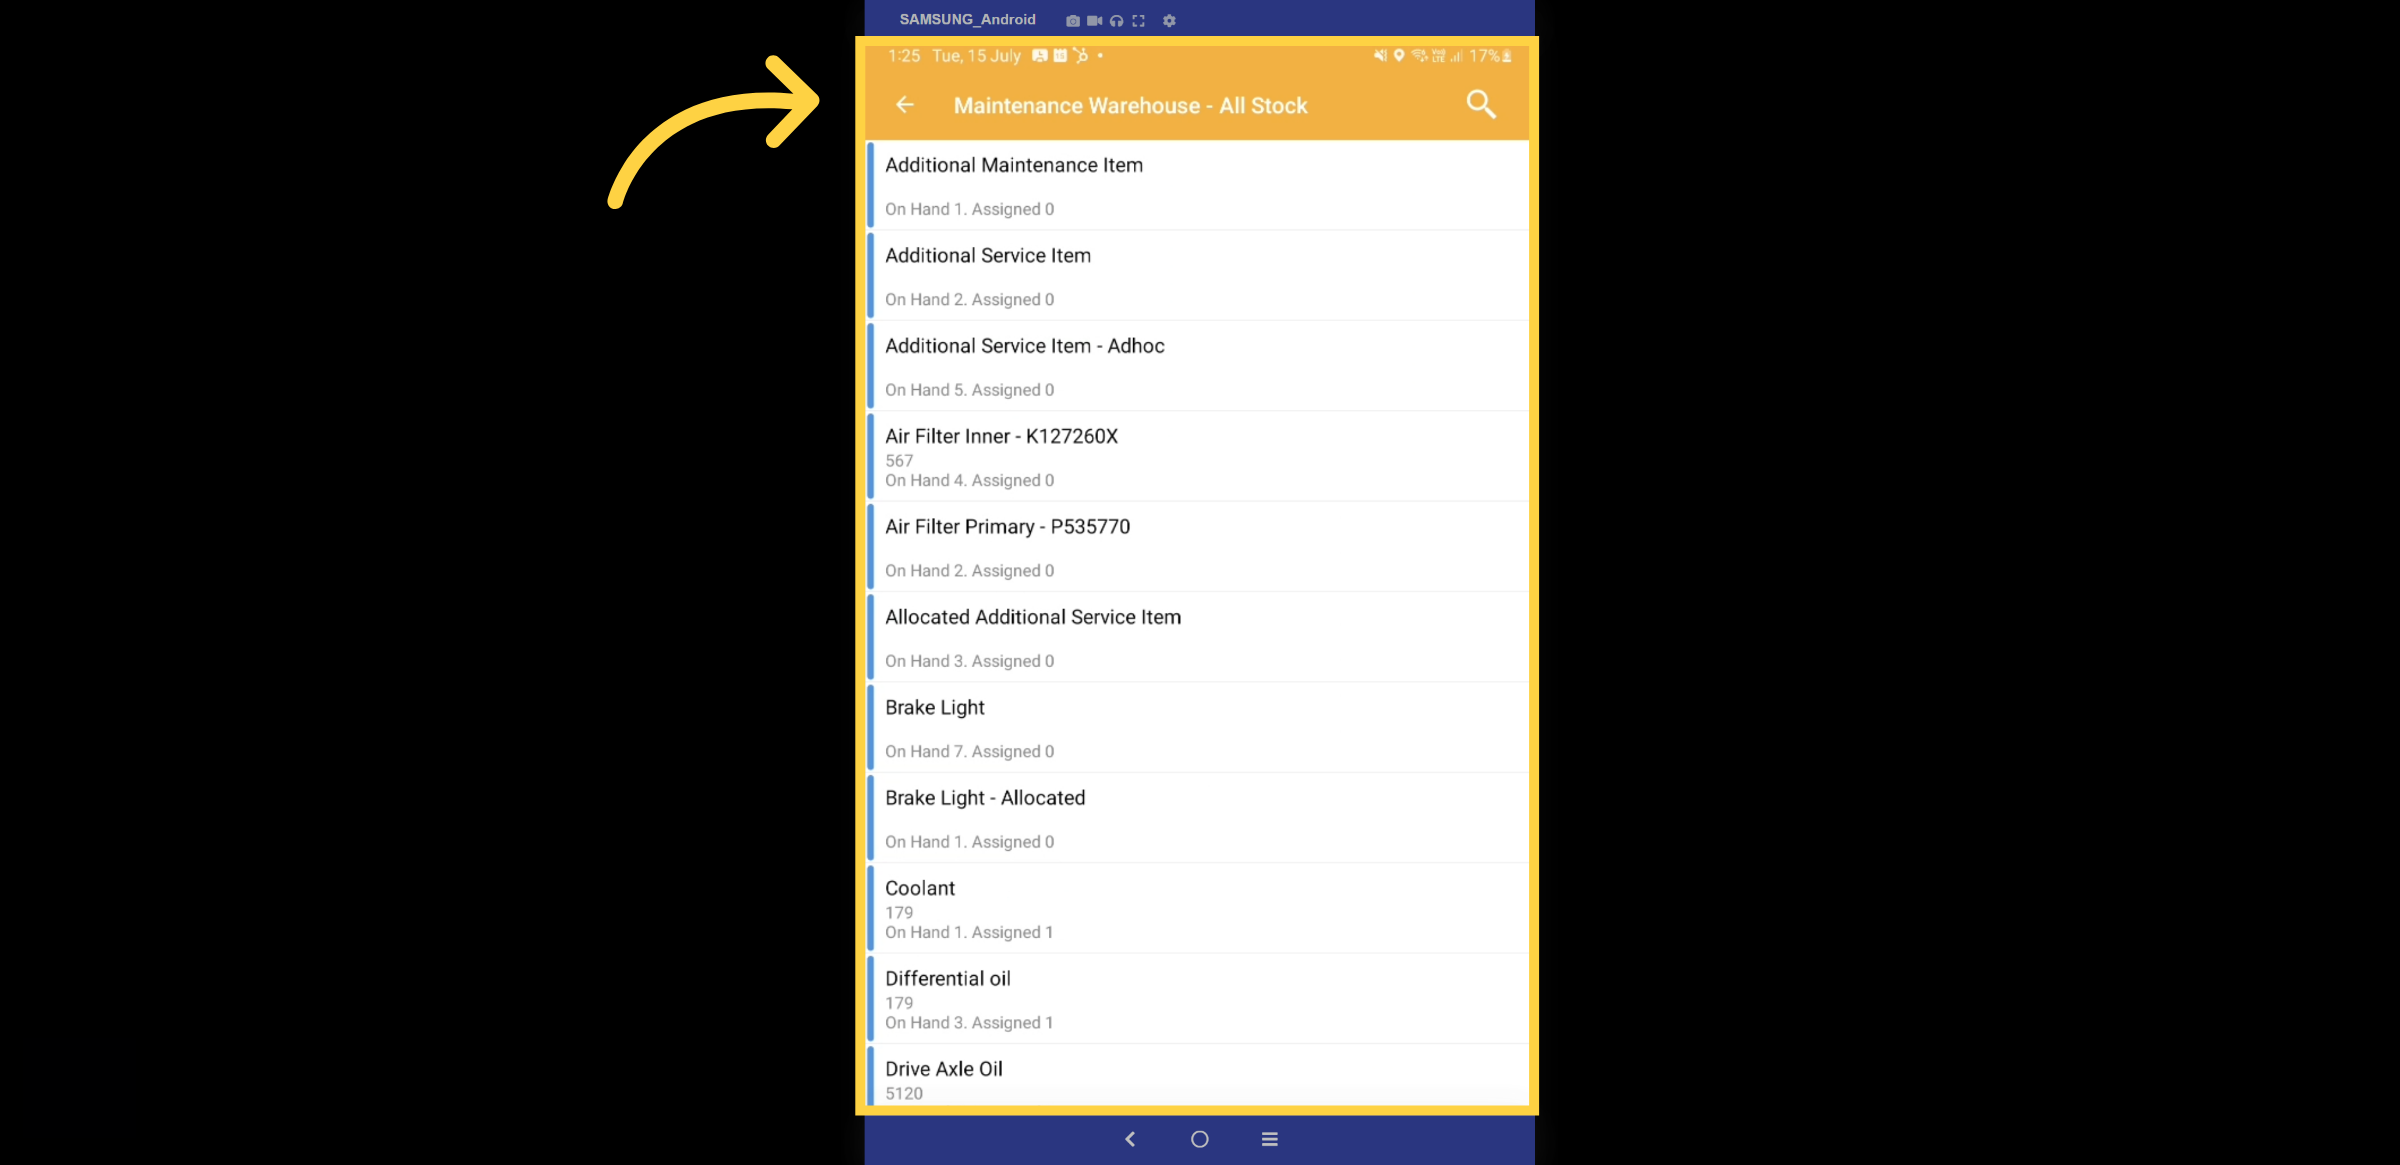
4. All Stock
You will have a comprehensive list of all stock in this warehouse, highlighting what is on hand and what has been assigned.
5. Stock Transfers
Discover the stock transfer feature.
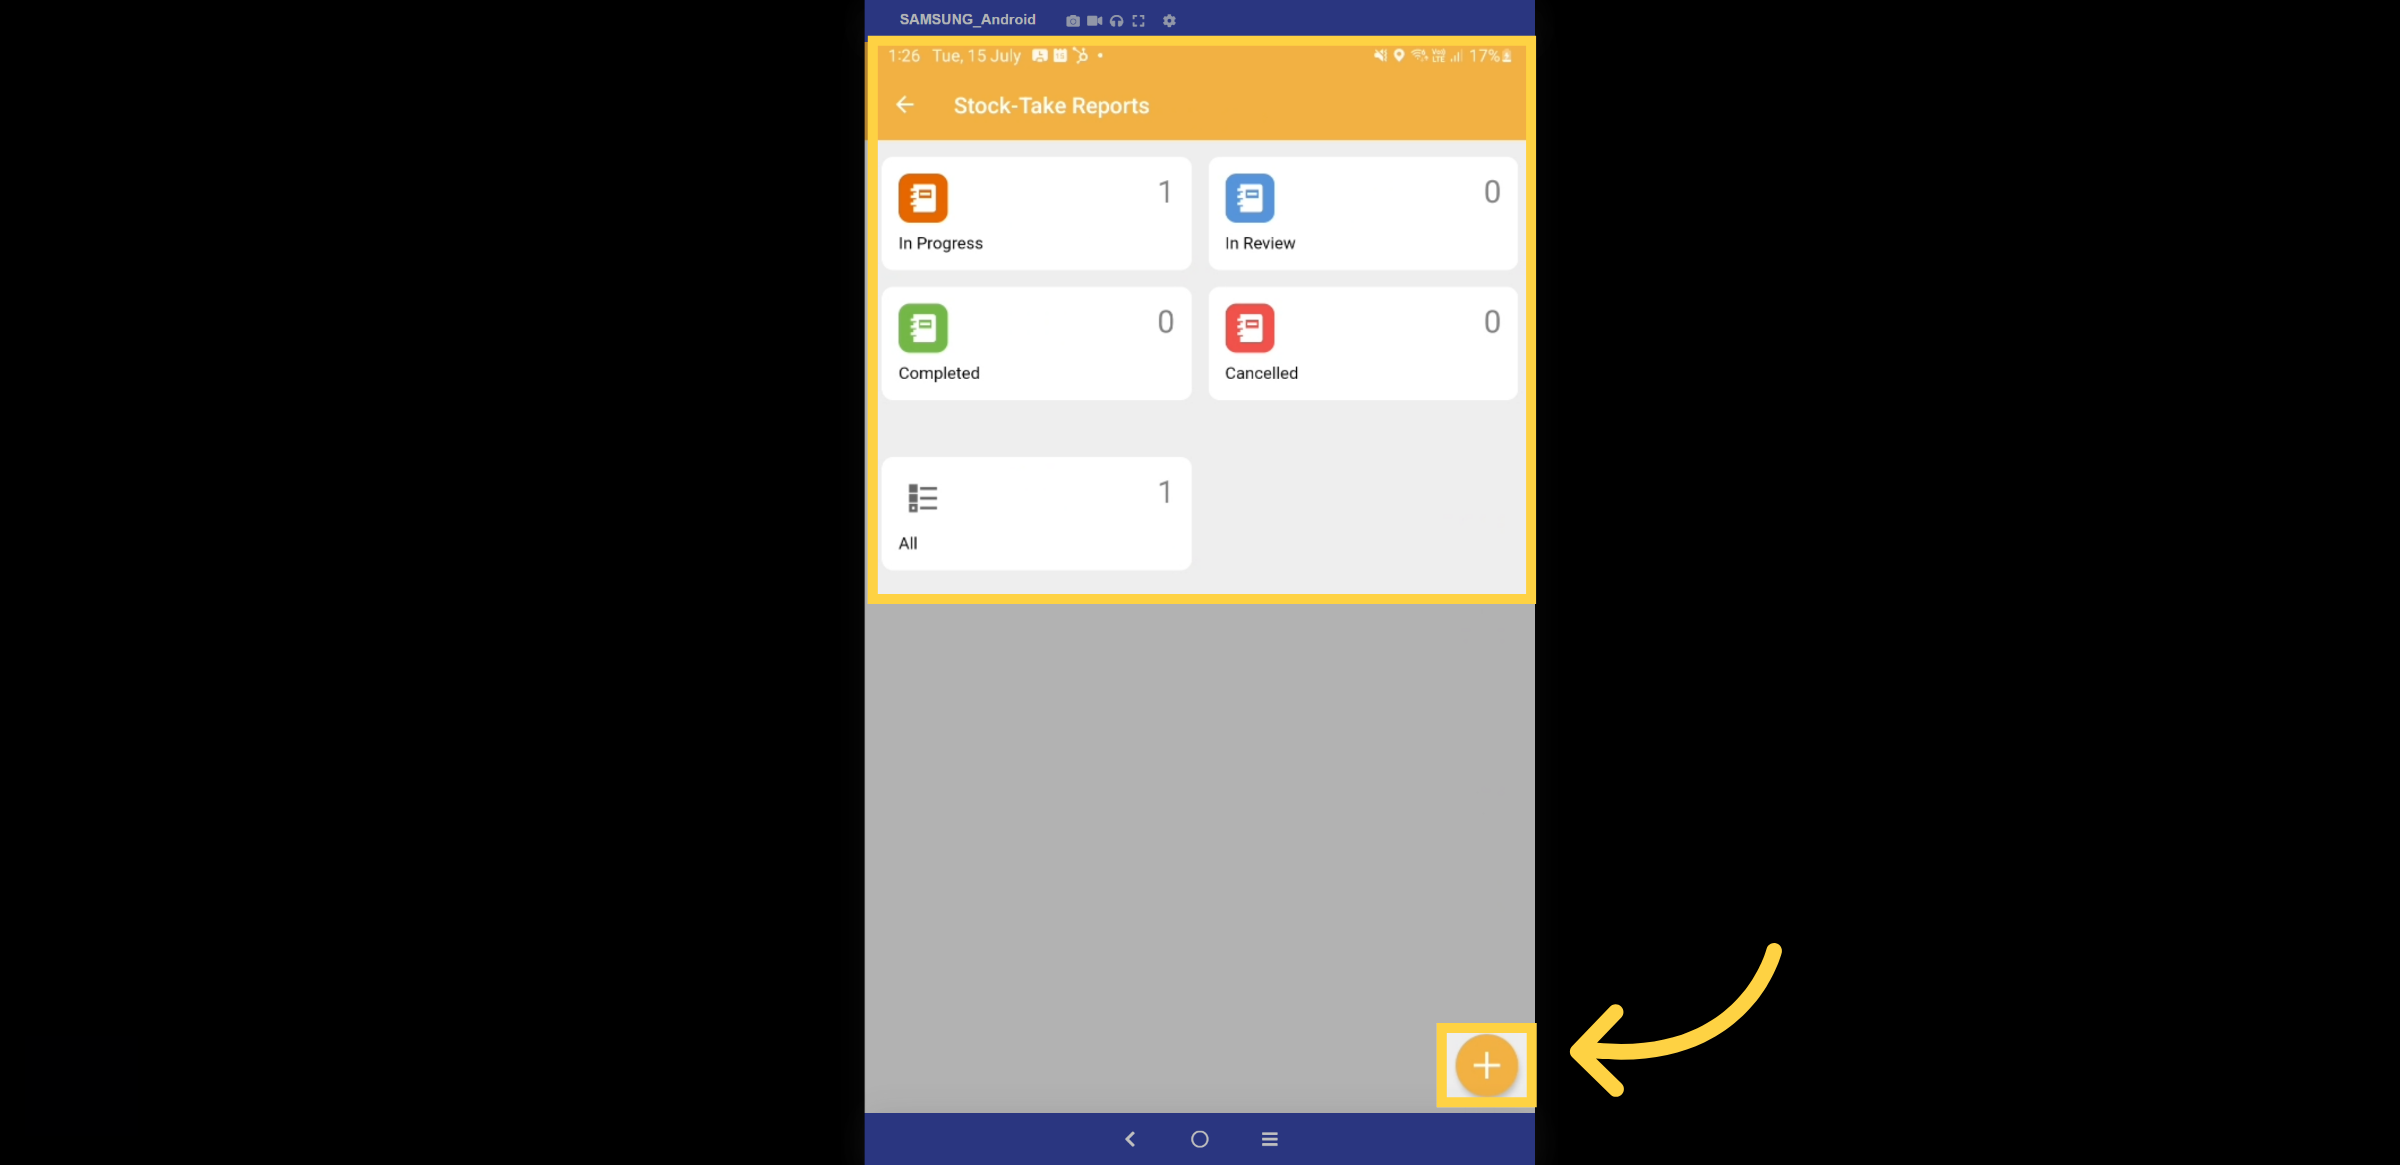
6. Report Dashboard
From the Report dashboard, you can view which stock-take reports are in progress, under review, completed, or canceled. The + icon enables you to create a new stock-take report.
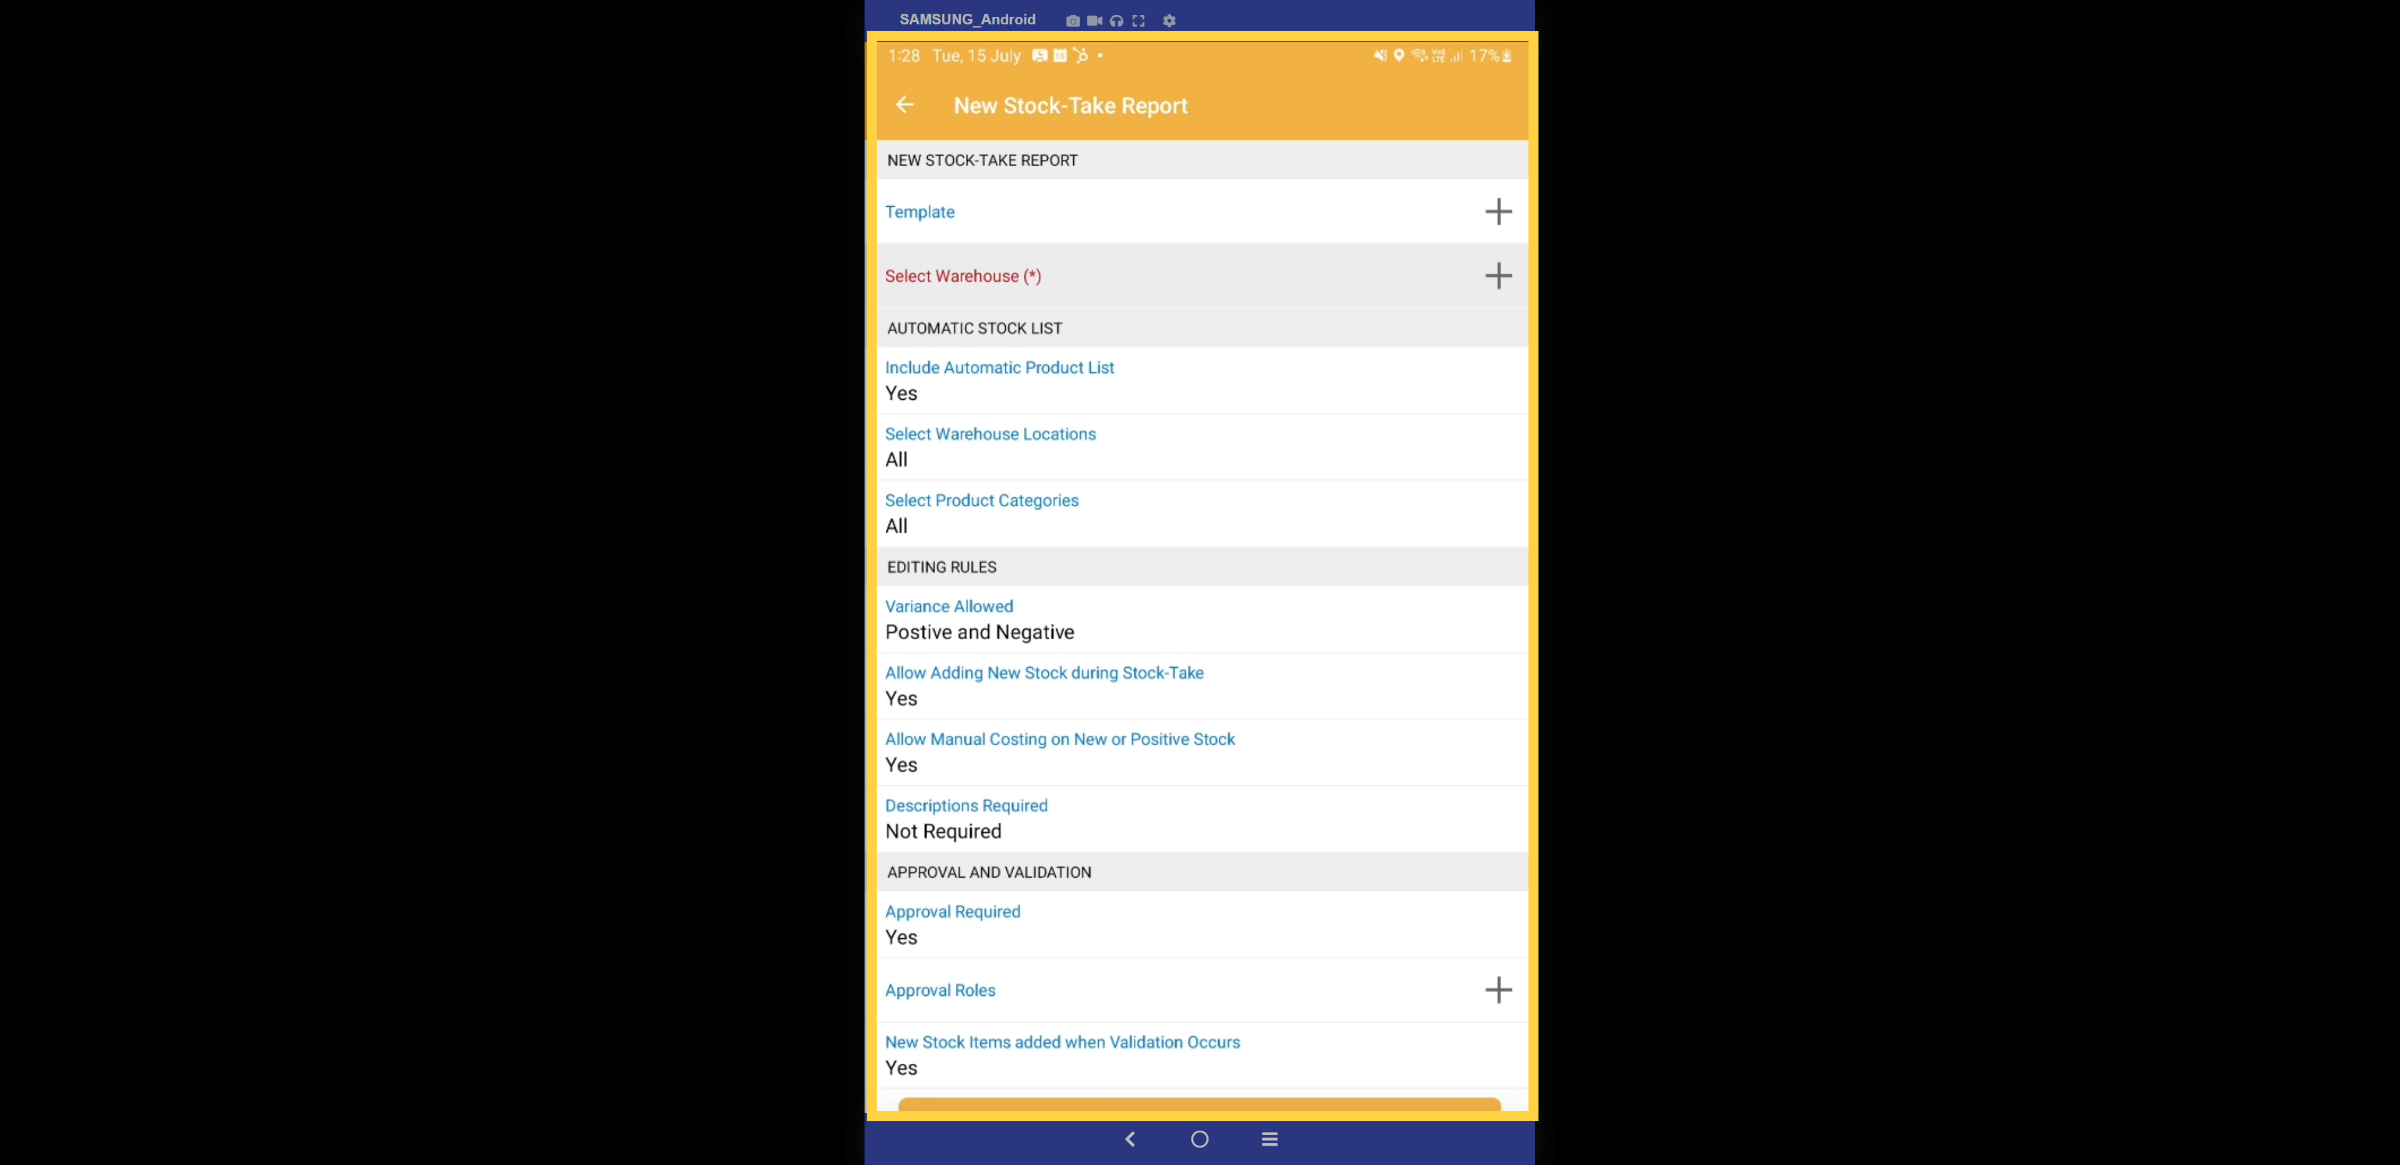
7. New Stock-take Report
When creating a new stock-take report, select an existing template and then choose the warehouse. Fill in and complete the form to begin recording the report.
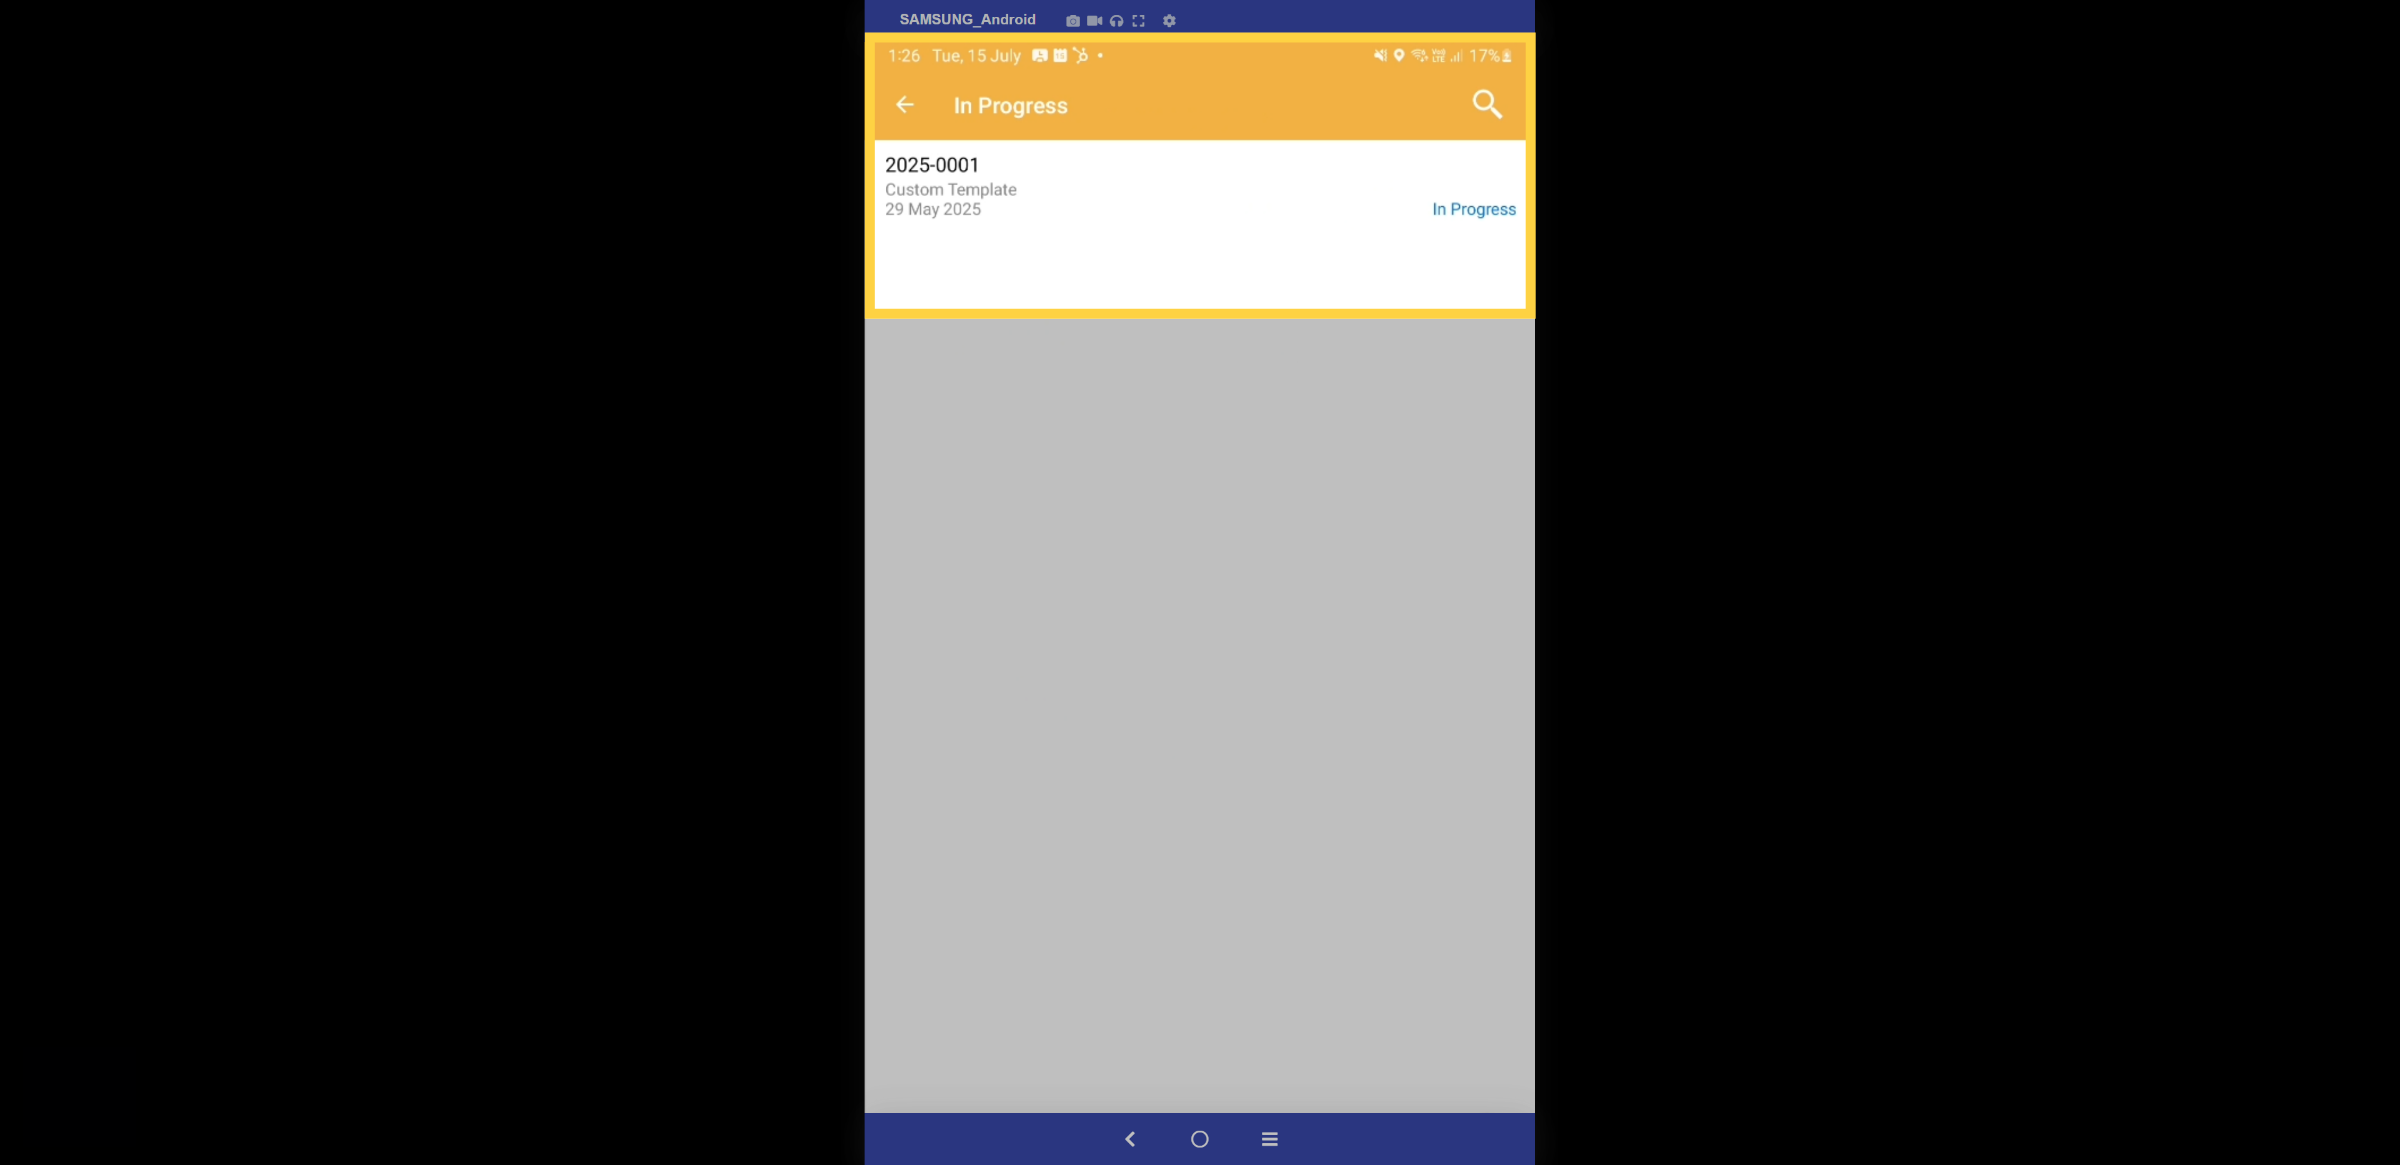
8. In Progress
Open the "In Progress" tab, so you can view the current stock take report along with the date it was started.
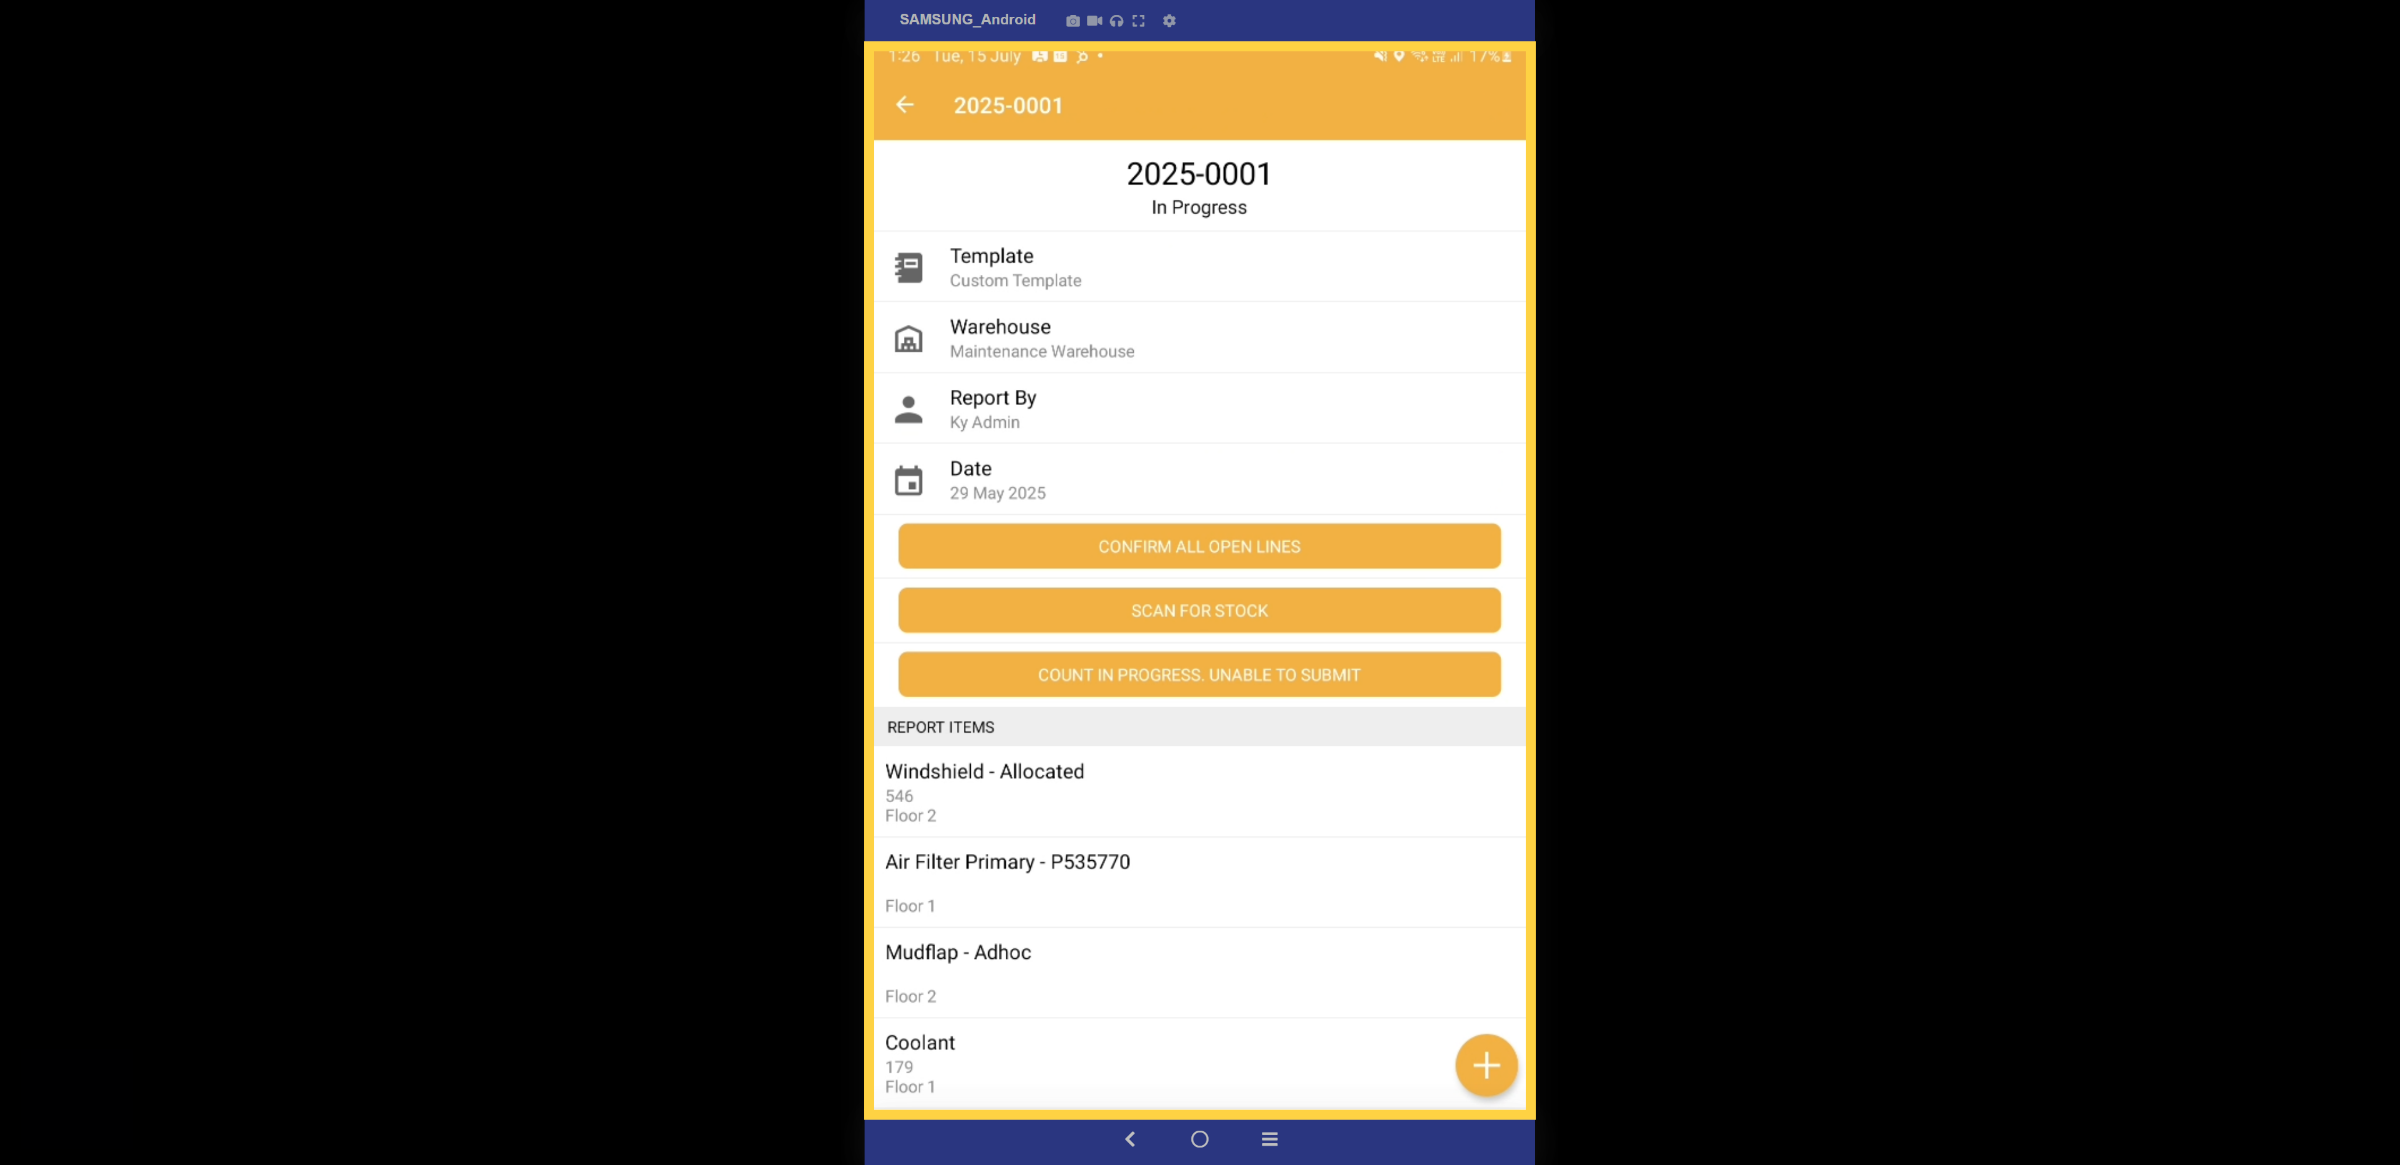
9. Stock-Take Report
In the report, you can view the products and items along with their respective locations. Please note that the report cannot be submitted until the stock count is completed. To scan a product, simply click the "Scan for Stock" button.
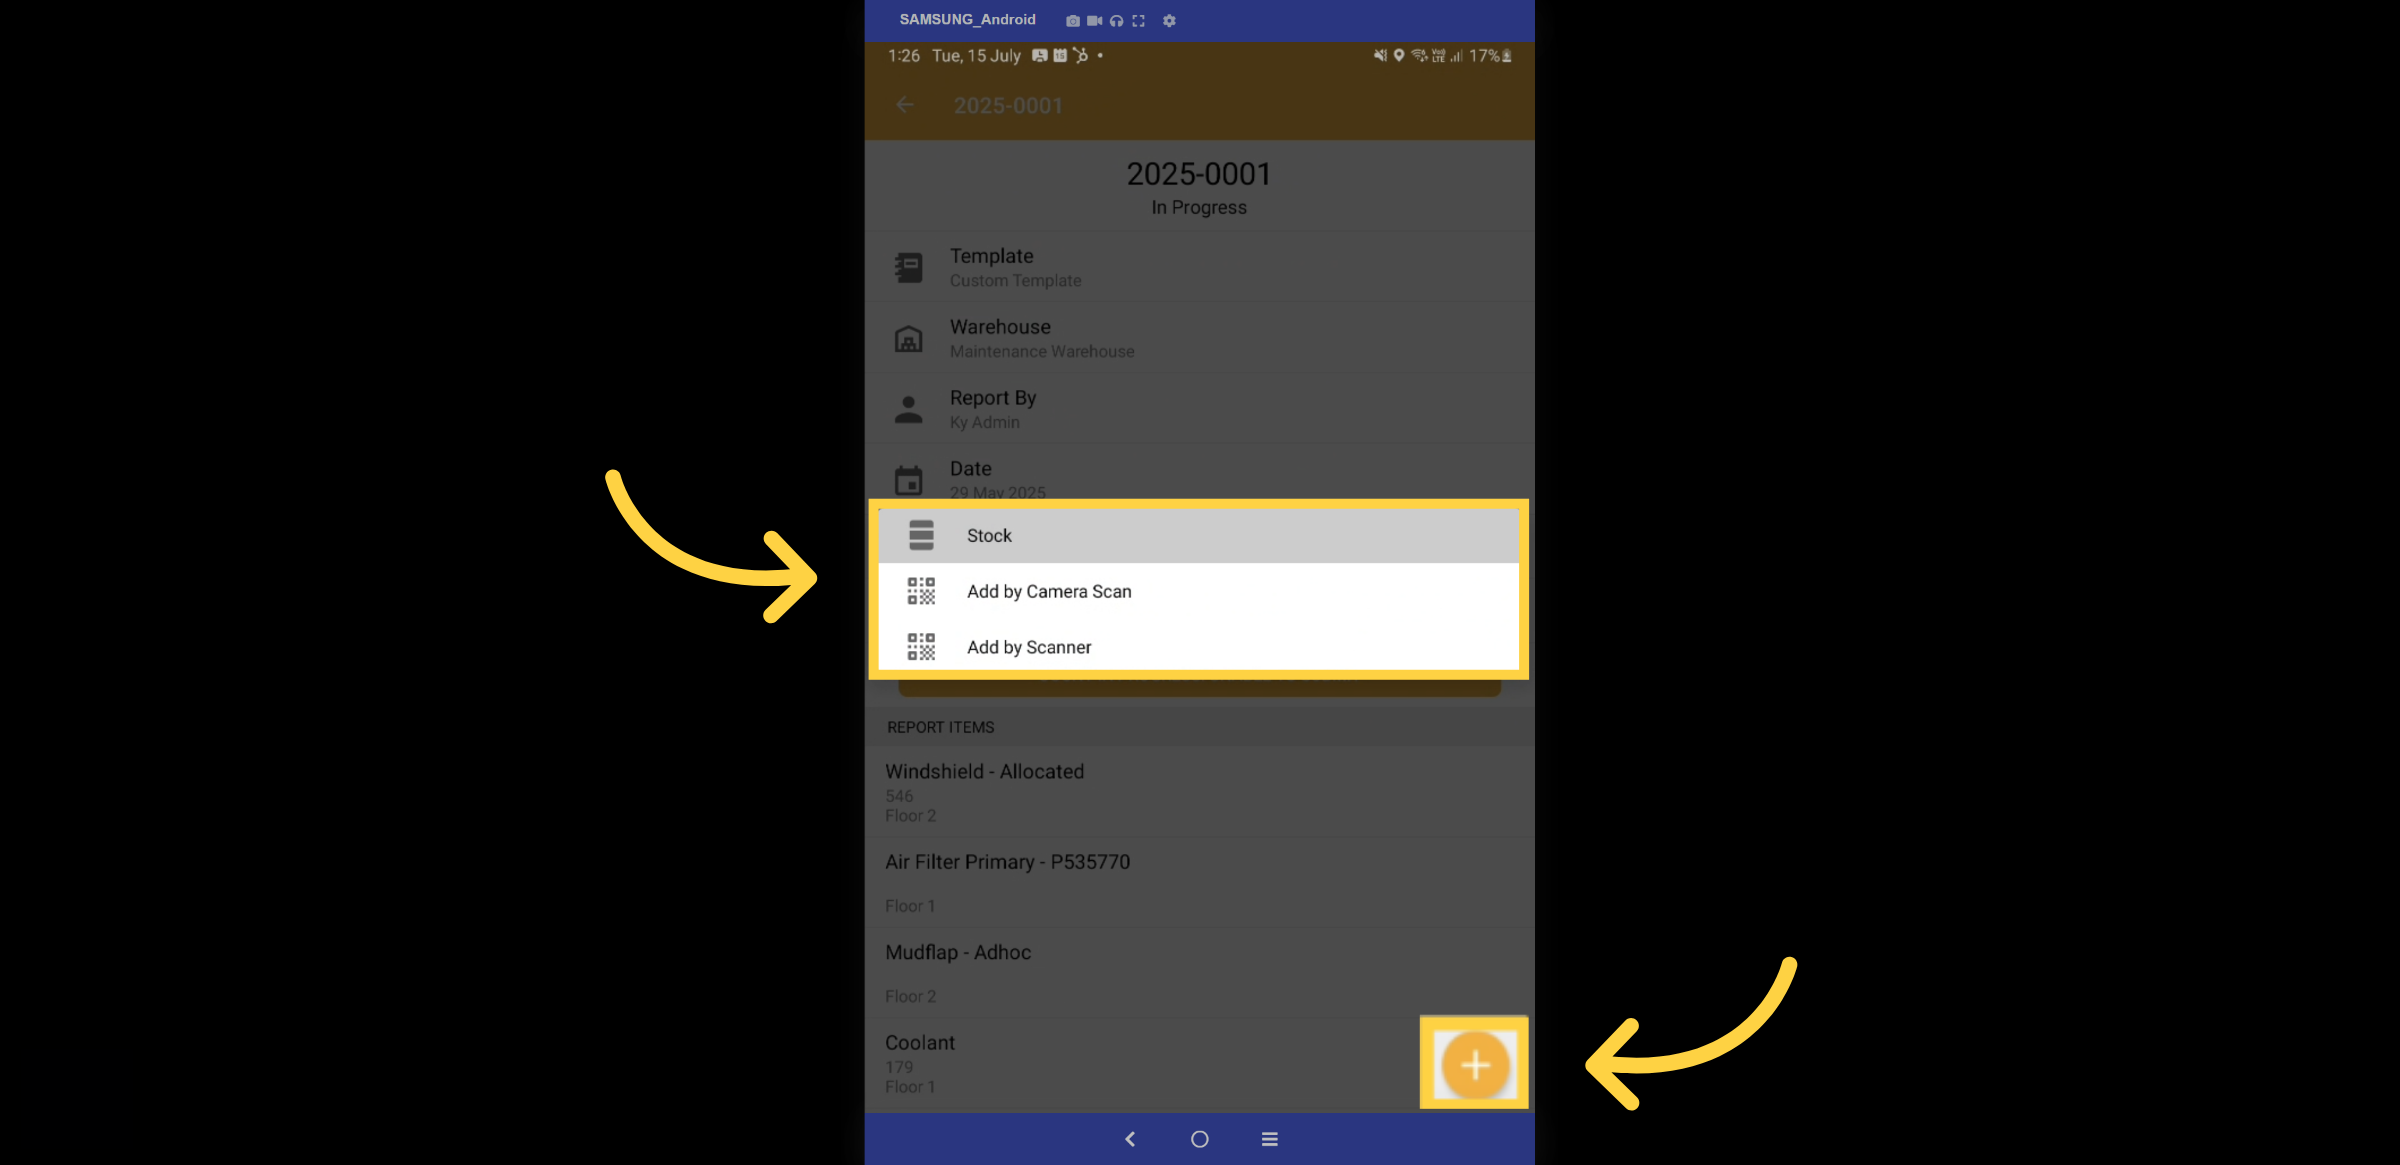
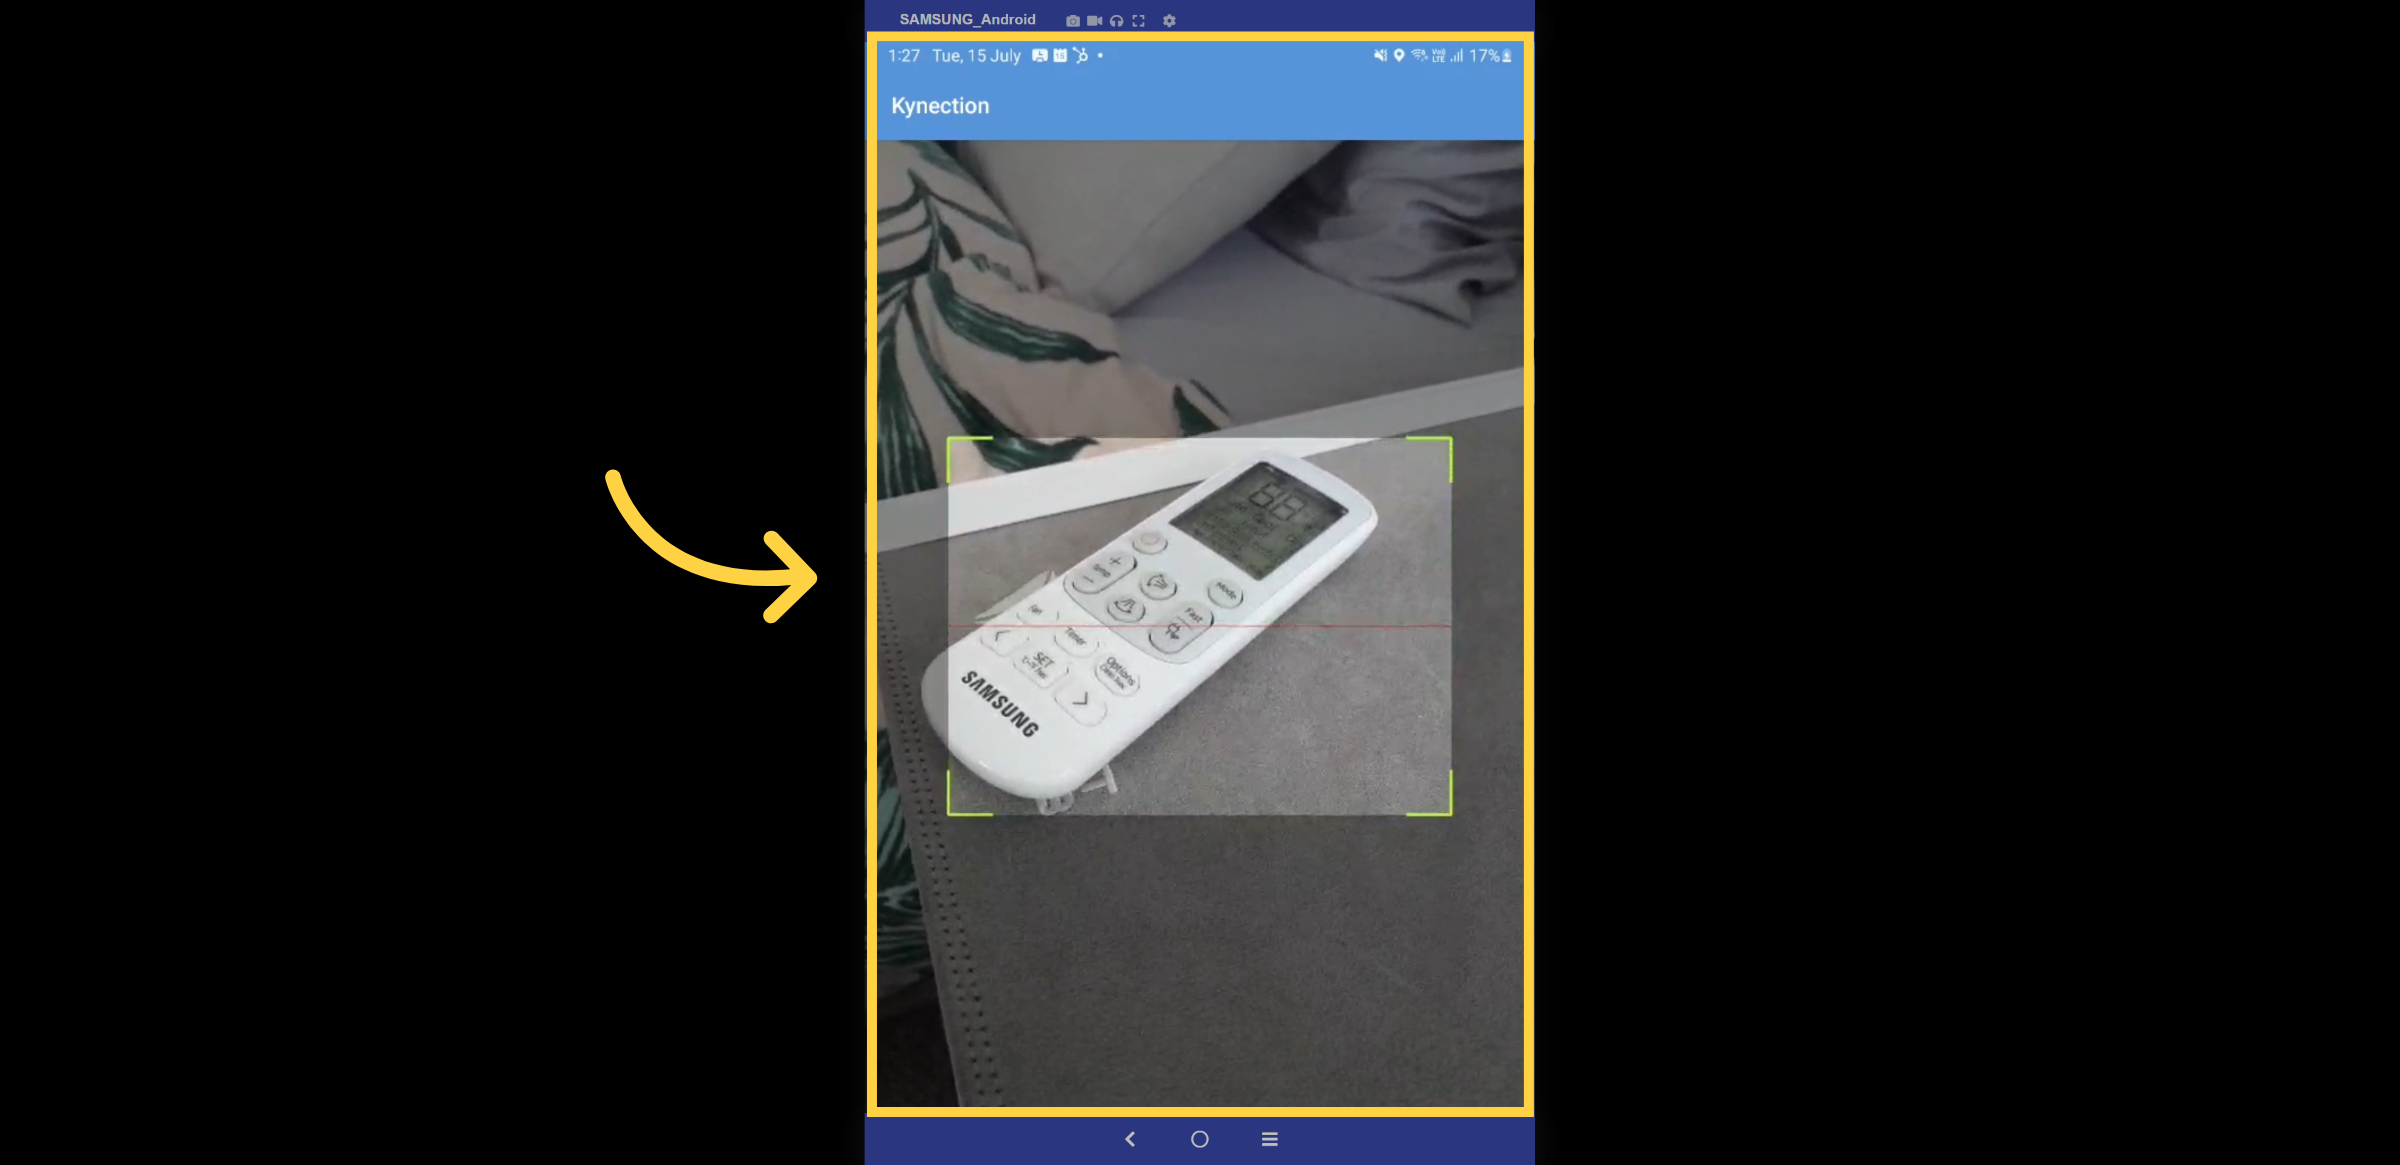
10. Device Scanner
You can choose to scan the item using either a camera scan or a barcode reader device. To add stock select the + Icon.
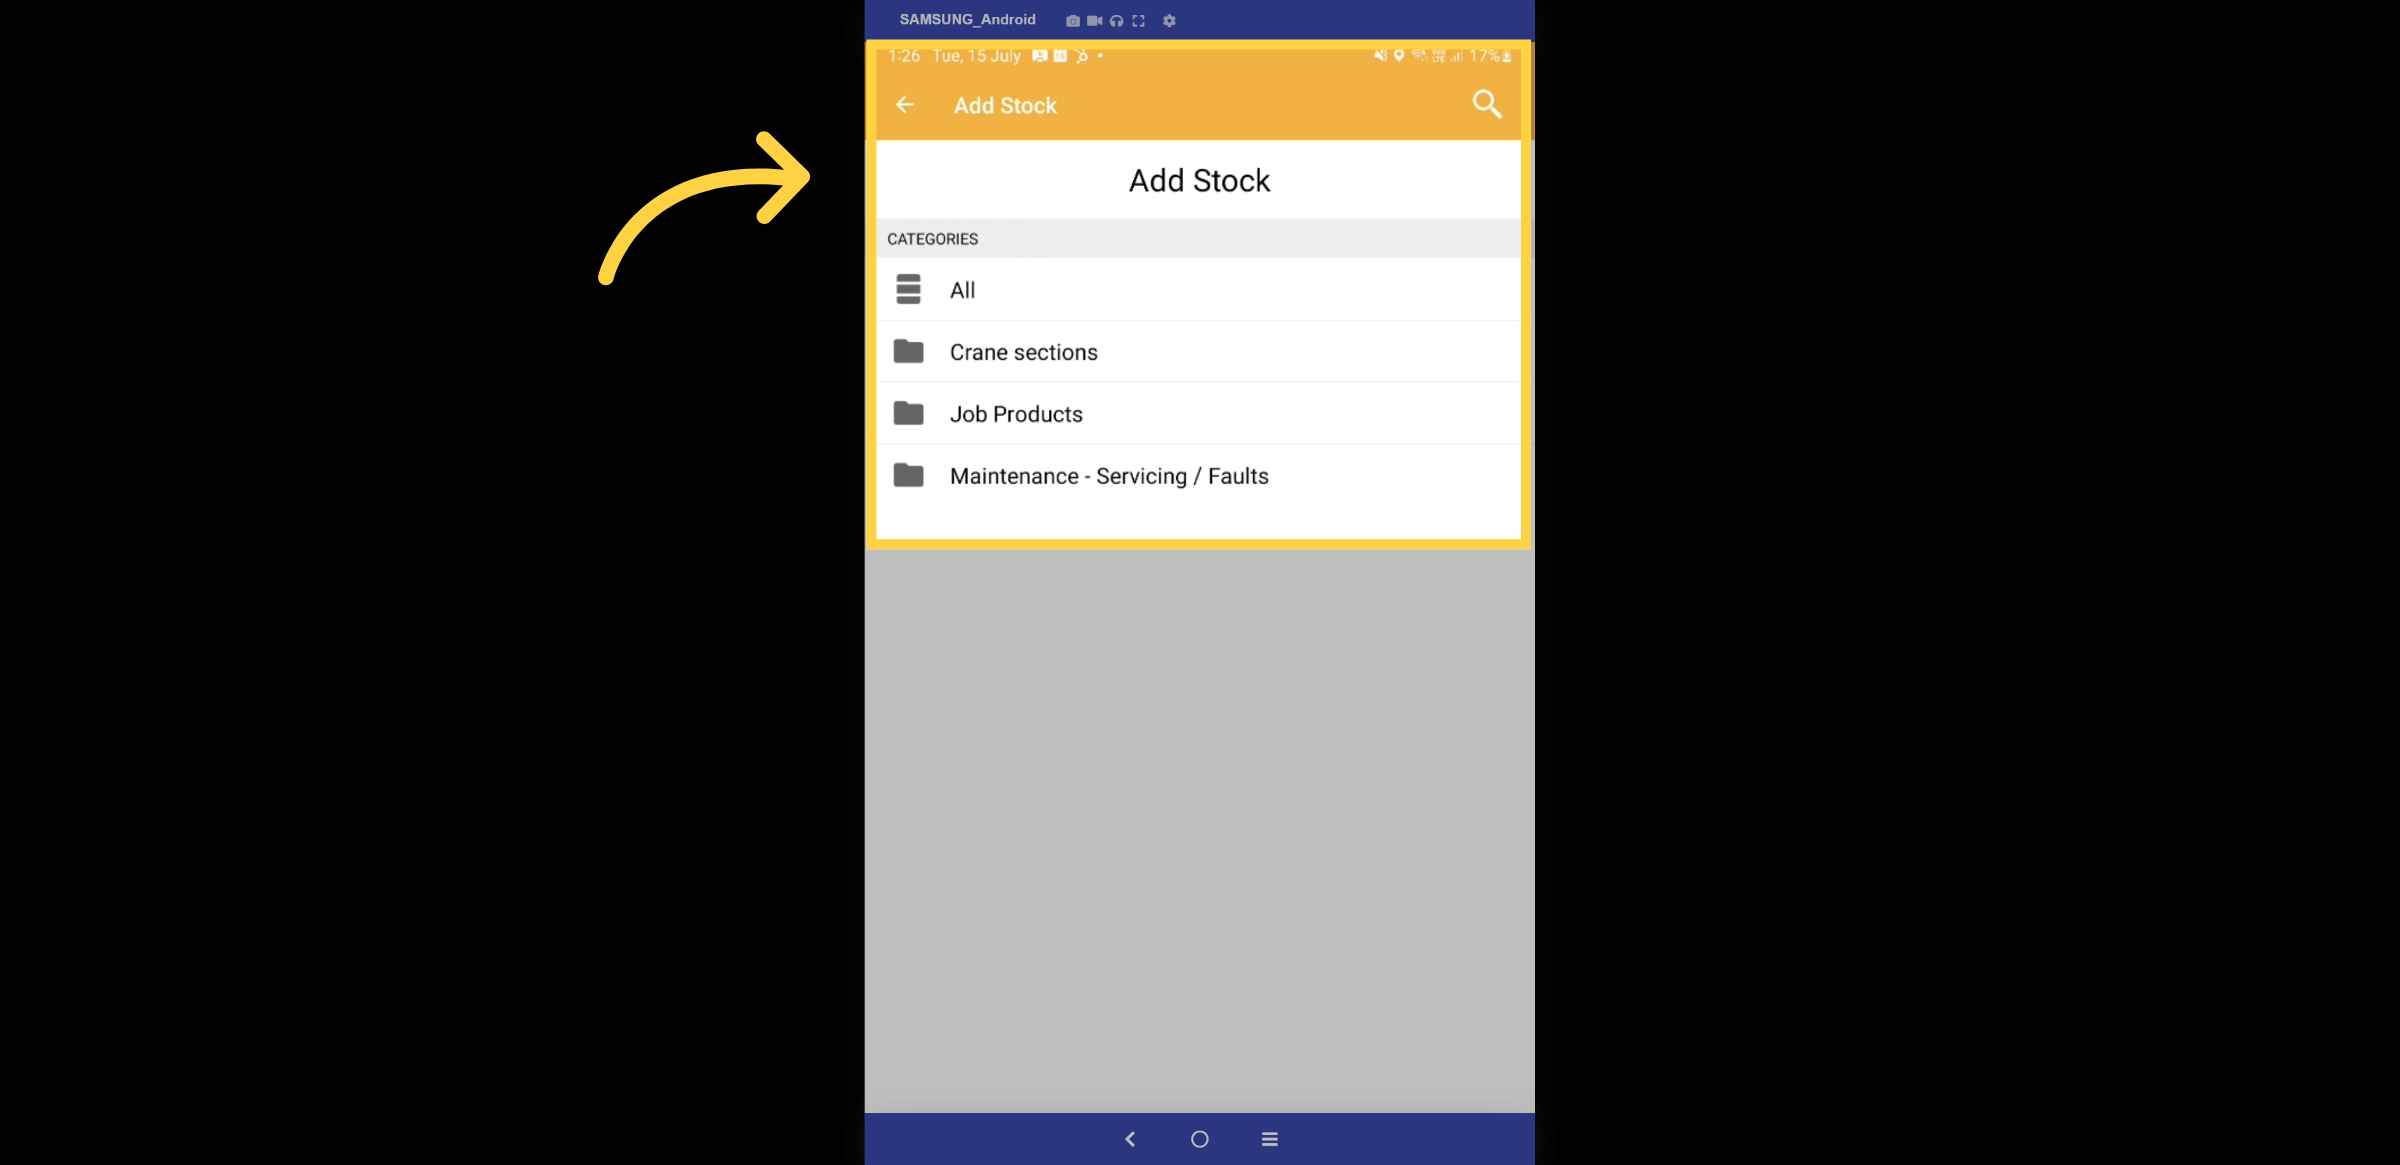
11. Add Stock
Folder categories are created in the web version and will be represented here. Select a folder to add stock.
12. Product Item
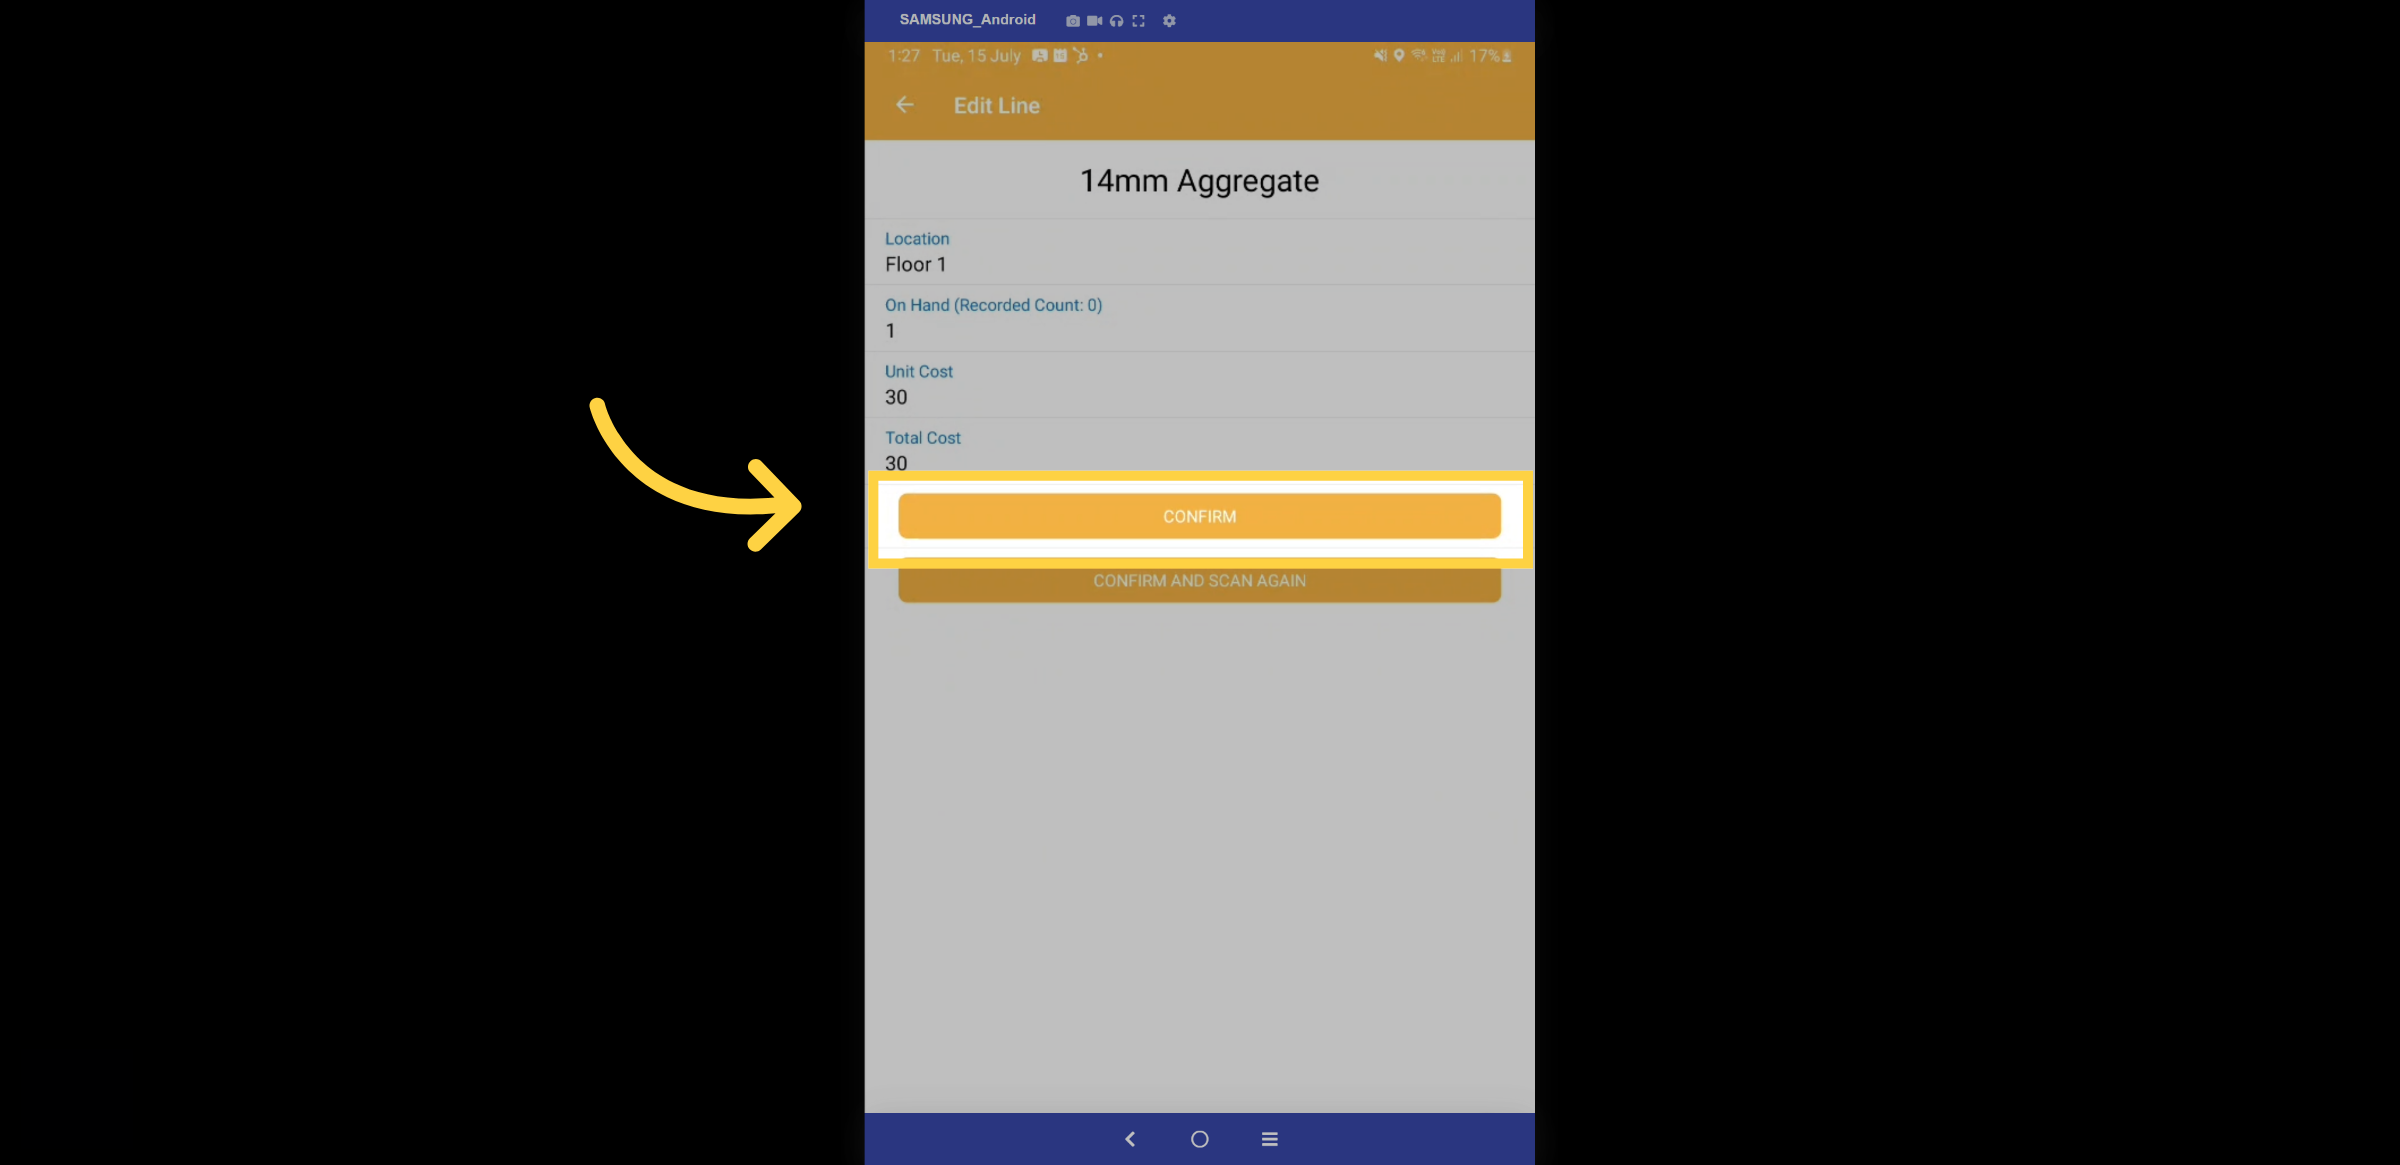
Once the stock item is selected, fill in the details by adding the location and recorded count. The unit cost will be populated automatically.
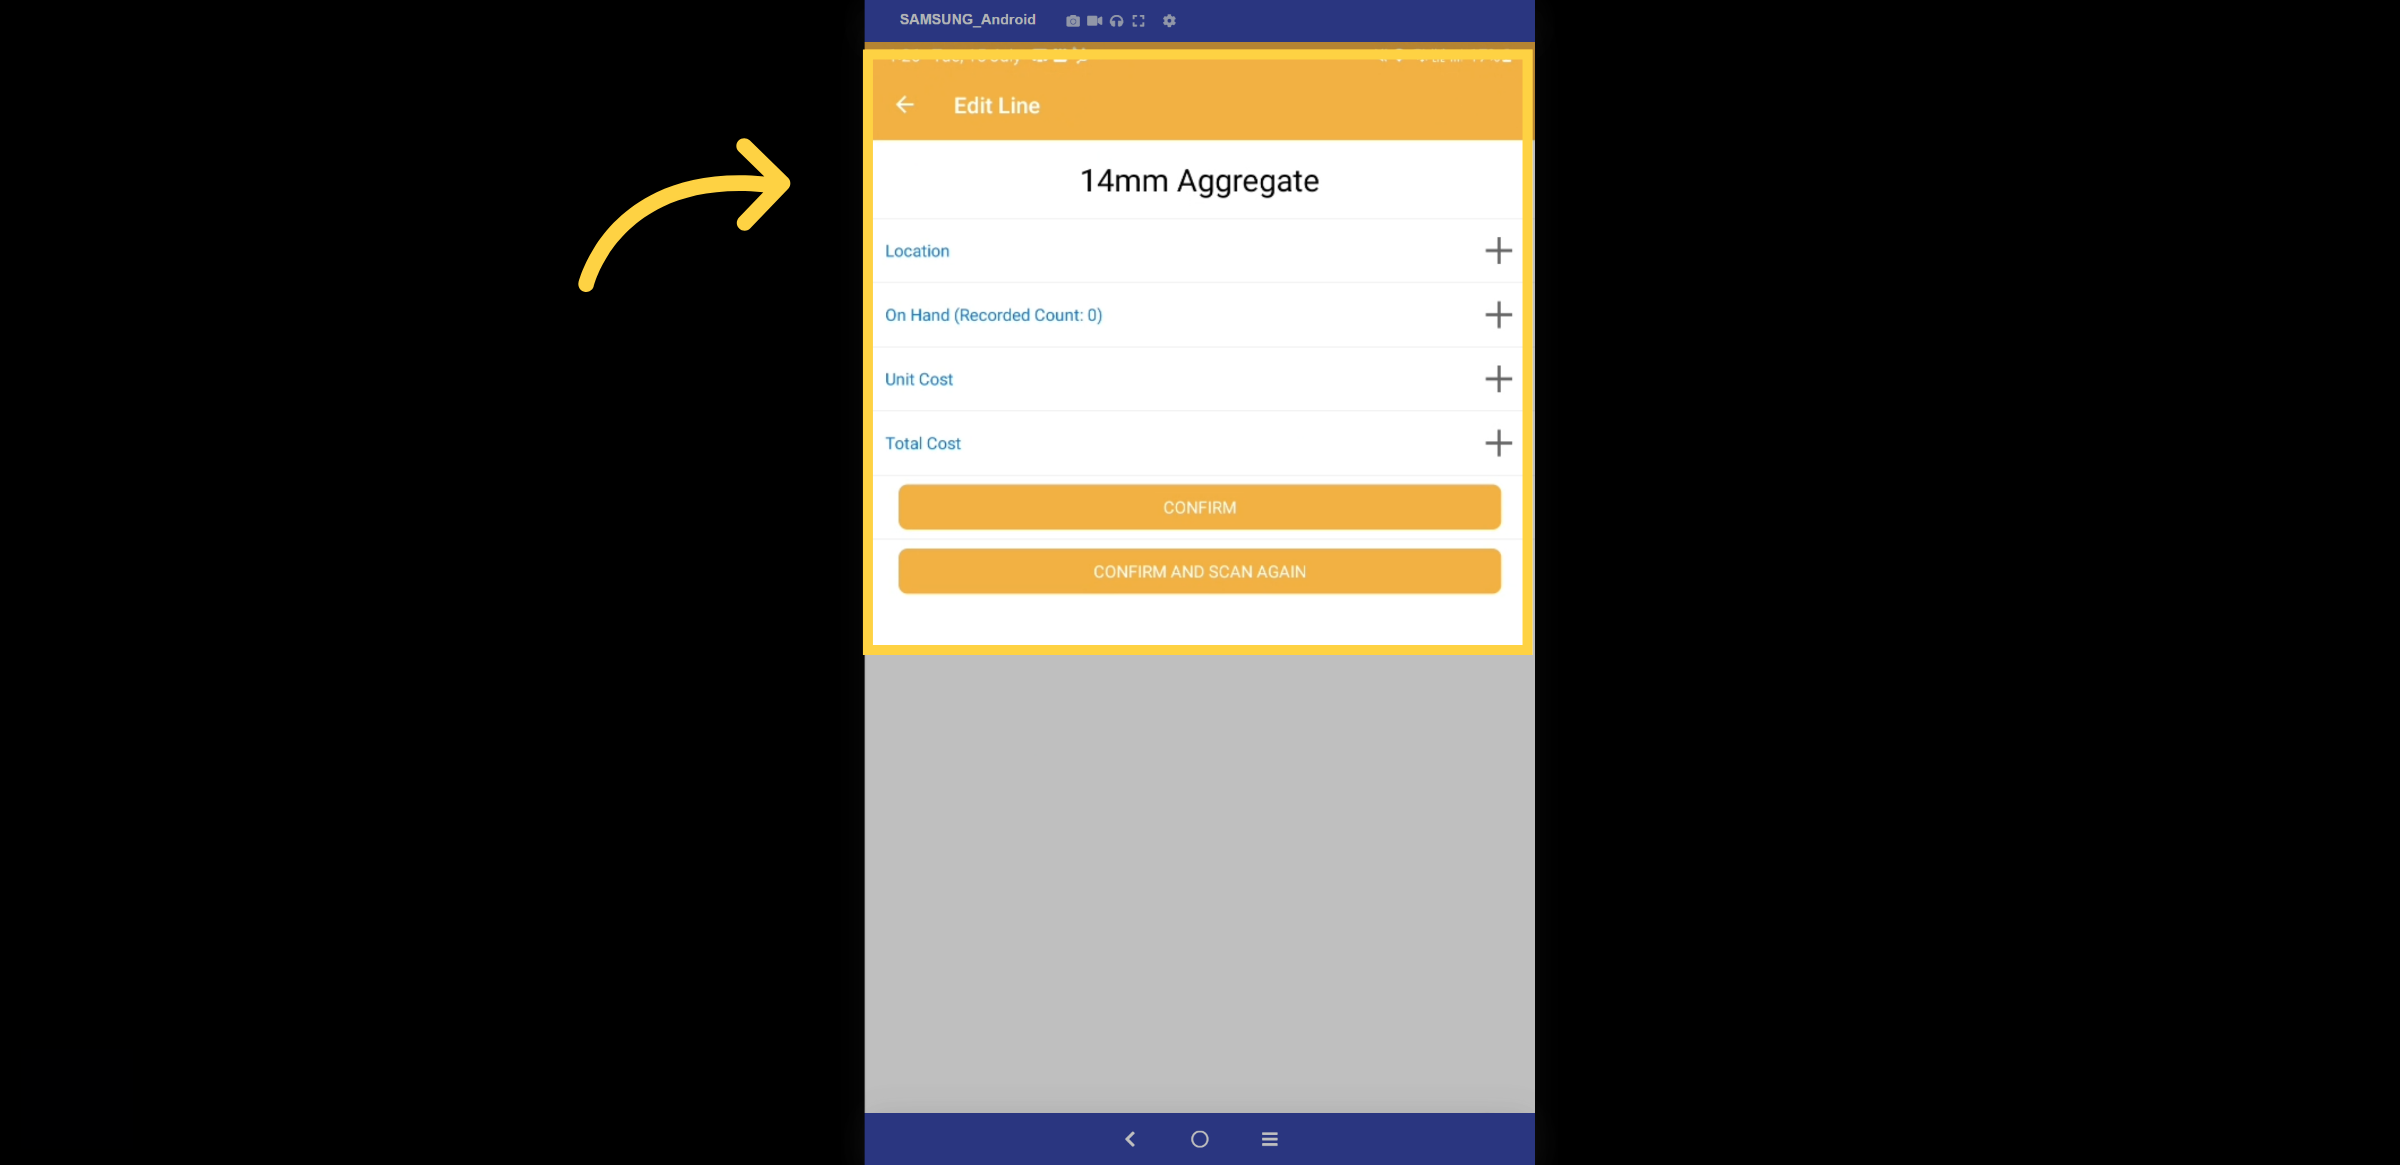
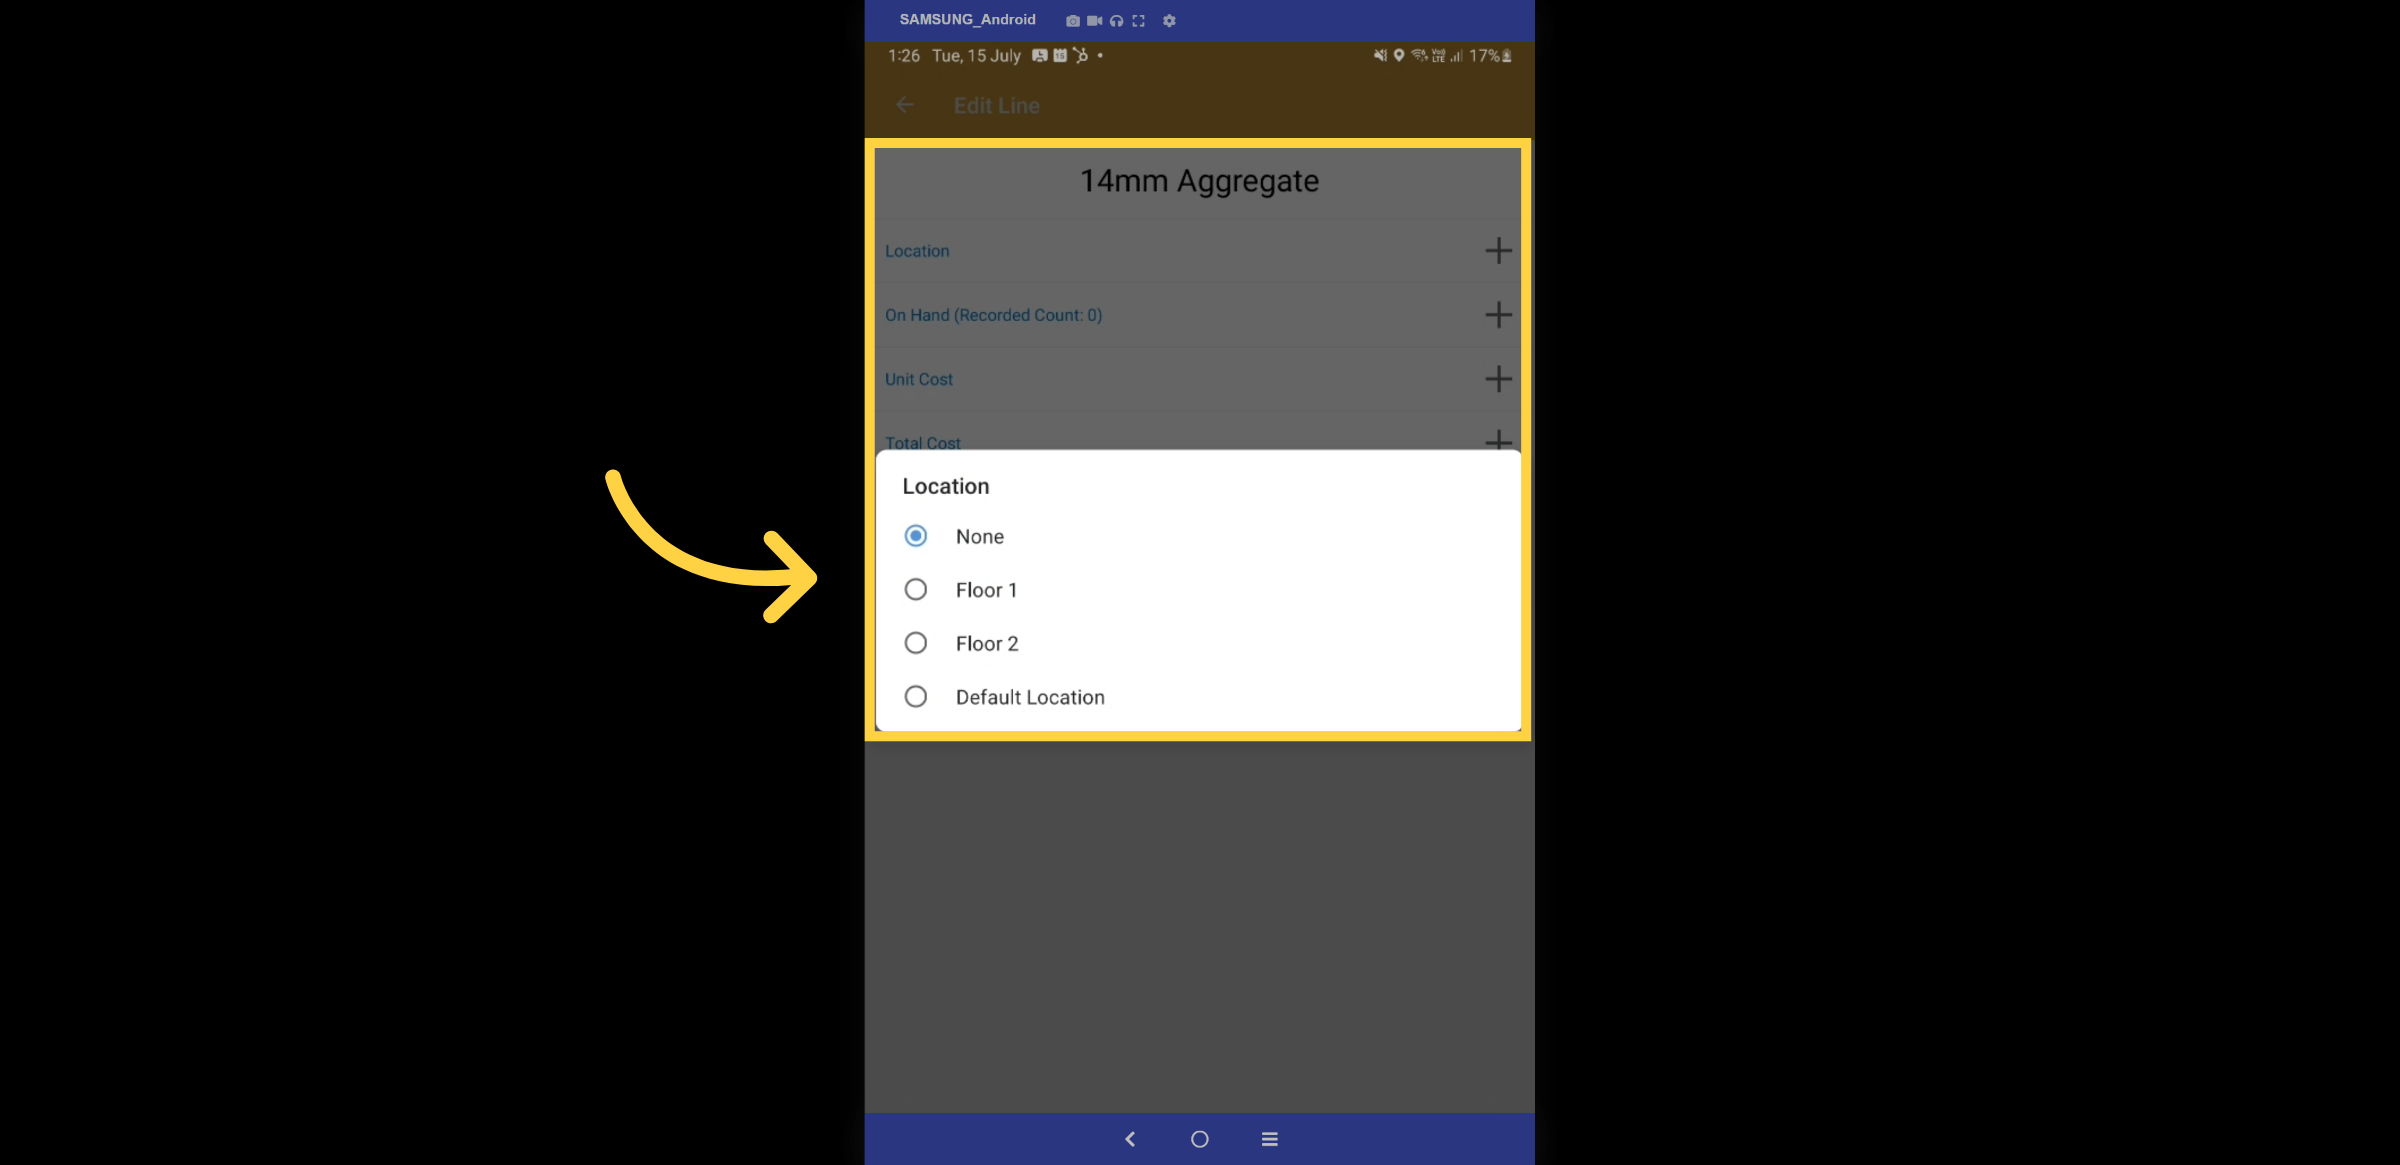
13. Location
Select from the list of warehouse locations in the pop-up box.
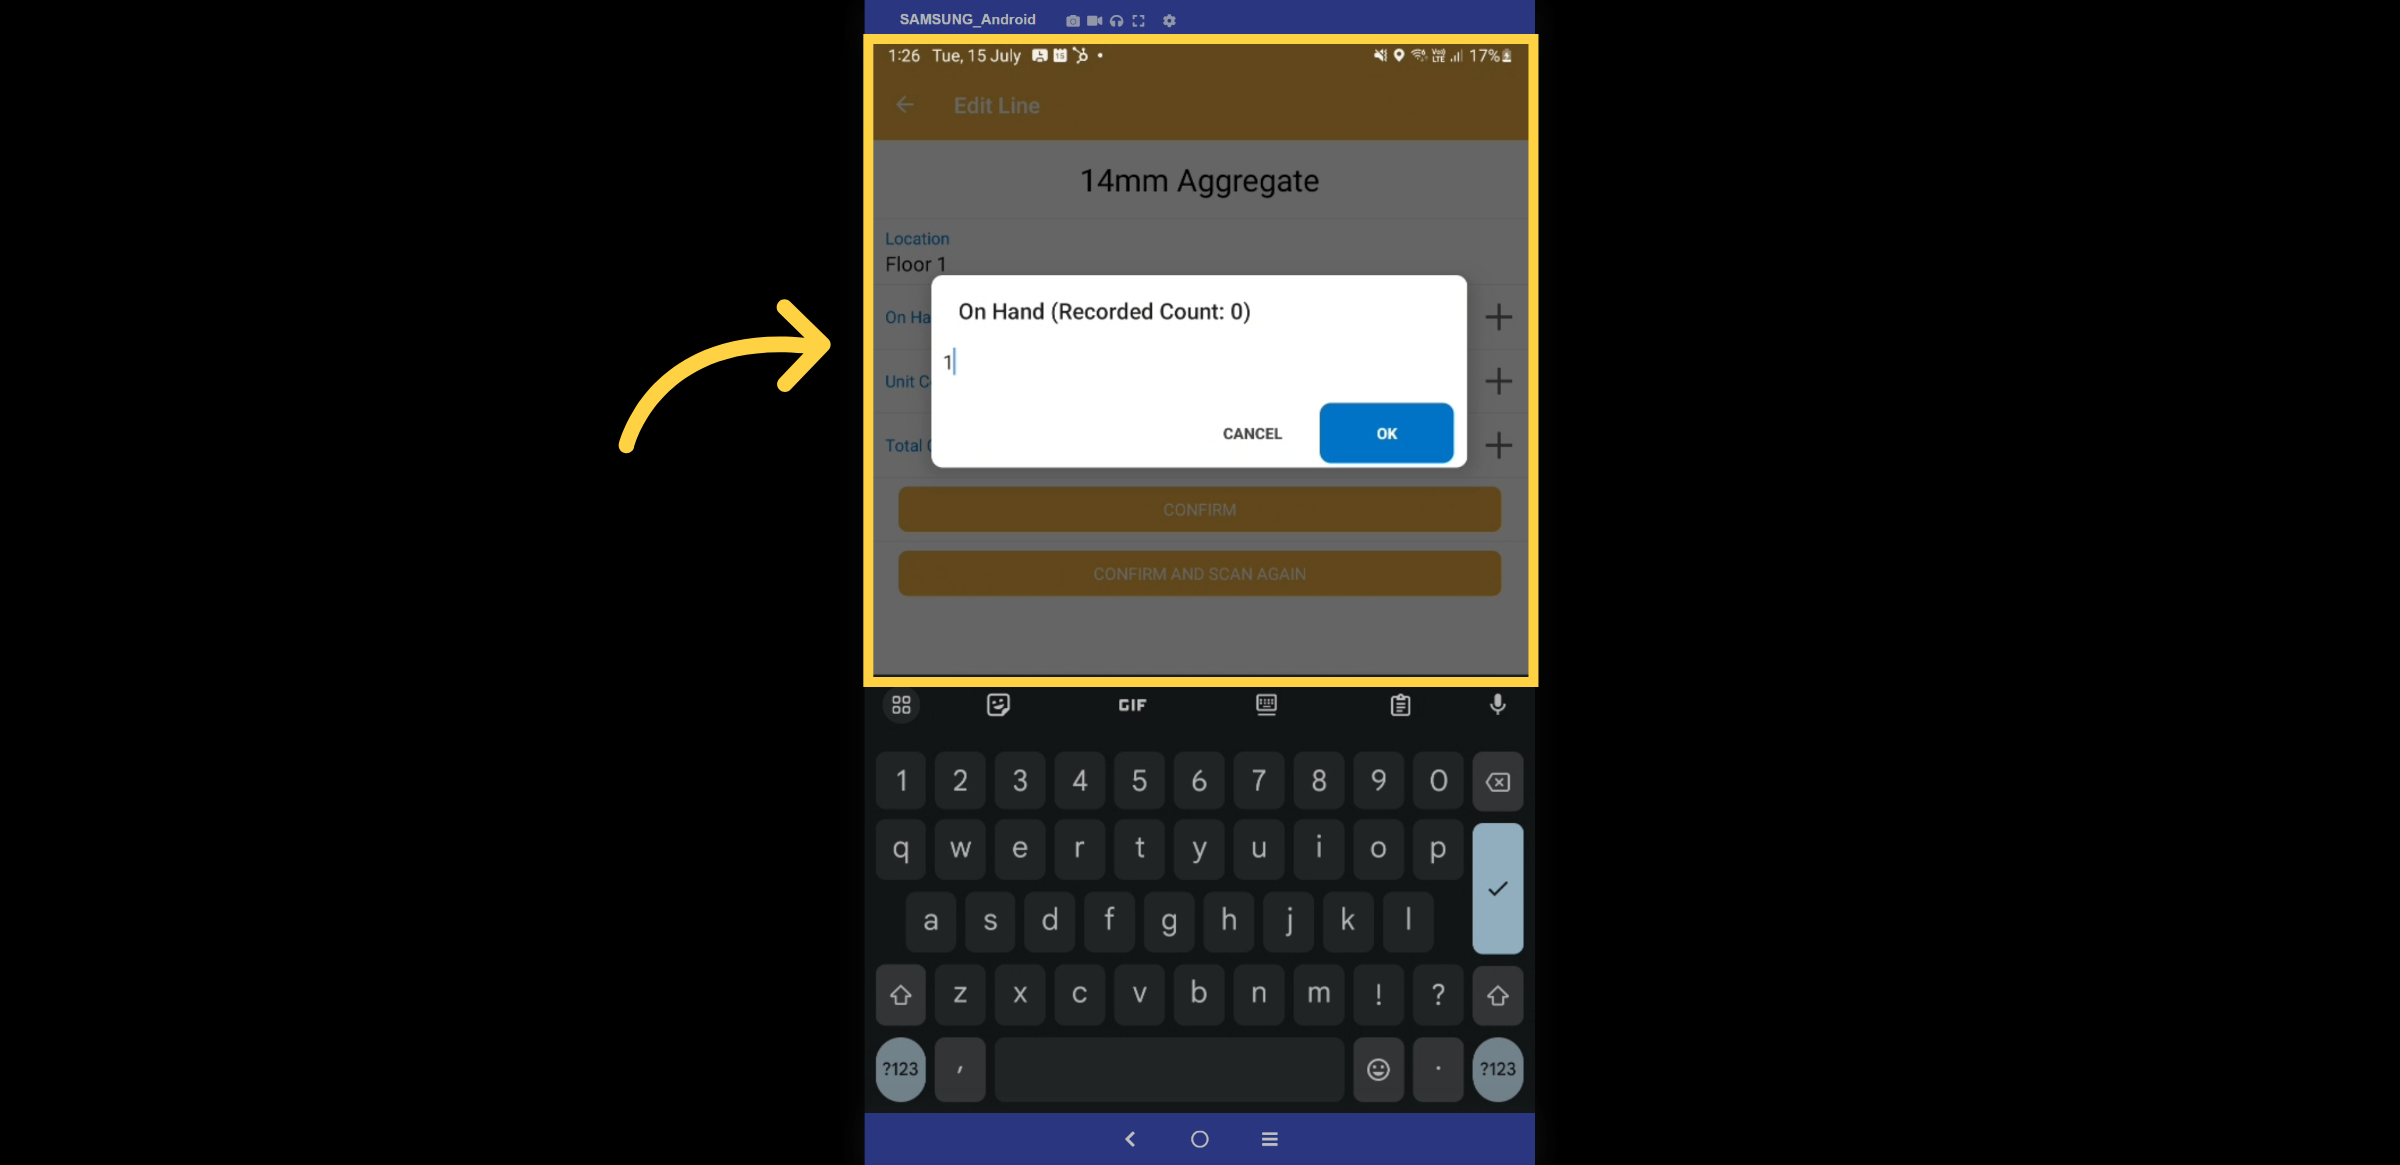
14. Record Count
The field for "On Hand" open a pop-up box to enter the recorded count of stock items.
15. Confirm
Review the details entered are correct and then confirm the changes.
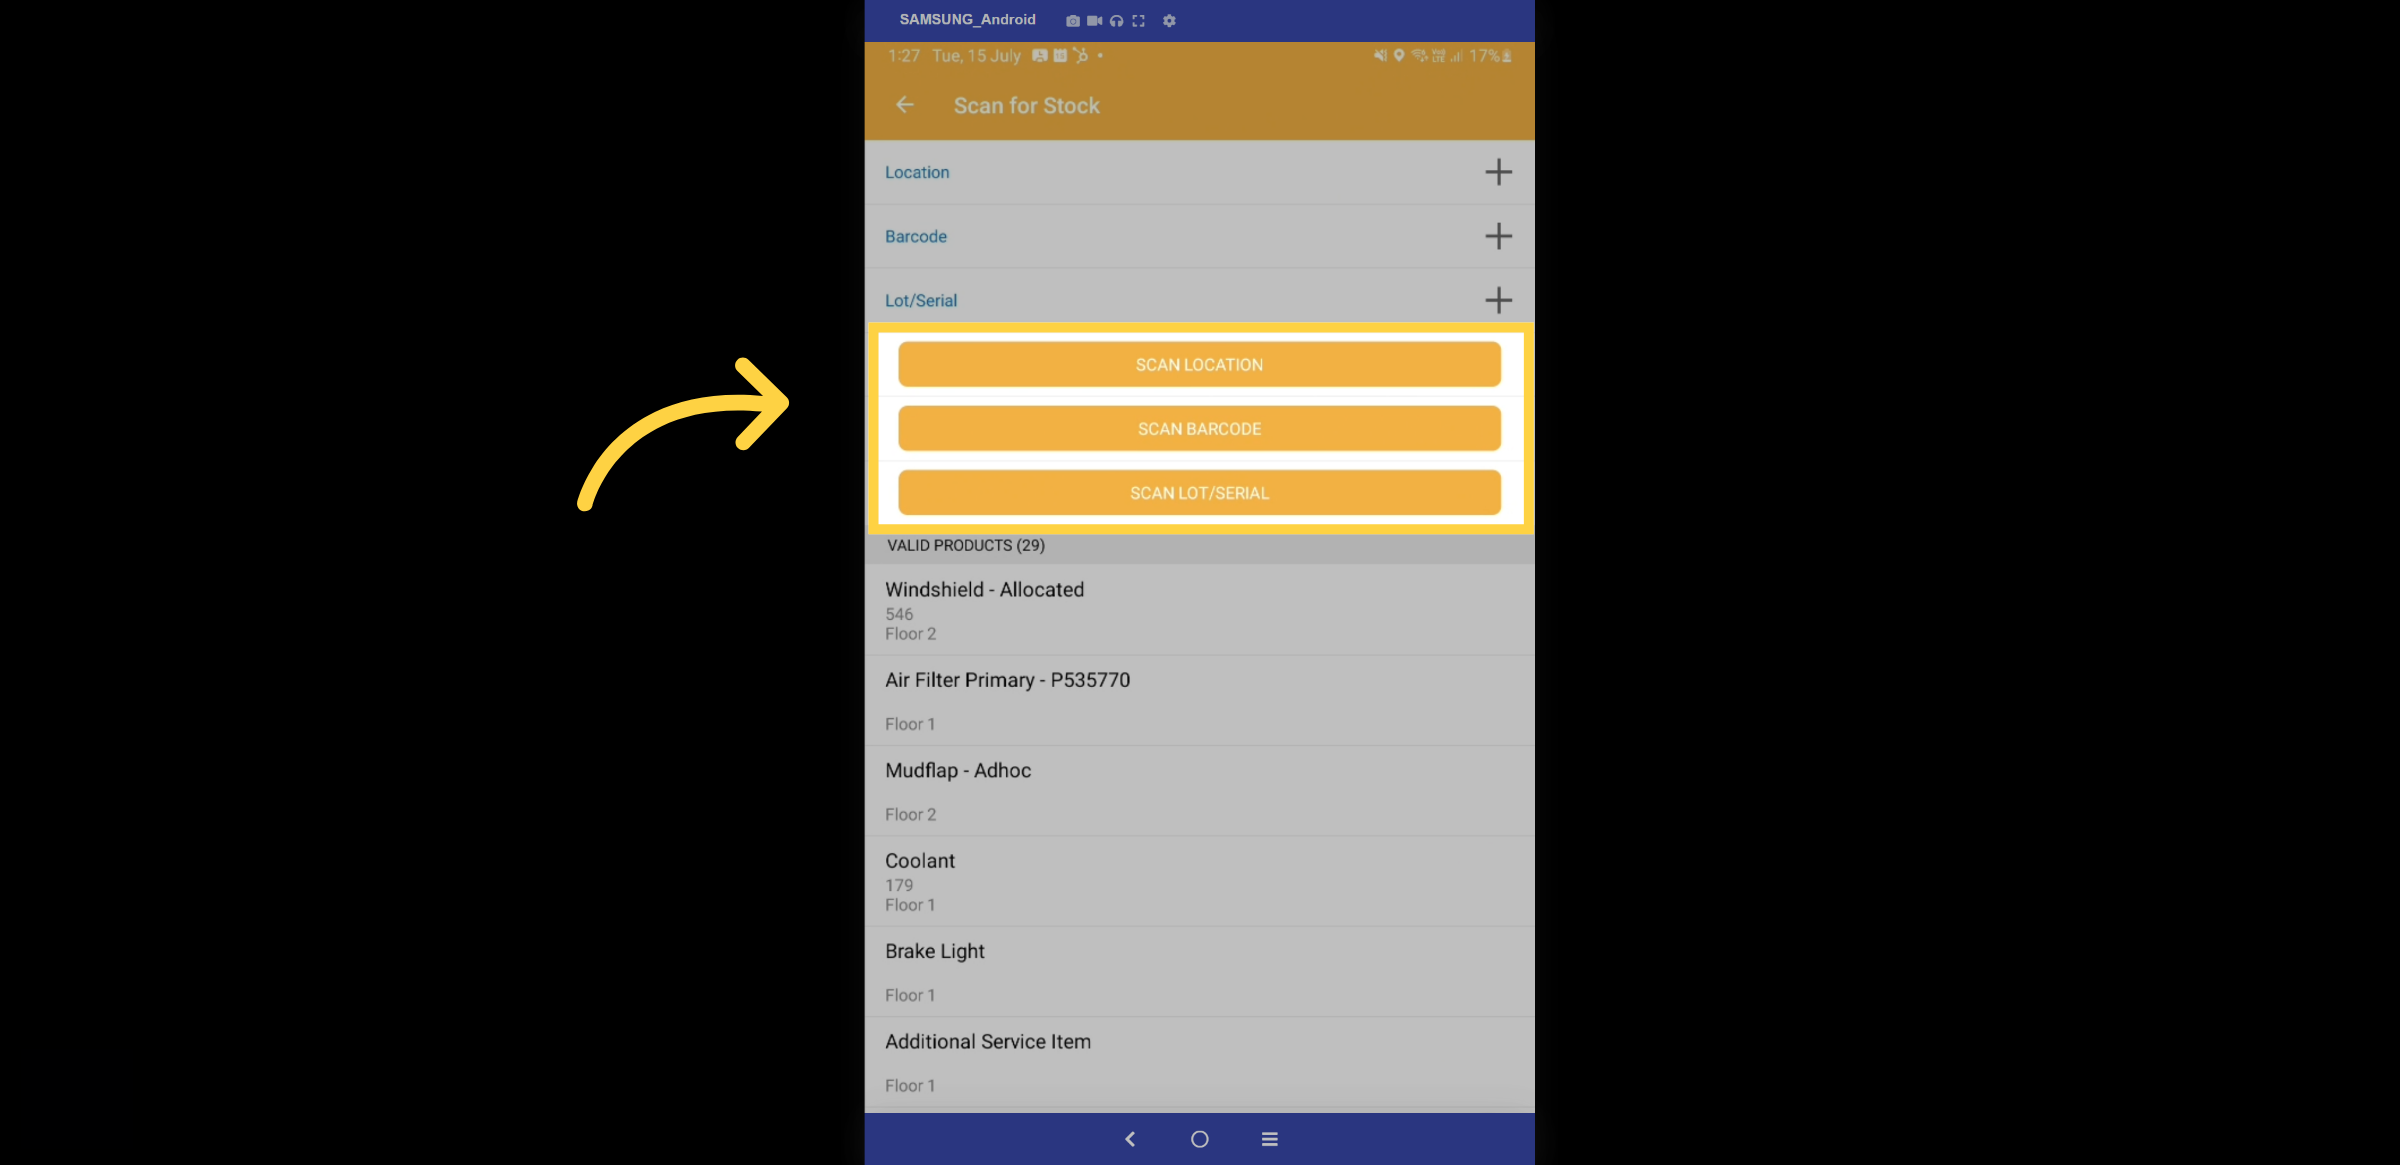
16. Scan options
Scanning can be configured against stock Location, Barcode, or Lot. Select the preferred option to get started.
17. Scan Barcode
Scan the barcode, QR code, or serial number with your device to bring up the stock details.
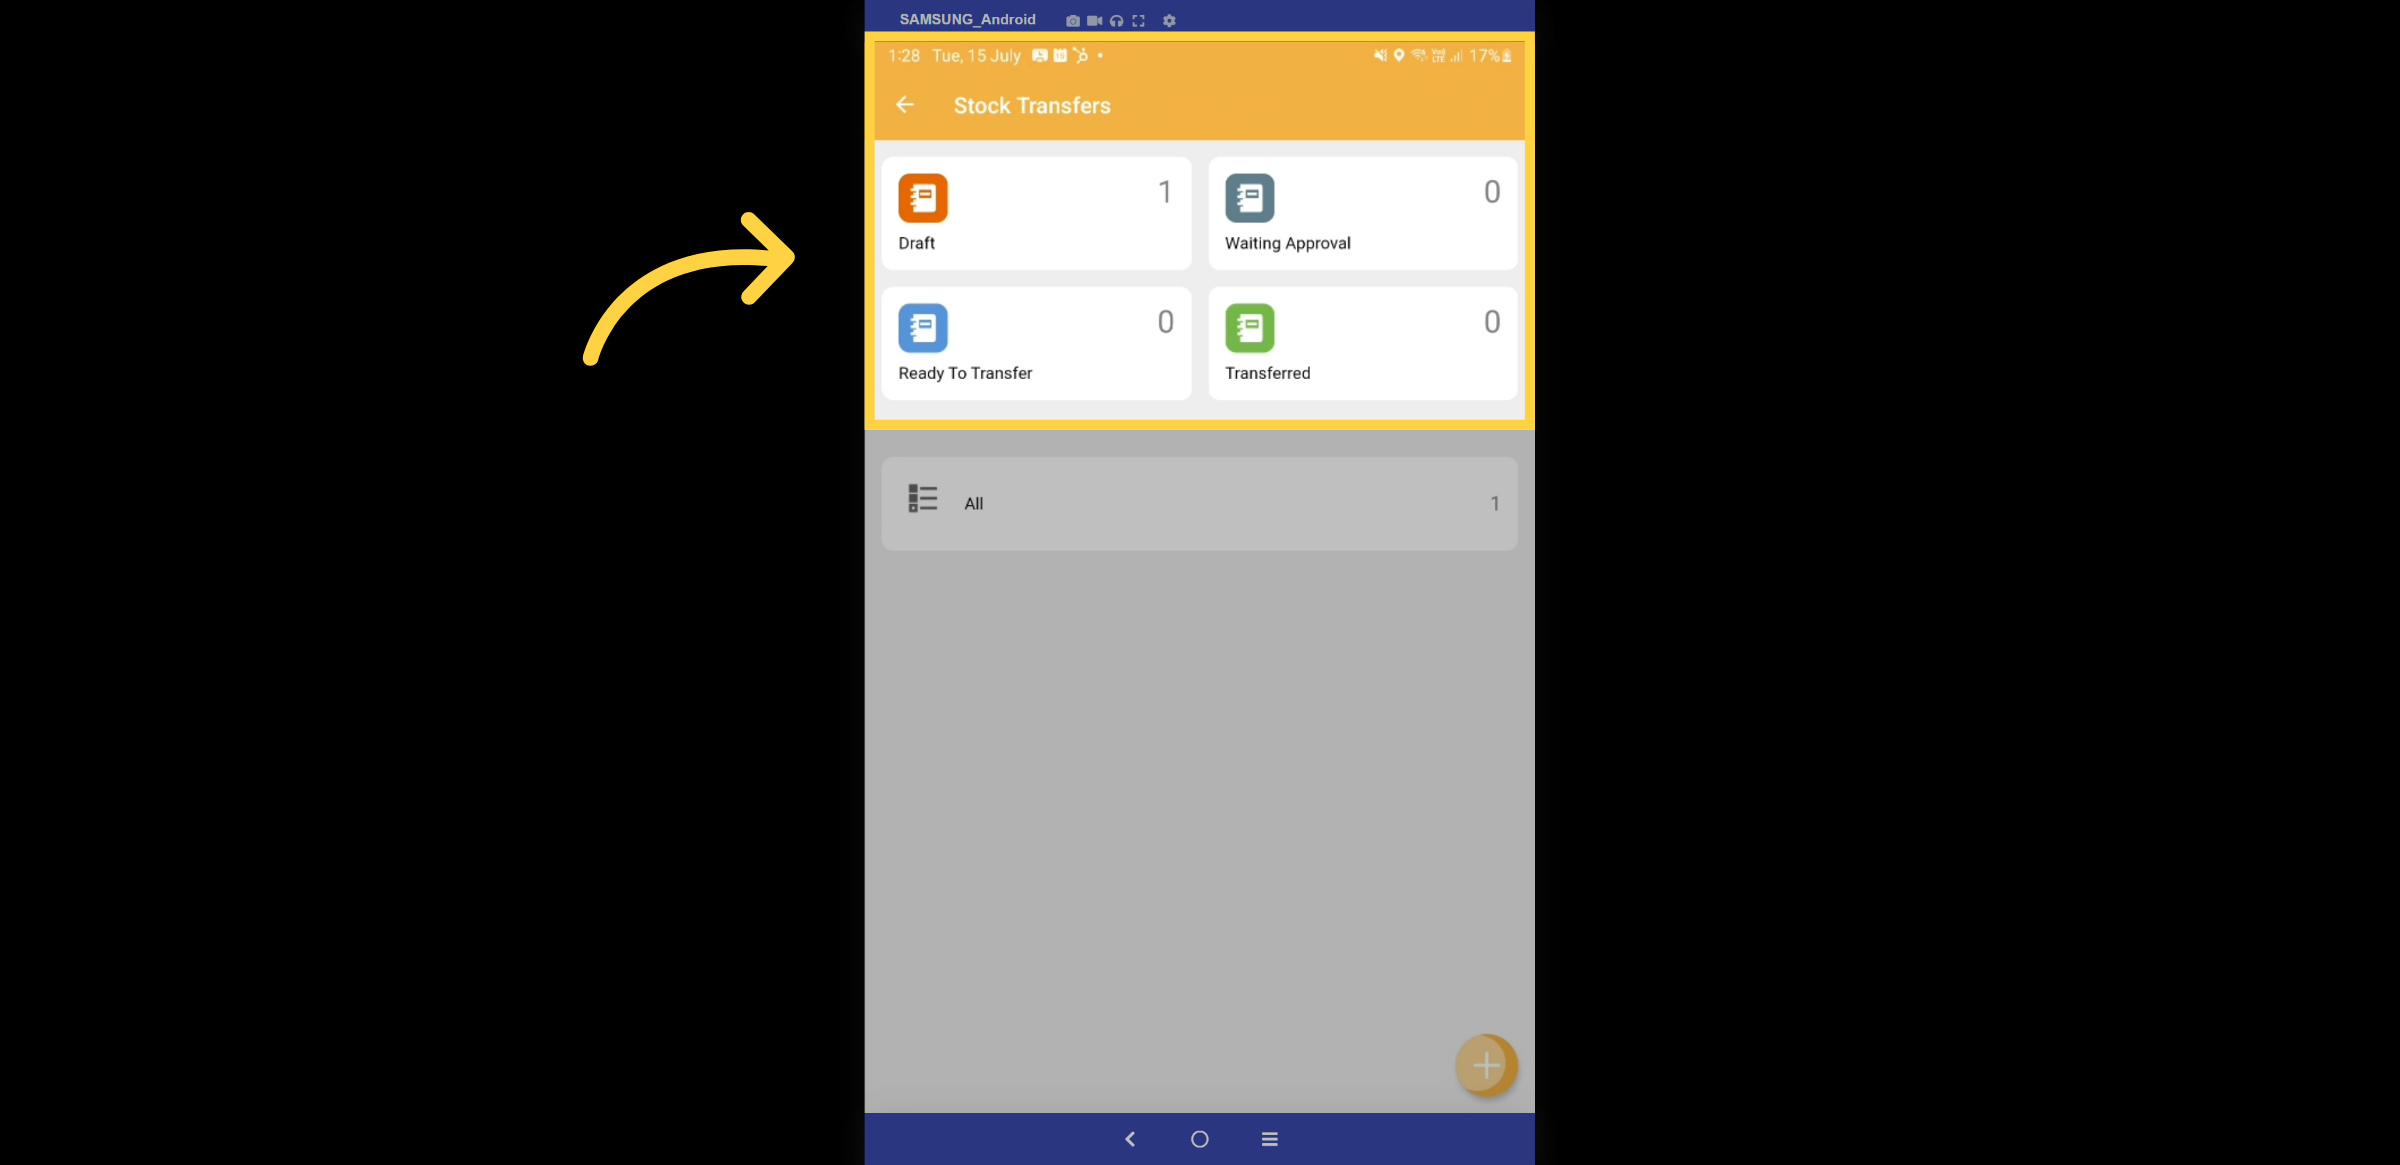
18. Stock Transfers
In the stock transfer section, you can view transactions that are in draft, awaiting approval, ready for transfer, and those that have already been completed.
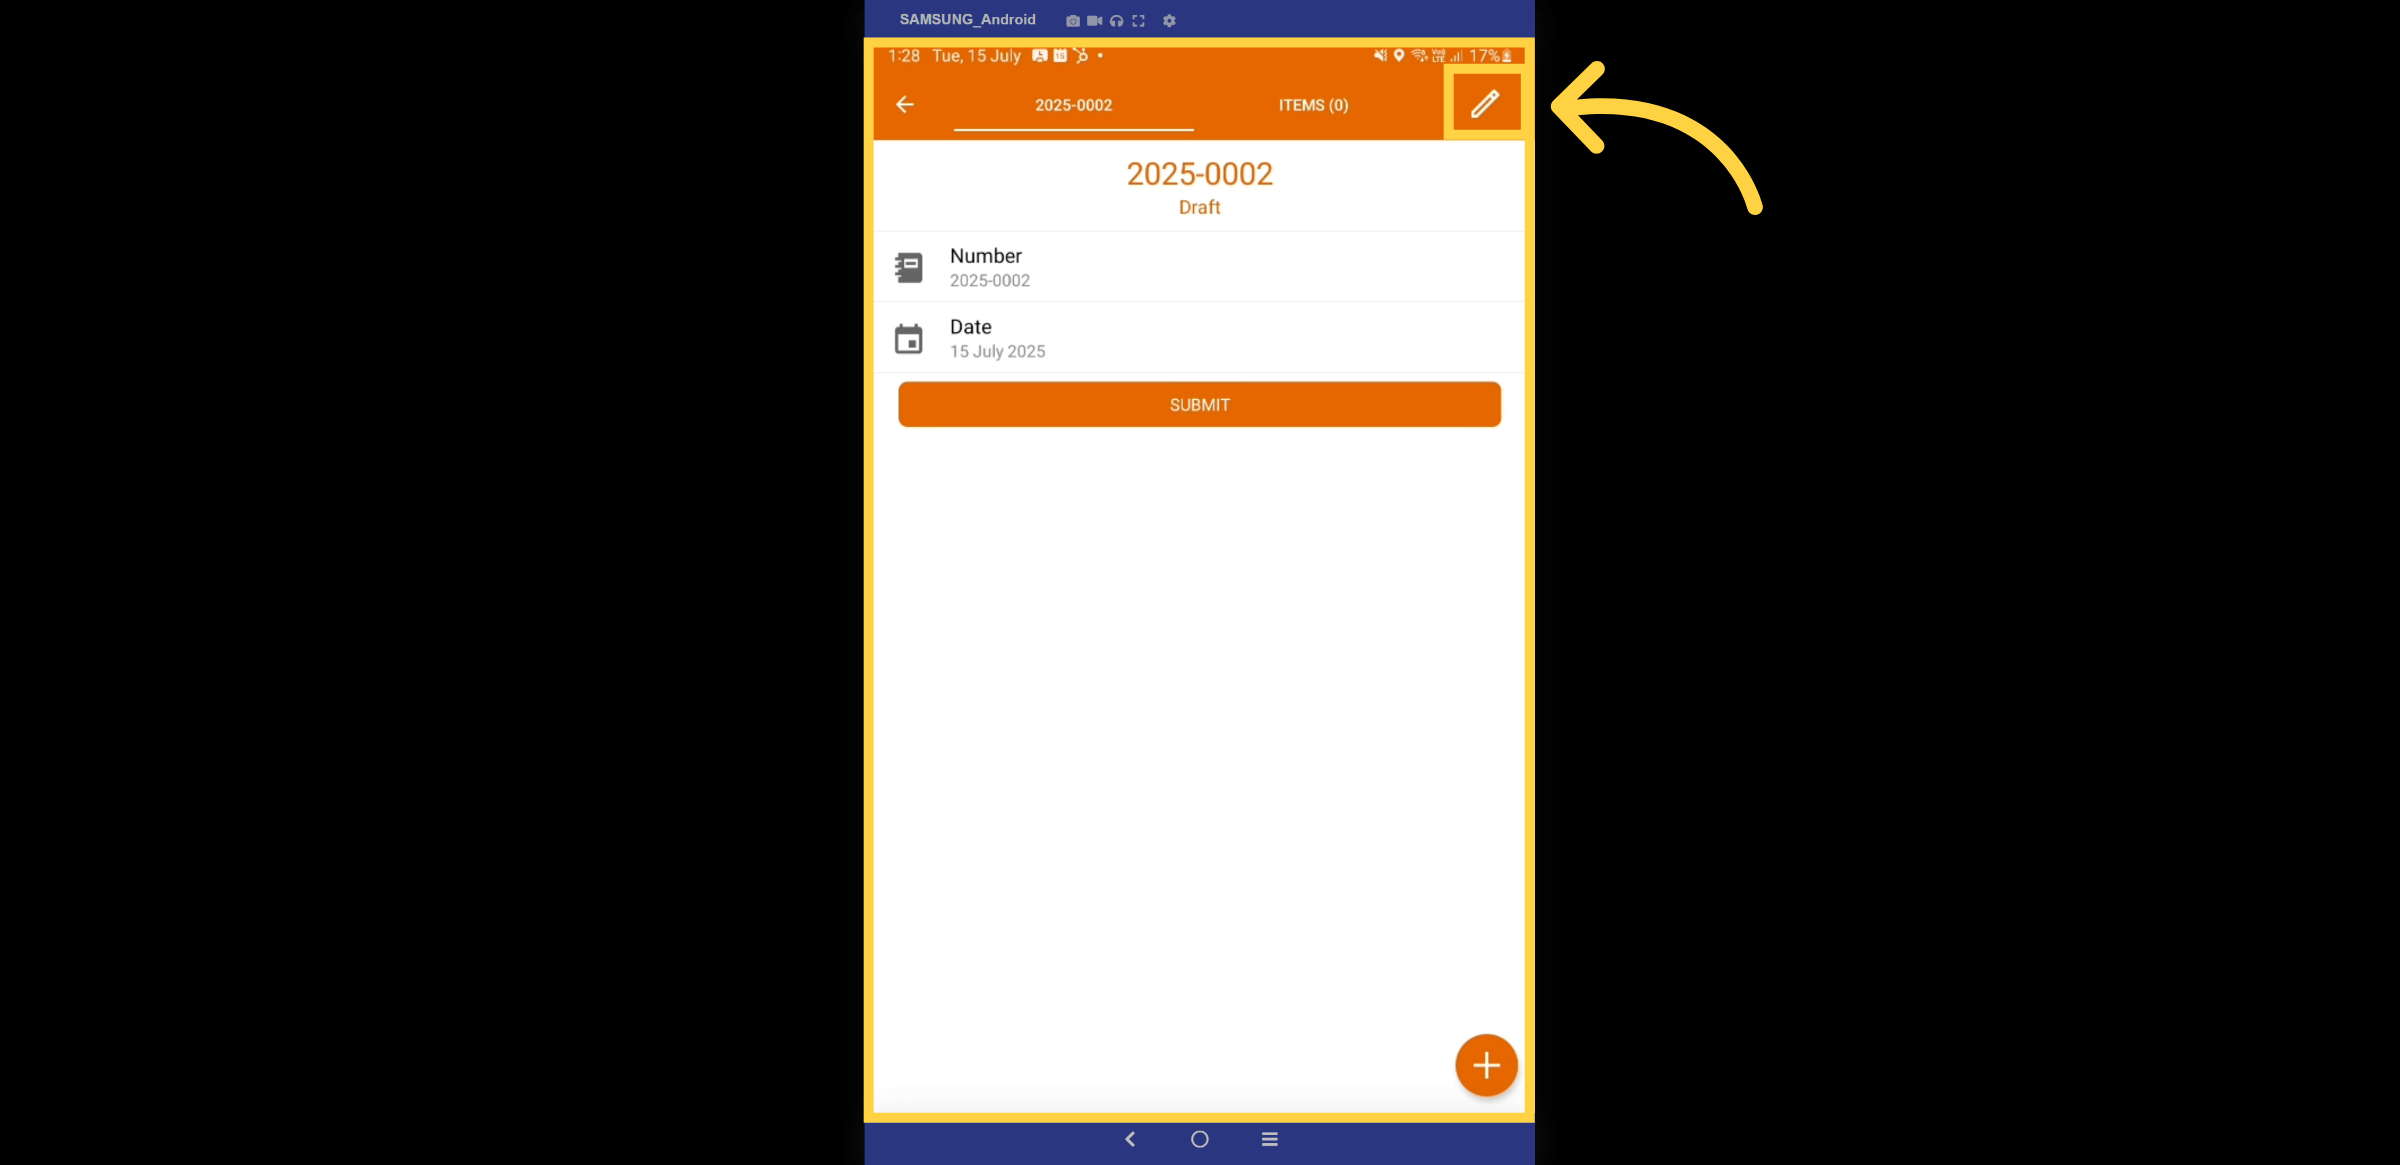
19. Draft Transfer
The transfer process begins with a Draft Transfer. Click on the edit pencil to get started. All drafts will be highlighted with an orange border.
20. Stock Transfer Details
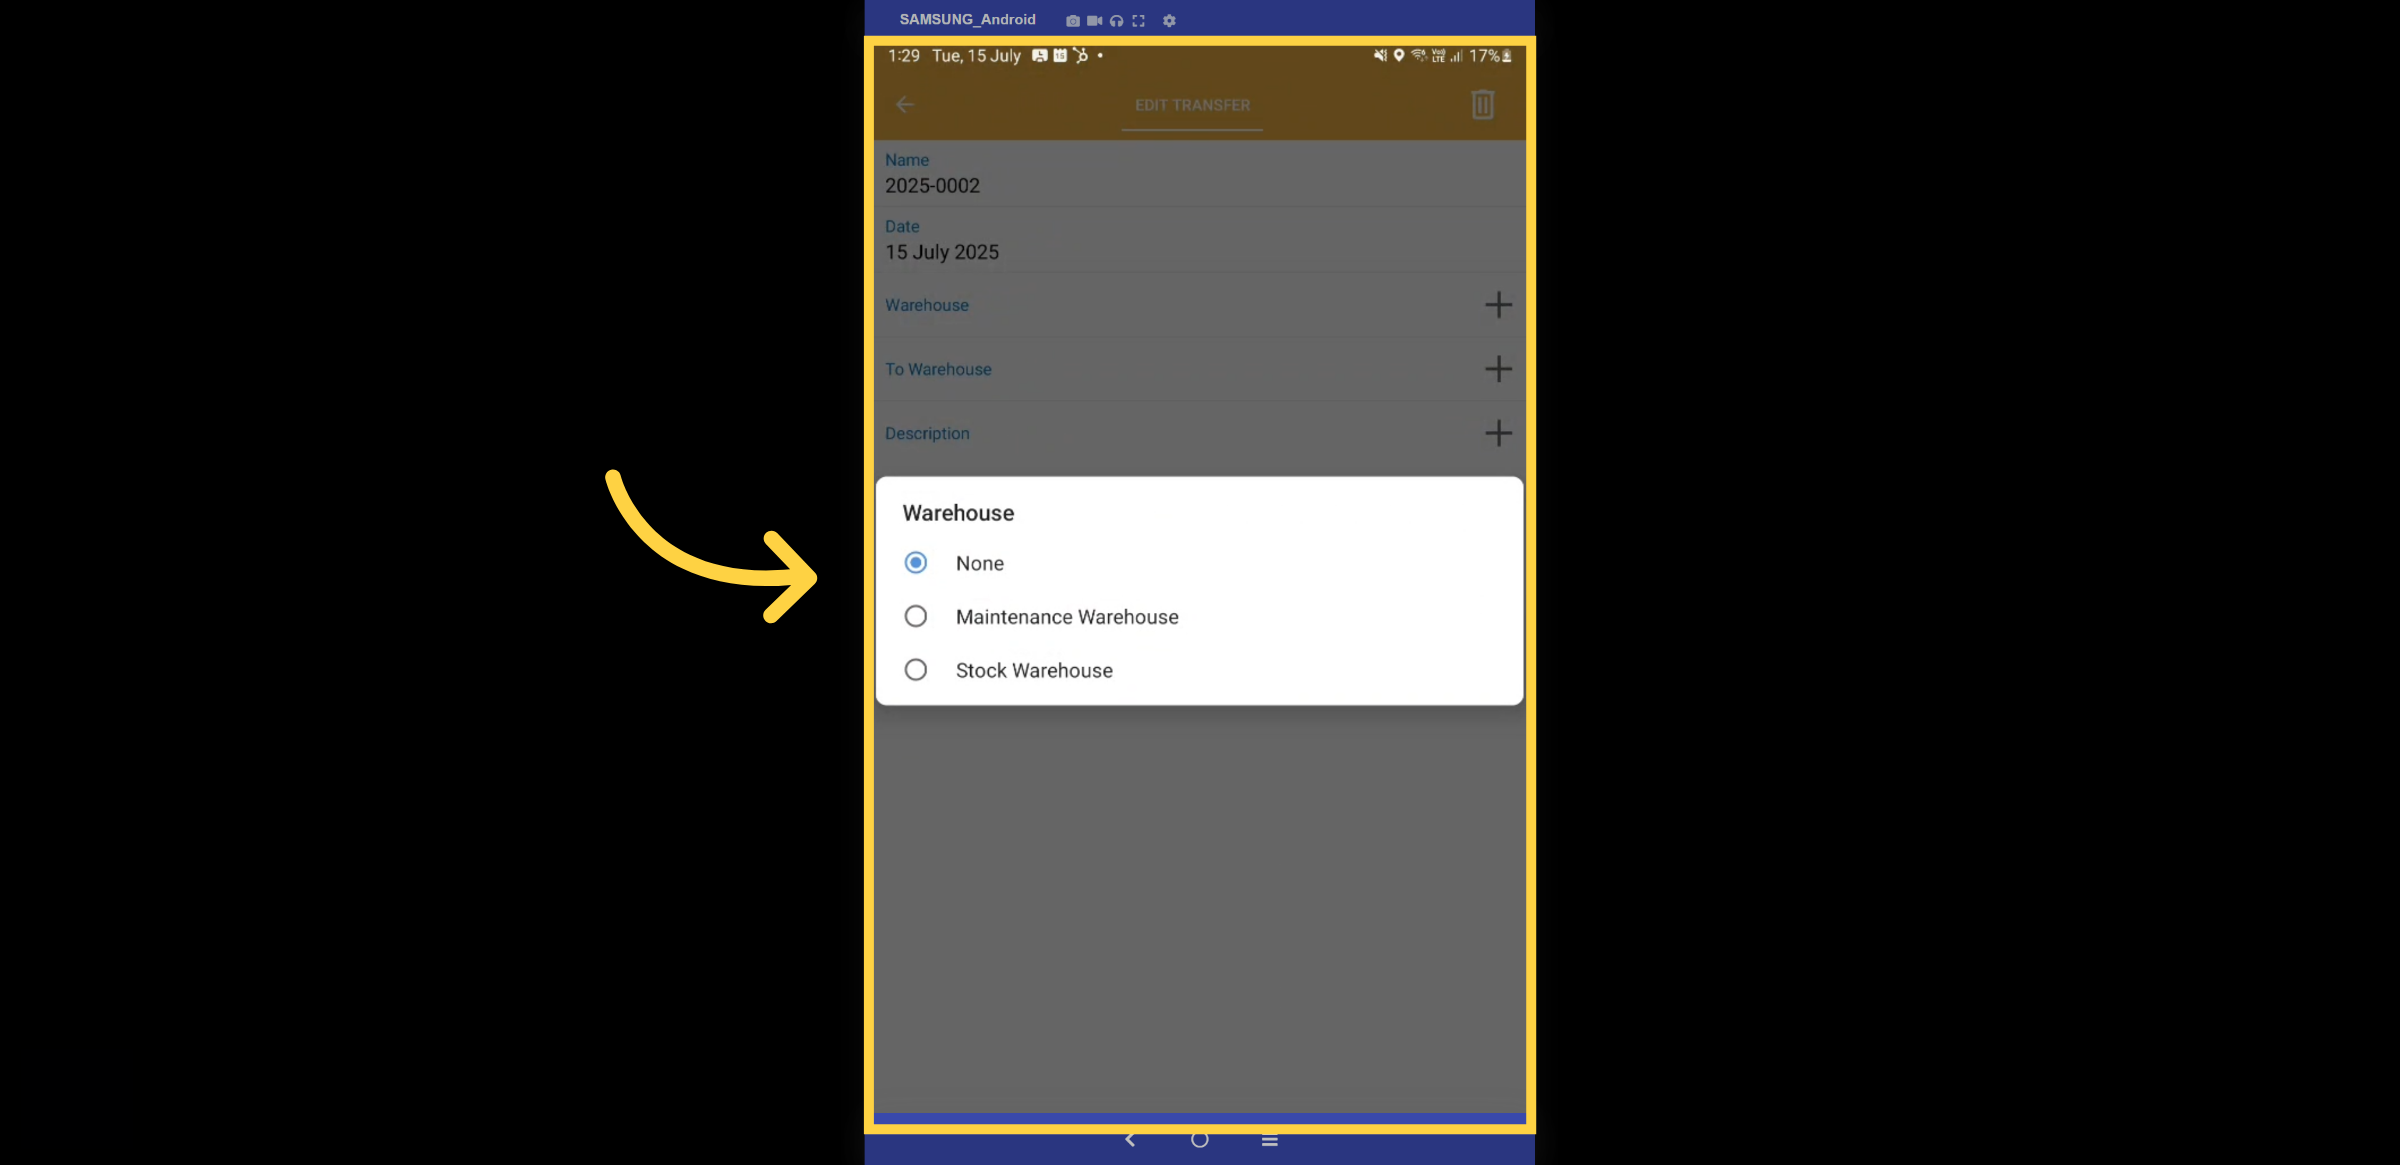
The Edit Transfer form captures the details of the current warehouse and the destination warehouse for the transfer.
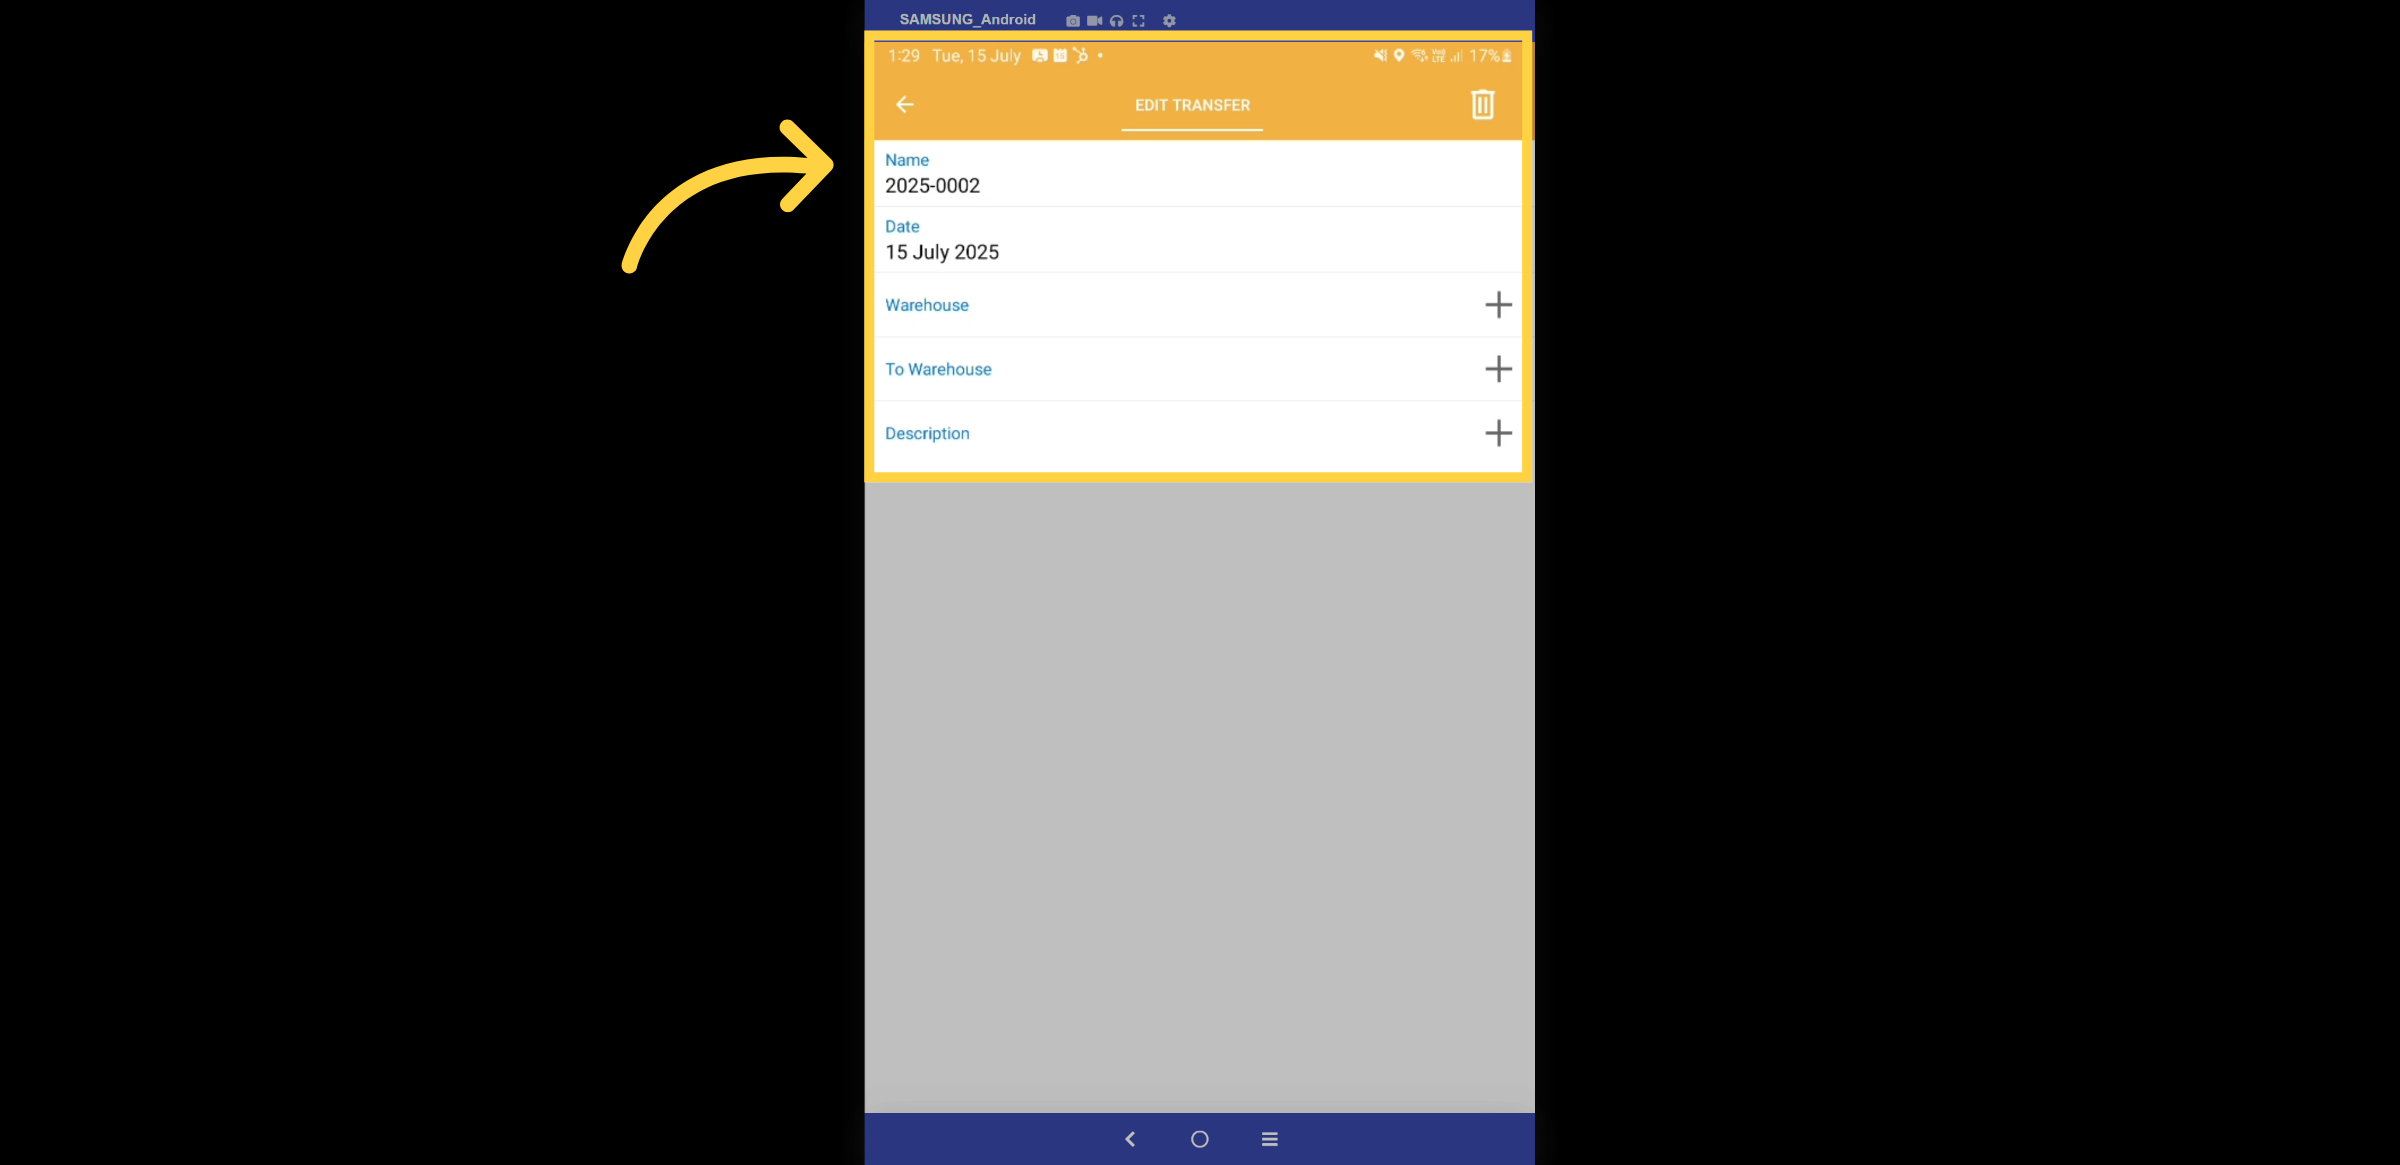
21. Current Warehouse
First select the warehouse where the stock is currently located.
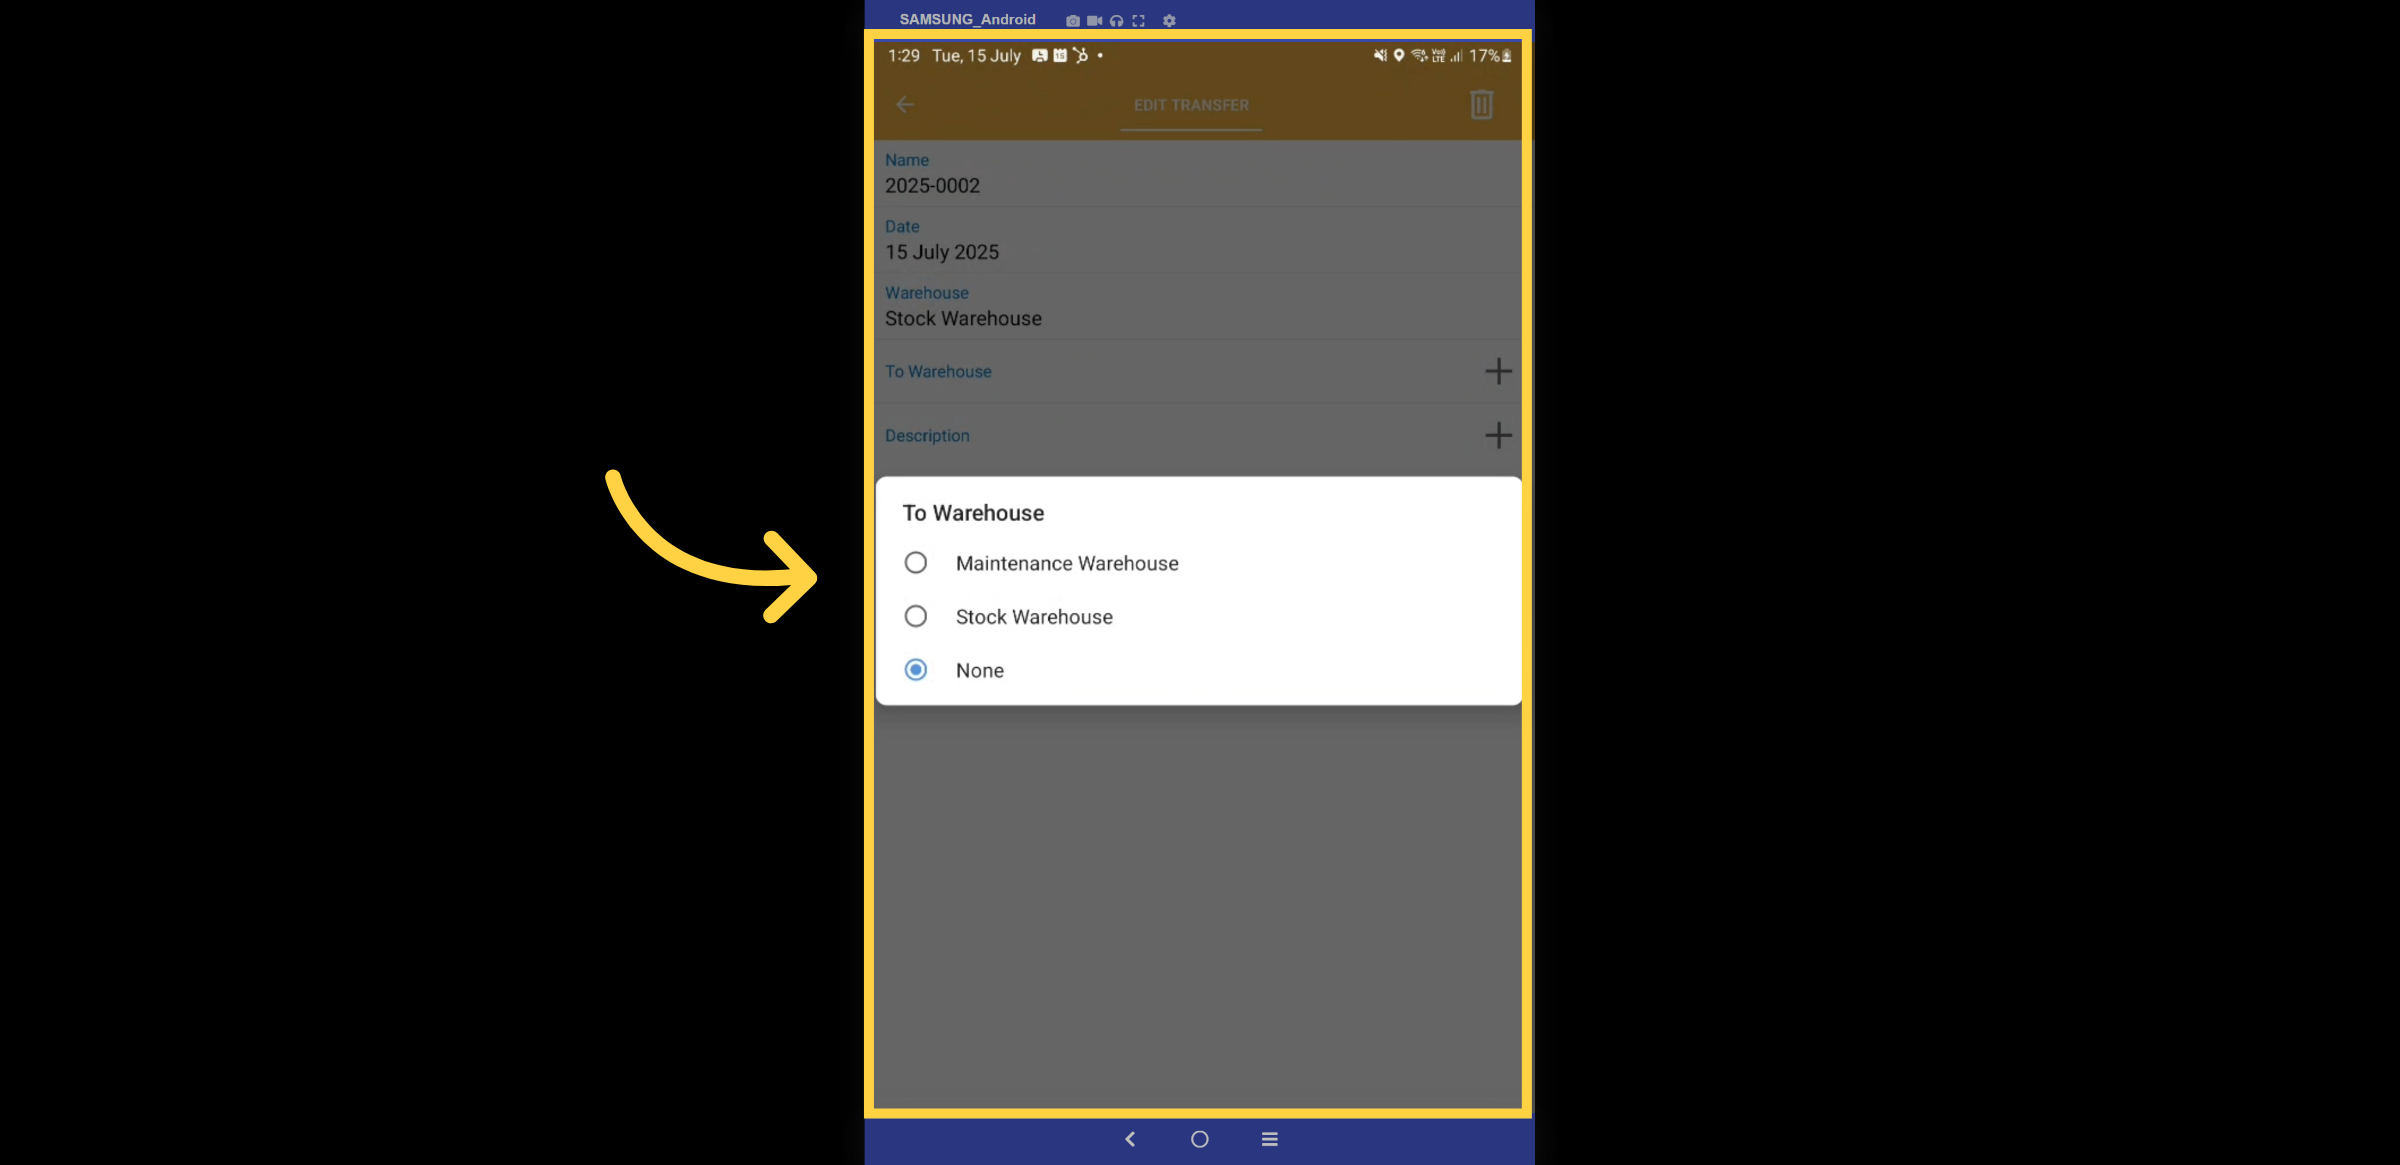
22. To Warehouse
Select the warehouse the stock is being transferred to.
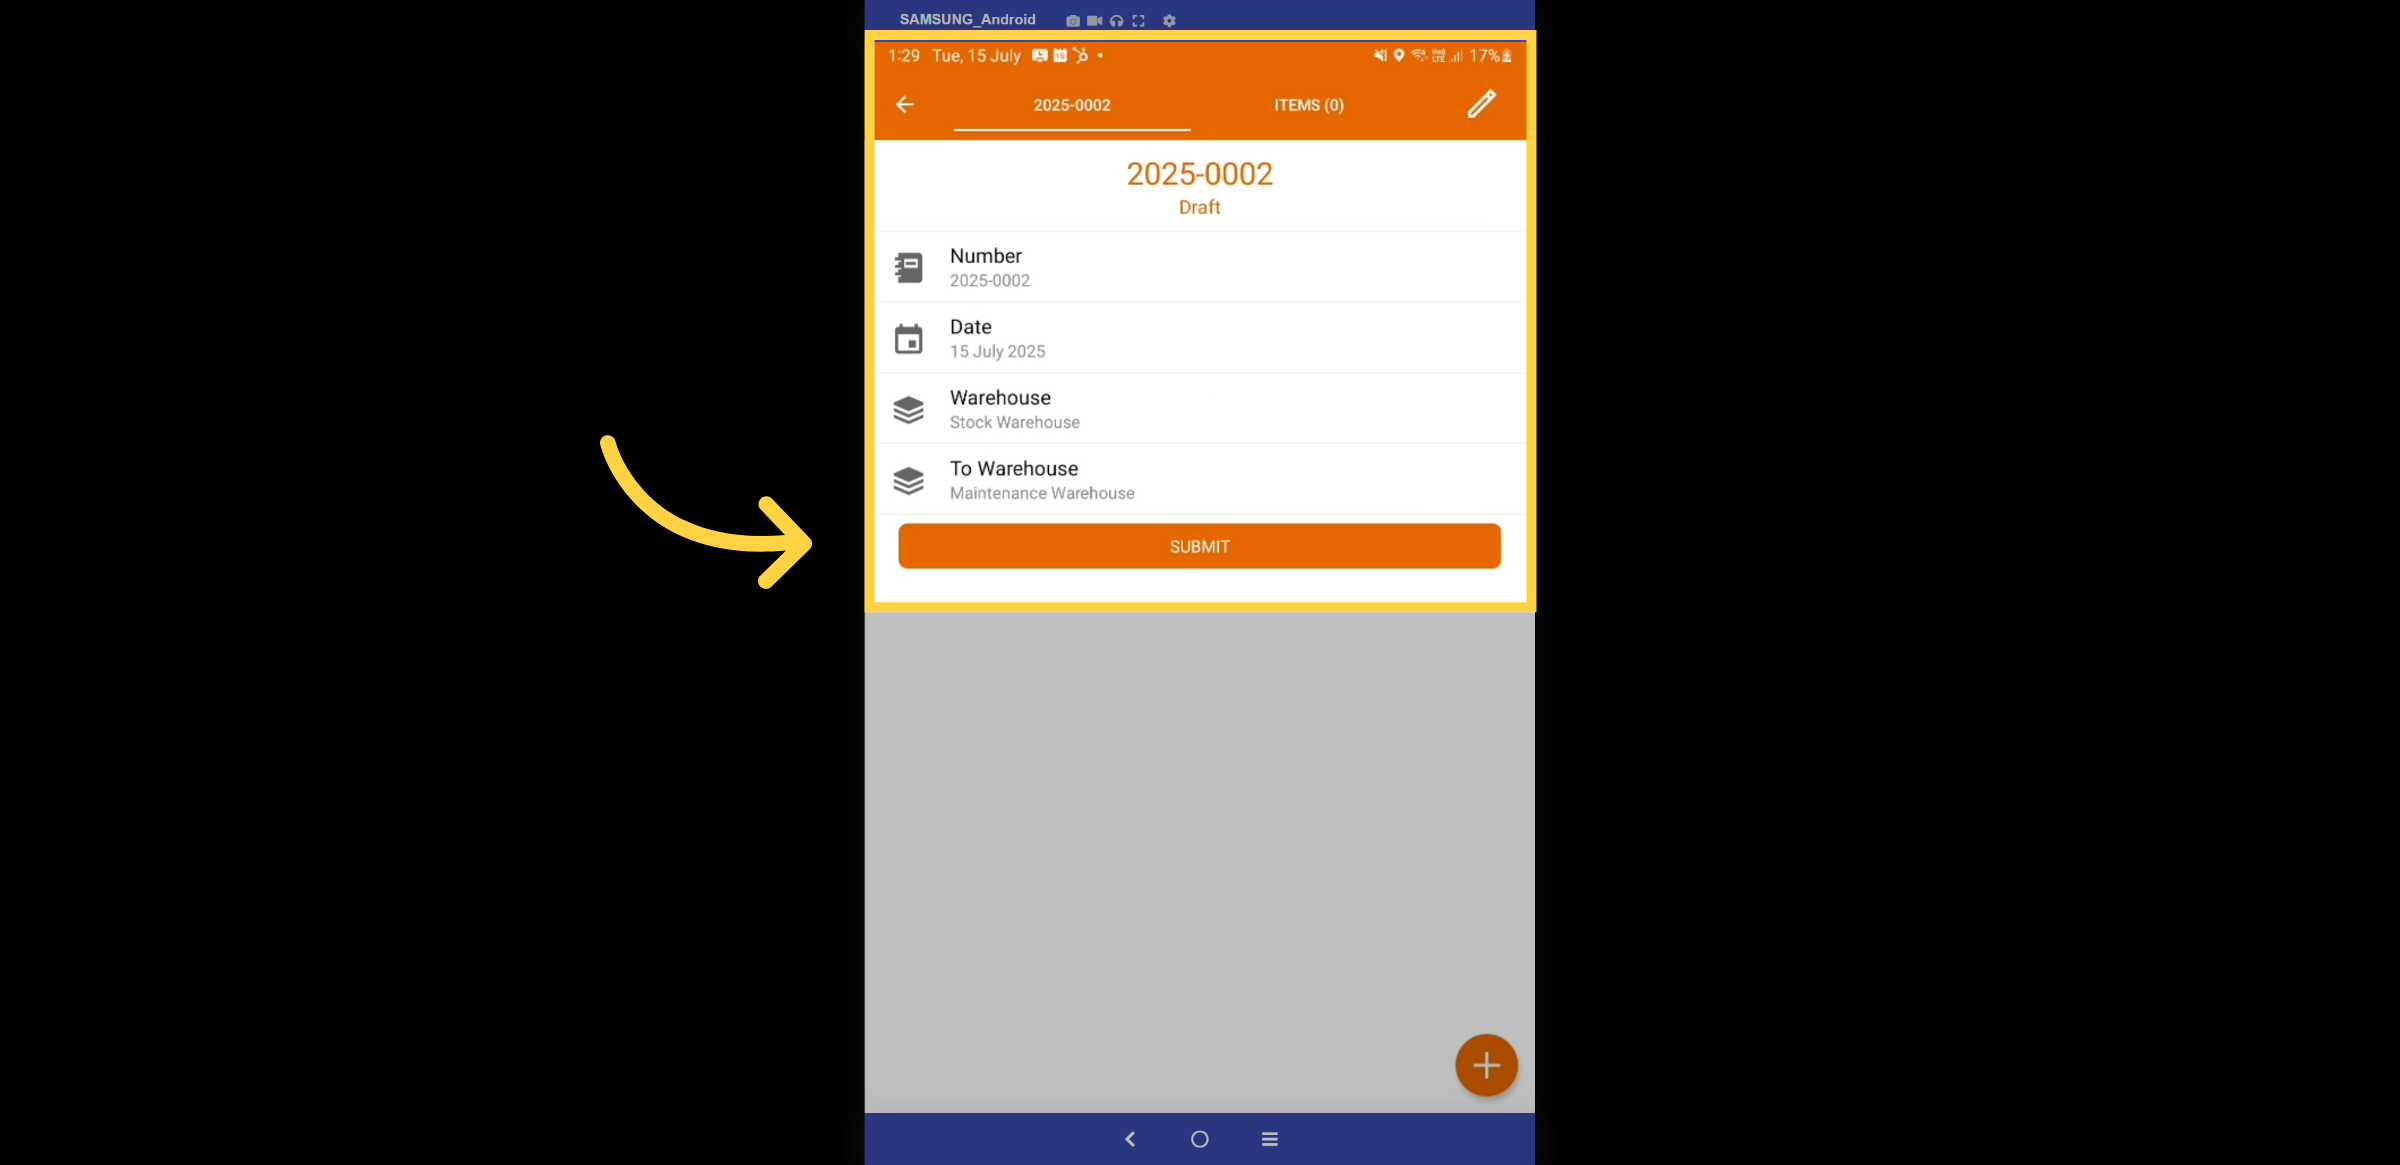
23. Review & submit.
Review the tranfer details to ensure they are correct and then select submit.
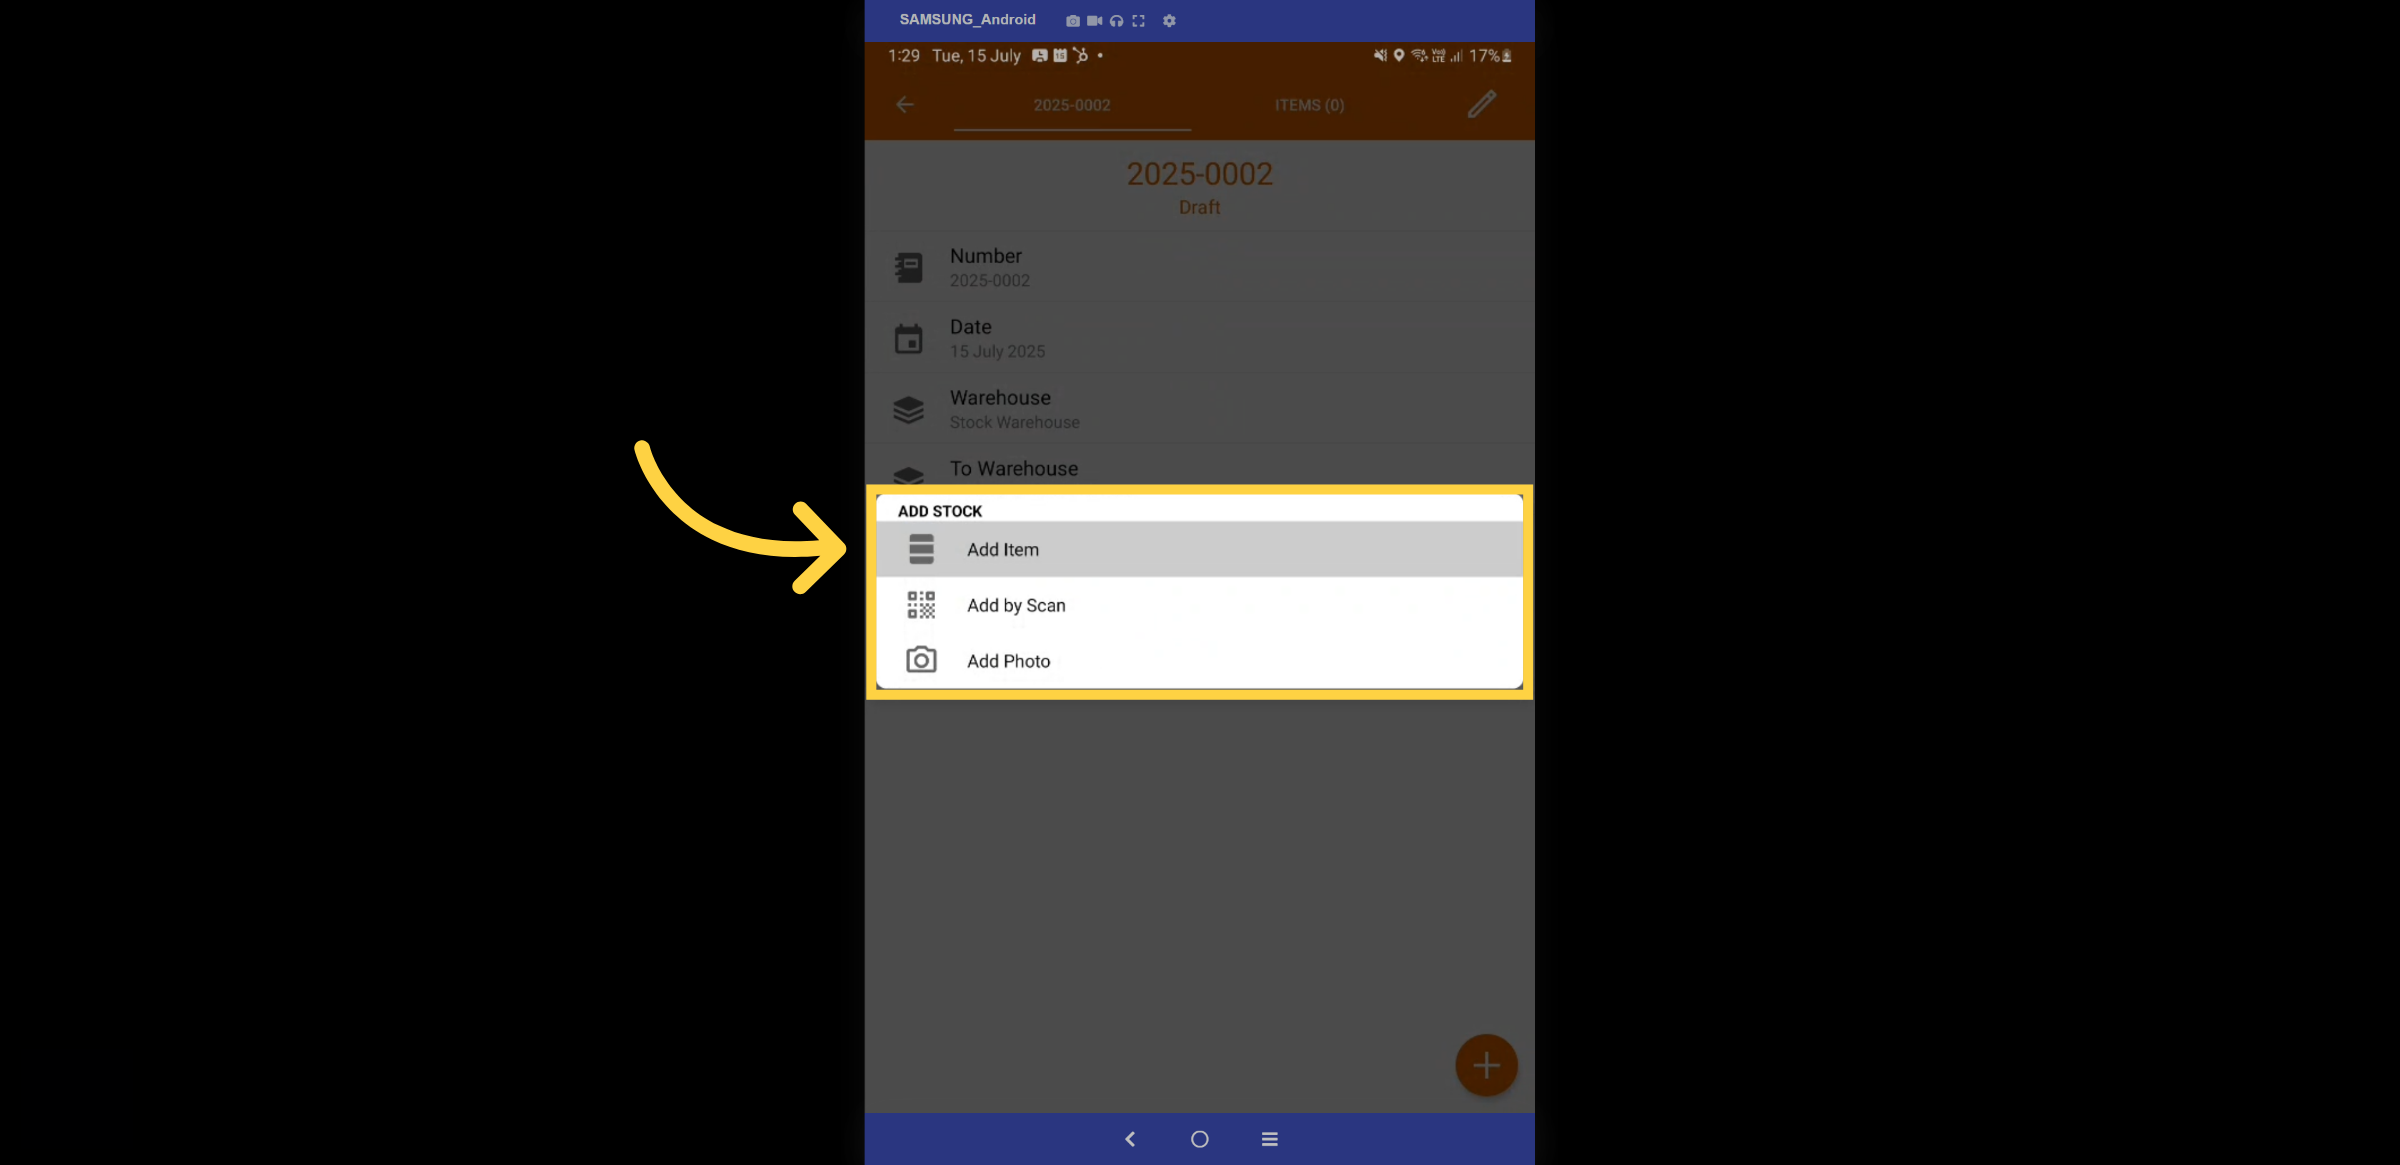
24. Add Item
Add the item by clicking the "Add Item" tab or simply scanning the item.
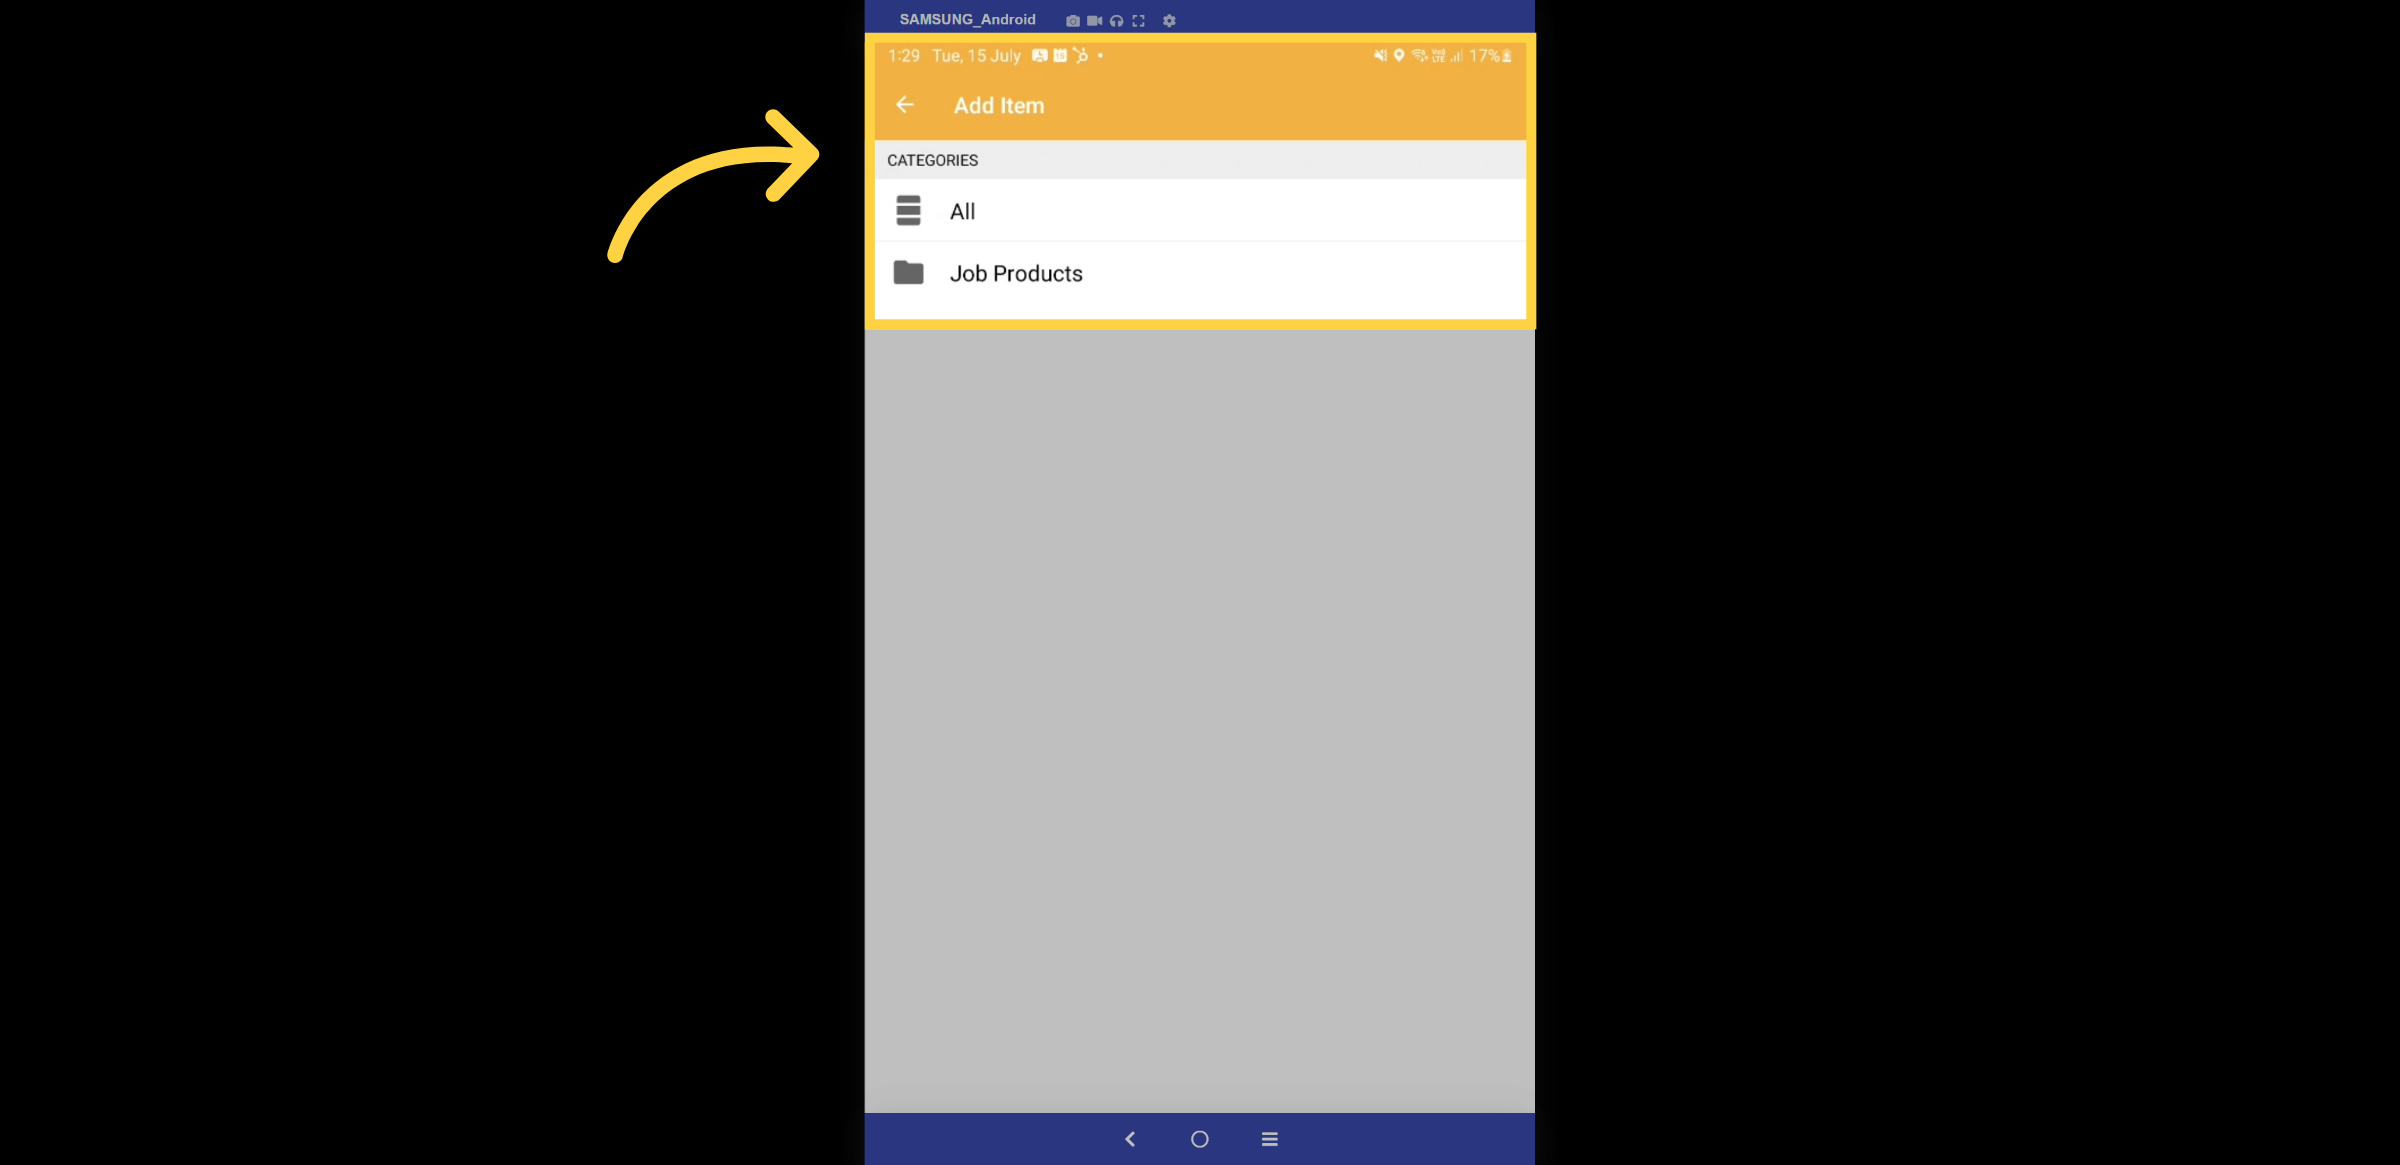
25. Add item Catagories
Select the category to which the item belongs.
26. Item Selection
Choose the item

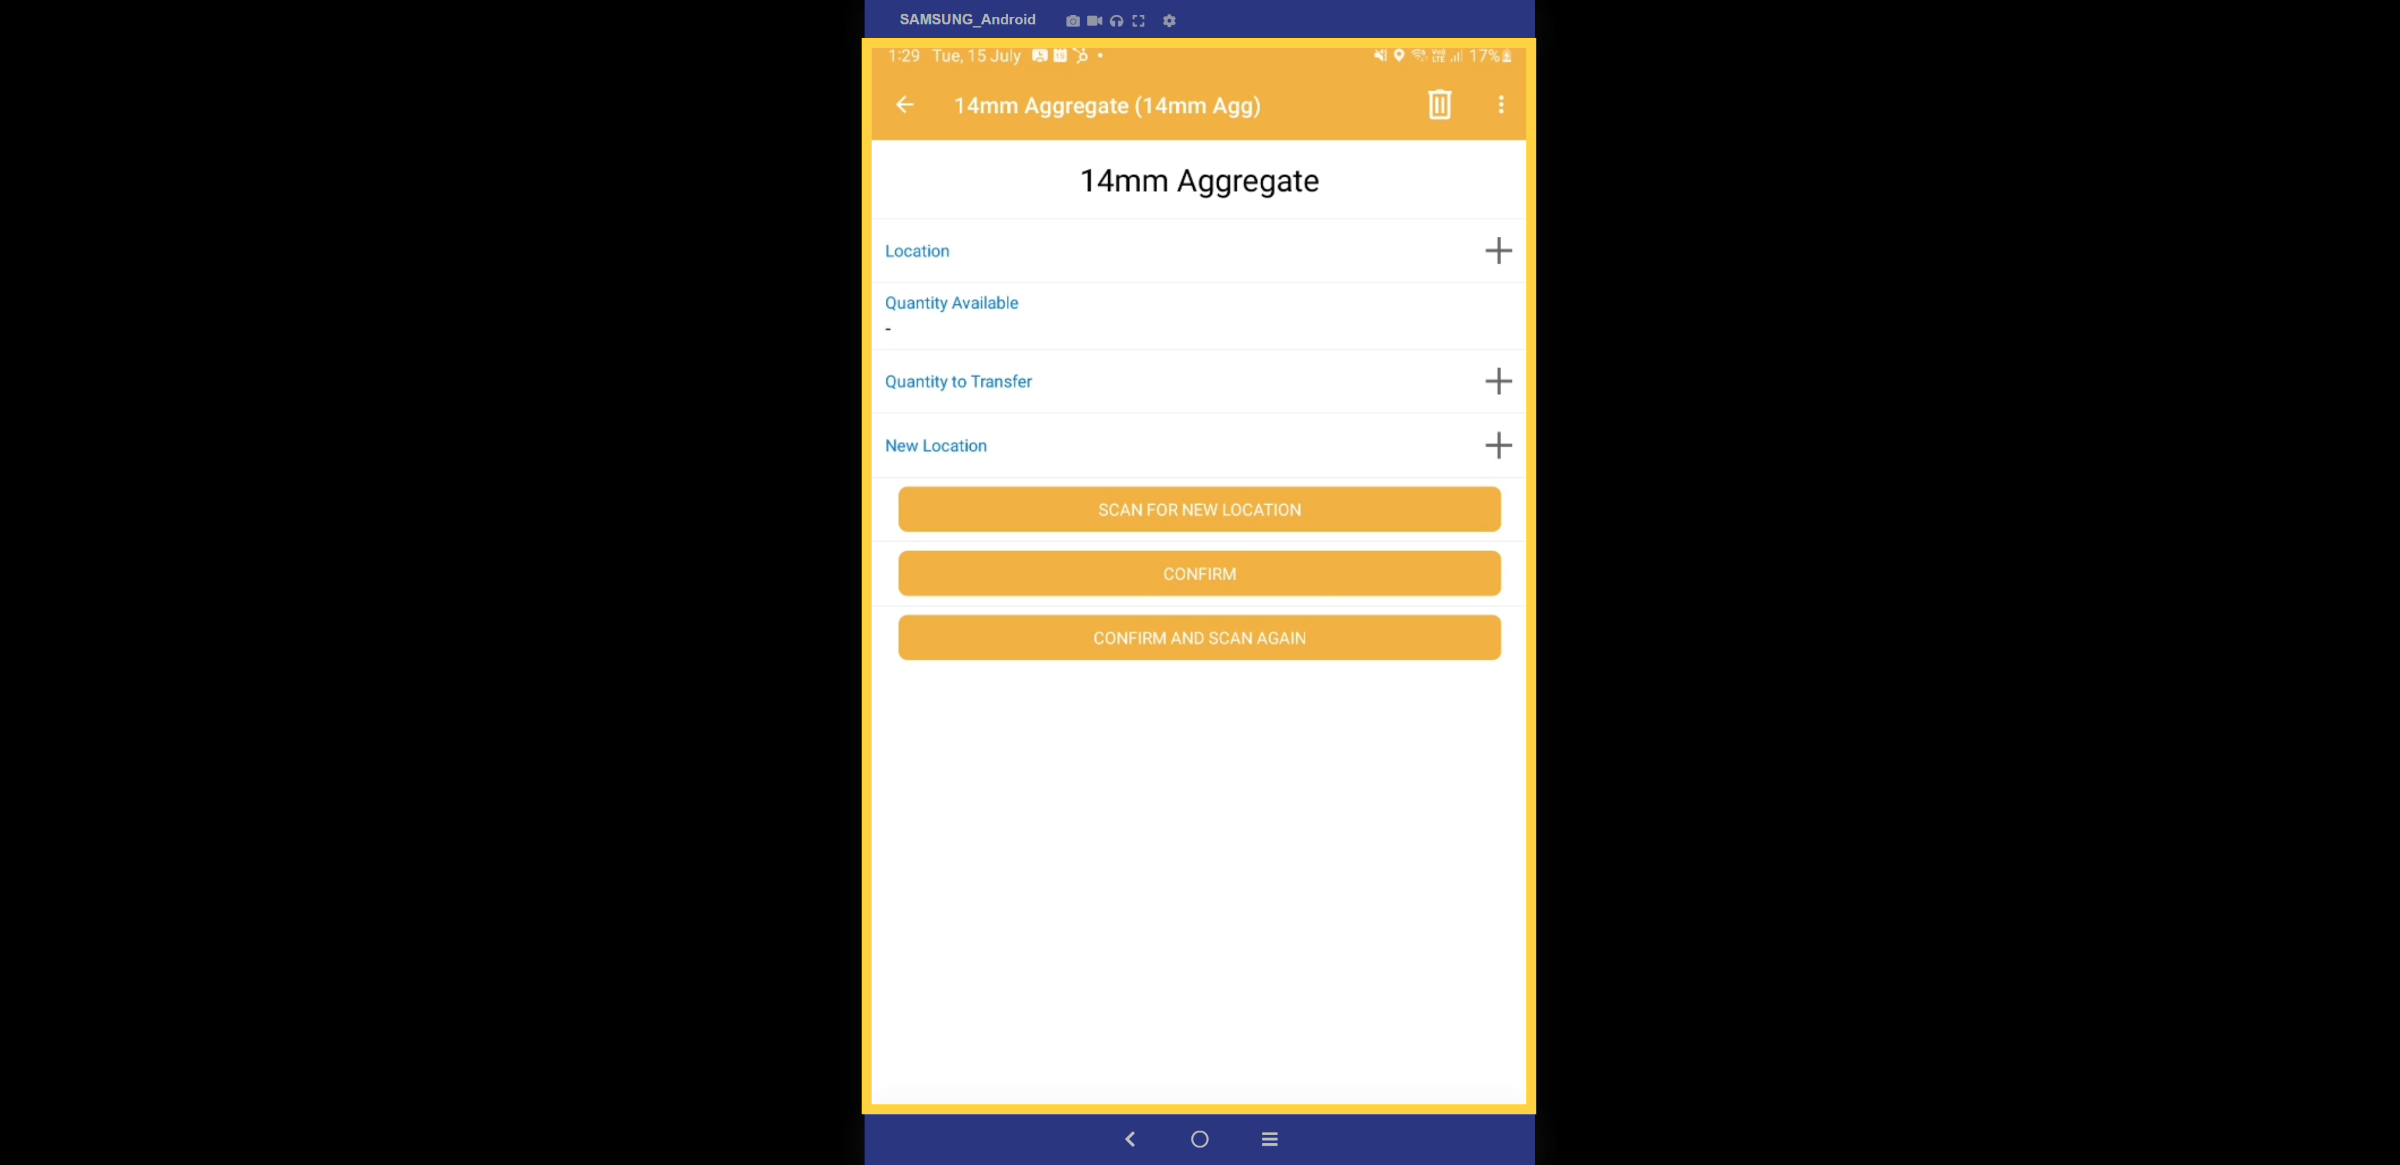
27. Item Details
The item will display the location, for example, the bay number, as well as the available quantity. Please complete the remaining fields for quantity to transfer and the new location.
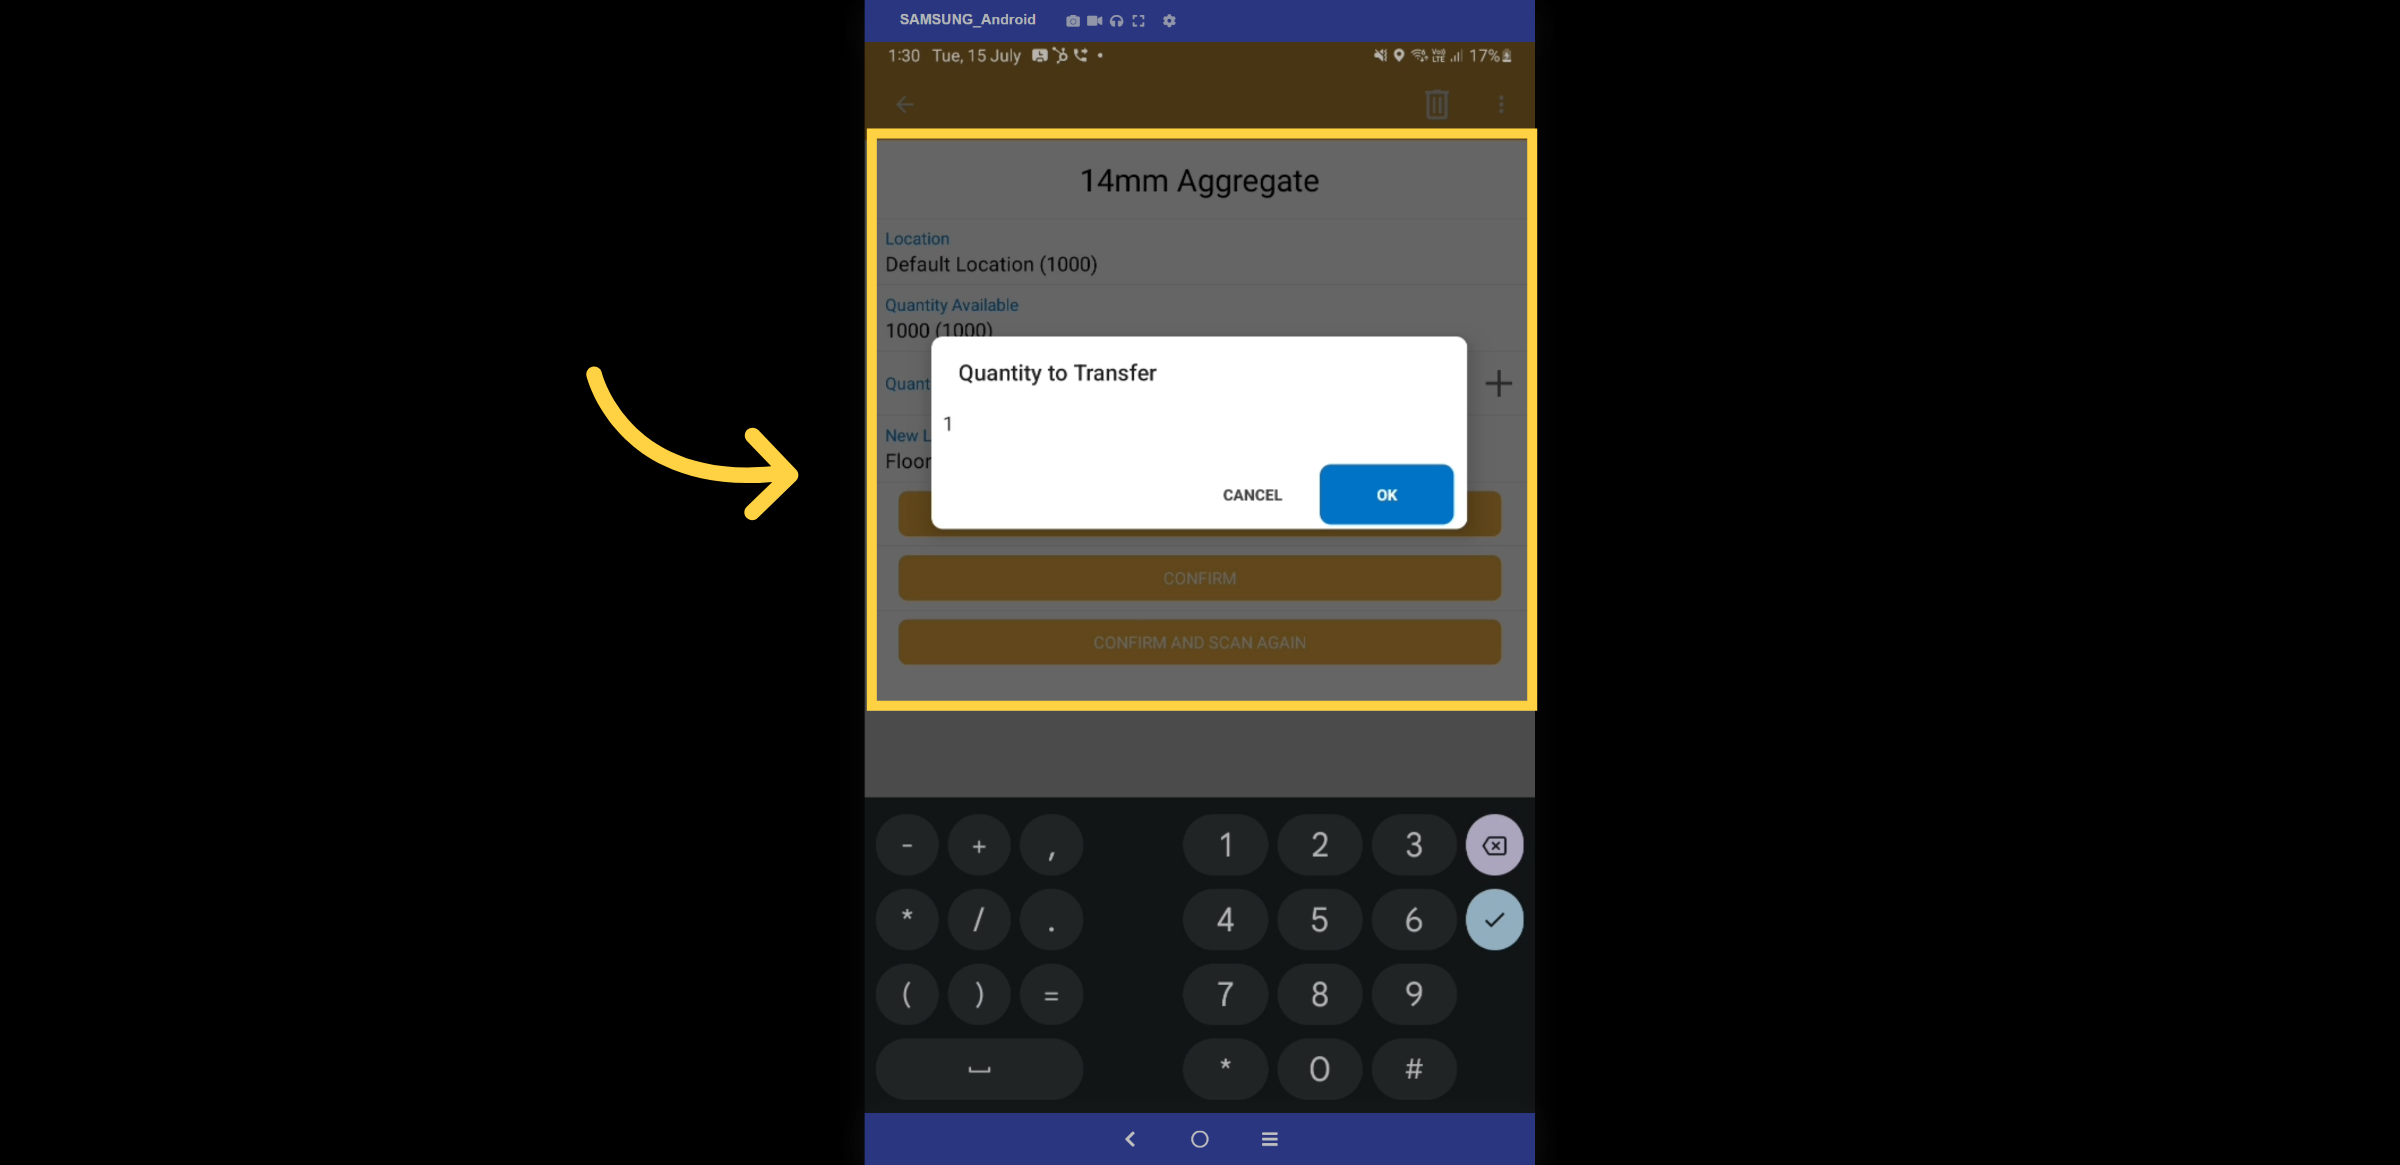
28. Quantity
Enter the quantity
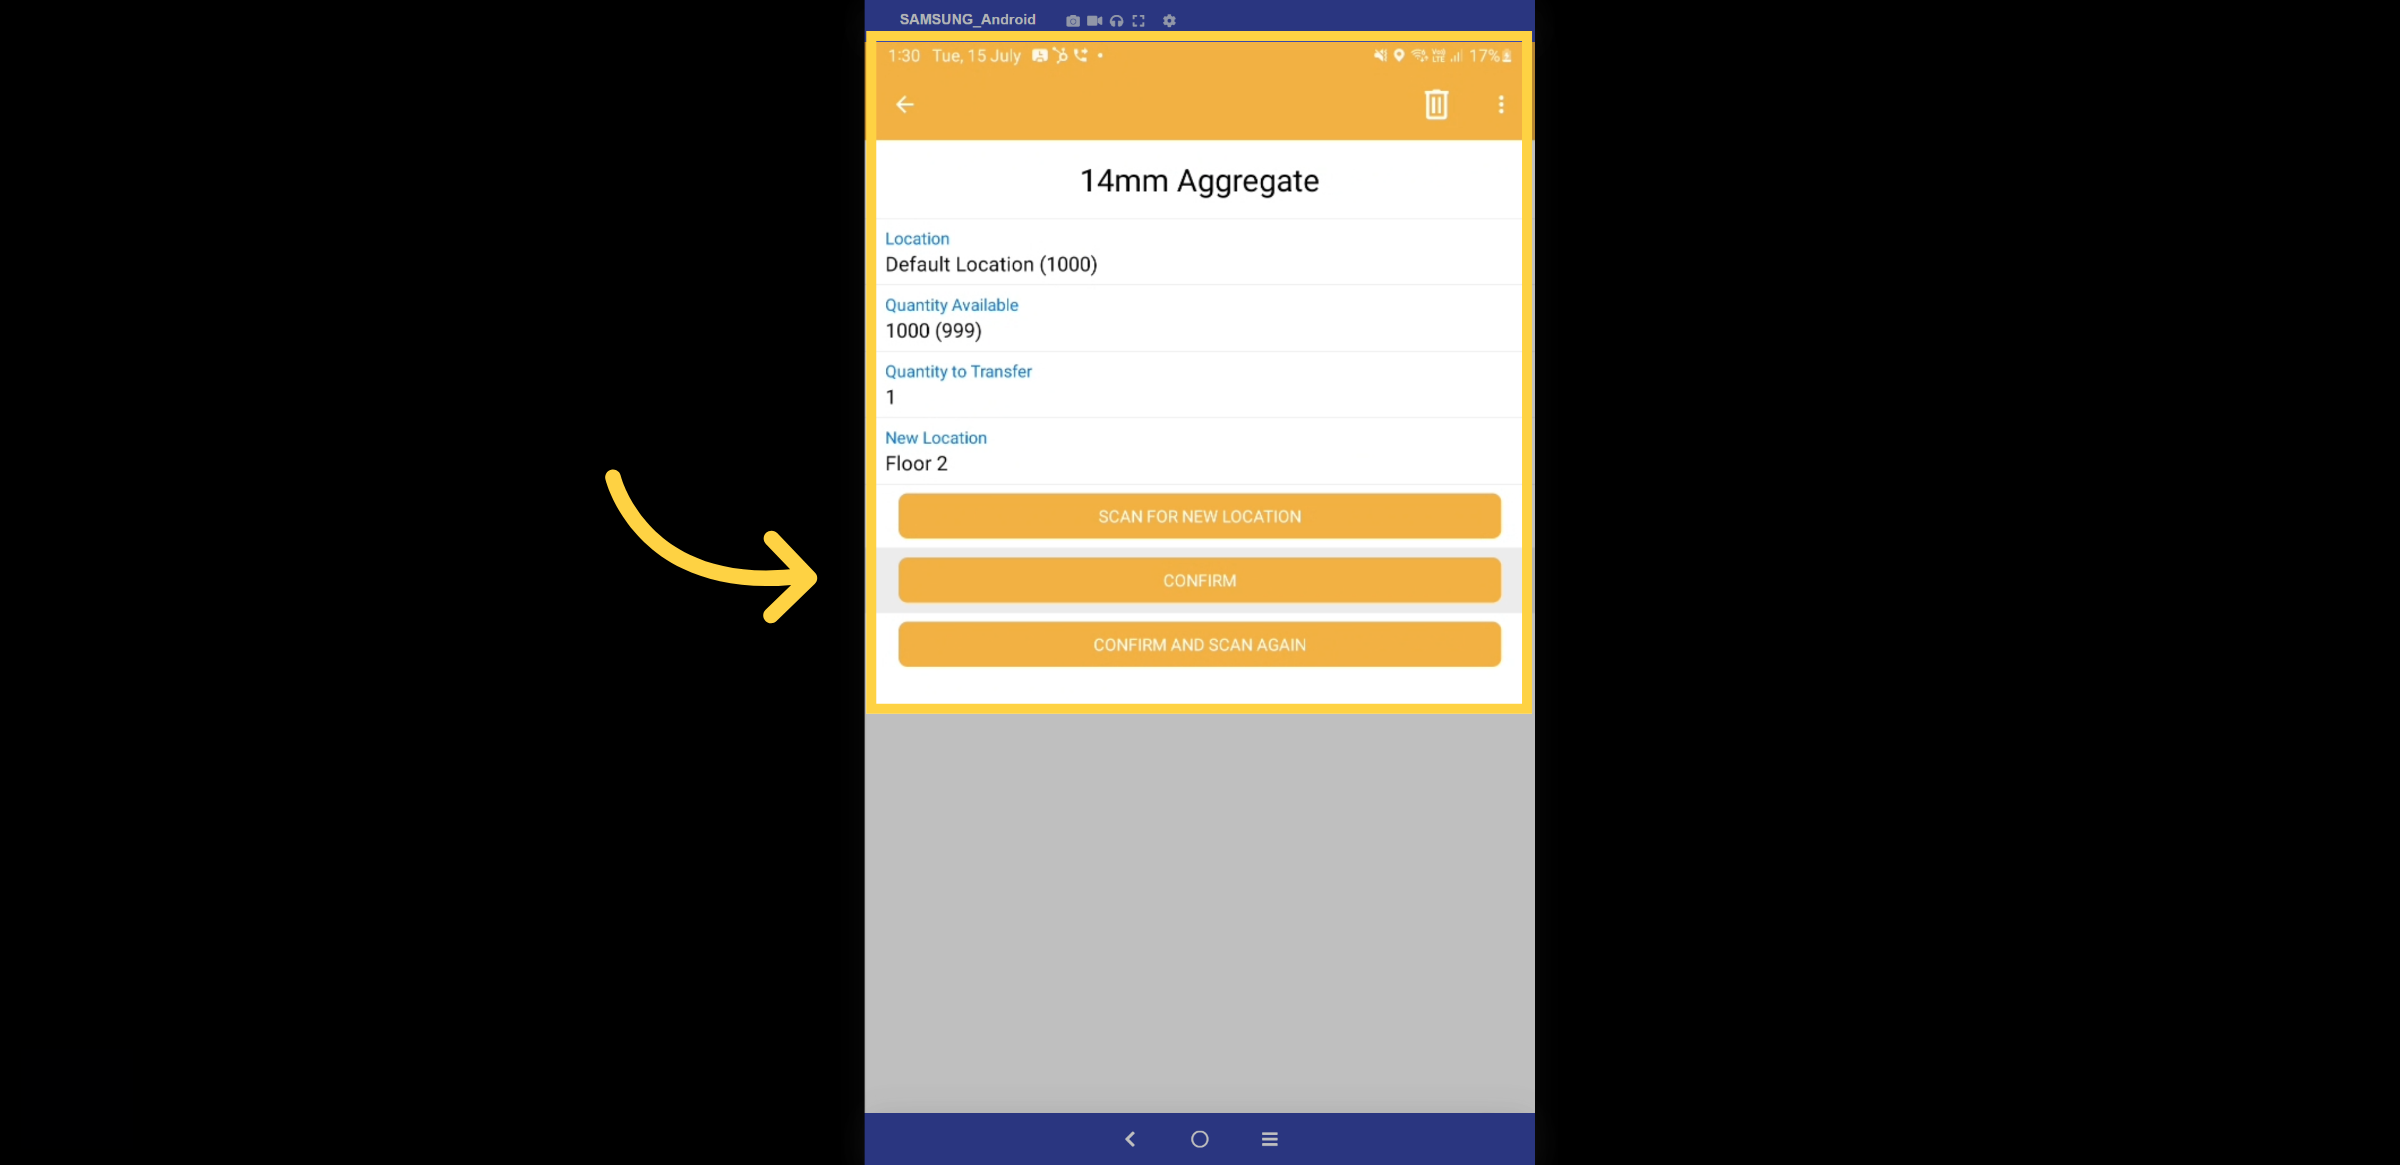
29. Confirm
Select the confirm button.
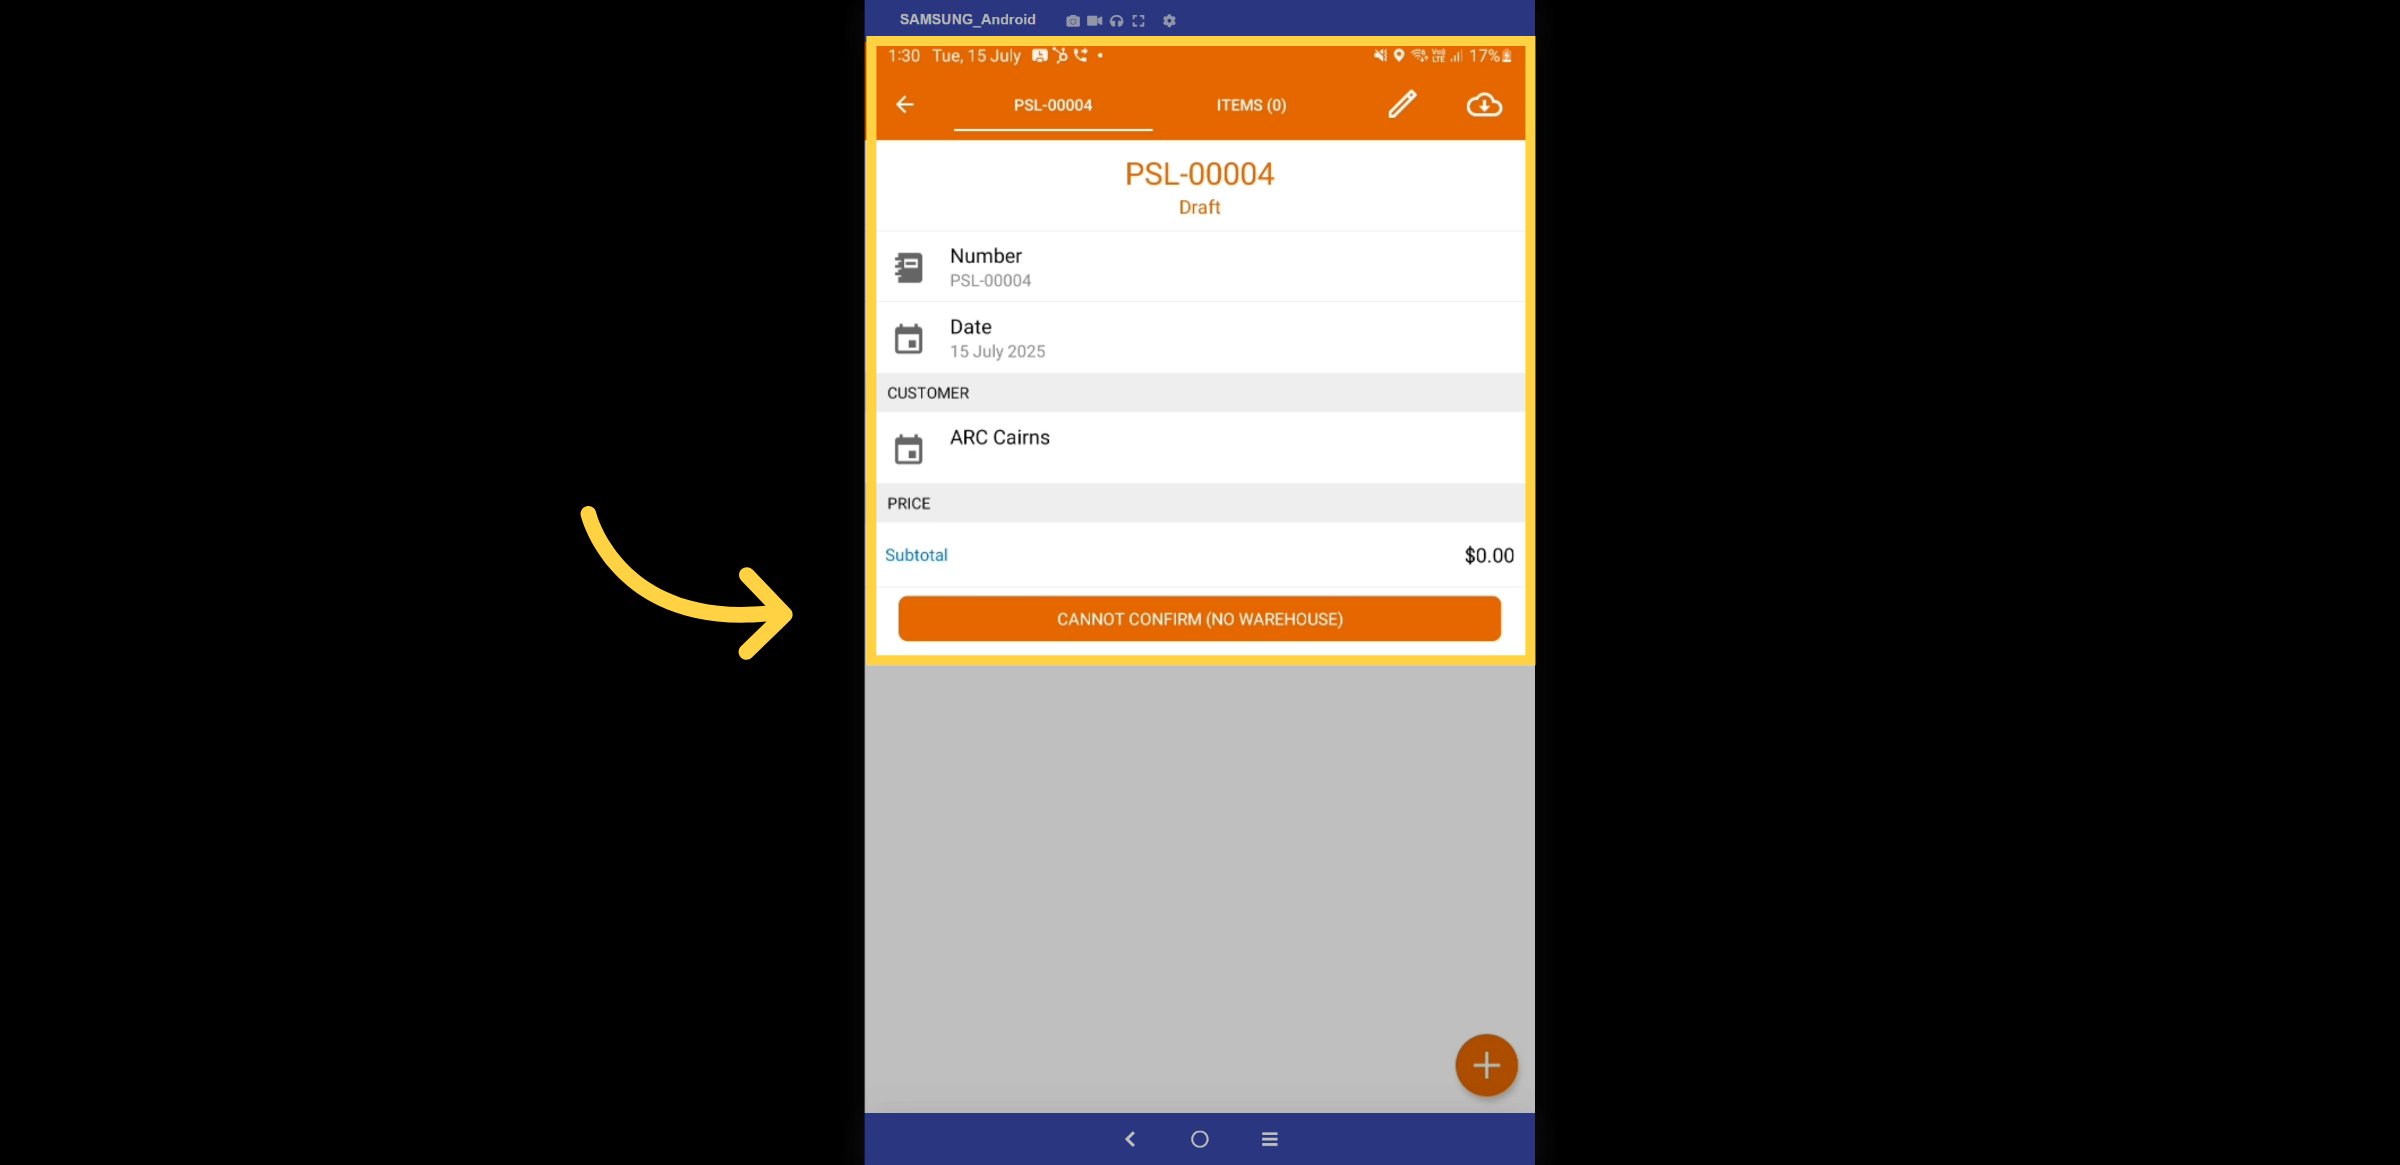
30. Packing Slips
Let's navigate to the packing slips feature.
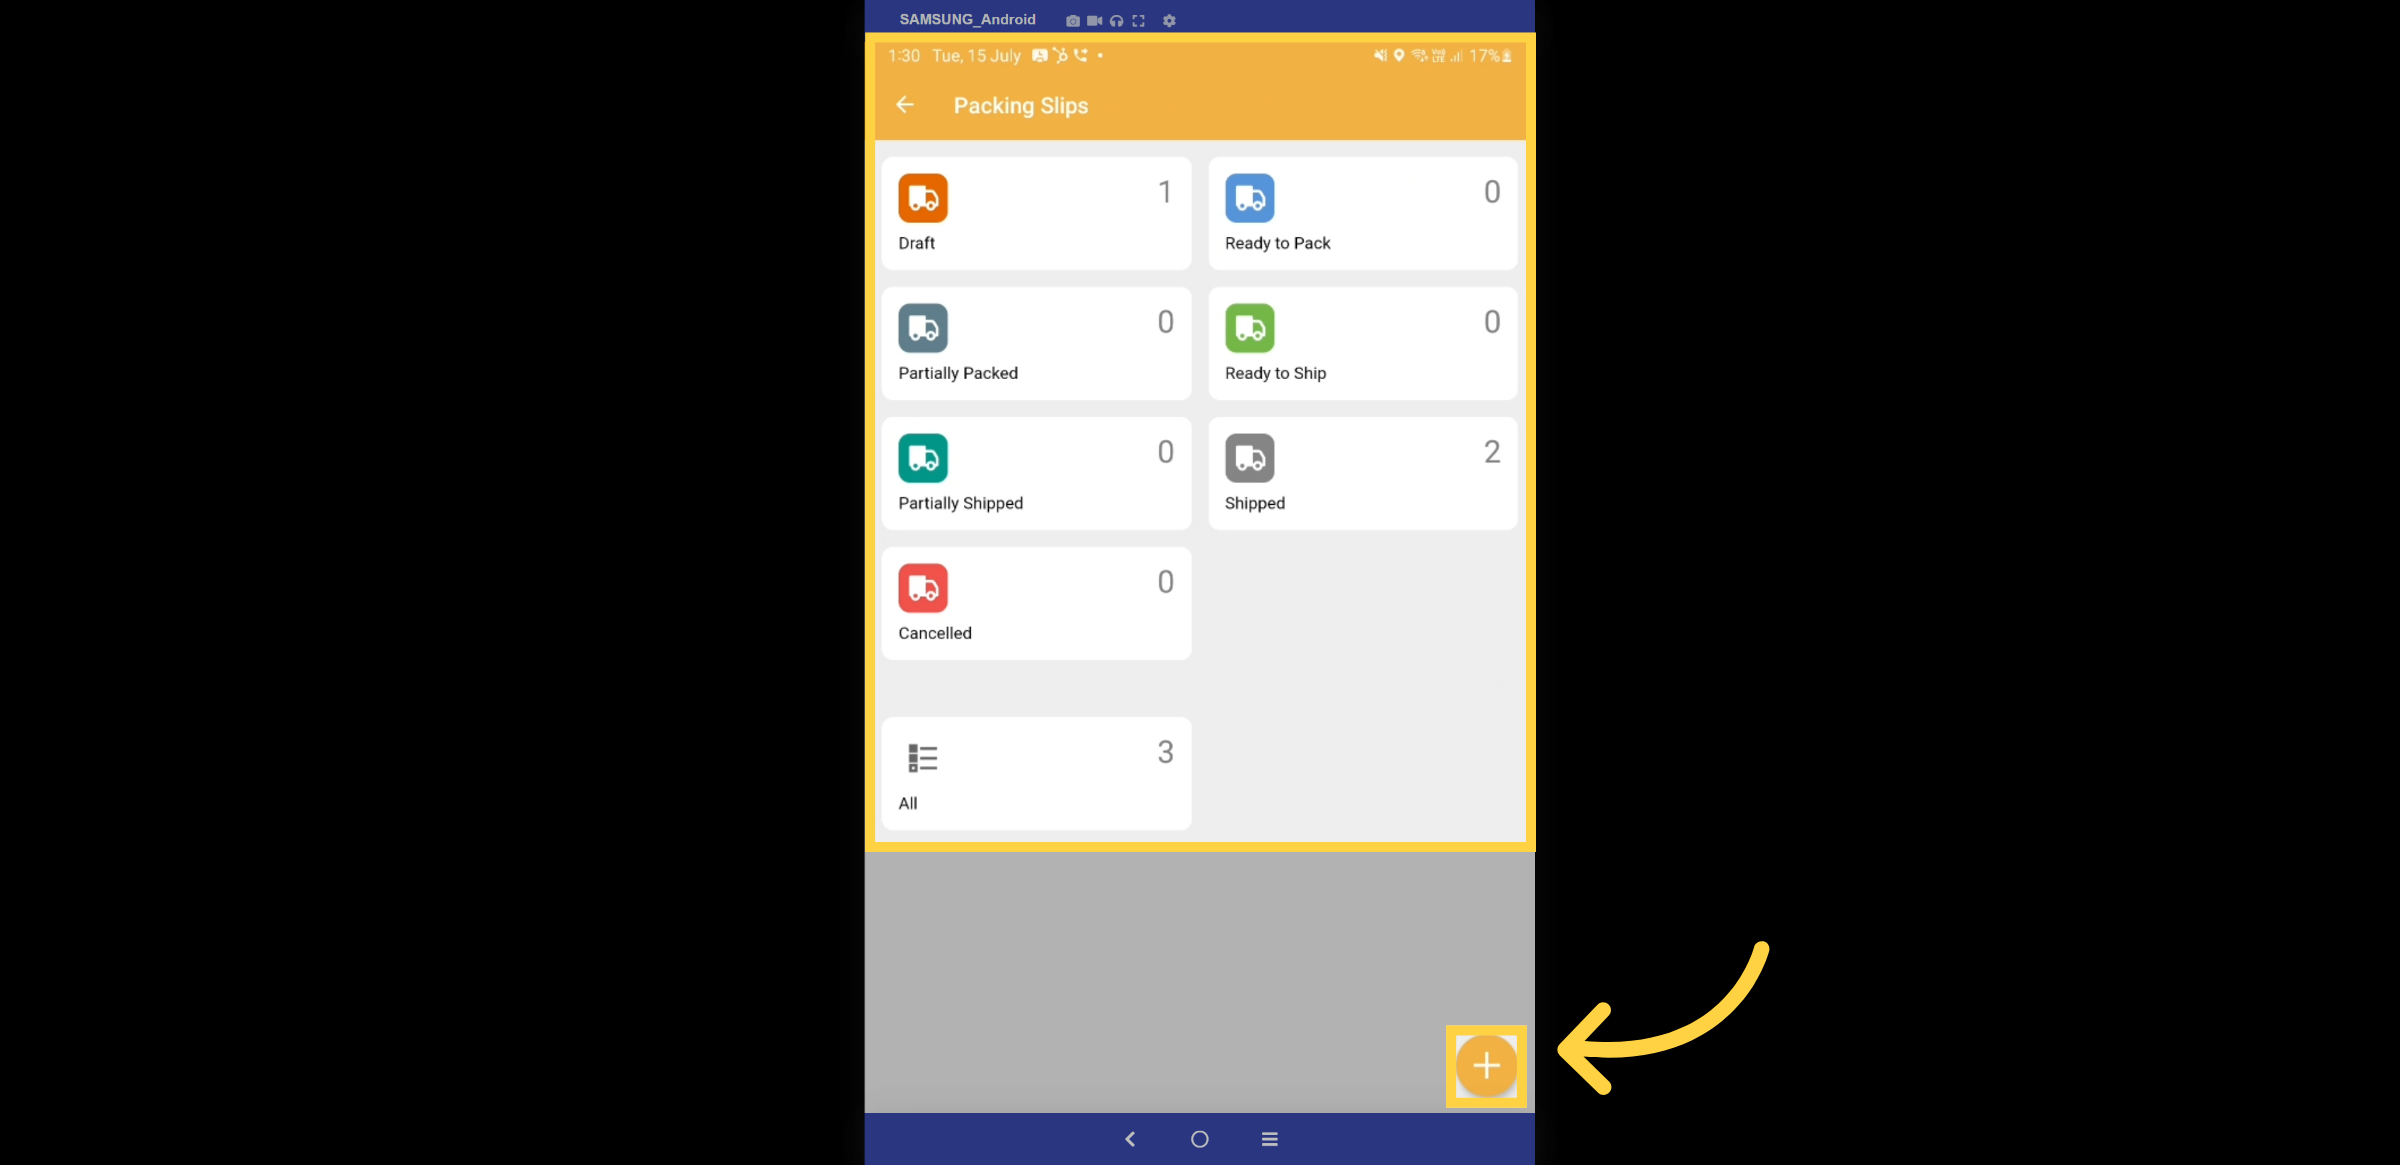
31. Packing Slips Dashboard
Within the Packing Slips dashboard, you can track the lifecycle of each packing slip, including stages such as draft, ready to pack, partially packed, ready to ship, partially shipped, shipped, and canceled. Each stage is represented by distinct colors for easy identification. Select the + icon to create a new Packing slip
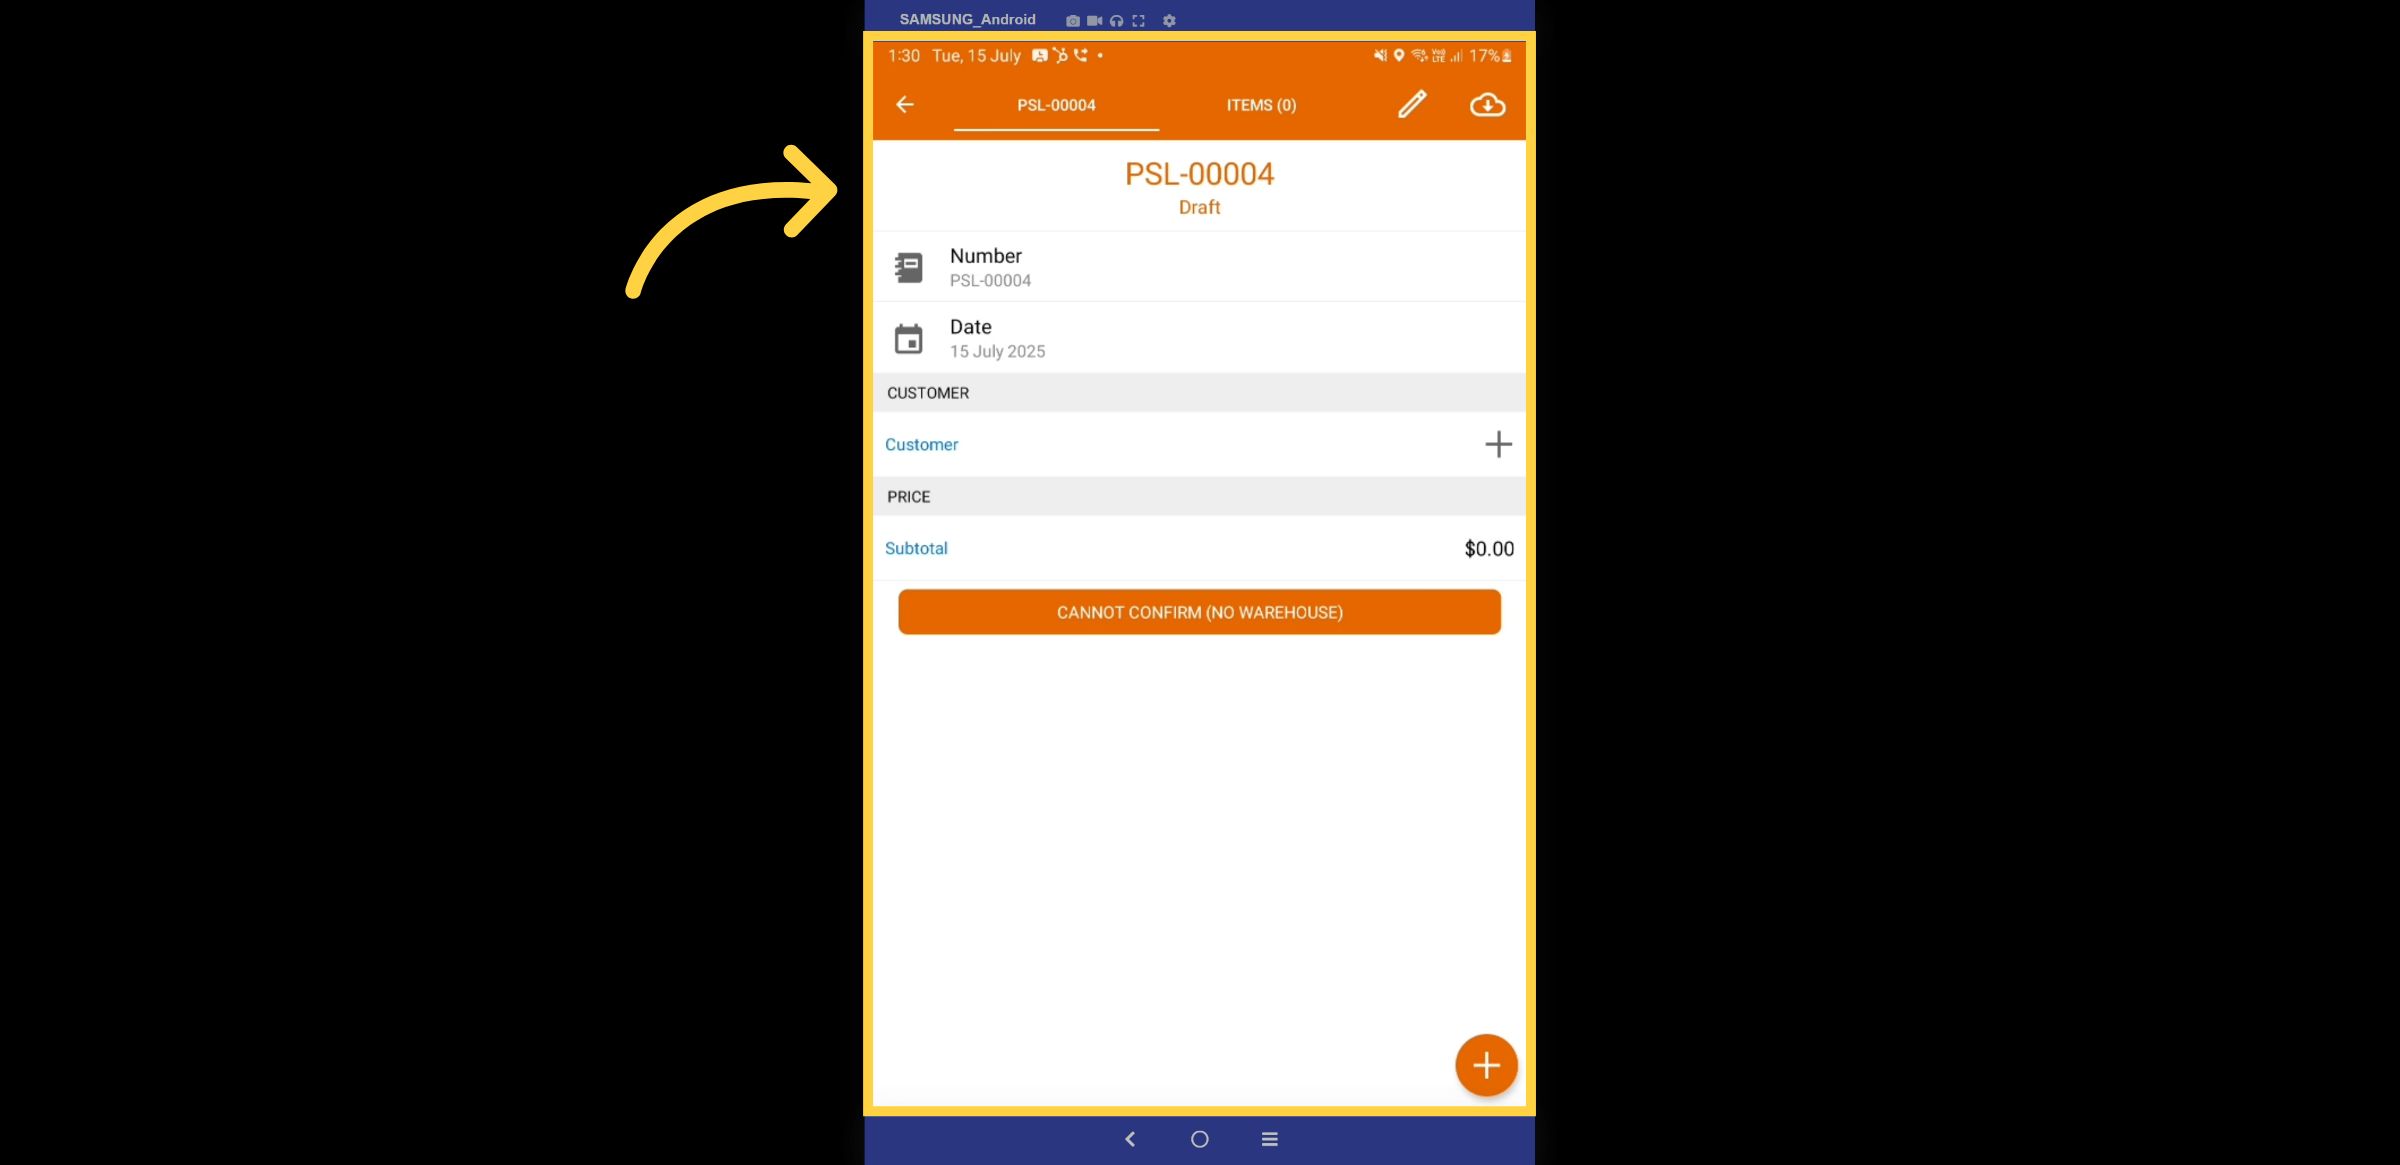
32. Draft Packing Slip
Once the packing slip is created, select the customer button.
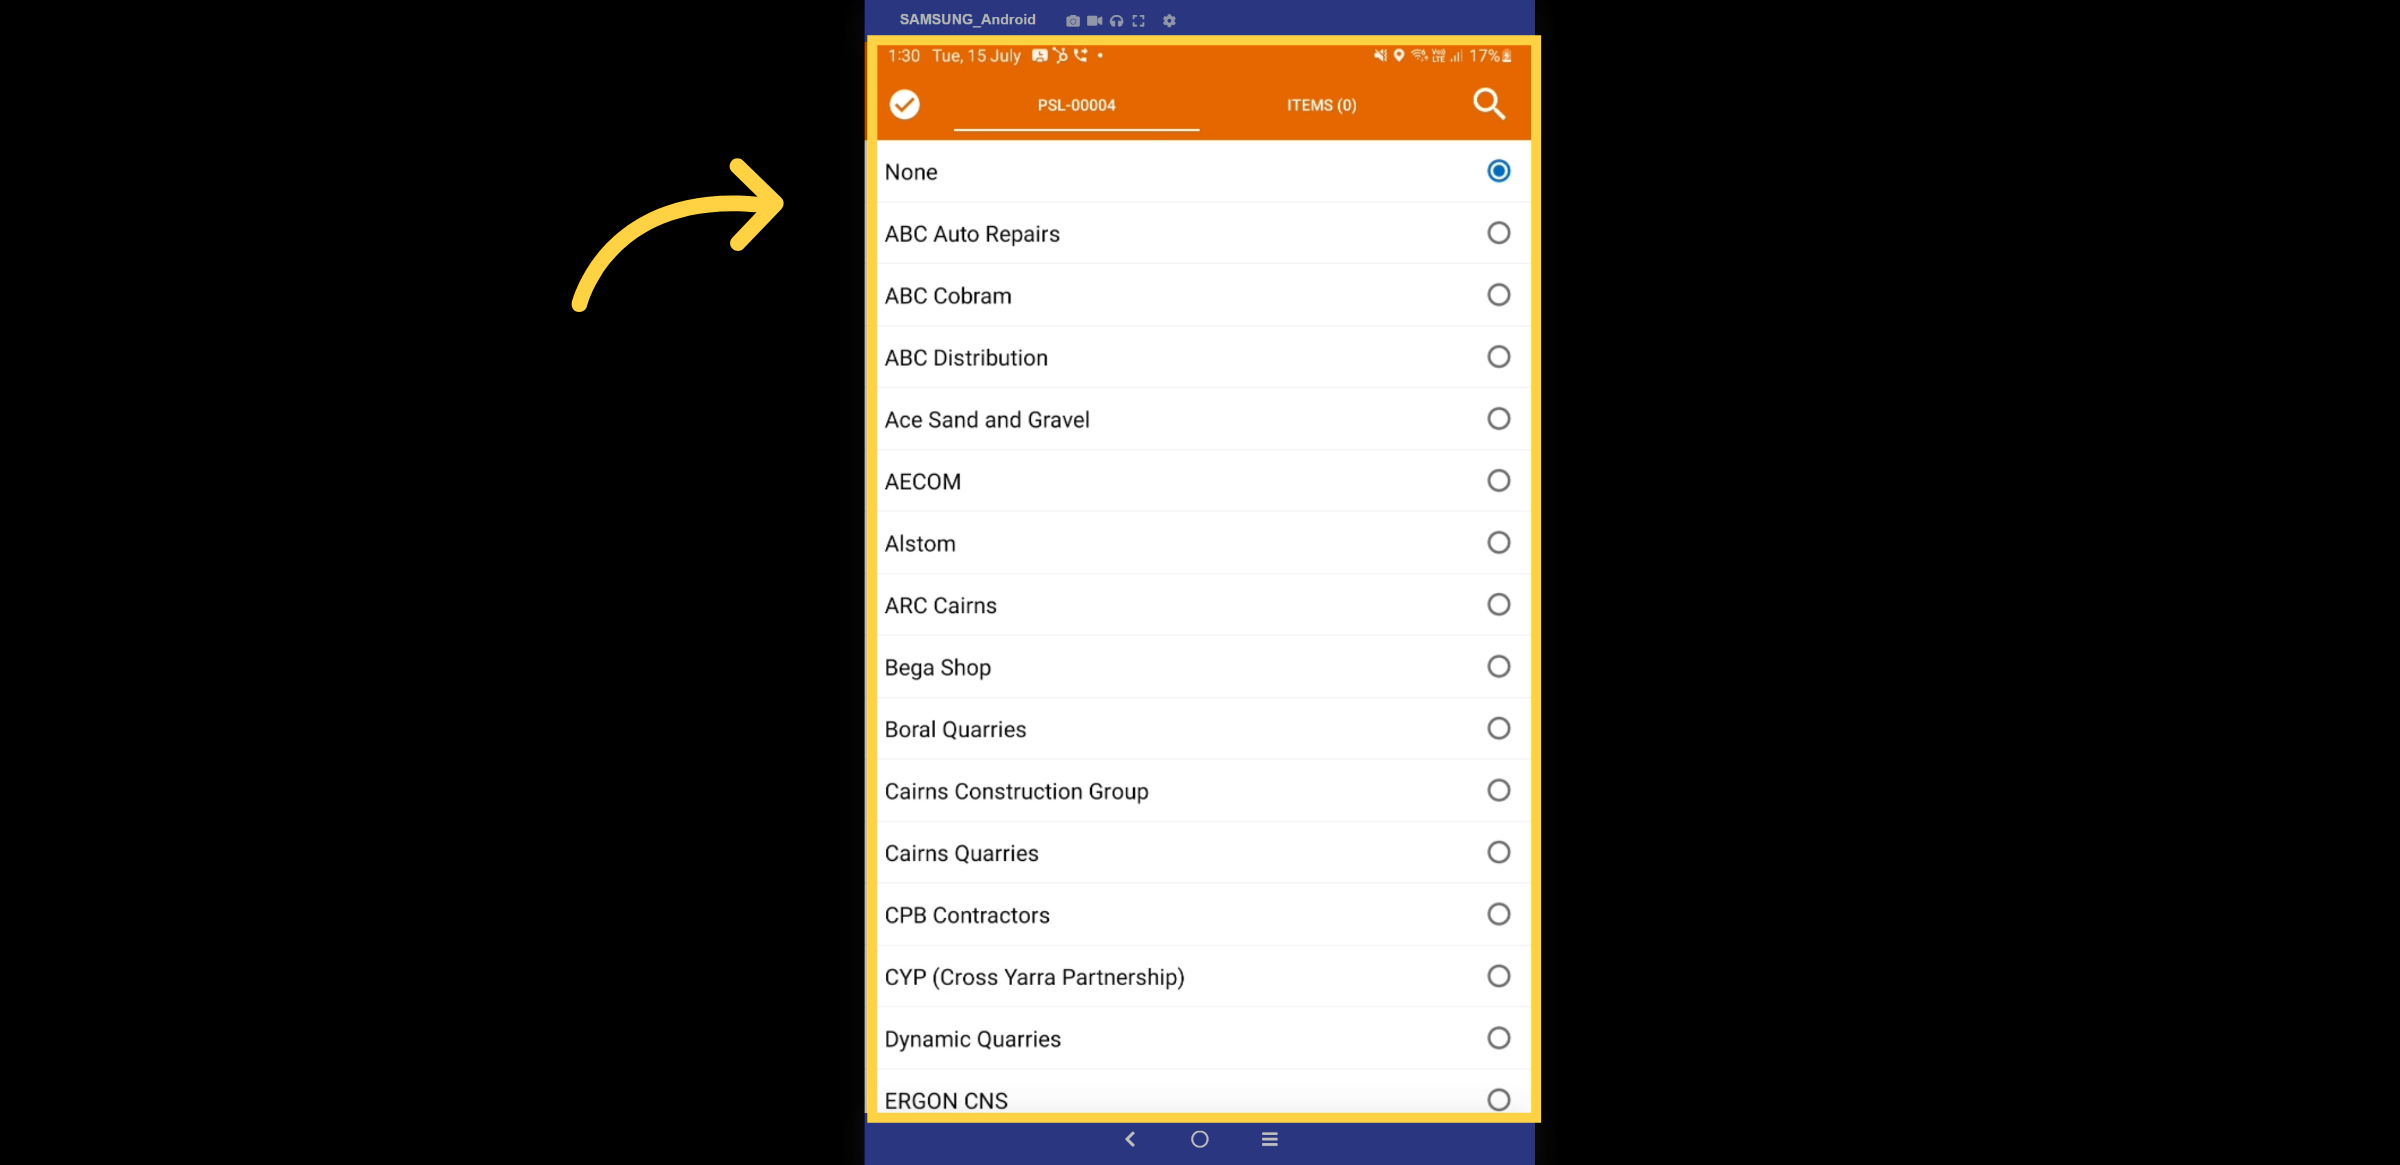
33. Customer Selection
Select a customer from the drop-down list.
34. Add Warehouse
Select the warehouses from which you’ll be collecting, and begin adding items to the list.
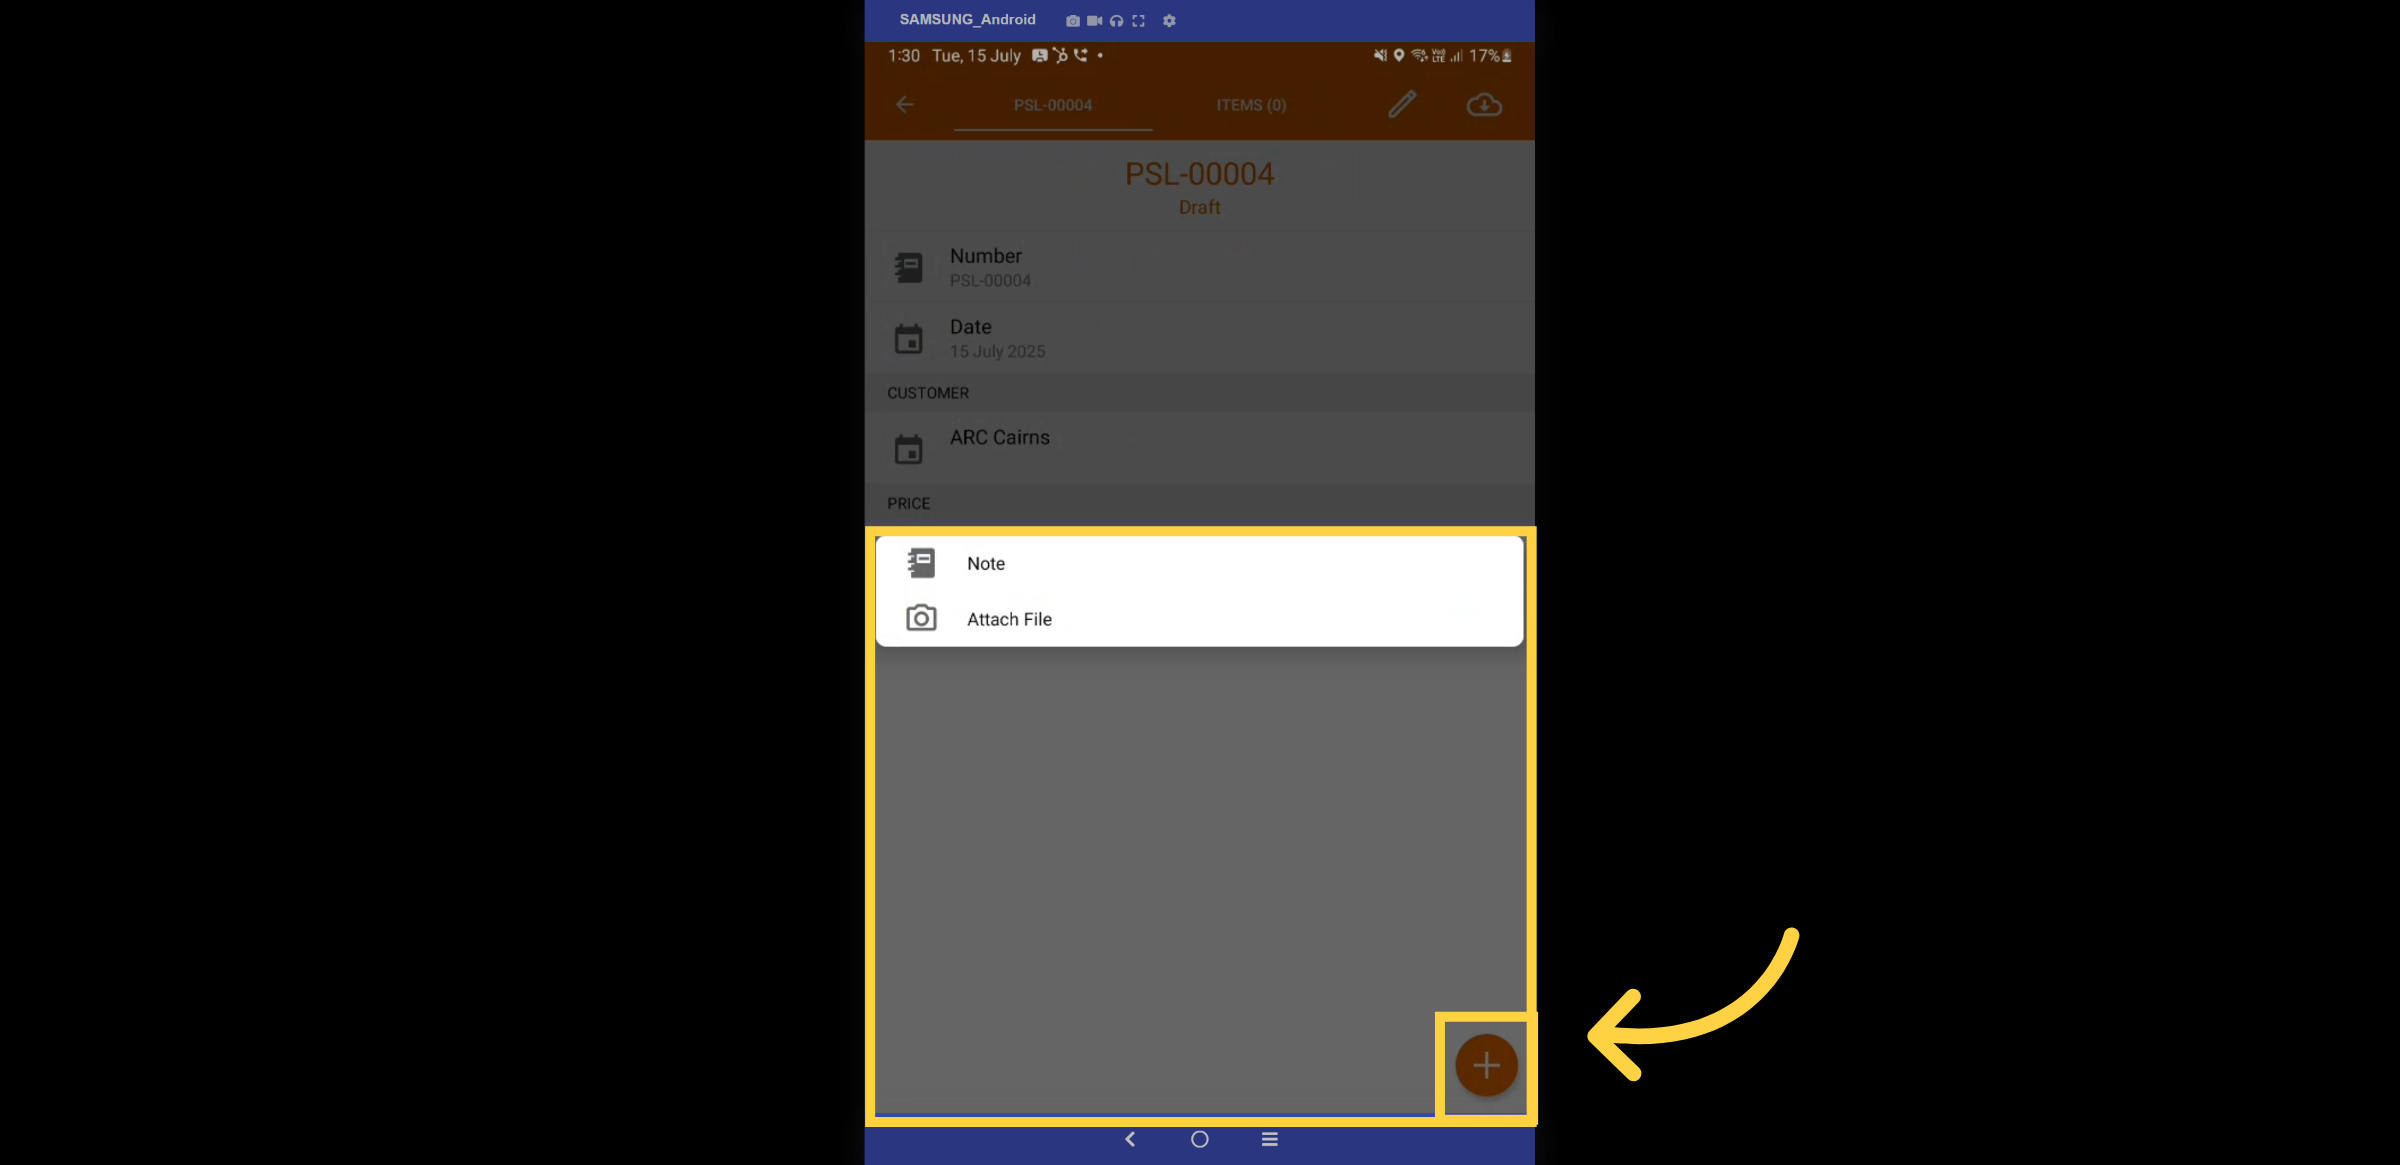
35. Attach
The + icon enables you to add notes and attach files to the packing slip.
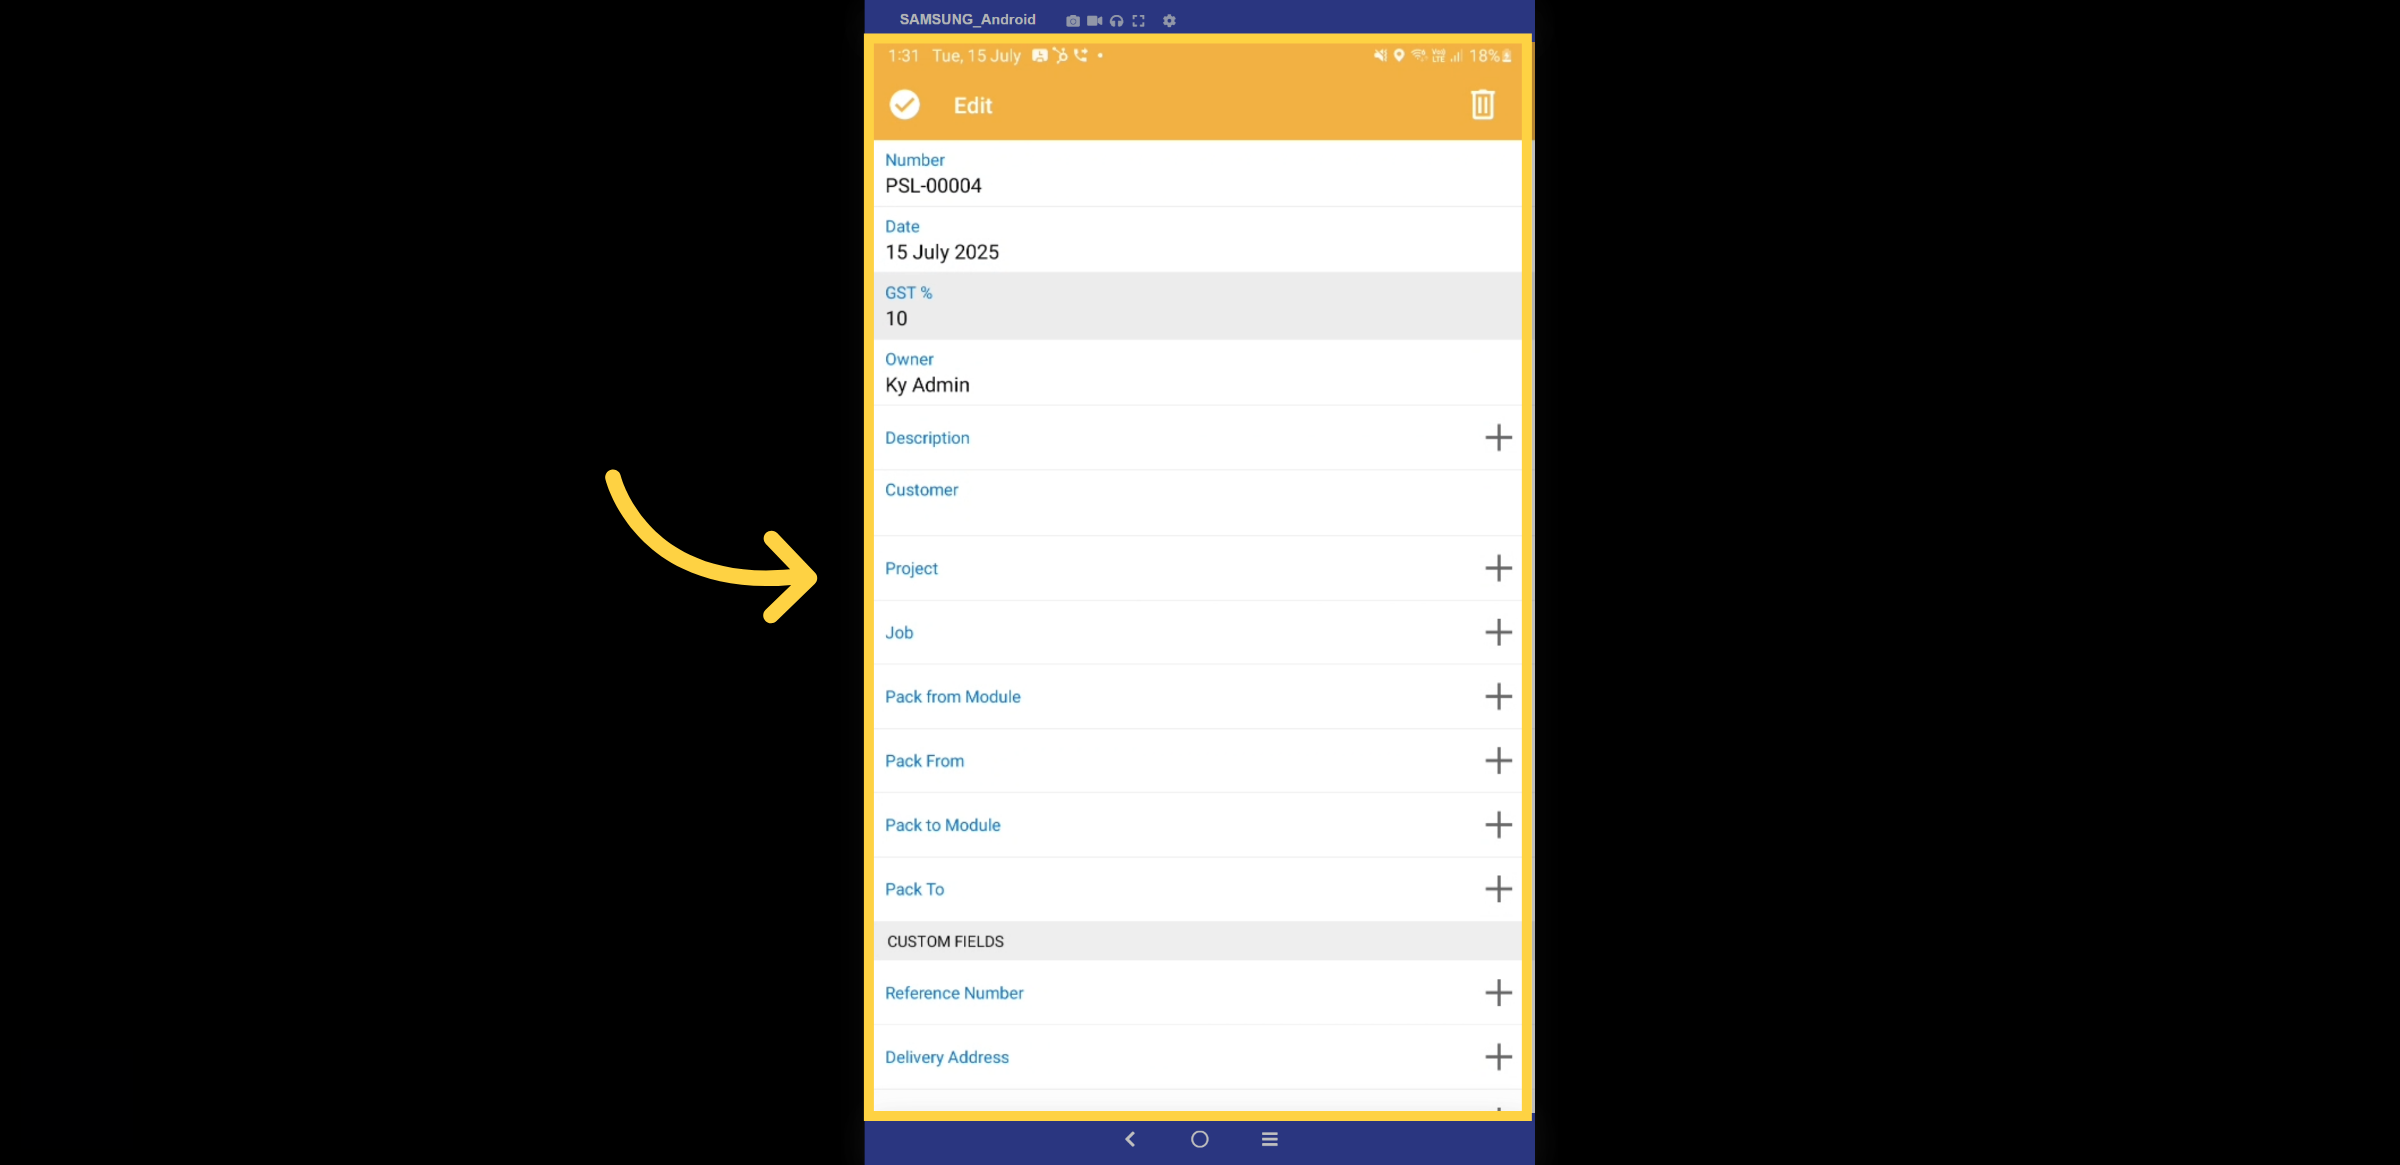
36. Complete Packing Slip
Finalise the required fields on the packing slip and submit.
Thanks for watching

