1. Scheduler
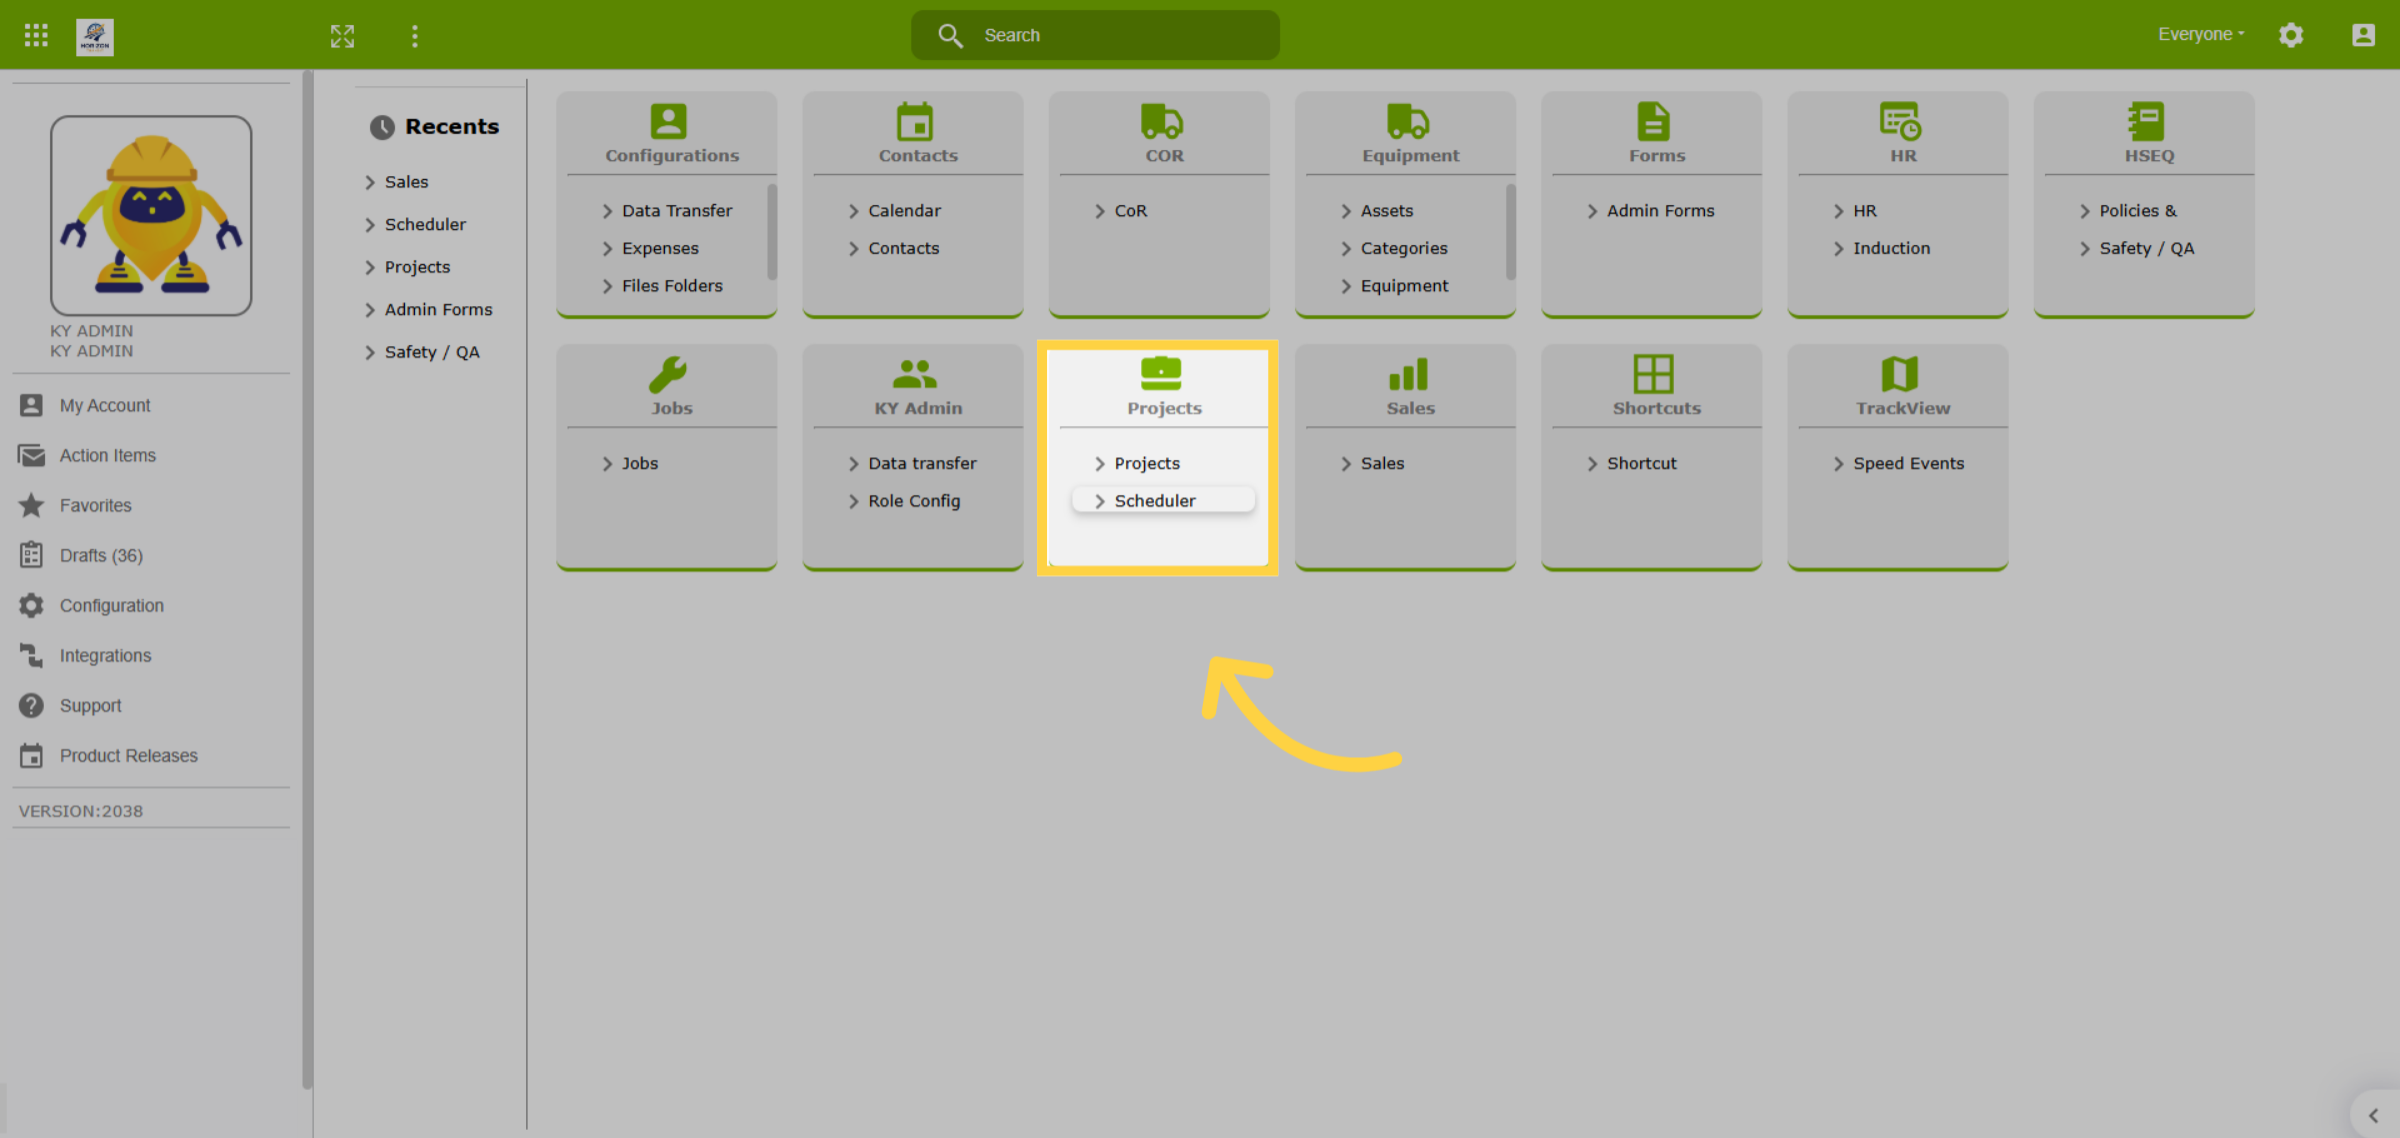
The scheduler can be tailored to accommodate various workflows, including the scheduling of runs. To get started, navigate to the Projects Module from the home dashboard and select Scheduler.
2. Overview Scheduler
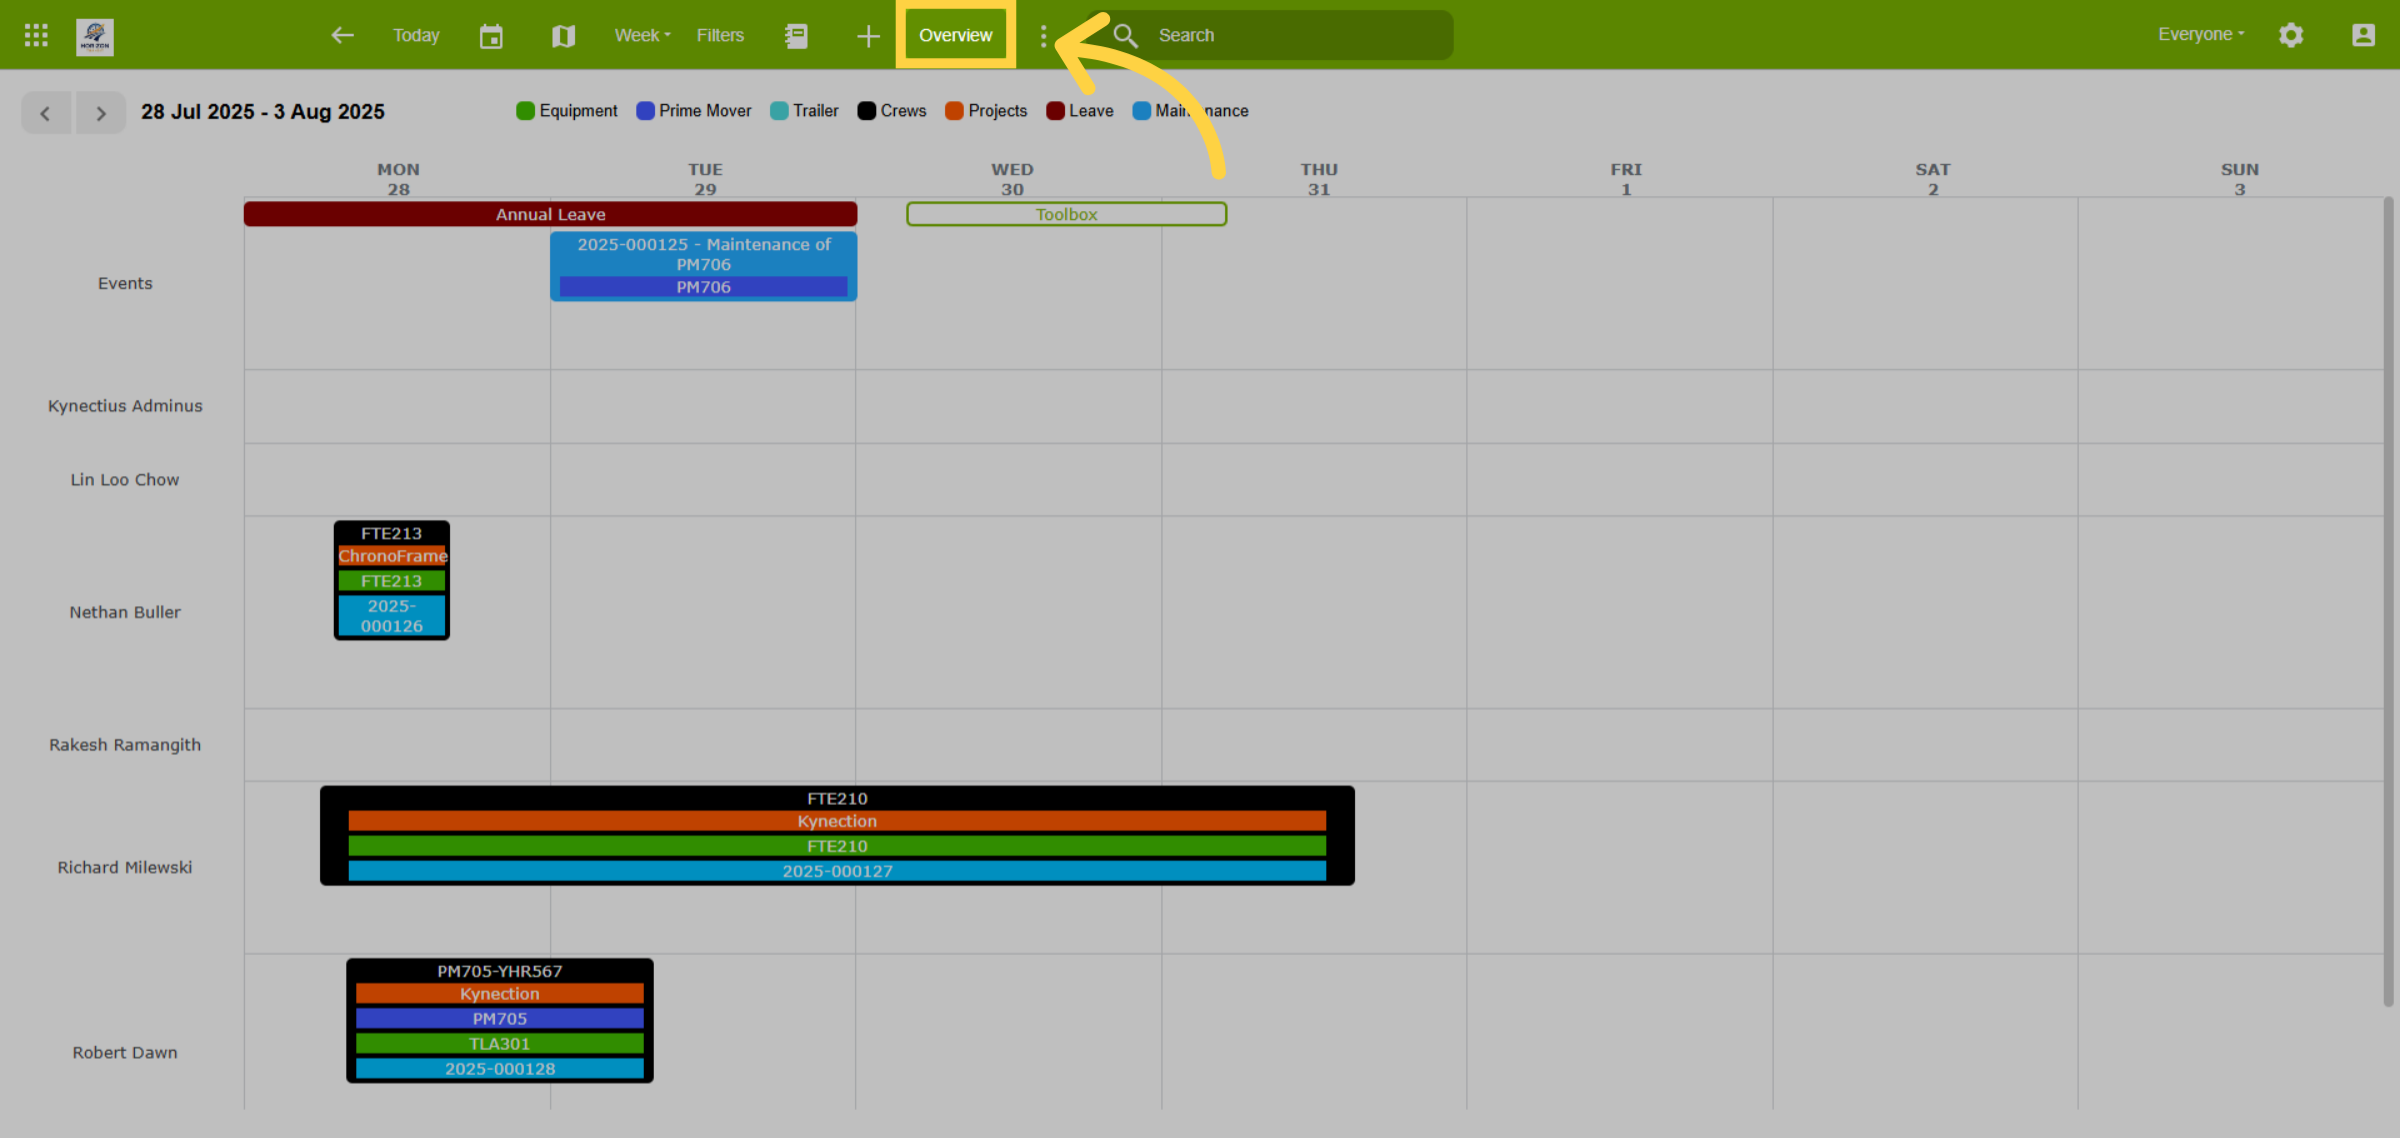
The Overview tab displays scheduled staff, serving as a review tool for job allocations and leave, but not for direct scheduling. Job allocations seen here originate from the Project Scheduler.
3. Projects Scheduler
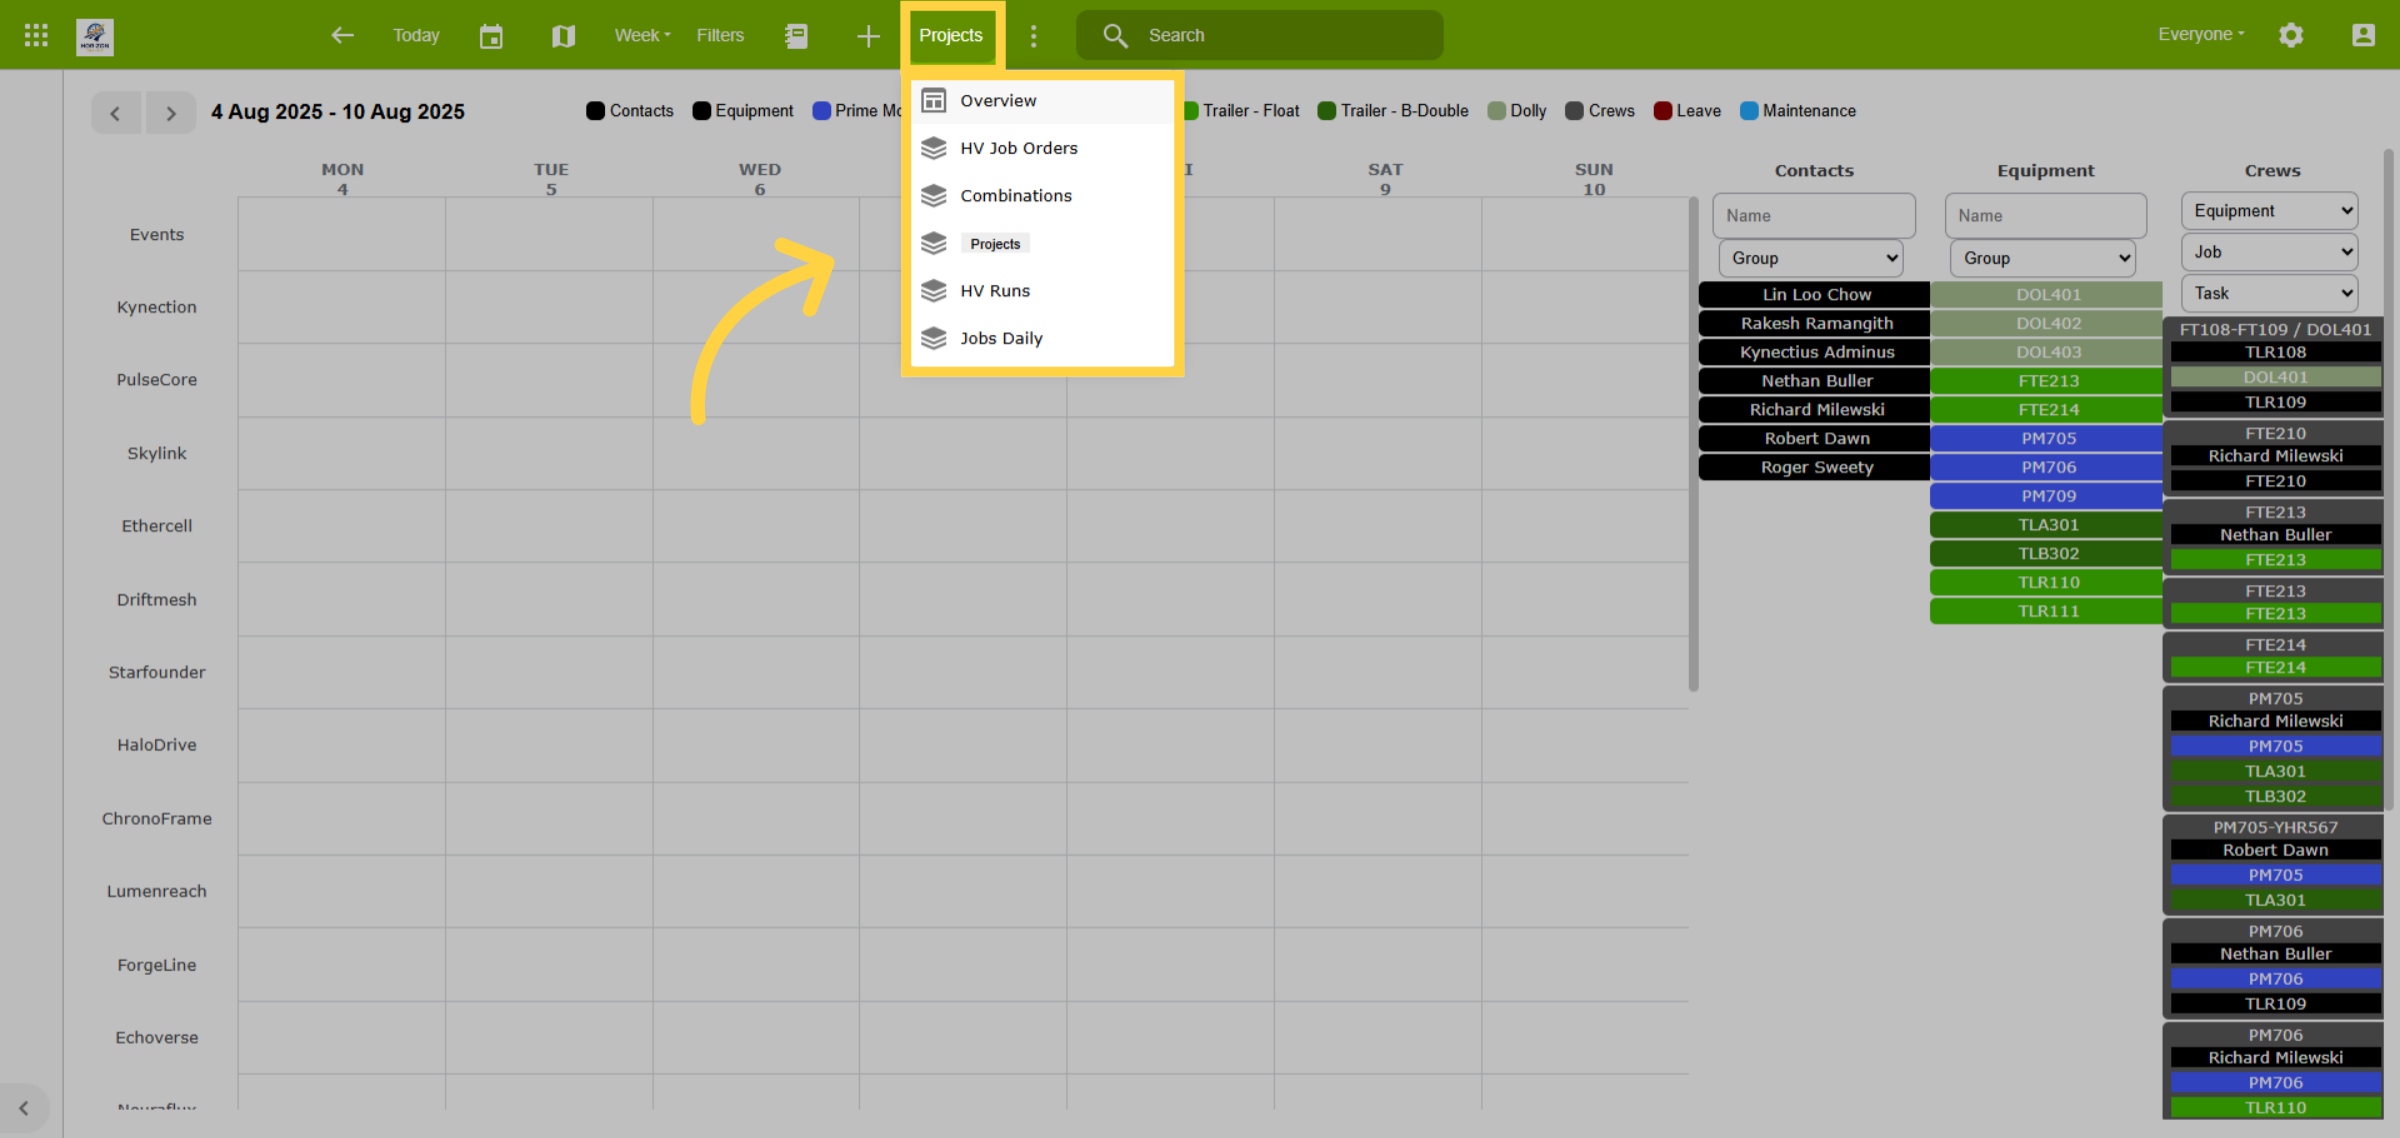
The Project Scheduler is accessible via the drop-down list.
4. Scheduler Format
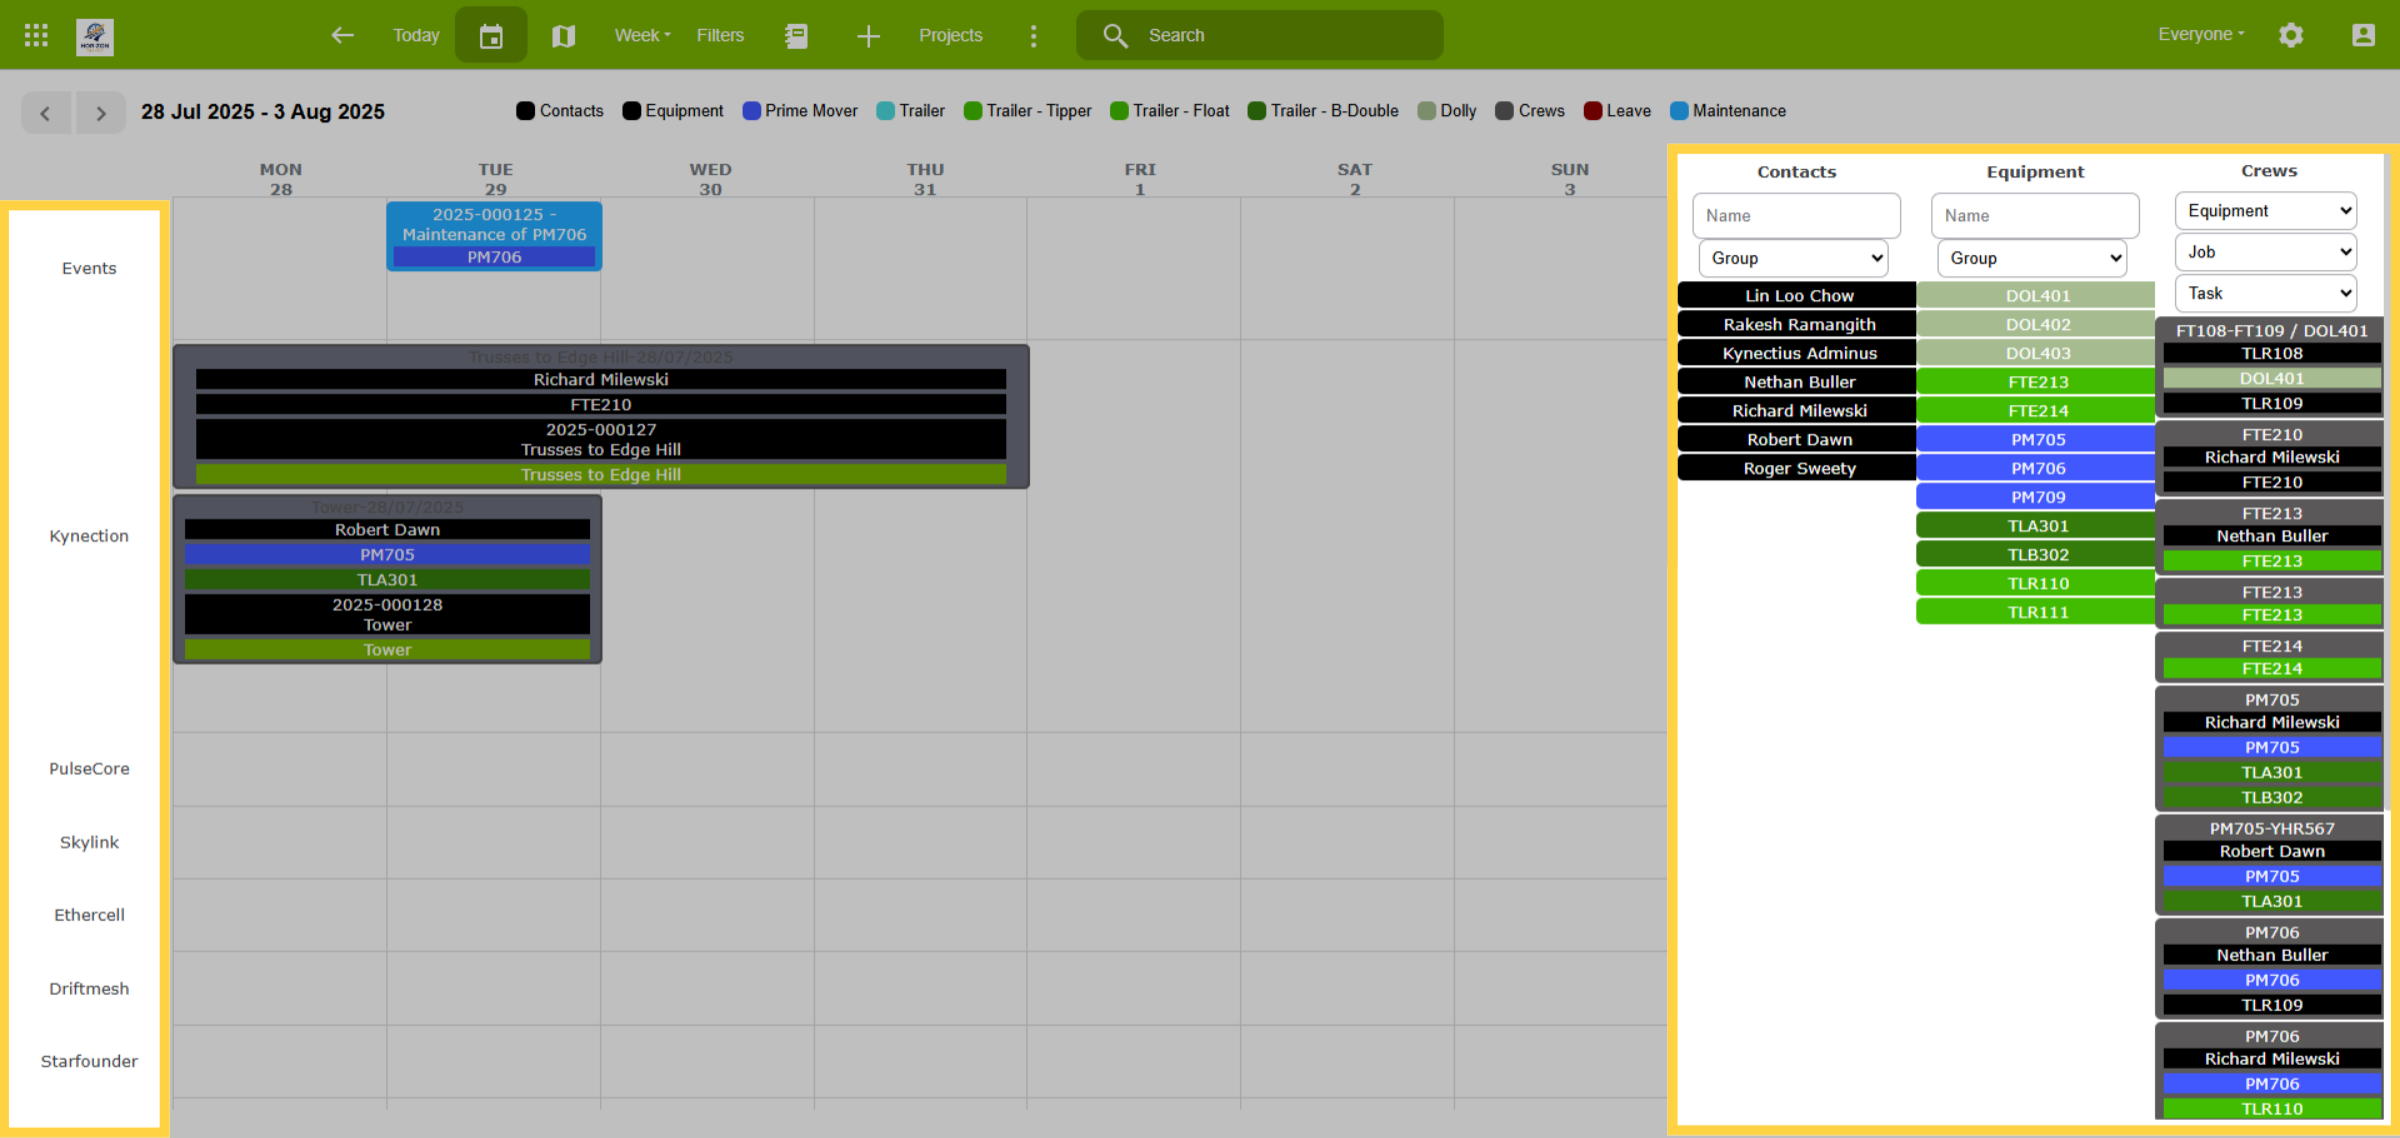
In this example, contacts, equipment, and crews are scheduled against projects. Active projects within the scheduler period display on the left. Contacts, equipment, and crews are available on the right.
5. Drag Equipment Against Project
The Equipment column lists available equipment, colour-coded by category, with a key at the top. To manually schedule, drag the relevant equipment onto the project event.
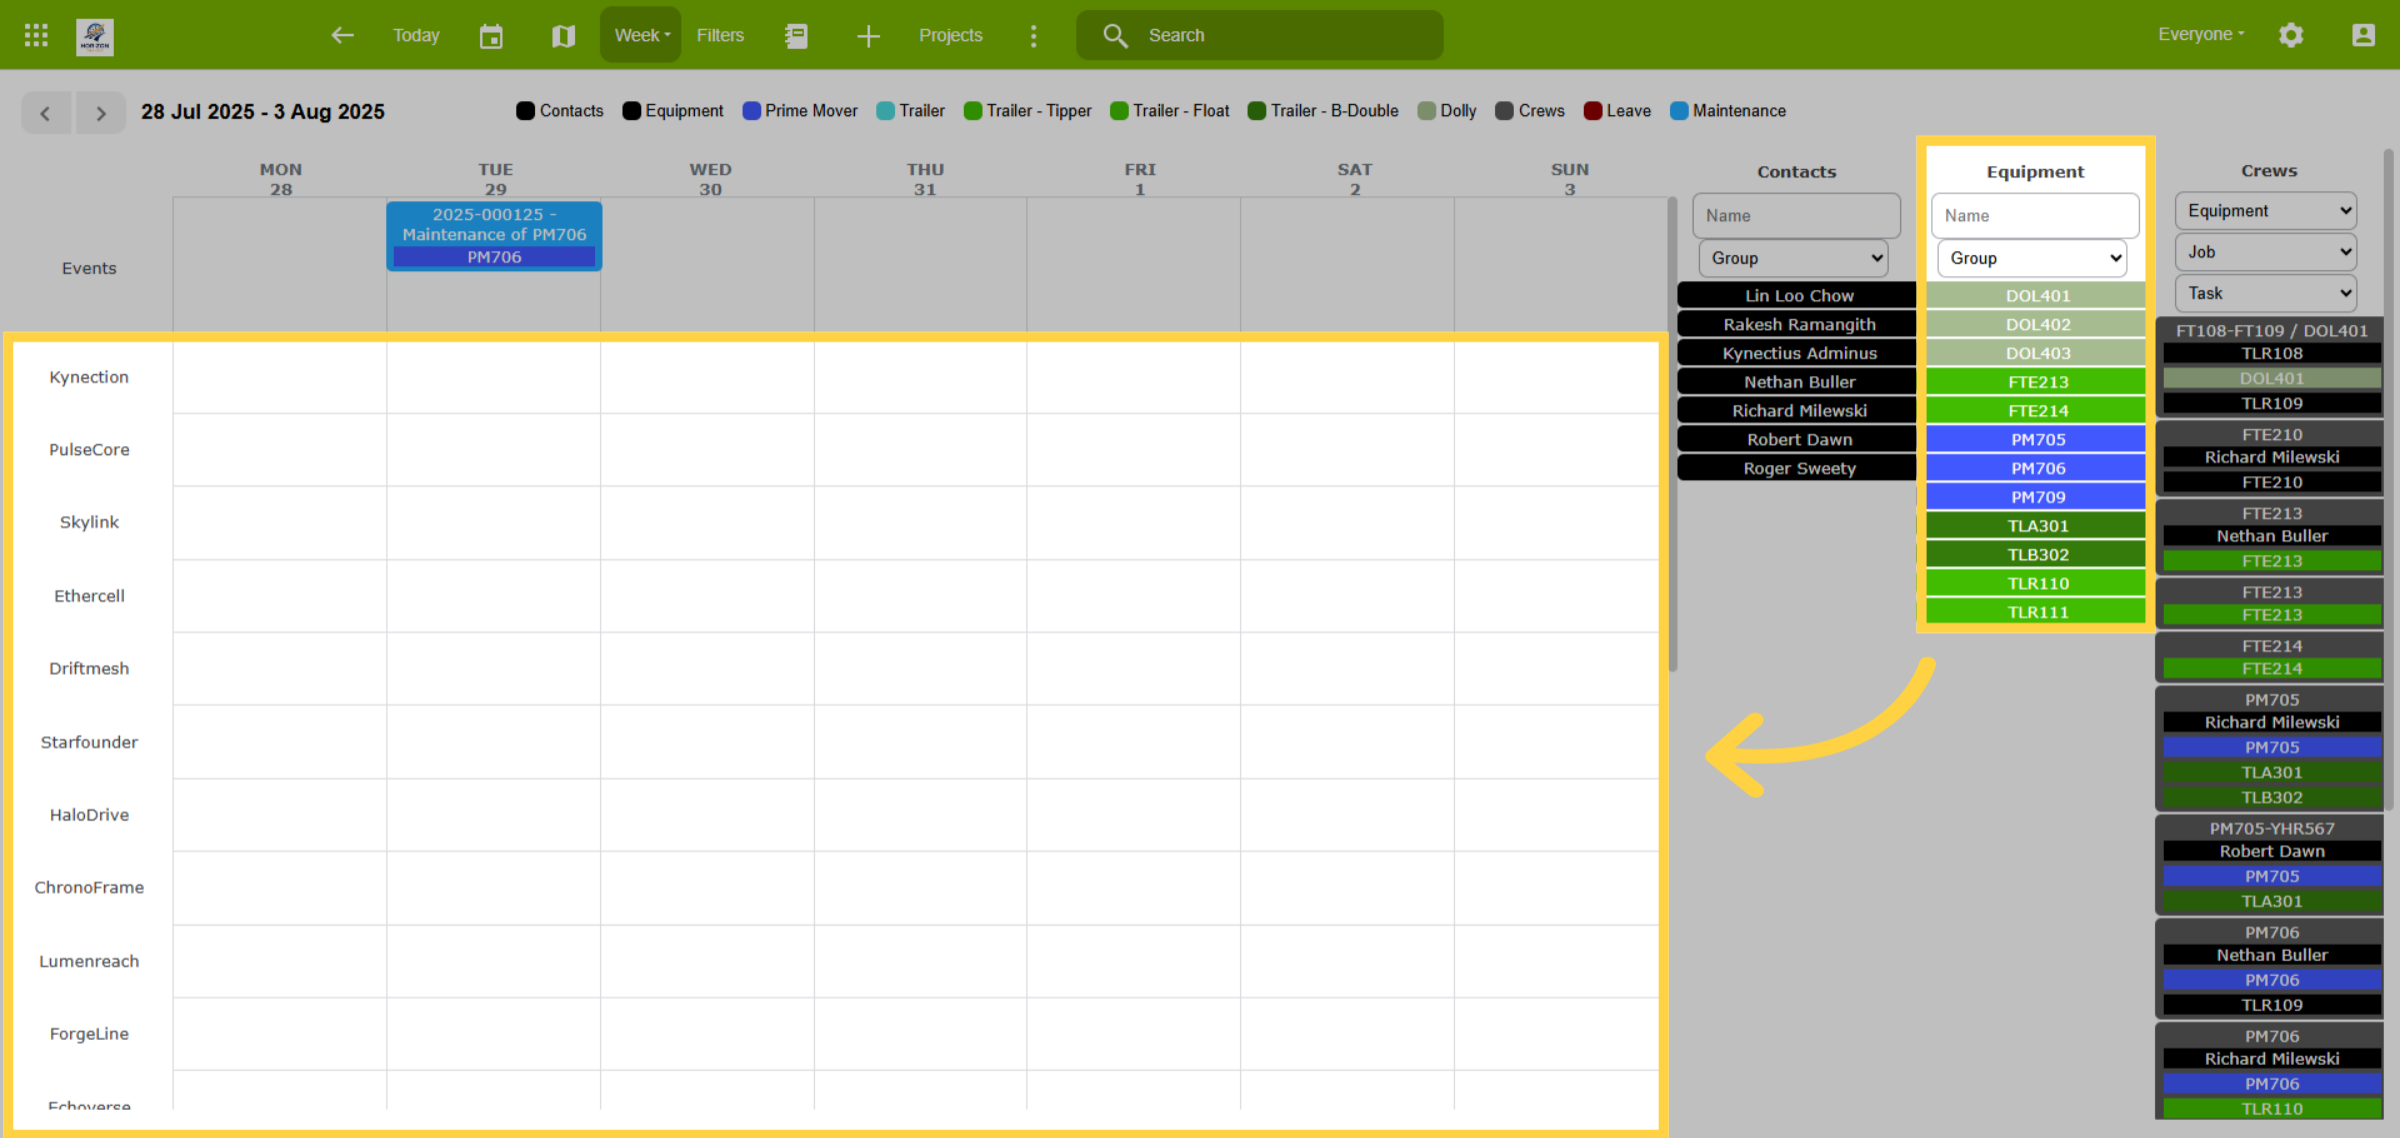
6. Select and Drag a Driver
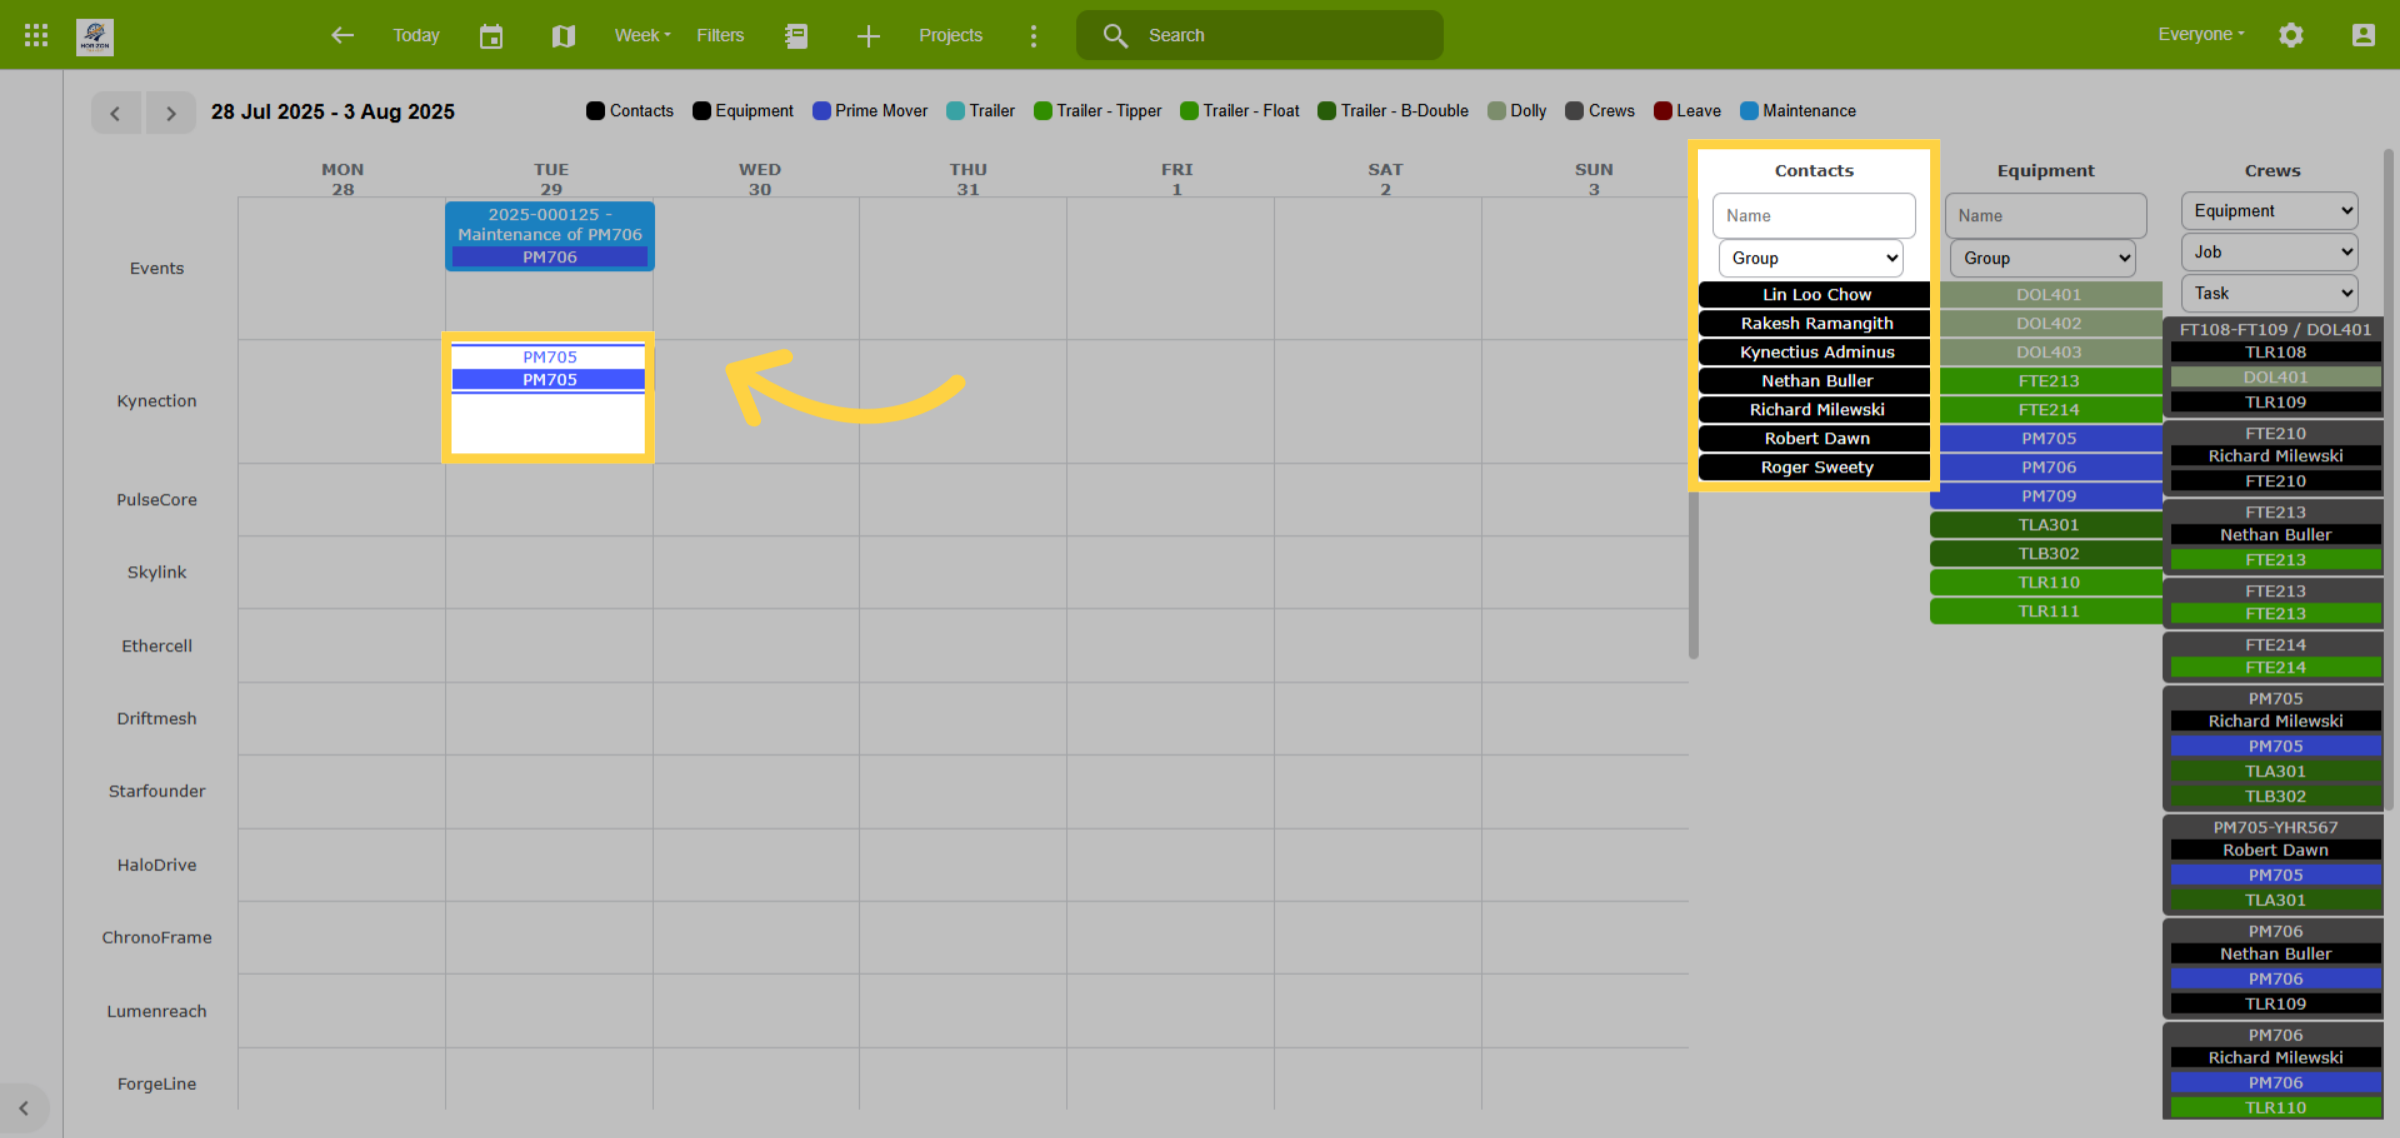
Groups setup in the Contacts module can be used to filter driver capabilities. Drag the relevant employee onto the previously added equipment event to complete the allocation. Alternatively, schedule crews by dragging the crew, which assigns equipment and the driver in a single action.
7. Create a Crew
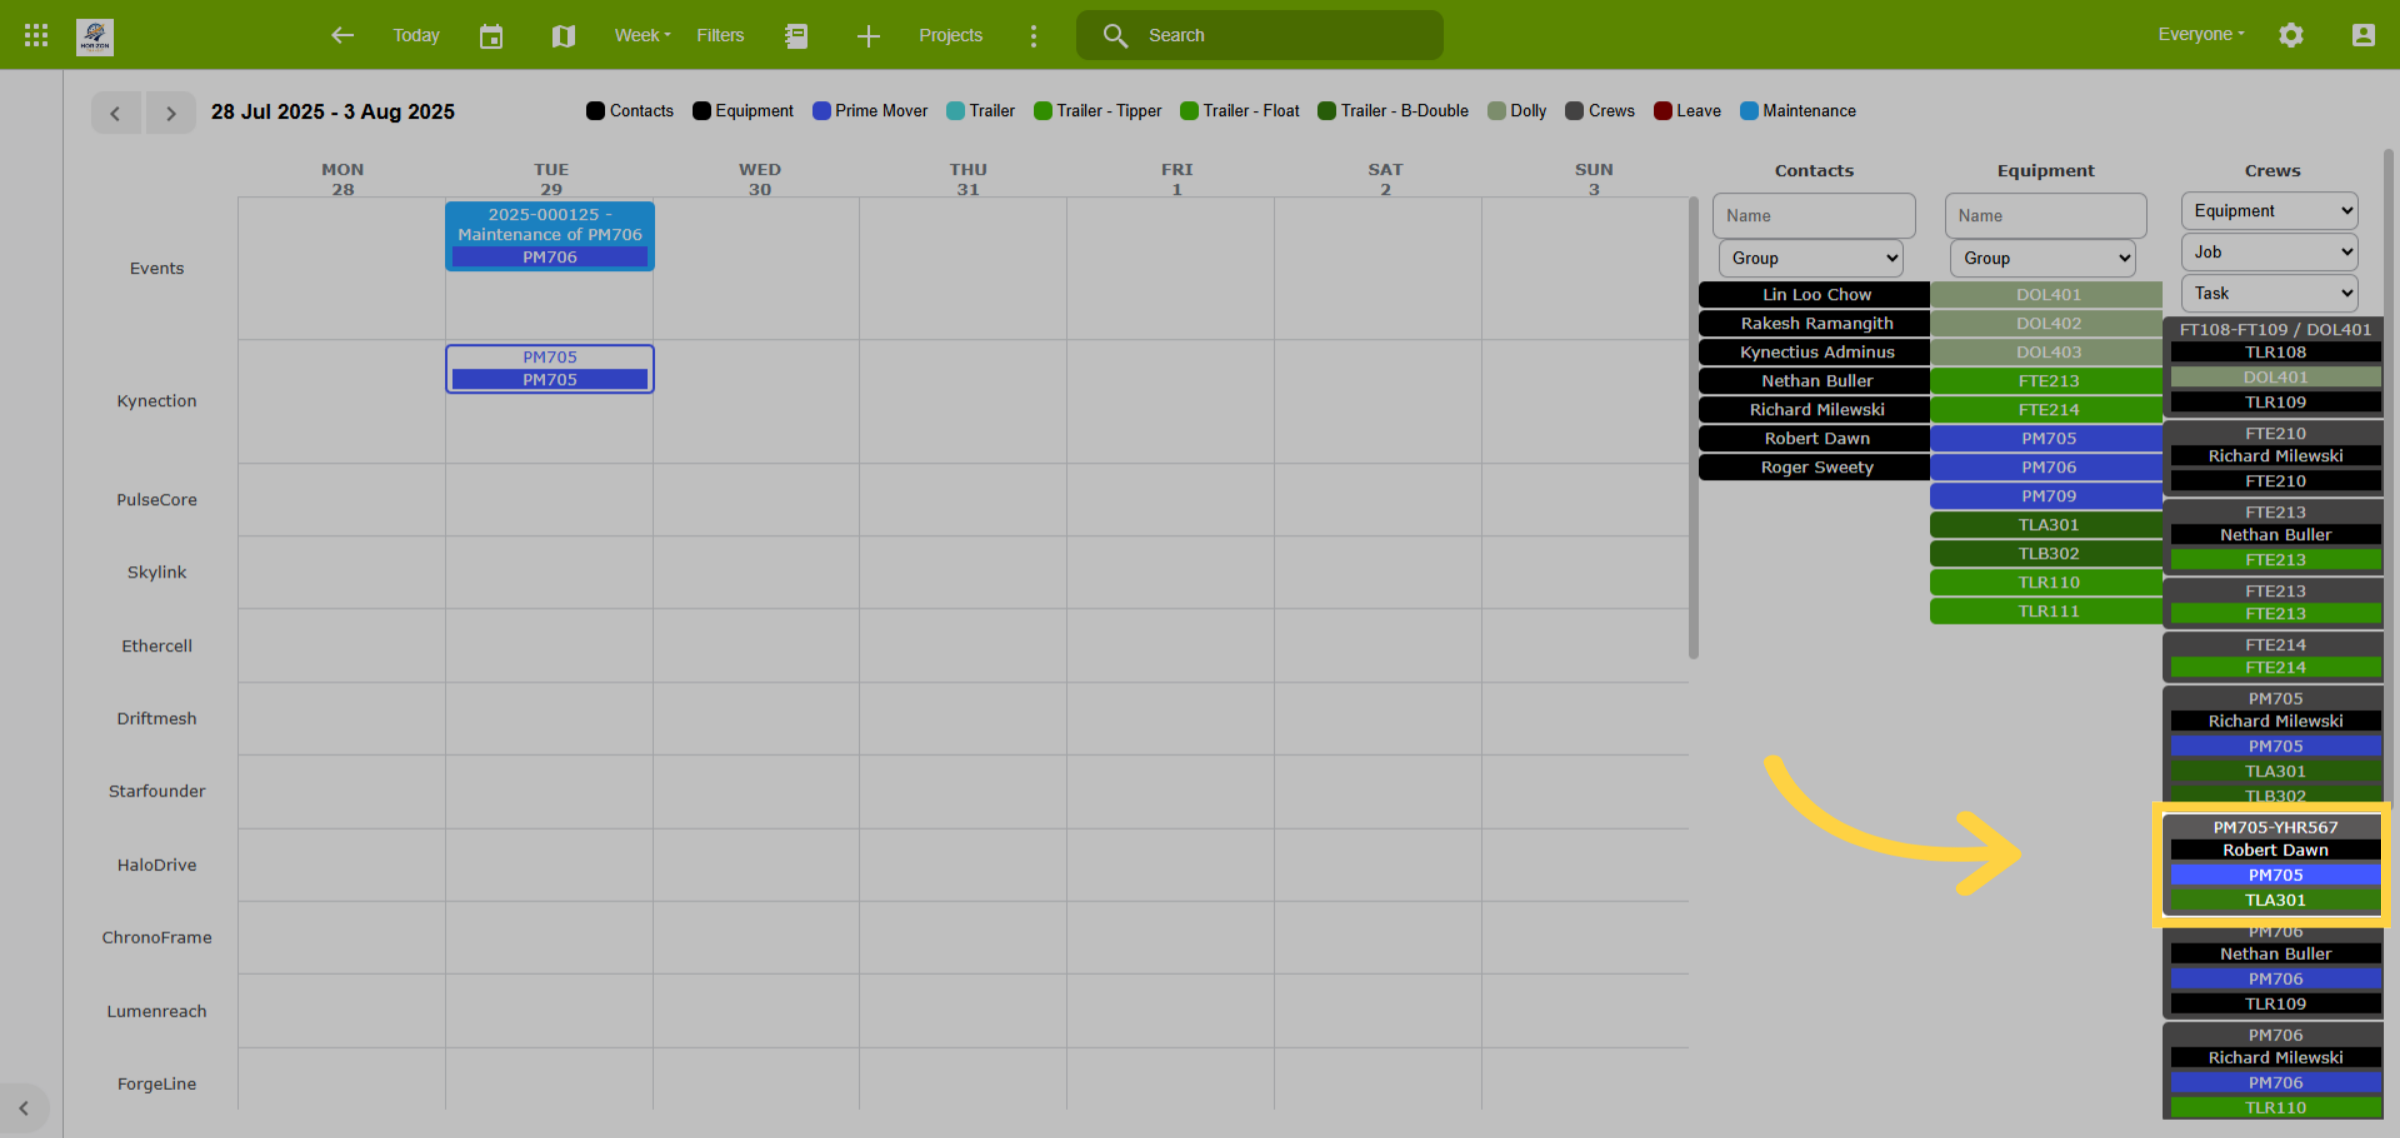
A Crew is a predefined combination that can include drivers and equipment. To create a crew, drag a piece of equipment or a person into the Crew column. The first item added becomes the default crew name. Drag additional items to build the crew.
8. Crew Details
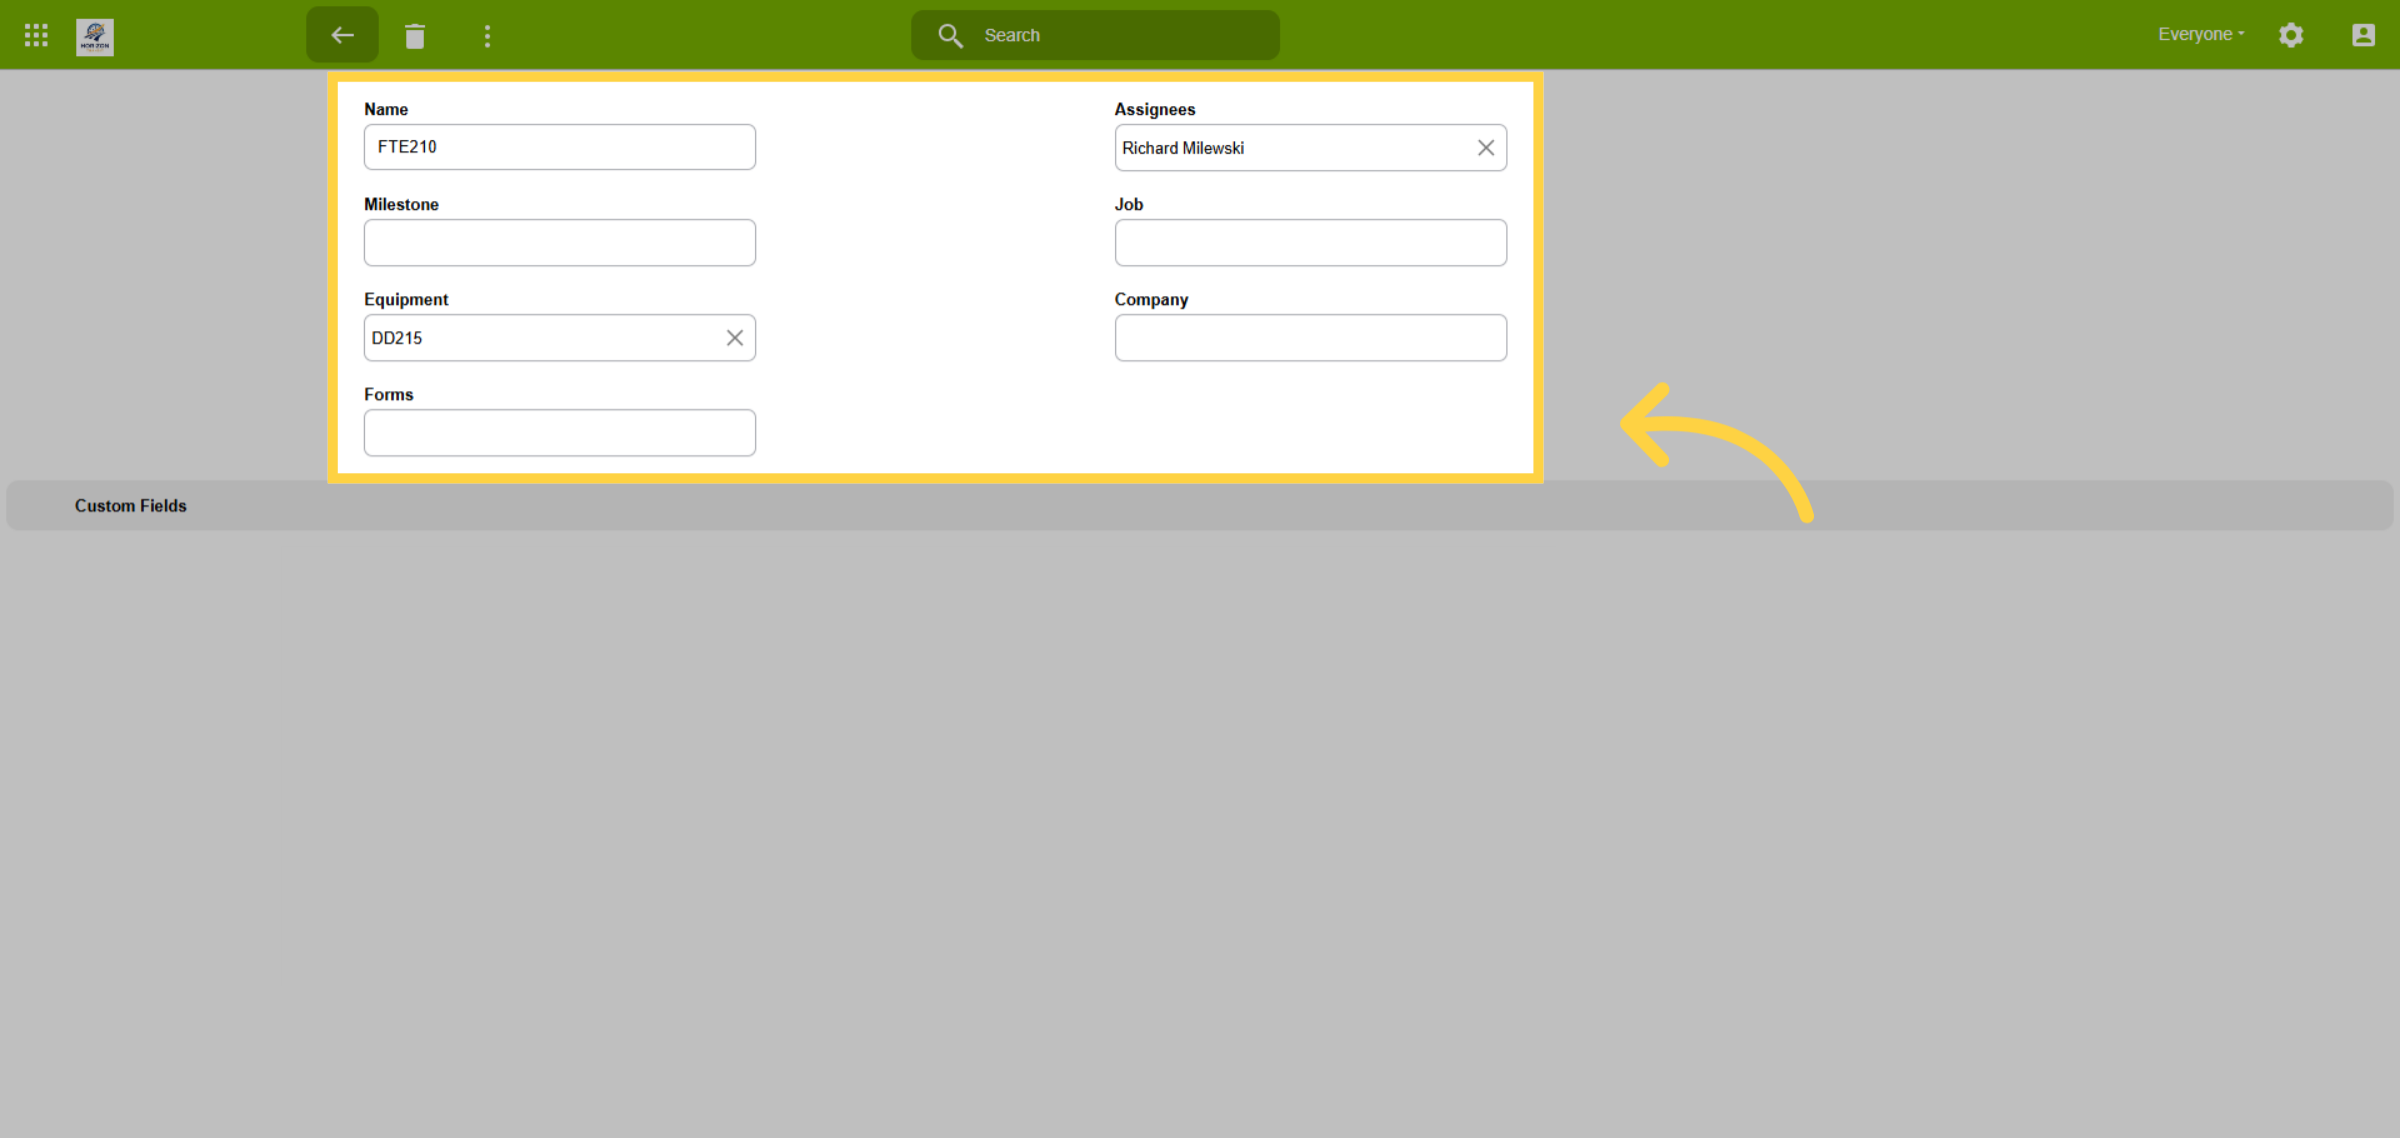
Crews can be edited by clicking the crew name to open the edit panel. Custom fields can also be added to the crew configuration for specific information.
9. Drag Crew onto Project
Drag your configured crew onto the scheduler.
10. Notifications
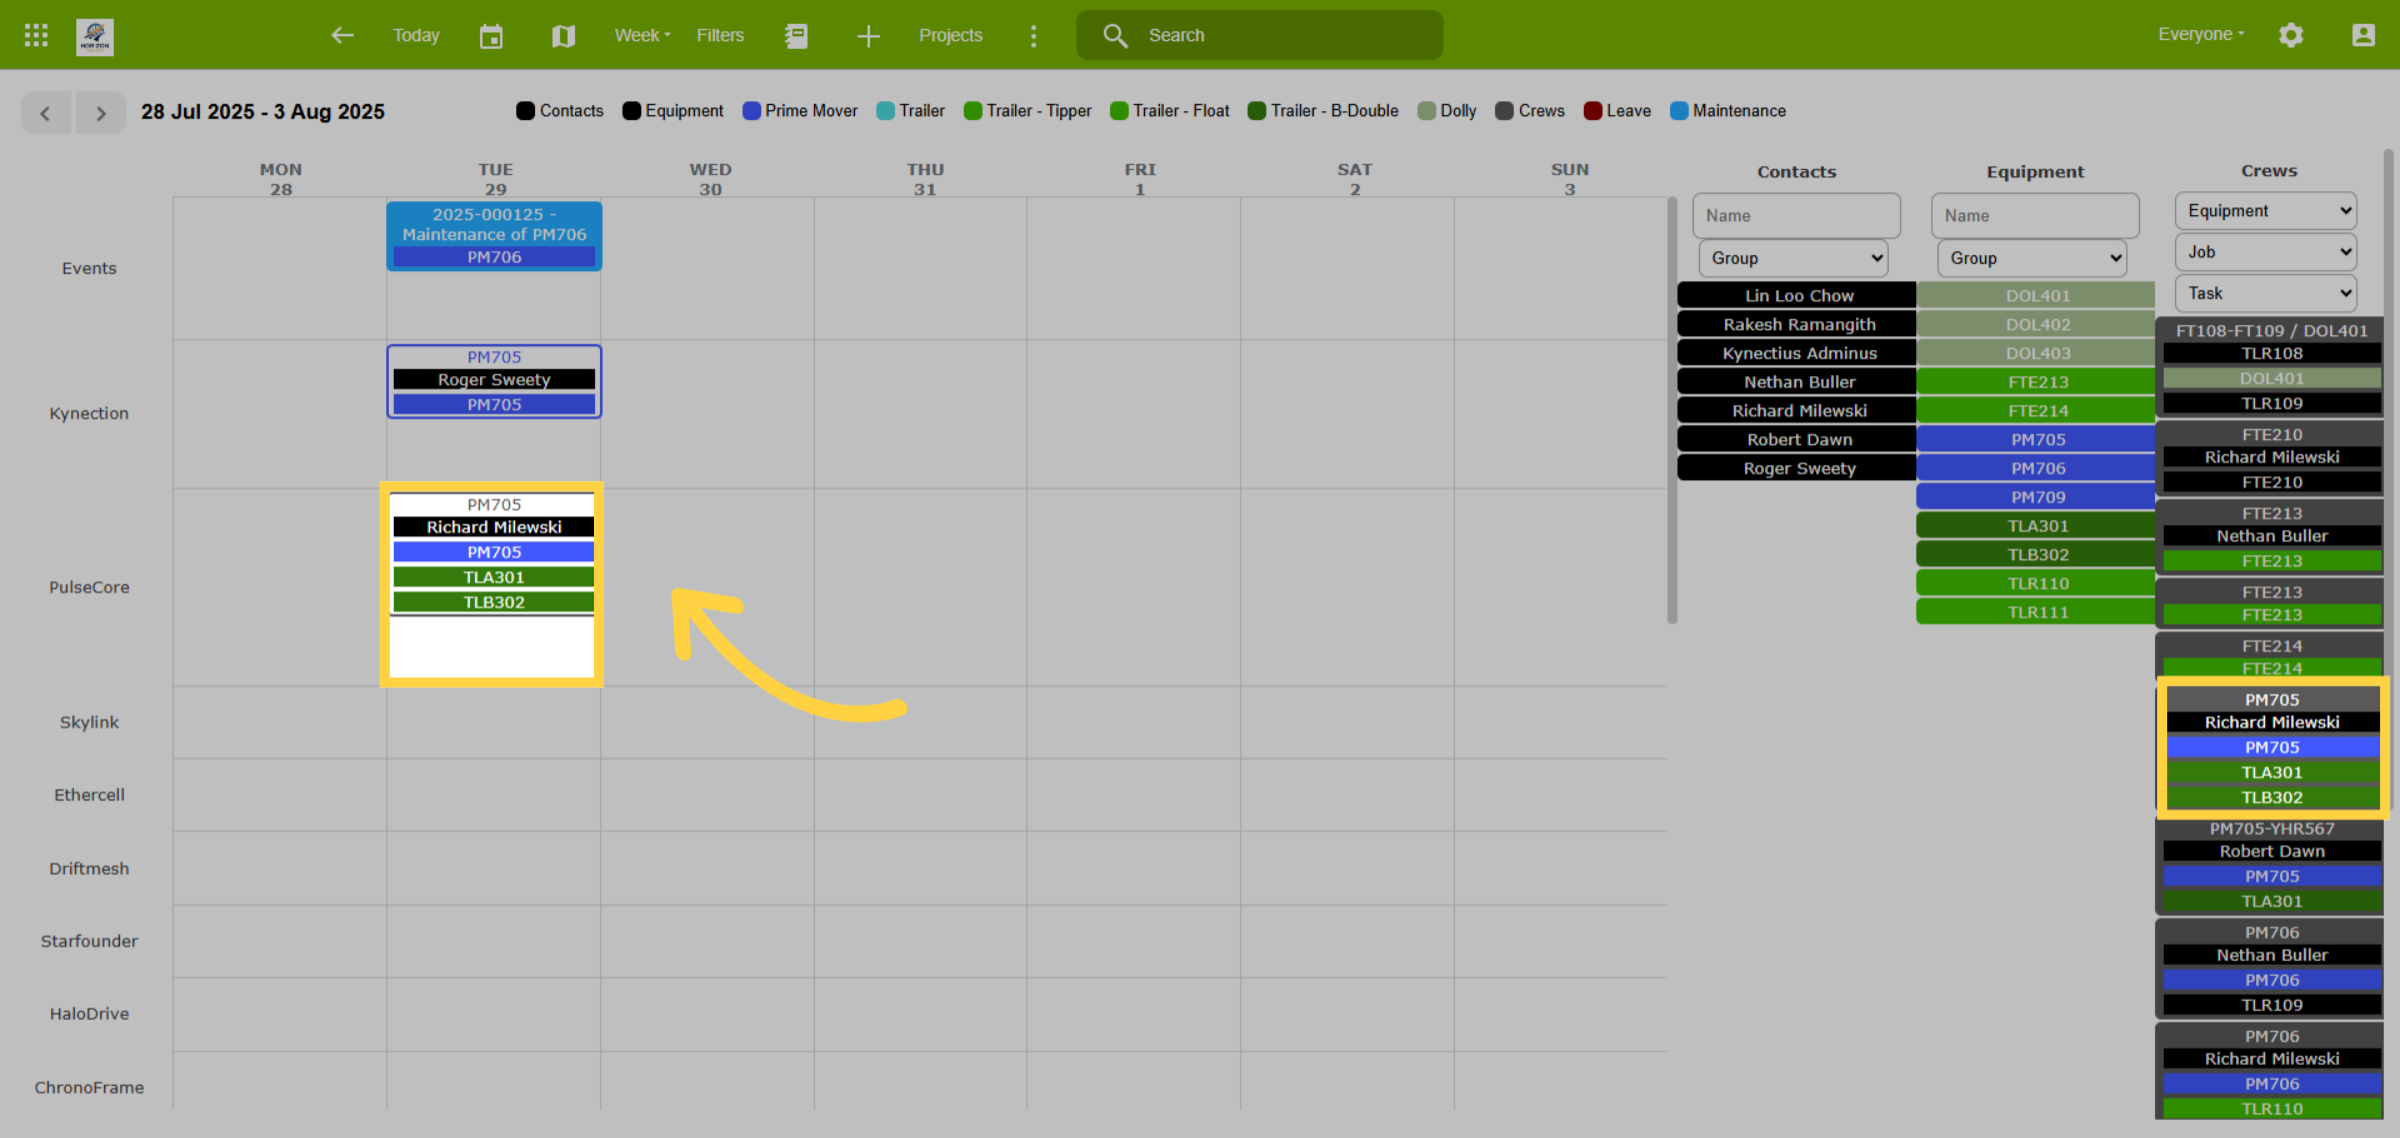
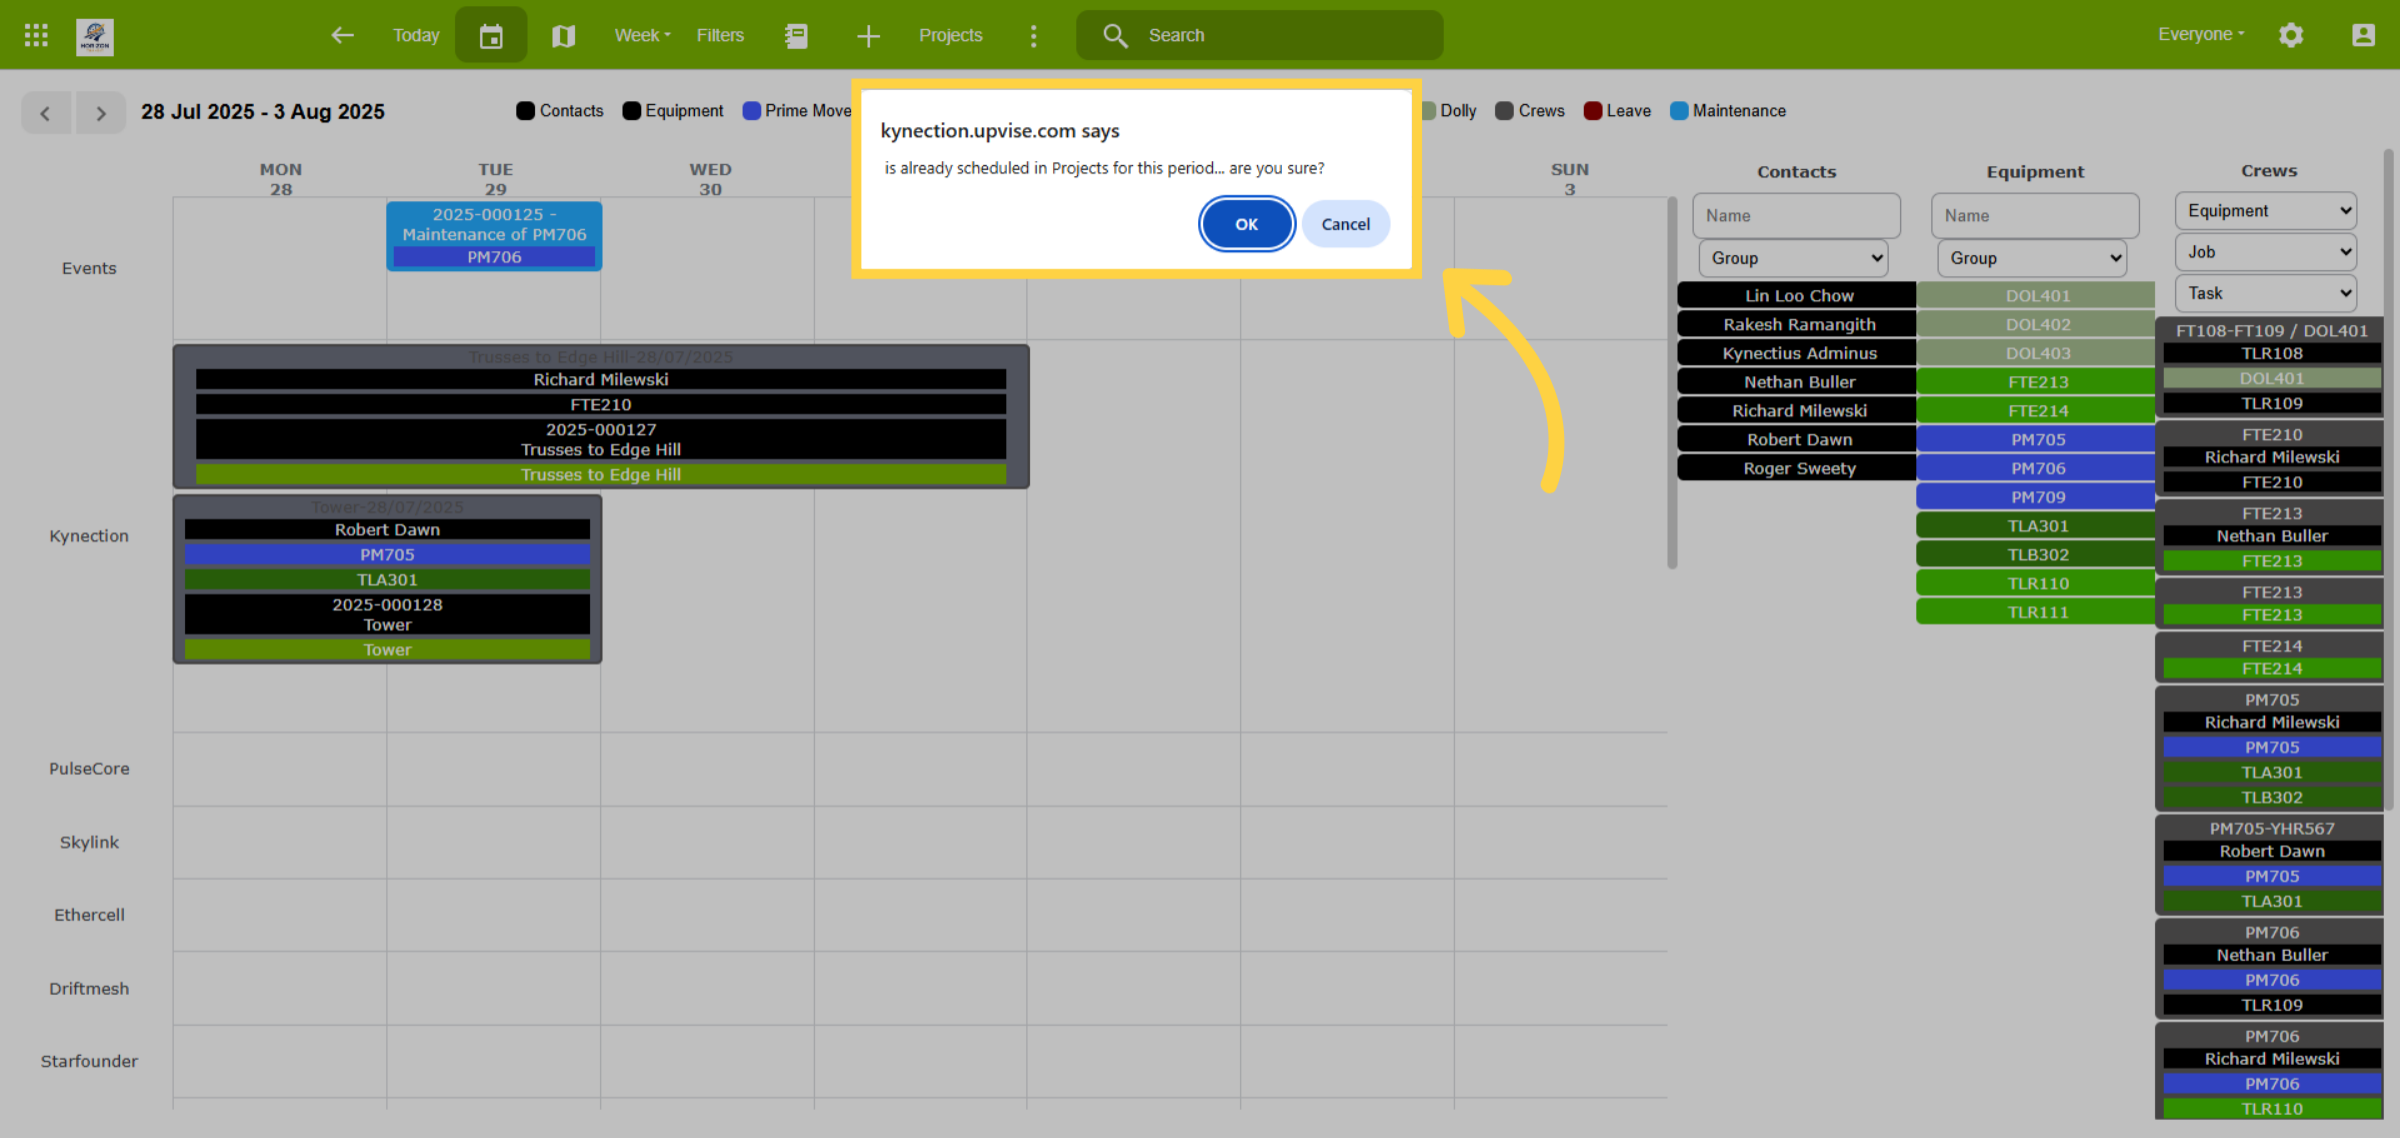
Notifications, which can be overridden, provide warnings if allocating already scheduled resources, employees on leave, or employees that don't meet the training & induction requirements. Equipment is also flagged as unavailable during planned maintenance.
11. Event Details
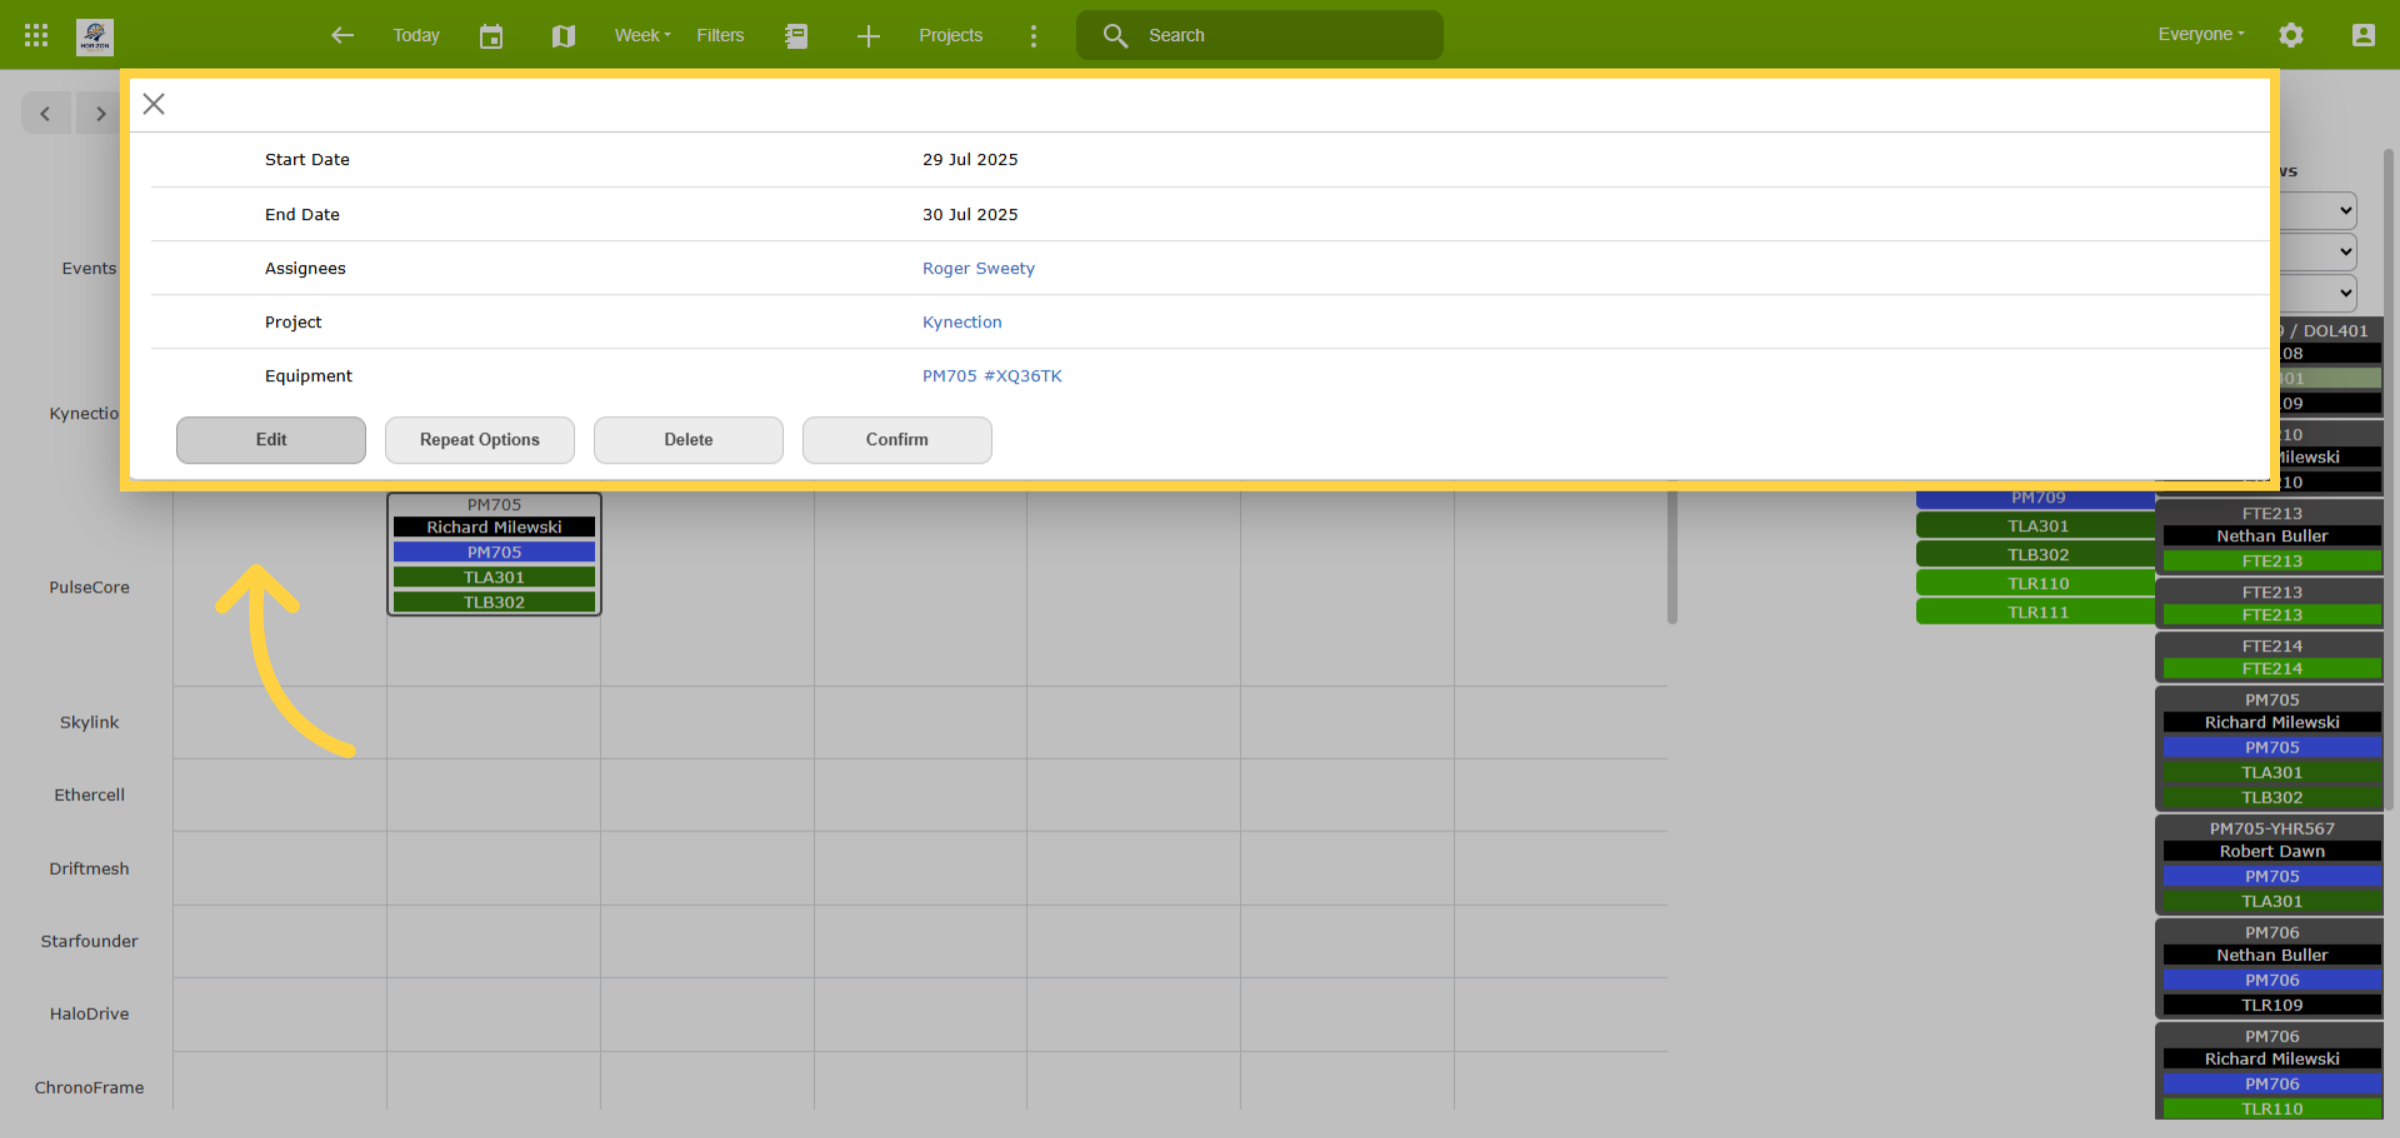
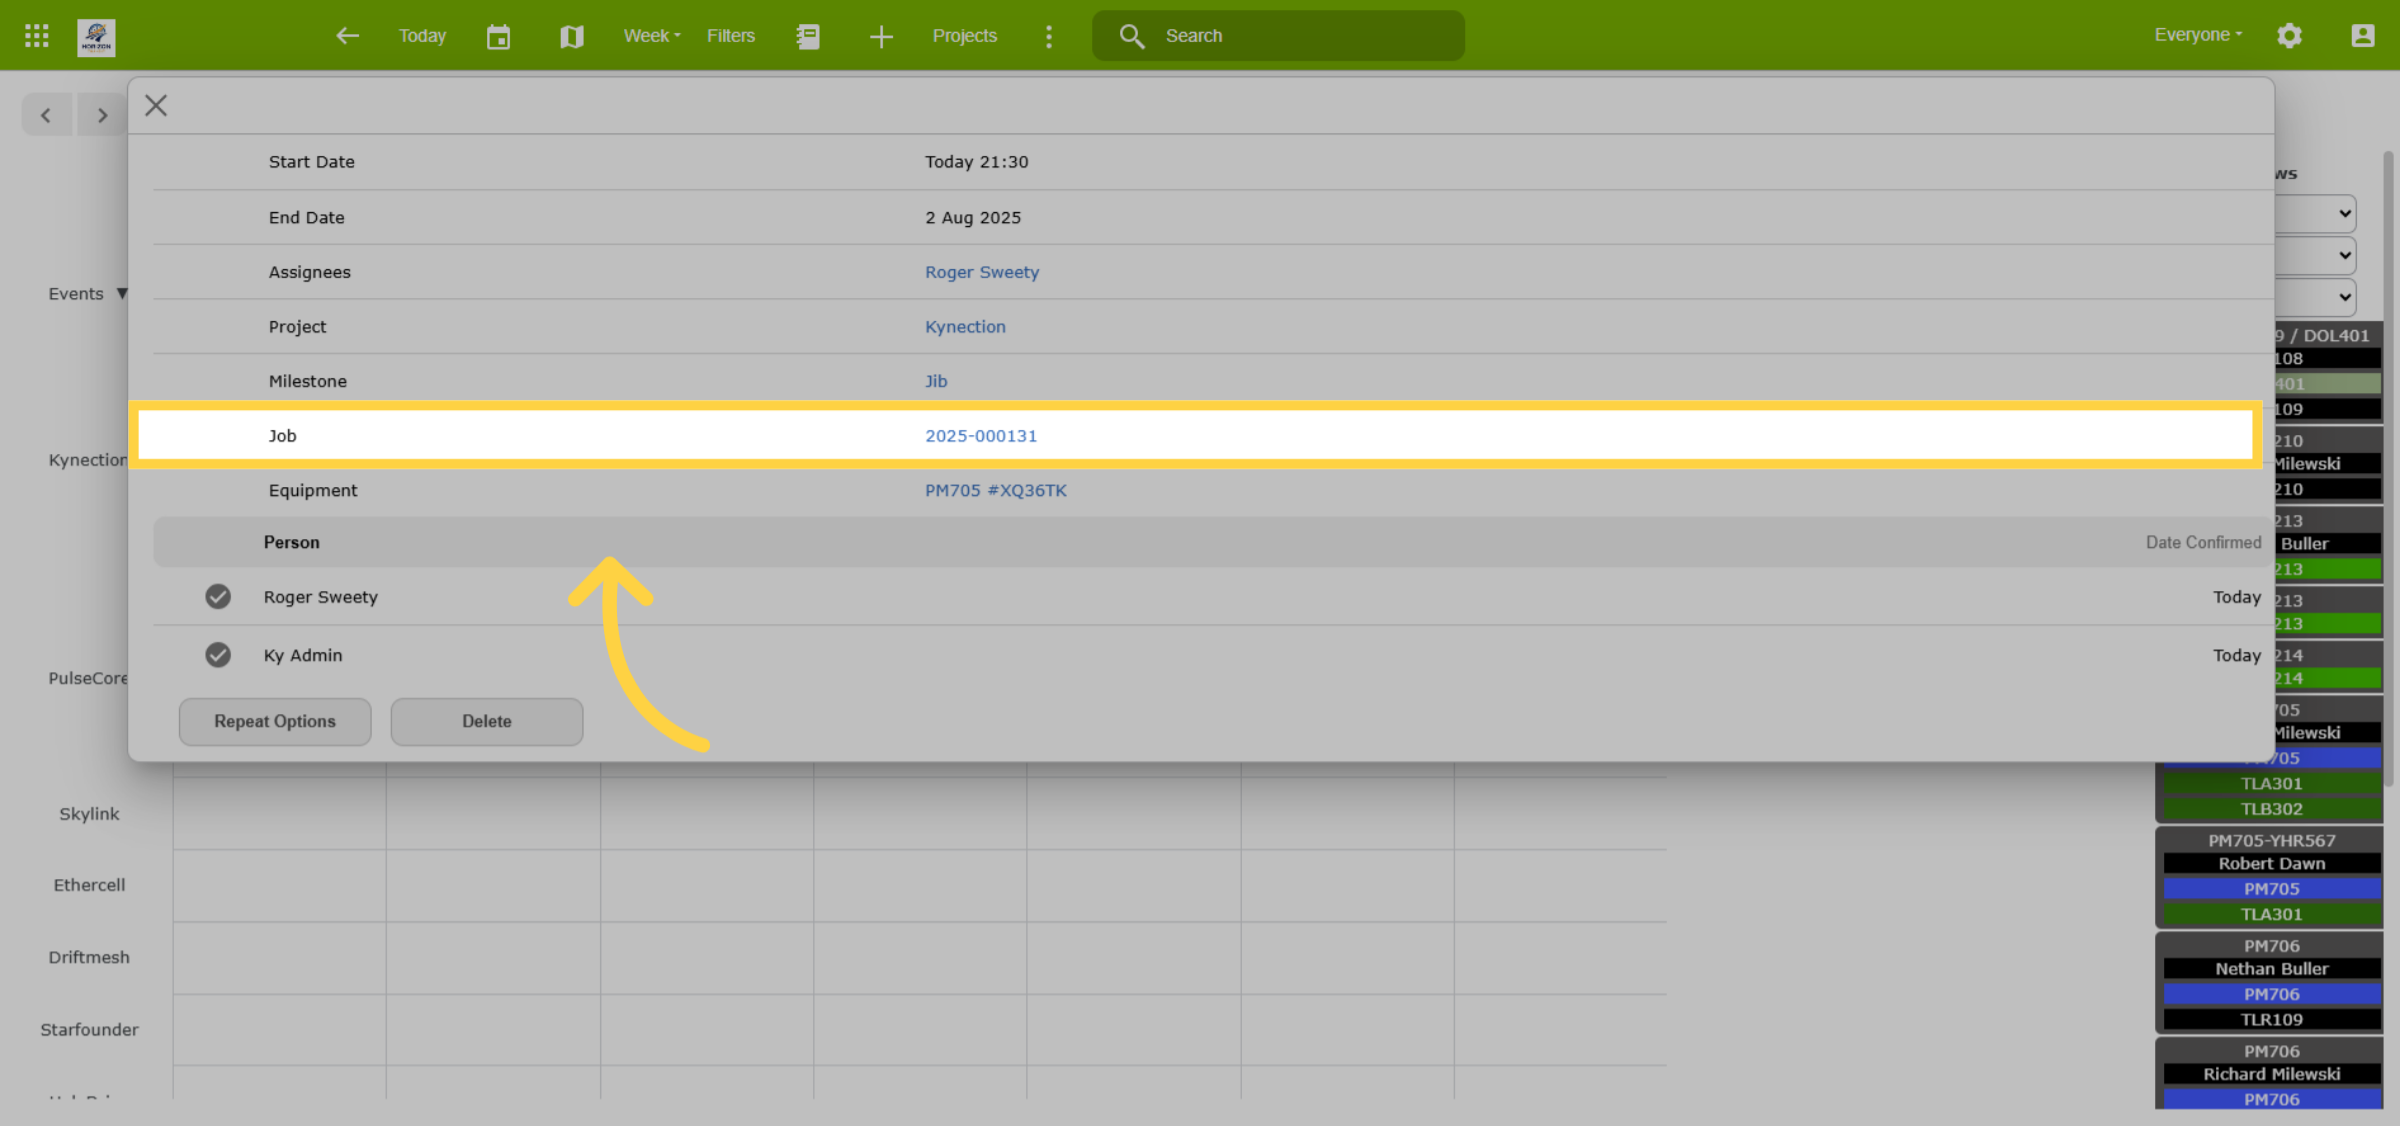
Click on a scheduled event to view its details, including the project, equipment, and assigned personnel. To view further details or make changes, click the edit icon. Deleting events returns the resources to the left hand pane.
12. Confirm
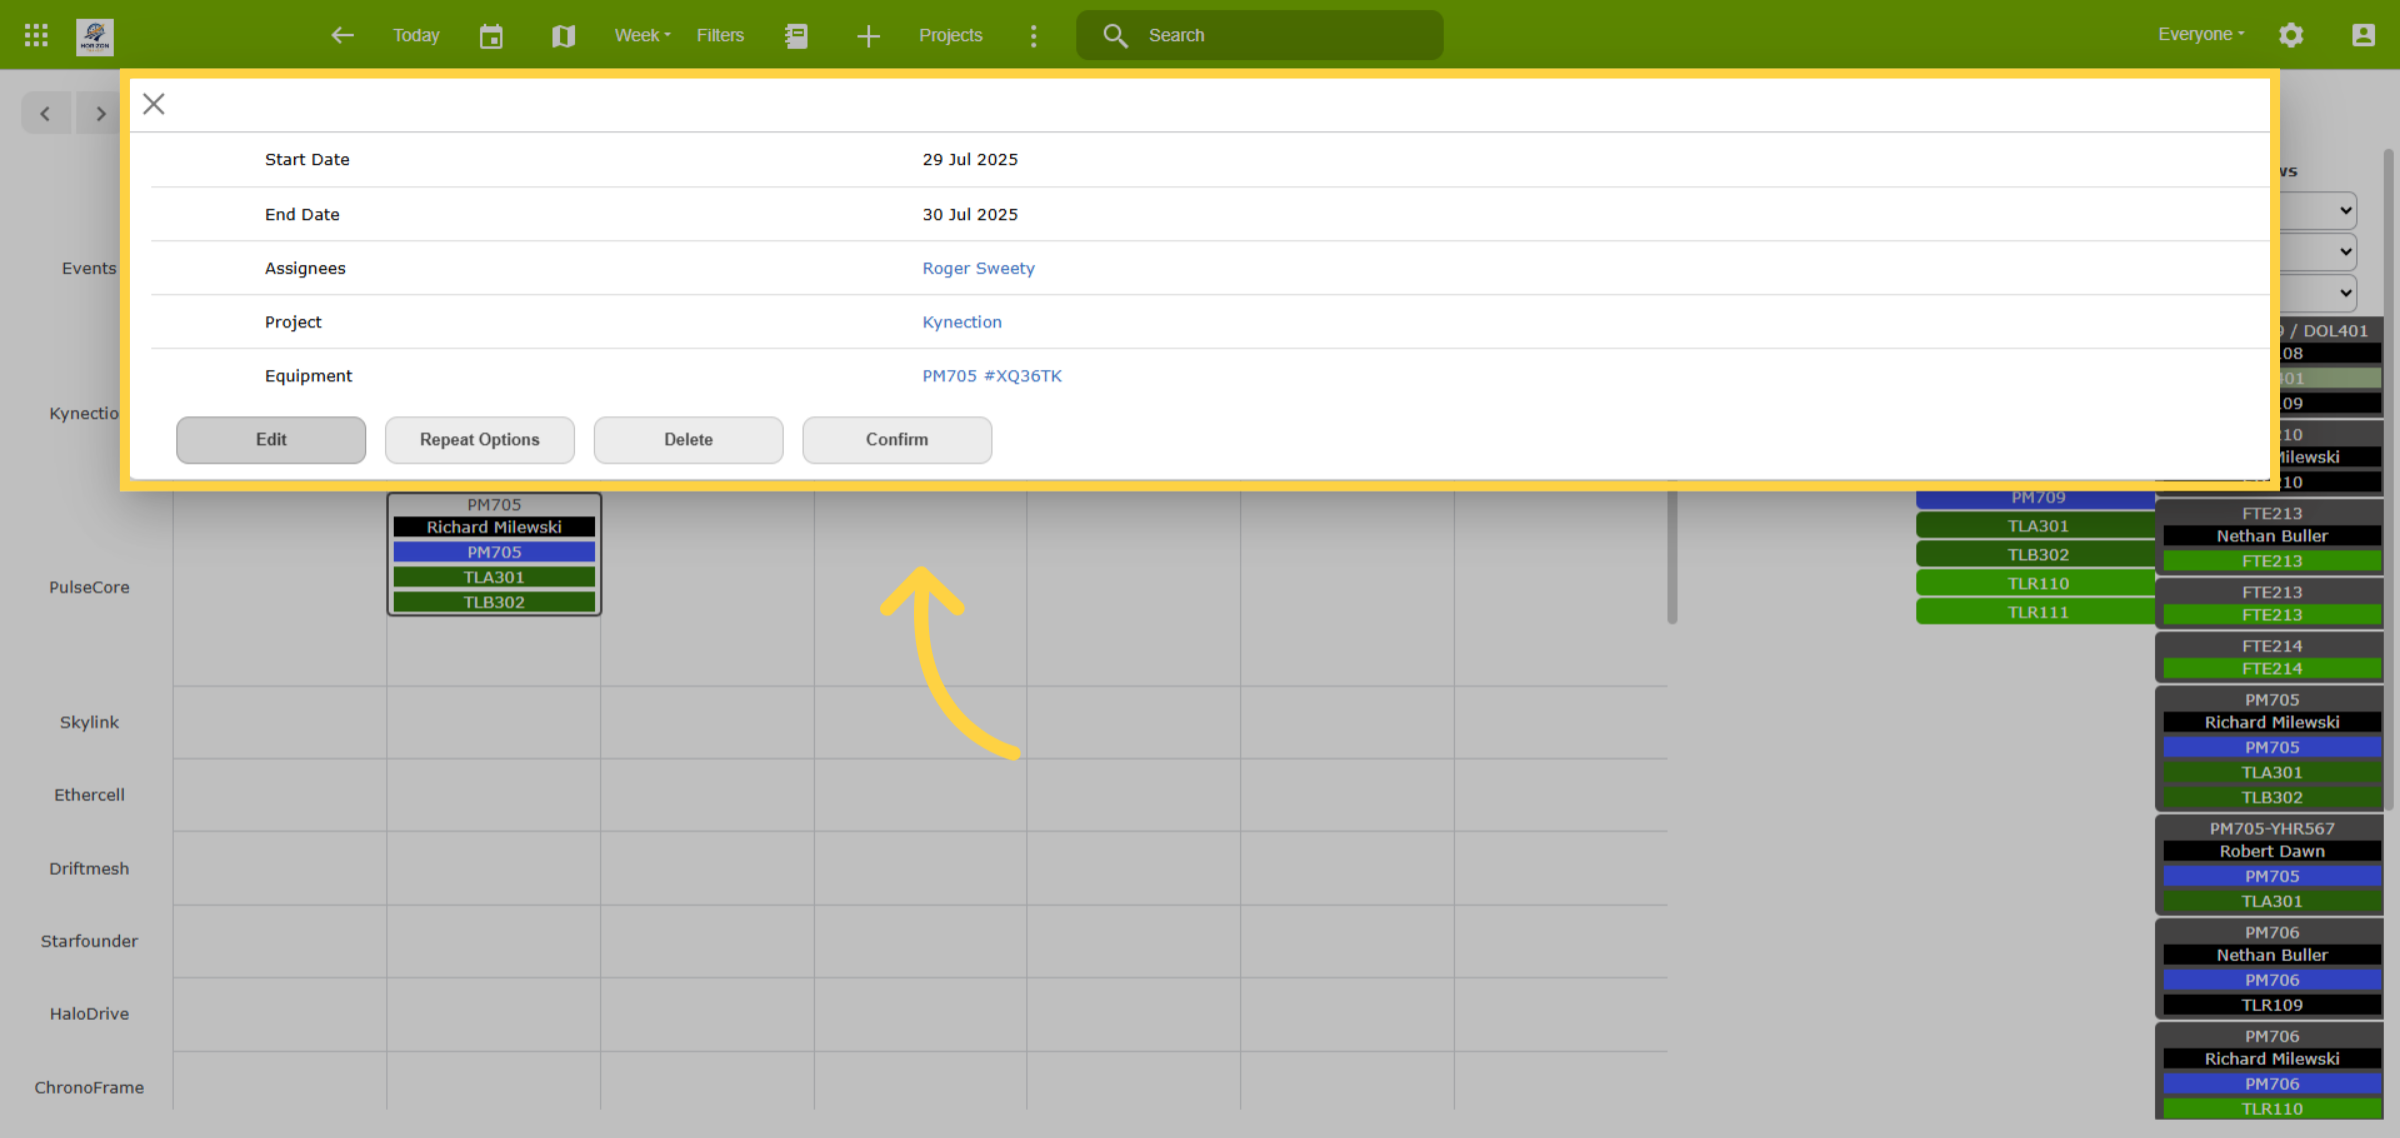
Once all event details, including drivers and equipment, are allocated, finalise the allocation by selecting the Confirm option. Jobs can be confirmed individually or all jobs can be confirmed at once, accessible from the 3 dots toolbar option. Jobs are then sent to employees via SMS, email, or the app, depending on configuration.
13. Confirmed Event
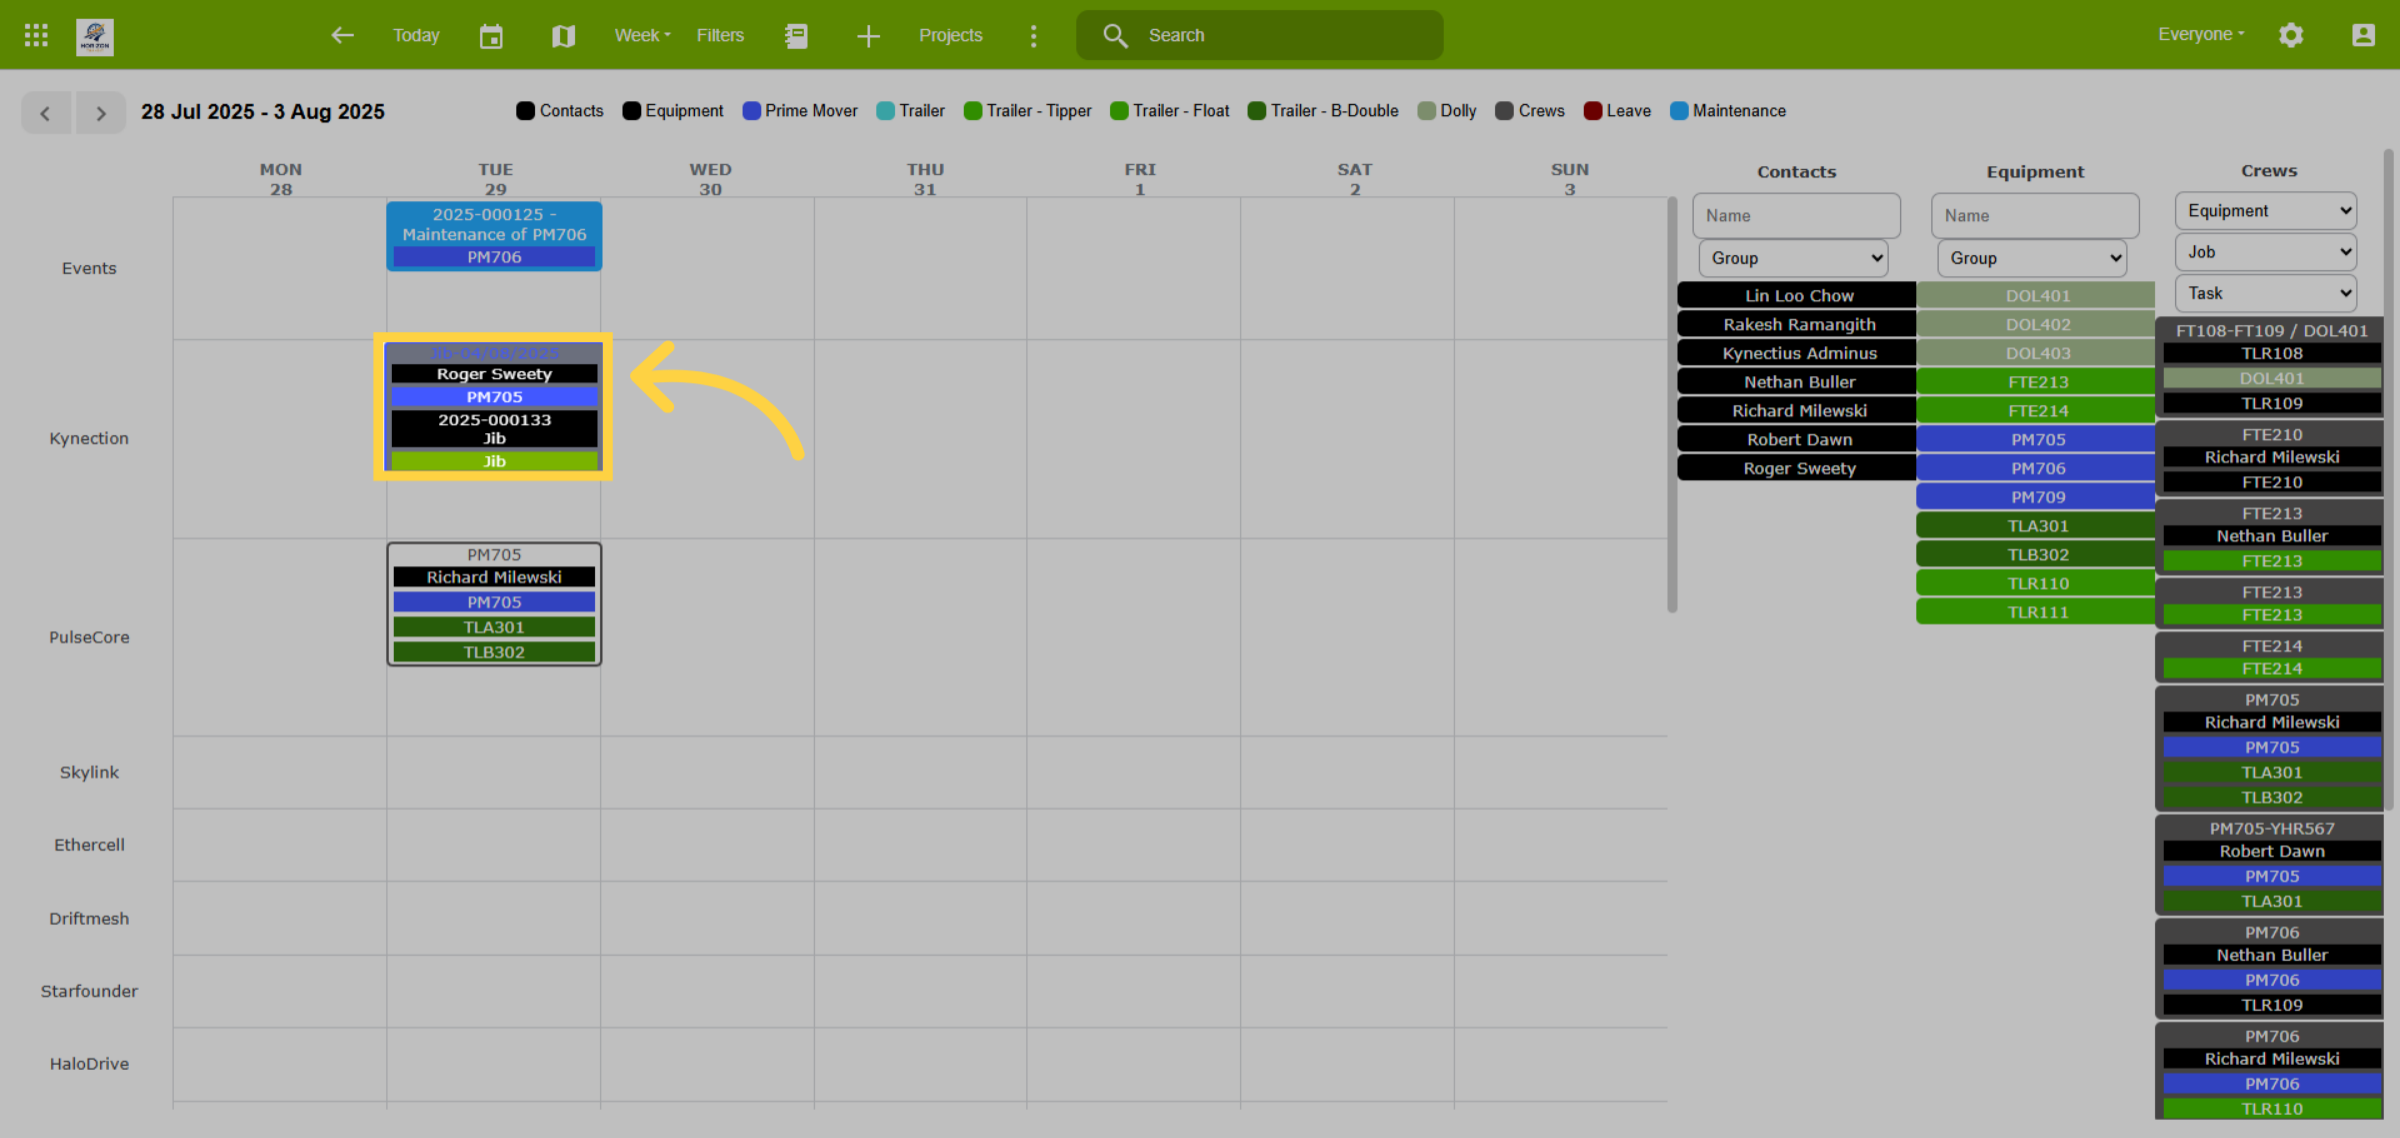
Confirmed jobs have a shaded background, making them easy to identify. Unconfirmed jobs have a white boarder. C
14. Linked Job
Once the job is confirmed, it is added to the event list. View linked job details by clicking the event, then selecting the job. This provides access to all relevant job information.
15. Job Details
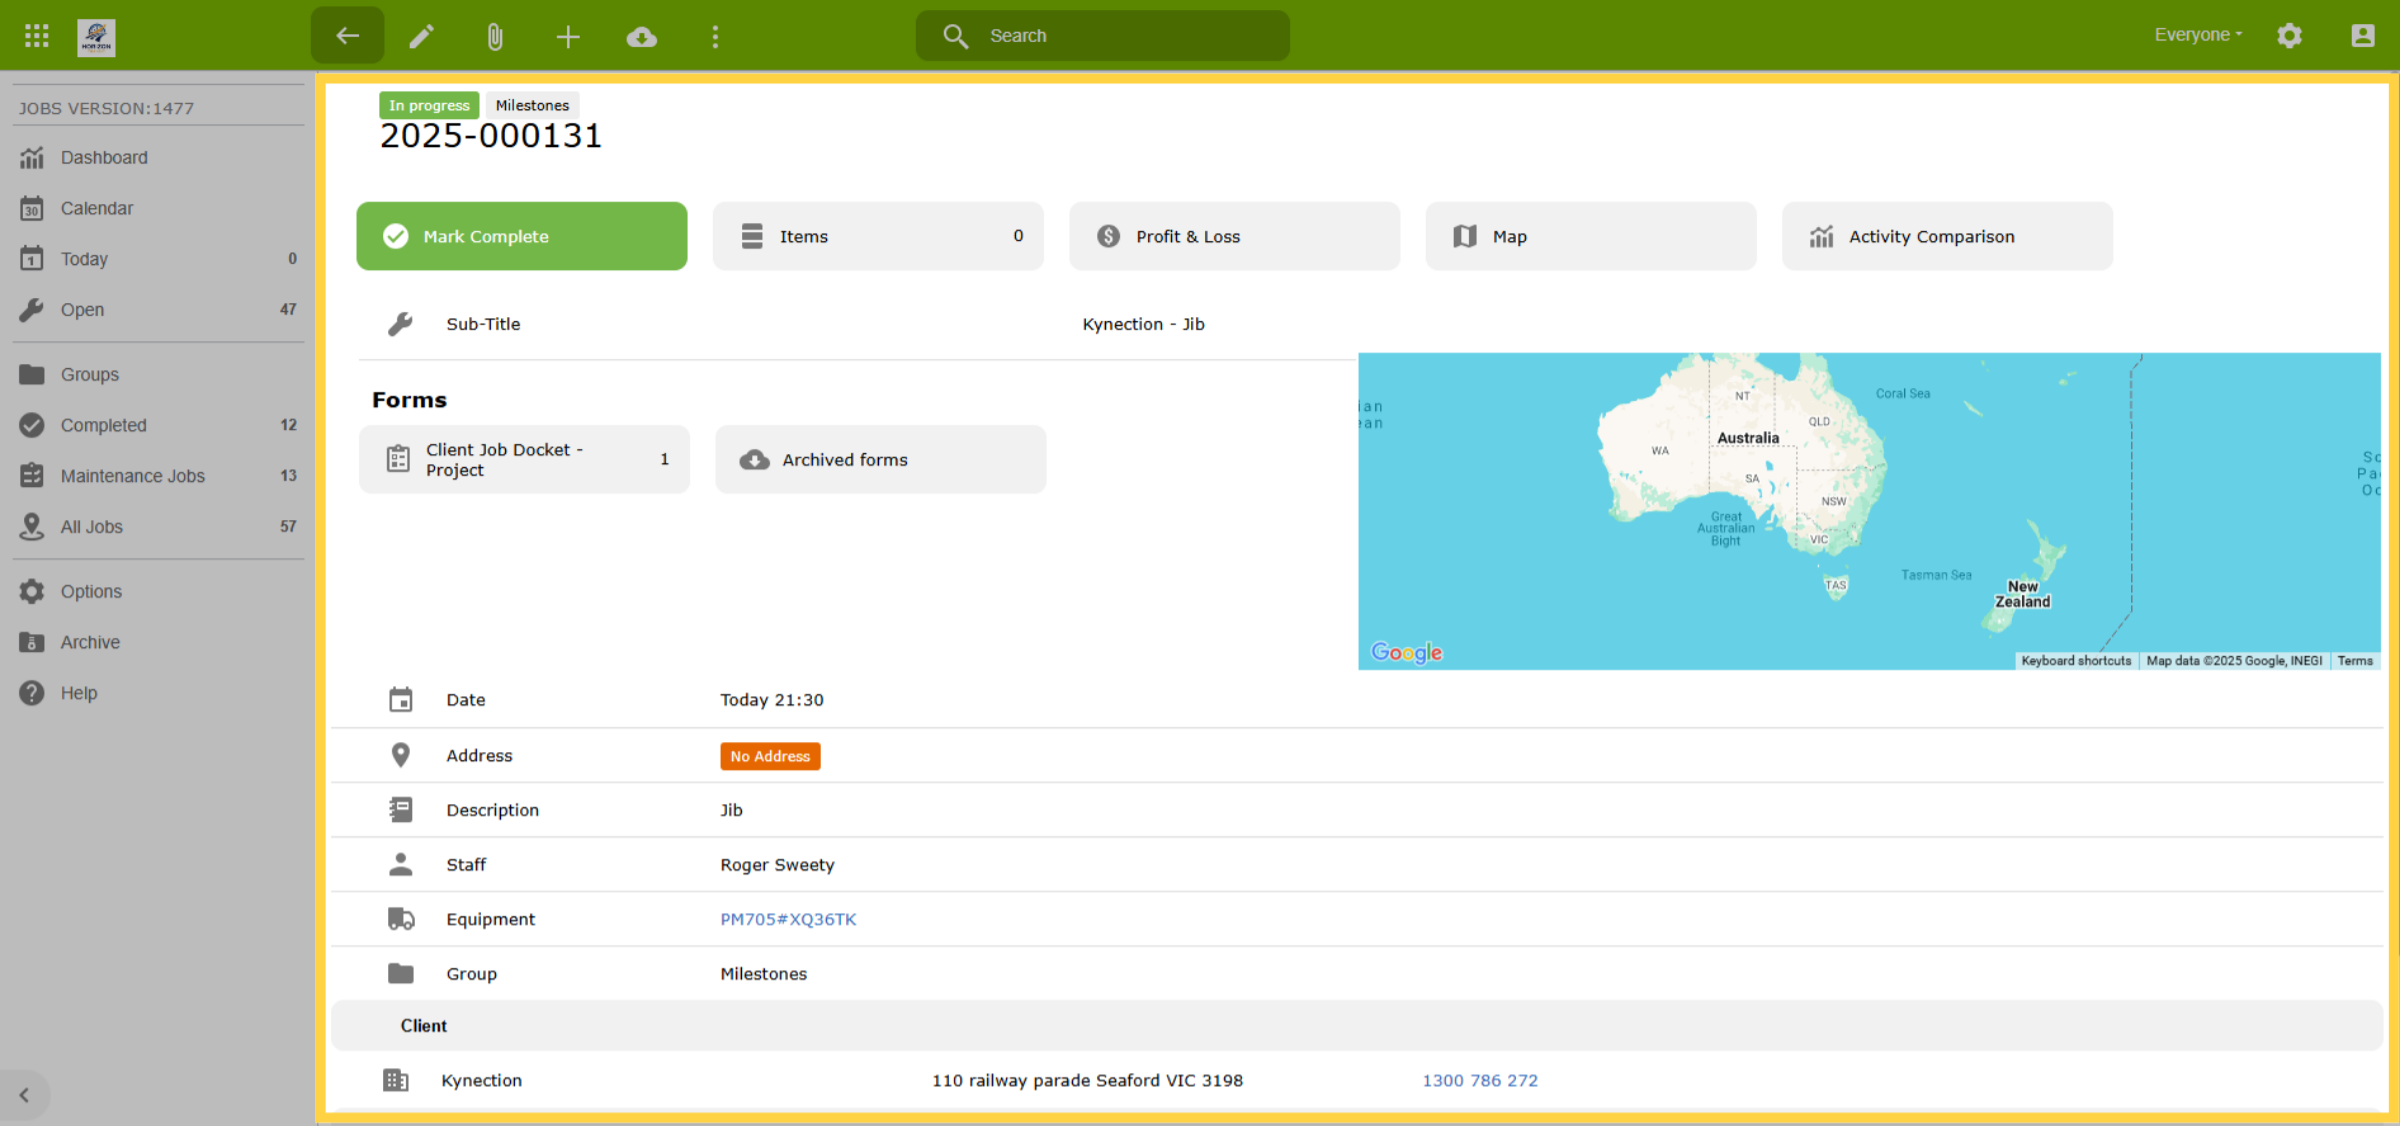
Easily edit job details using the pencil icon in the toolbar. A mobile app refresh will ensure changes are visible to the operator.
16. Scheduler View
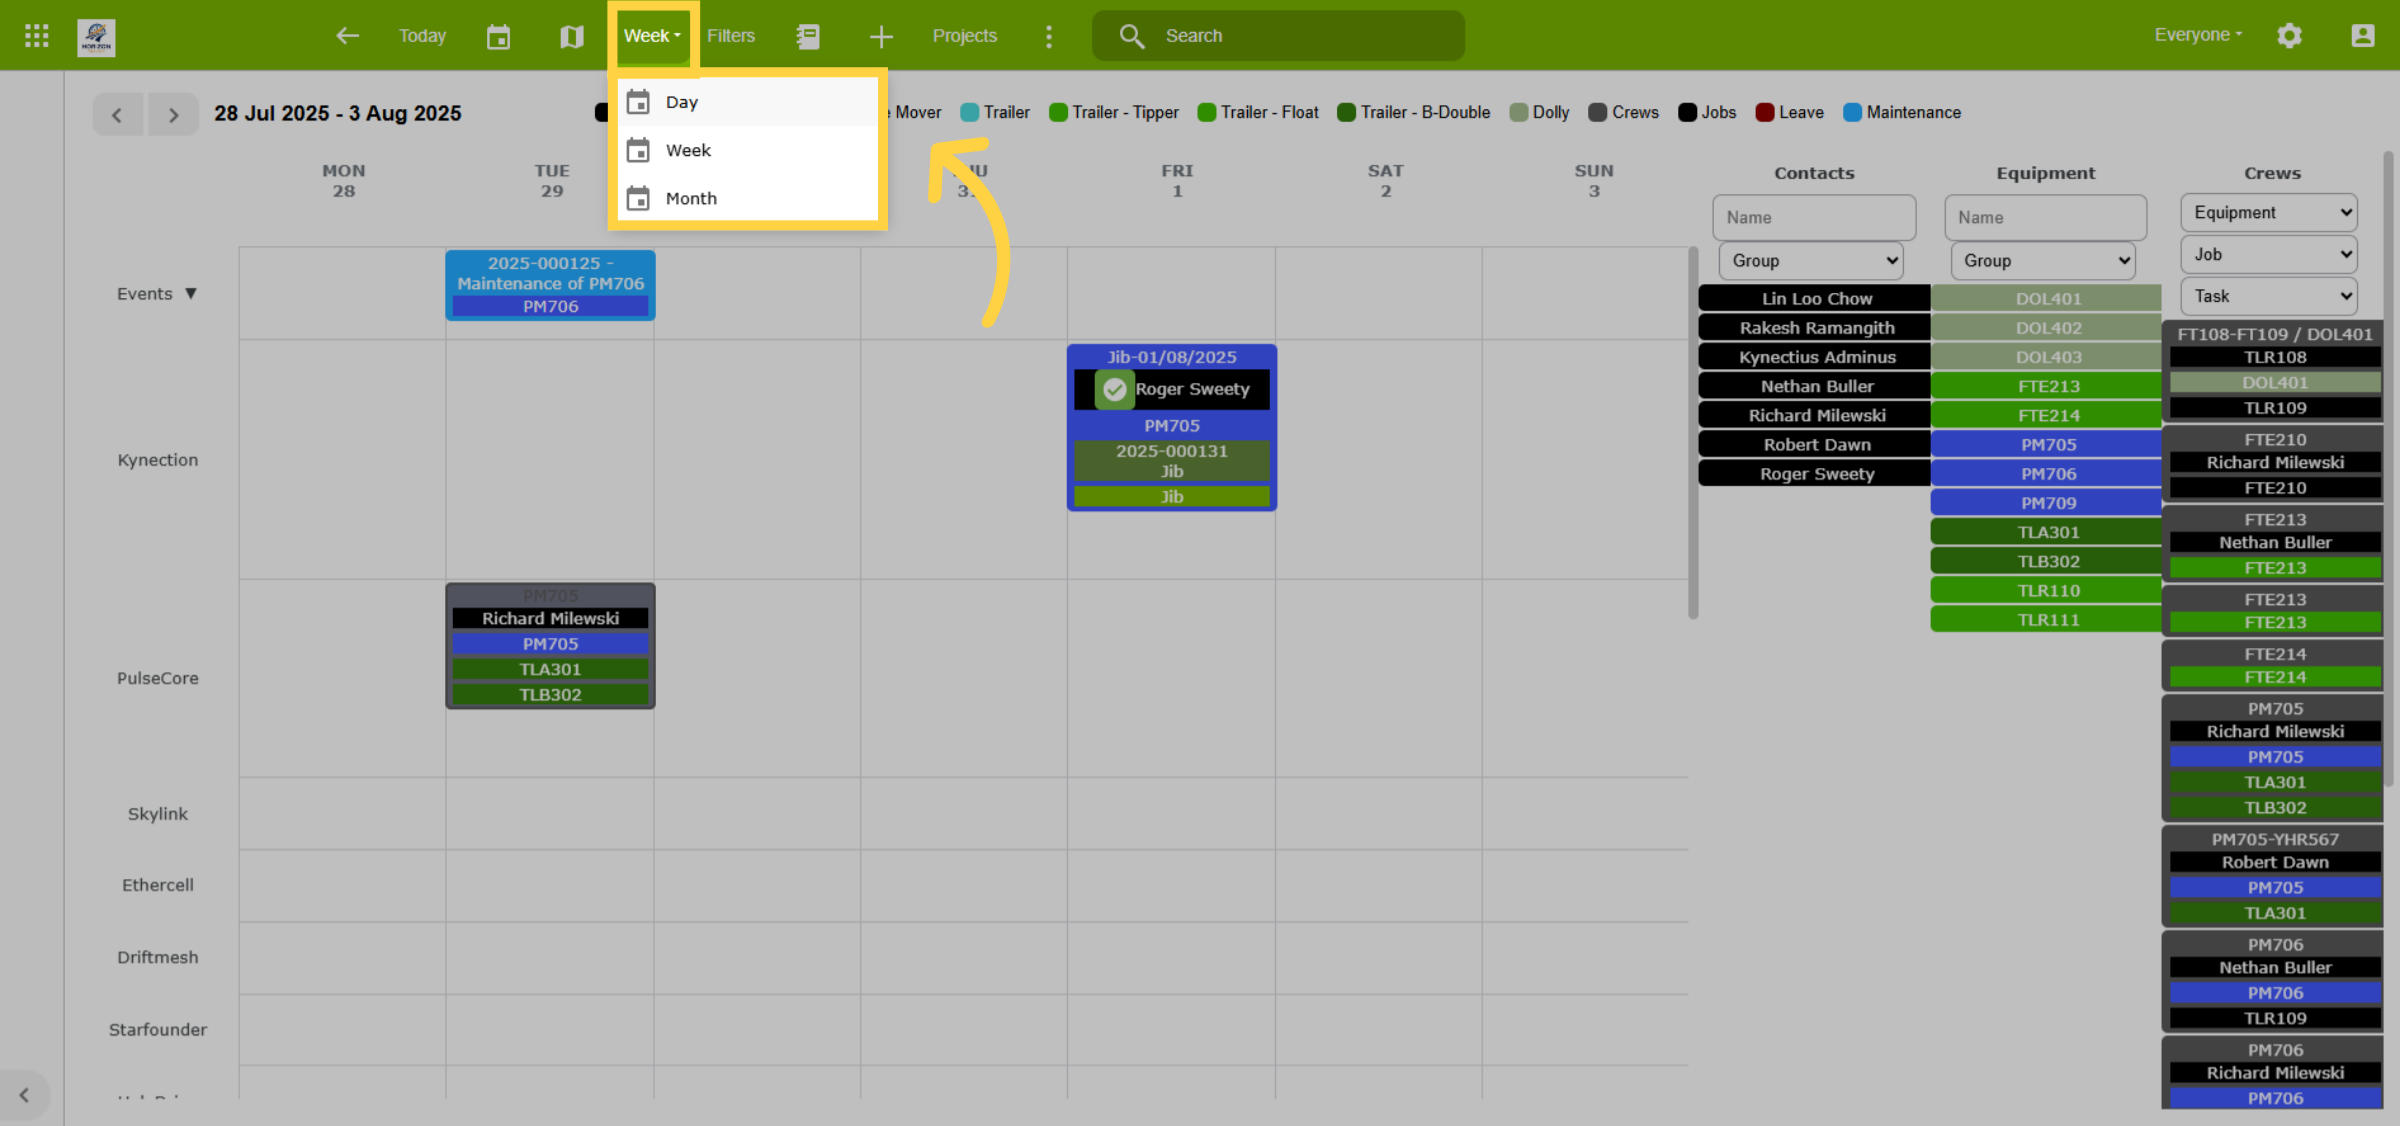
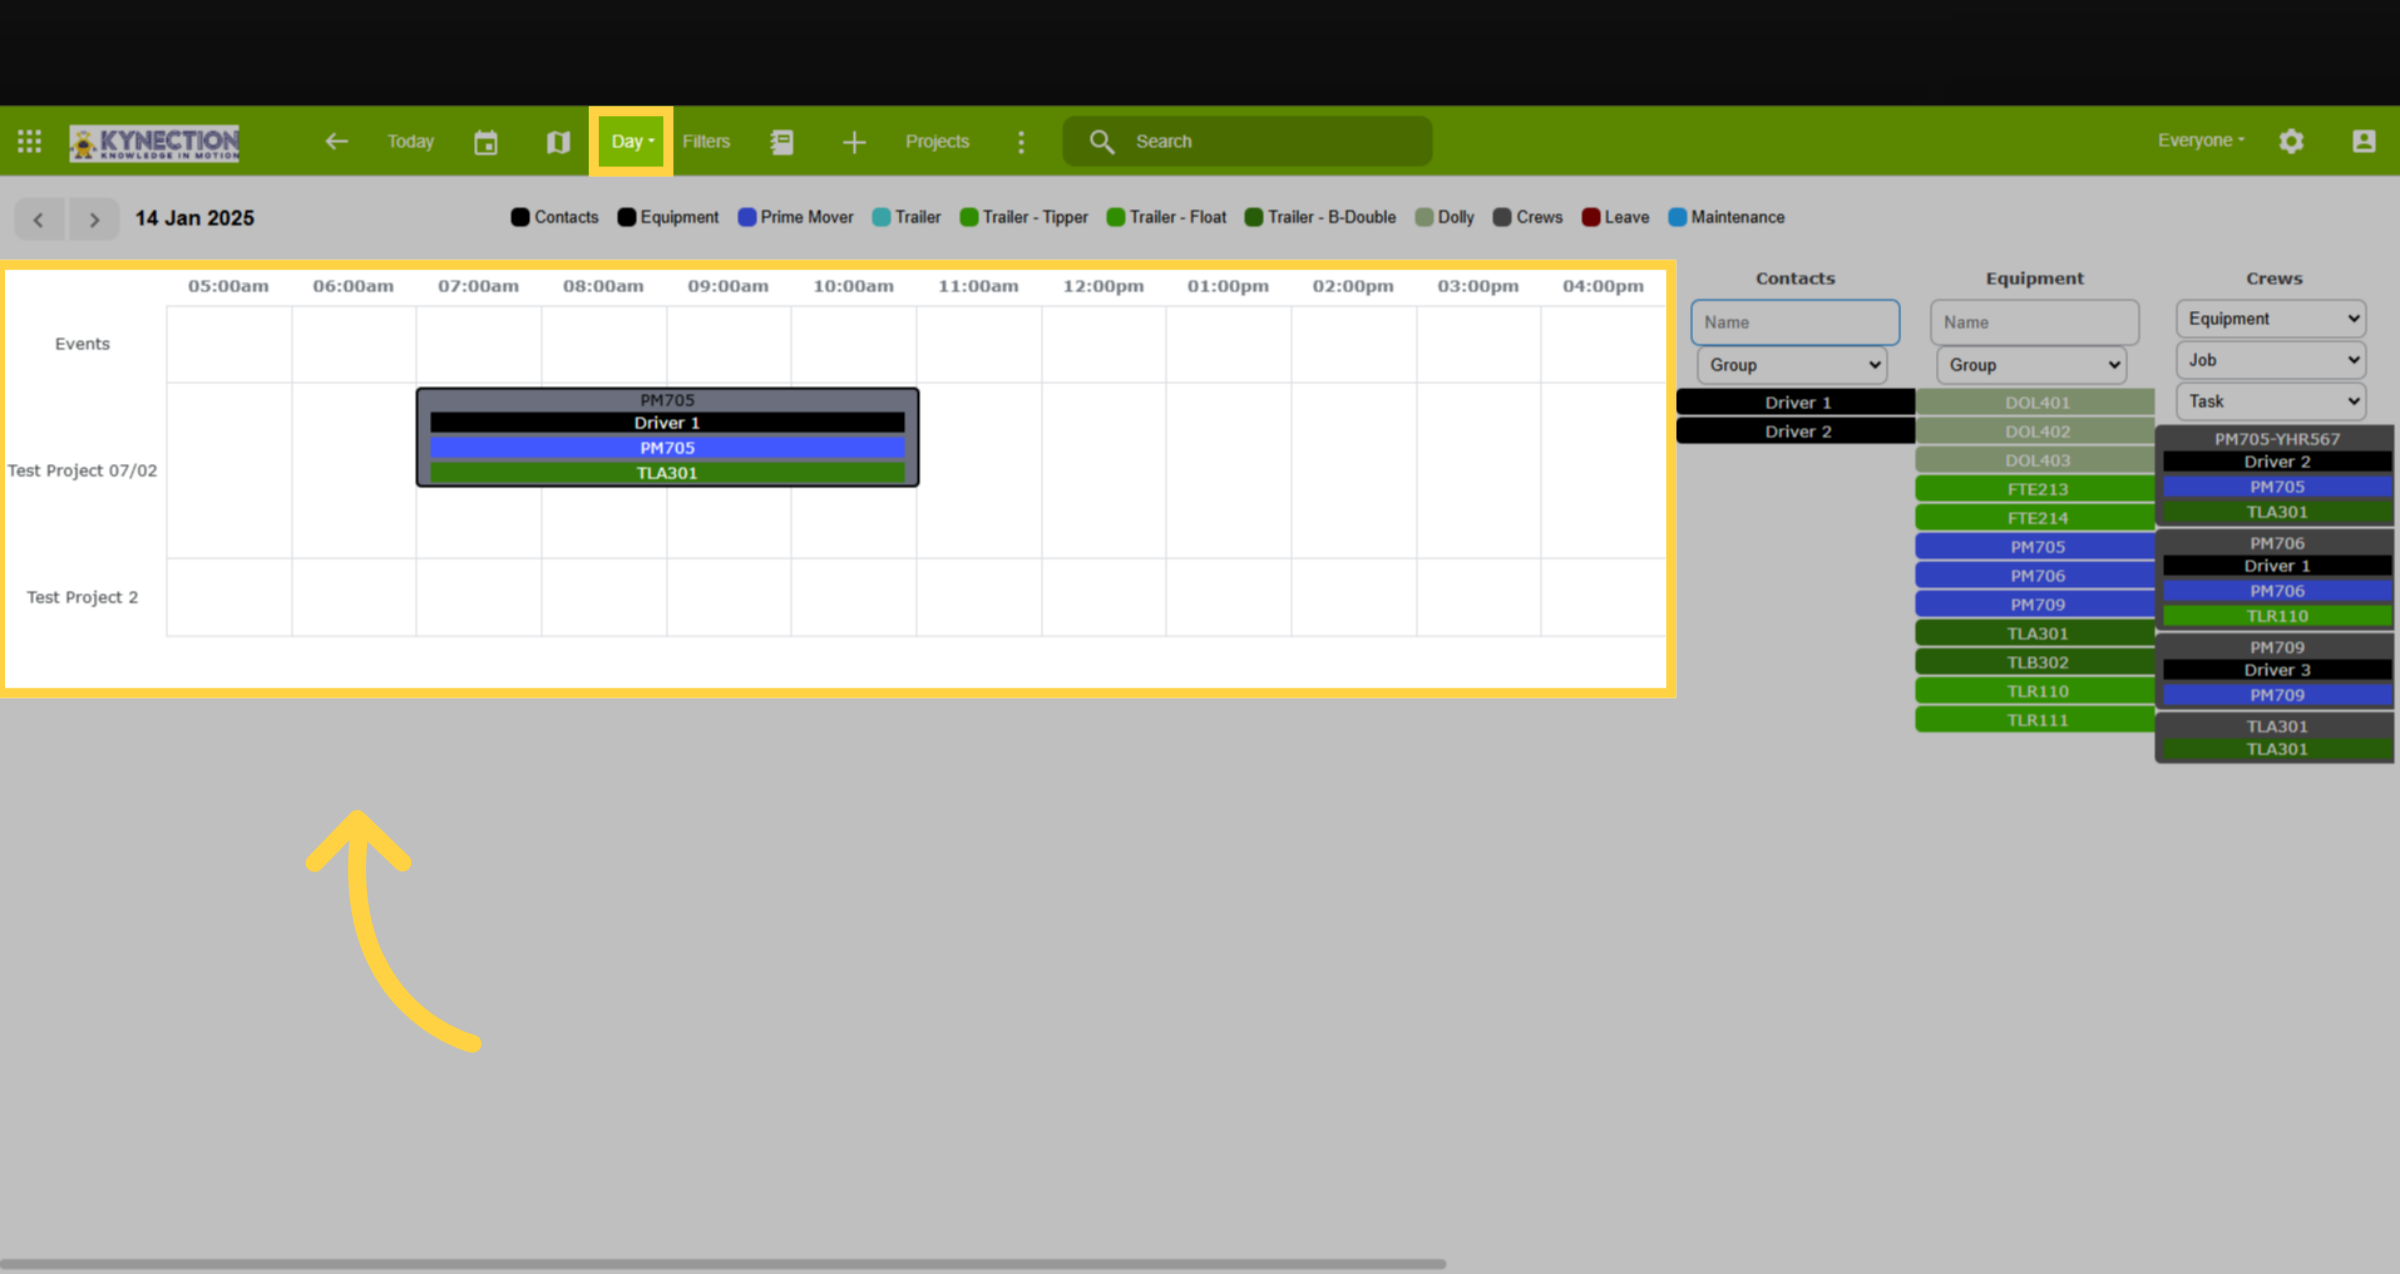
The current scheduler view is adjustable for extended forecast scheduling (up to a month ahead) or reduced to a day view for detailed hourly multi-job allocation.
17. Day View
The Day View enables scheduling and hourly adjustments for multiple job allocations. Jobs can be set with a base time and then adjusted to fit the schedule.
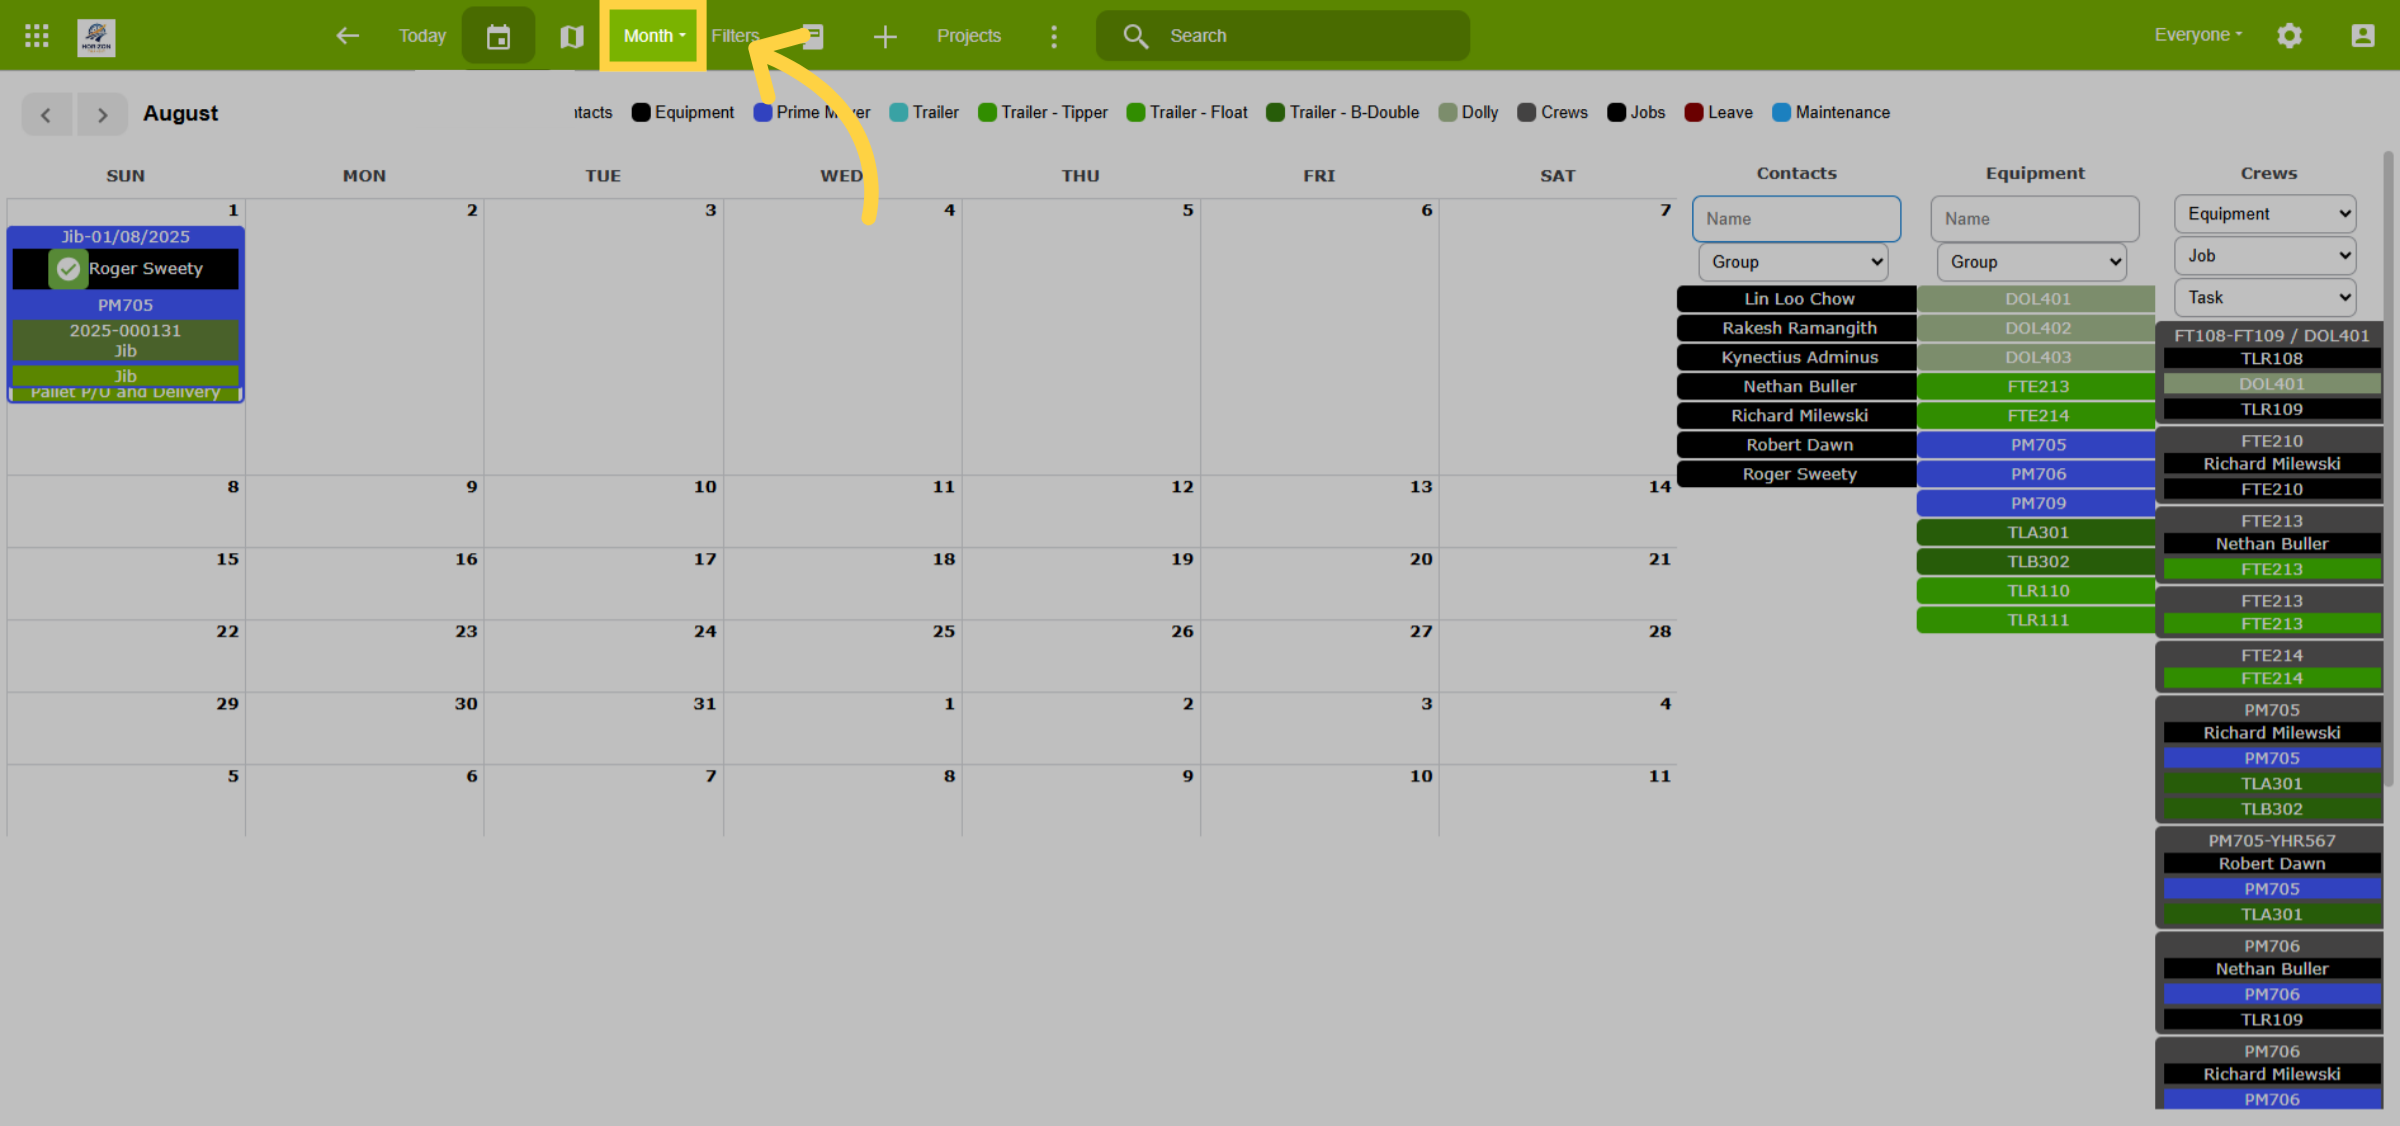
18. Month View
The Month View allows for extended forecast planning, providing a broader scheduling perspective. All schedulers can display both equipment maintenance and staff leave, offering a complete overview of resources and availability.
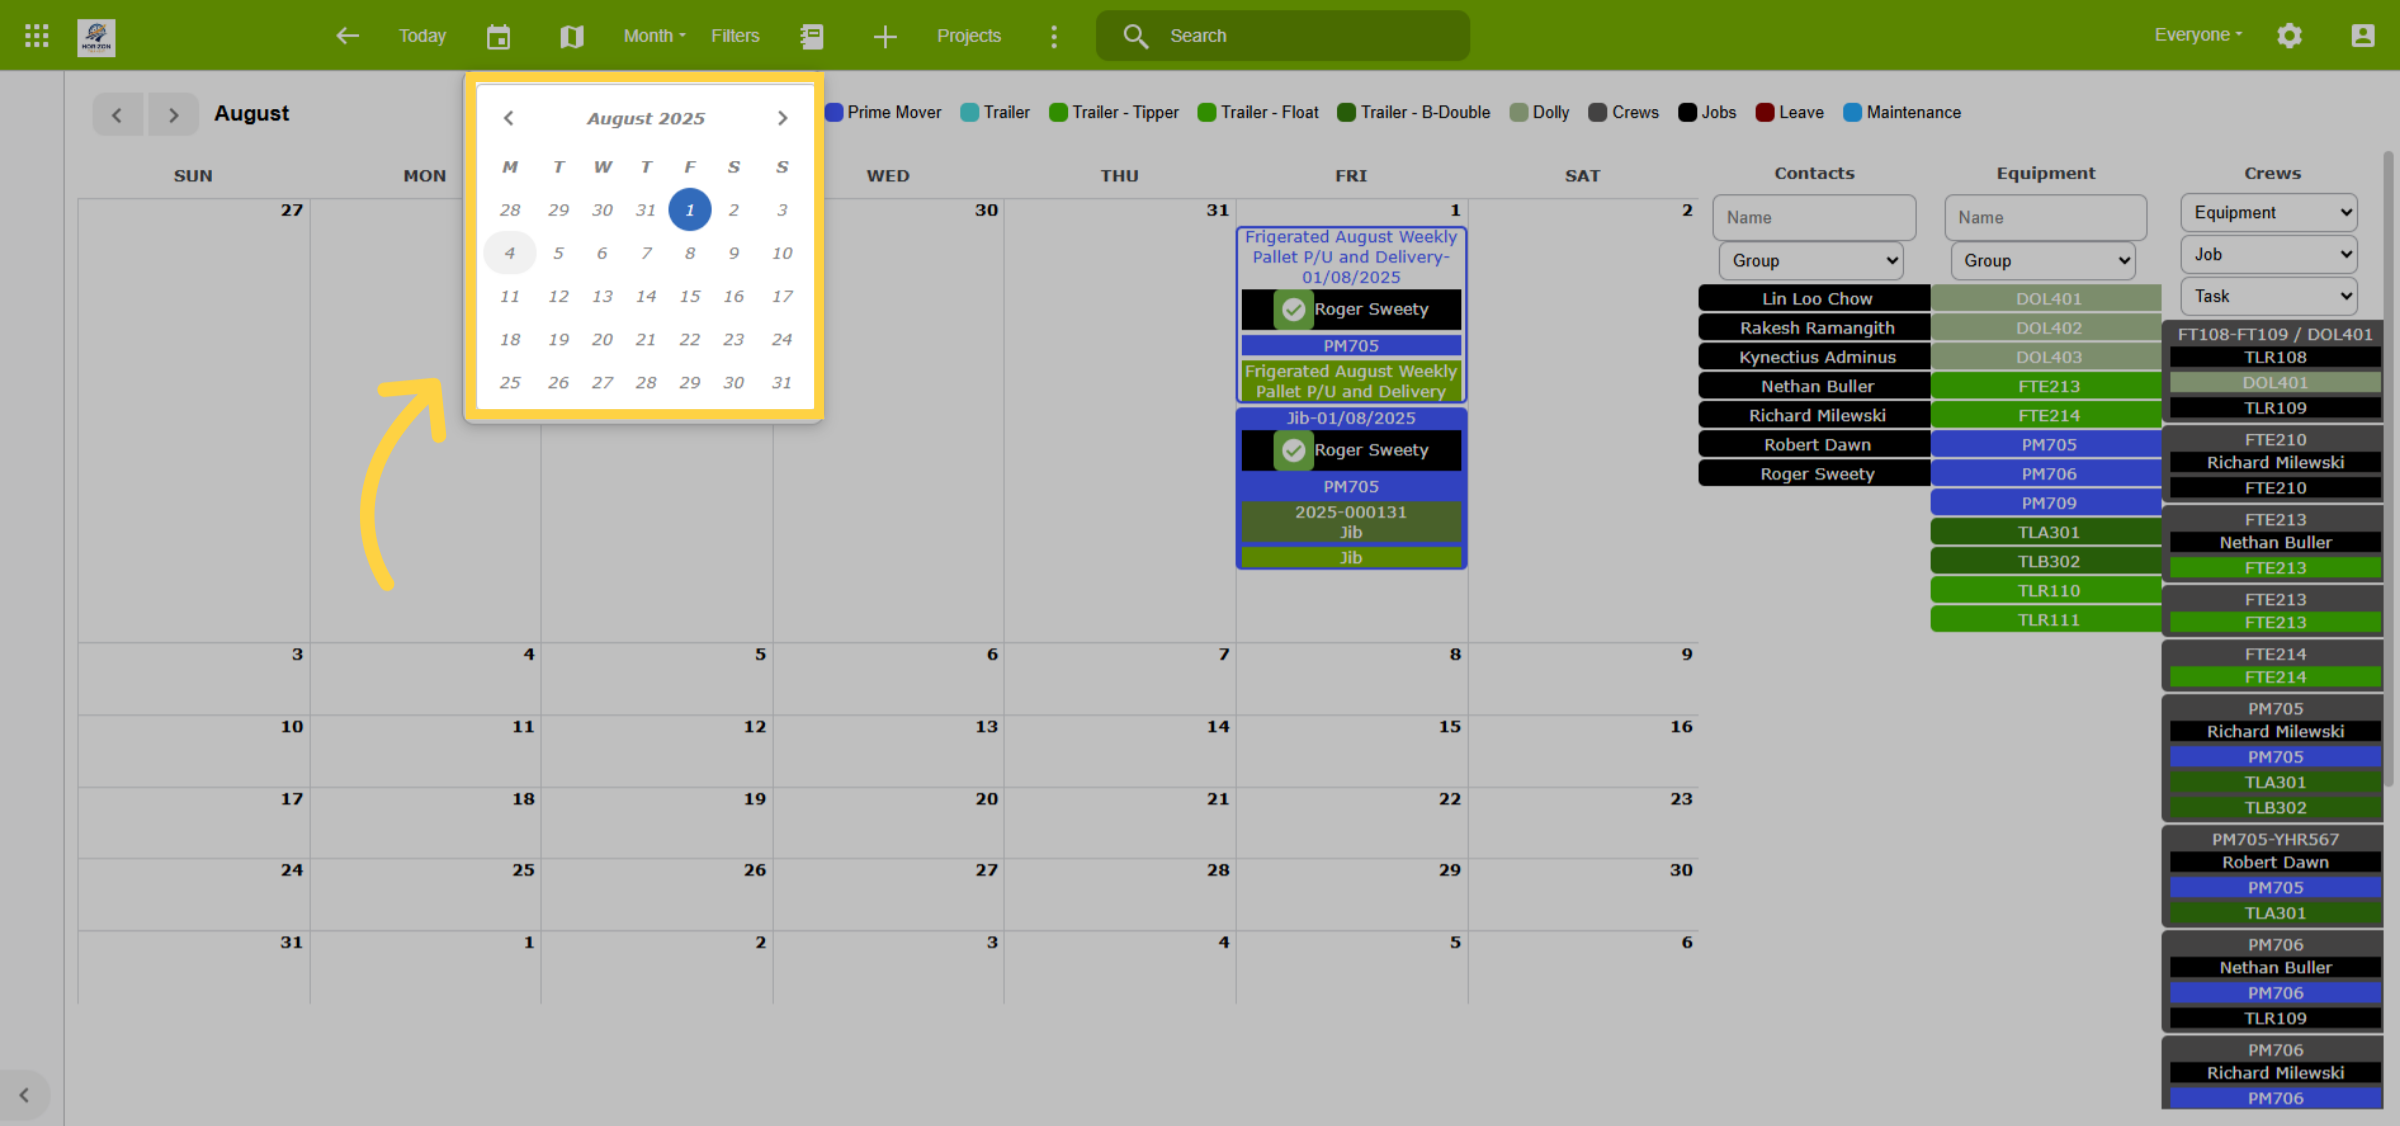
19. Date Filtering
The scheduler toolbar includes multiple quick actions, such as a date filter to select a single date or period.
20. Map Icon
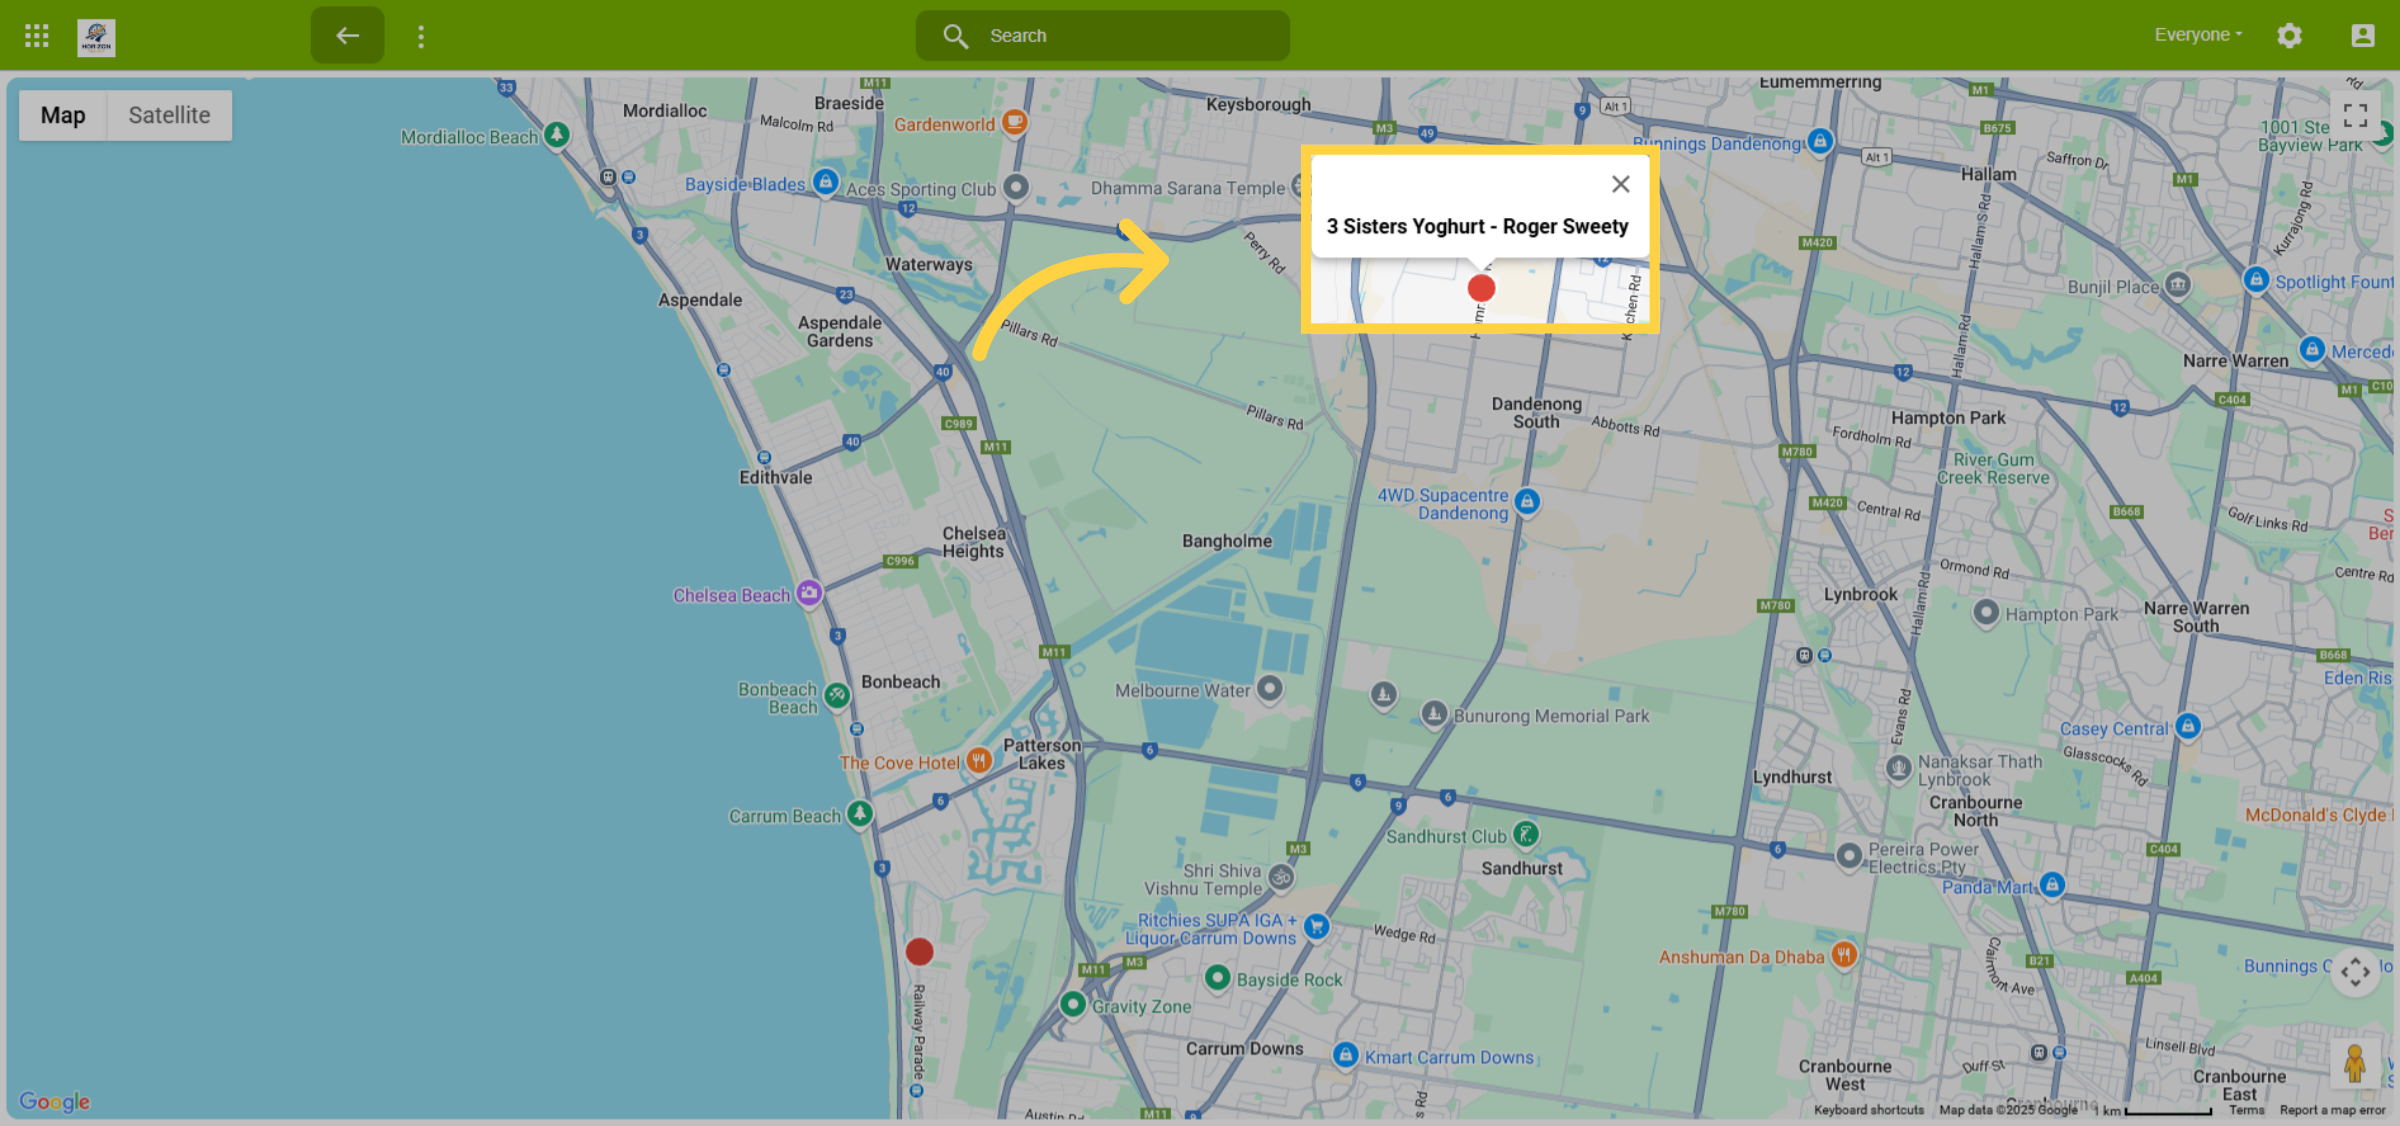
The Map View shows project and personnel locations.
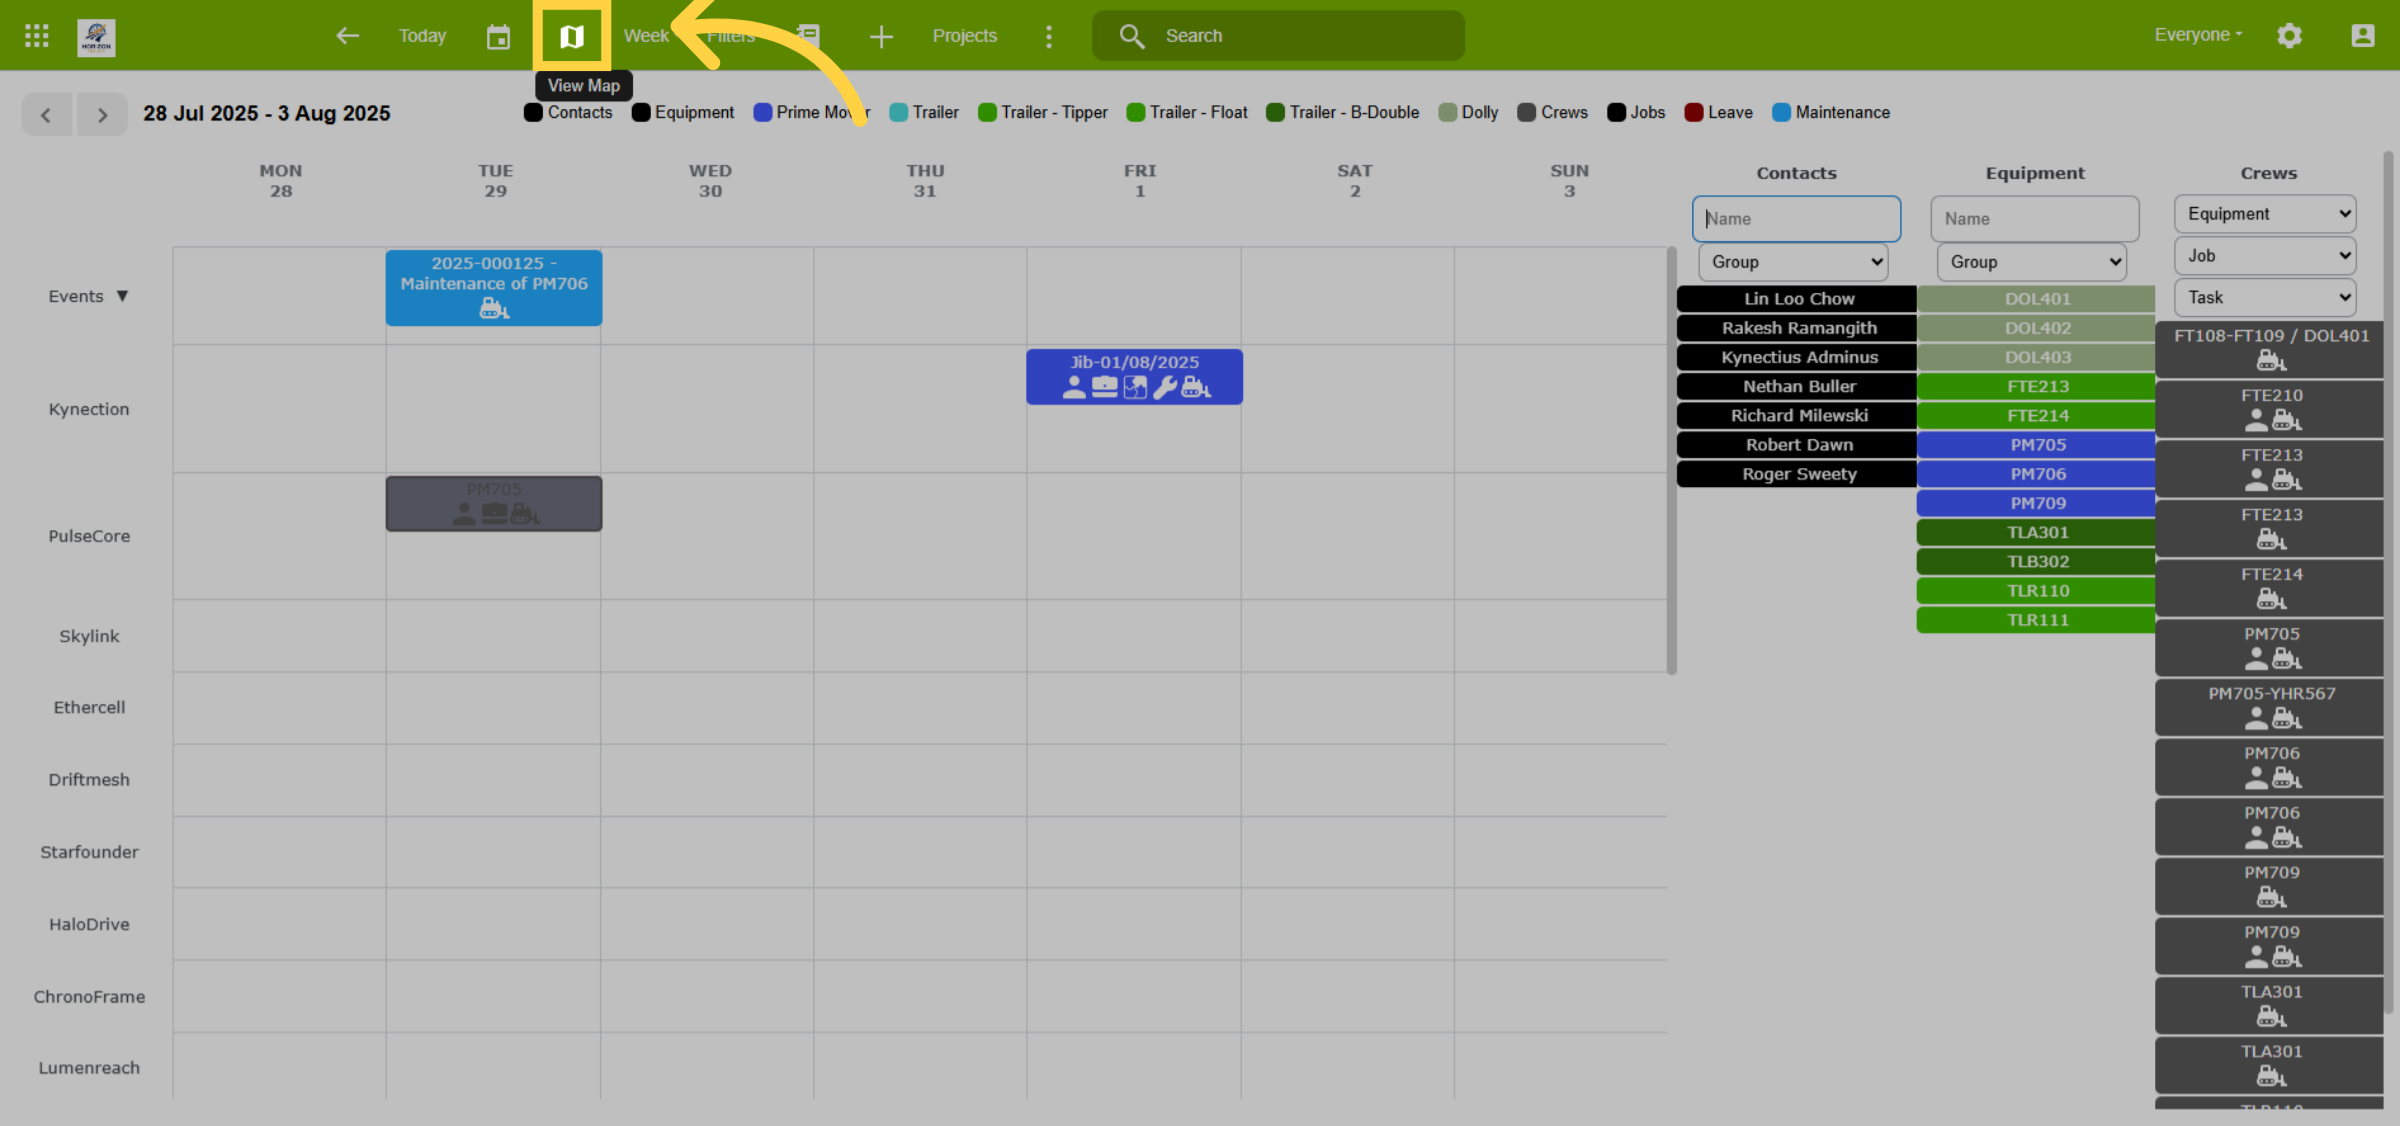
21. Project Site & People
View all projects on a map, with locations based on the project address. Once you click on a project, you can see the personnel allocated to it.
22. Toggle
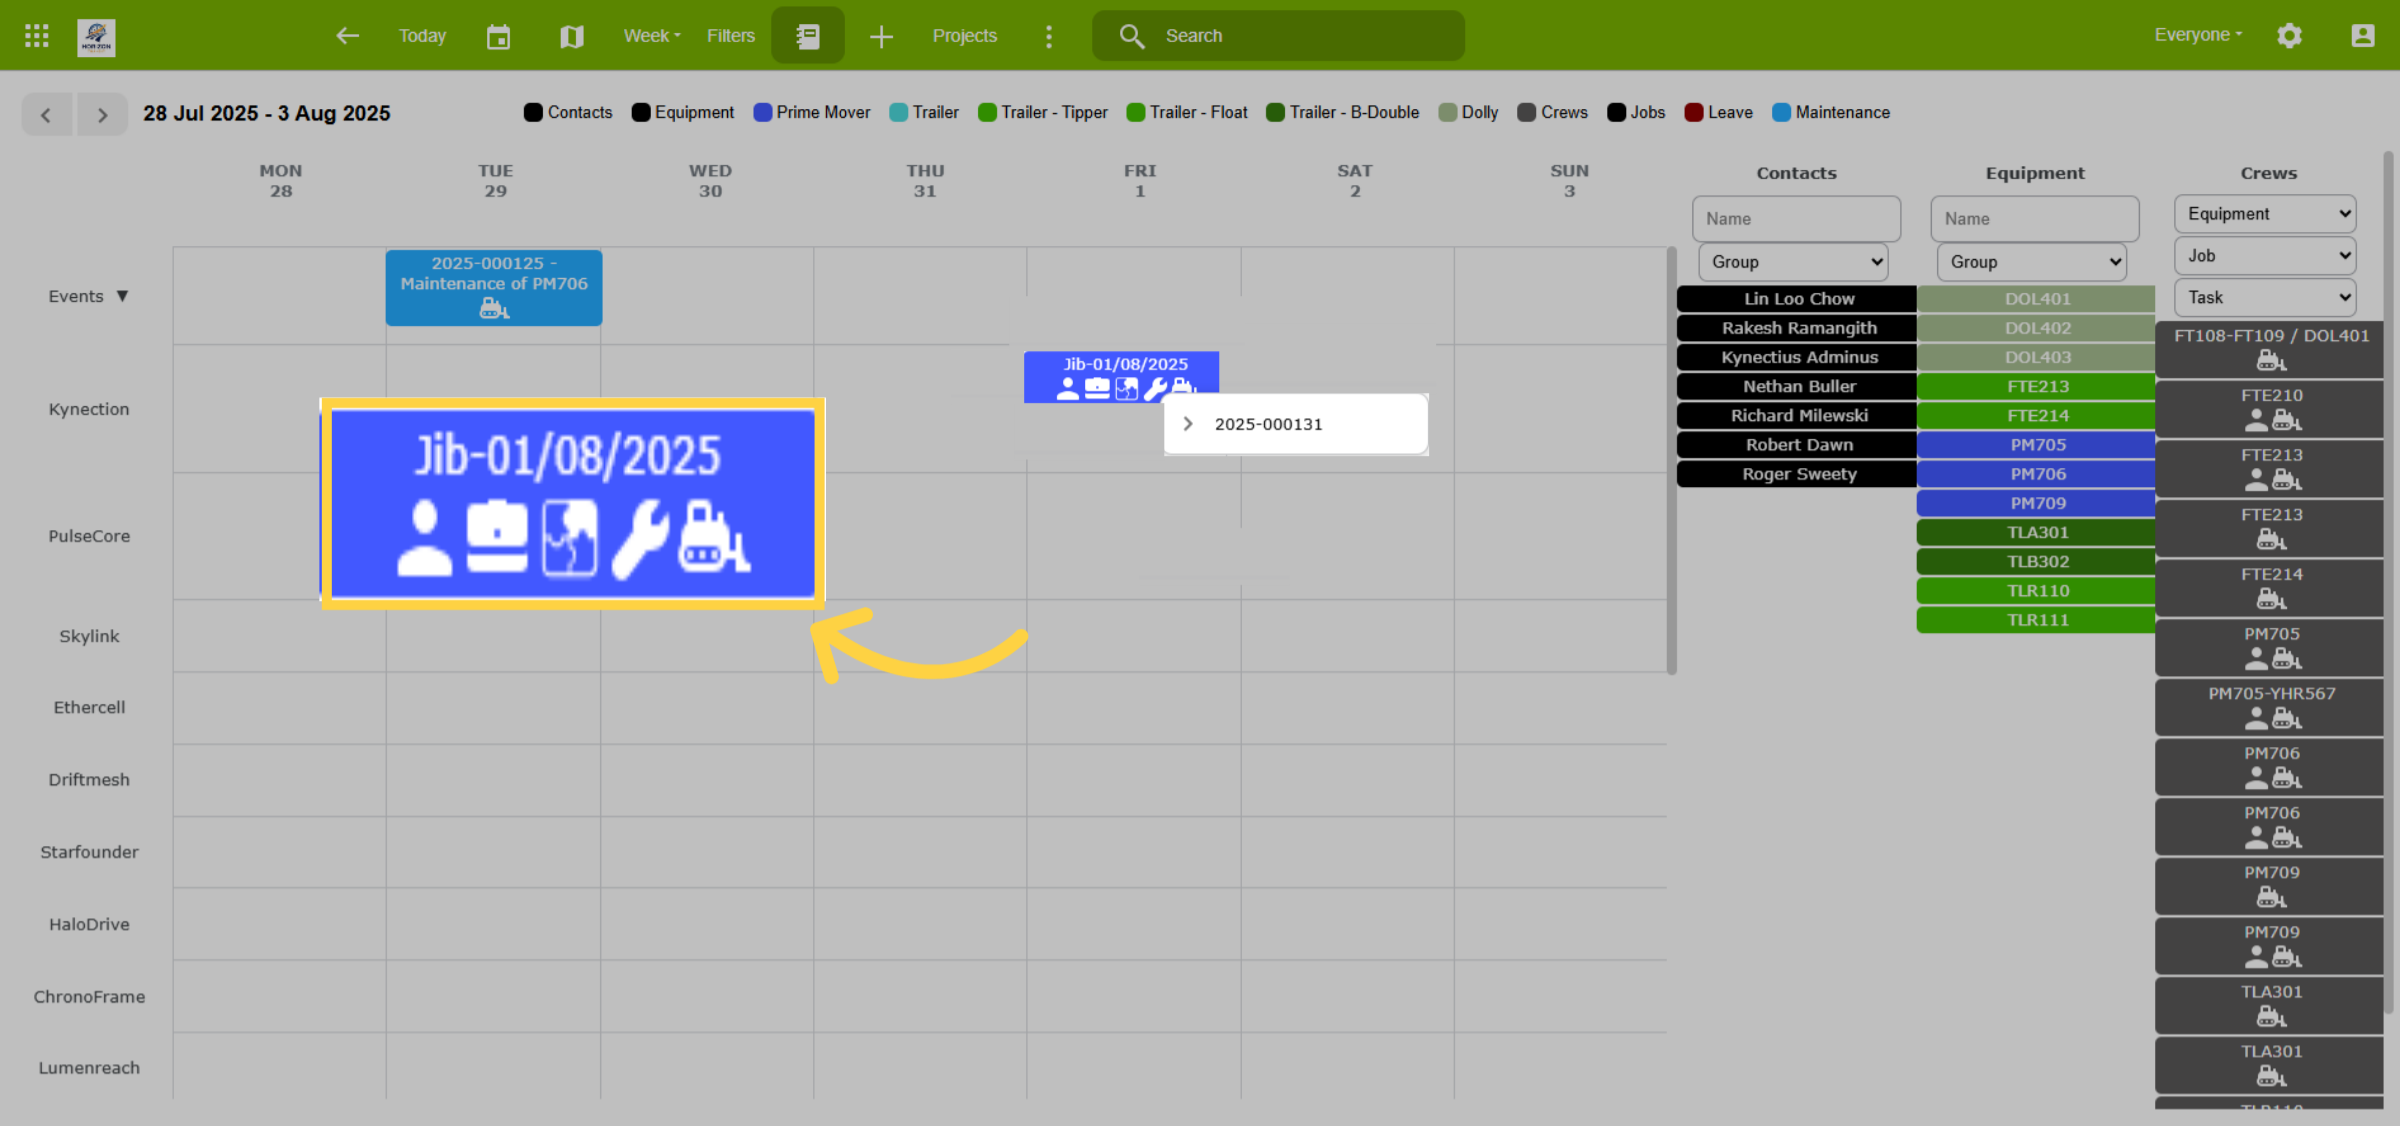
The toggle provides different views of the scheduler. Expand to see a summary, or toggle to see icons. Select an icon for more job details, including people, milestones, jobs, projects, and equipment. Click once for the details and again to be directed to the item.
23. HV Runs
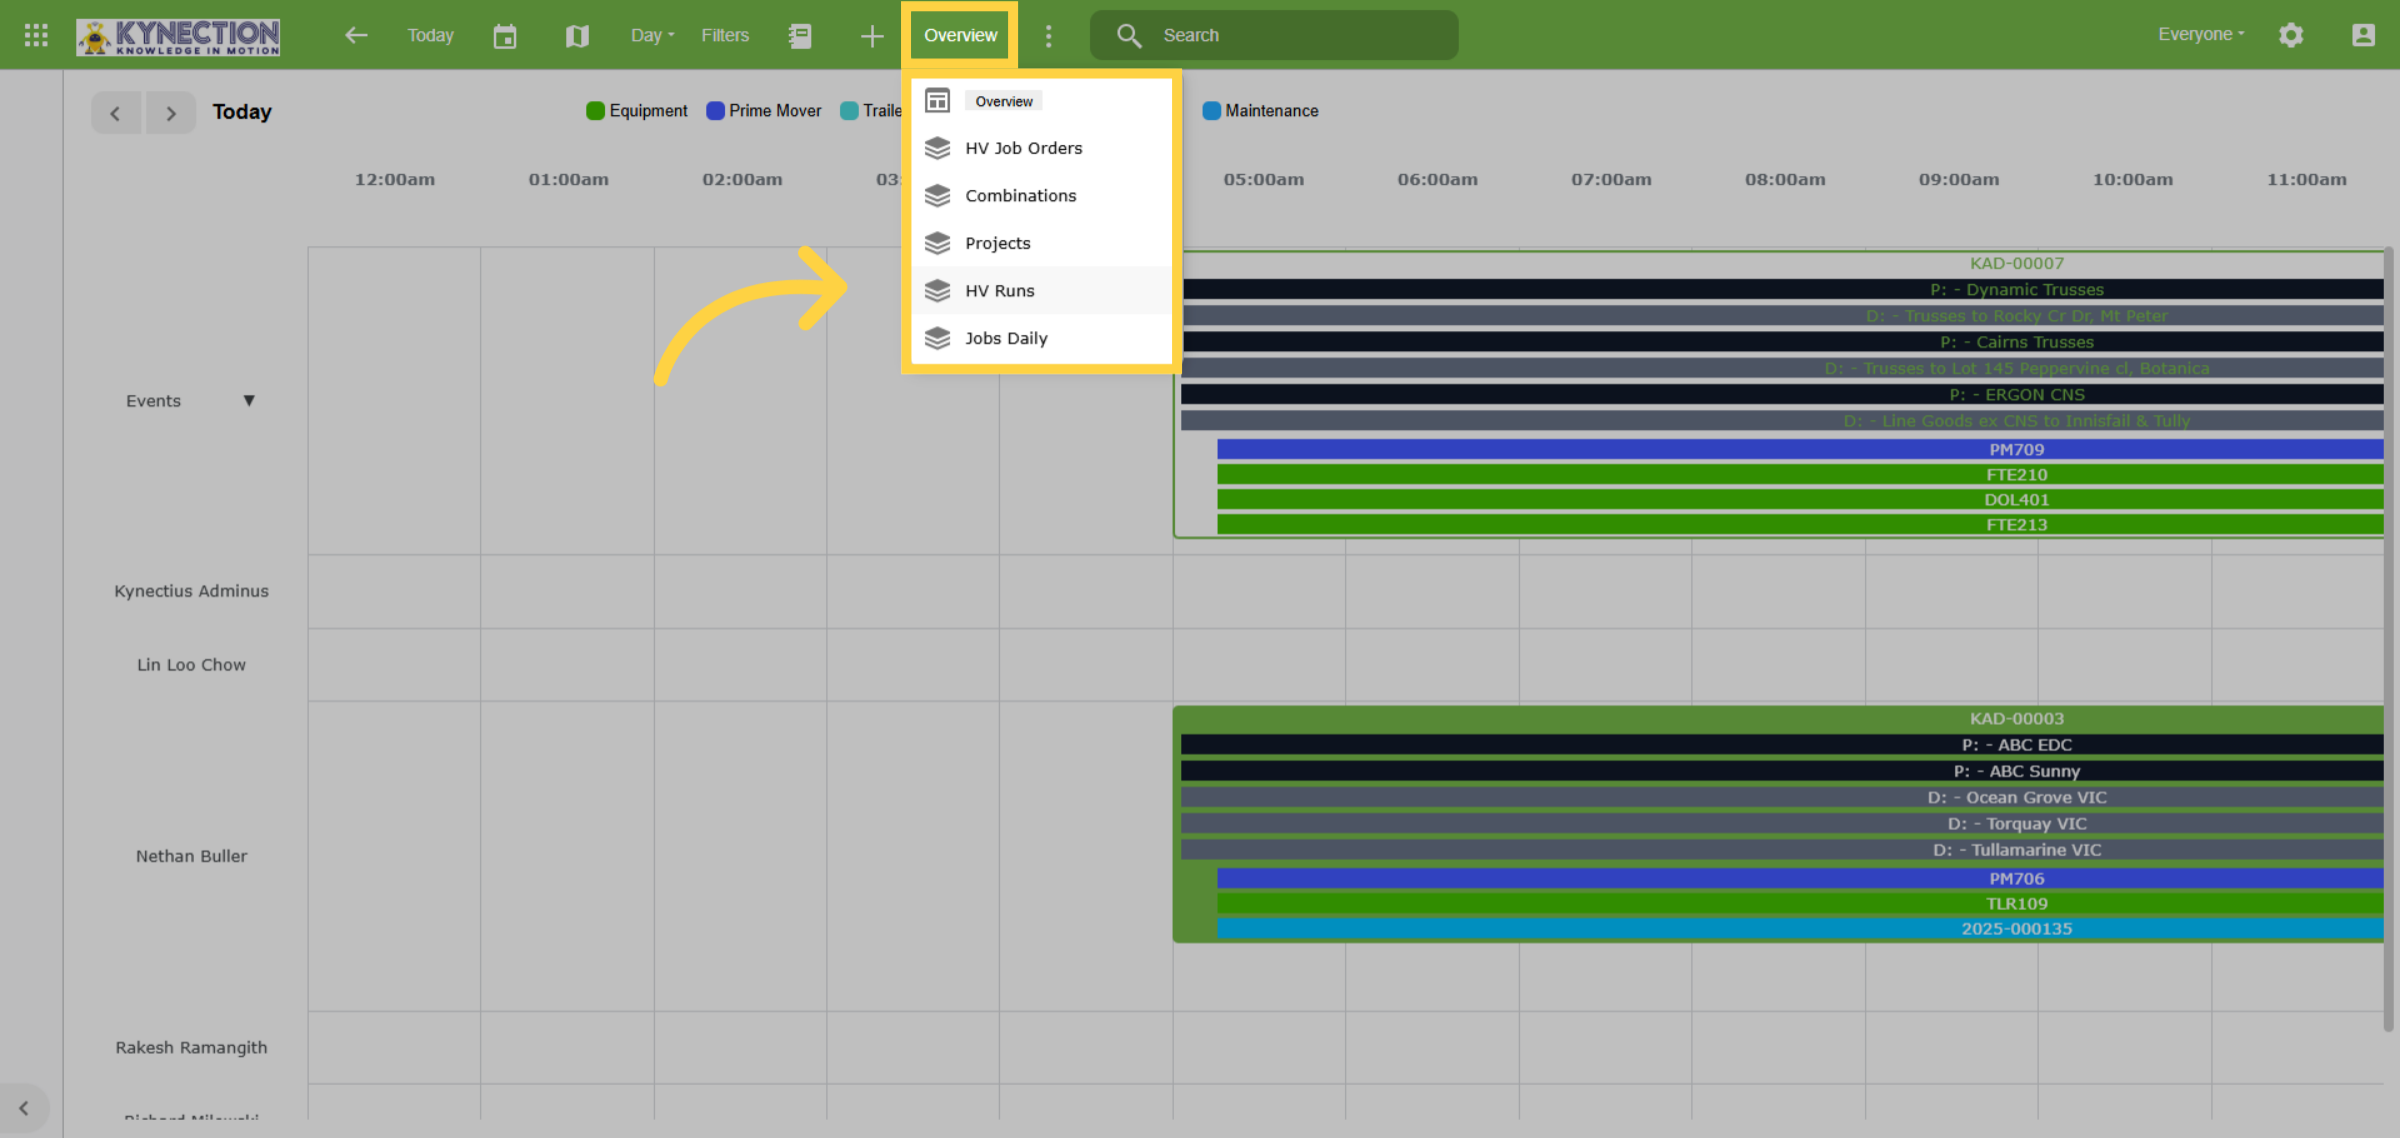
In addition to the Projects Scheduler, Kynection support a Runs Scheduler for workflows that have multiple legs. Select the HV Runs scheduler from the toolbar.
24. HV Runs Scheduler Layout
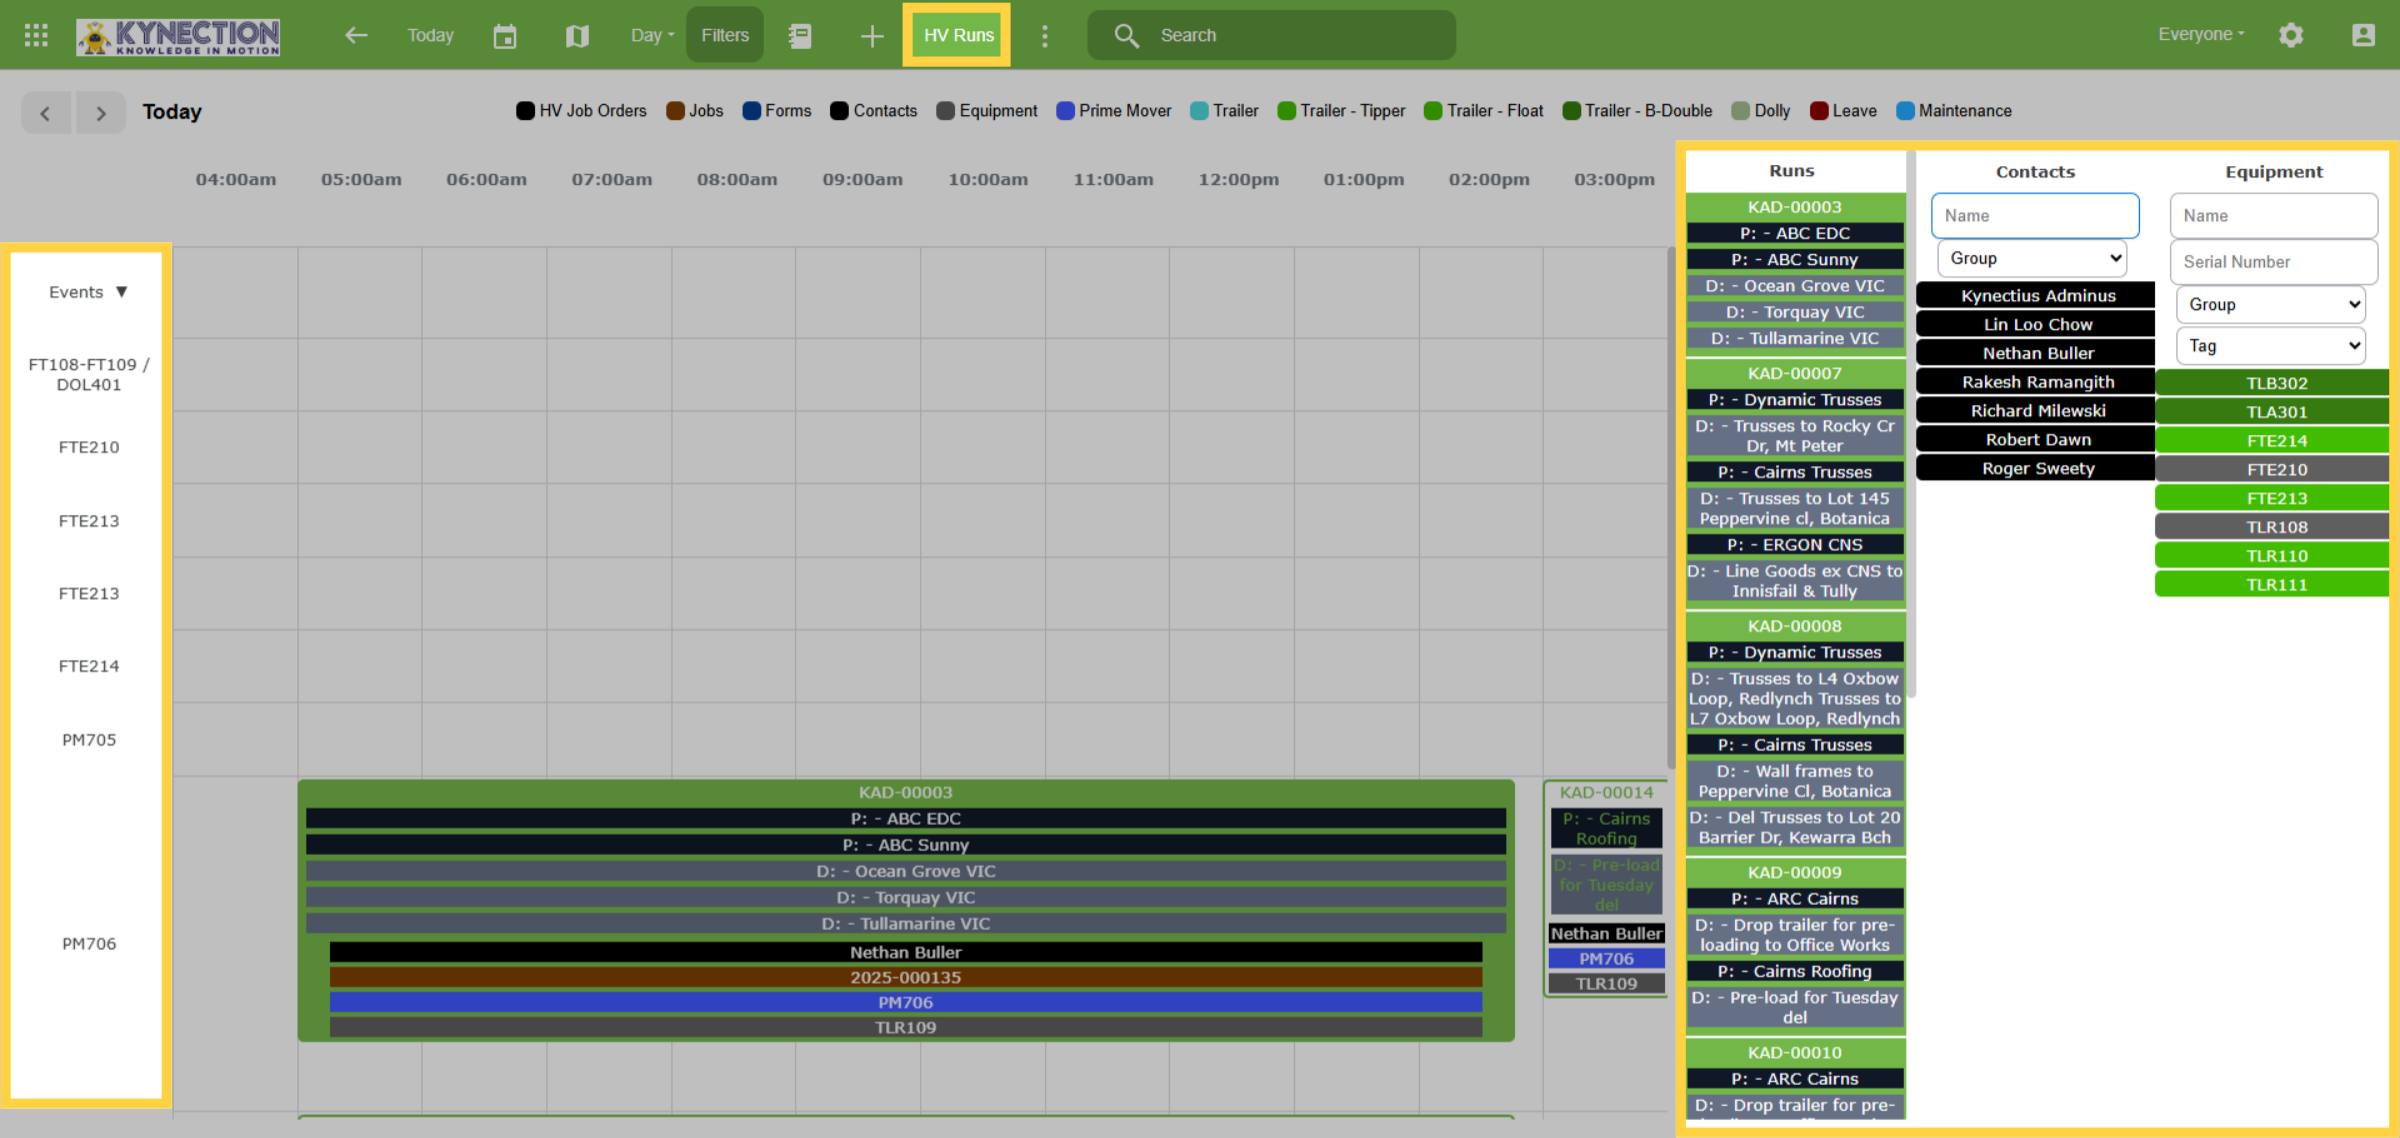
The HV Runs Scheduler features a layout similar to the Projects Scheduler, allowing users to drag runs to specific equipment and allocate drivers easily. Users can also add equipment like trailers and set up combinations of trucks, trailers, and drivers.
25. HV Runs Toolbar
The toolbar provides options to switch between Day and Week views, includes a calendar for navigation, maps for location viewing, and filters for search refinement. A toggle feature allows for data compression for efficient viewing.
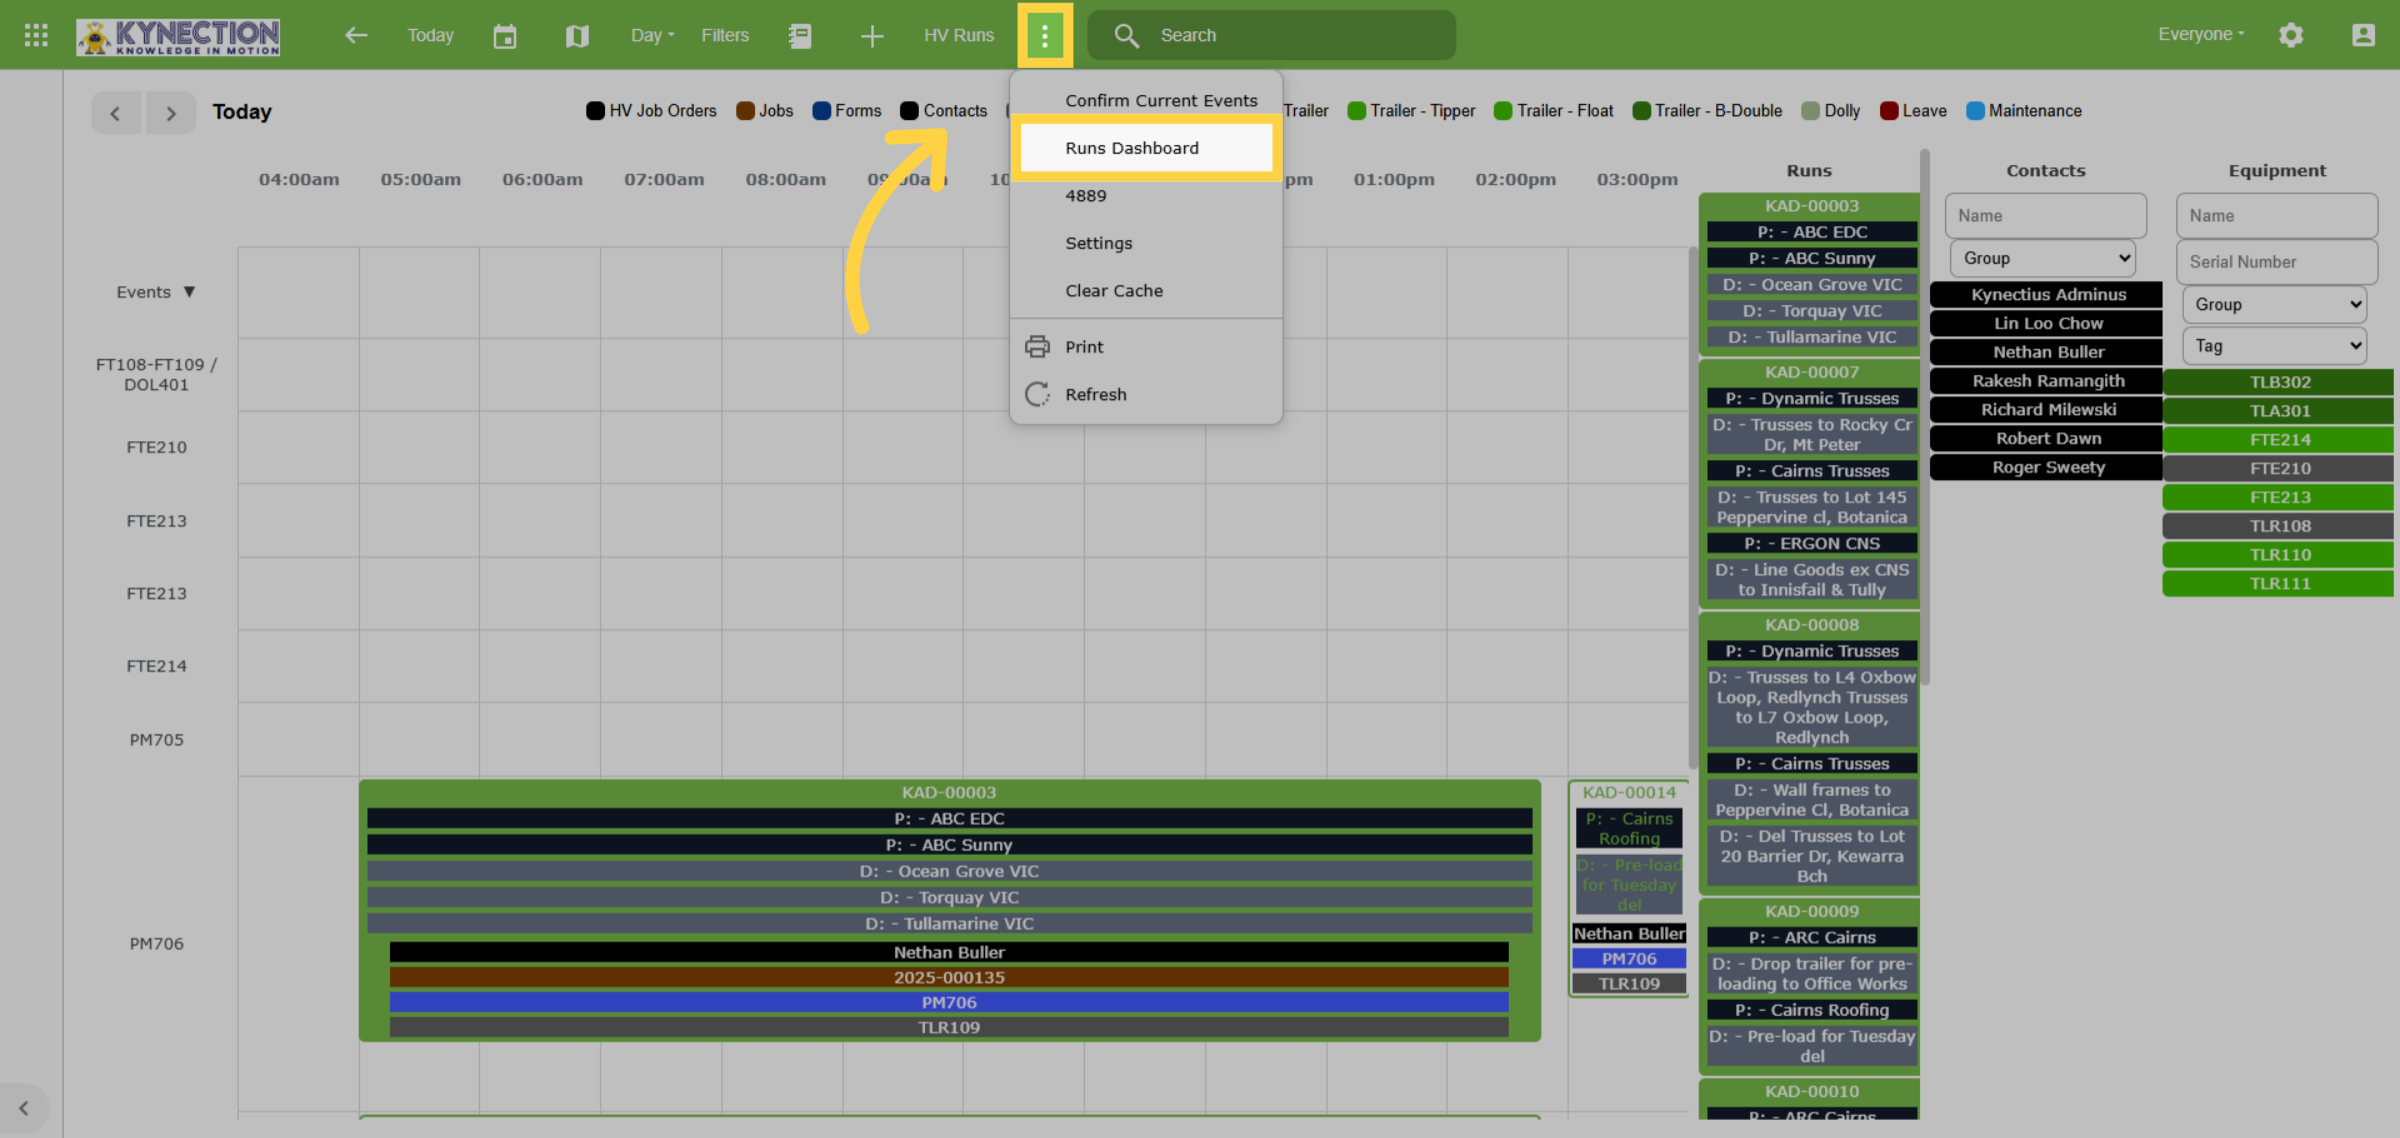
26. Runs Dashboard
To access the Runs Dashboard, click on the three-dot menu. From the Runs Dashboard you can view jobs, add new ones, and create runs.
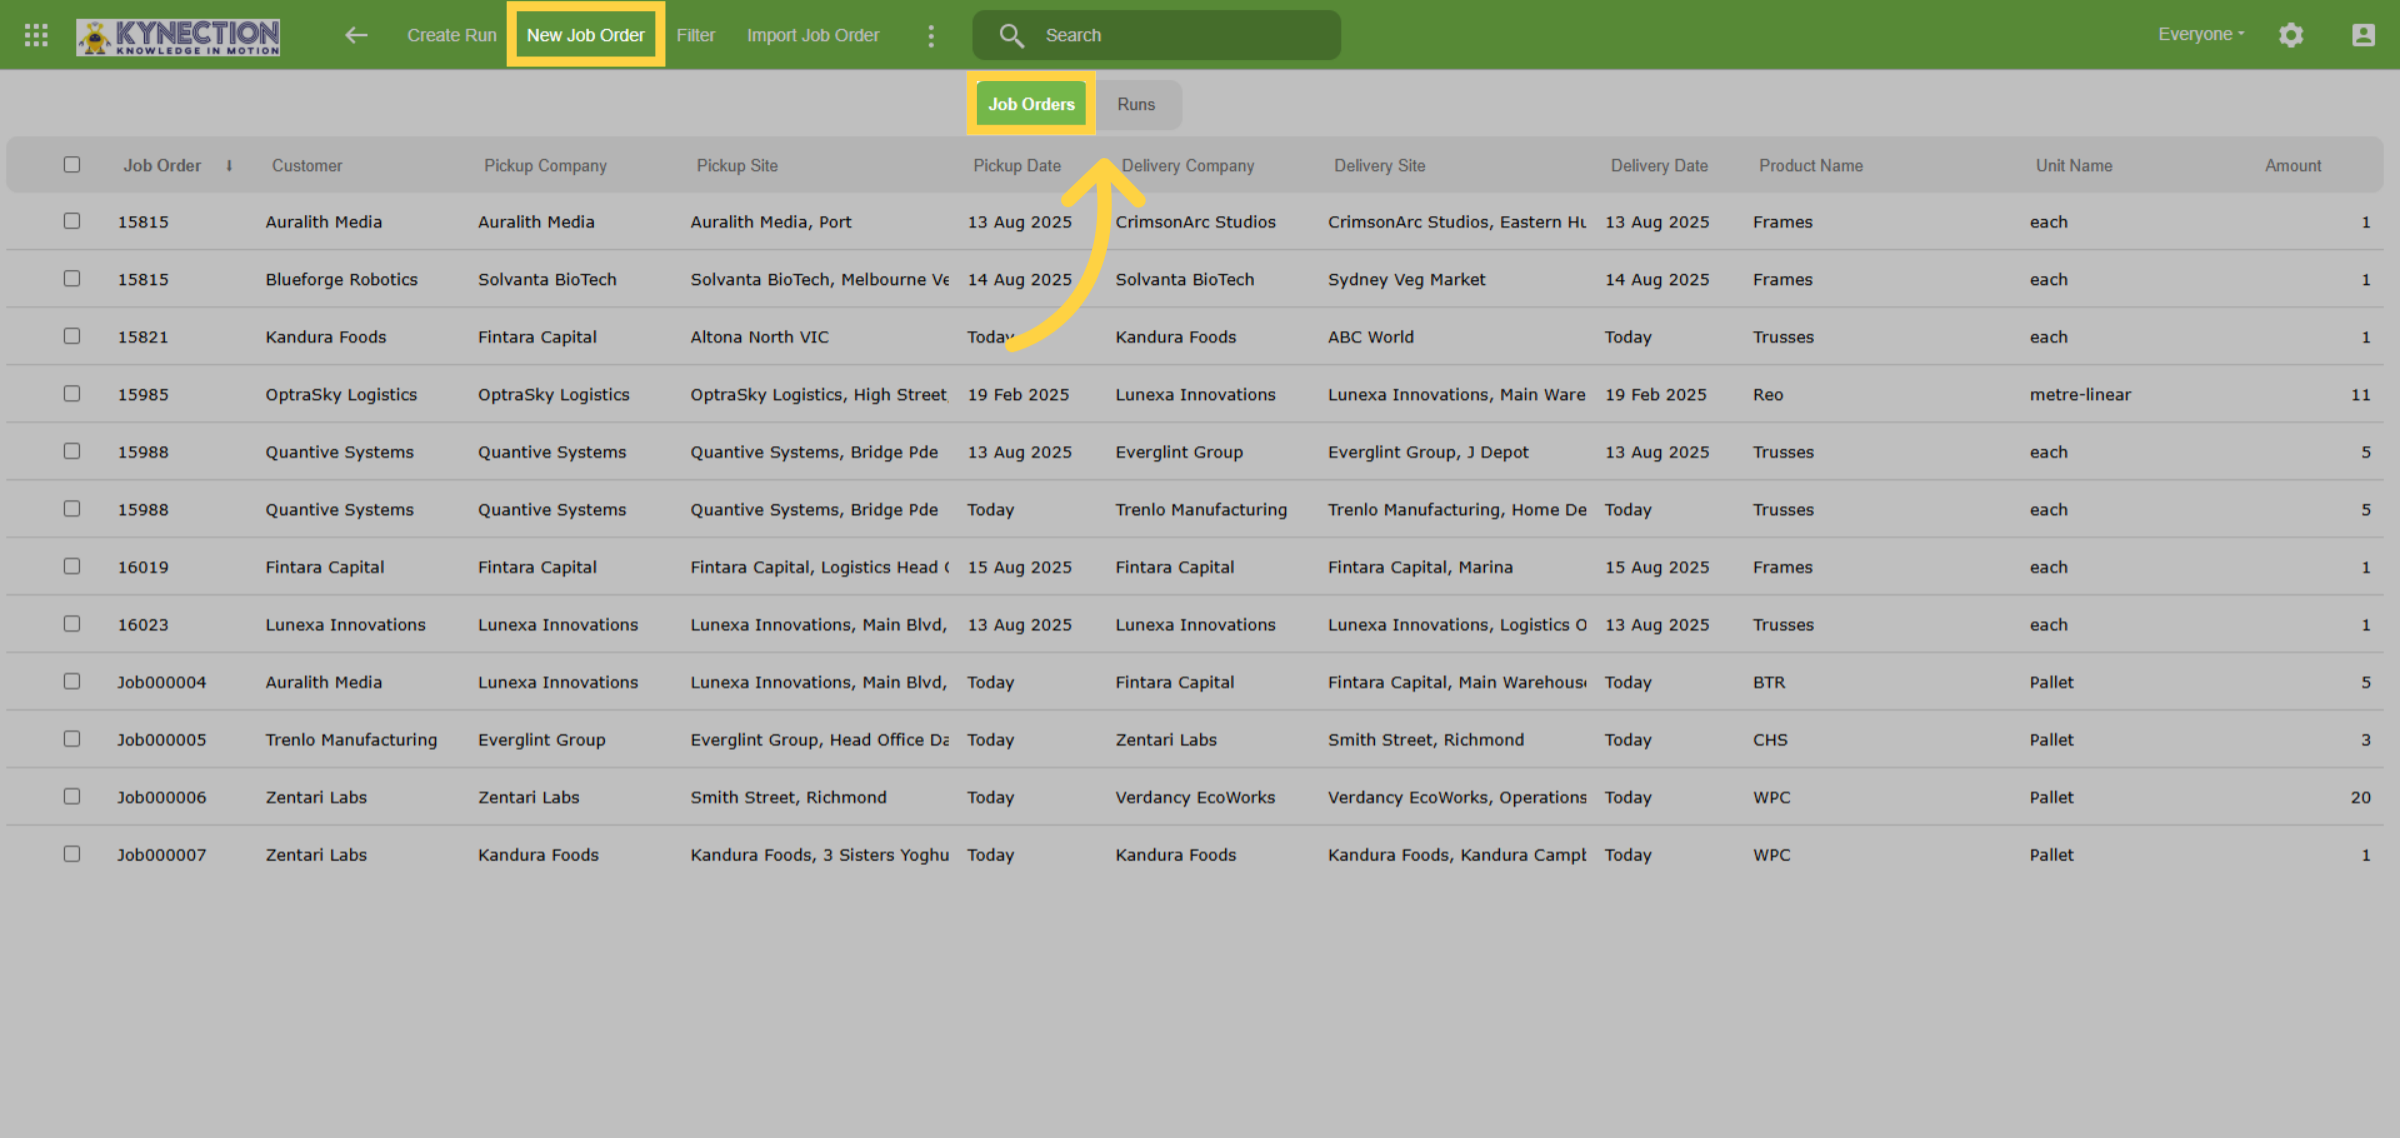
27. Job Orders Screen
Upon opening the Runs Dashboard, you will be greeted by the Jobs Orders screen. The "New Job Order" button found in the toolbar captures new customer enquires.
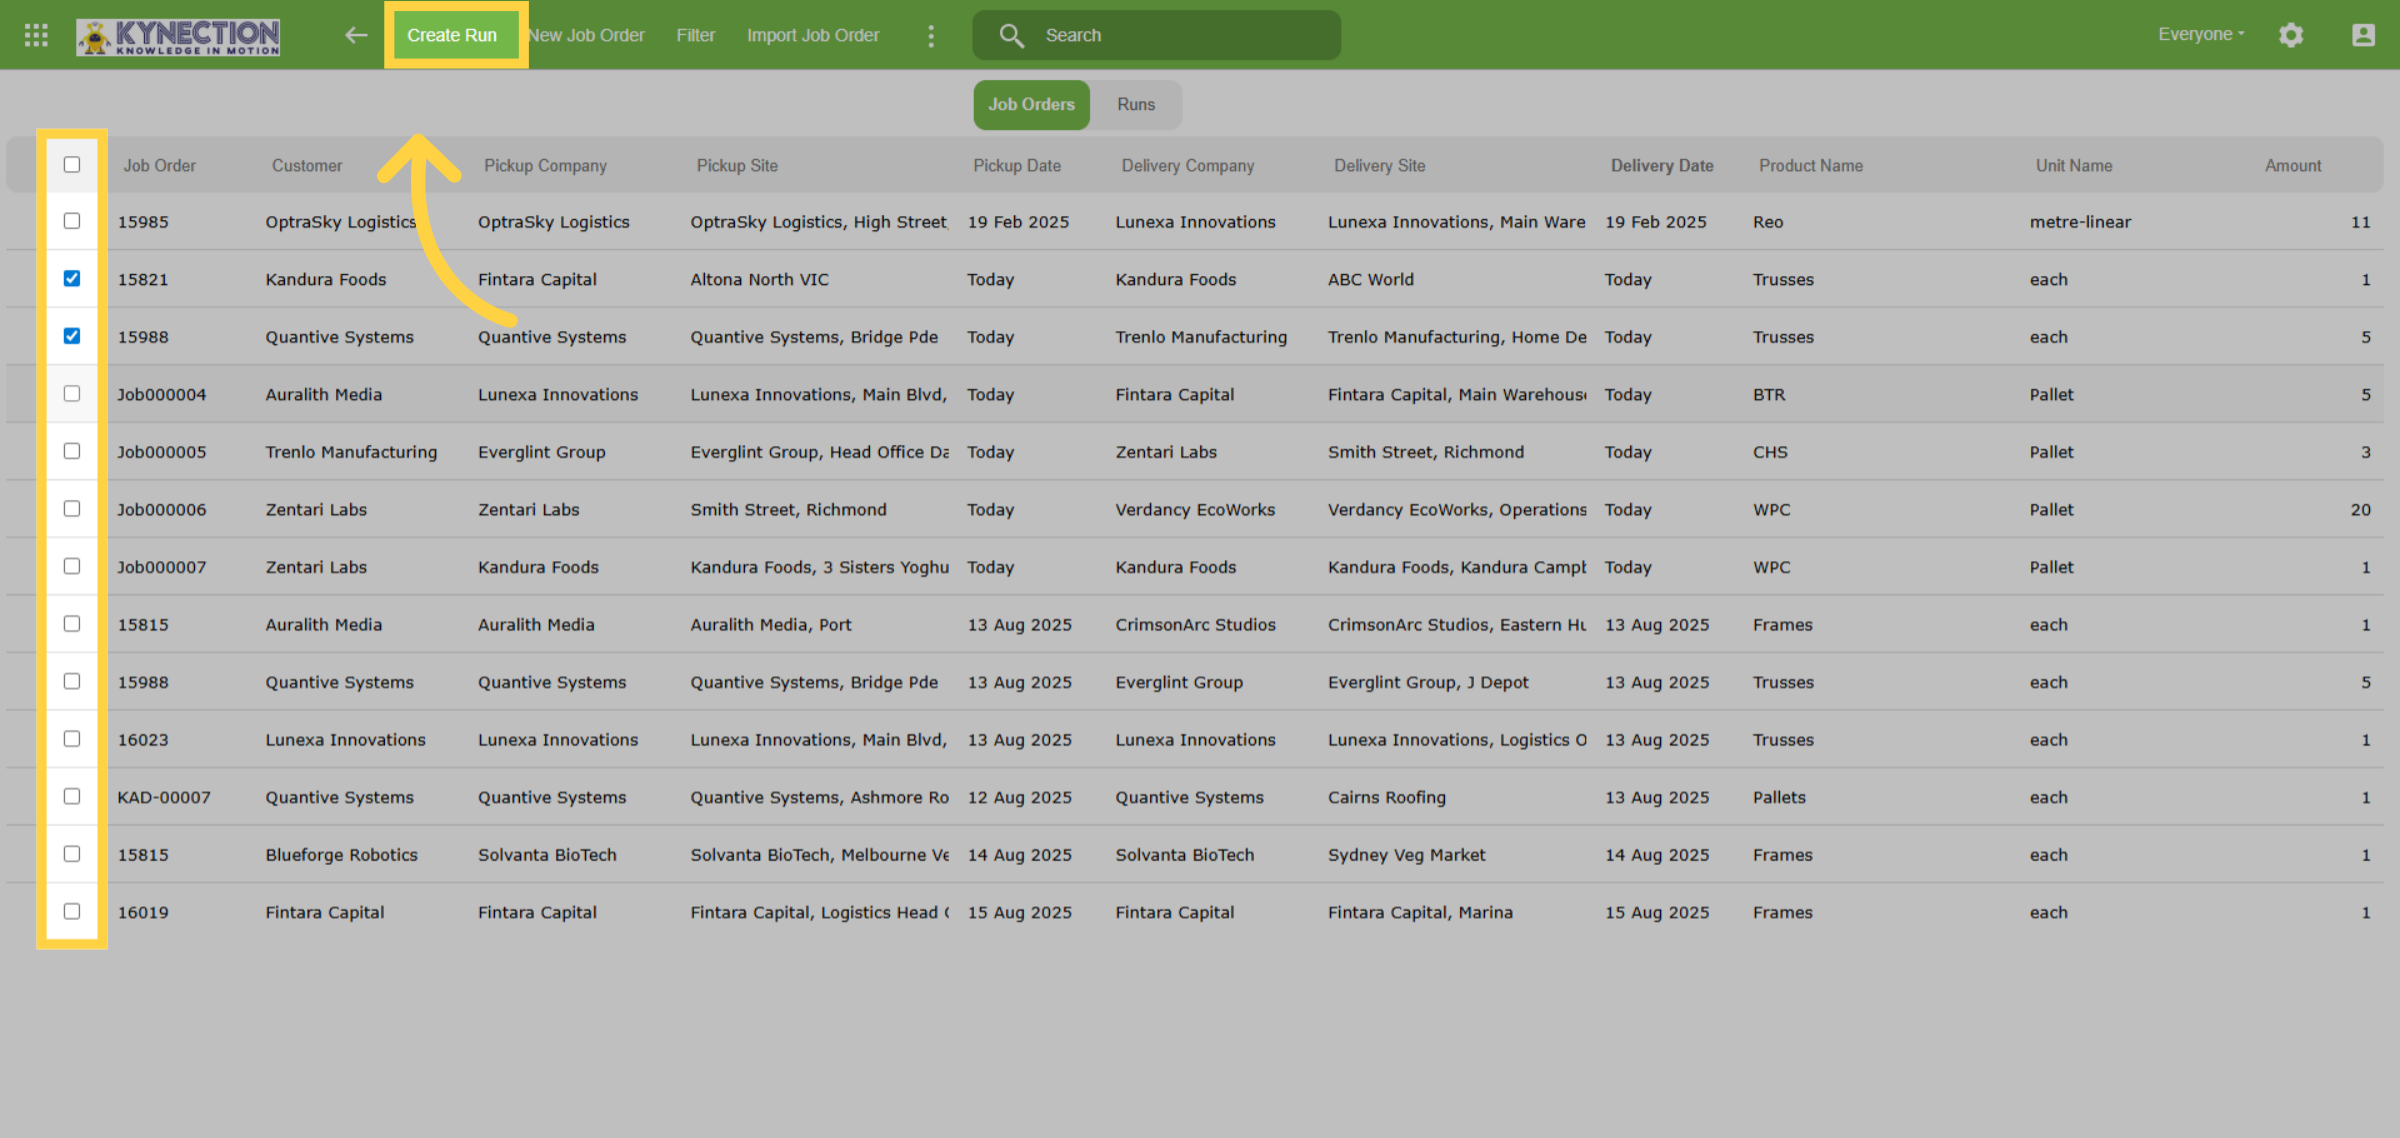
28. Create Run
To initiate a run, start by selecting the jobs you wish to include by checking the corresponding tickbox next to each job. Once you've made your selections, click on "Create Run" in the toolbar.
29. Edit Run
Your run has been successfully created and can now be found at the bottom of the job orders list. You can easily rearrange the job order by dragging the jobs into your desired sequence. Alternatively, click on any job to edit.
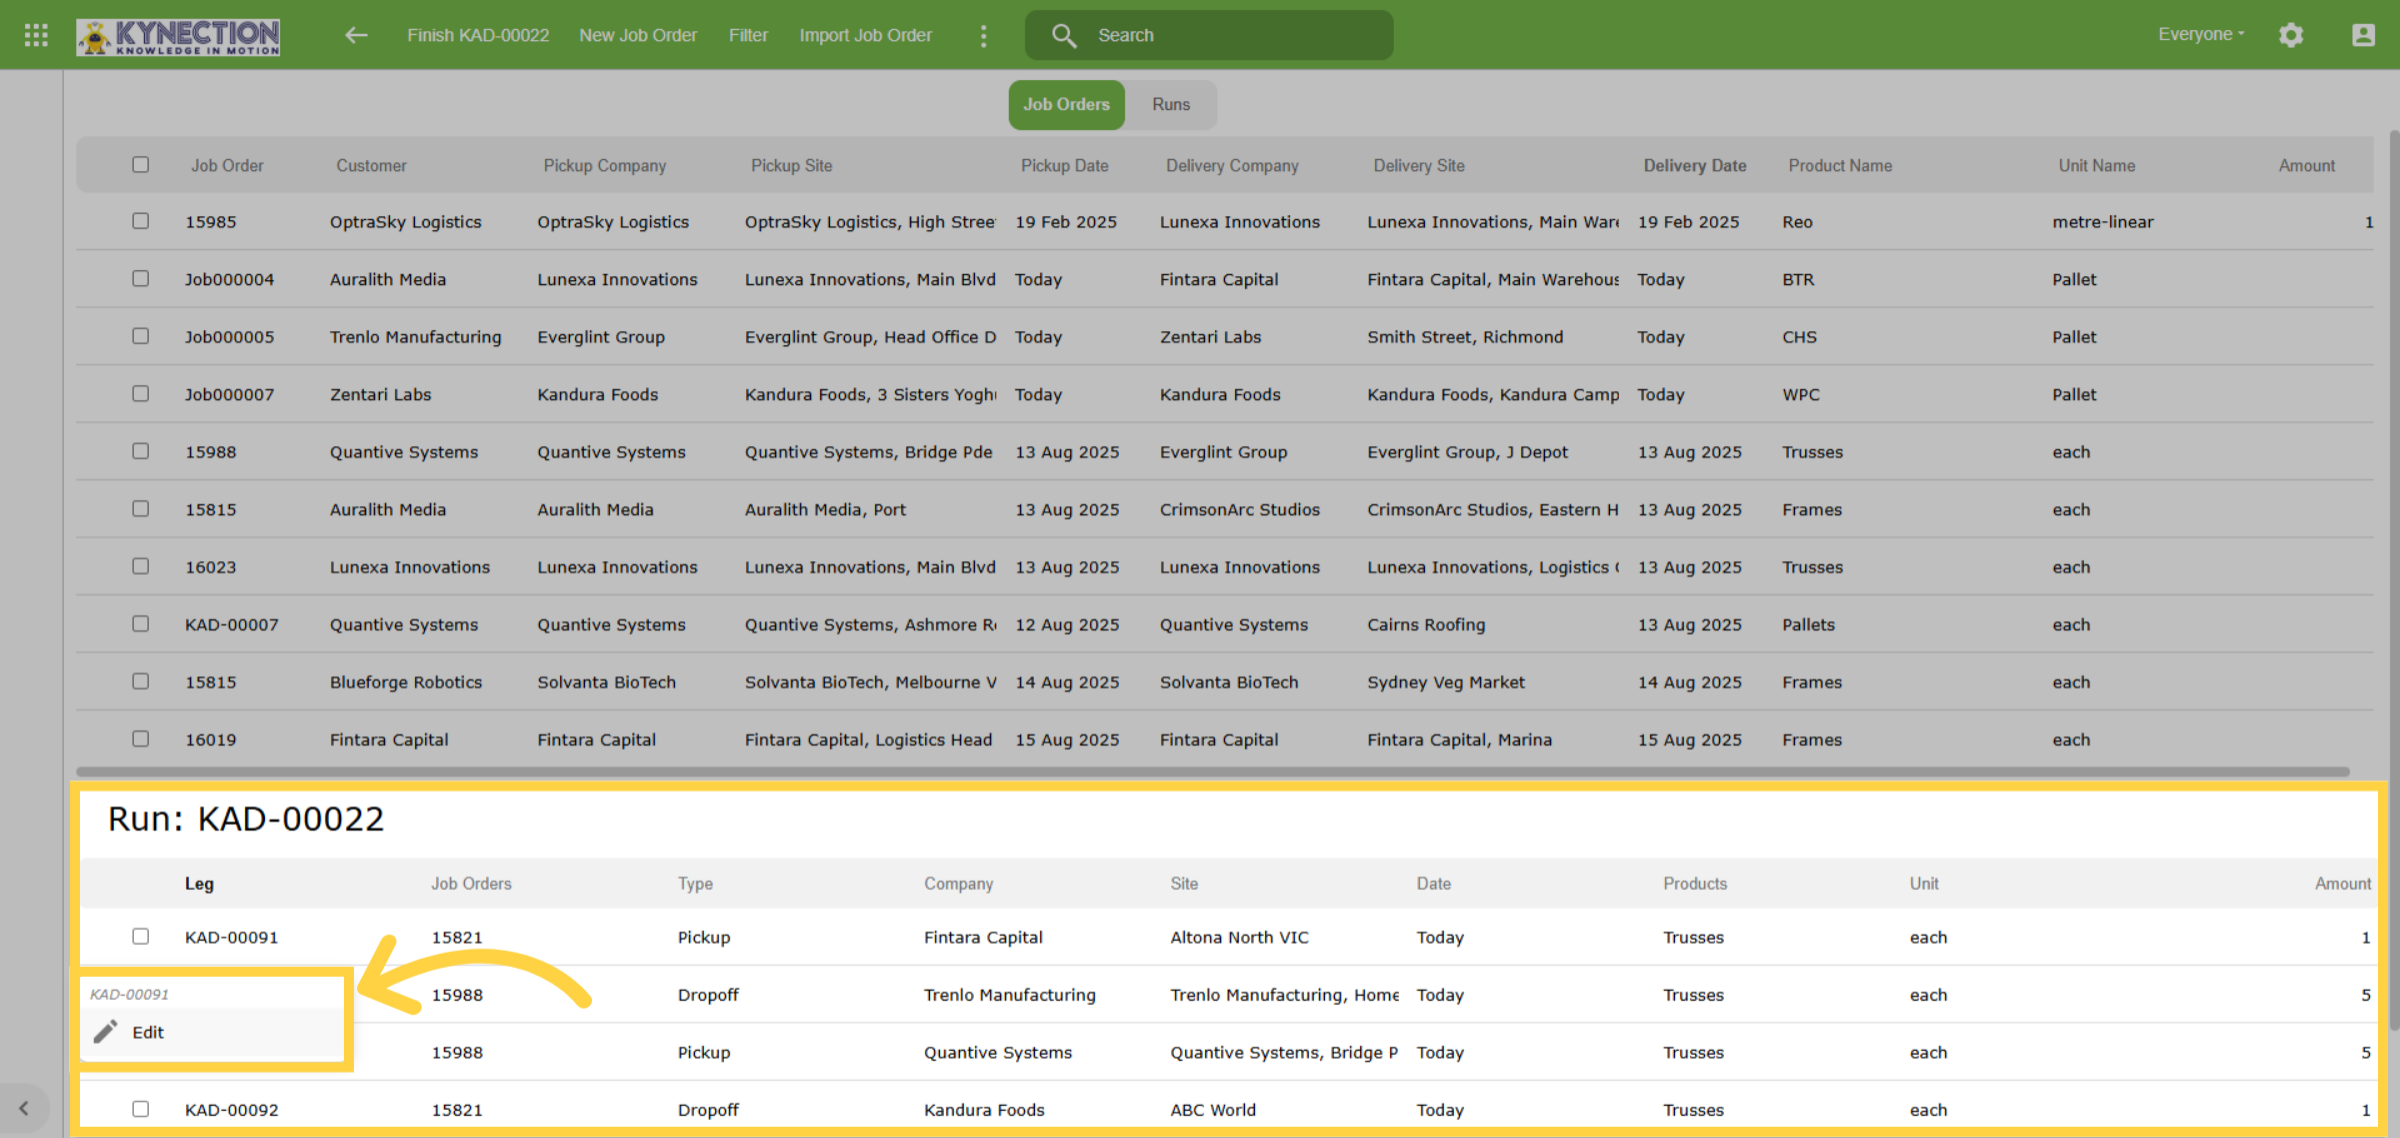
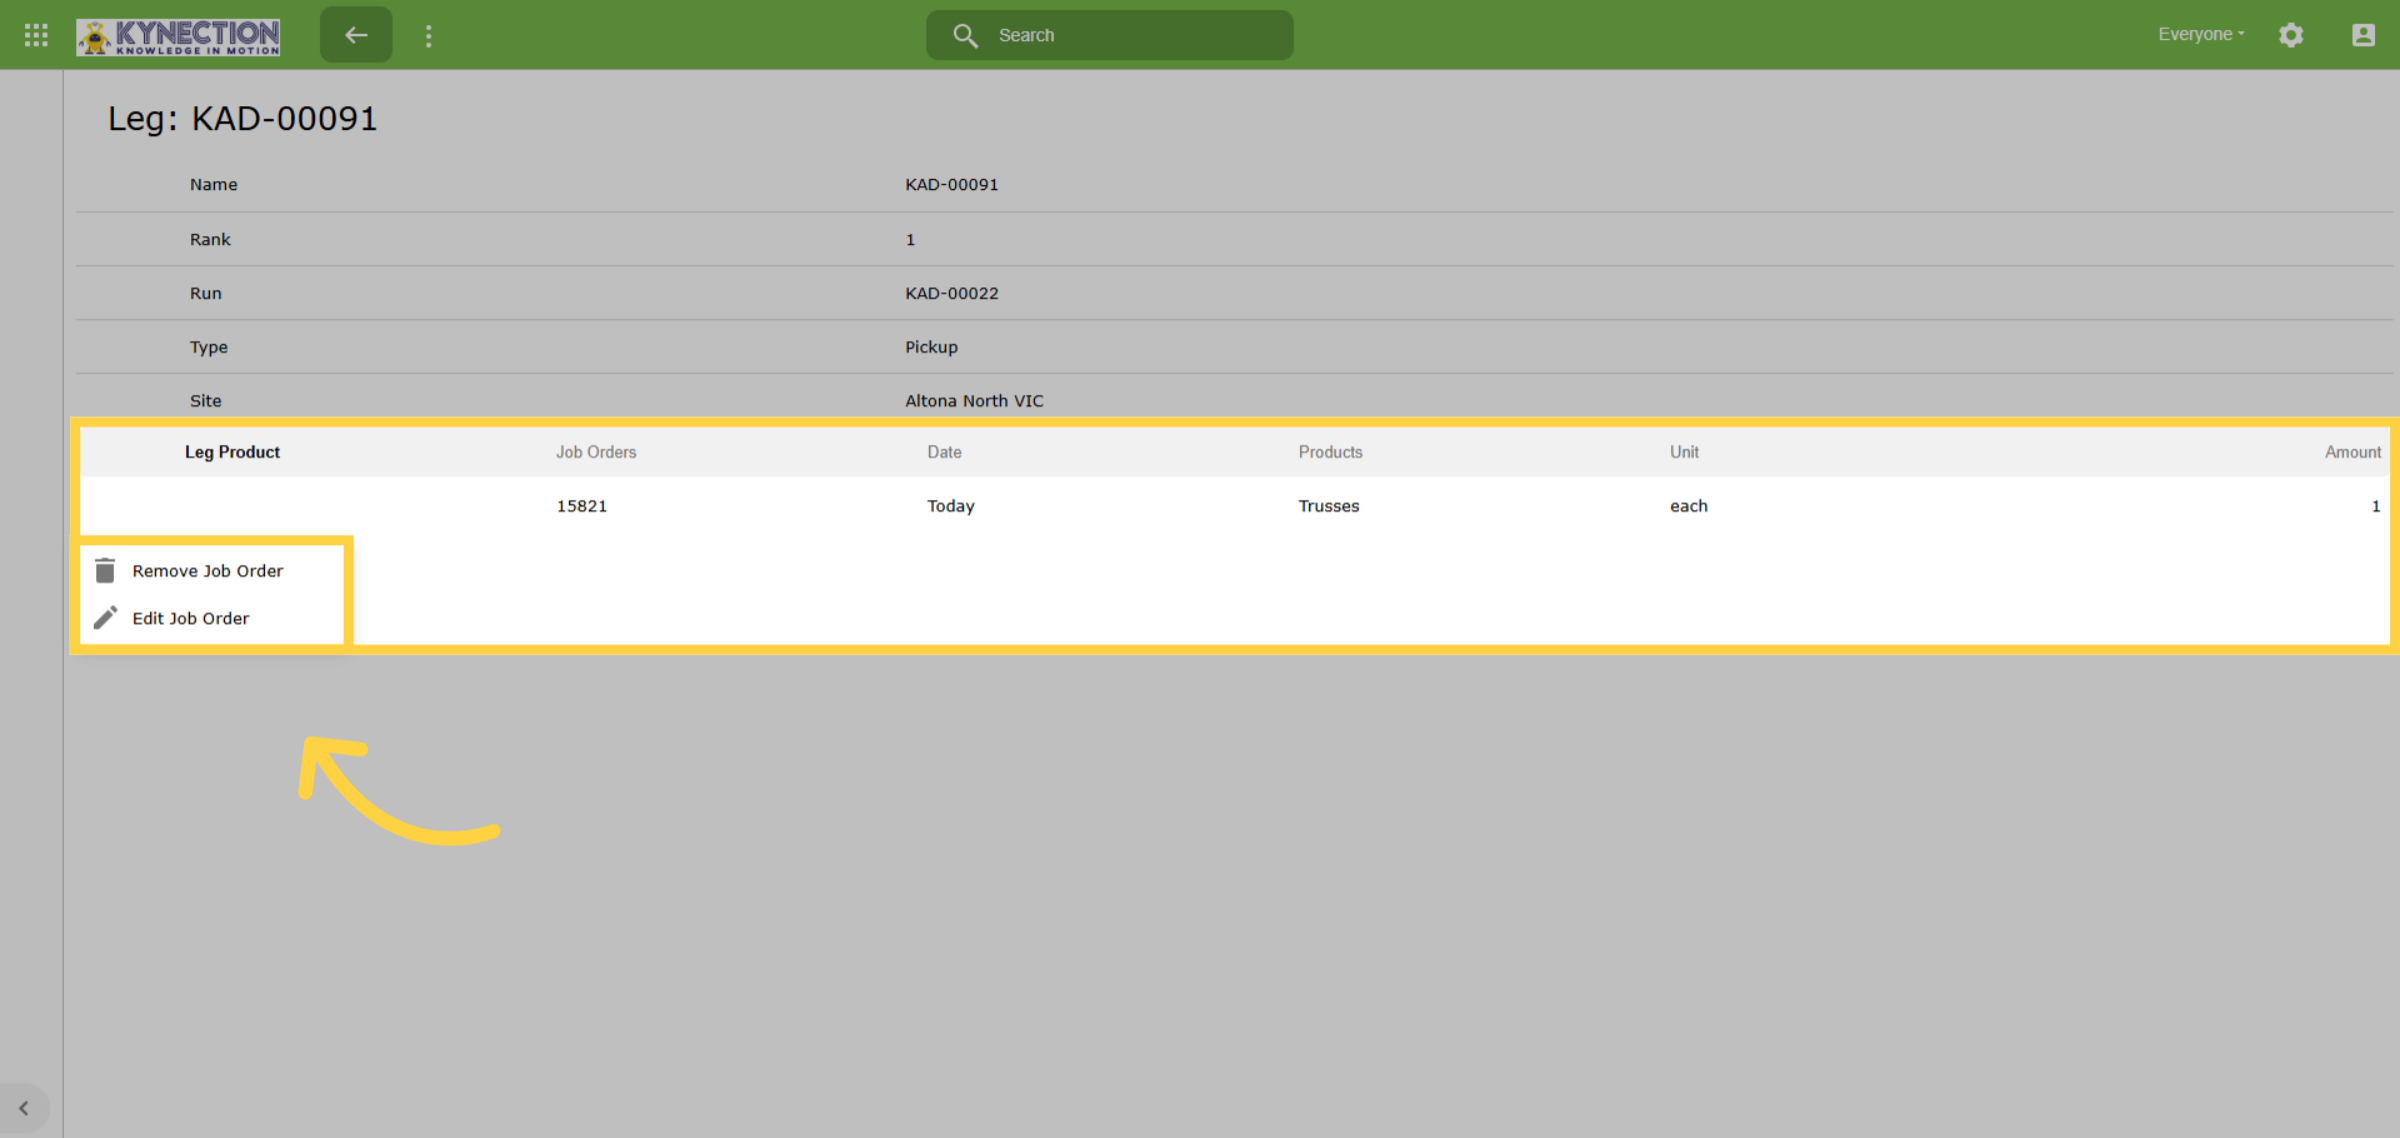
30. Edit Job Order
Once you click on "Edit", you have the option to either remove the job order from the run or modify it. You can access these options by selecting the specific job order.
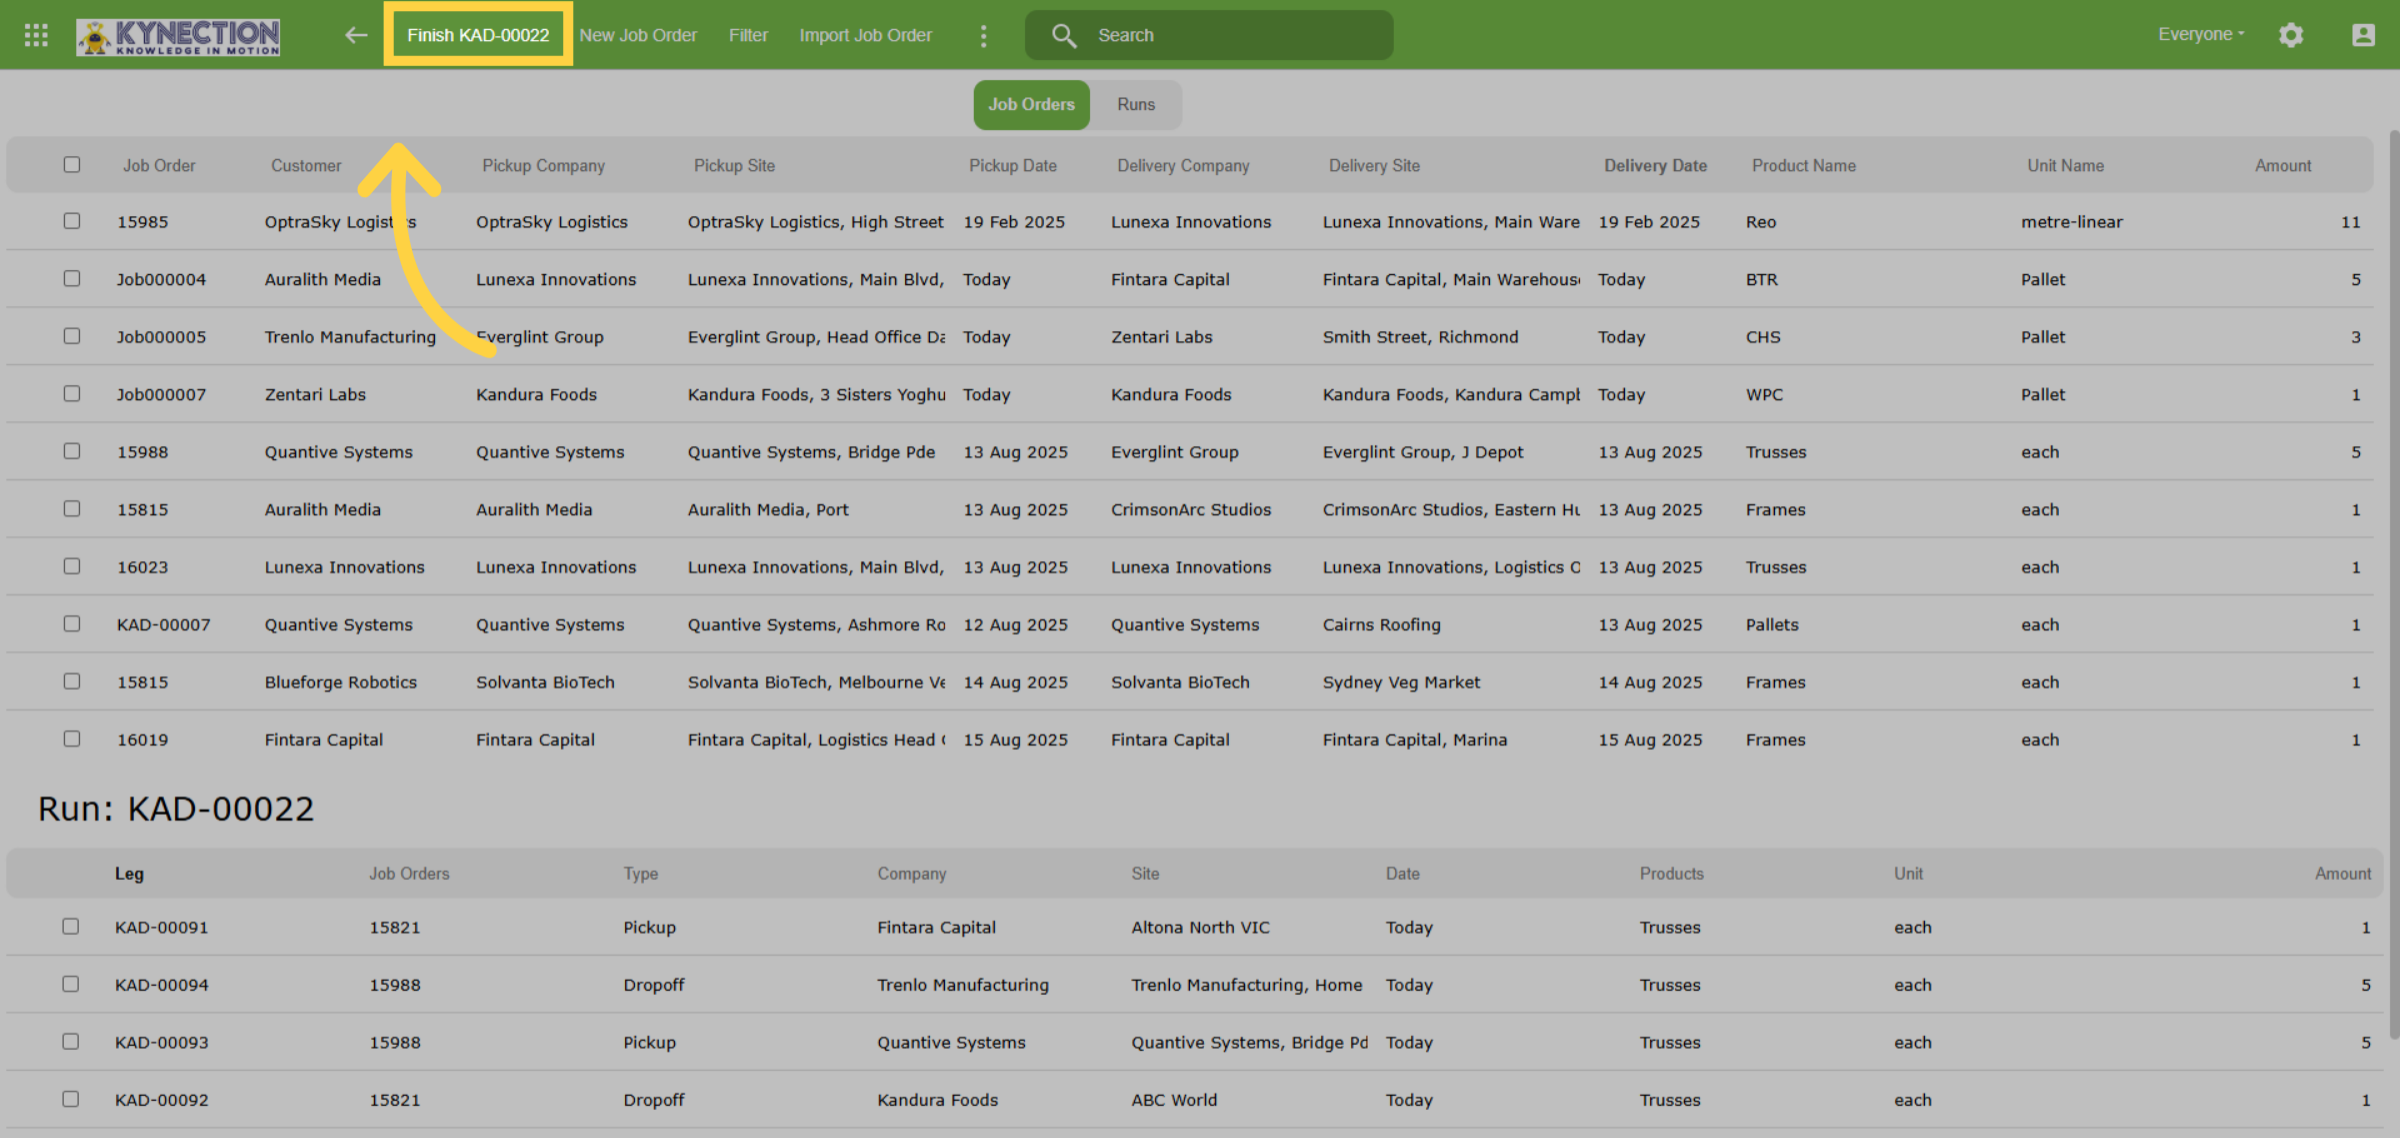
31. Finish Run
Once you have everything set up for the new run, click on "Finish" in the toolbar. To view or modify the runs, navigate to the "Runs" tab located at the top of the screen.
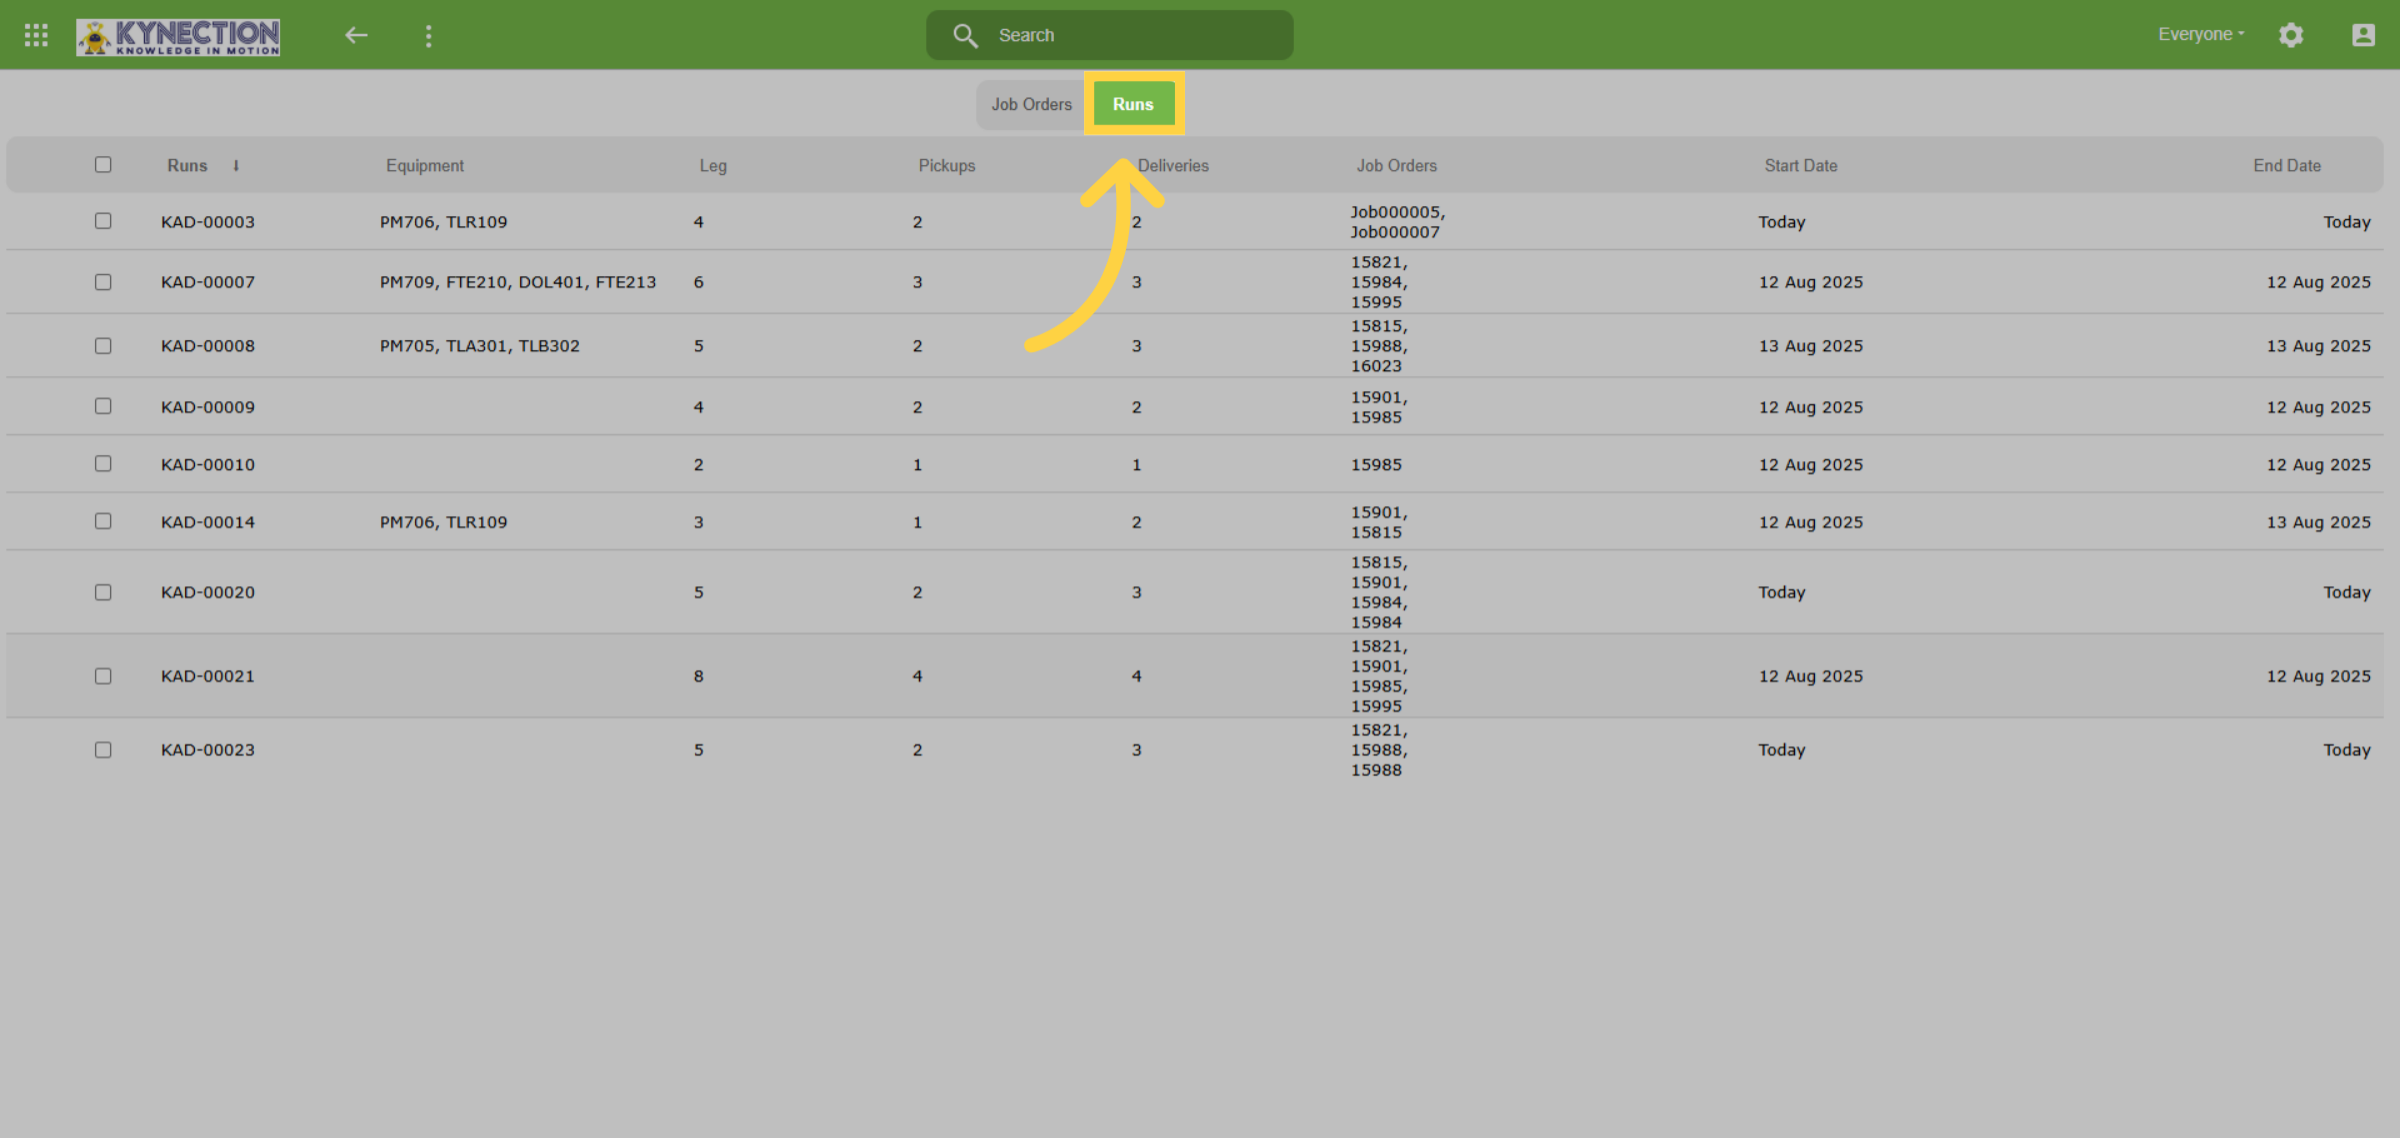
32. Runs
The Runs screen provides a quick overview of each run's start and end dates, displays the associated job orders, and indicates whether the run has been scheduled.
33. Add Job Orders to Run
To enhance a run with additional job orders, begin by selecting the desired run, then click on "Add Job Orders" in the toolbar.
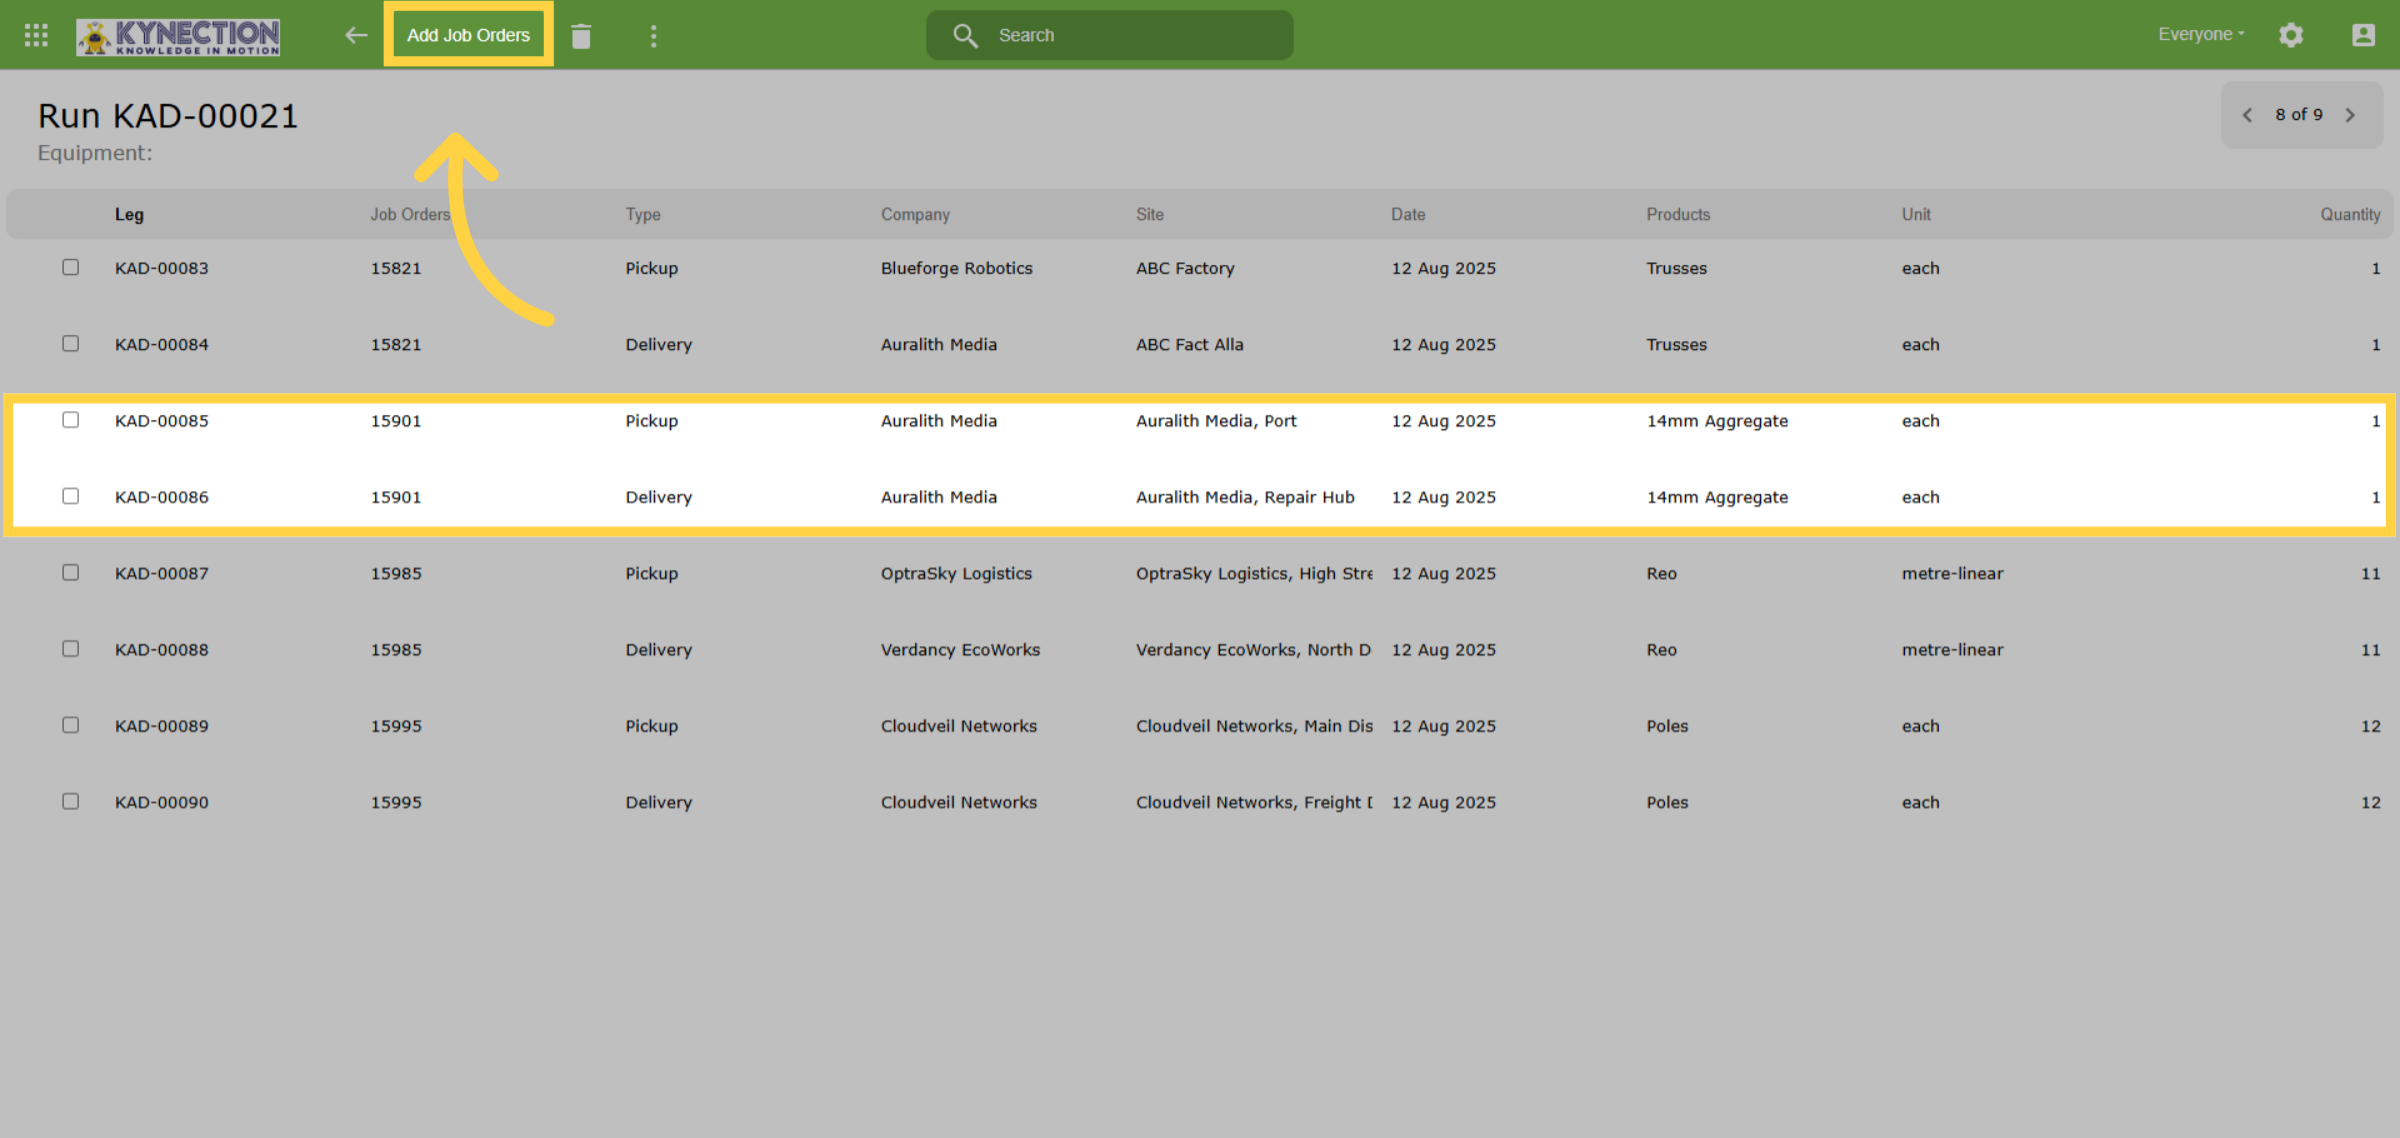
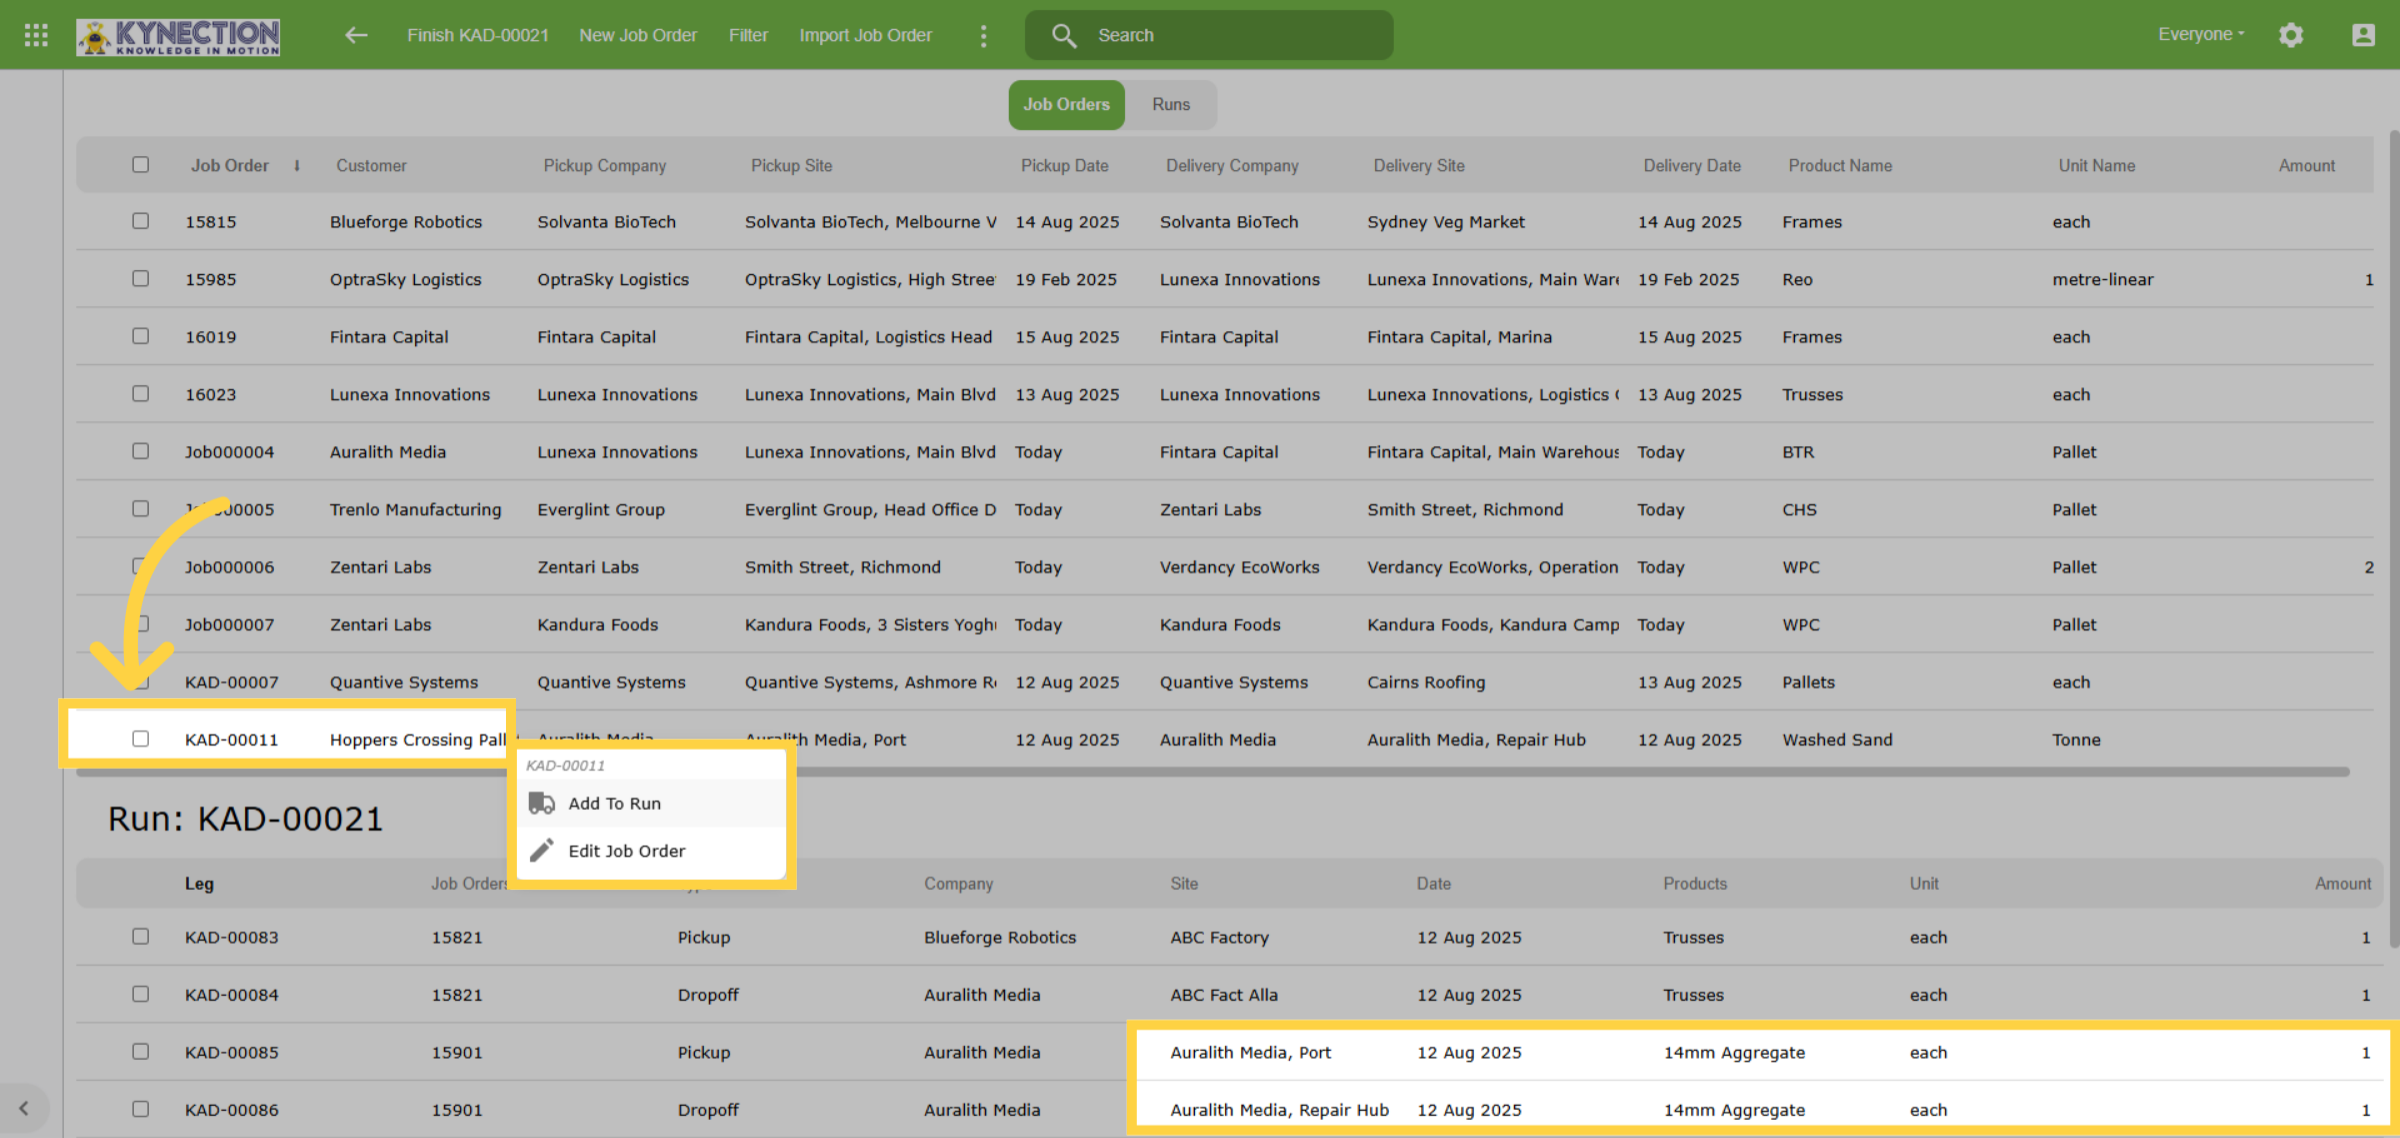
34. Edit Run
When you choose "Add Job Orders," you'll be redirected to the Create Run Screen. Click on the job you wish to include, then select "Add to Run." Once you've finished adding the desired jobs, click on the "Finish" option in the toolbar.
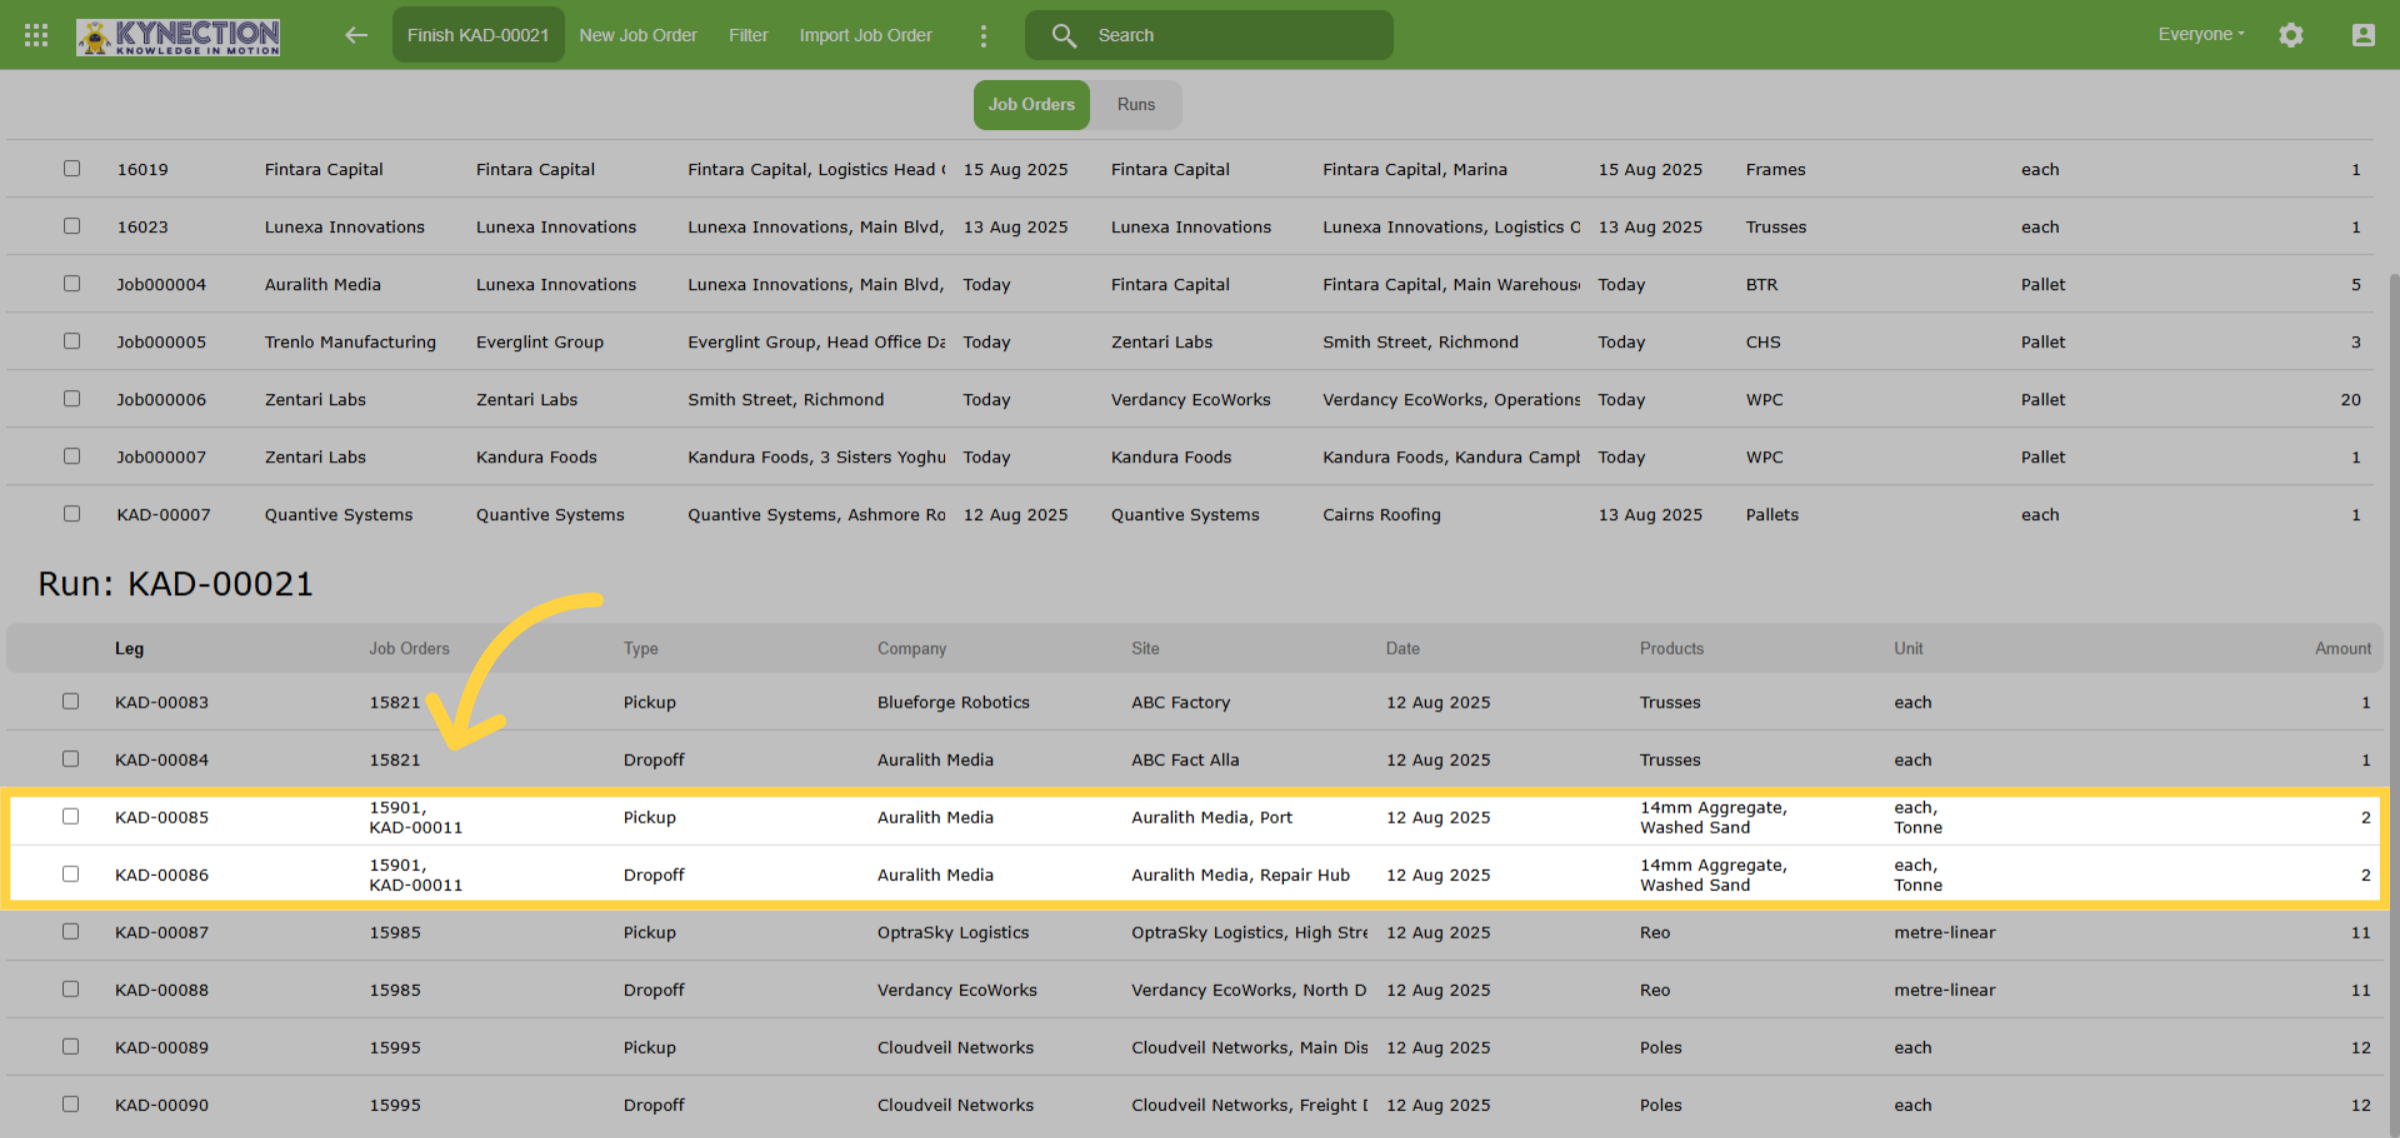
35. Merged Job Orders
In this example, the newly added job shares identical details with another job allocated on the run. As a result, the two job orders have been consolidated into a single pick-up and delivery task.
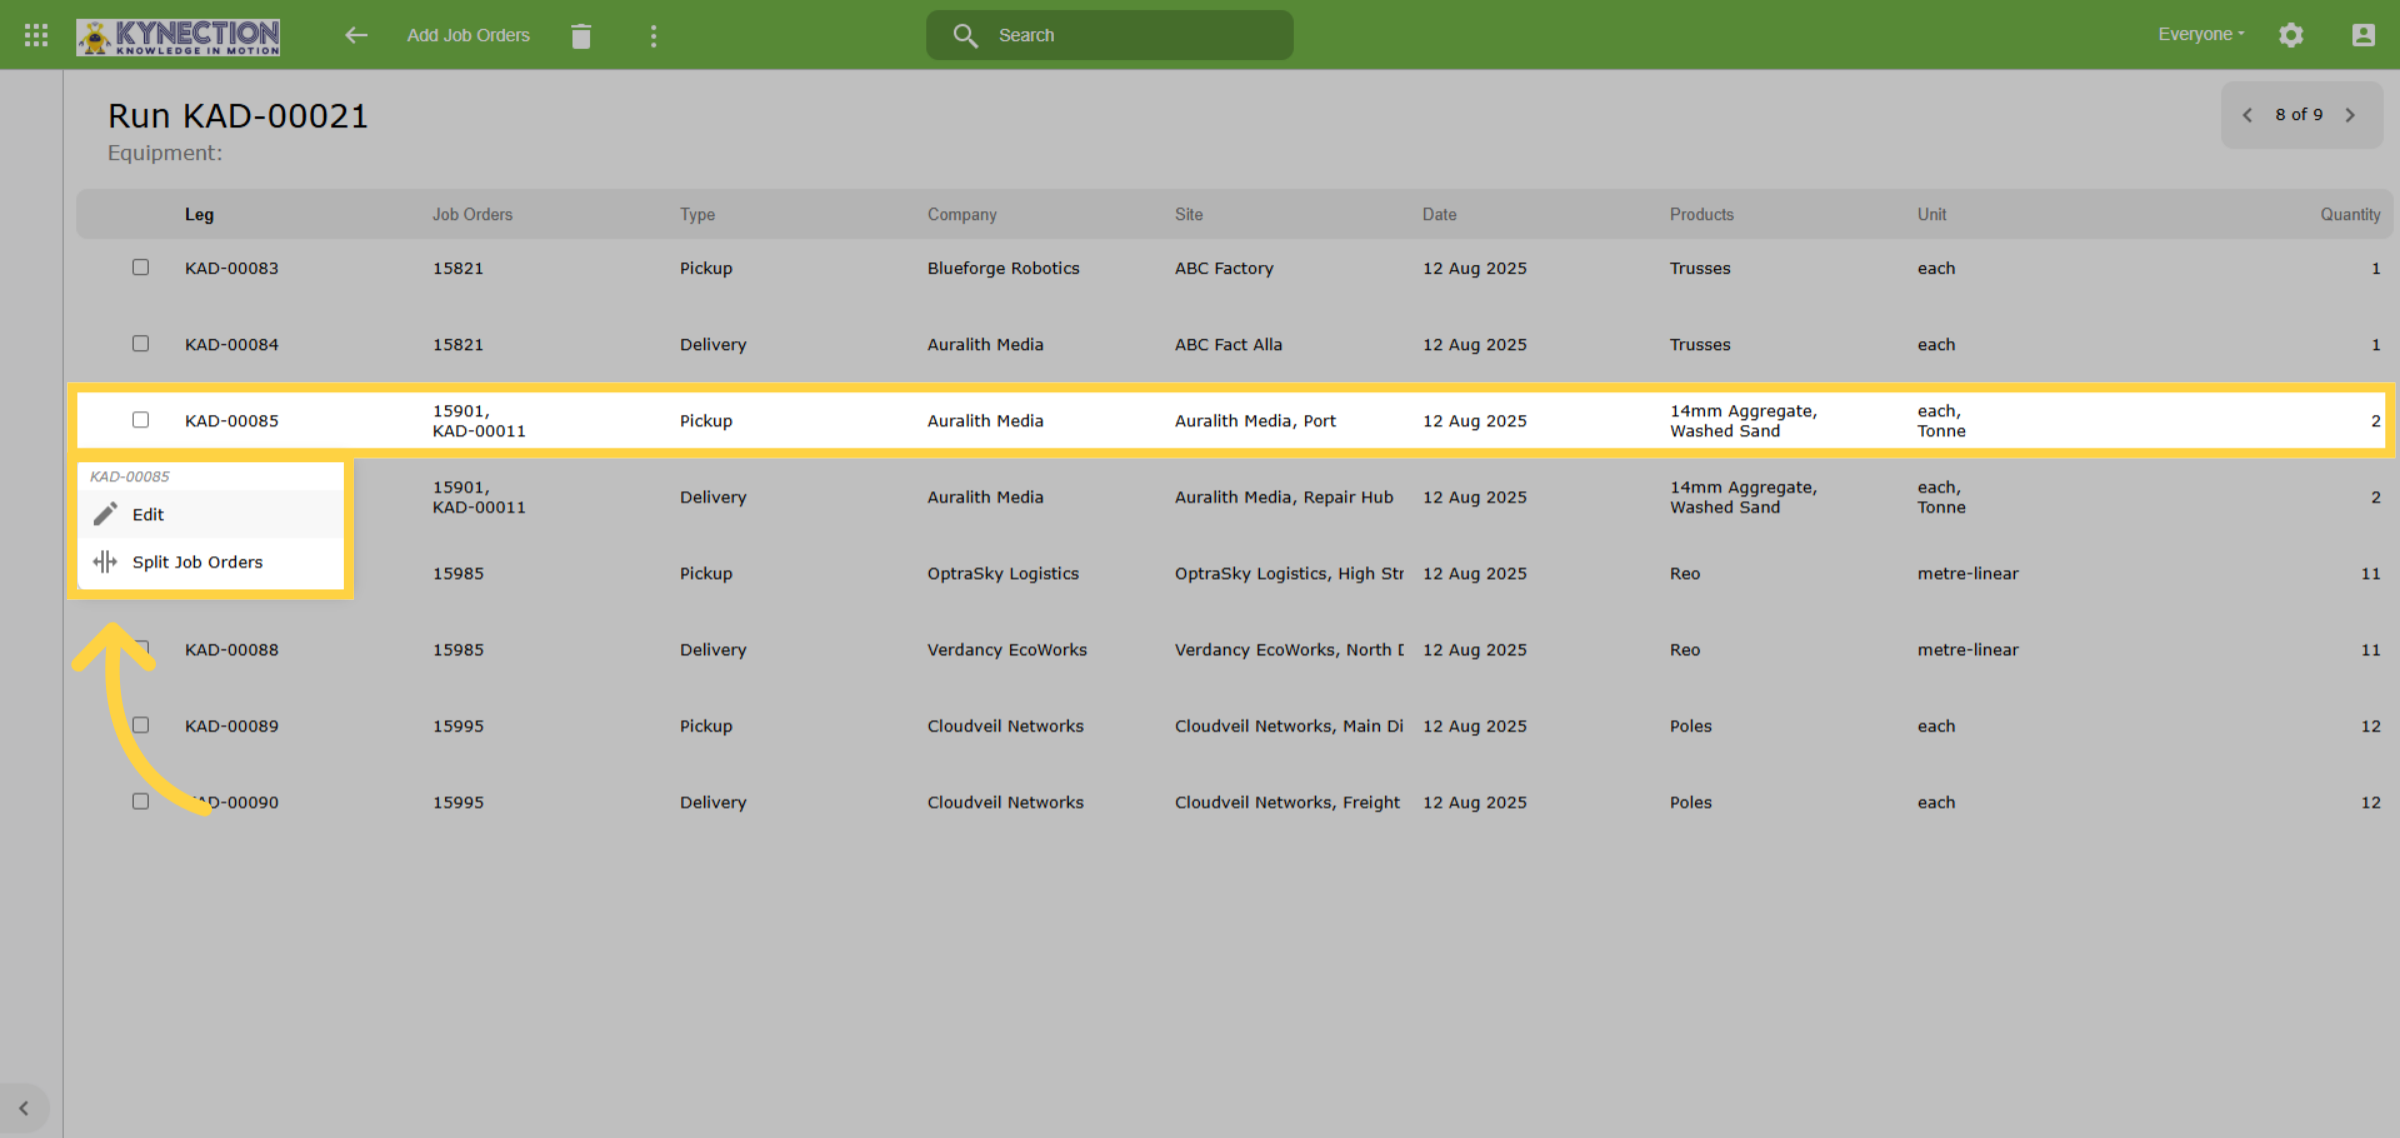
36. Split Job Orders
If merging job orders is not suitable, simply select the job and choose the "Split Job Orders" option to add another leg to the run.
37. Edit or Remove Job Orders
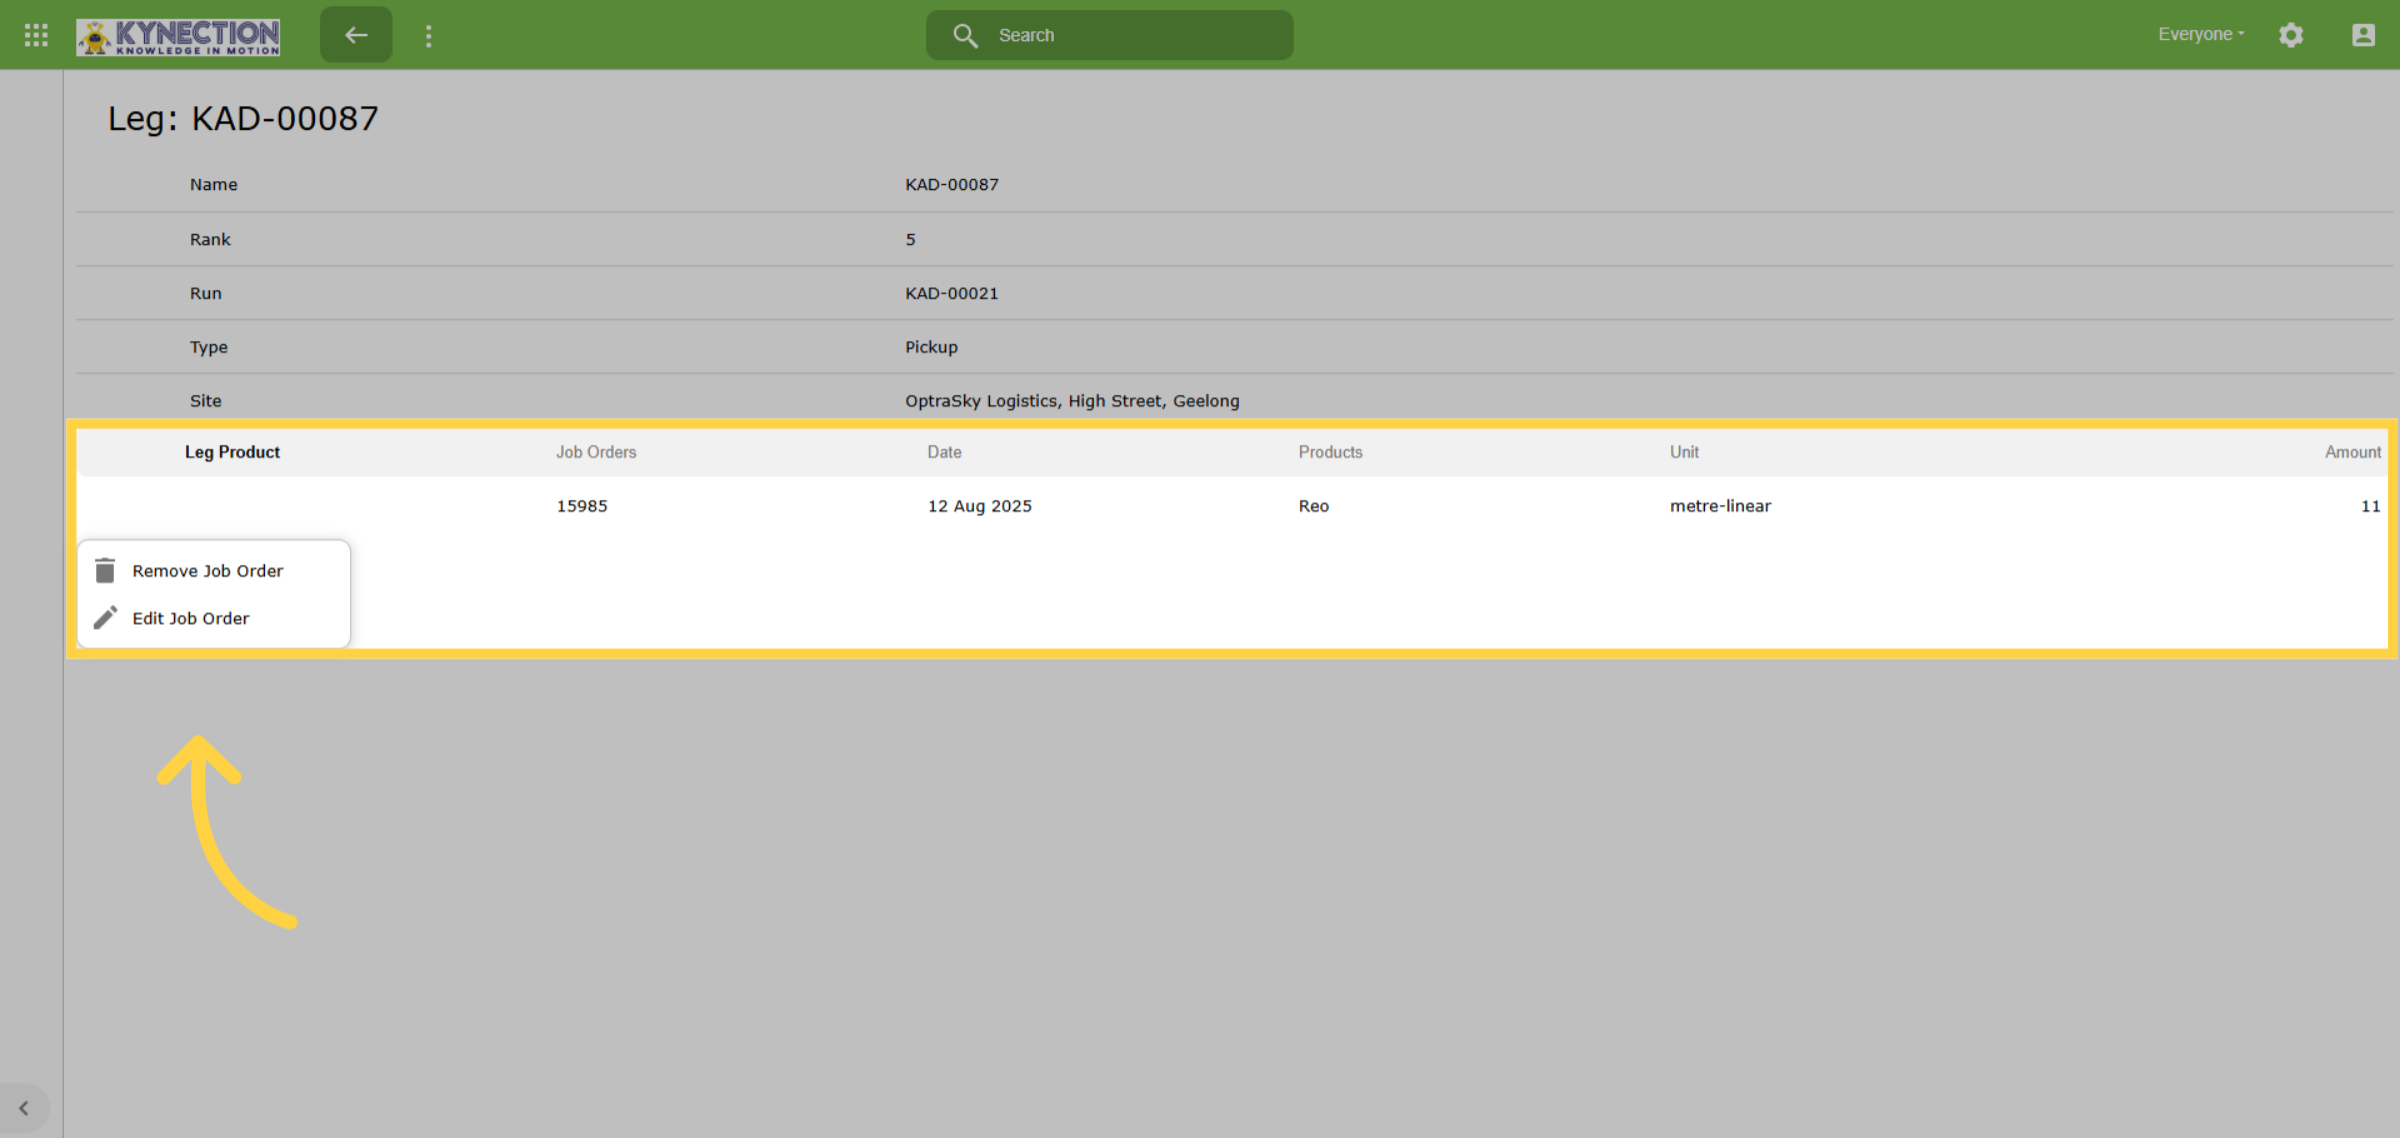
You can easily edit or remove Job Orders from a run by tapping on the specific leg of the run. Once the leg is opened, select the Job Order you wish to edit or remove.
38. Event Details
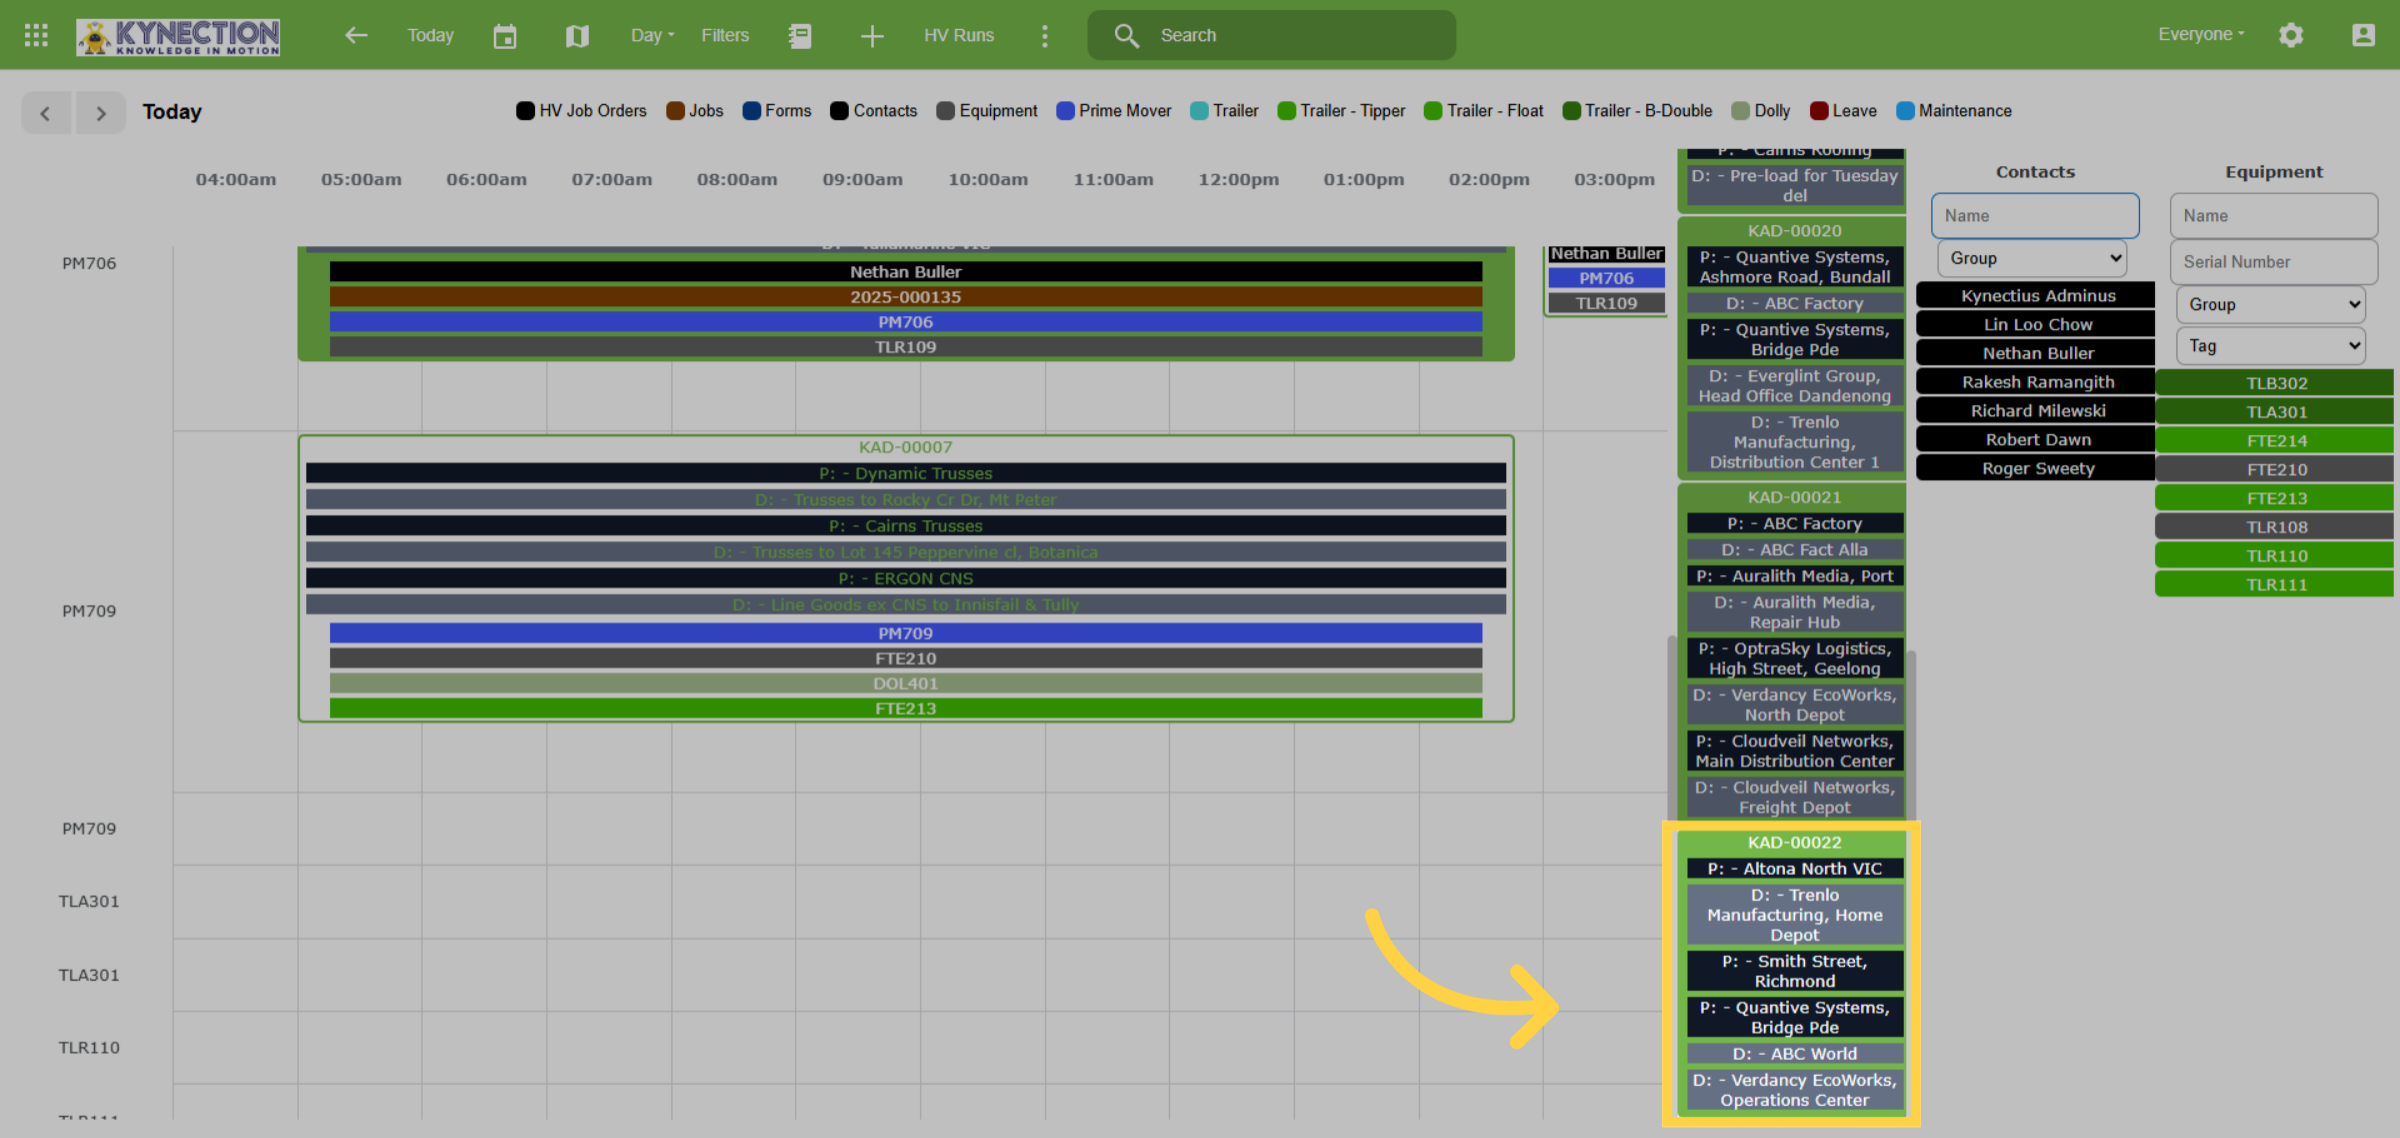
The scheduler presents run events with pickup locations highlighted in black and delivery locations in grey.
39. Editing Runs from the Jobs List
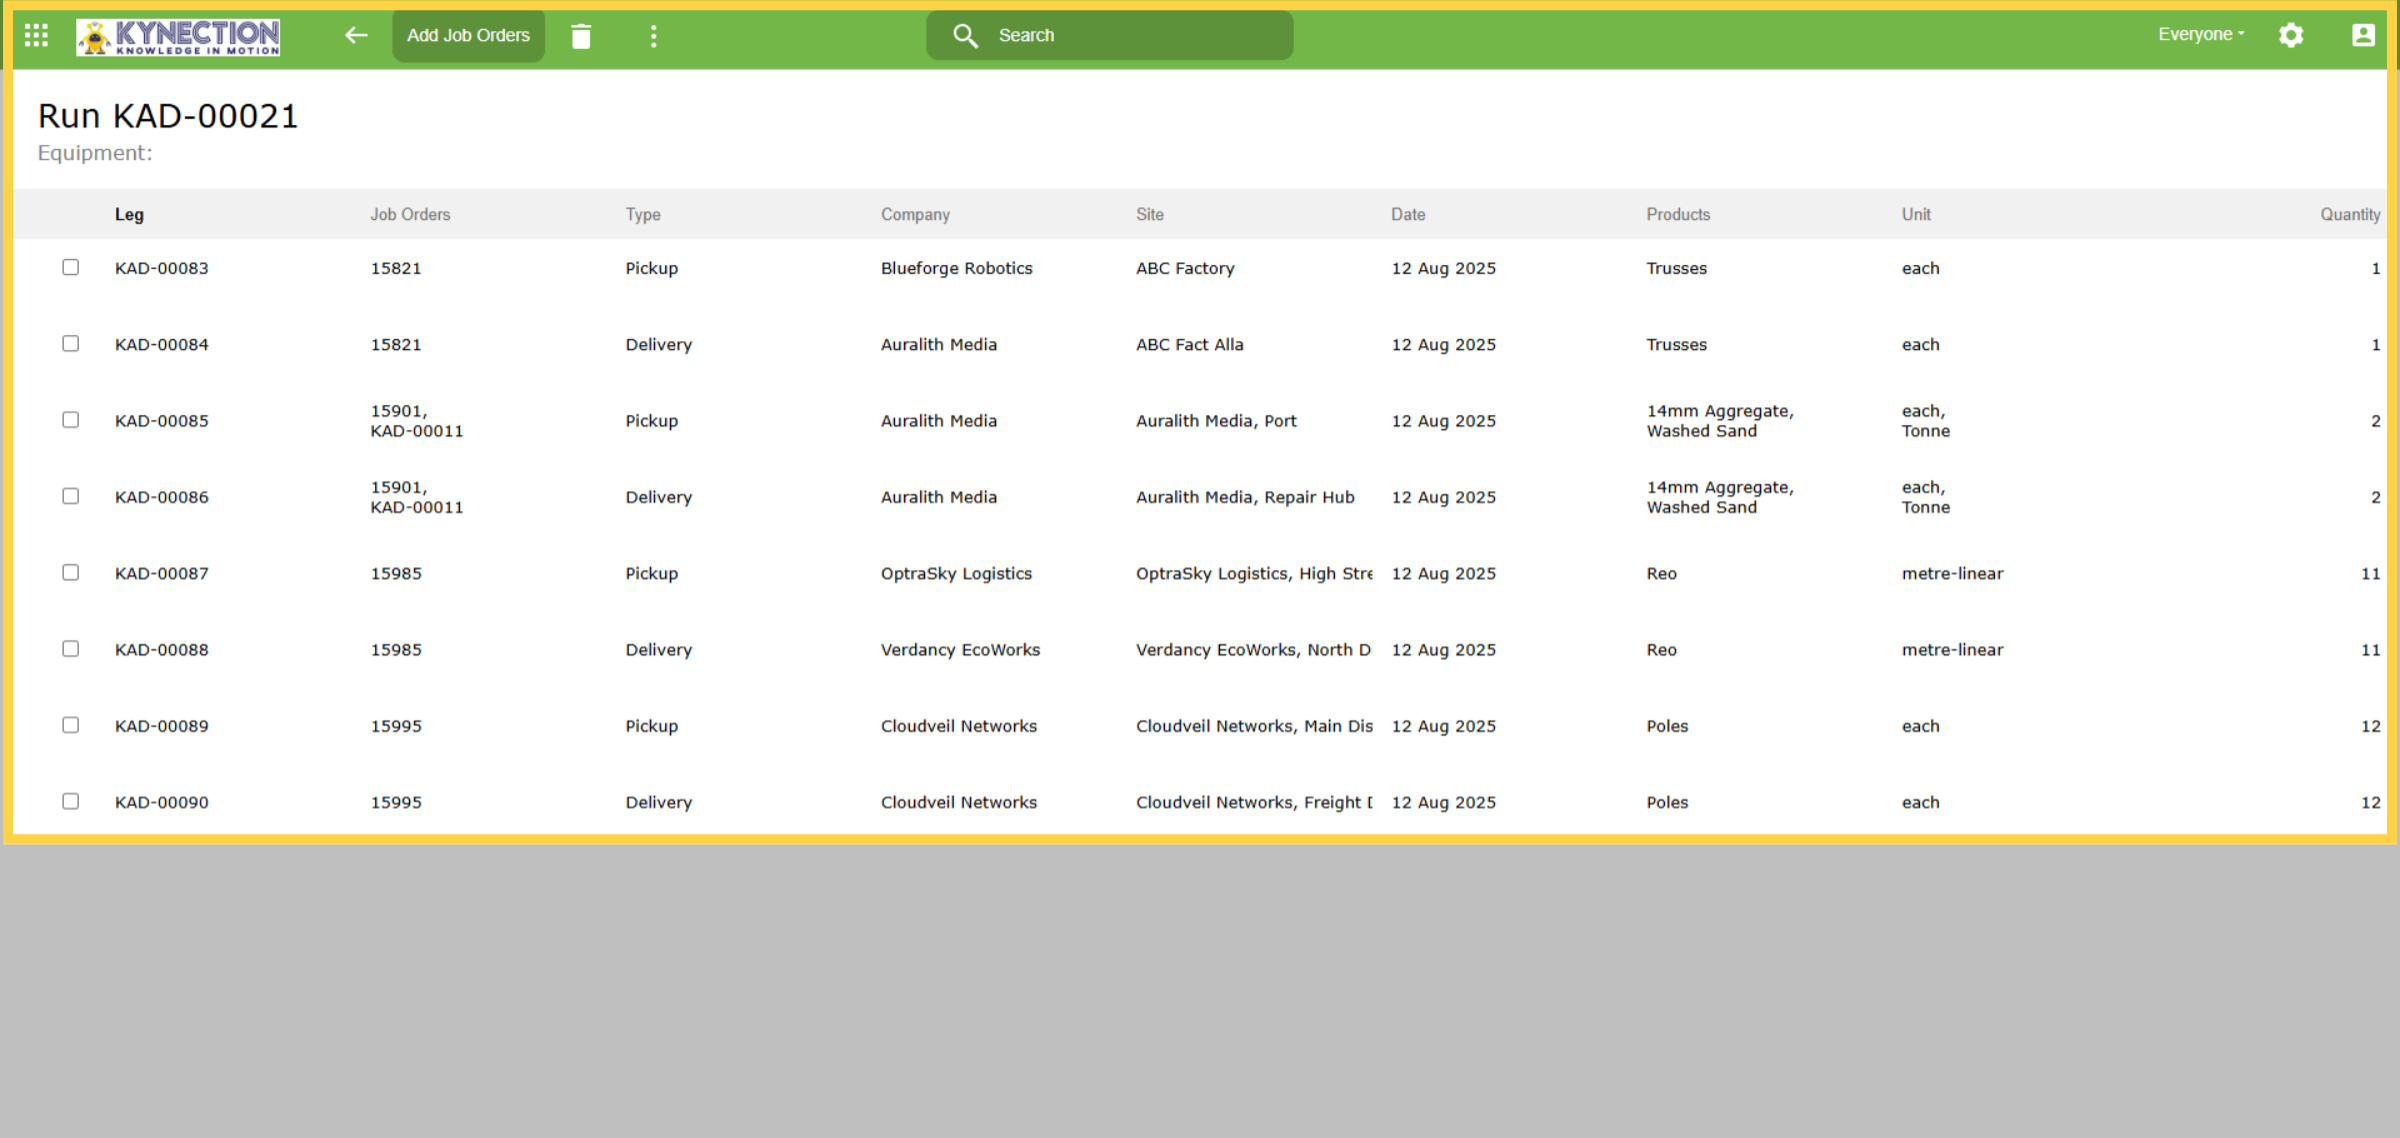
You can easily edit runs directly from the scheduler. Simply select a run from the list, and you will be taken directly to the edit screen of the Run.
40. Editing Scheduled Runs
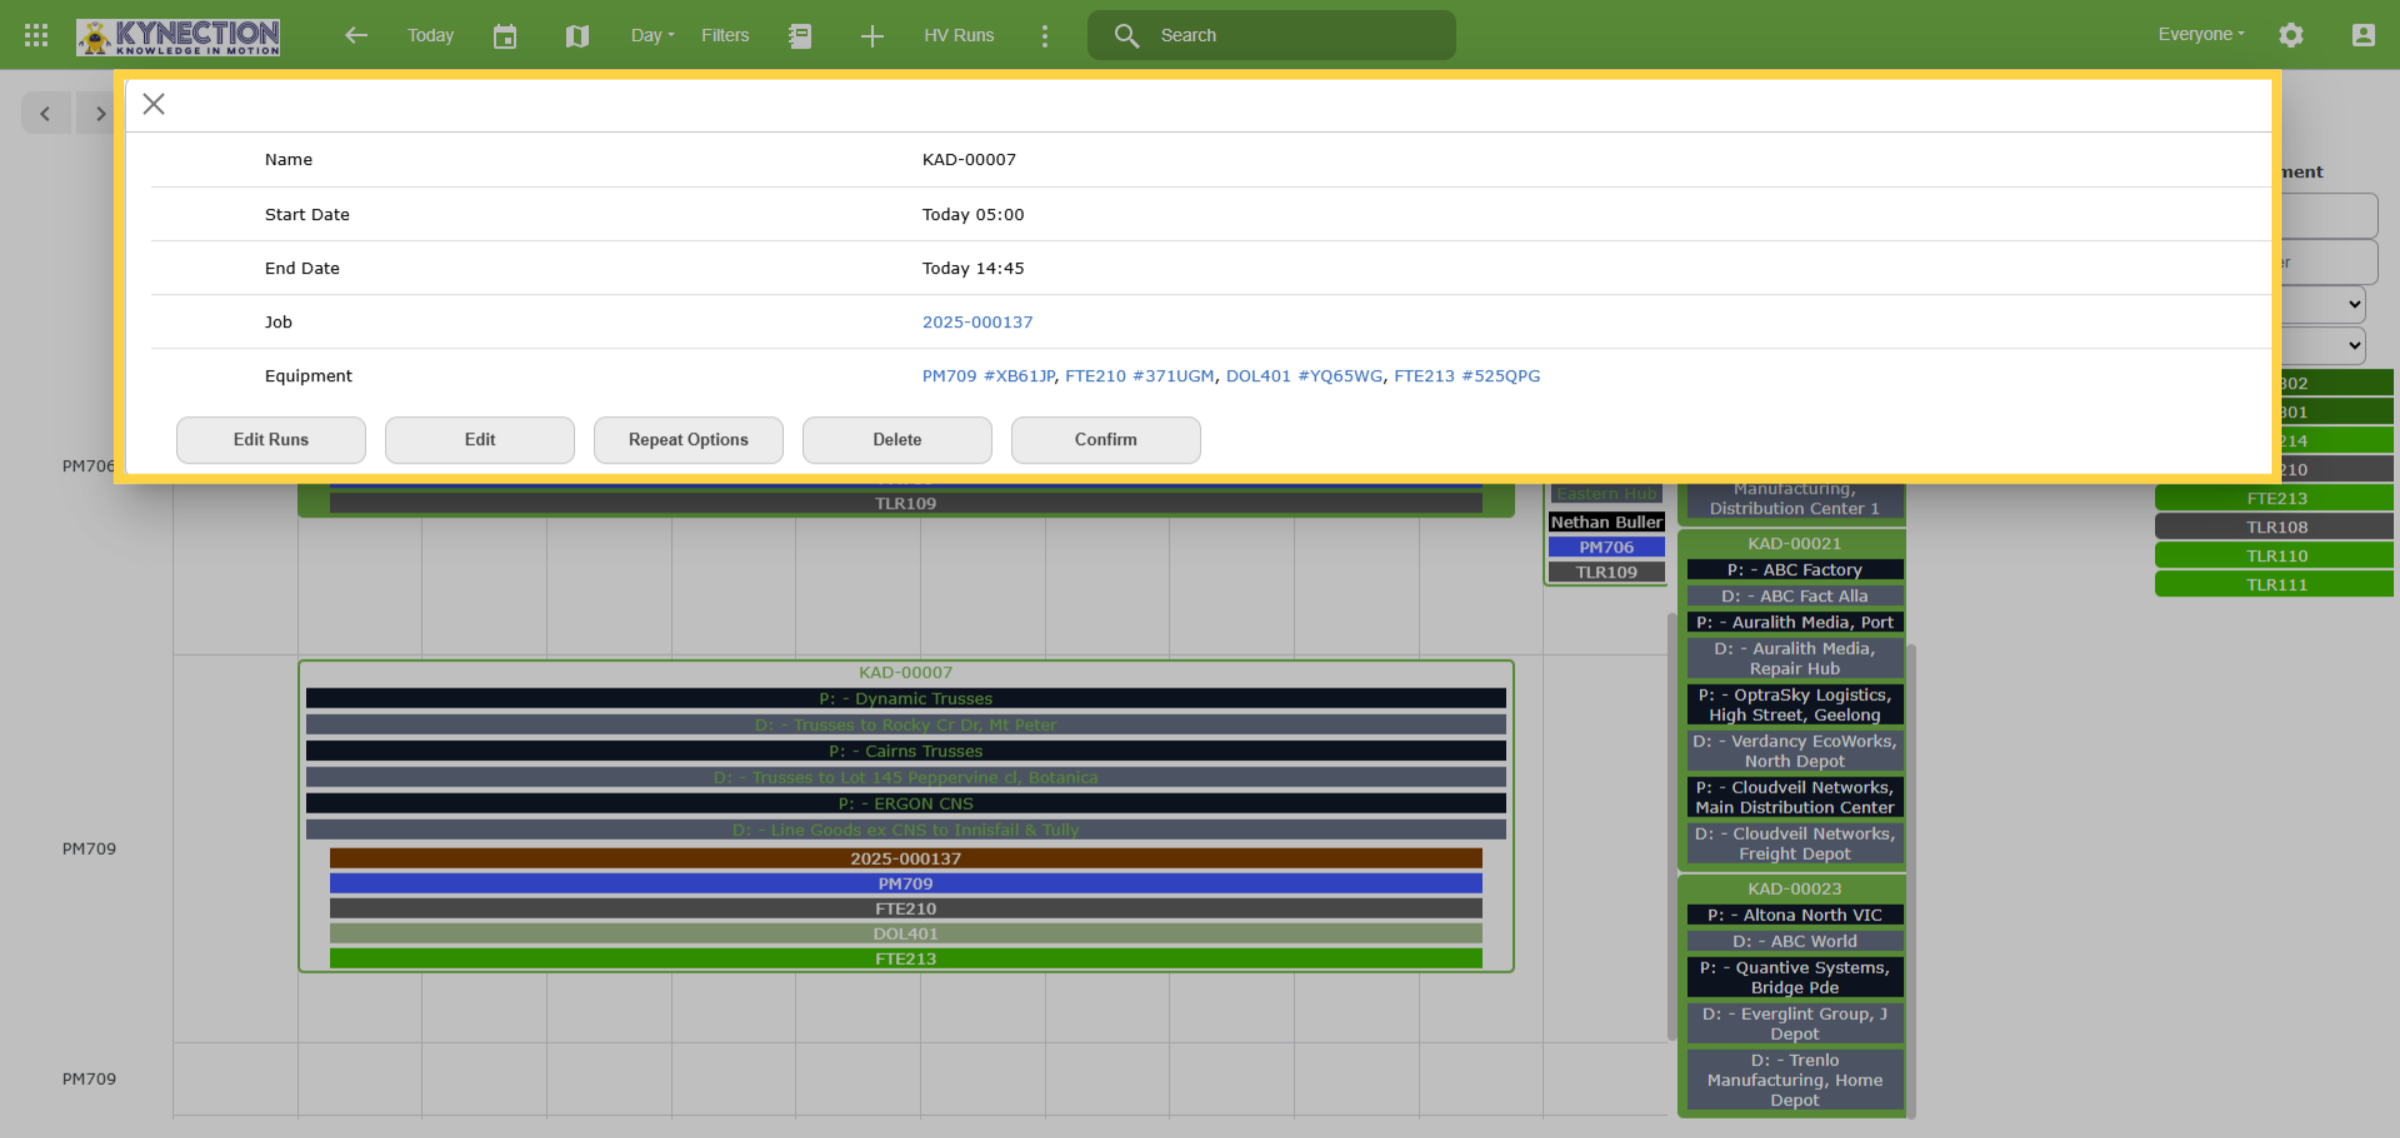
To access the Run Dashboard, simply click on a scheduled job and select "Edit Runs." Alternatively, on a confirmed job, clicking "Edit" will direct you to the job that contains the associated runs. For quick access to the equipment records, just click on the asset.
41. Moving Jobs the the Scheduler
Reposition jobs in the scheduler by clicking the surrounding white container. Note that moving a confirmed job will remove its confirmation. The scheduler enhances your workflow with notifications for duplicate bookings and potential conflicts due to staff leave or truck maintenance.
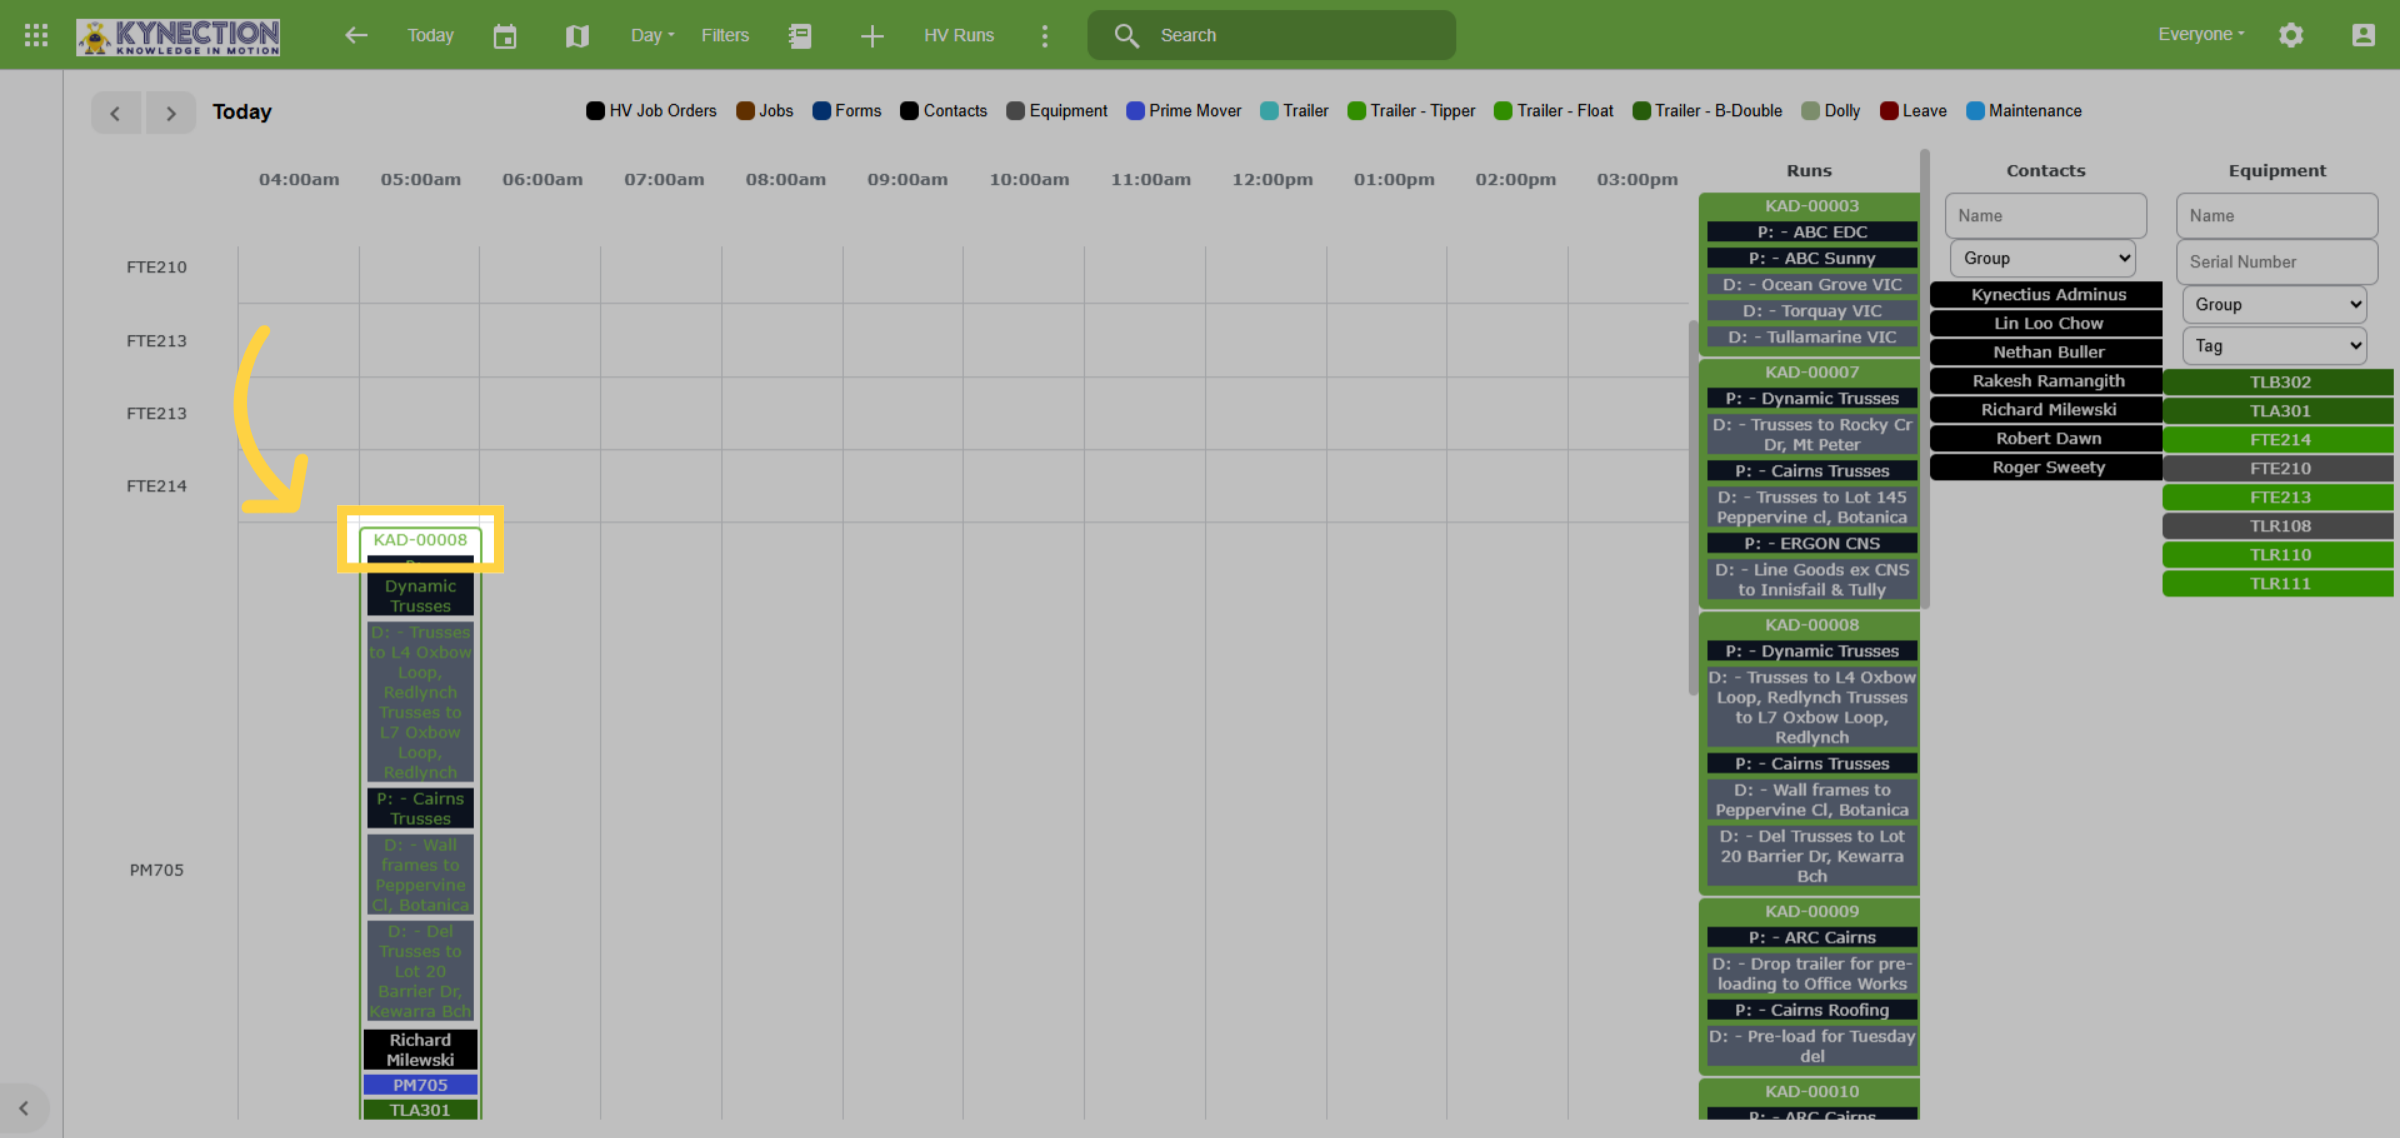
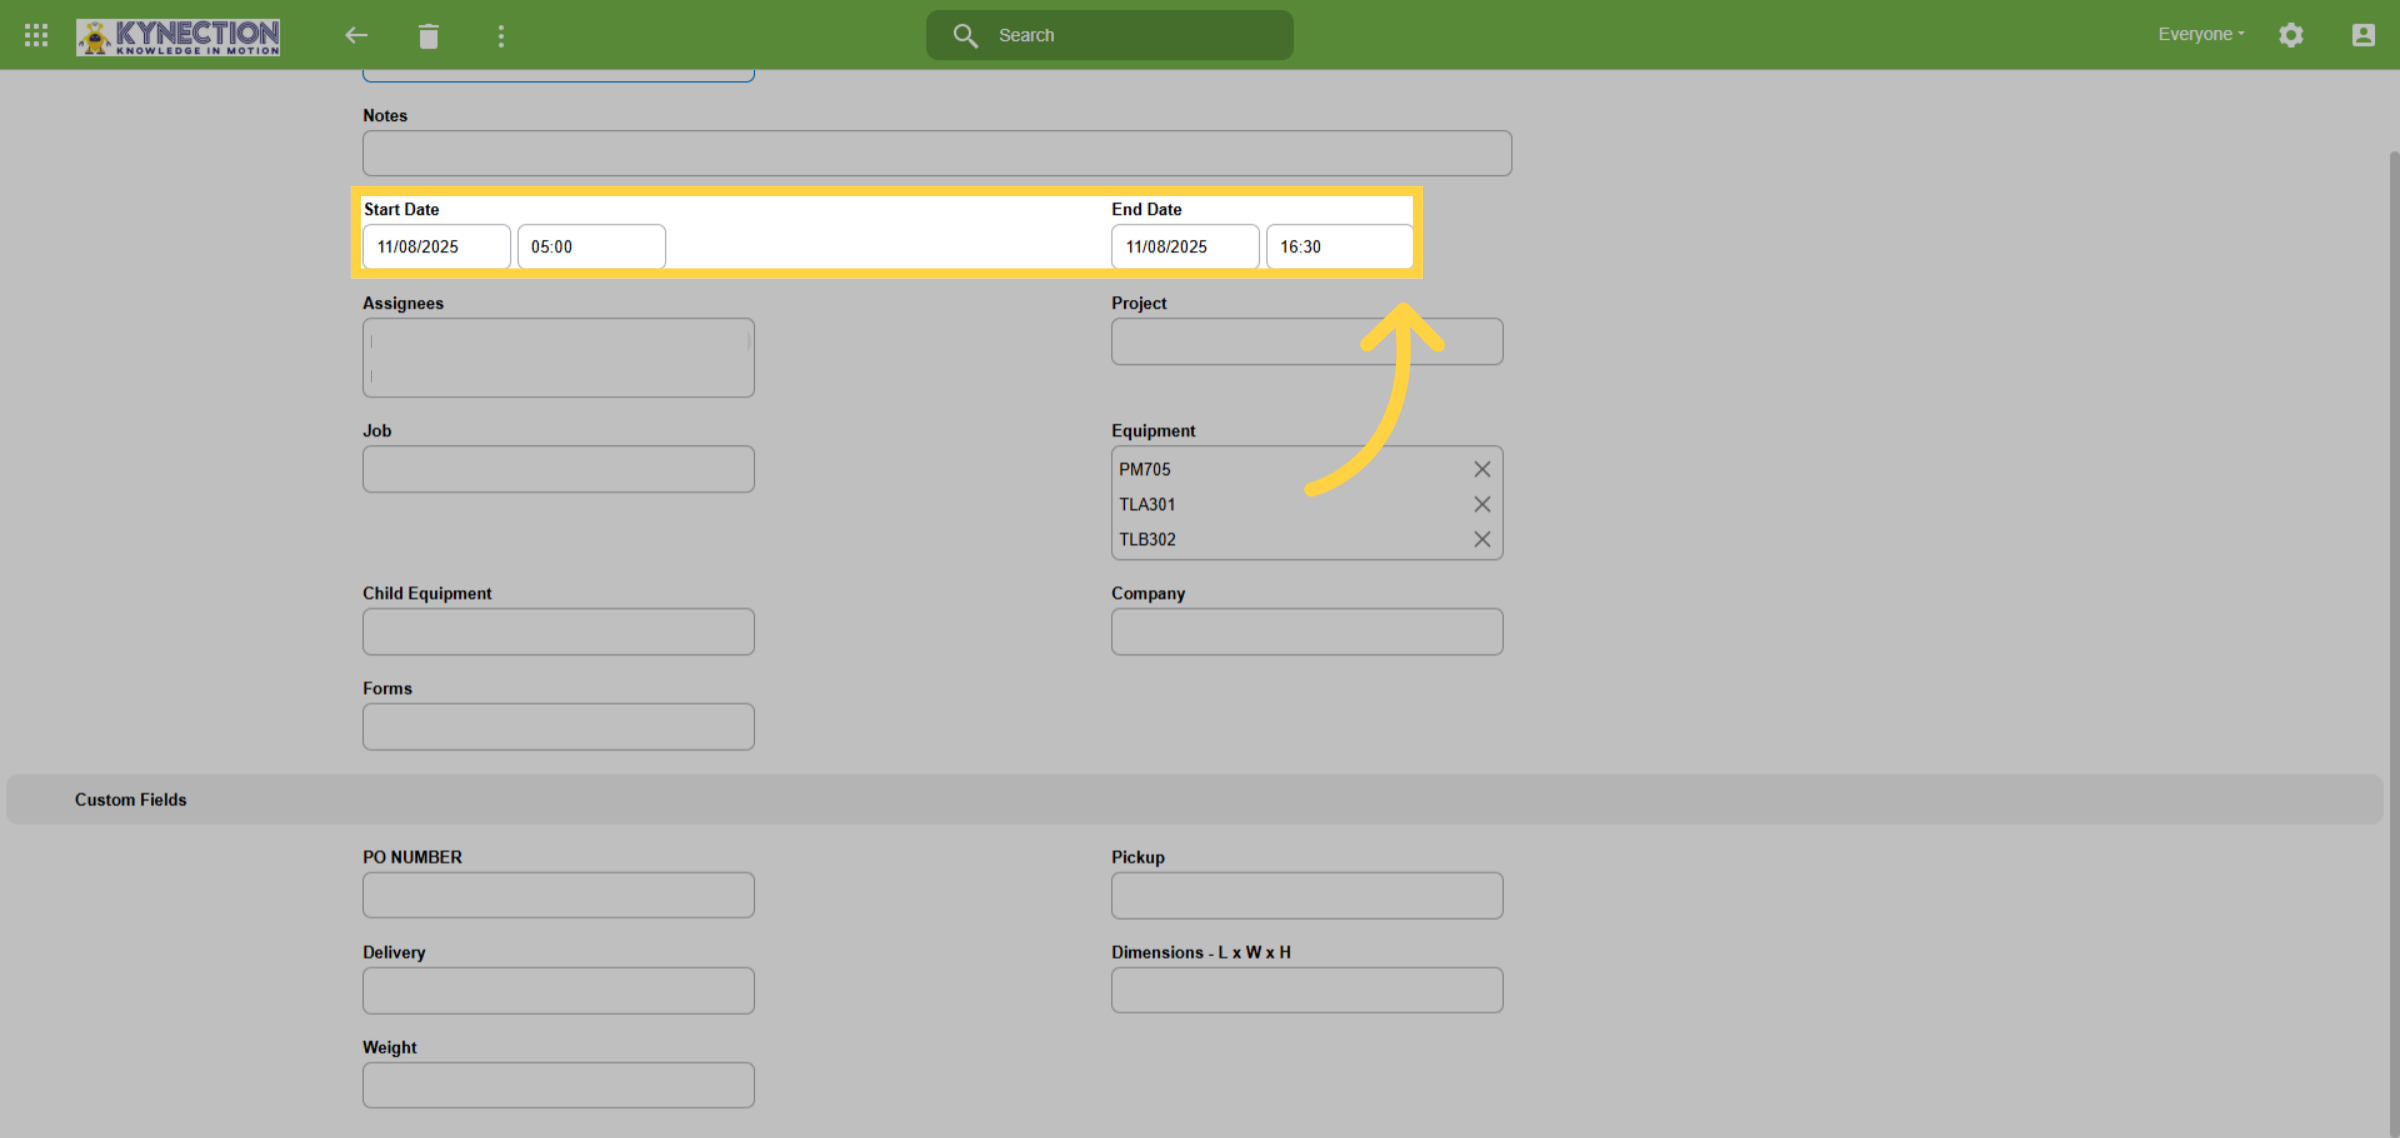
42. Block Out Scheduler
Jobs can be moved across hours in a day offering a clear visual representation of utilisation. Drag jobs forward by clicking and holding the job line. For earlier times, relocate the job to the desired start time first, or, edit the job and update start and end times.
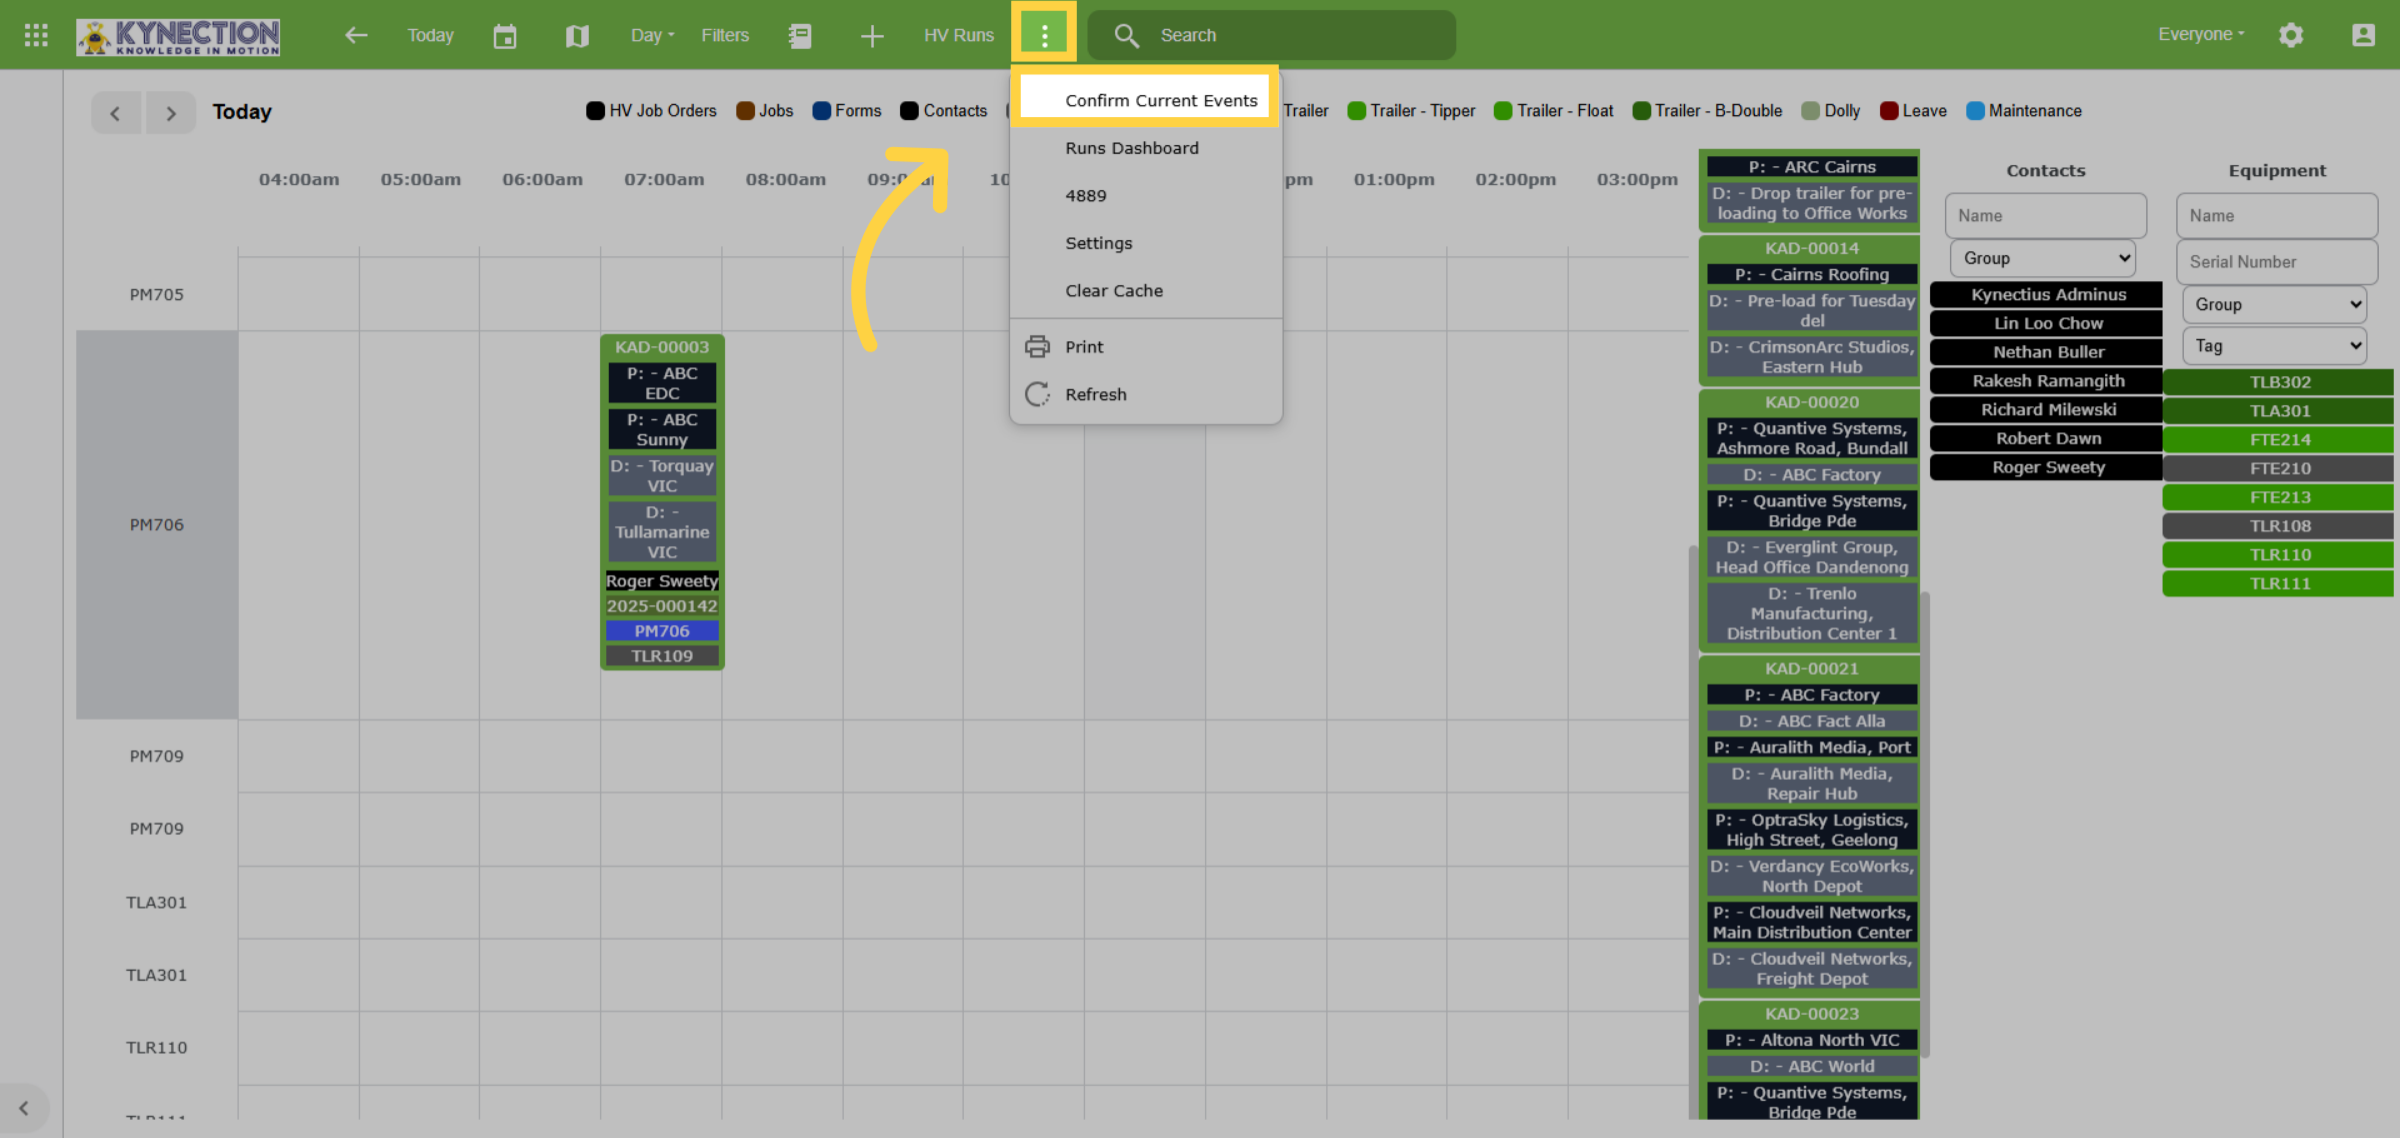
43. Confirm Jobs
Runs can be confirmed individually, or all at once. To confirm jobs for the next day, select the 3 dots and activate the "Confirm Current Events" option. Individual jobs can be confirmed by clicking the run and selecting confirm. Job numbers are allocated to runs once jobs are confirmed.
44. Thanks for watching
This guide outlines the essential steps for effectively managing jobs with the Projects and HV Runs schedulers.

