This guide will help you navigate the Kynection app for managing timesheets, tracking leave, and completing daily dockets effectively. Workflows and forms may differ depending on customer requirements.
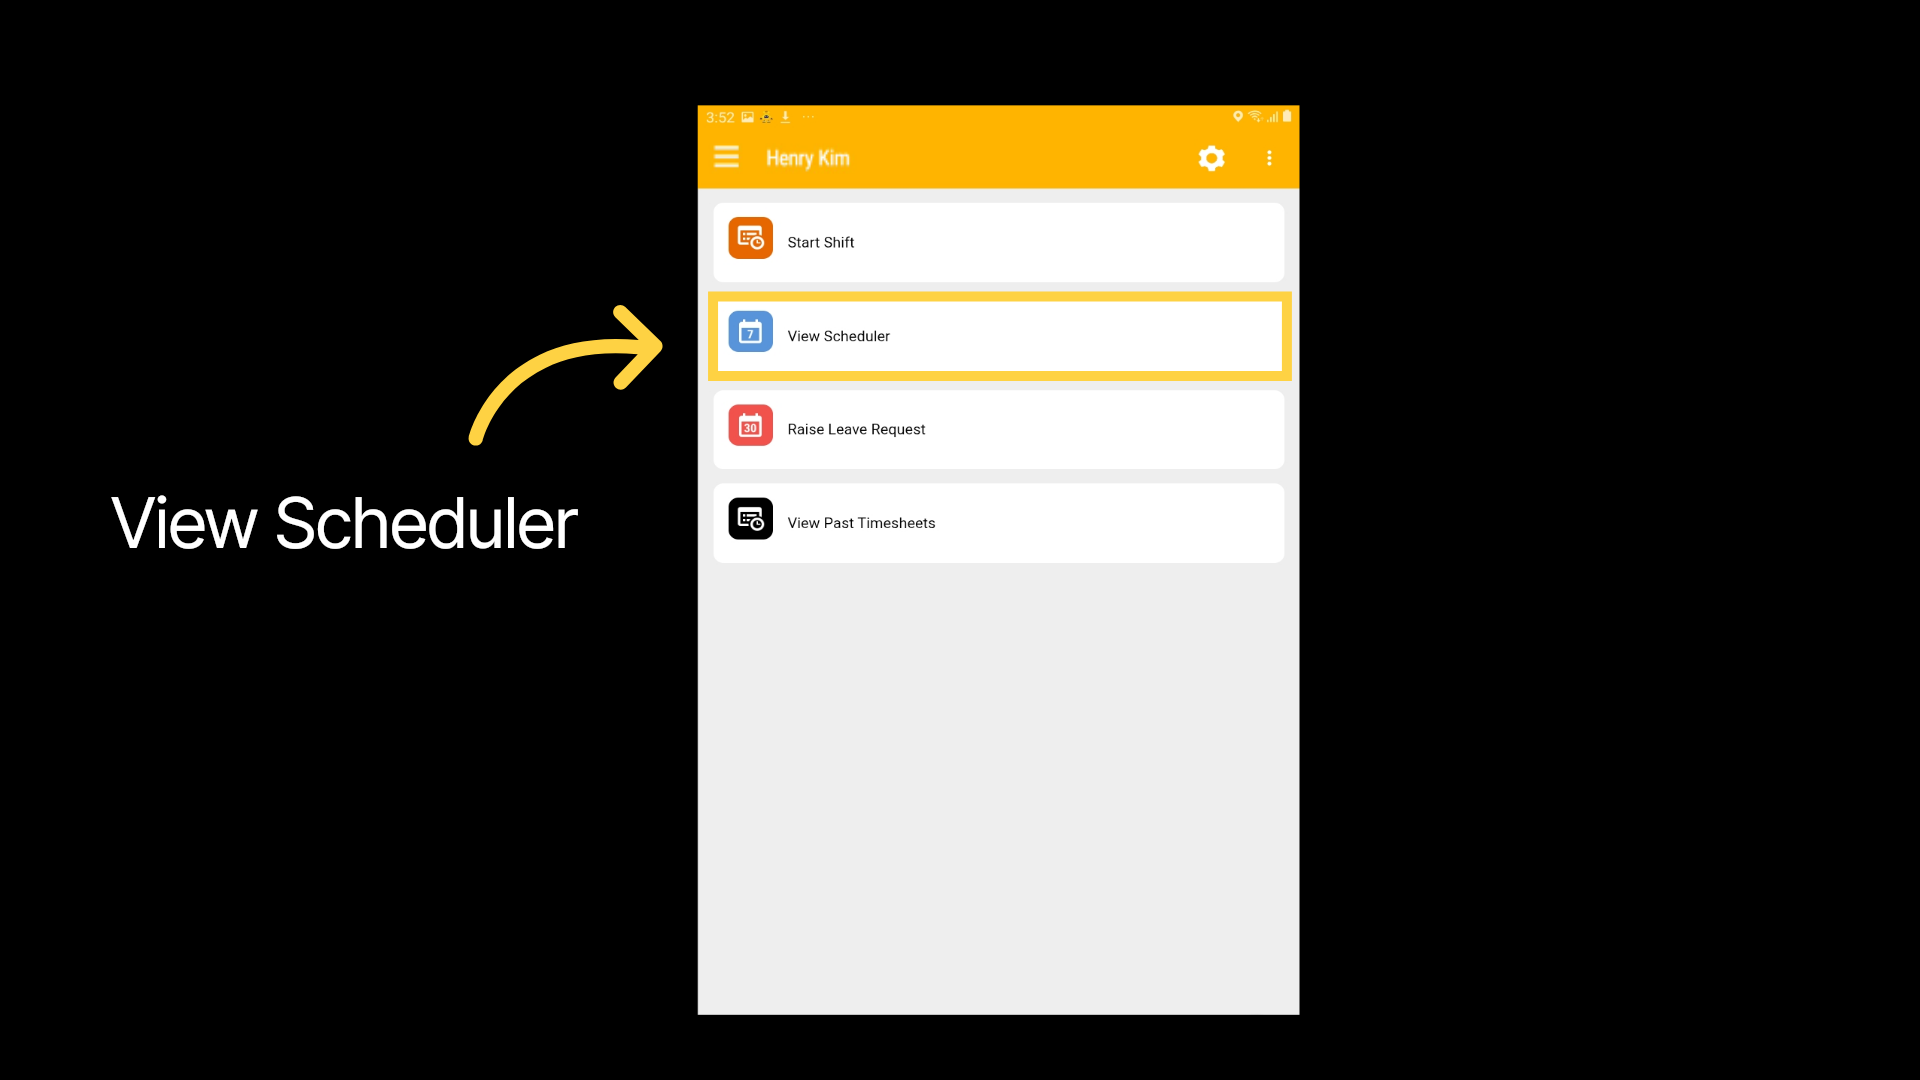
1. View Scheduler
Check your assigned jobs anytime without starting your shift. To begin, select View Scheduler.
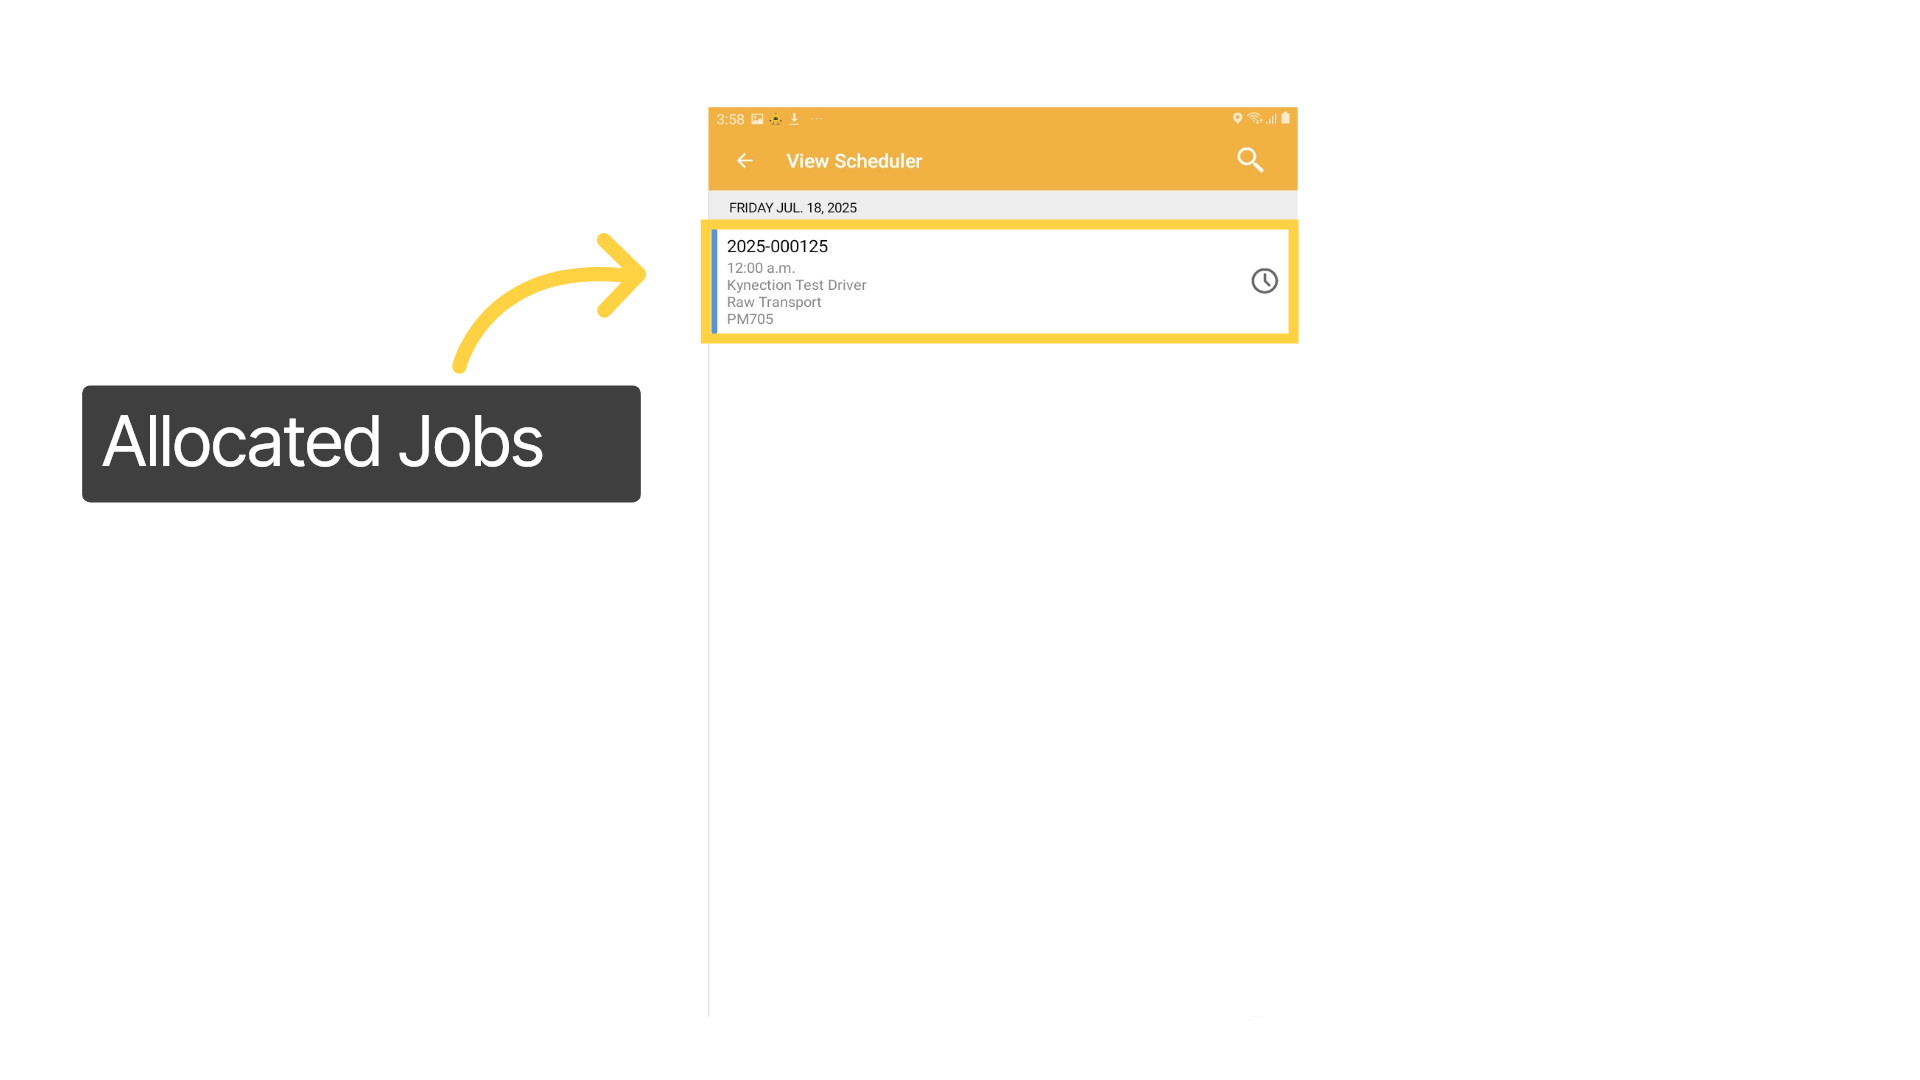
2. Allocated Jobs
If multiple jobs are assigned they will display in time order. Click the job to review its details.
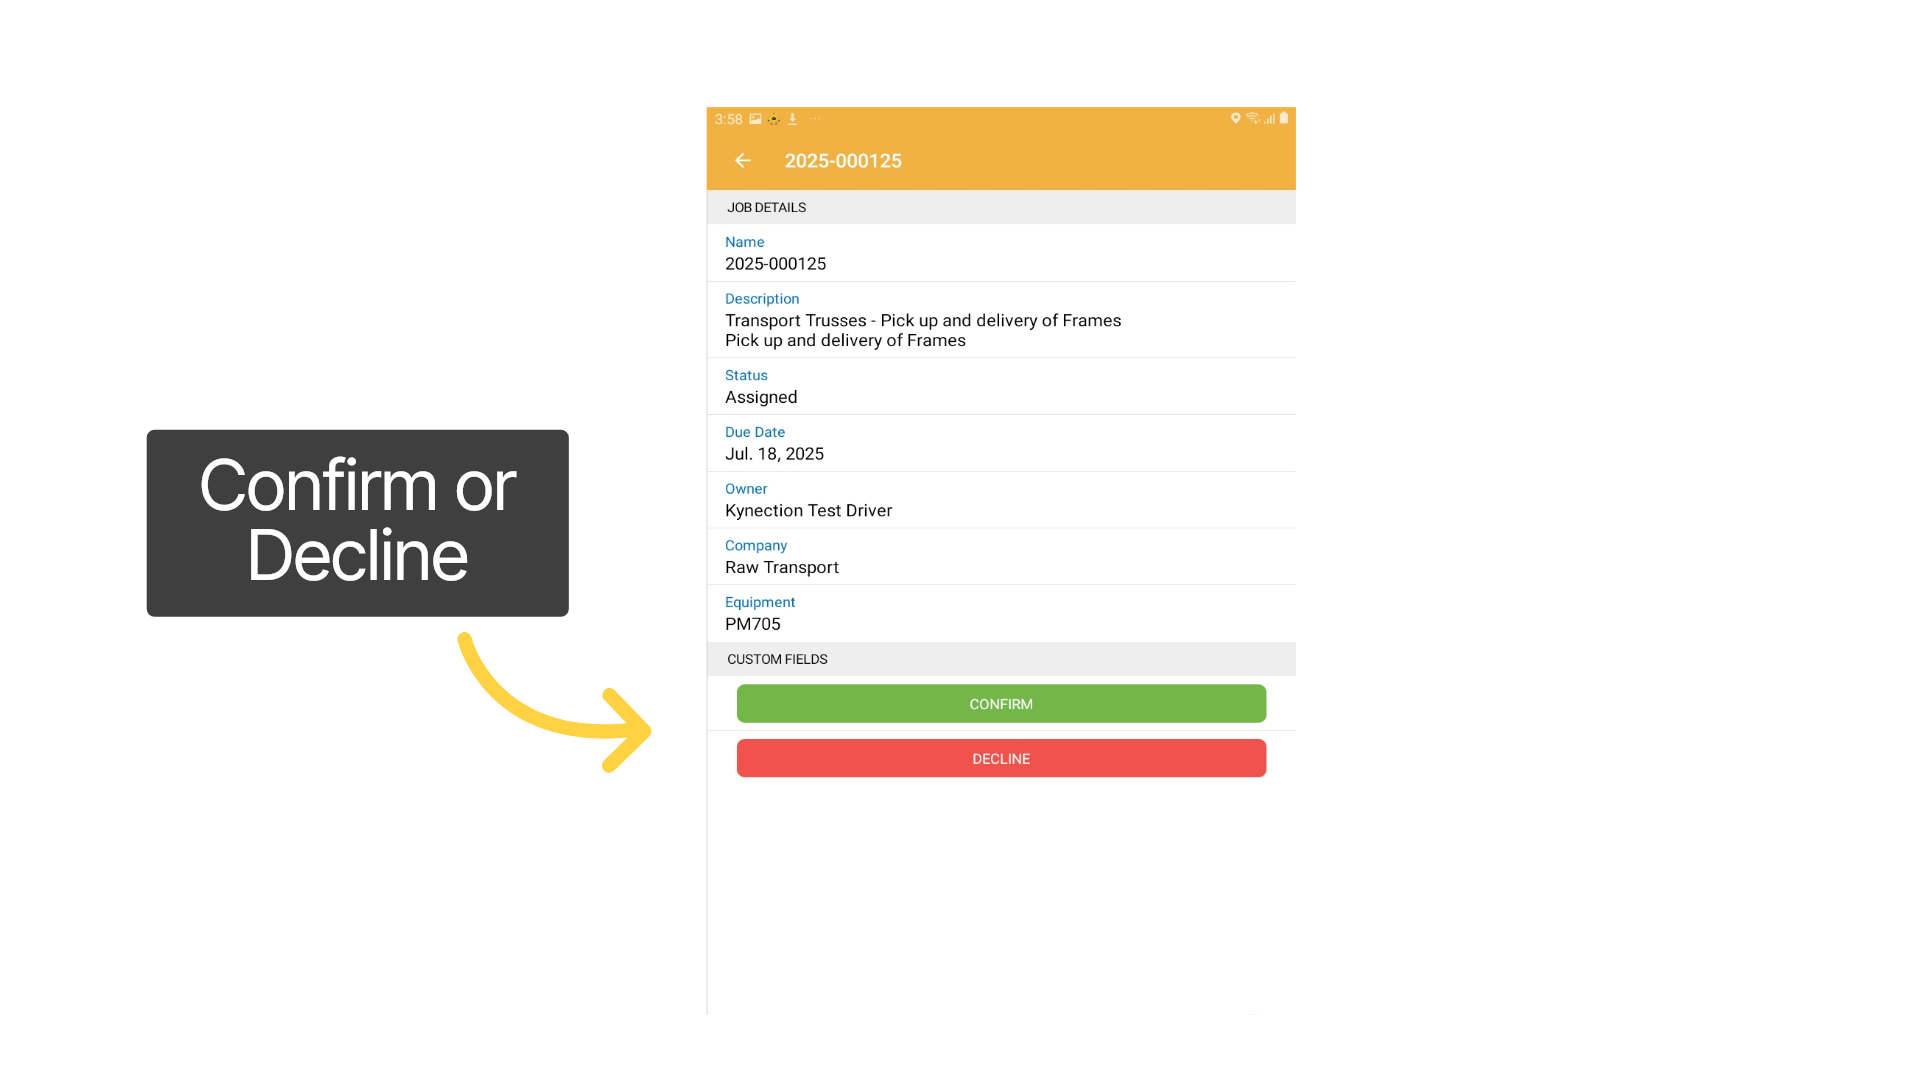
3. Confirm or Decline Job
Review the job details and choose to either confirm or decline the job. Your response will update the operations scheduler accordingly.
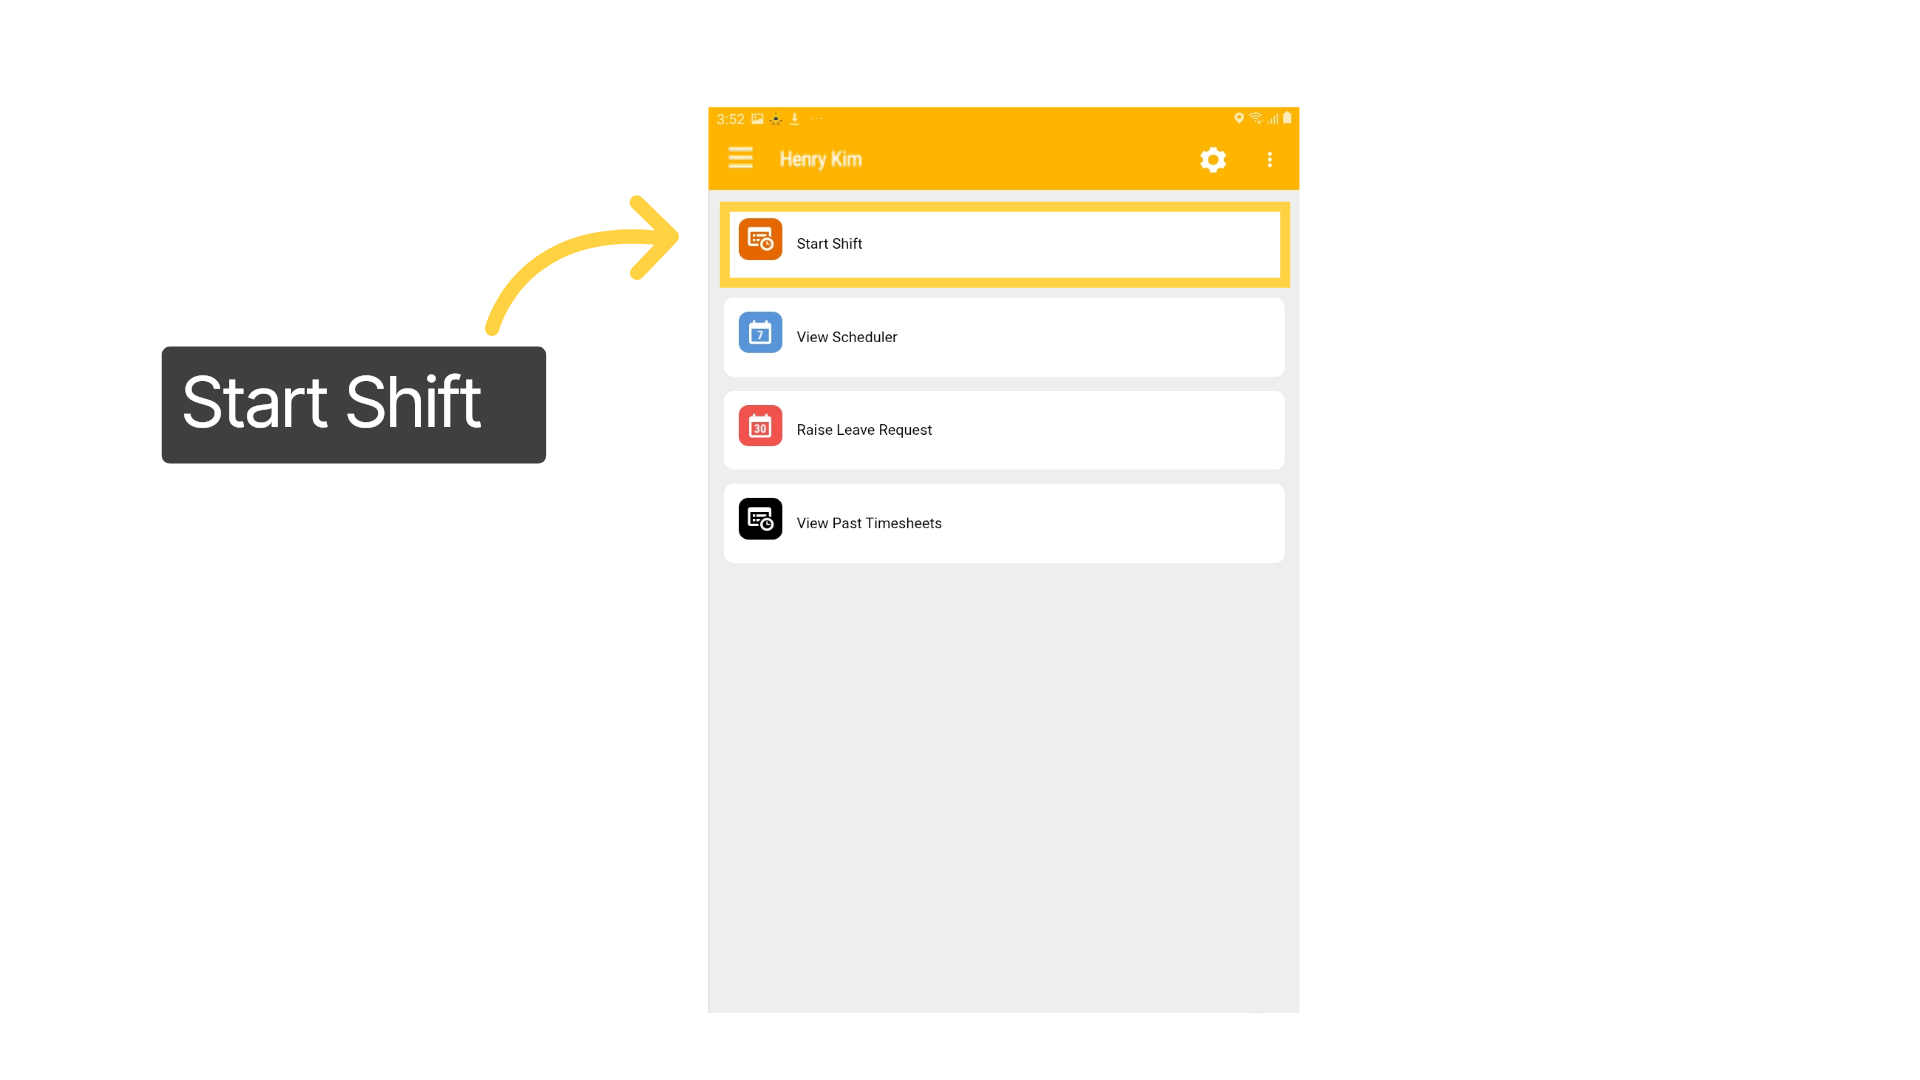
4. Start Shift
Kynection tracks your clock-in and clock-out times for accurate timesheet management. To begin your day select Start Shift.
5. Fit for Duty
Start by completing the Fit for Duty declaration. Tap to open the form, and then select the pencil icon located at the bottom of the screen to begin editing.
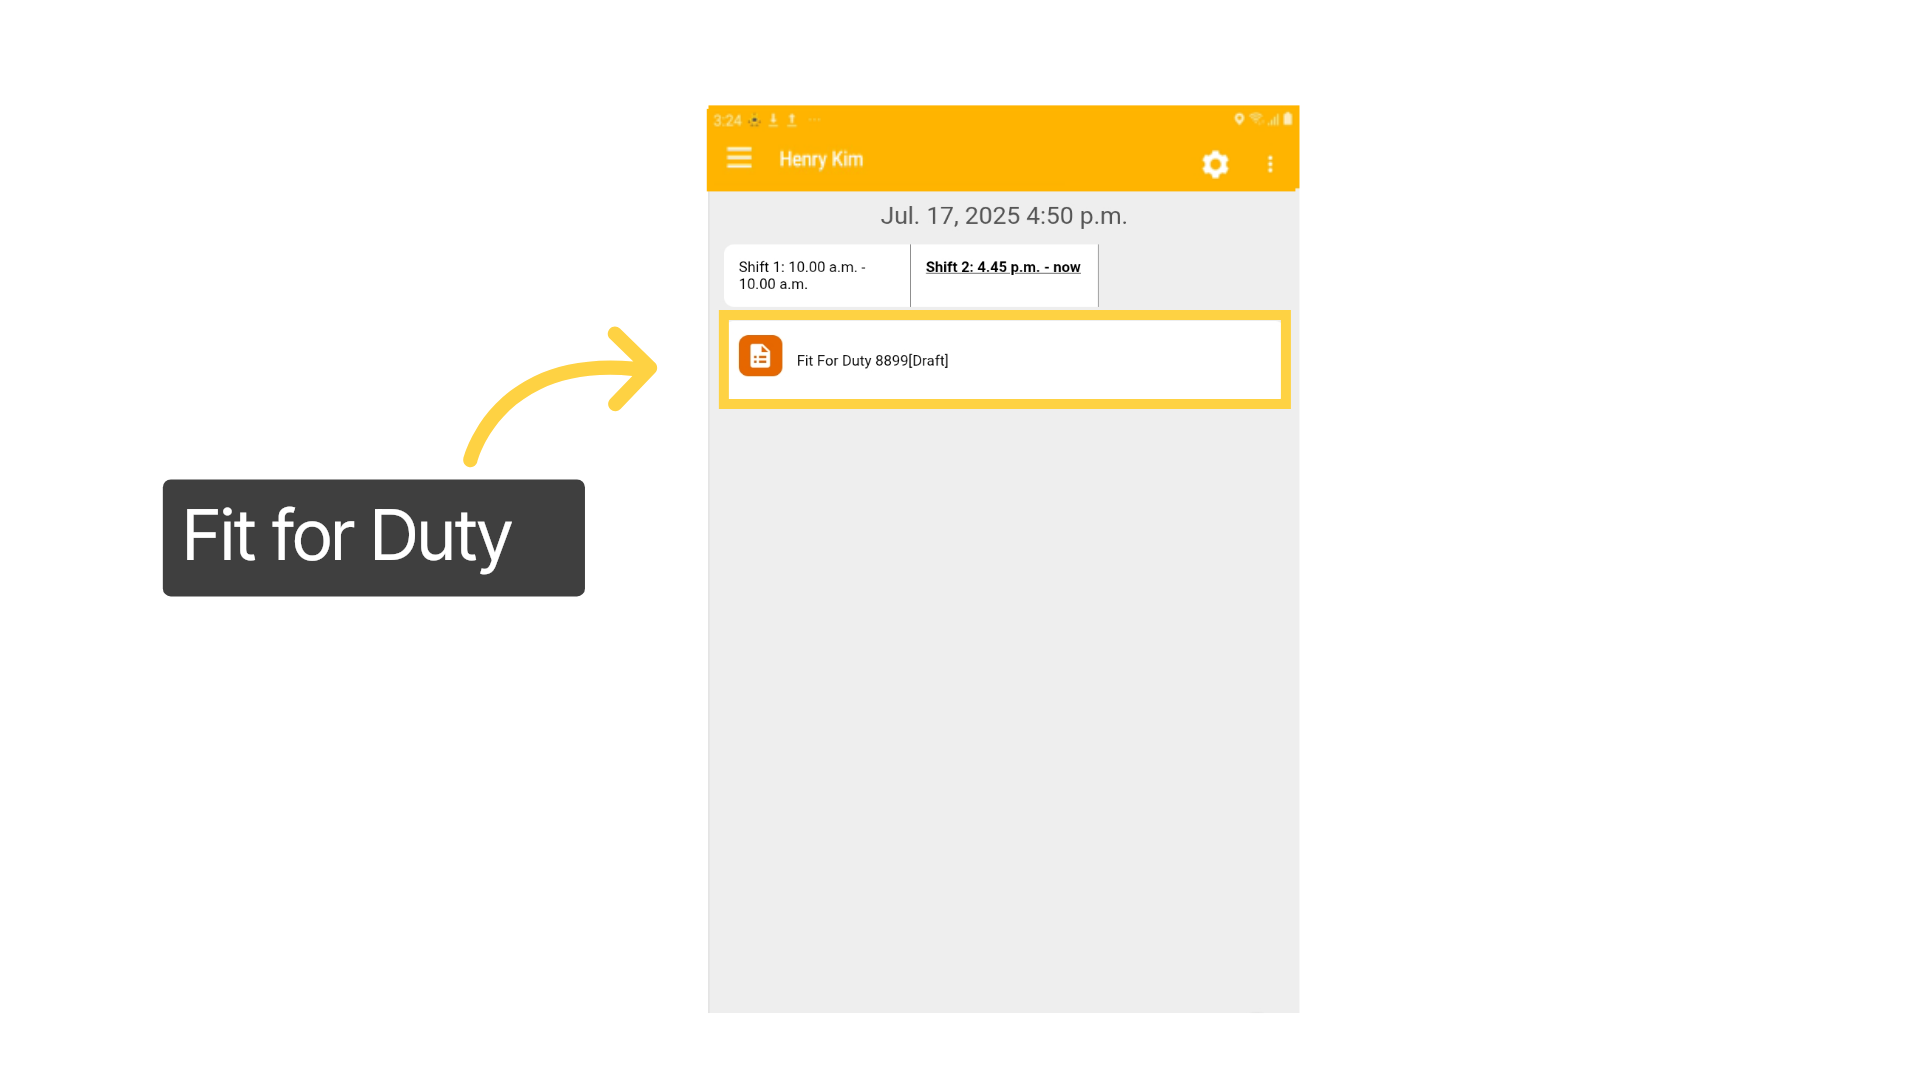
6. Confirm Compliance
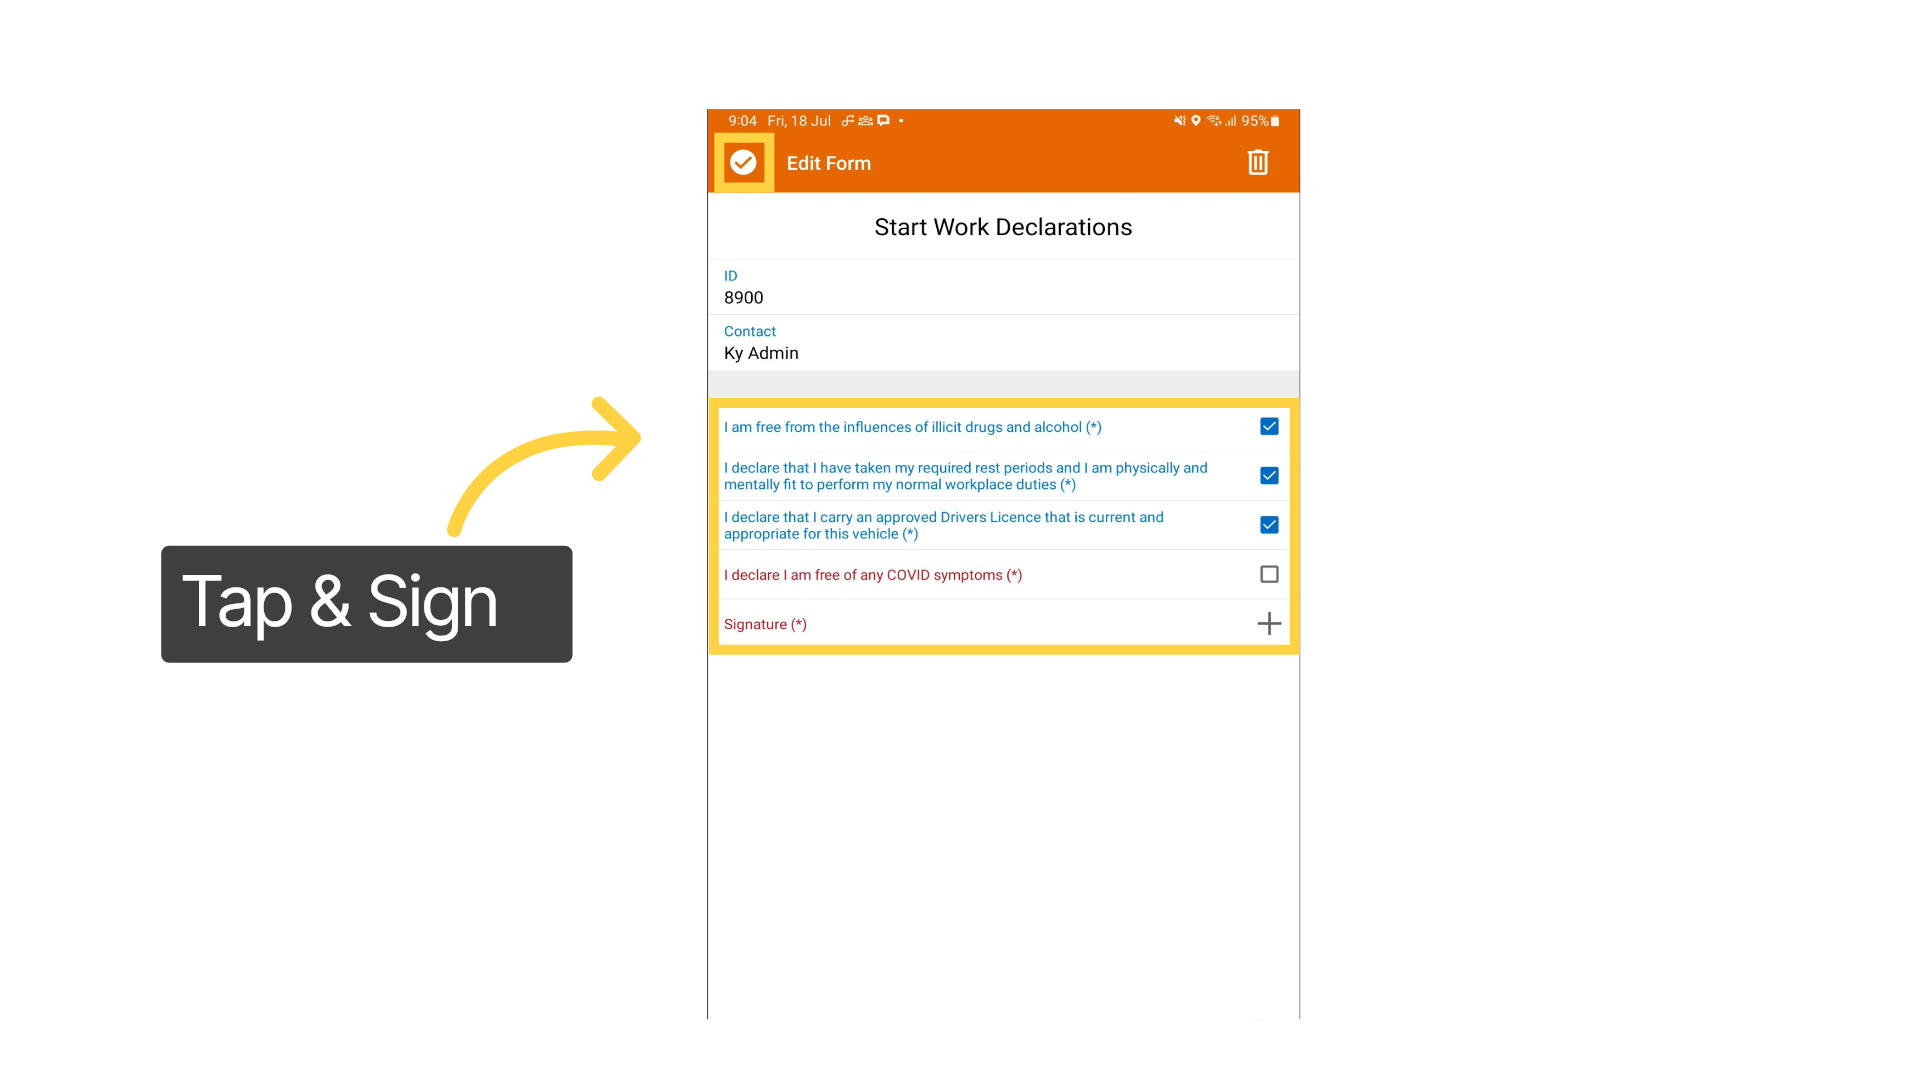
To confirm compliance, tap each item on the declaration and add your signature. For Android users, save your changes by clicking the tickbox in the top left corner. If using an Apple device, select Done in the top right corner.
7. Submit
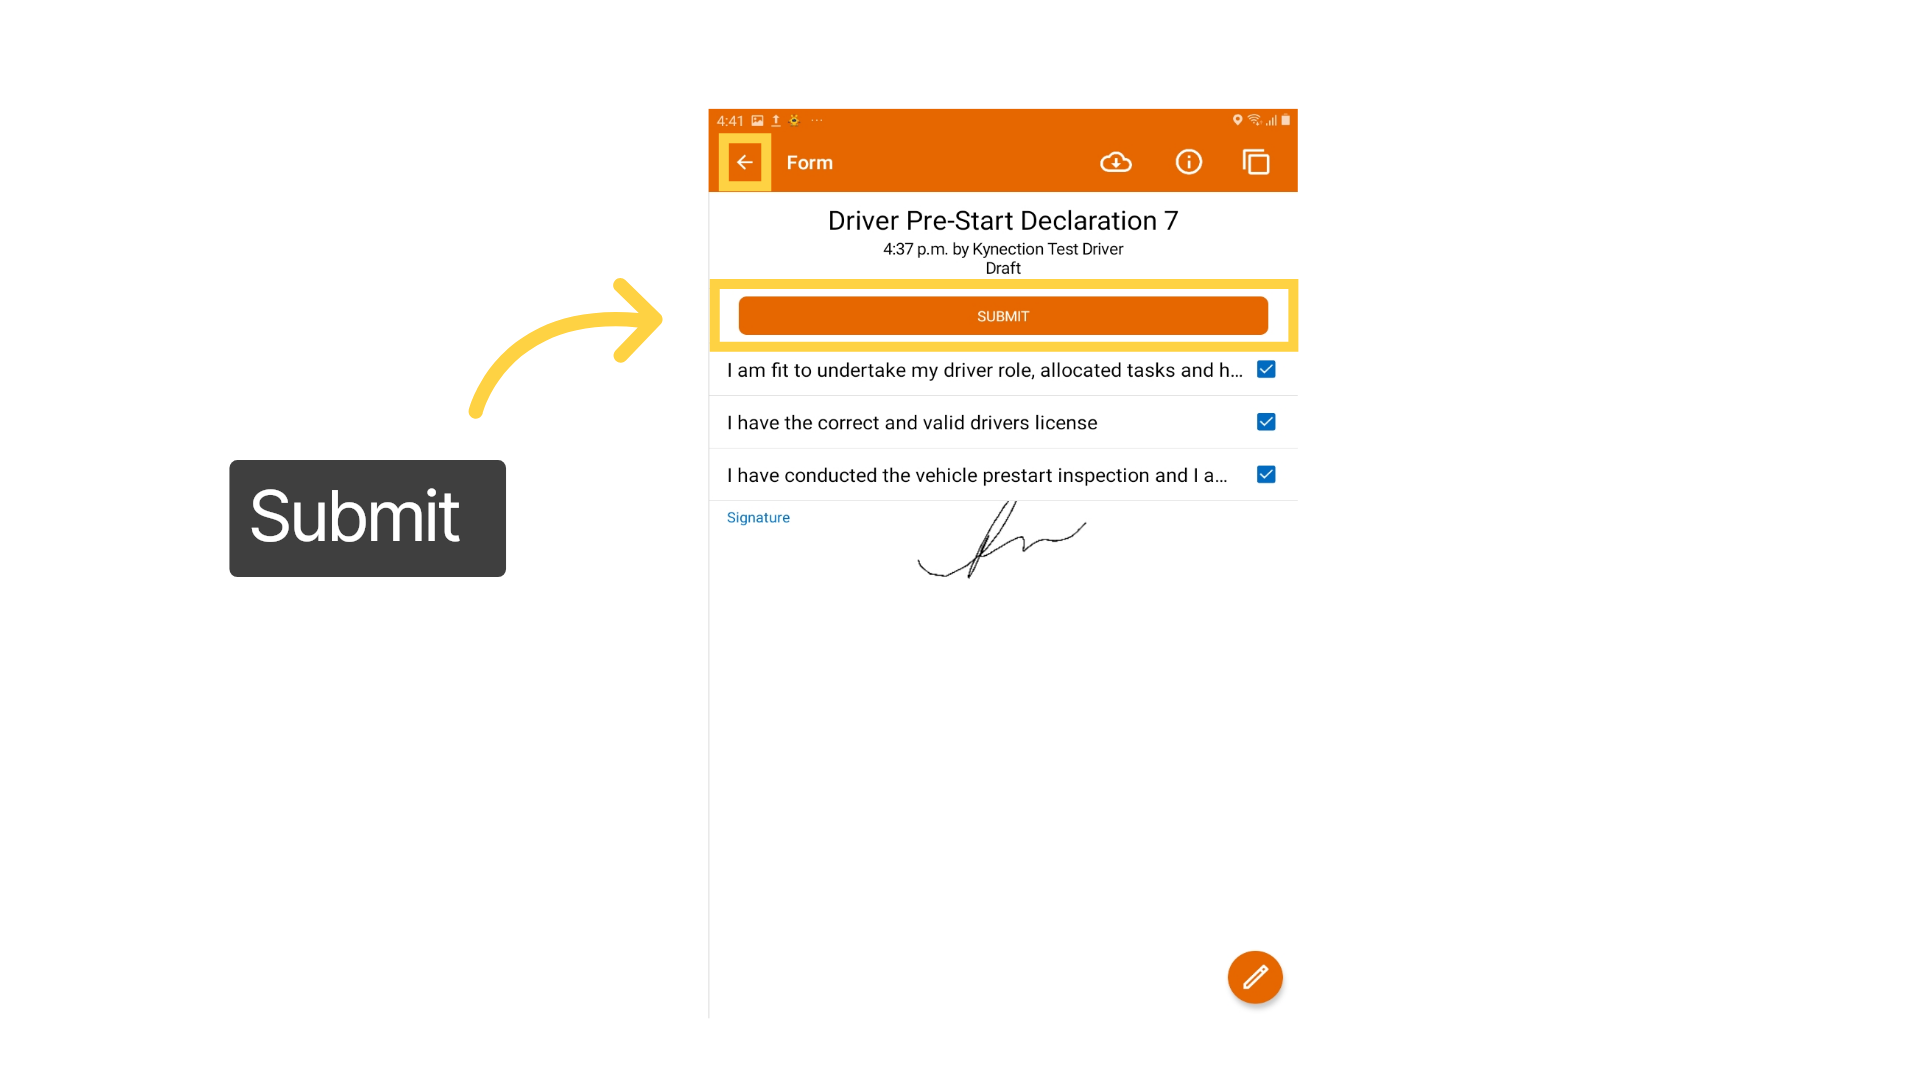
Forms must be submitted to proceed to the next workflow step. Use the back arrow to return to the job after submission.
8. Linked Equipment
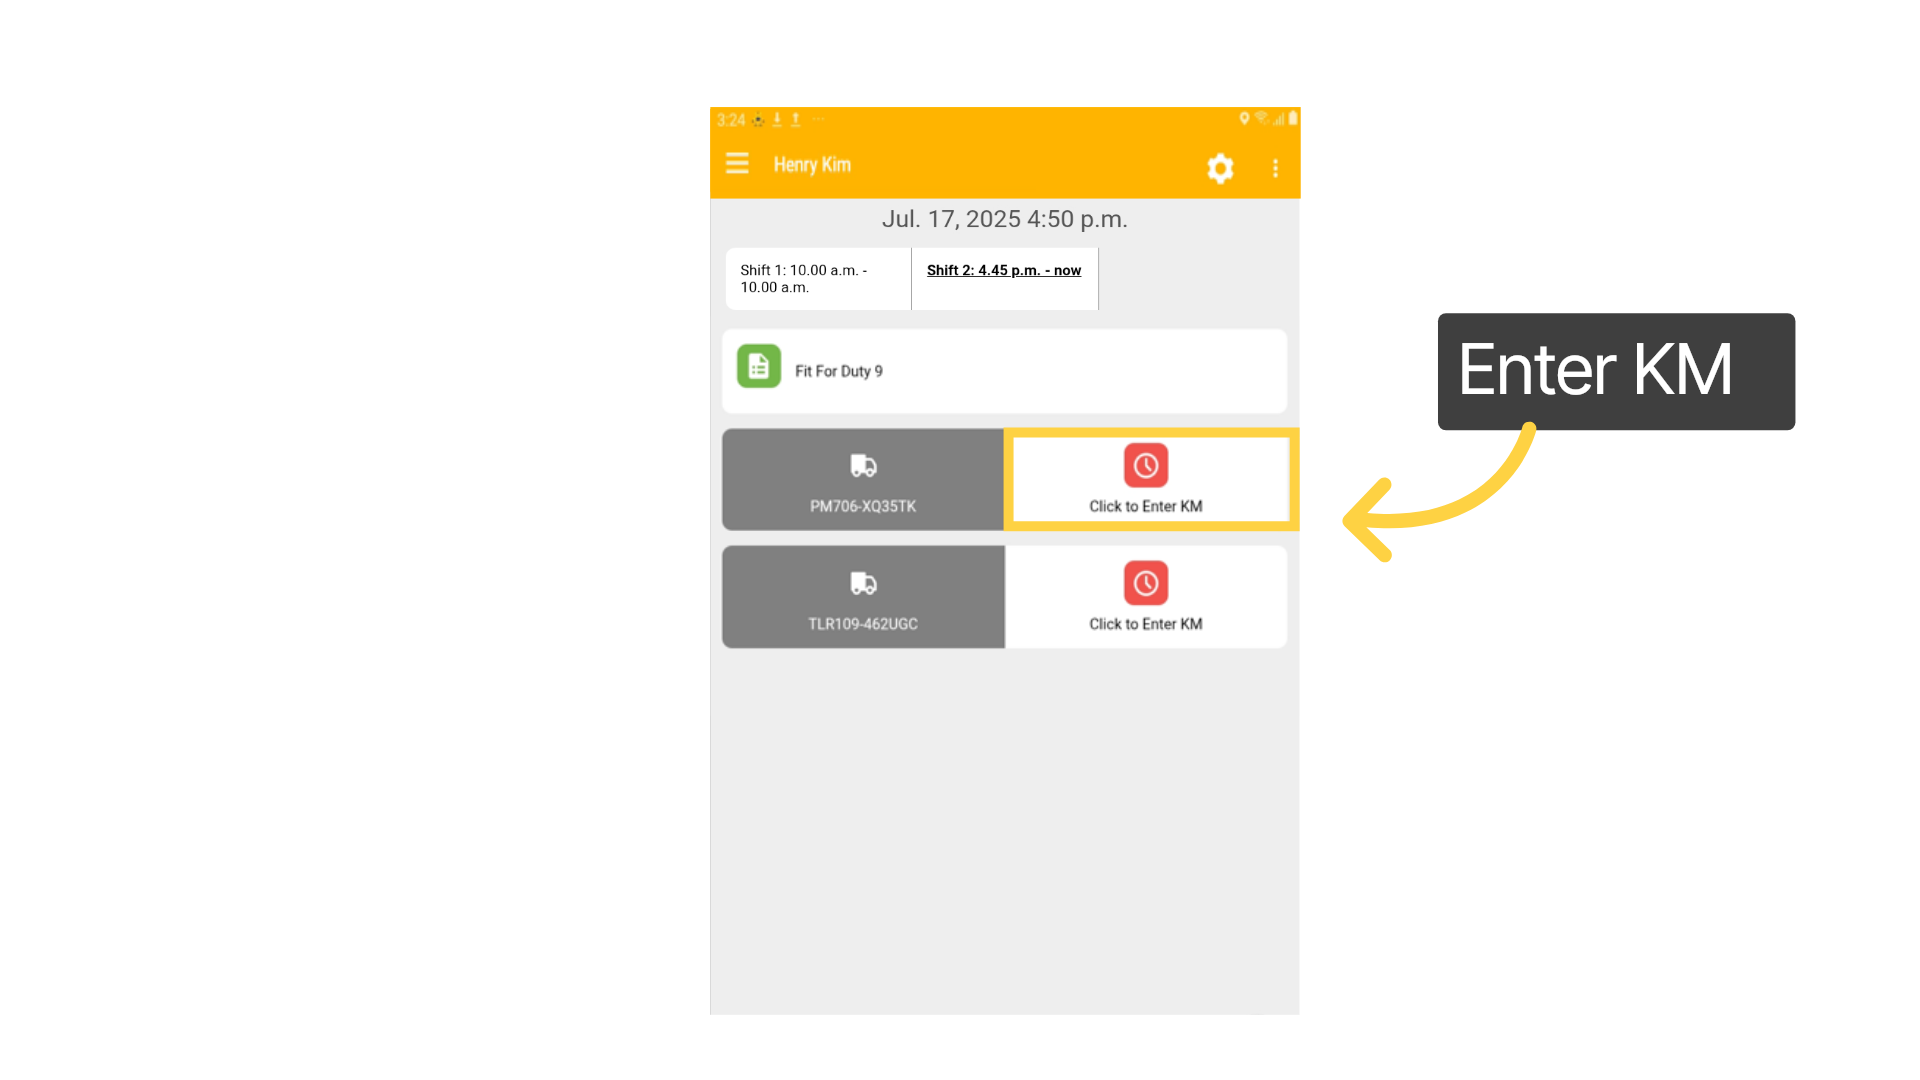
The equipment associated with your job is now accessible. Before starting any tasks, it is essential to complete a prestart inspection. To initiate the prestart process, click to enter kilometres.
9. Prestarts
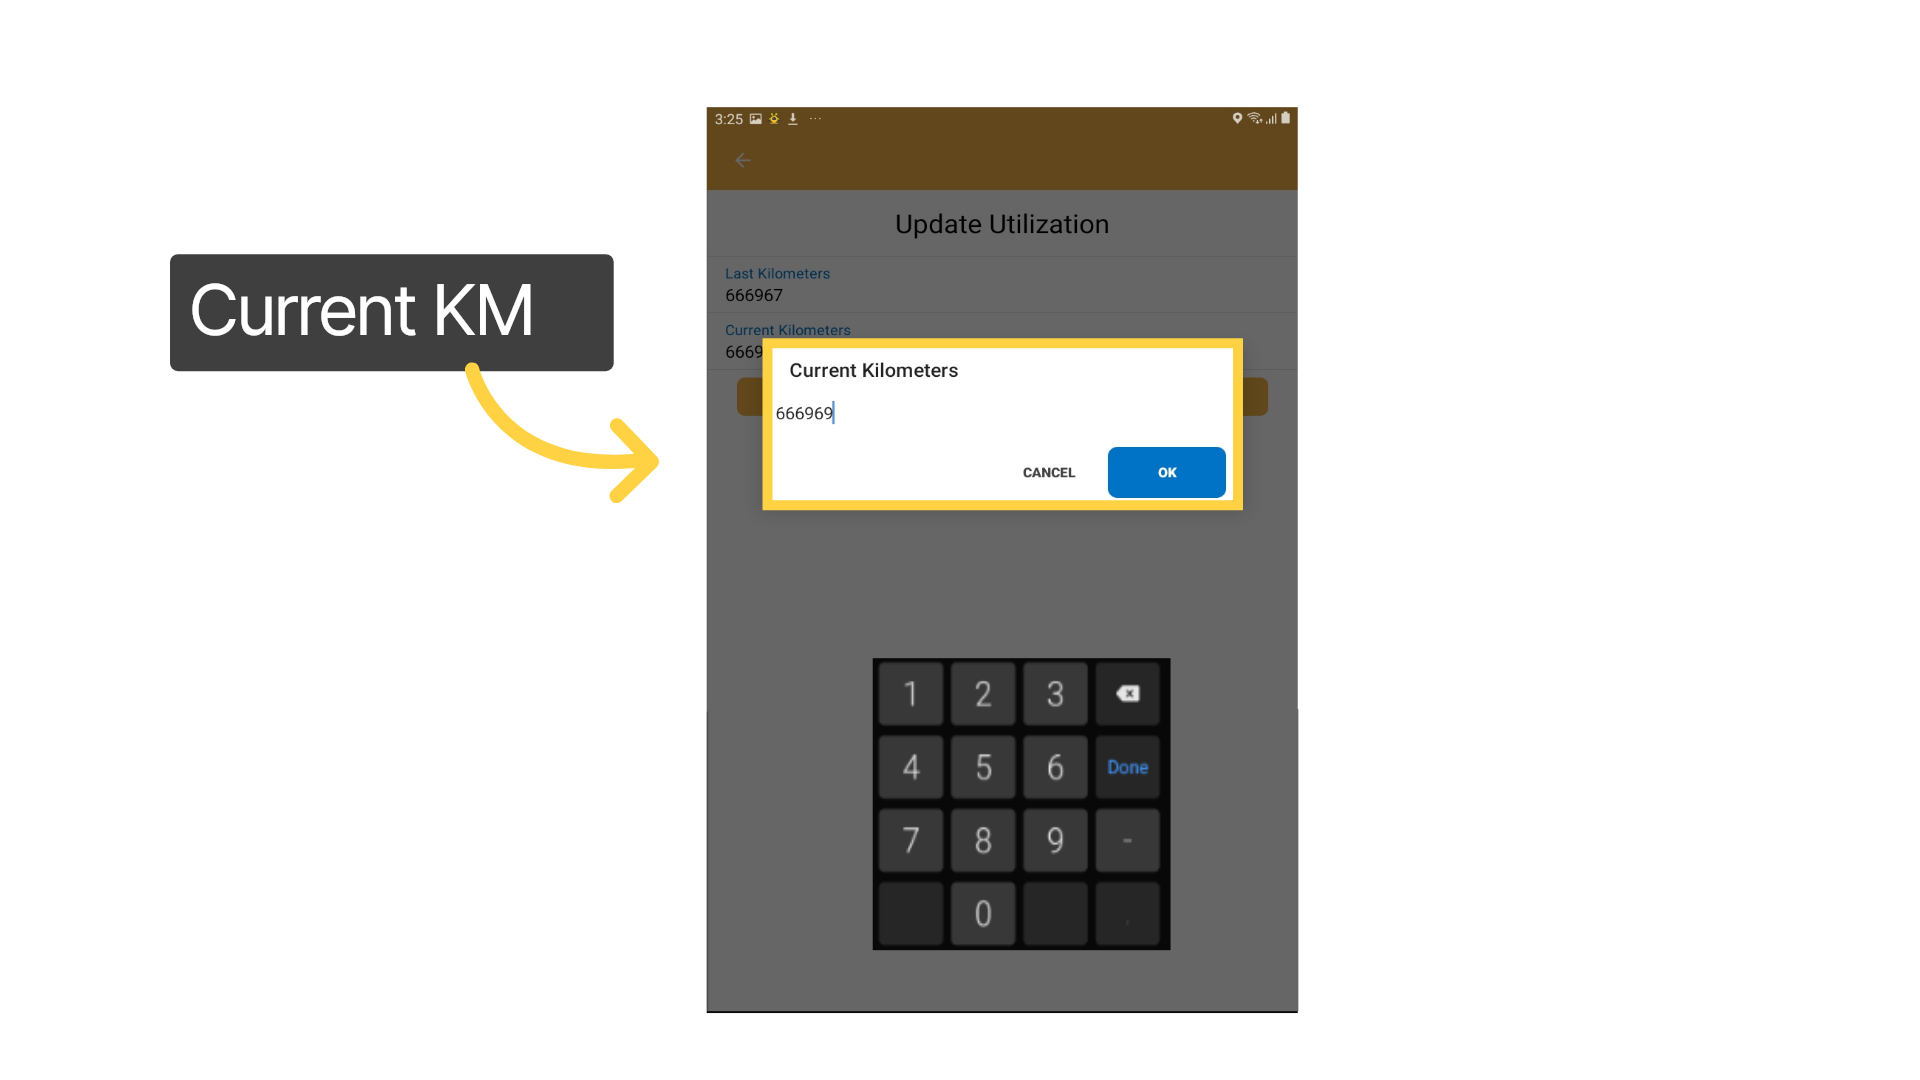
Enter the current odometer reading. You can see the last recorded reading for your reference.
10. Prestart Checklist
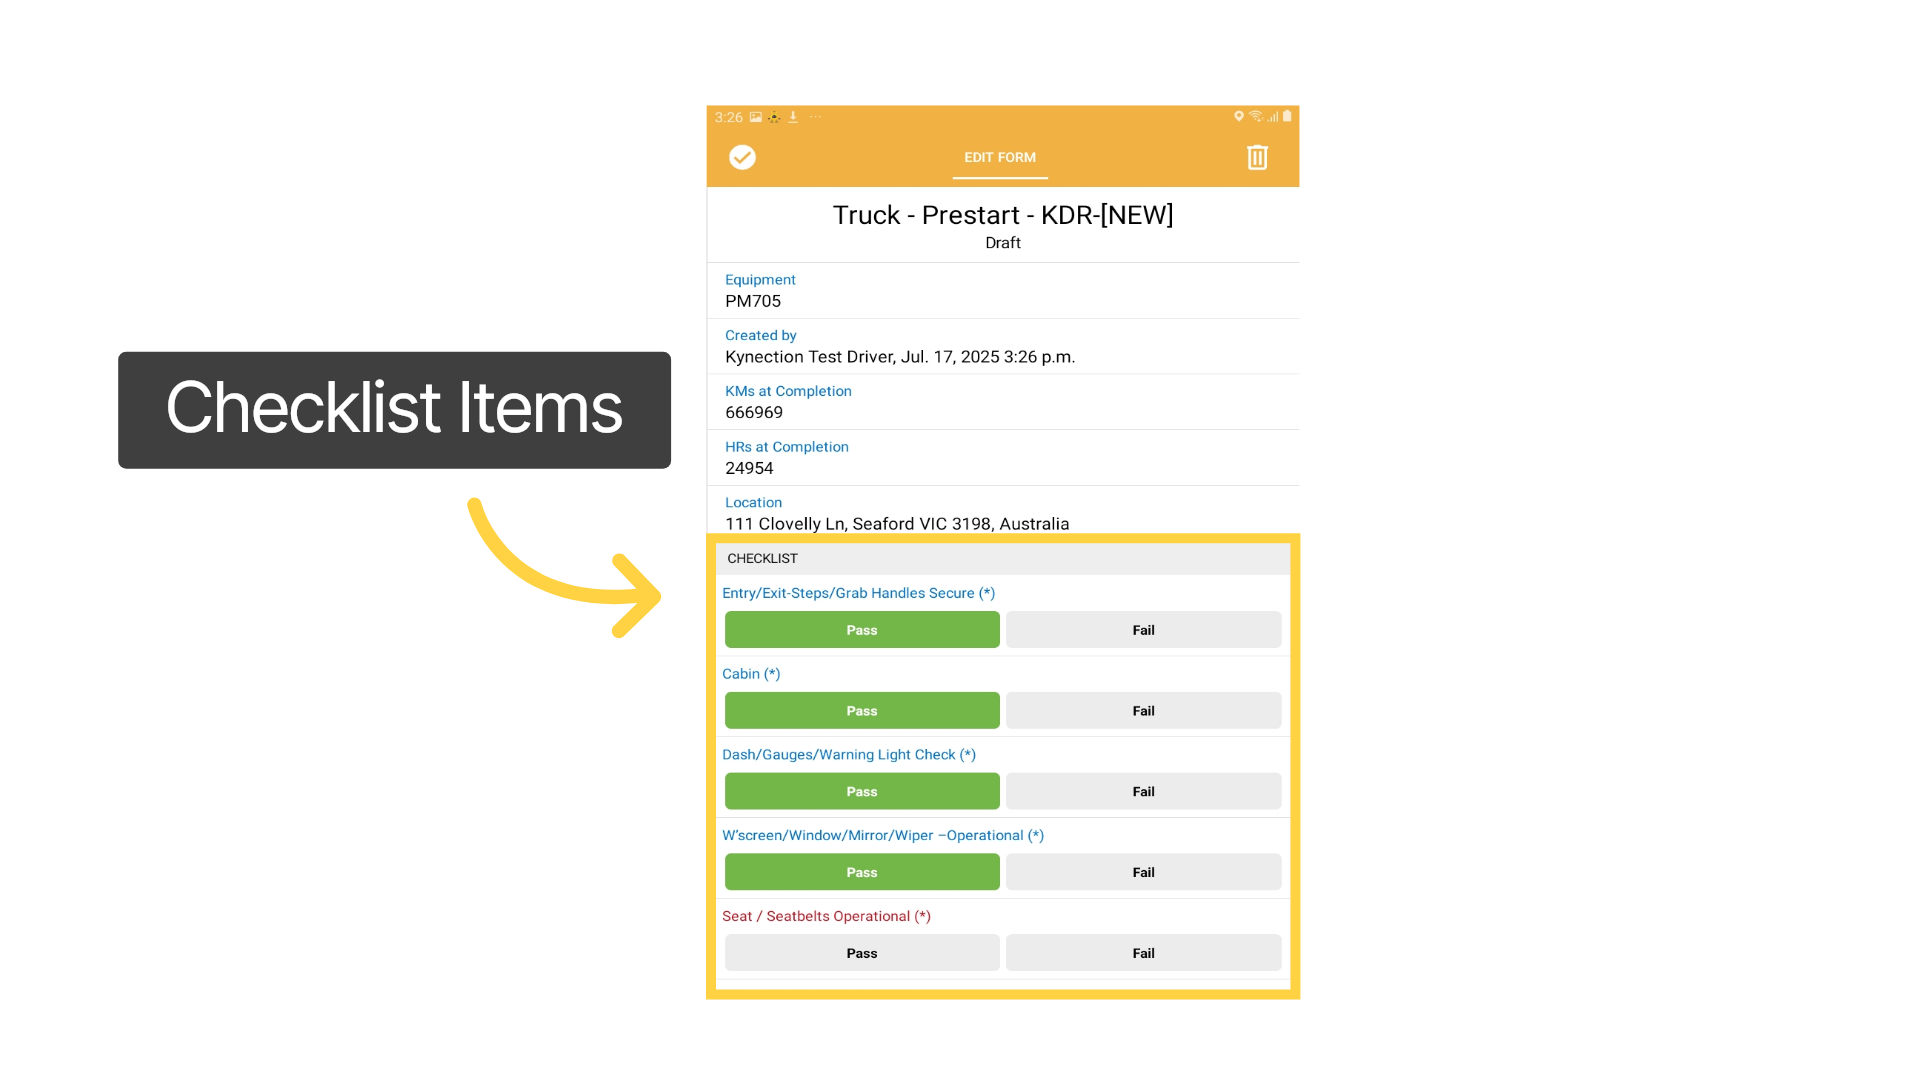
Pass or Fail each item on the checklist. Some items might already show Fail if previously reported and still unresolved.
11. Critical Items
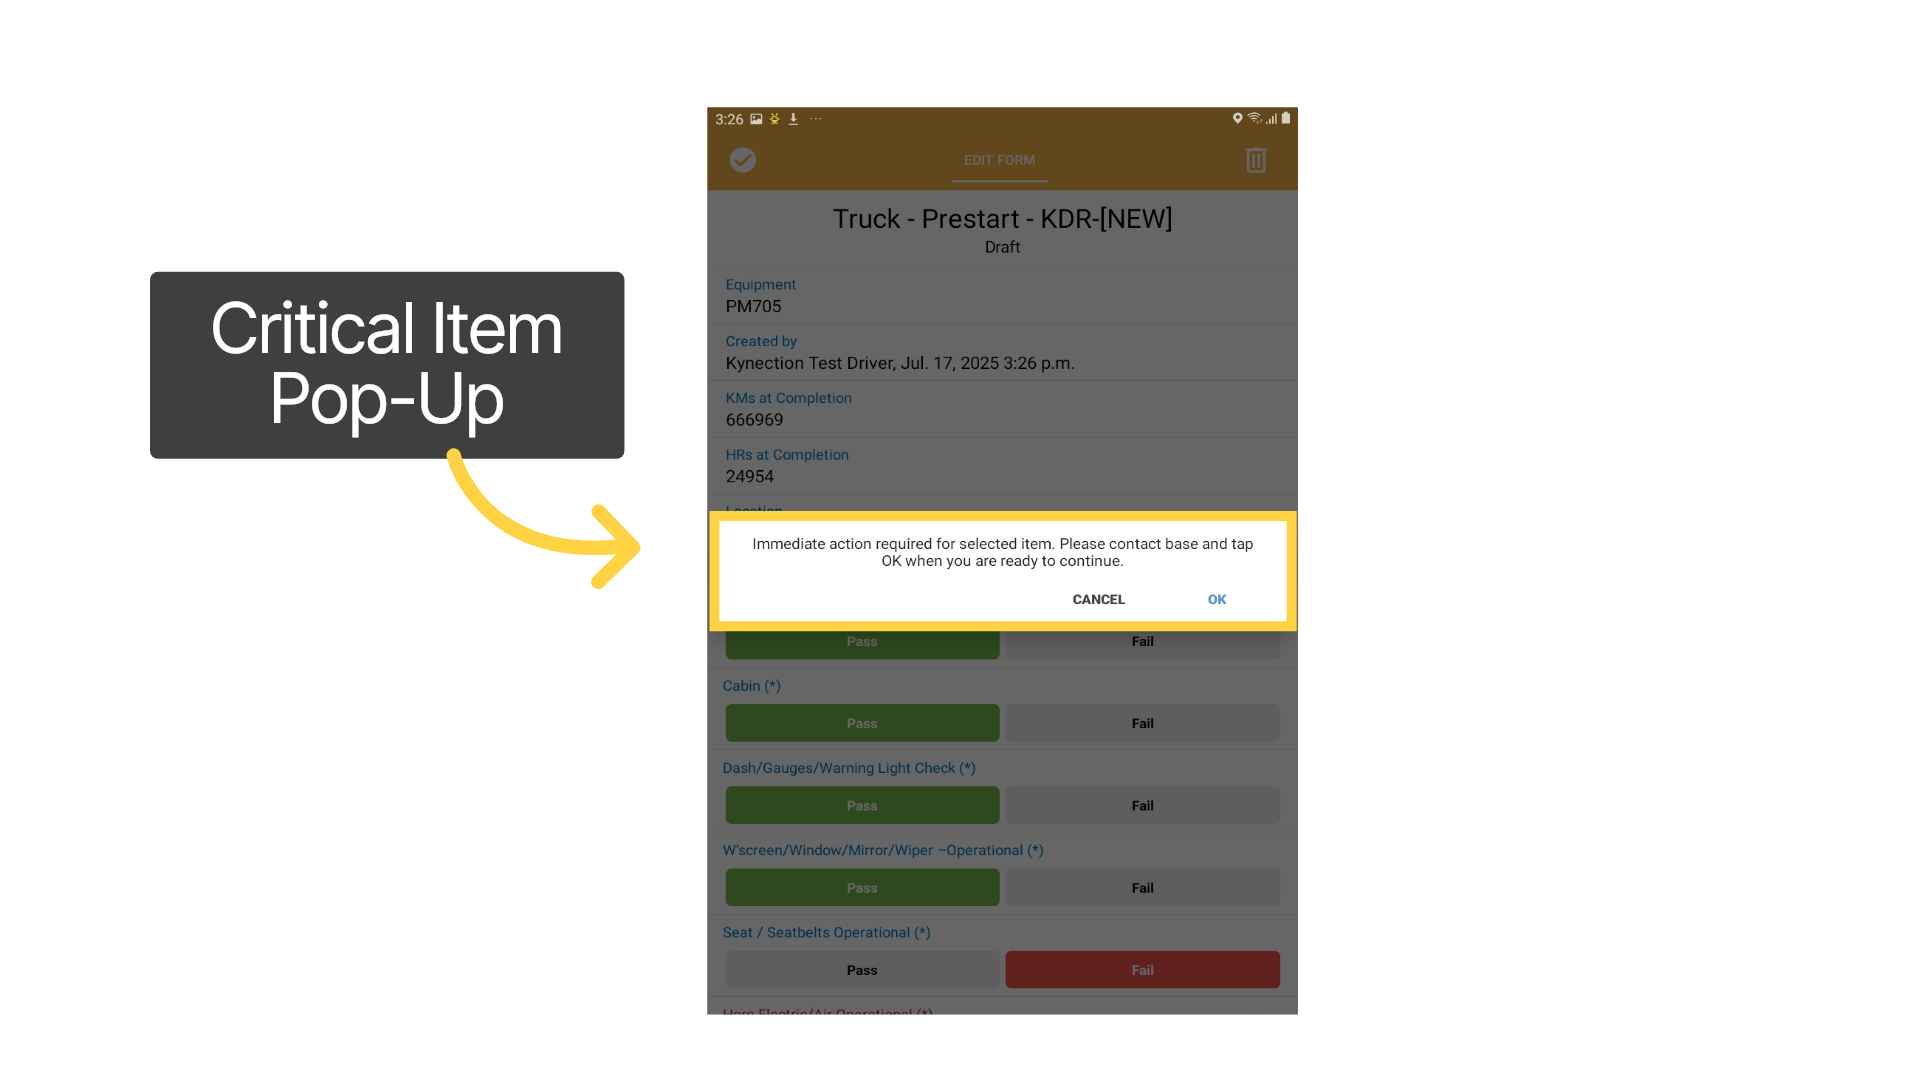
Some fault types are marked as critical for safety or roadworthiness. If you select Fail on these items, a pop-up message will tell you to contact the office for more instructions.
12. Record Fault
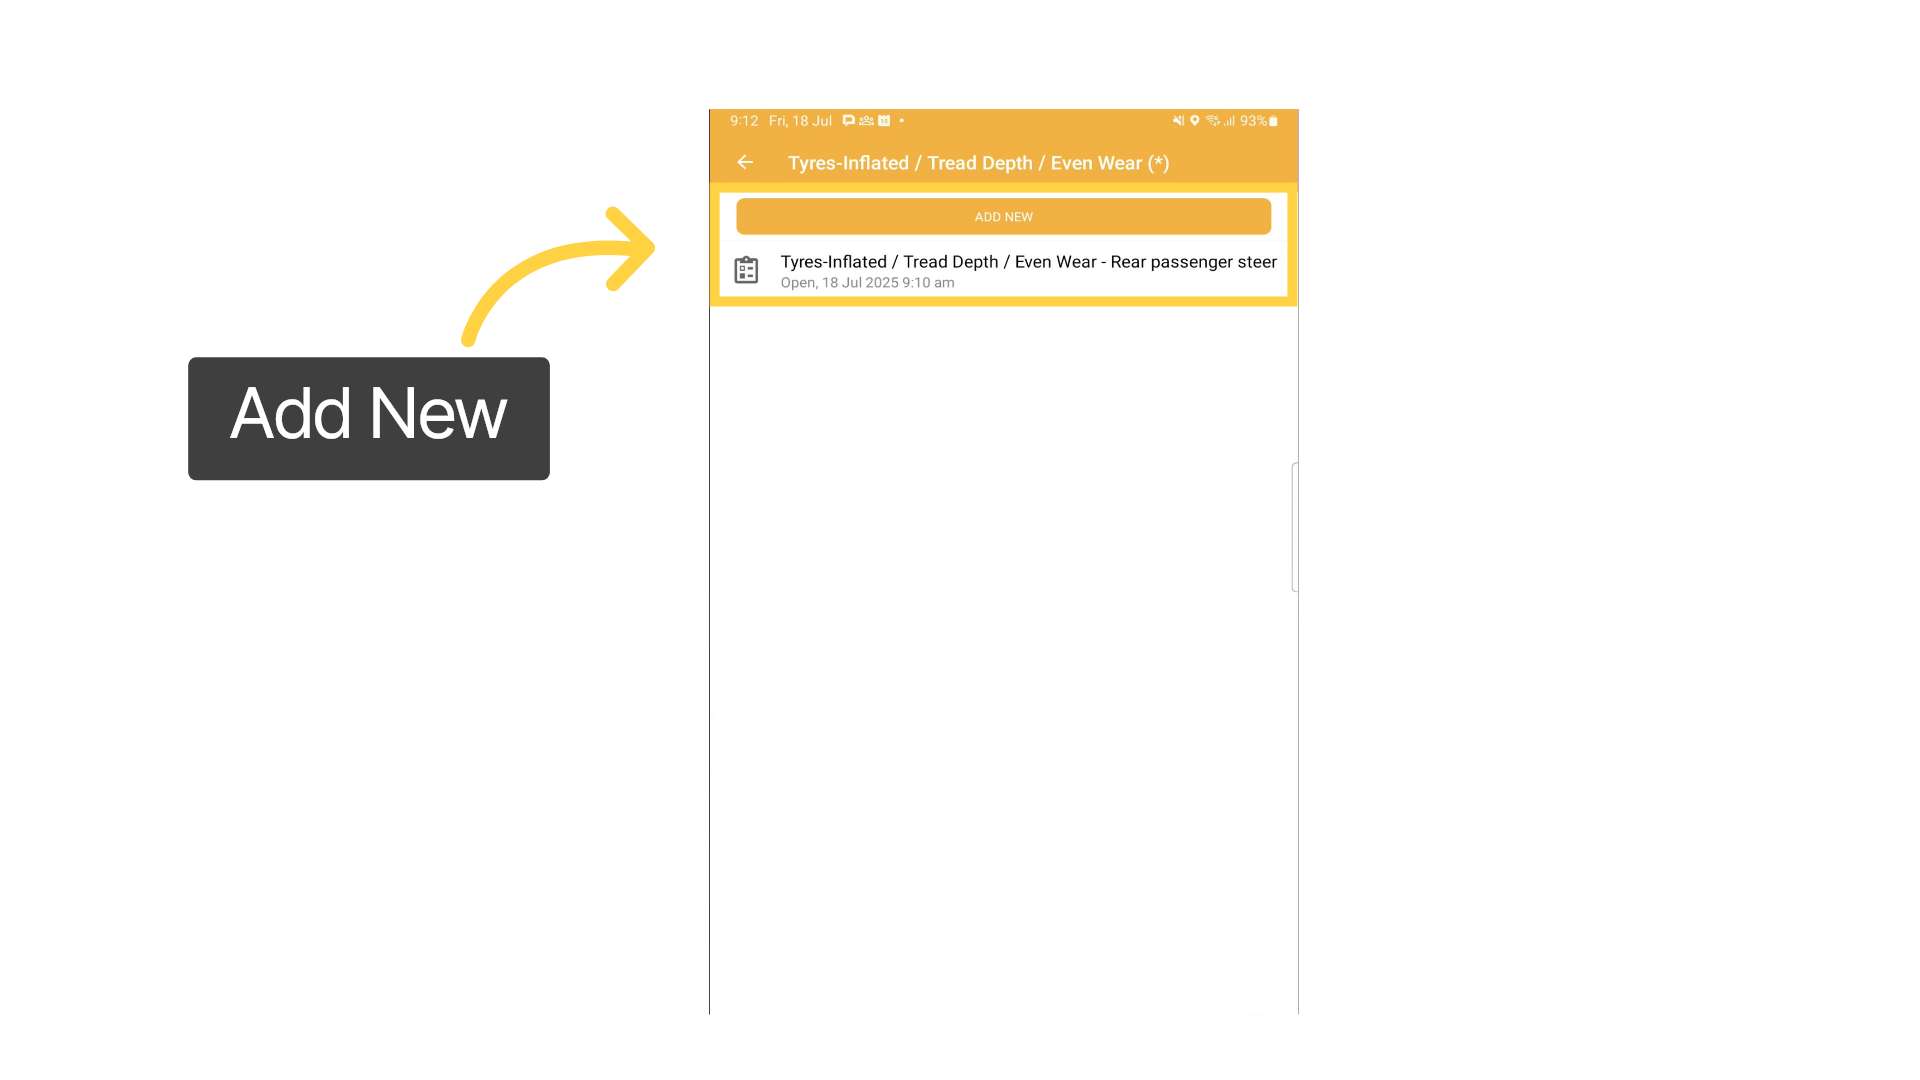
Existing faults are visible under the Add New button. If your fault is the same as the existing fault, tap the back arrow to exit. If you found a different fault, select Add New.
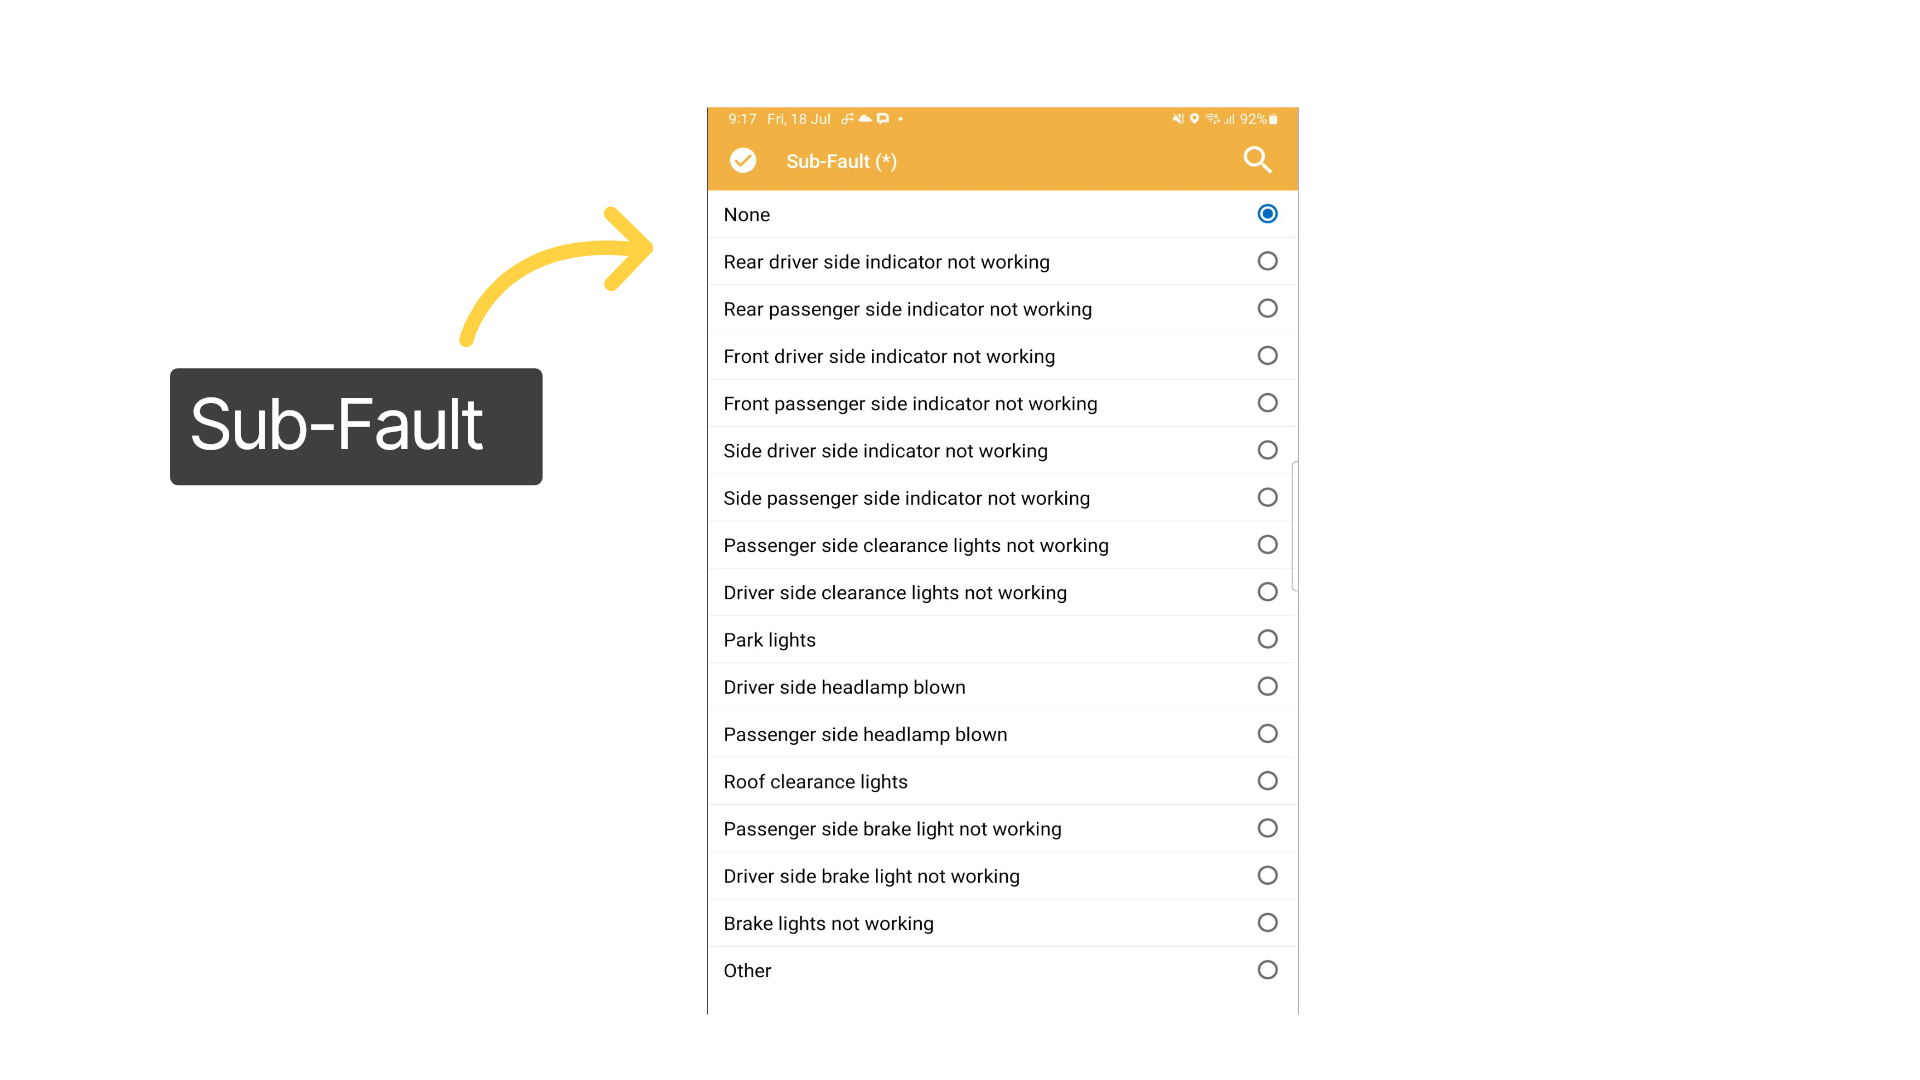
13. Sub-Fault
After selecting fail on the item category, select the specific fault type from the Sub-Fault list. If the fault doesn't correspond to any of the available choices select Other and explain the issue in notes.
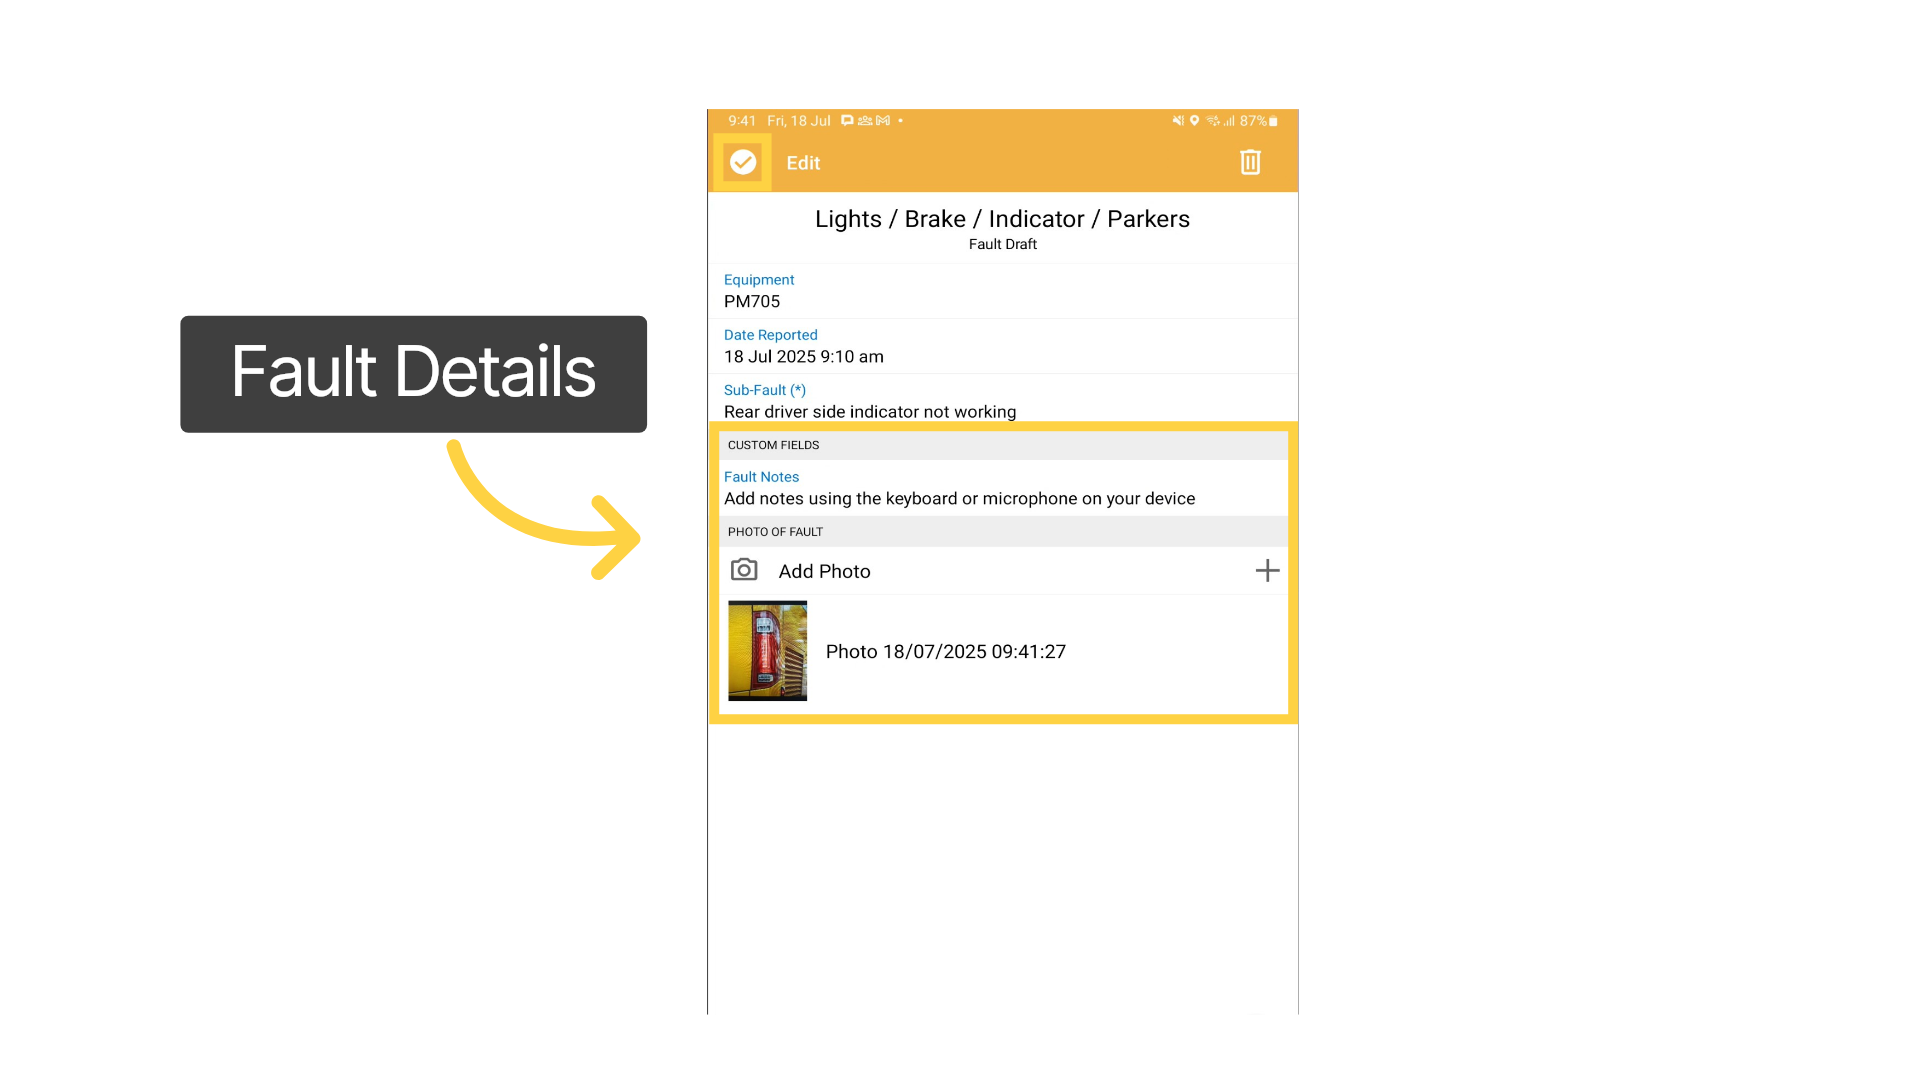
14. Fault Details
Provide detailed notes of the fault and upload a photo. Add notes using the keyboard or your device's microphone. Save and return to the prestart.
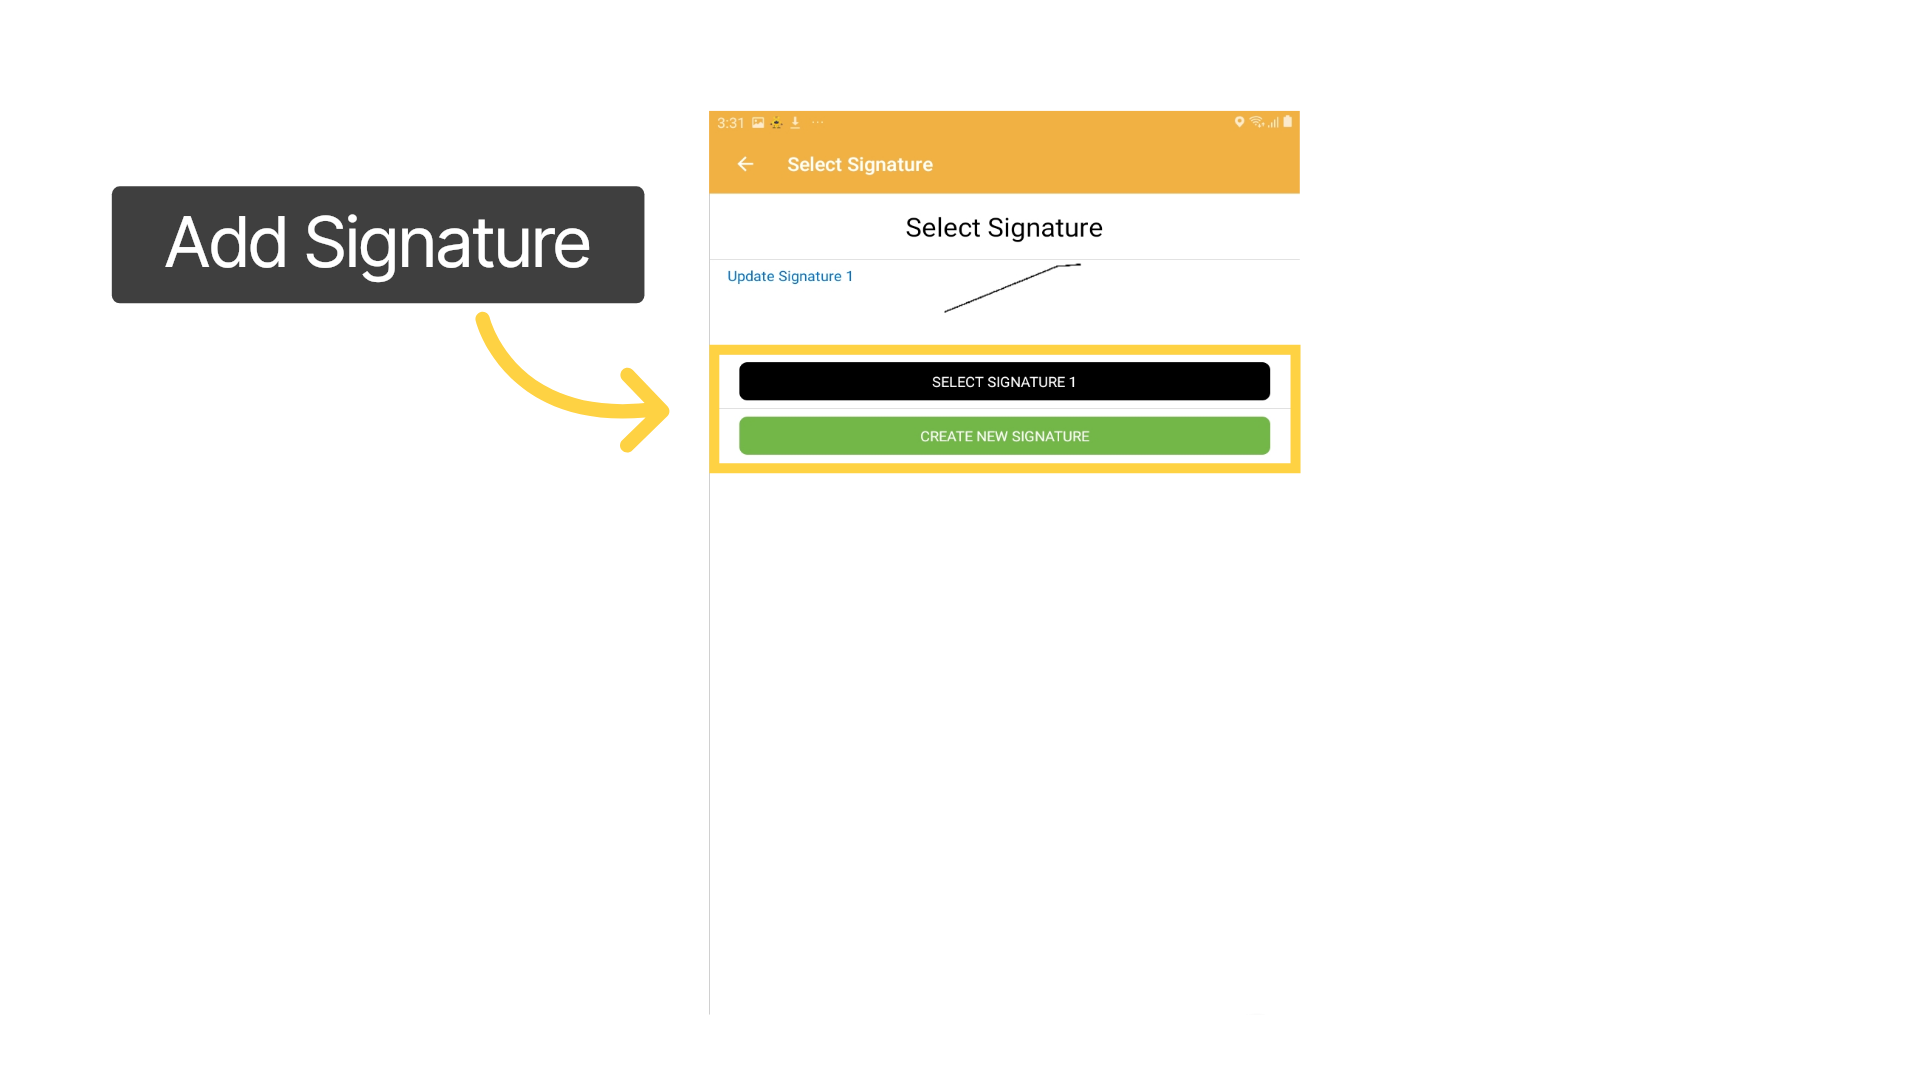
15. Create or Select Signature
The first time a prestart is completed, a signature needs to be created. This signature saves for easy selection when completing future prestarts.
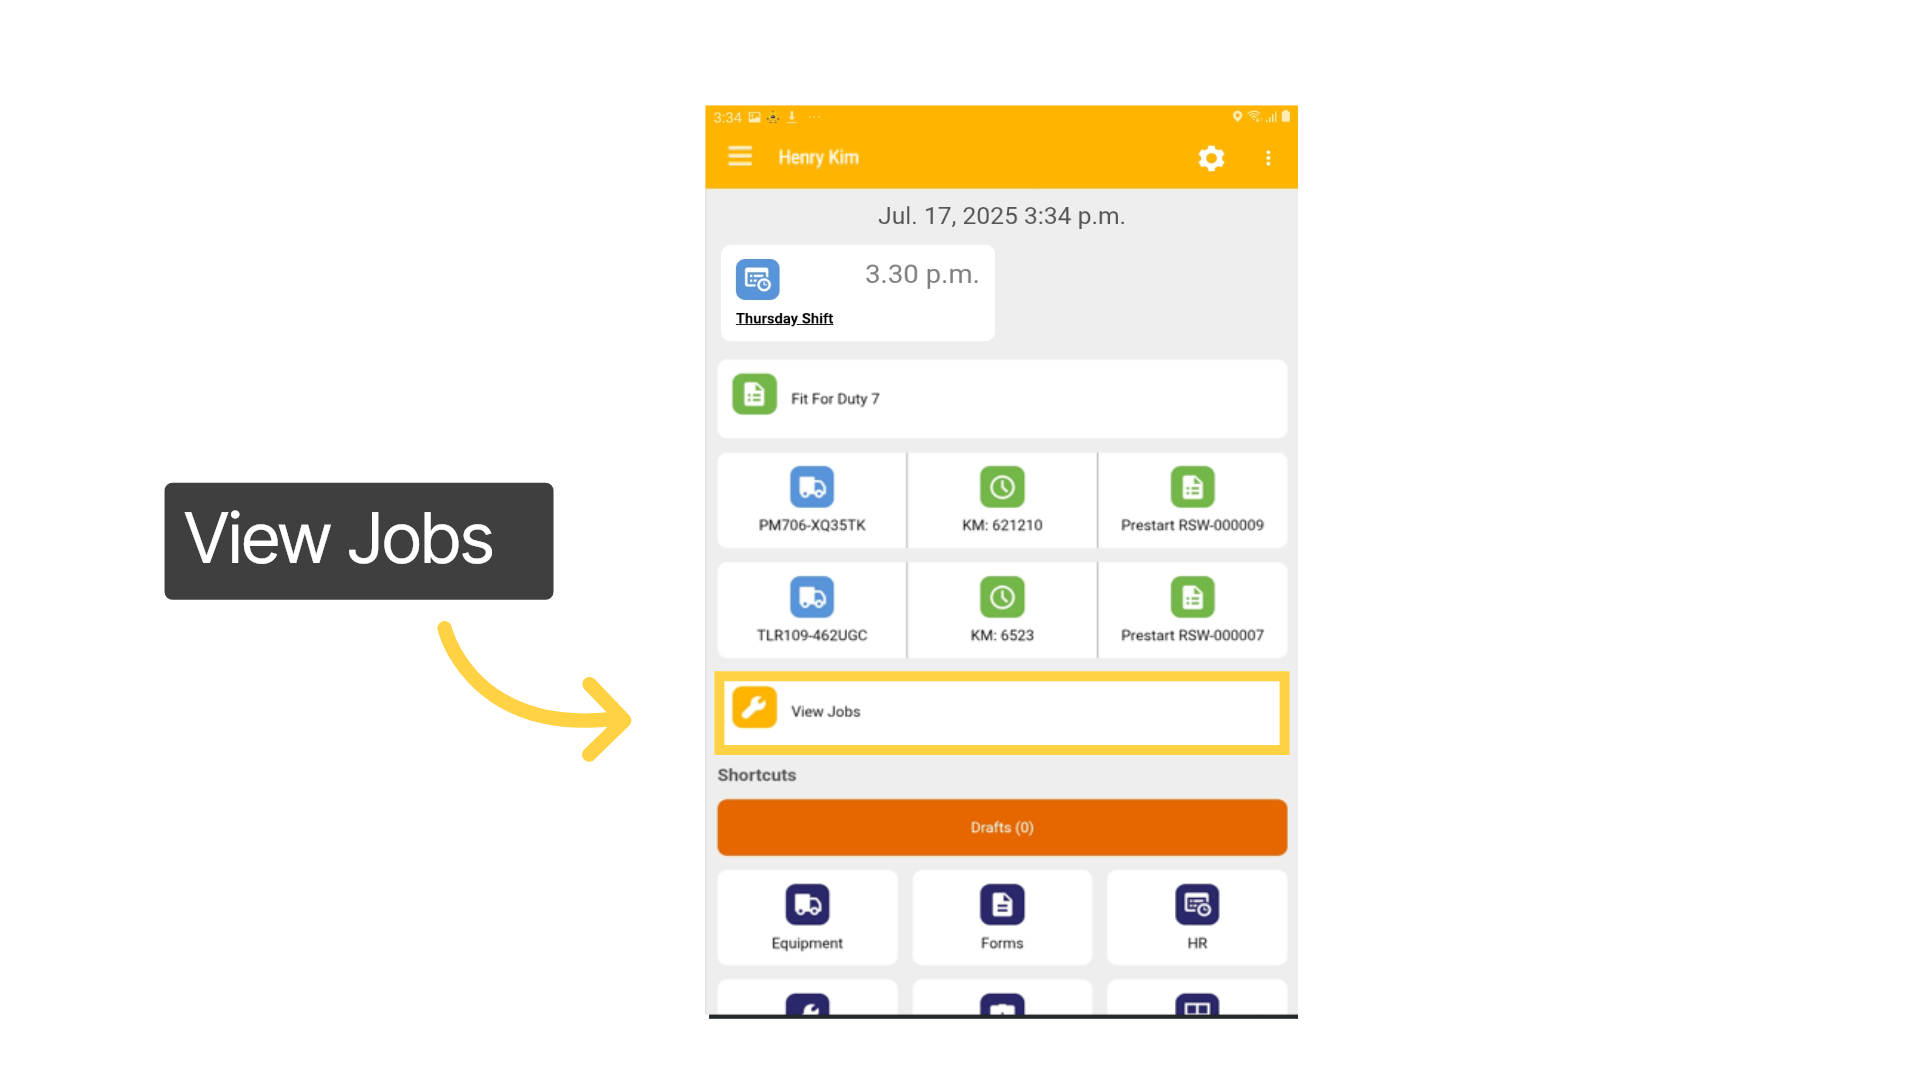
16. View Jobs
Completed forms convert to green, as displayed by the prestart. Complete additional equipment if allocated, otherwise elect View Jobs to see your assignment.
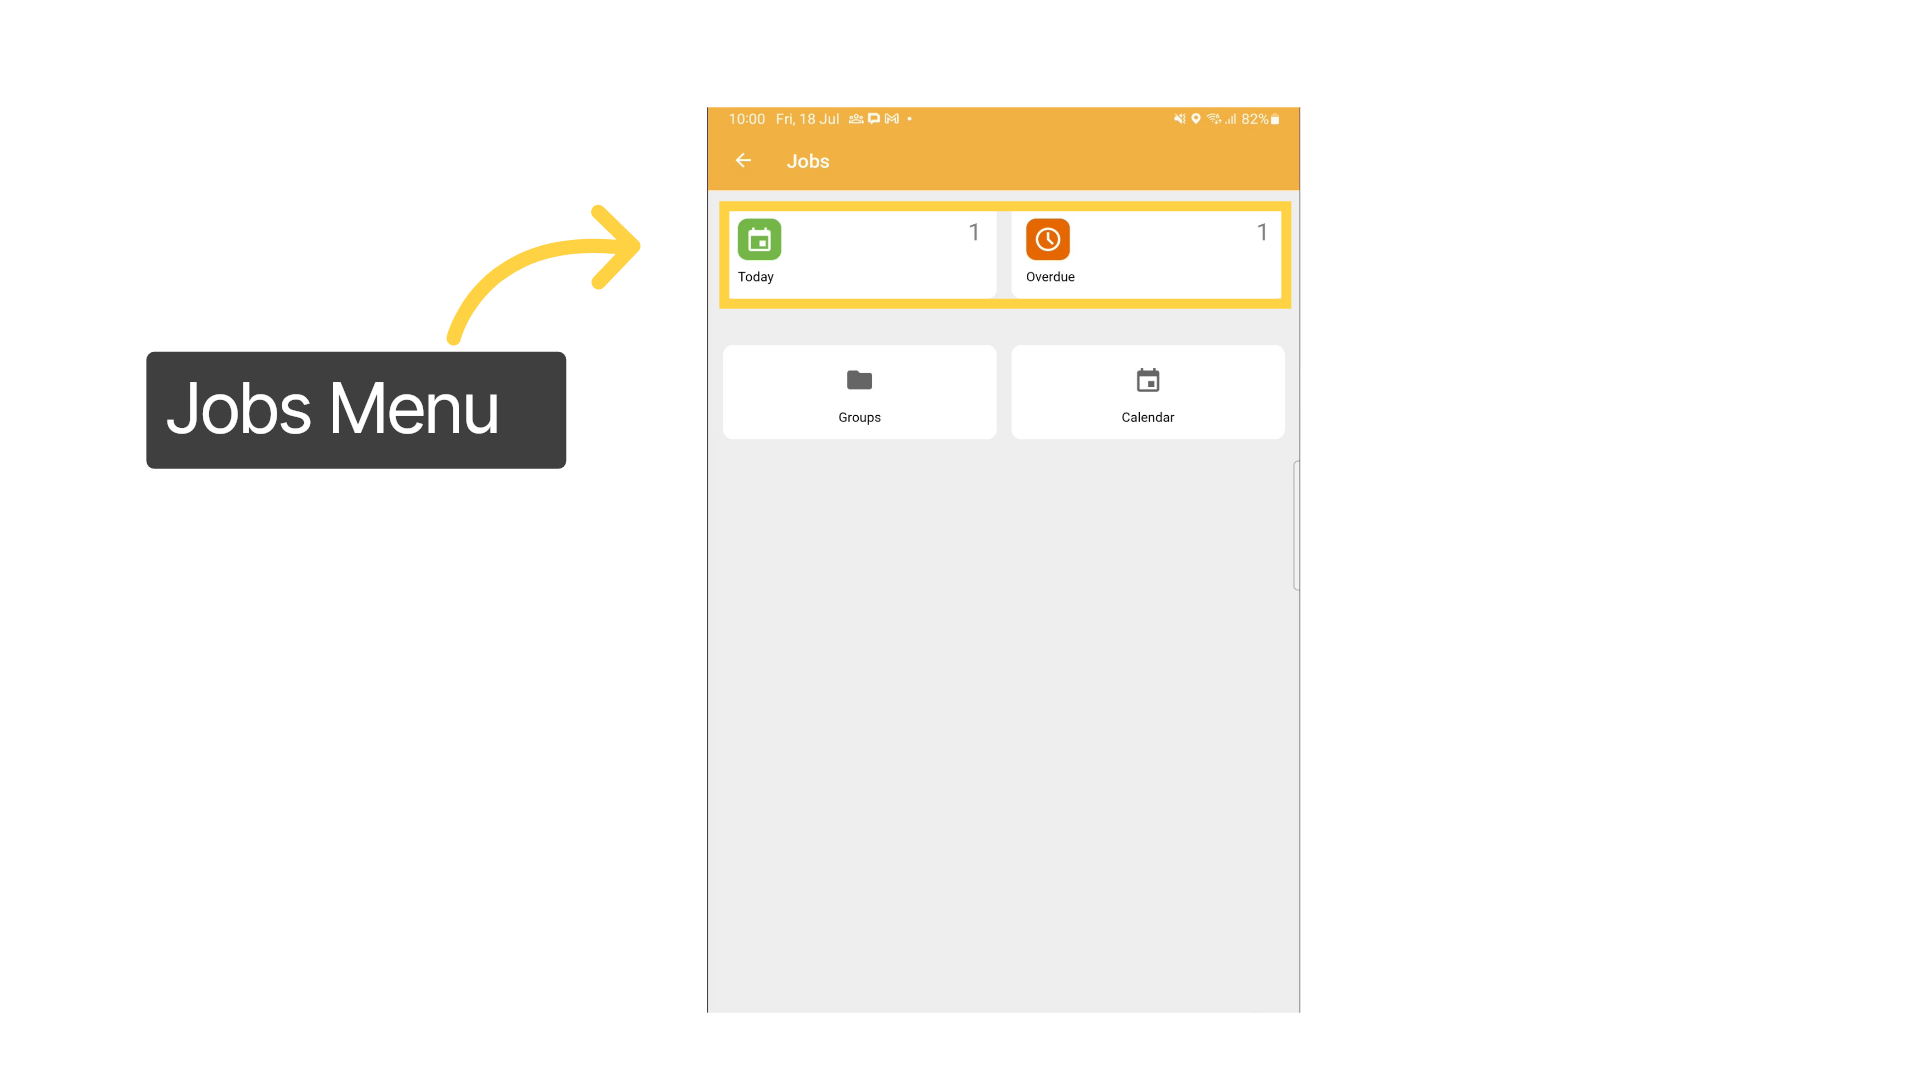
17. Jobs Menu
Open the Today folder to see tasks assigned to you. Jobs are categorised by status and are placed into folders for In Progress, Completed and Overdue.
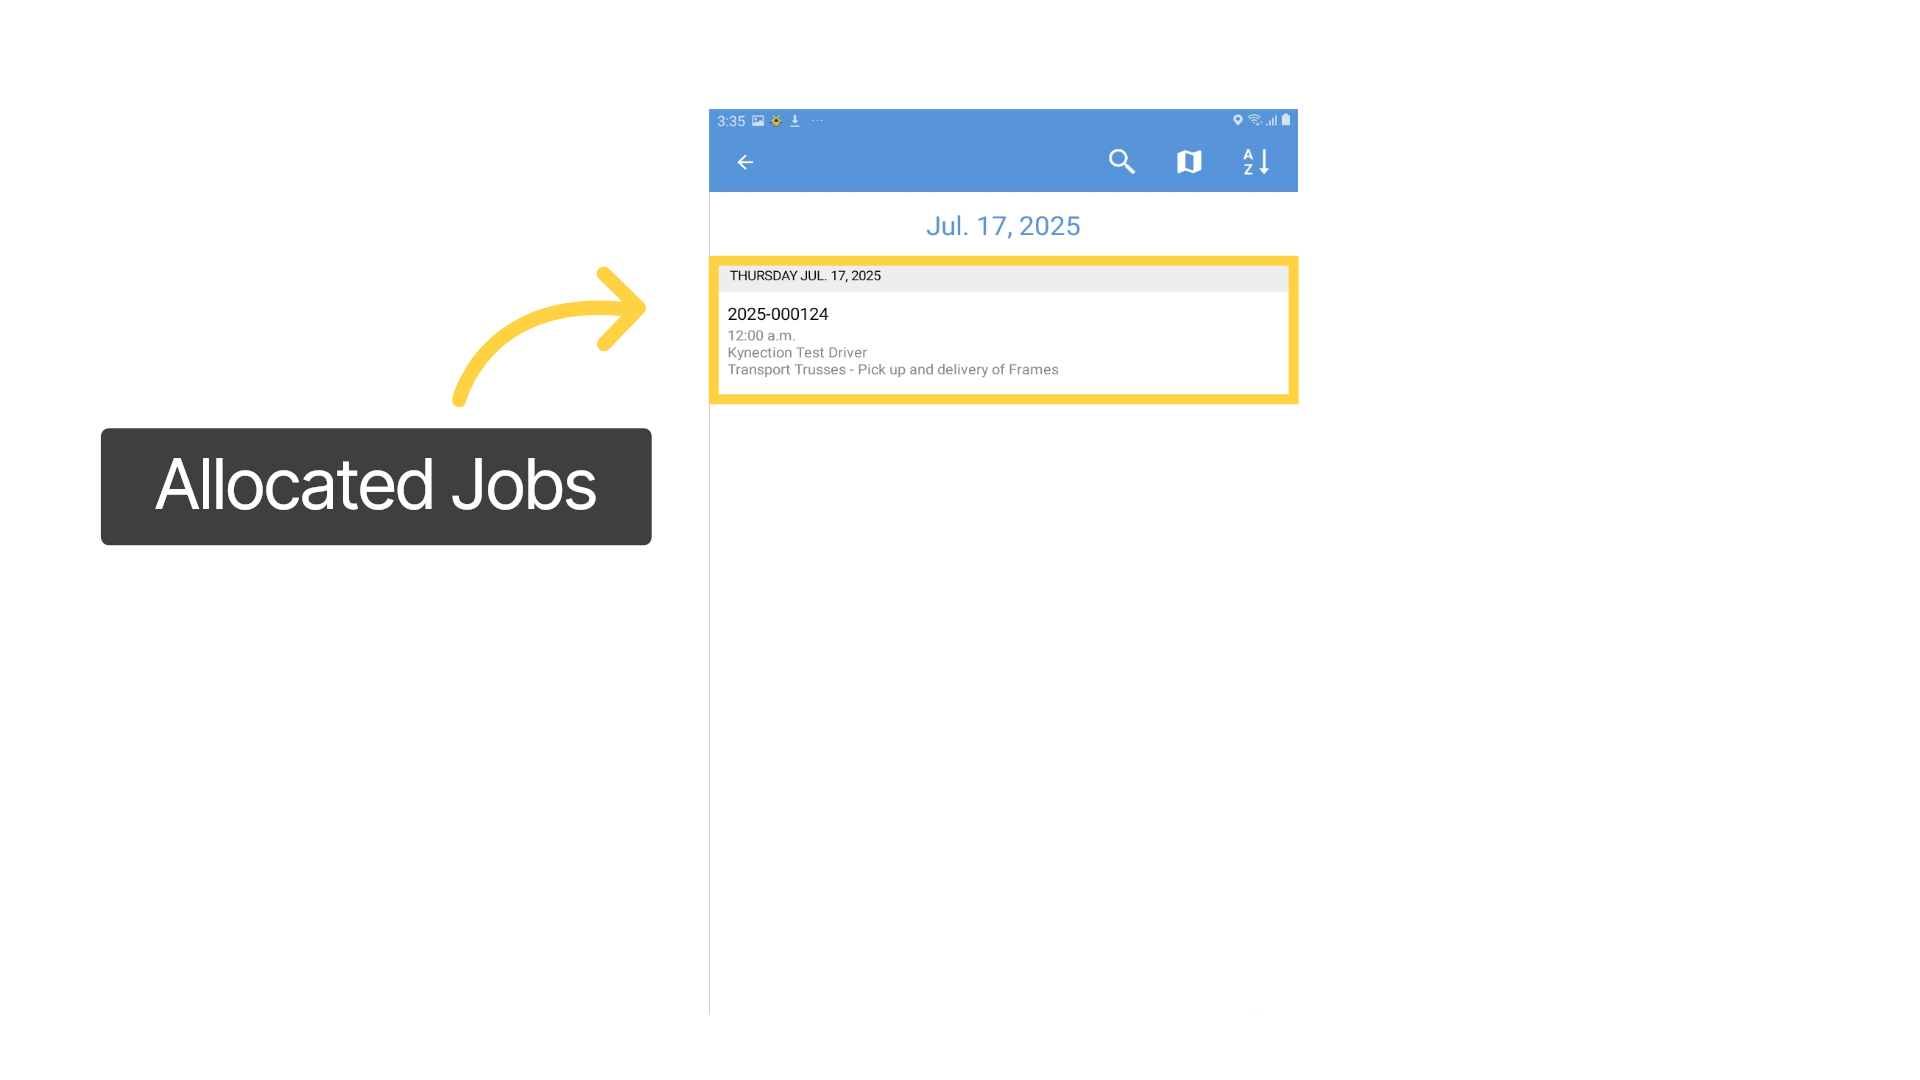
18. Allocated Jobs
If multiple jobs are allocated for the day they will appear in time order as scheduled. Select the job to get started.
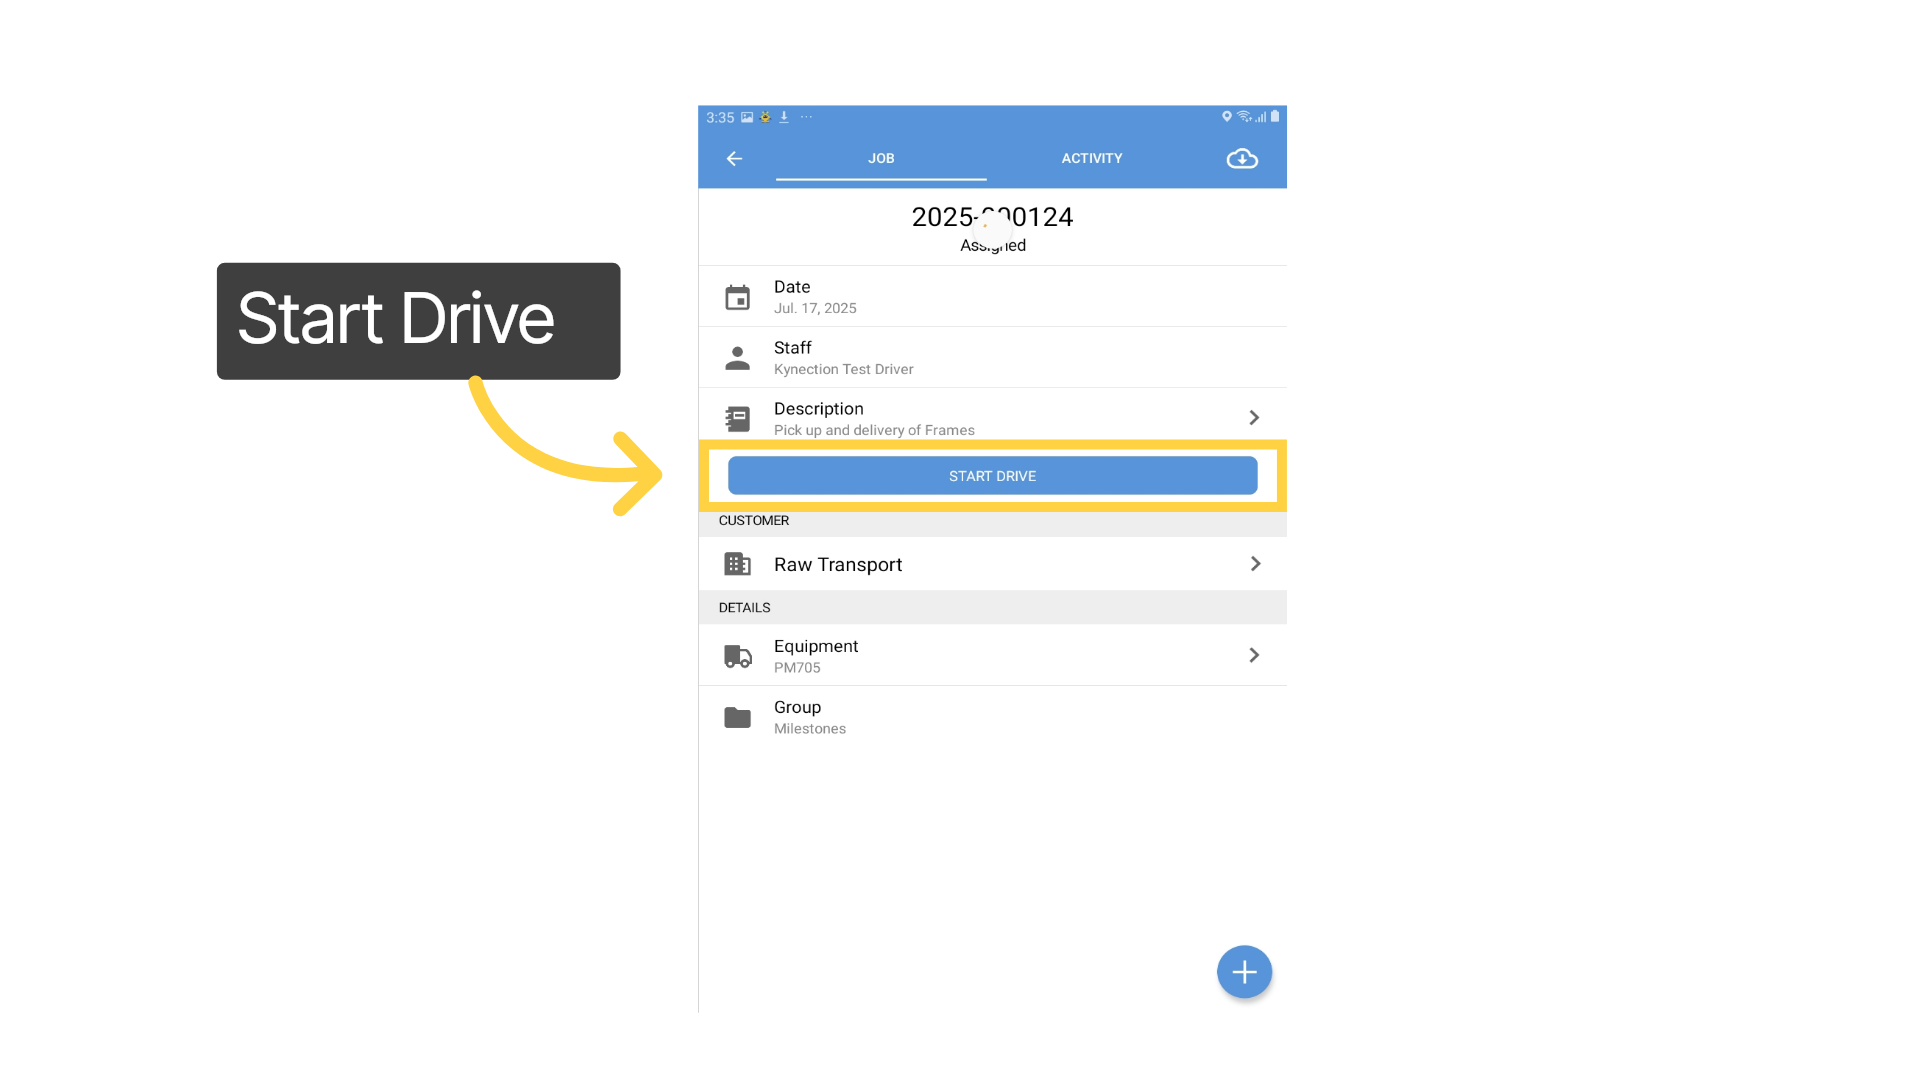
19. Start Drive
The main job screen provides details & instructions required to complete the task. When leaving the depot, selec Start Drive. This logs your start time and location on the job docket.
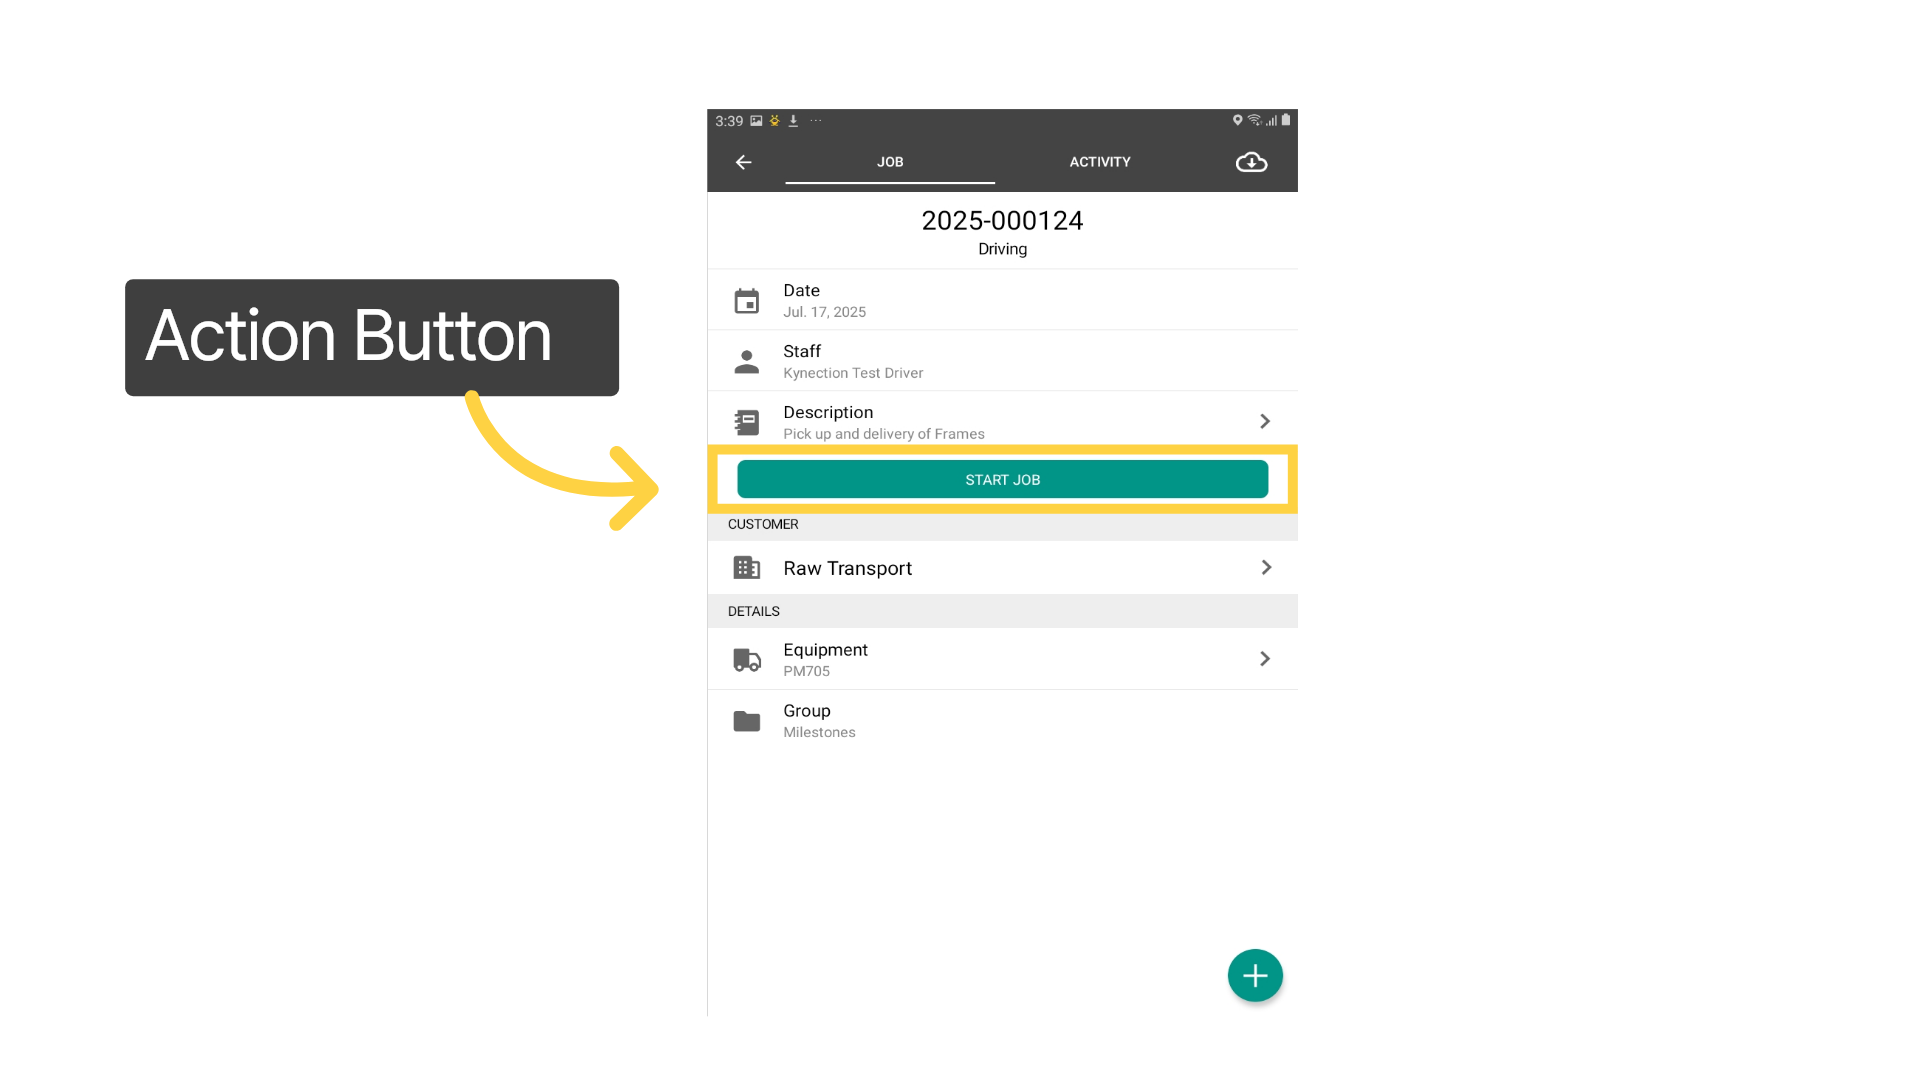
20. Start Job
After pressing Start Drive, the button changes to Start Job. This action button will update to the next step each time you select it. Tap Start Job when you arrive at the customer's site.
21. Job Forms
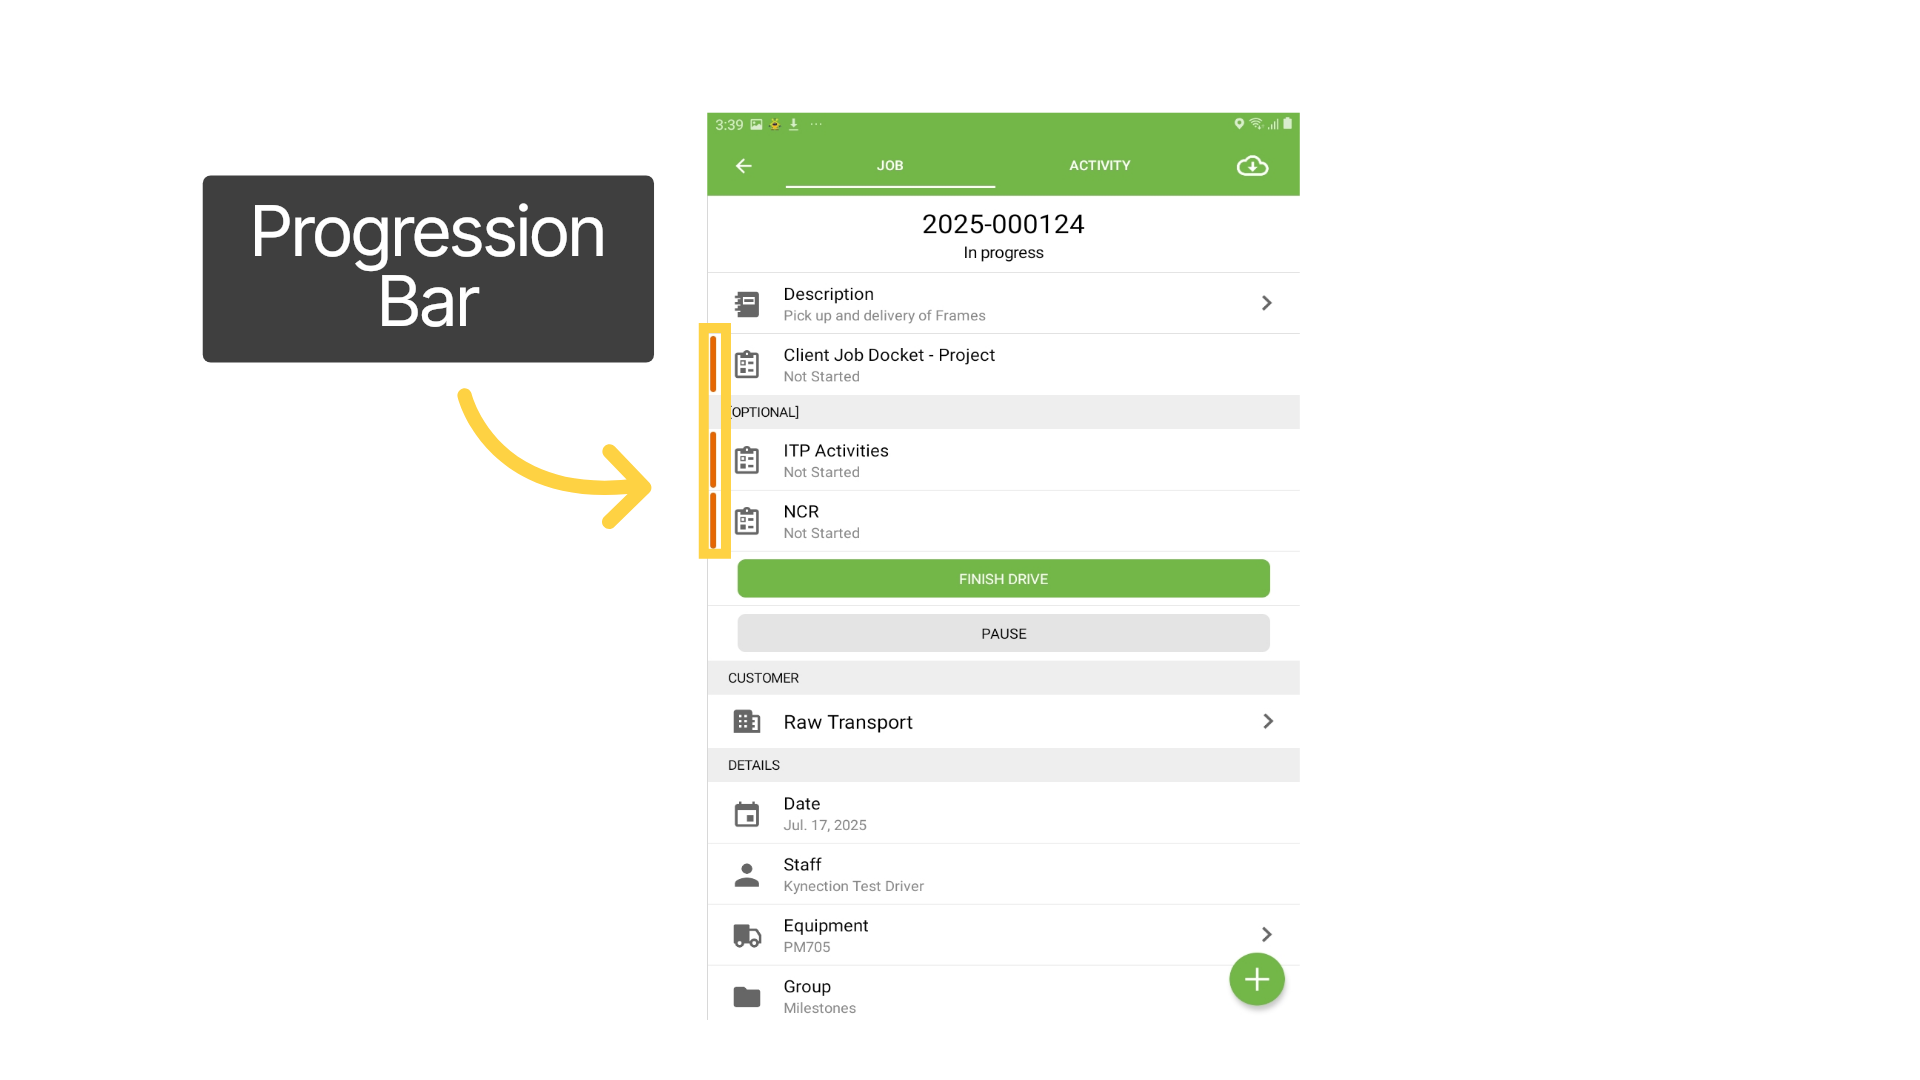
Mandatory job-forms appear below the job description with optional forms underneath. The colour coded progression bar on the right of the form displays the form status with red for not started and green for completed.
22. Form Fields
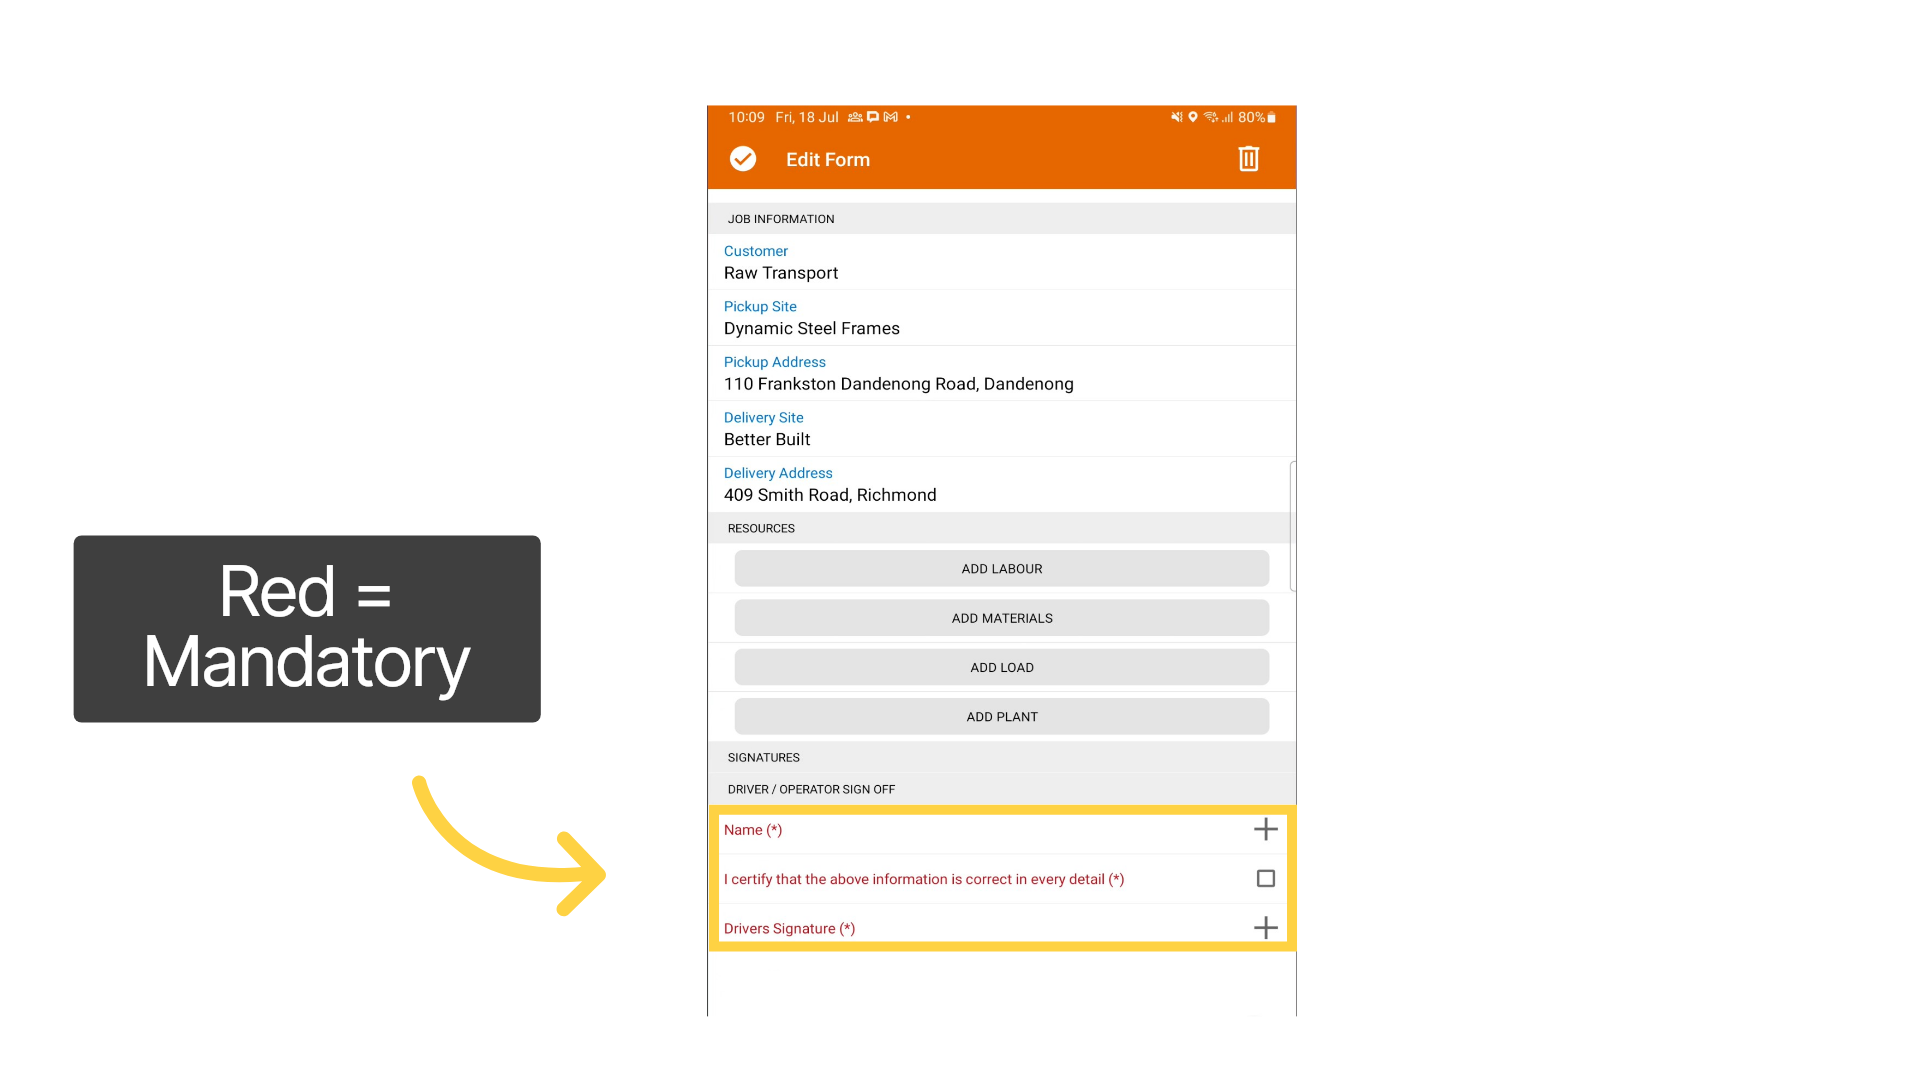
Data capture on forms can include multiple choice questions, text, photos or signature fields. Certain information is pre-filled to expedite form completion; however, it can still be modified as needed. Fields highlighted in red indicate responses are mandatory.
23. Submit Form
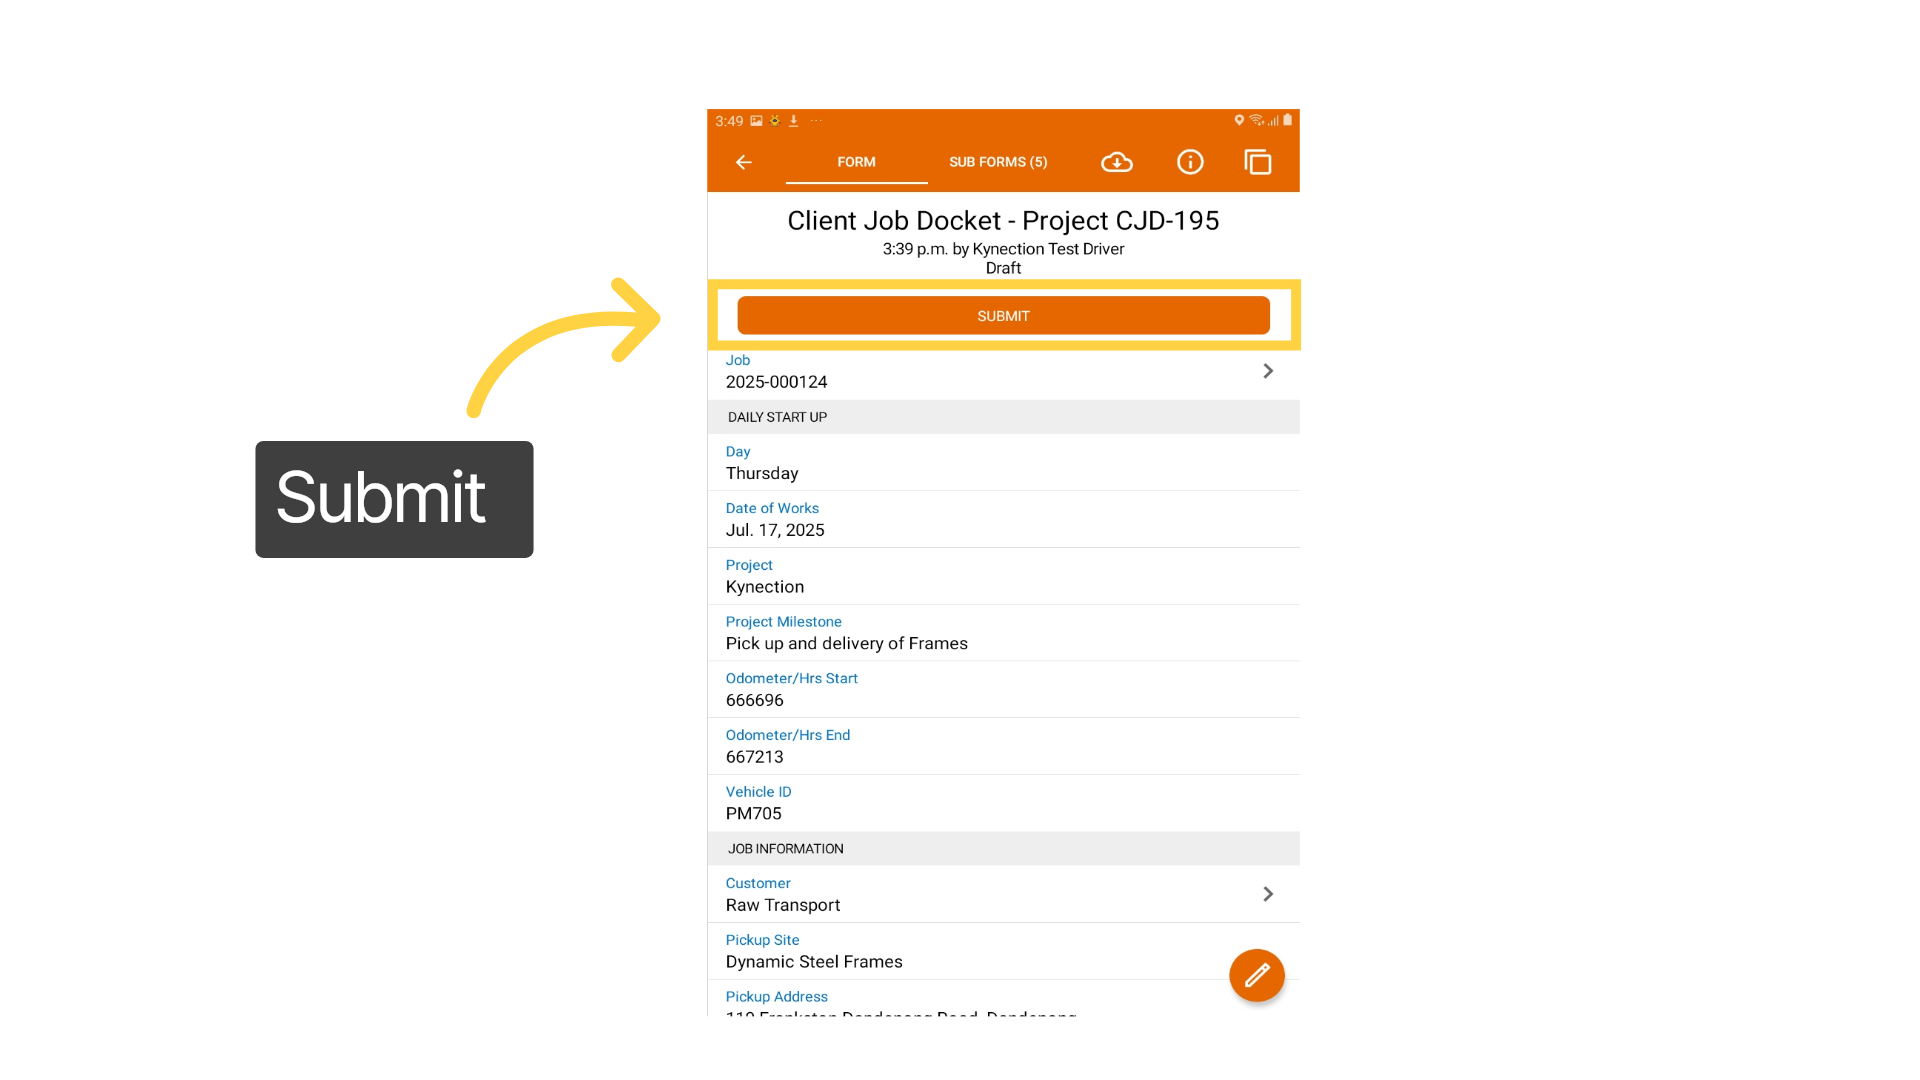
To progress to the next step in the workflow, forms need to be submitted, or, if accidentally created, deleted. This final step sends captured data back to the office. Tap OK.
24. Finish Drive
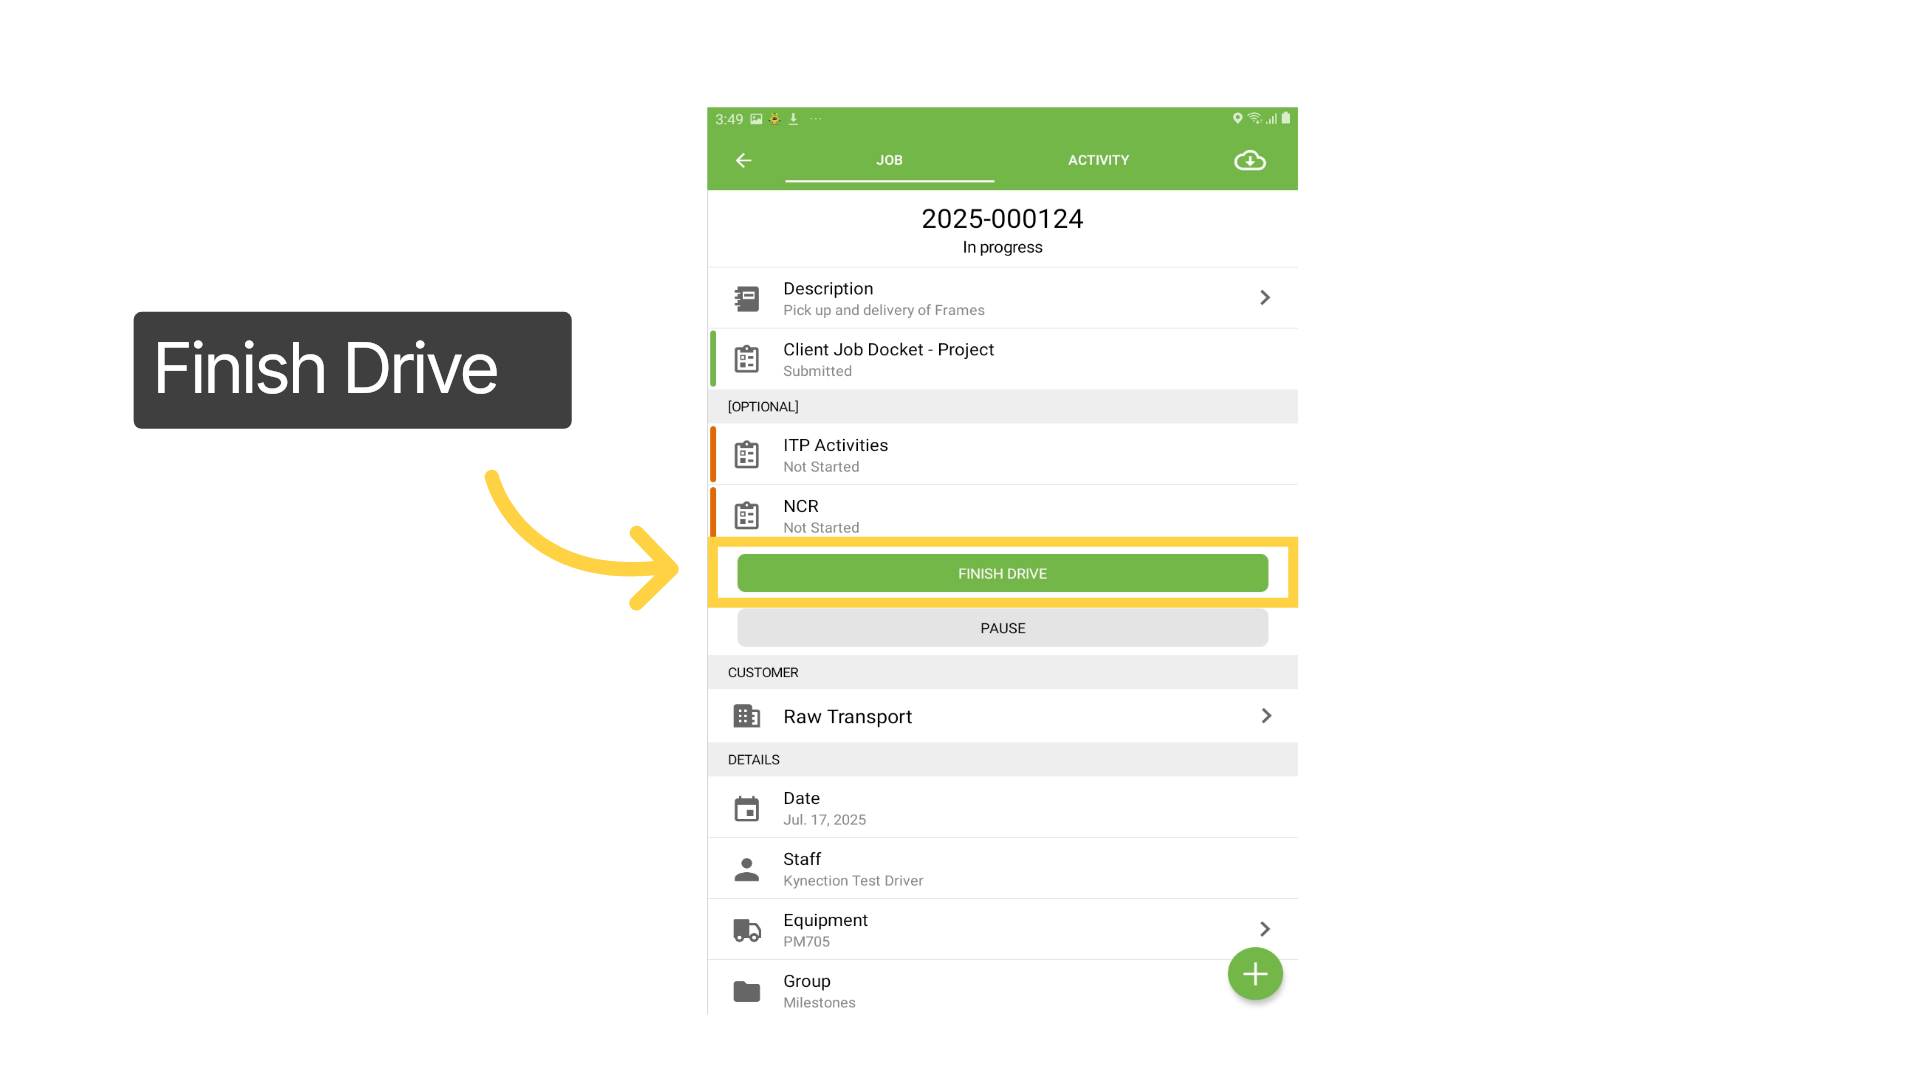
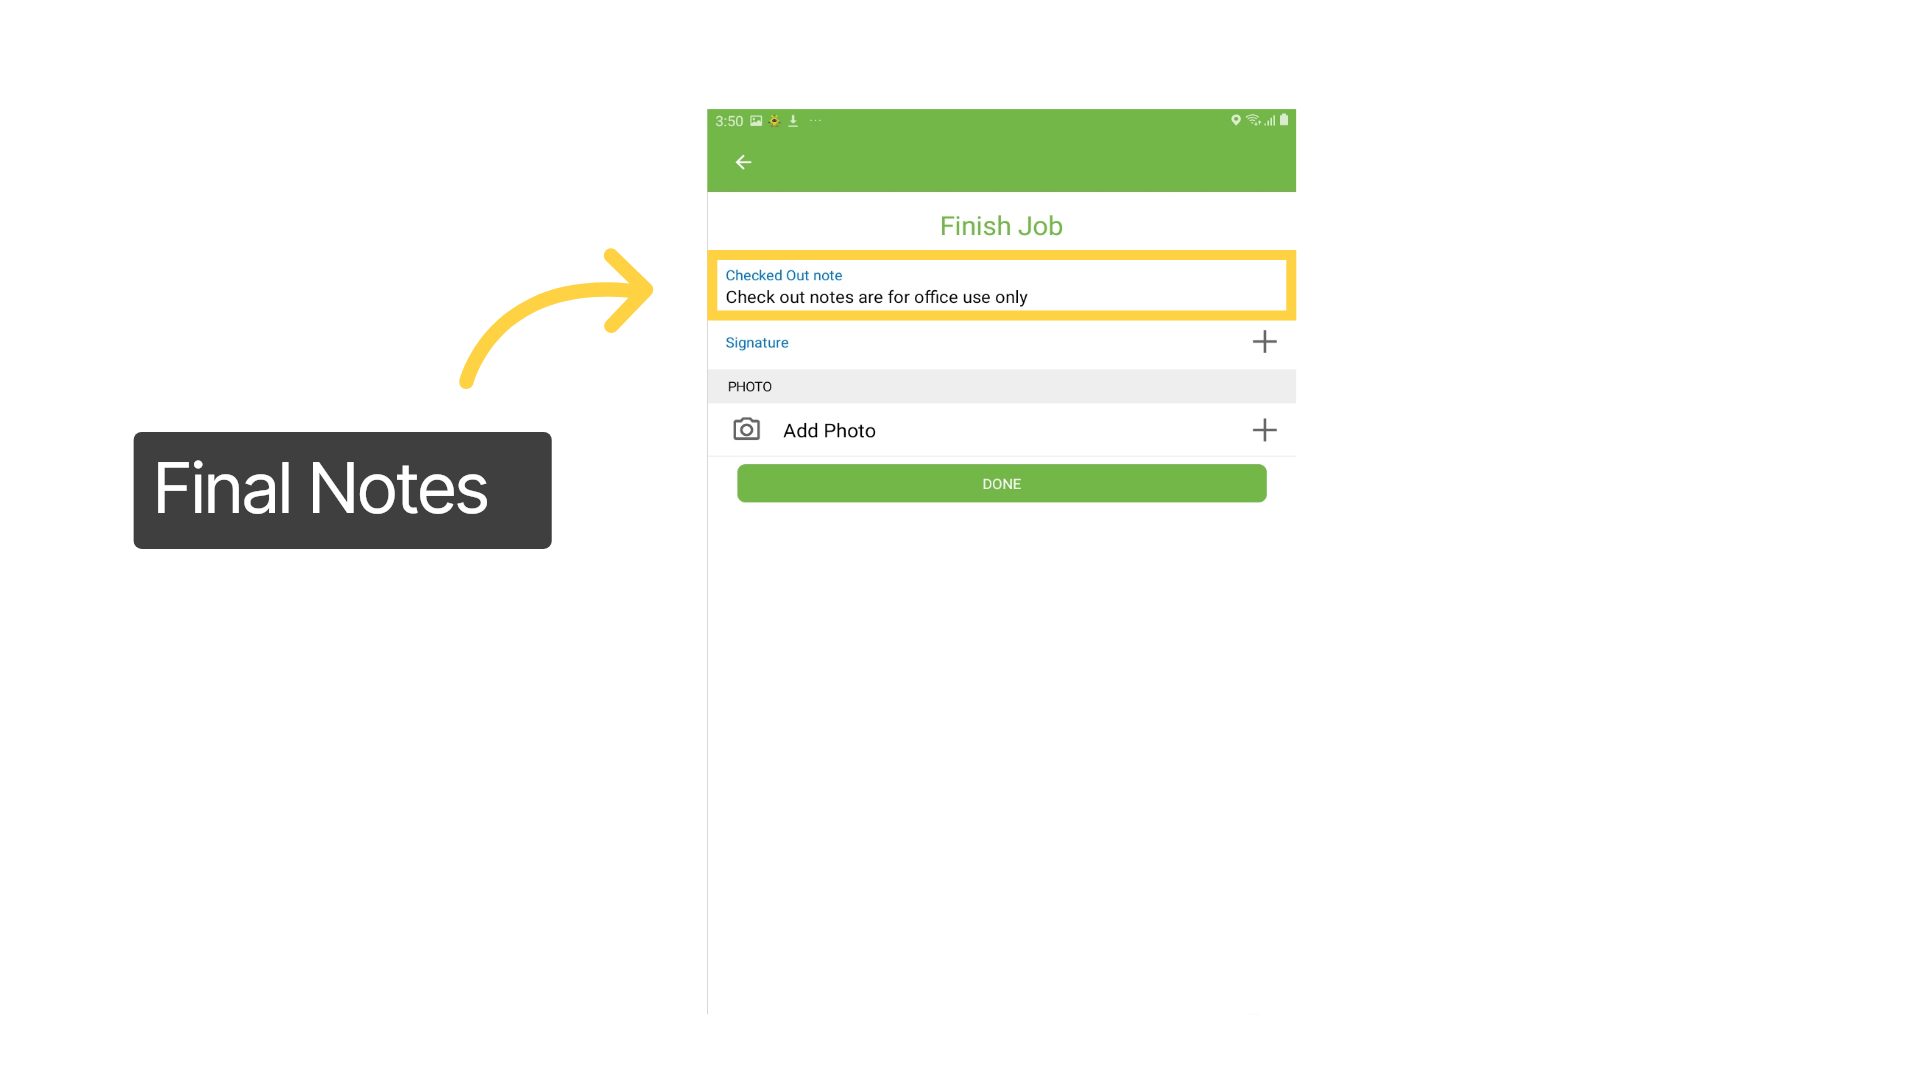
Selecting Finish Drive indicates your return to the depot. Before completing the job you have an option to record notes that are for internal purposes only, found on the Finish Job Screen.
25. Finish Job
Add your signature to the job and upload a photo if required. Ensure all data has been captured and then select Done.
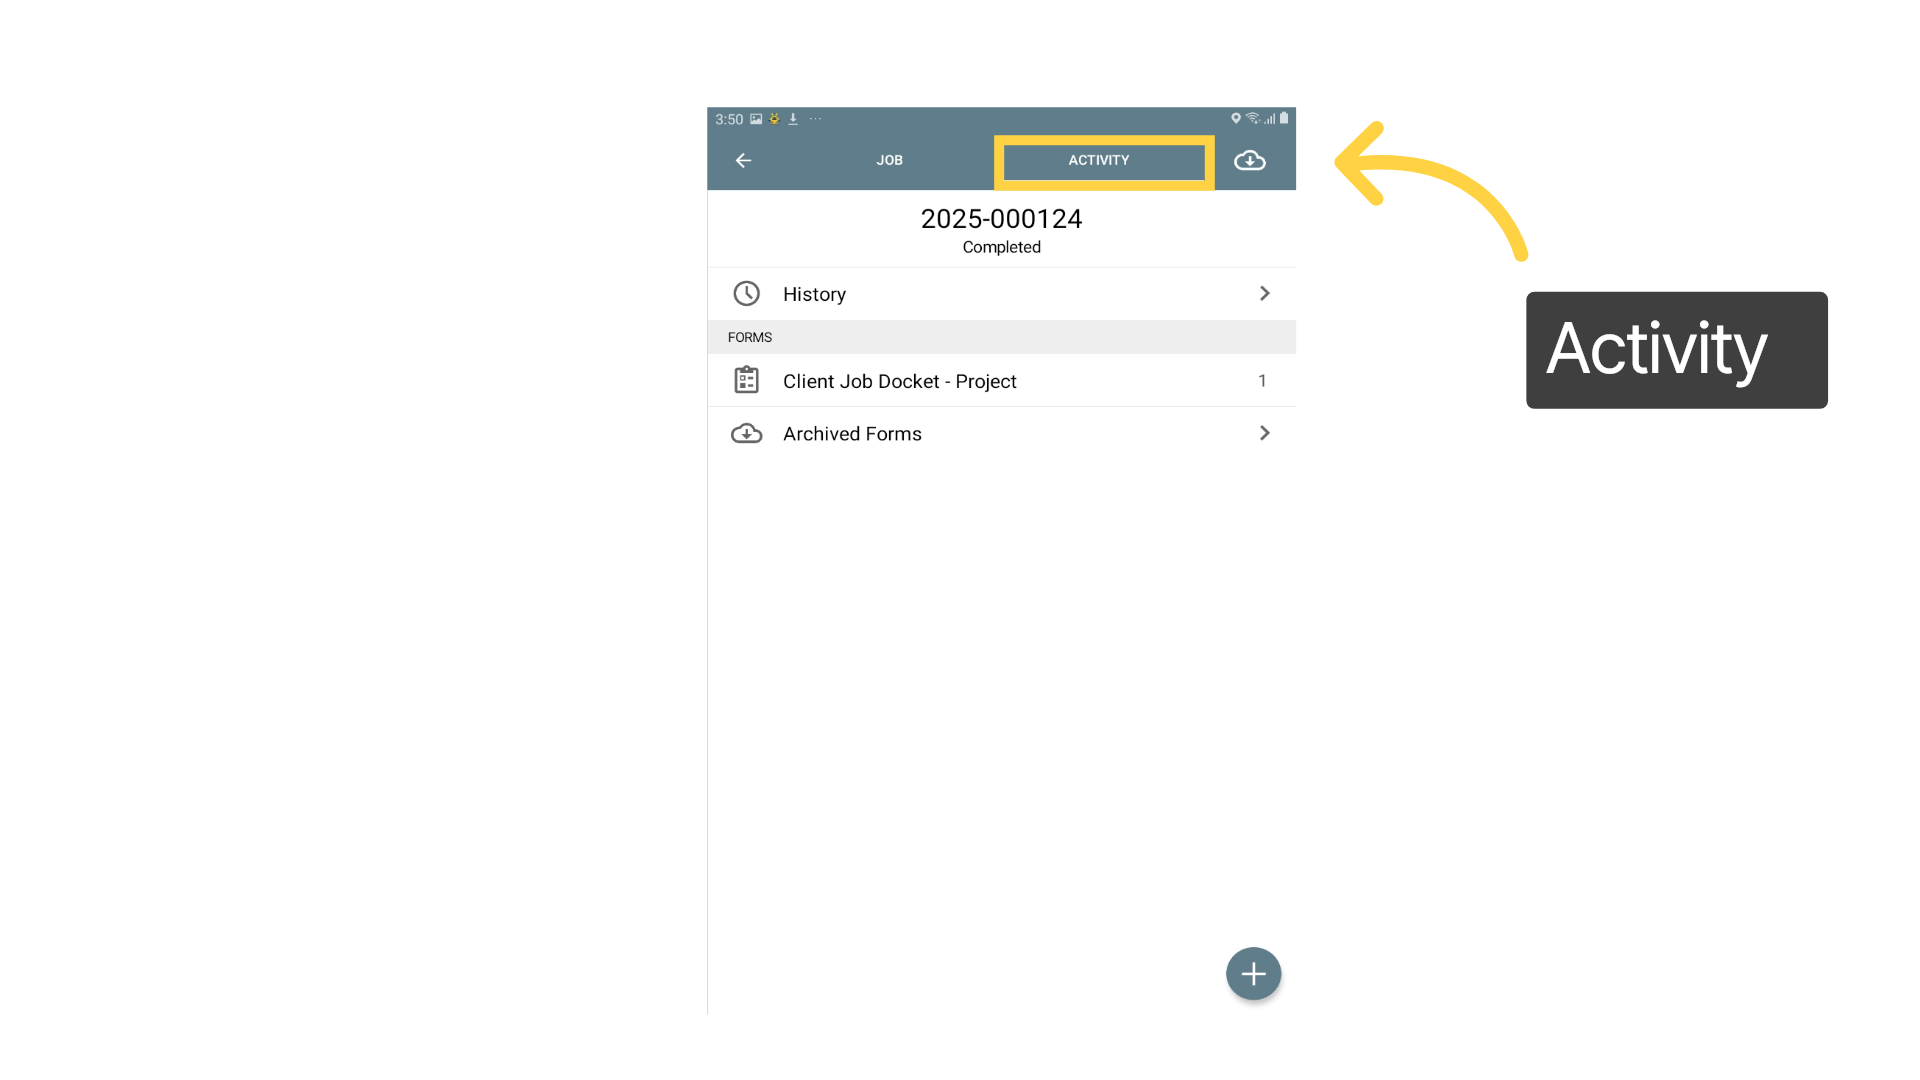
26. Completed Job
This job will now be listed in the Completed Jobs Folder. The activity tab on completed jobs stores associated sub-forms.
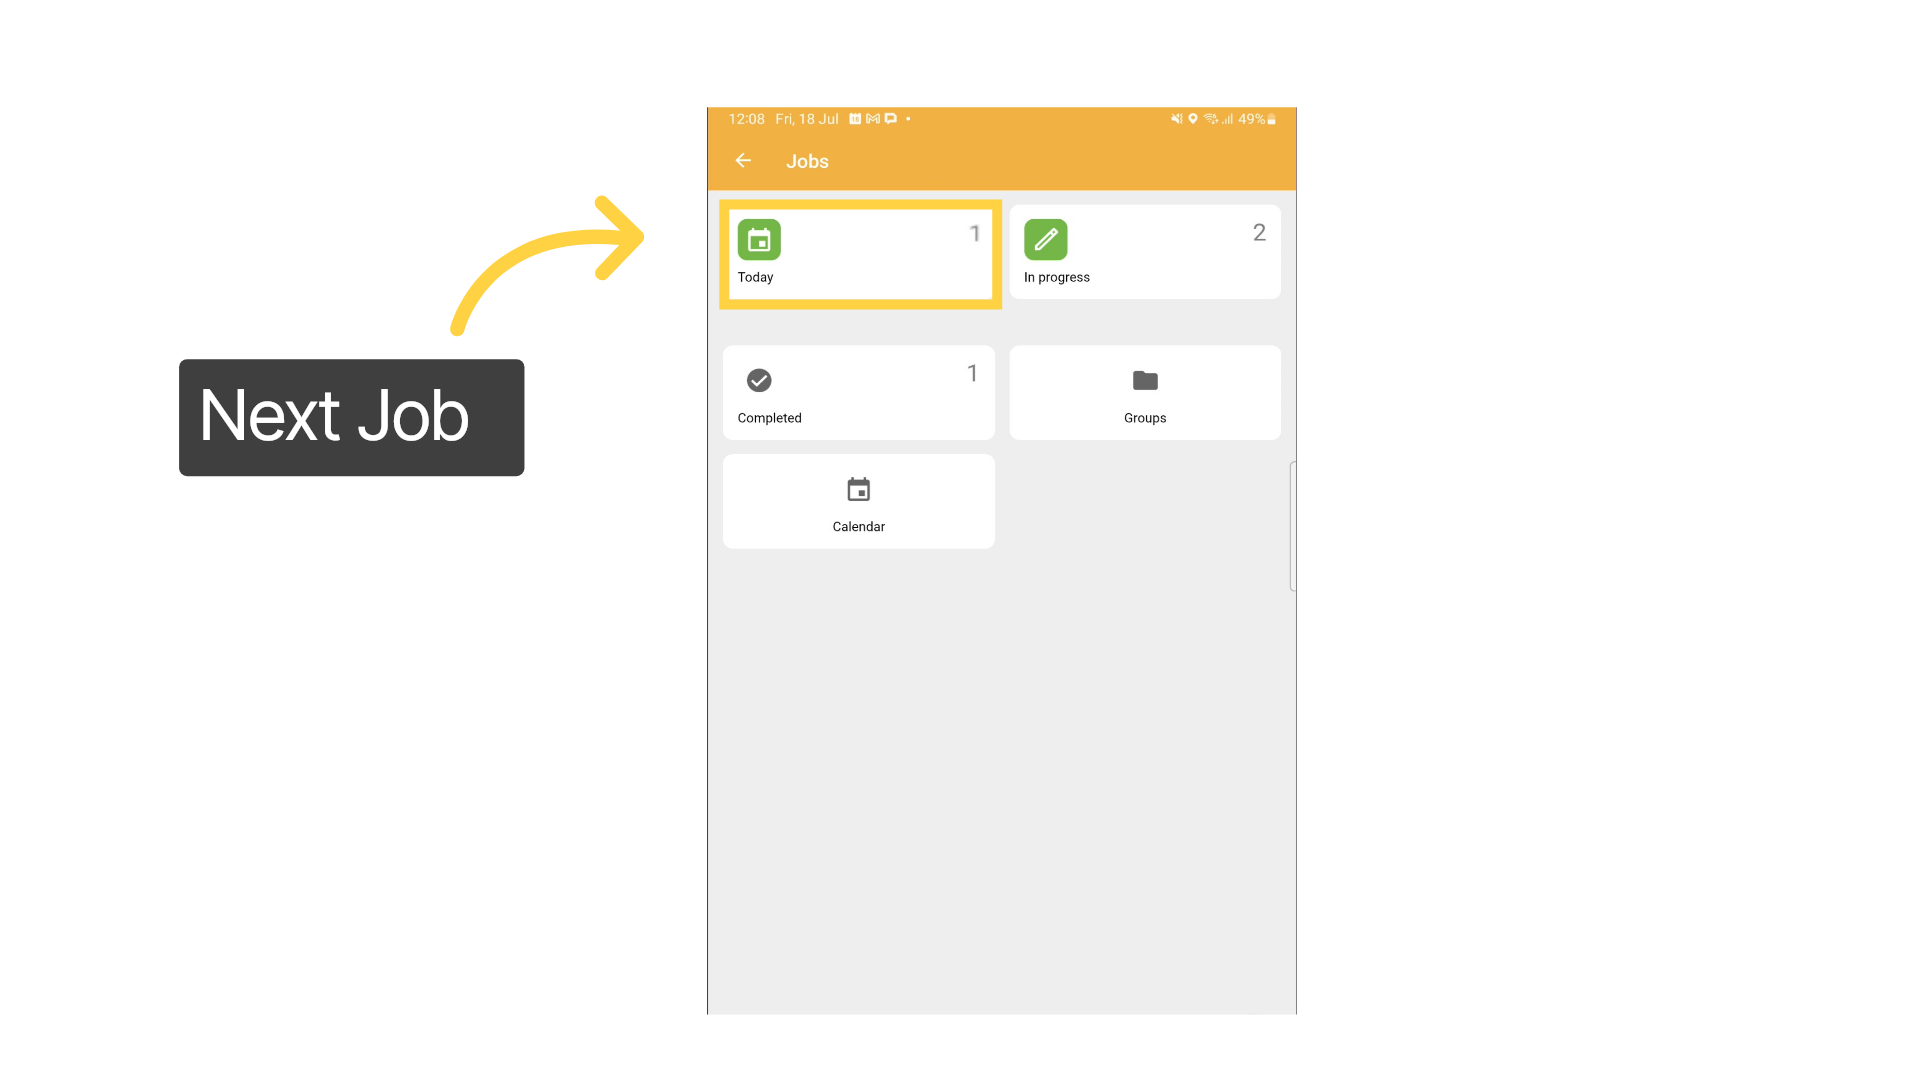
27. Next Job
Return to the home dashboard using the back arrow, and then select View Jobs to start your next allocated job.
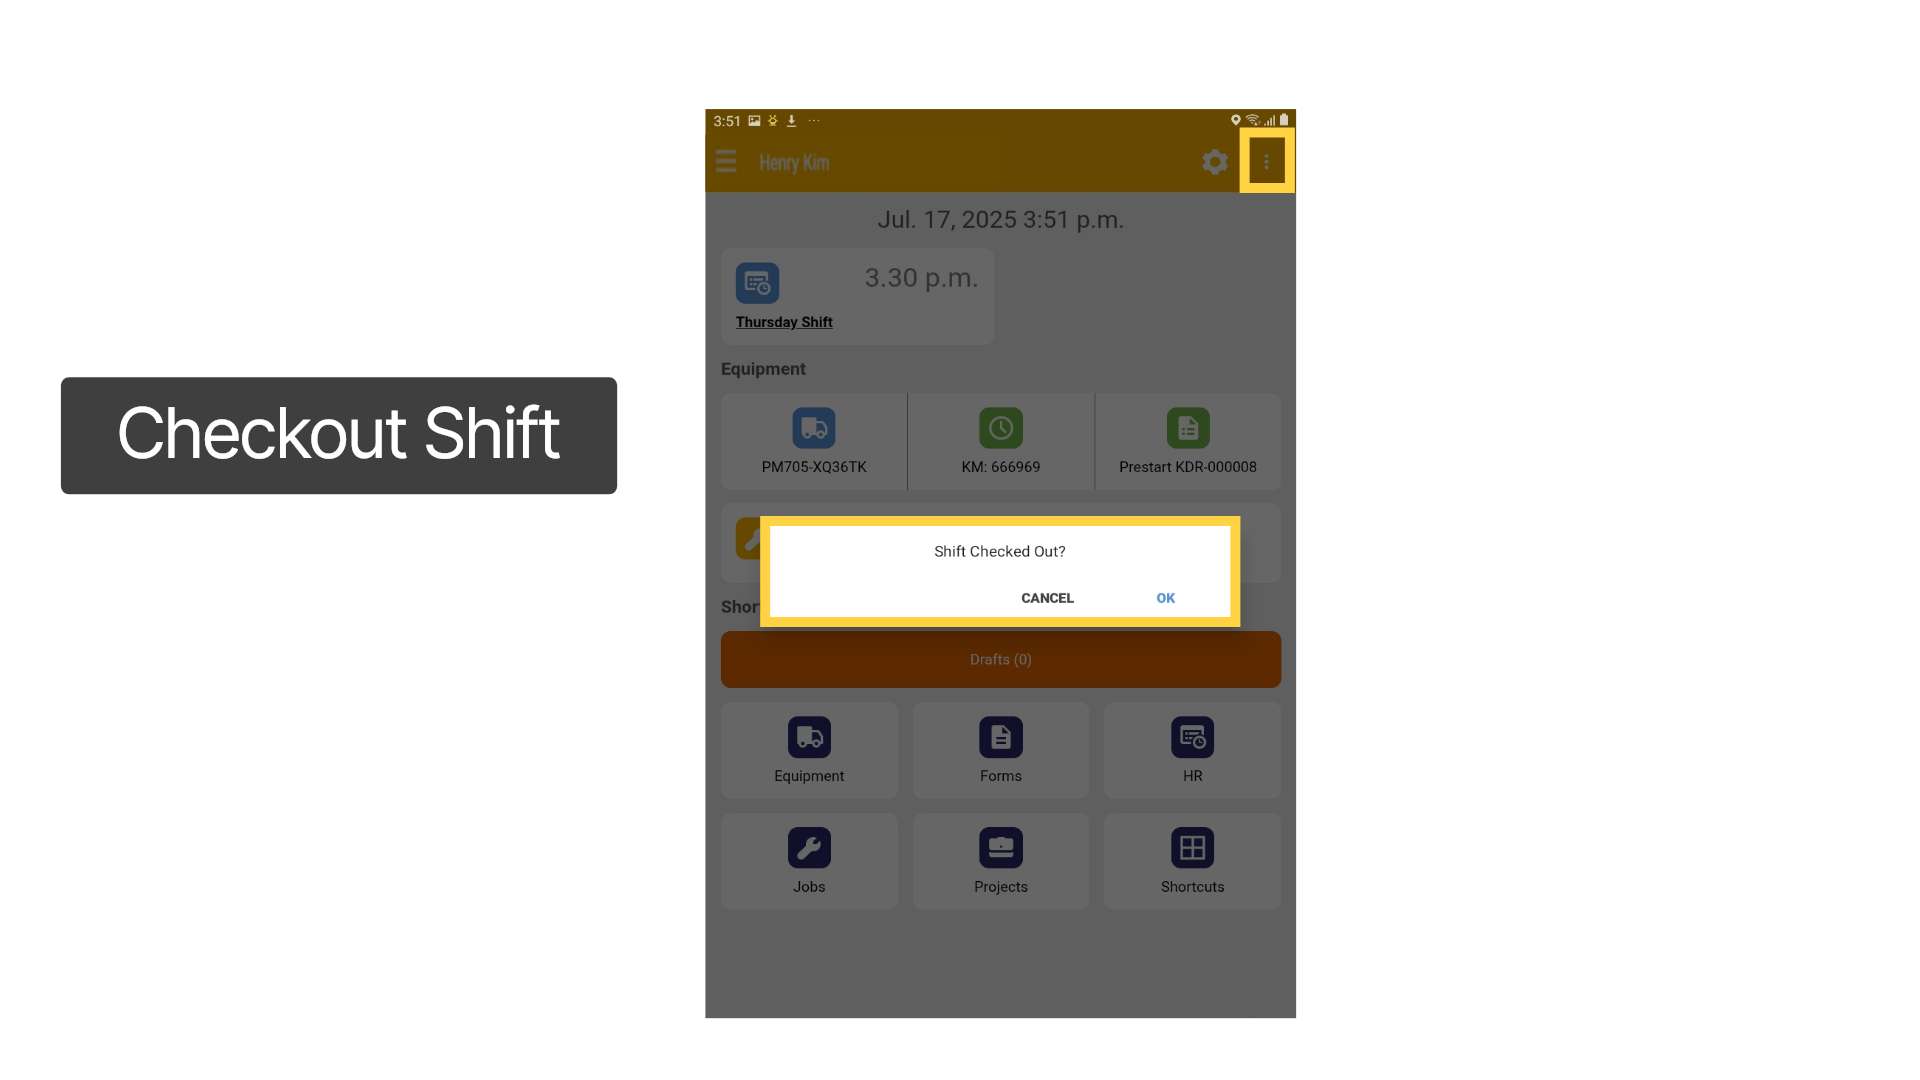
28. Checkout Shift
To clock out at the end of your shift on an Android device, tap the 3 dots at the top right of the screen, then select Sign out Shift. For Apple devices use the Checkout Shift located at the bottom left of the screen.
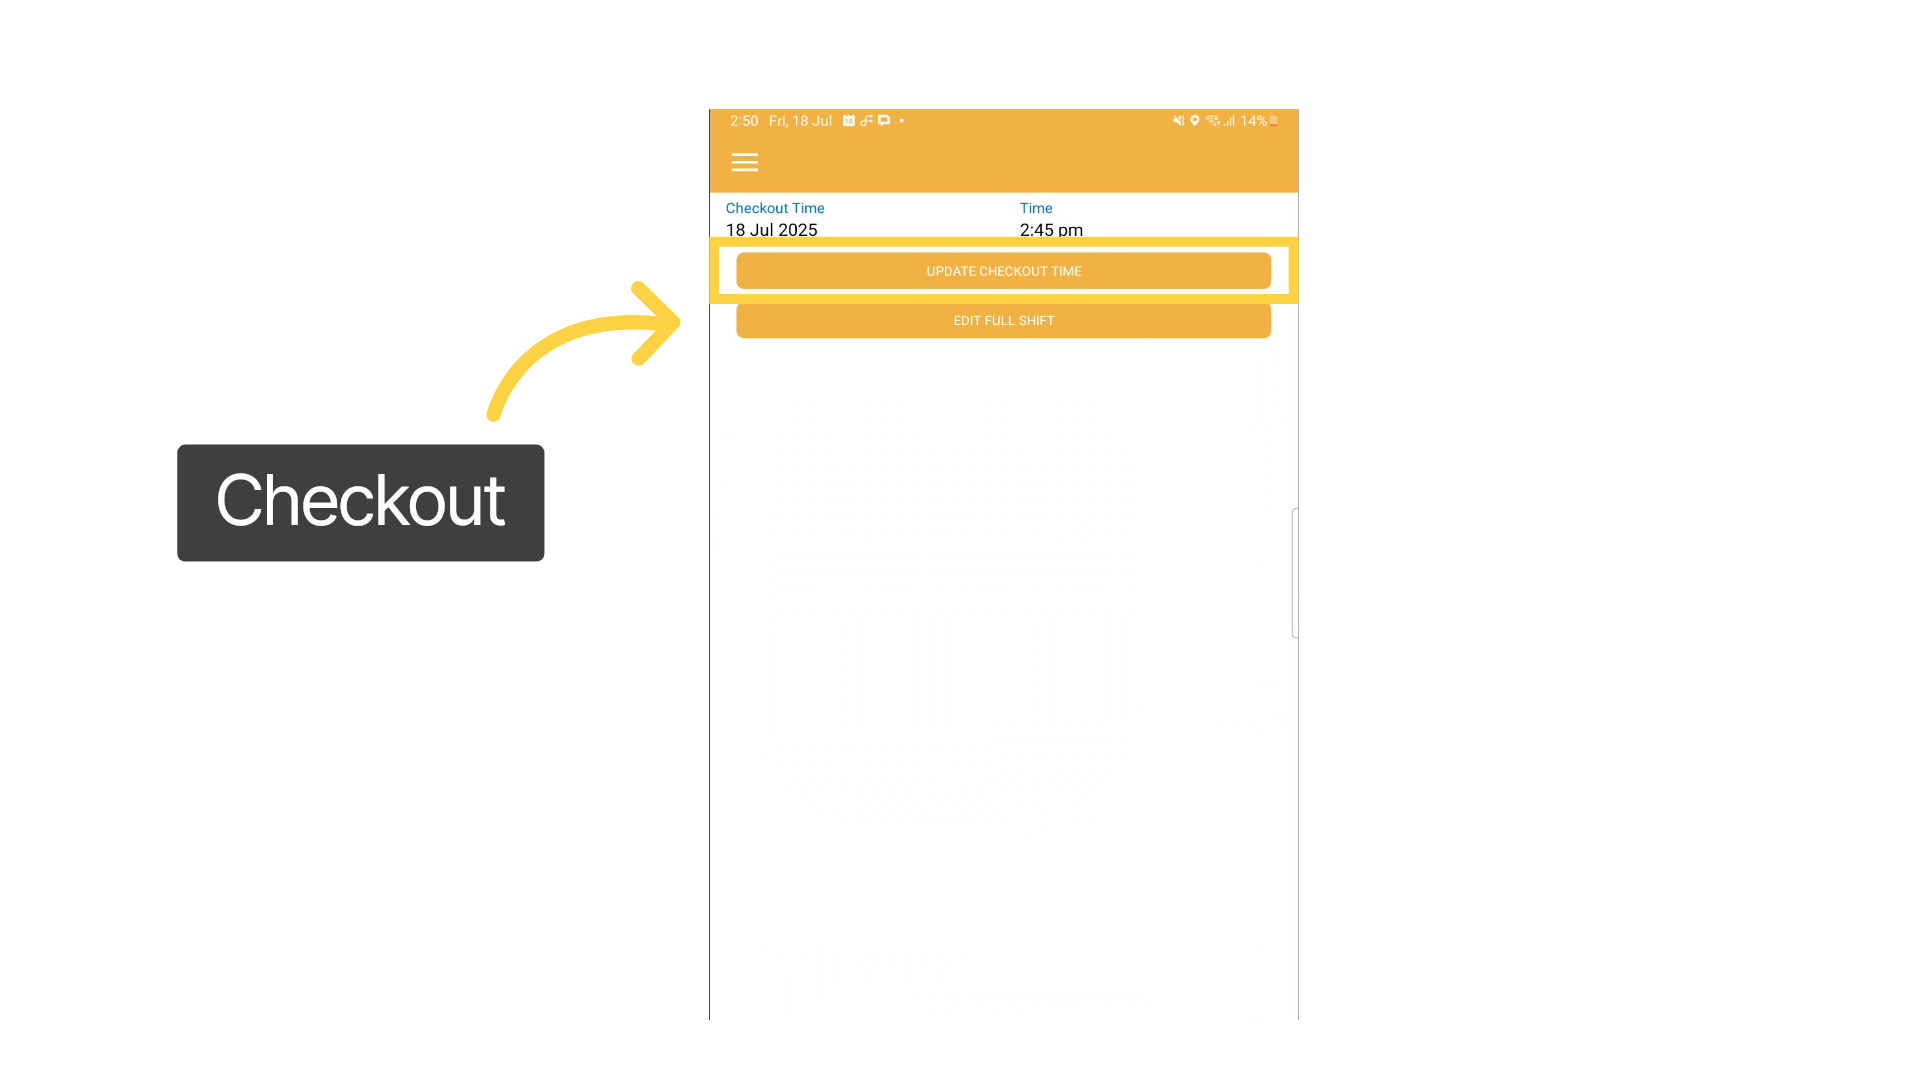
29. Clock Out
If you need to make changes to your shift times, select Edit Full Shift. Otherwise select Update Checkout Time to clock out.
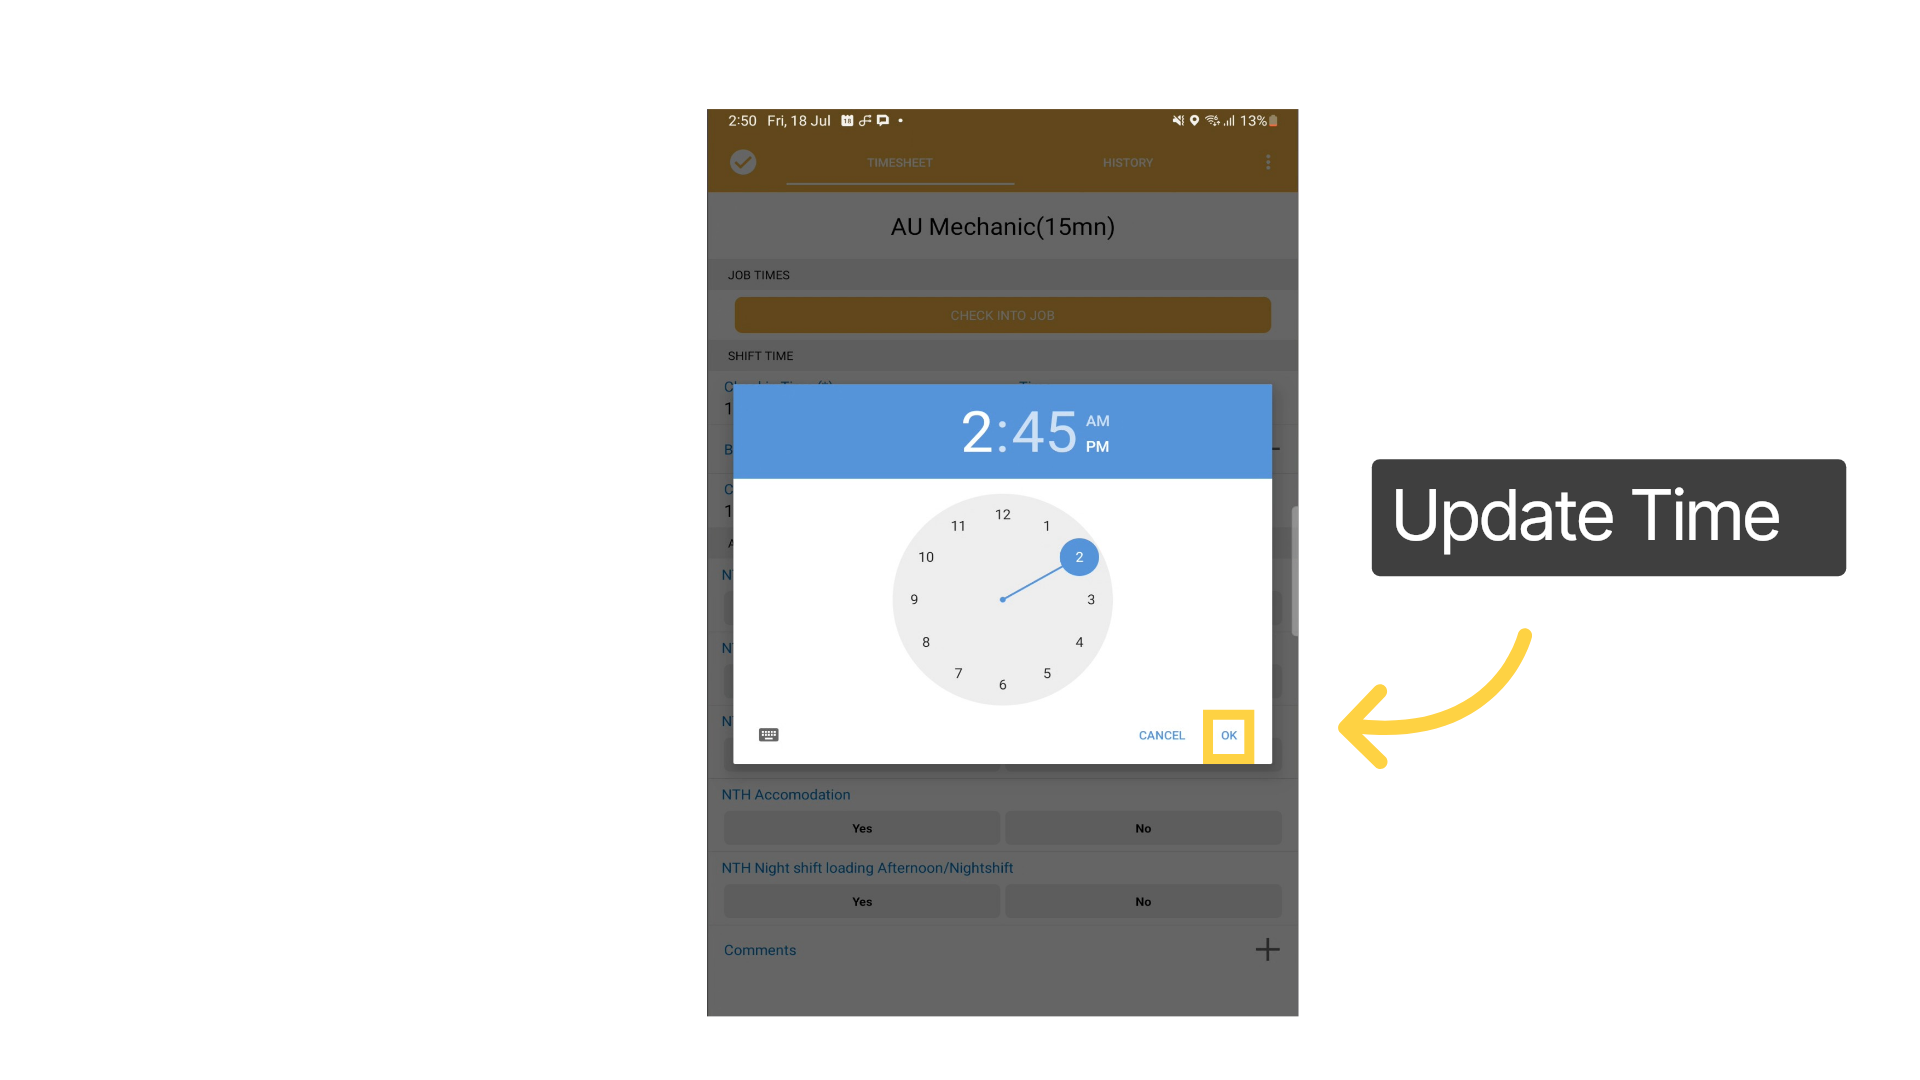
30. Edit Shift Times
Click the time to Edit, ensure the AM and PM is correct, then tap OK to confirm. Select the tick icon to save the changes and then proceed to Update Checkout Time to clock out.
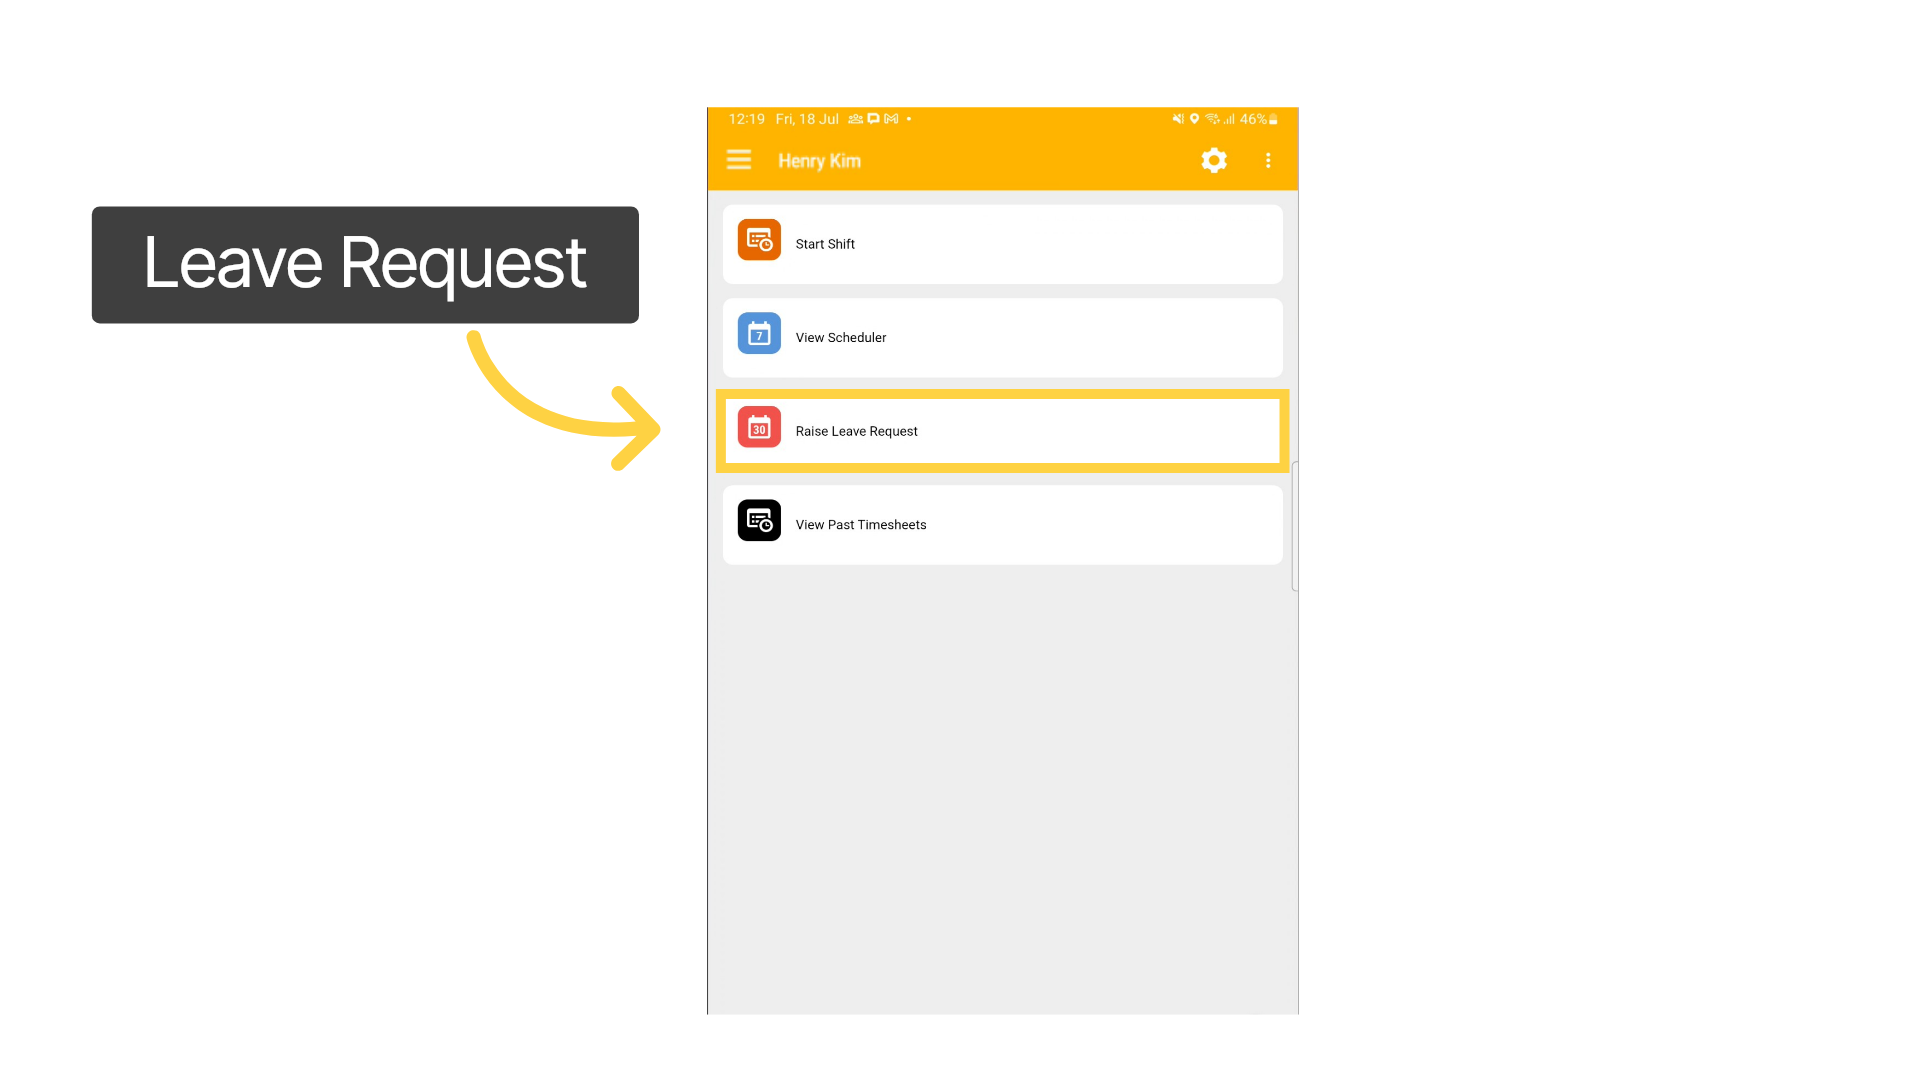
31. Raise Leave Request
Once you have clocked off, you will return to the Shift Start screen, ready for your next shift. From this screen you can request leave without starting shift by selecting the Raise Leave Request button.
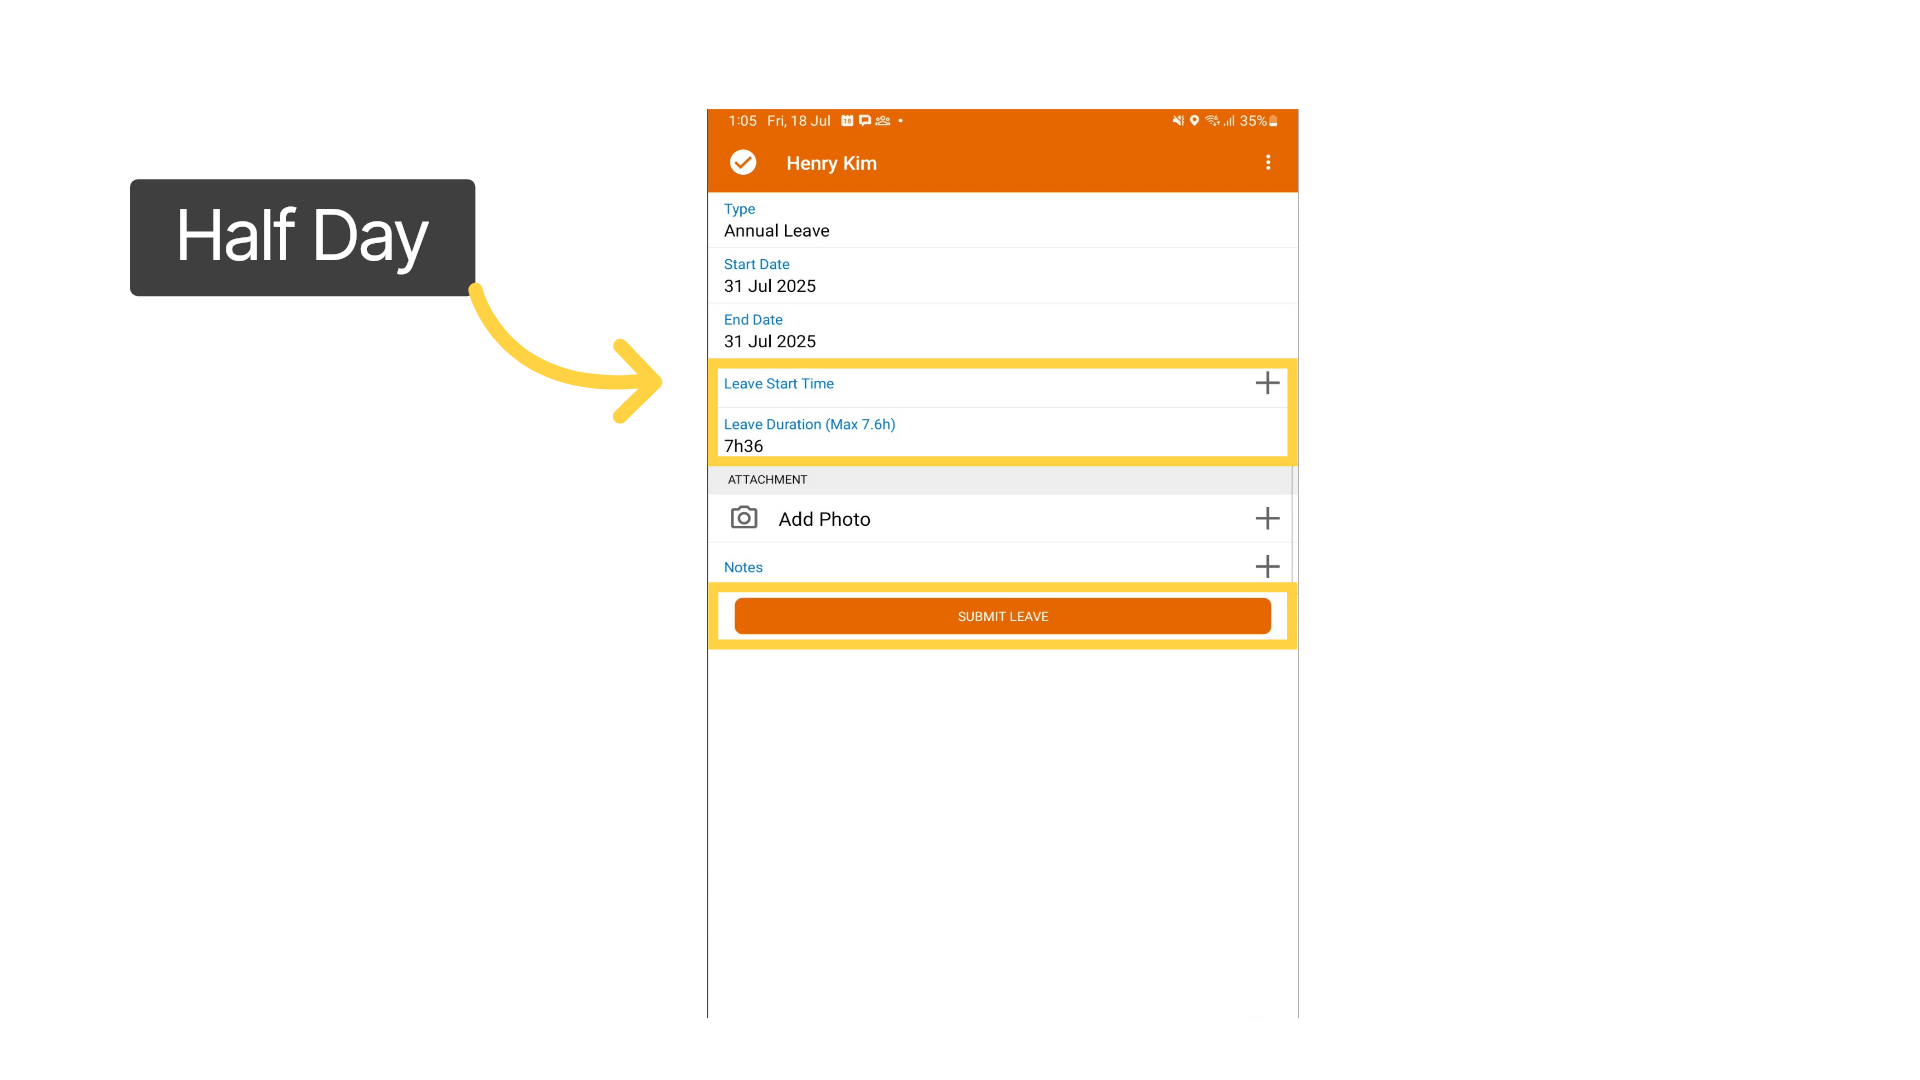
32. Submit Leave Request
Start by choosing the leave type from the drop-down list and adding the start and end dates. Use the start time and duration for half-day leave; otherwise, hours default to your EBA. Add a photo of a medical certificate if required, some notes and then Submit Leave for approval. Use the back arrow at the top to return to the home page.
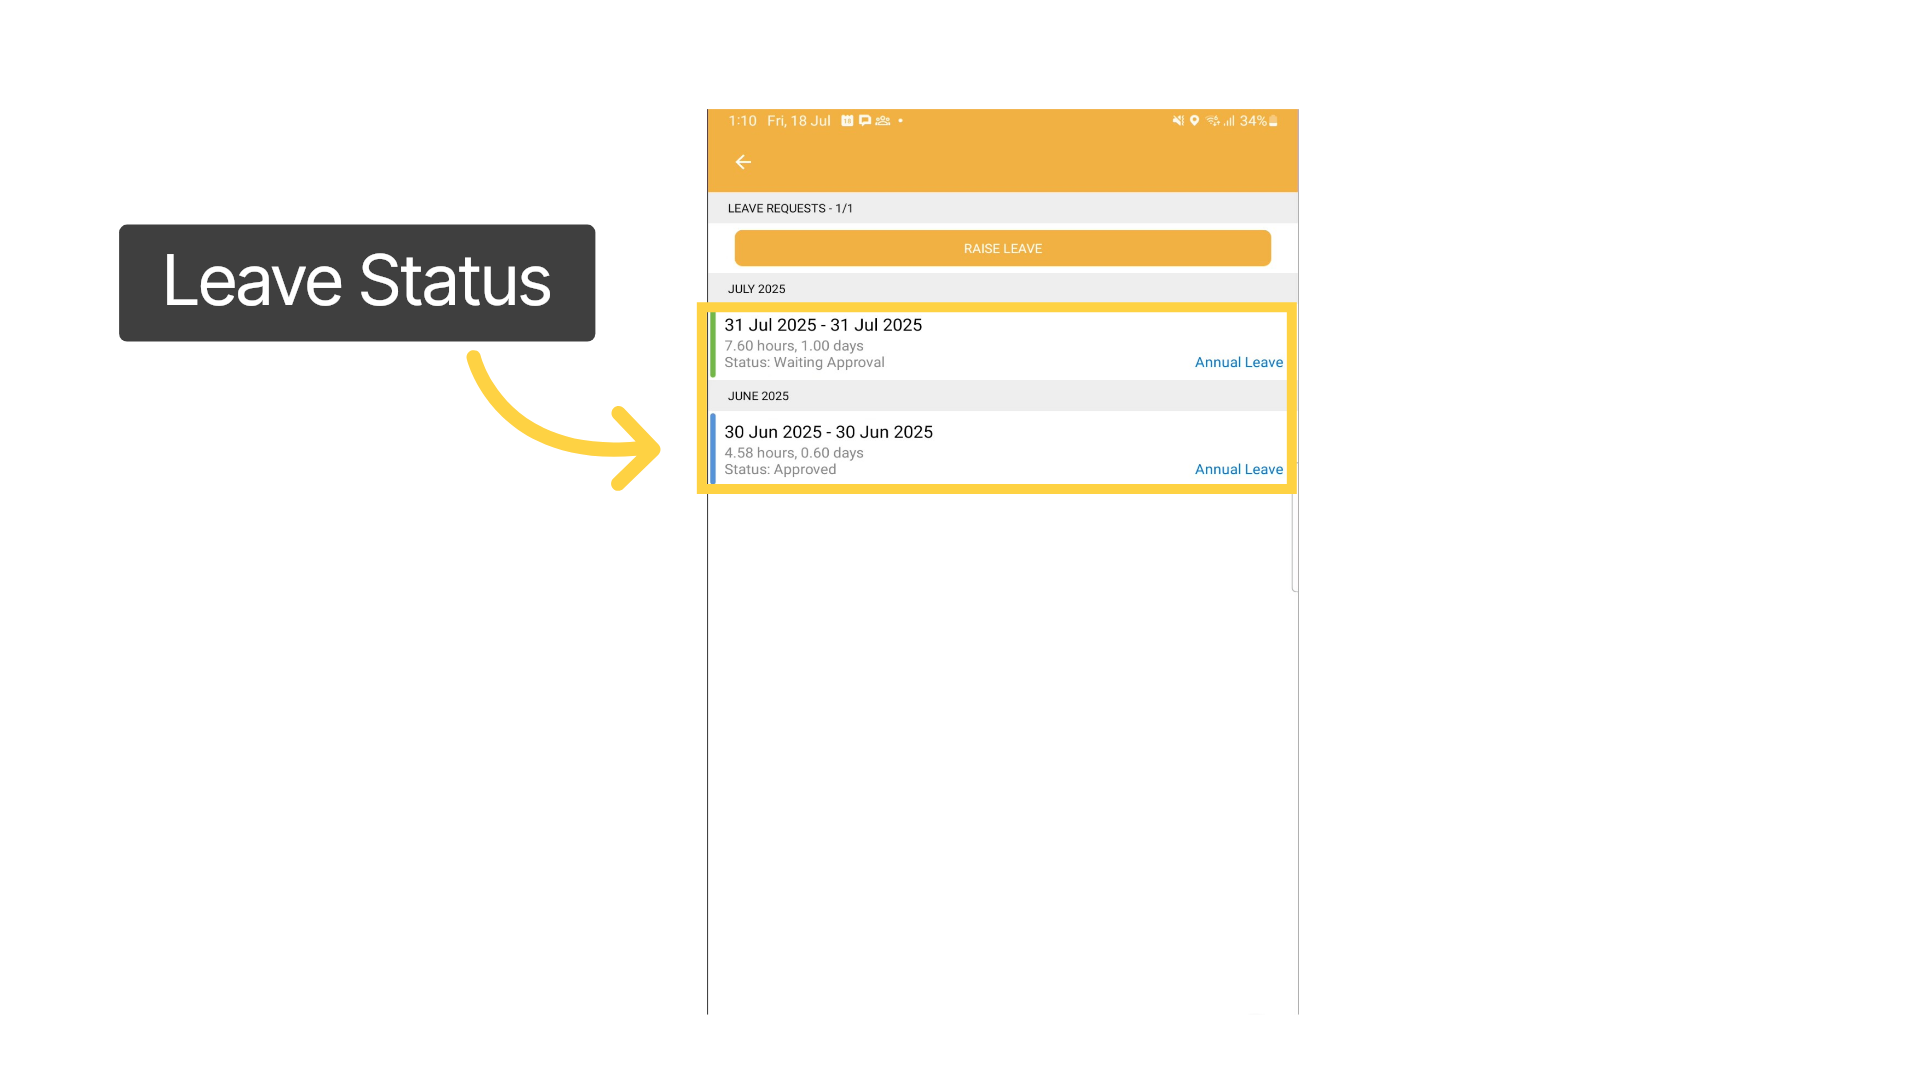
33. Leave Status
The Leave Request section and will show the status of your submitted leave as it goes through the approval process.
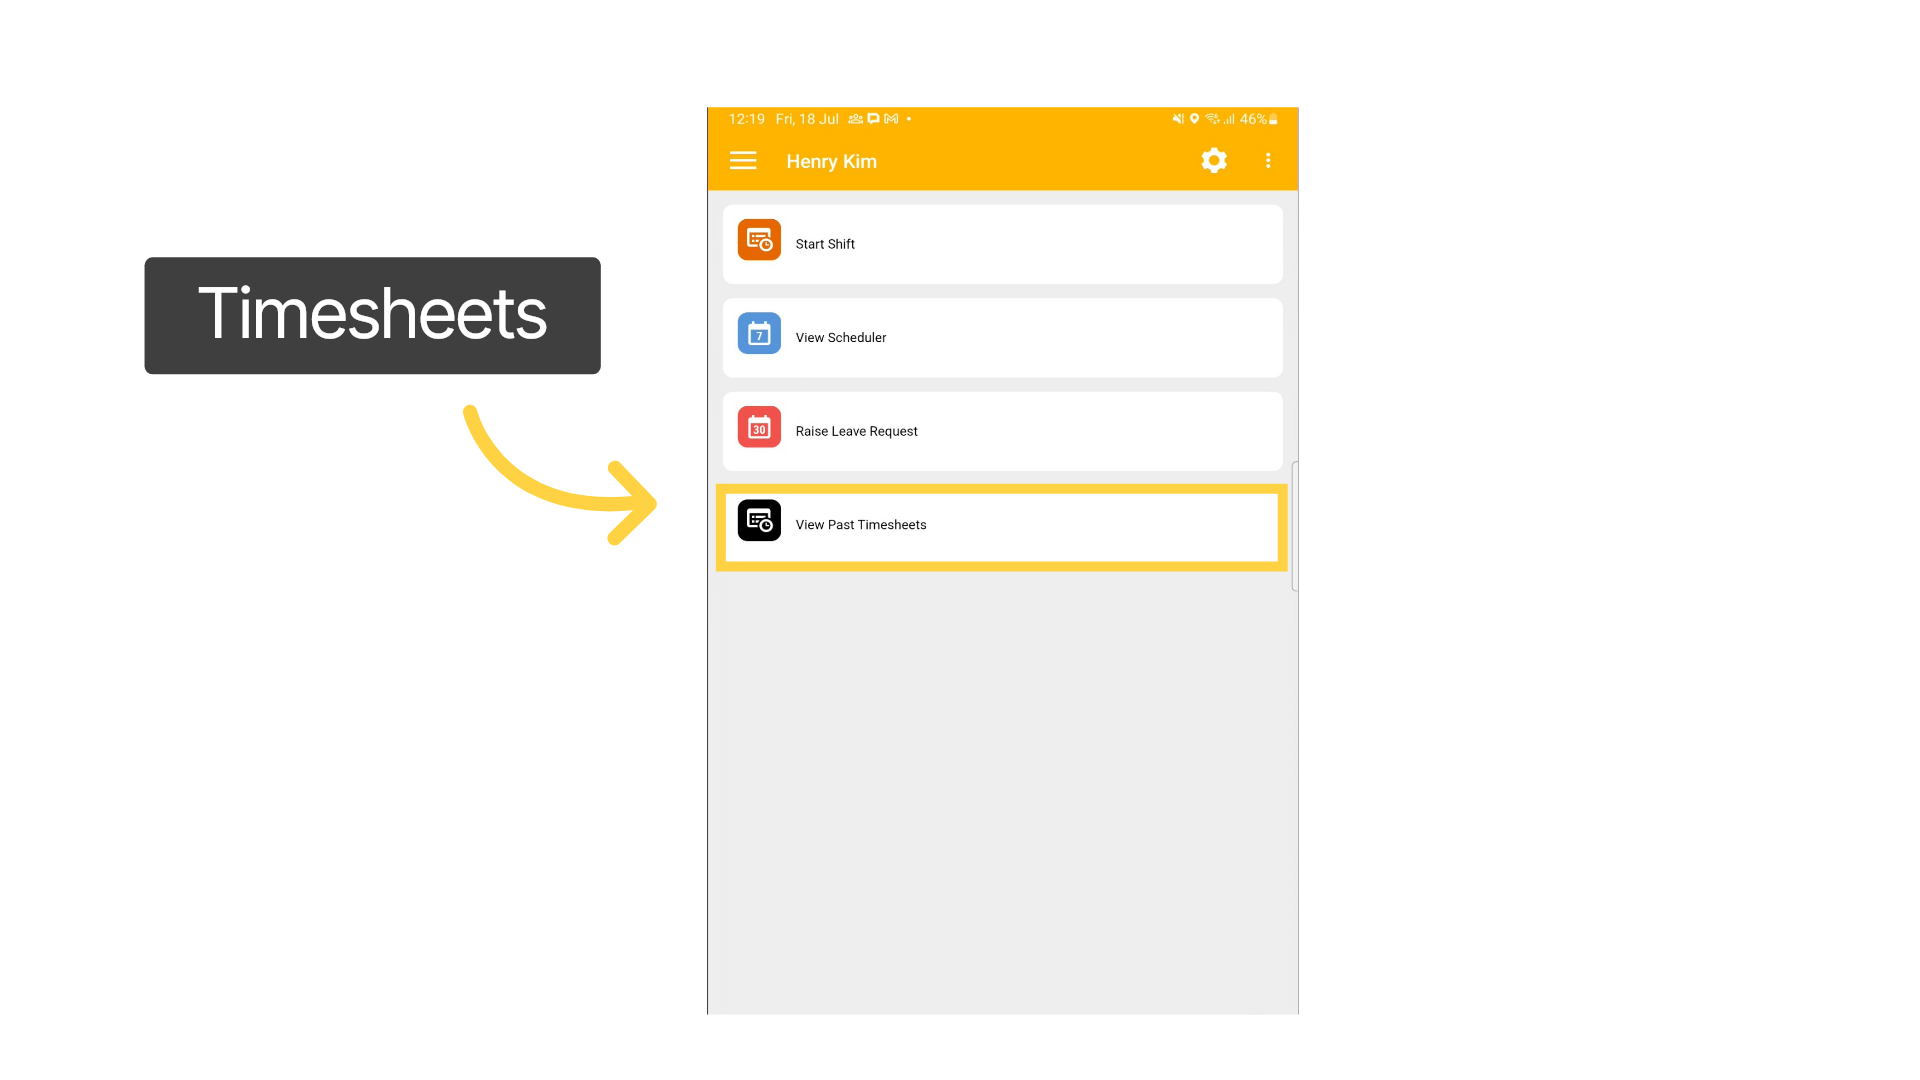
34. Timesheets
Your submitted timesheets can be viewed from the Start Shift Screen when you're not clocked in, or, if you are clocked in, from the HR module found at the bottom of your screen.
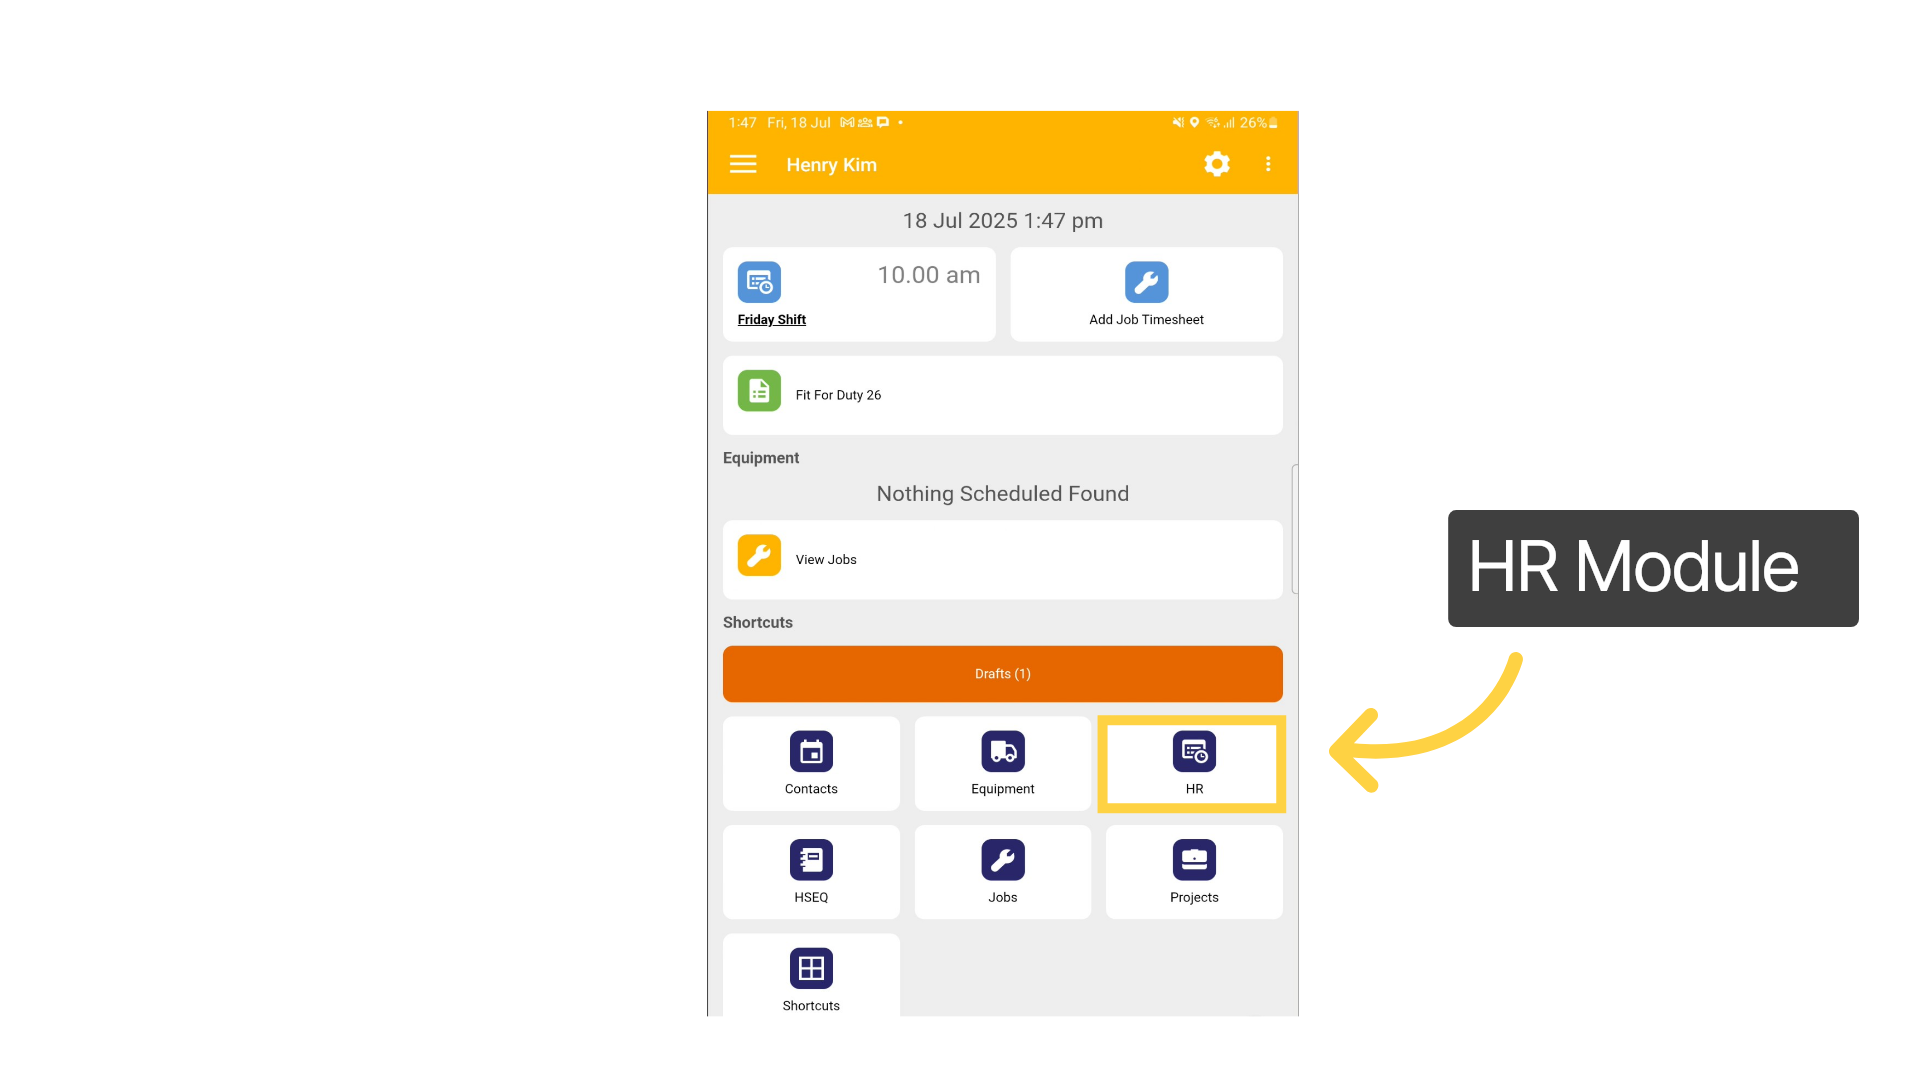
35. HR Module
While you are clocked into a shift, you can conveniently access leave requests and submitted timesheets by selecting the HR module from the start screen. At any point, you can easily navigate to the start screen using the back arrow.
This guide covered the mobile app job workflow, including how to raise leave certificates.

