1. Sales
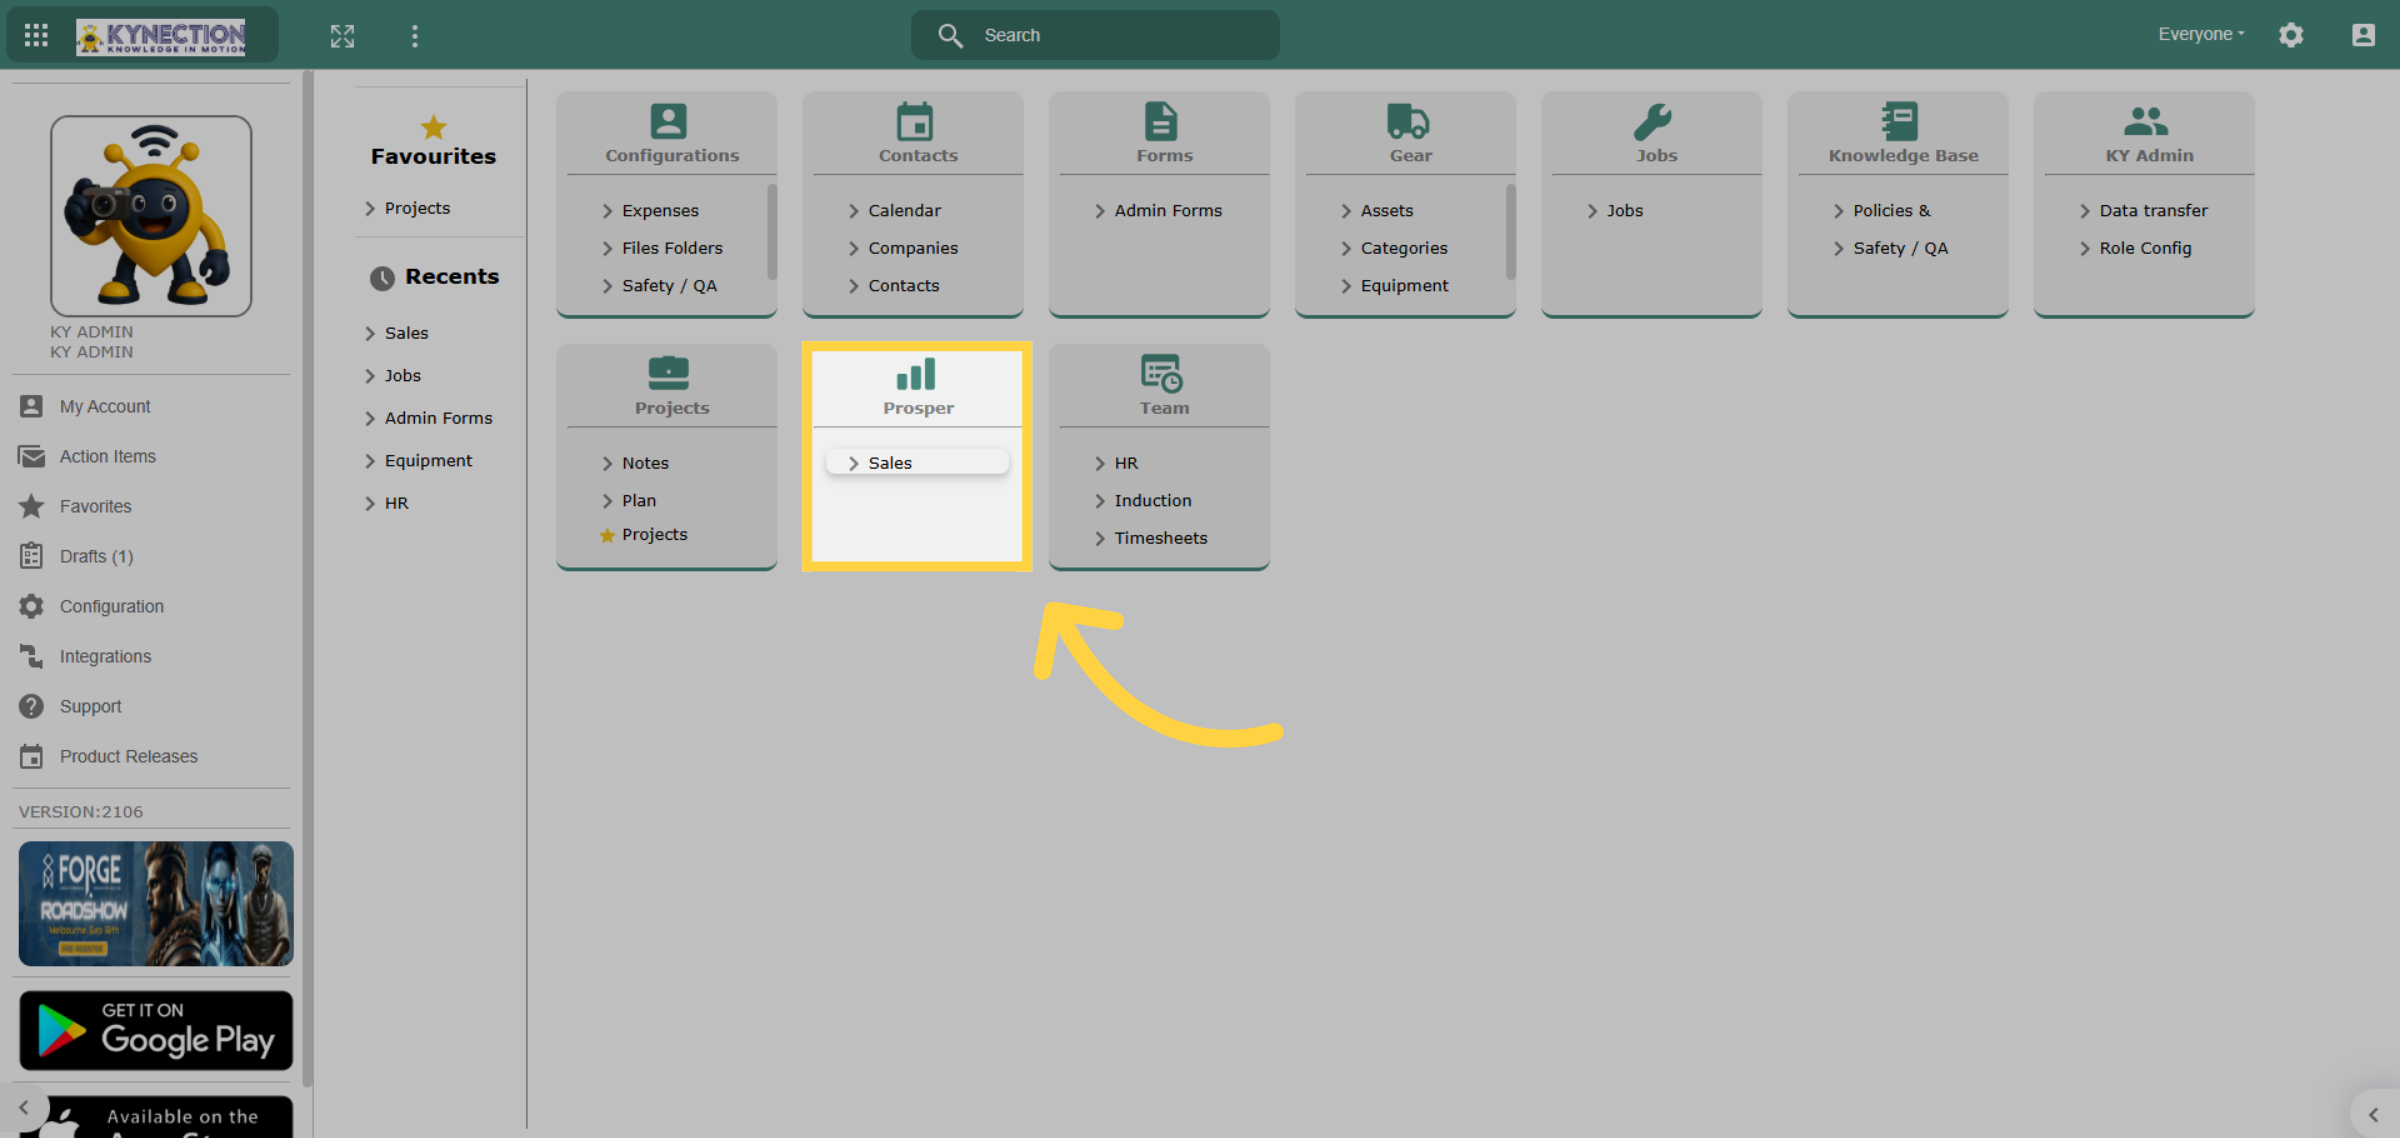
From the home dashboard, navigate to the Prosper module and select Sales.
2. Deals
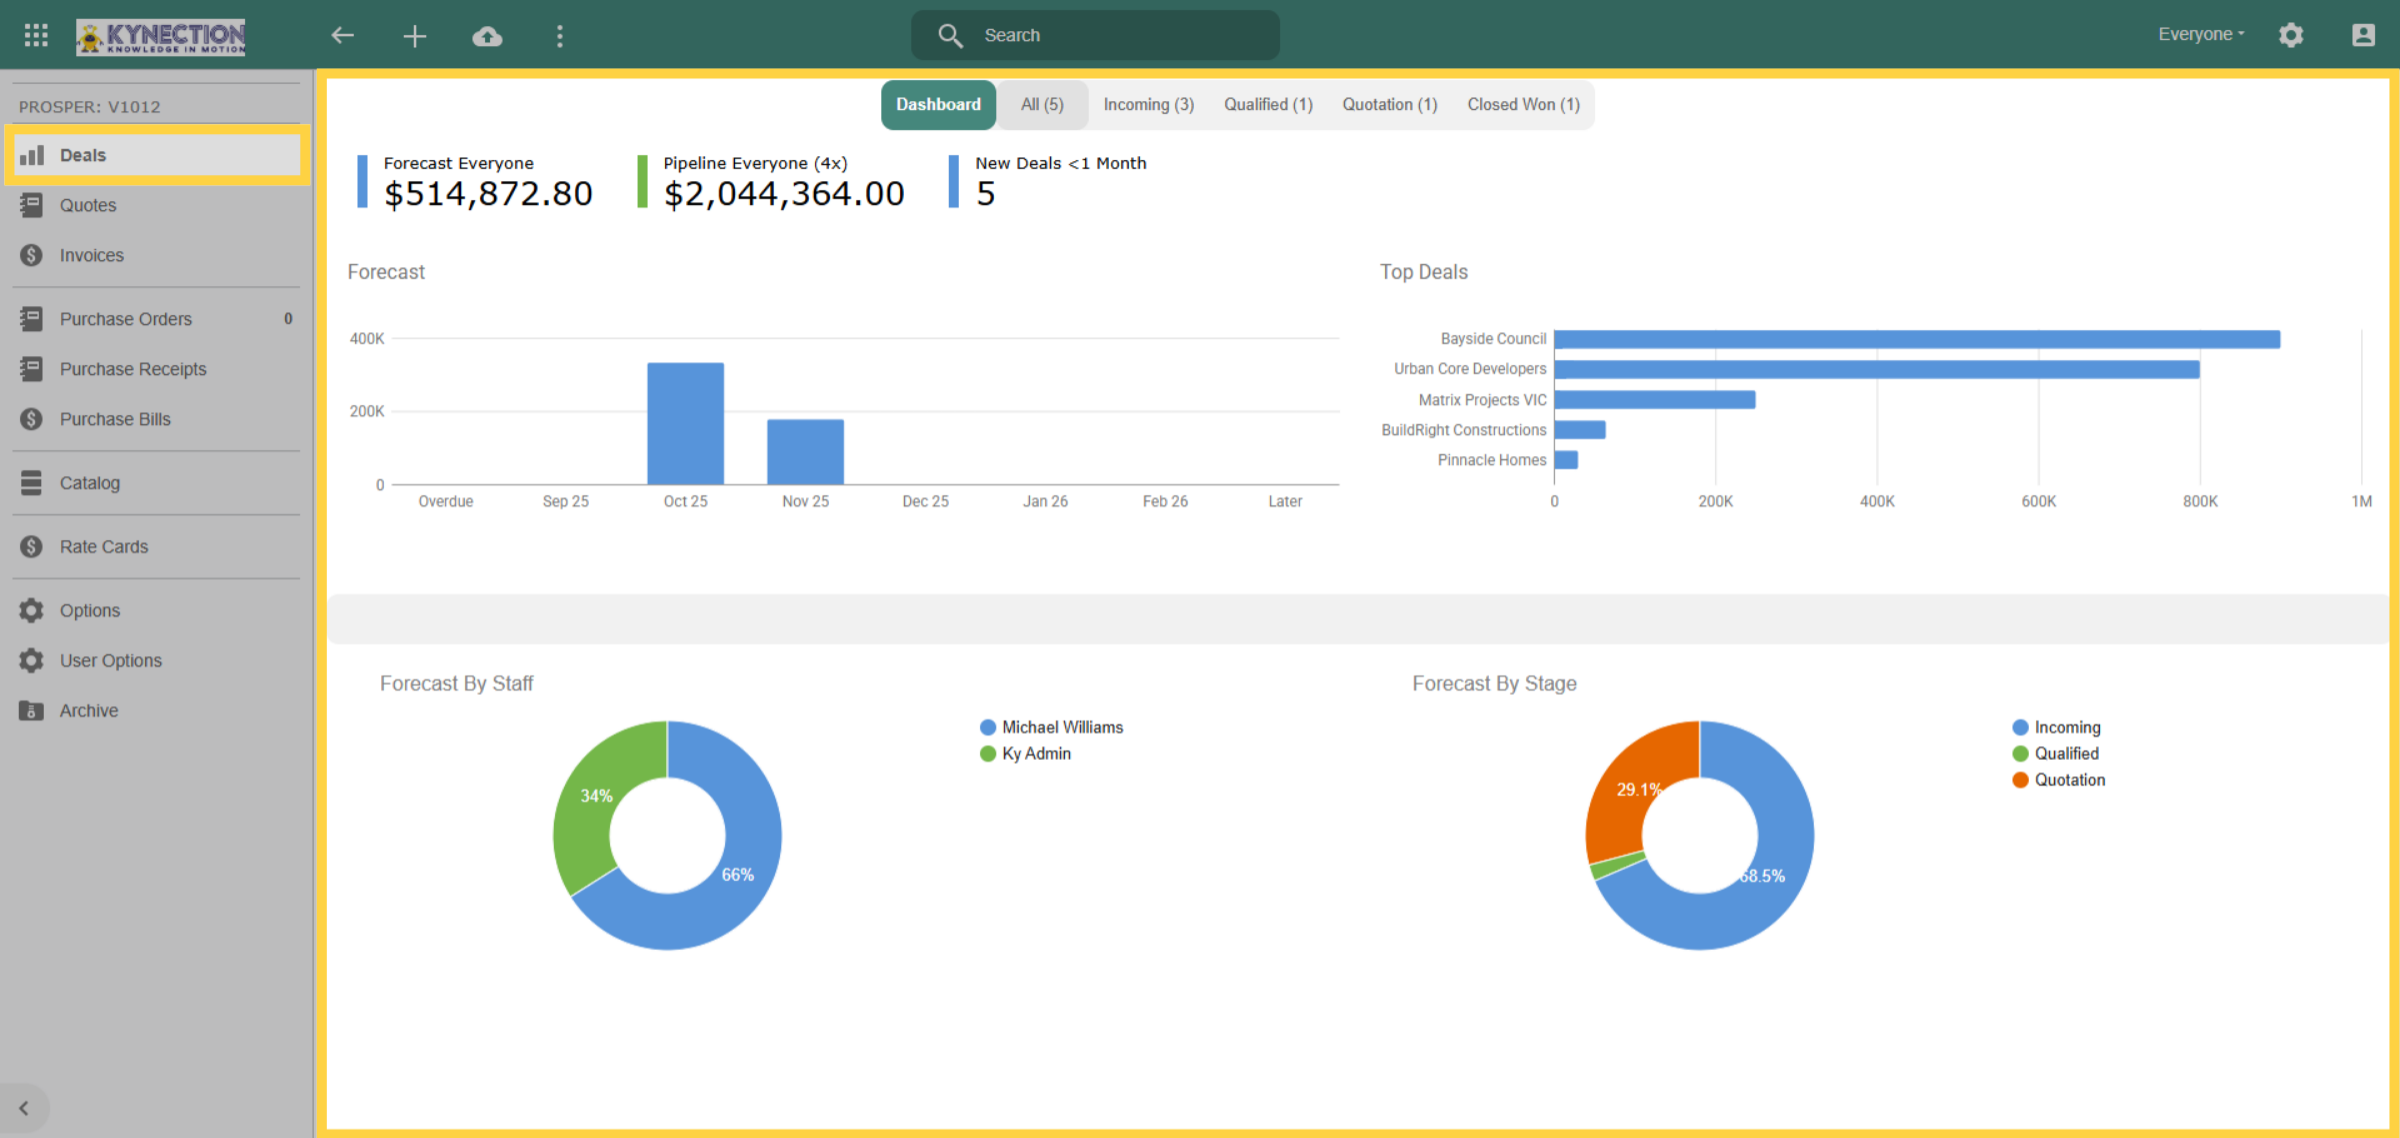
The Sales Module launches the Deals Dashboard, facilitating efficient management of tenders and quoted projects. This dashboard offers monthly forecasts, monitors the sales pipeline, and displays individual employee forecasts. Sub-tabs at the top categorie deals by their status..
3. New Deal
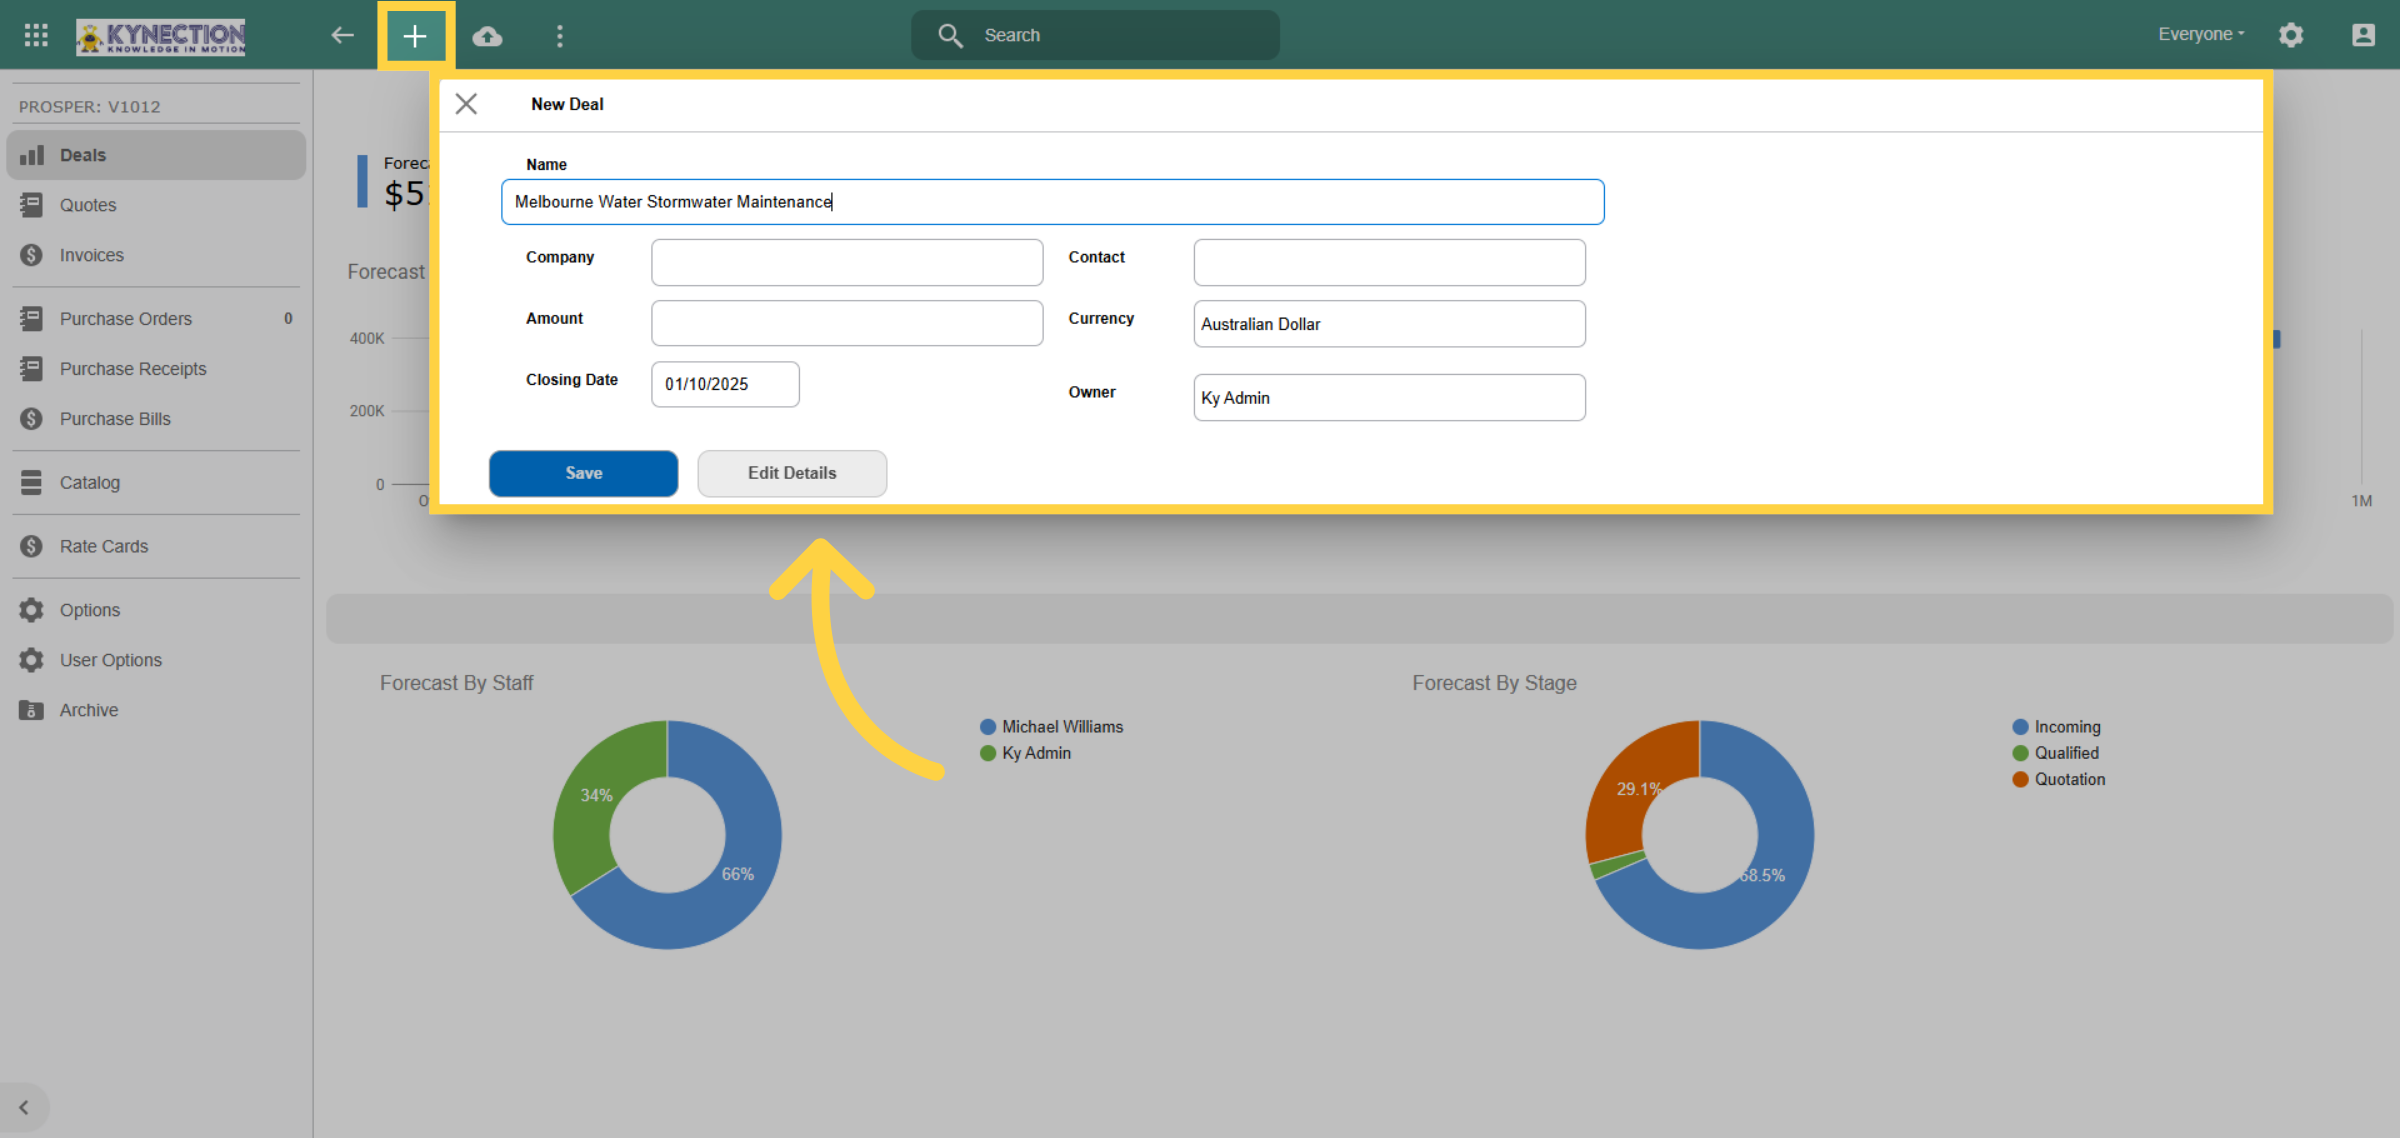
To create a new deal, click the plus icon in the toolbar. Enter the name and company details, and include the amount if available. The drop-down lists for company and contact feature an "Add New" option. You can also enter the amount later to ensure it accurately reflects your quotation.
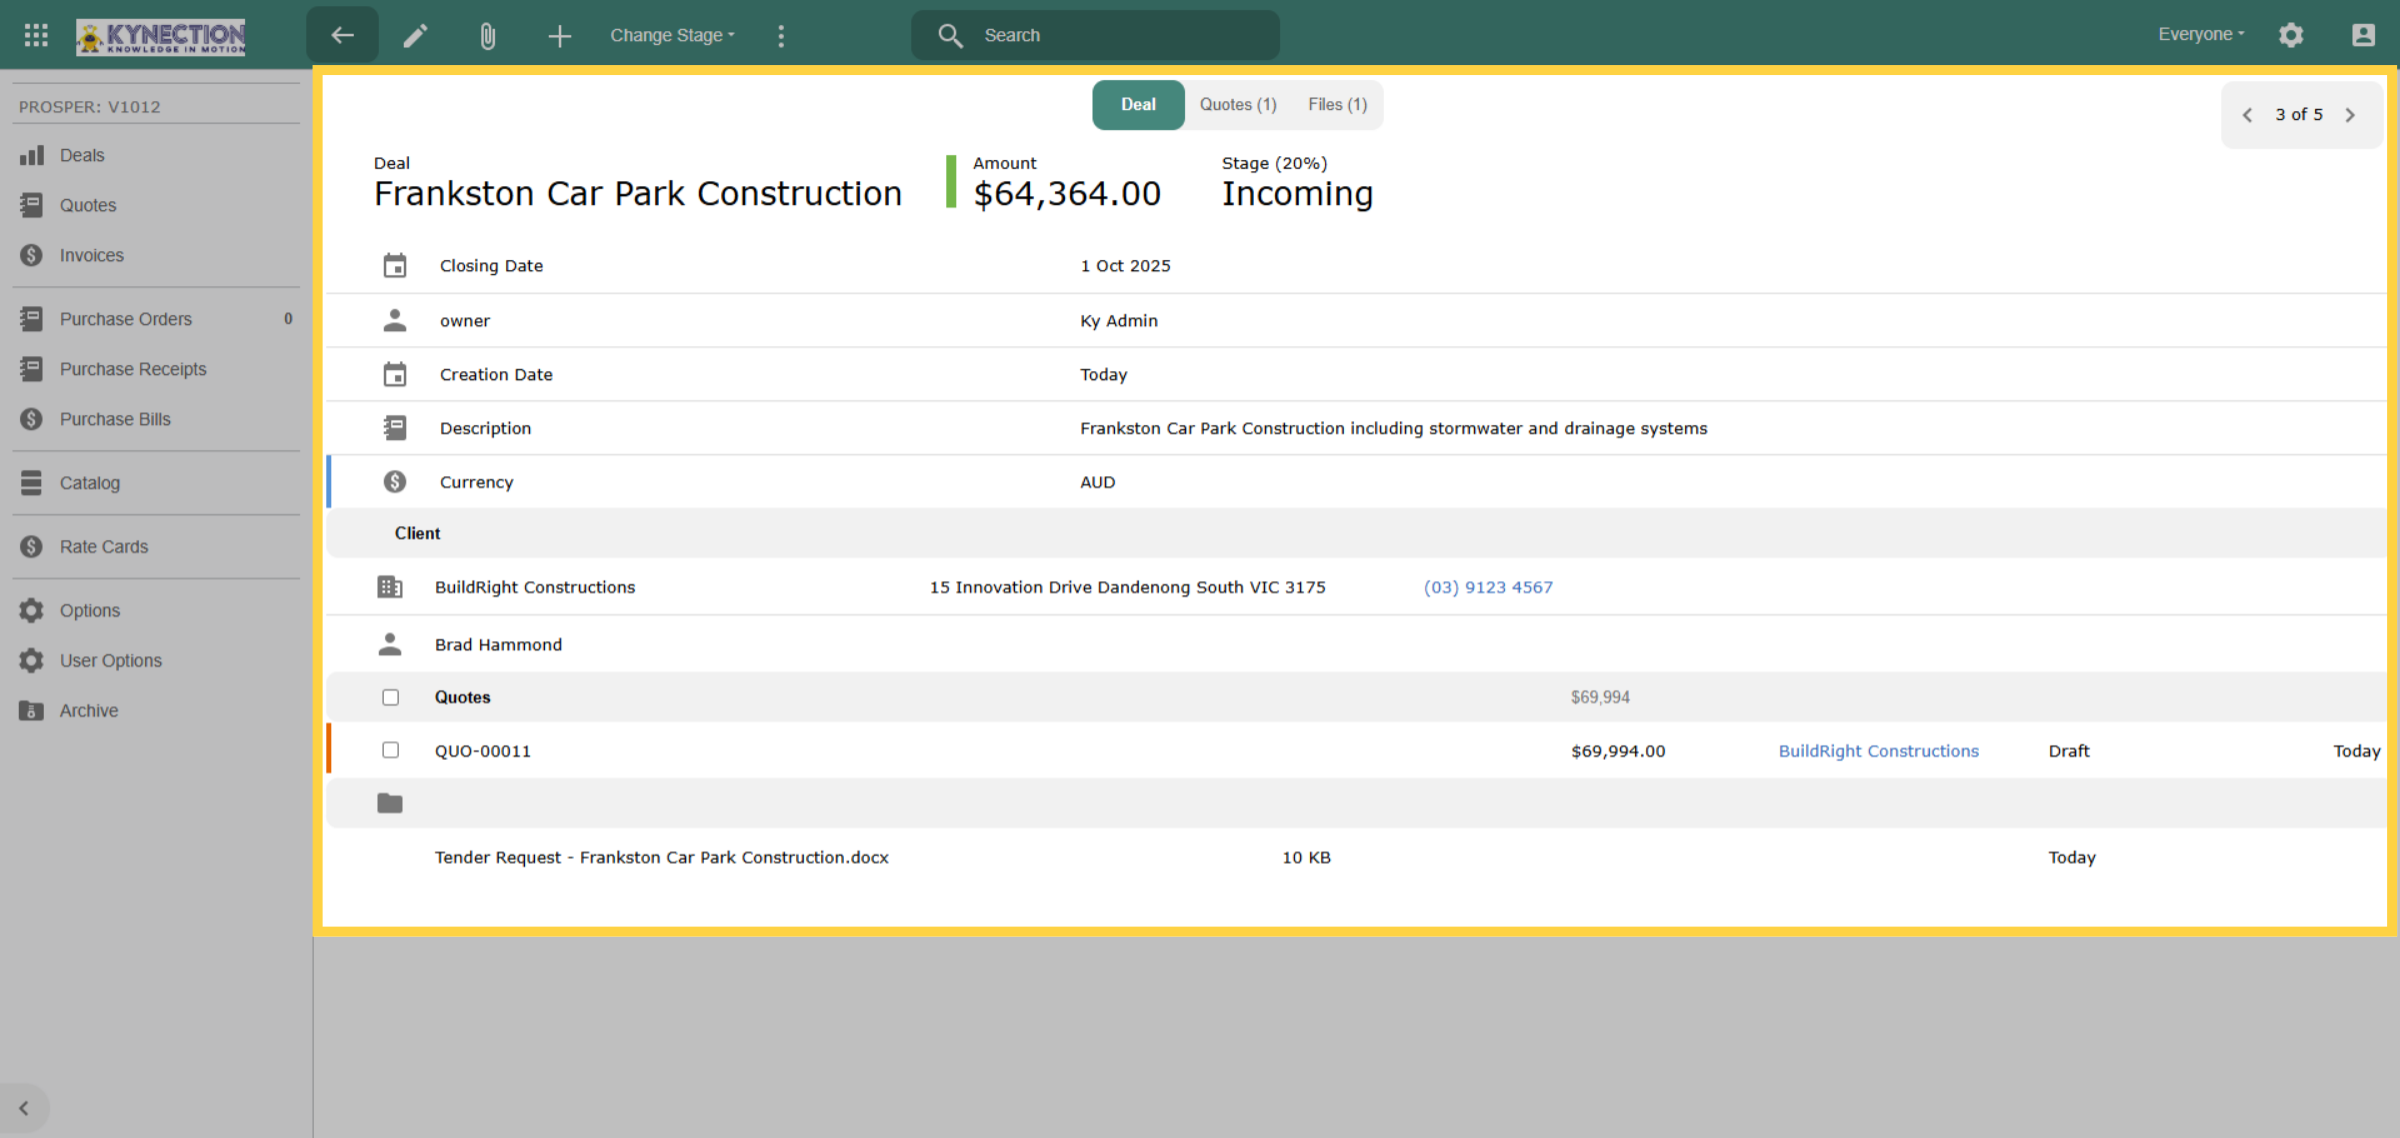
4. Deal Details
Open a Deal to access all information related to the tender. The toolbar offers options for quickly creating quotes or adding notes, tasks, files, or events. Use the Change Stage feature to update the deal's status as it advances through each stage.
5. Quotes
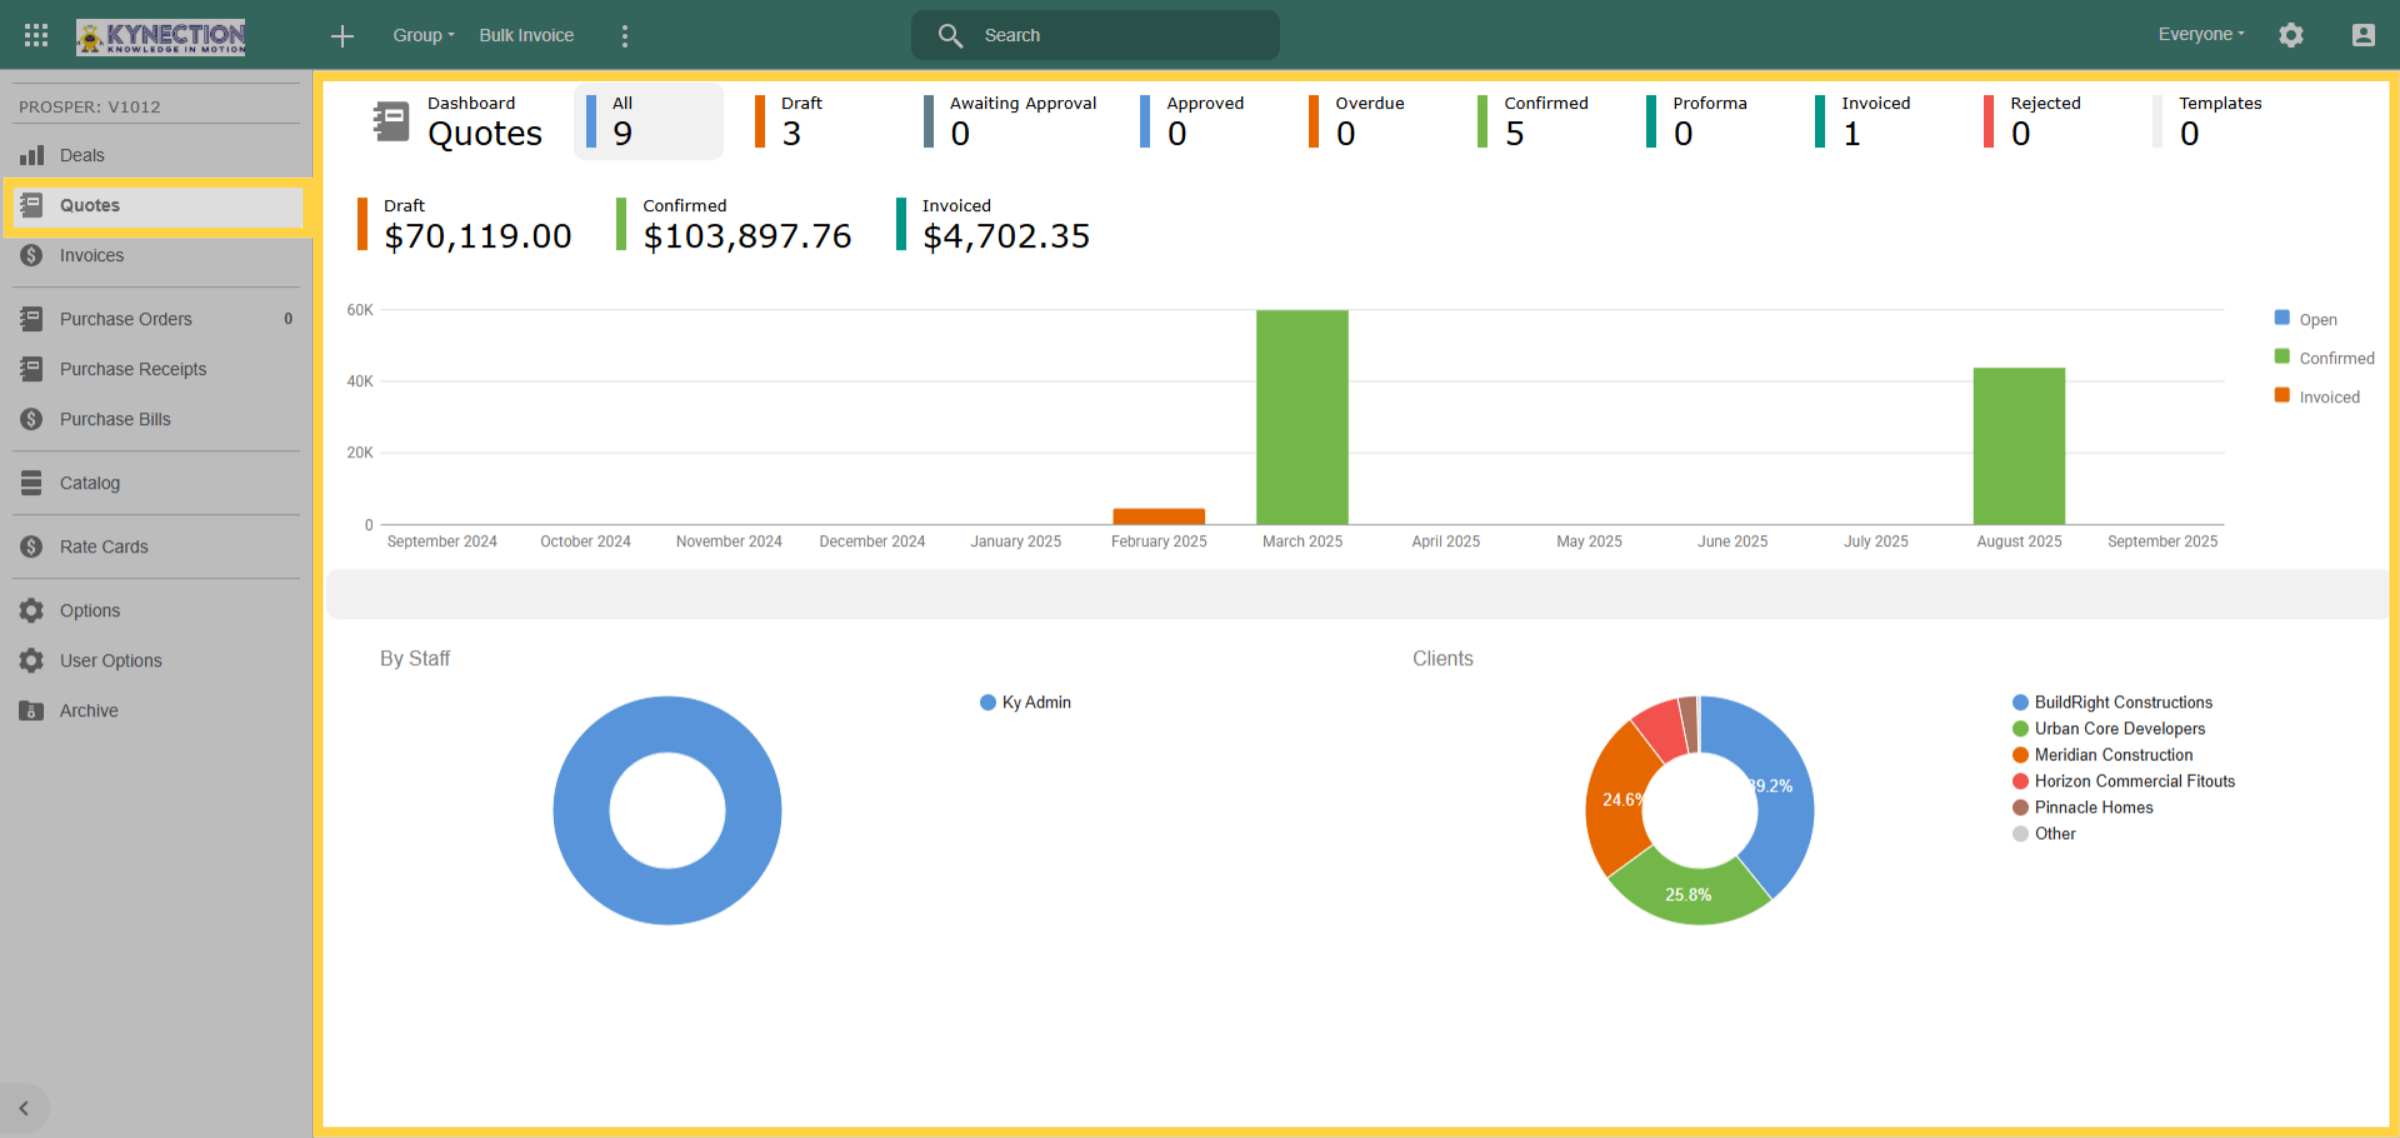
Clicking the Quotes tab on the left panel opens the Quotes Dashboard, where you can view the complete lifecycle of each quote, customisable to your preferences. From this section, you can also easily create a new quote.
6. Add New Quote
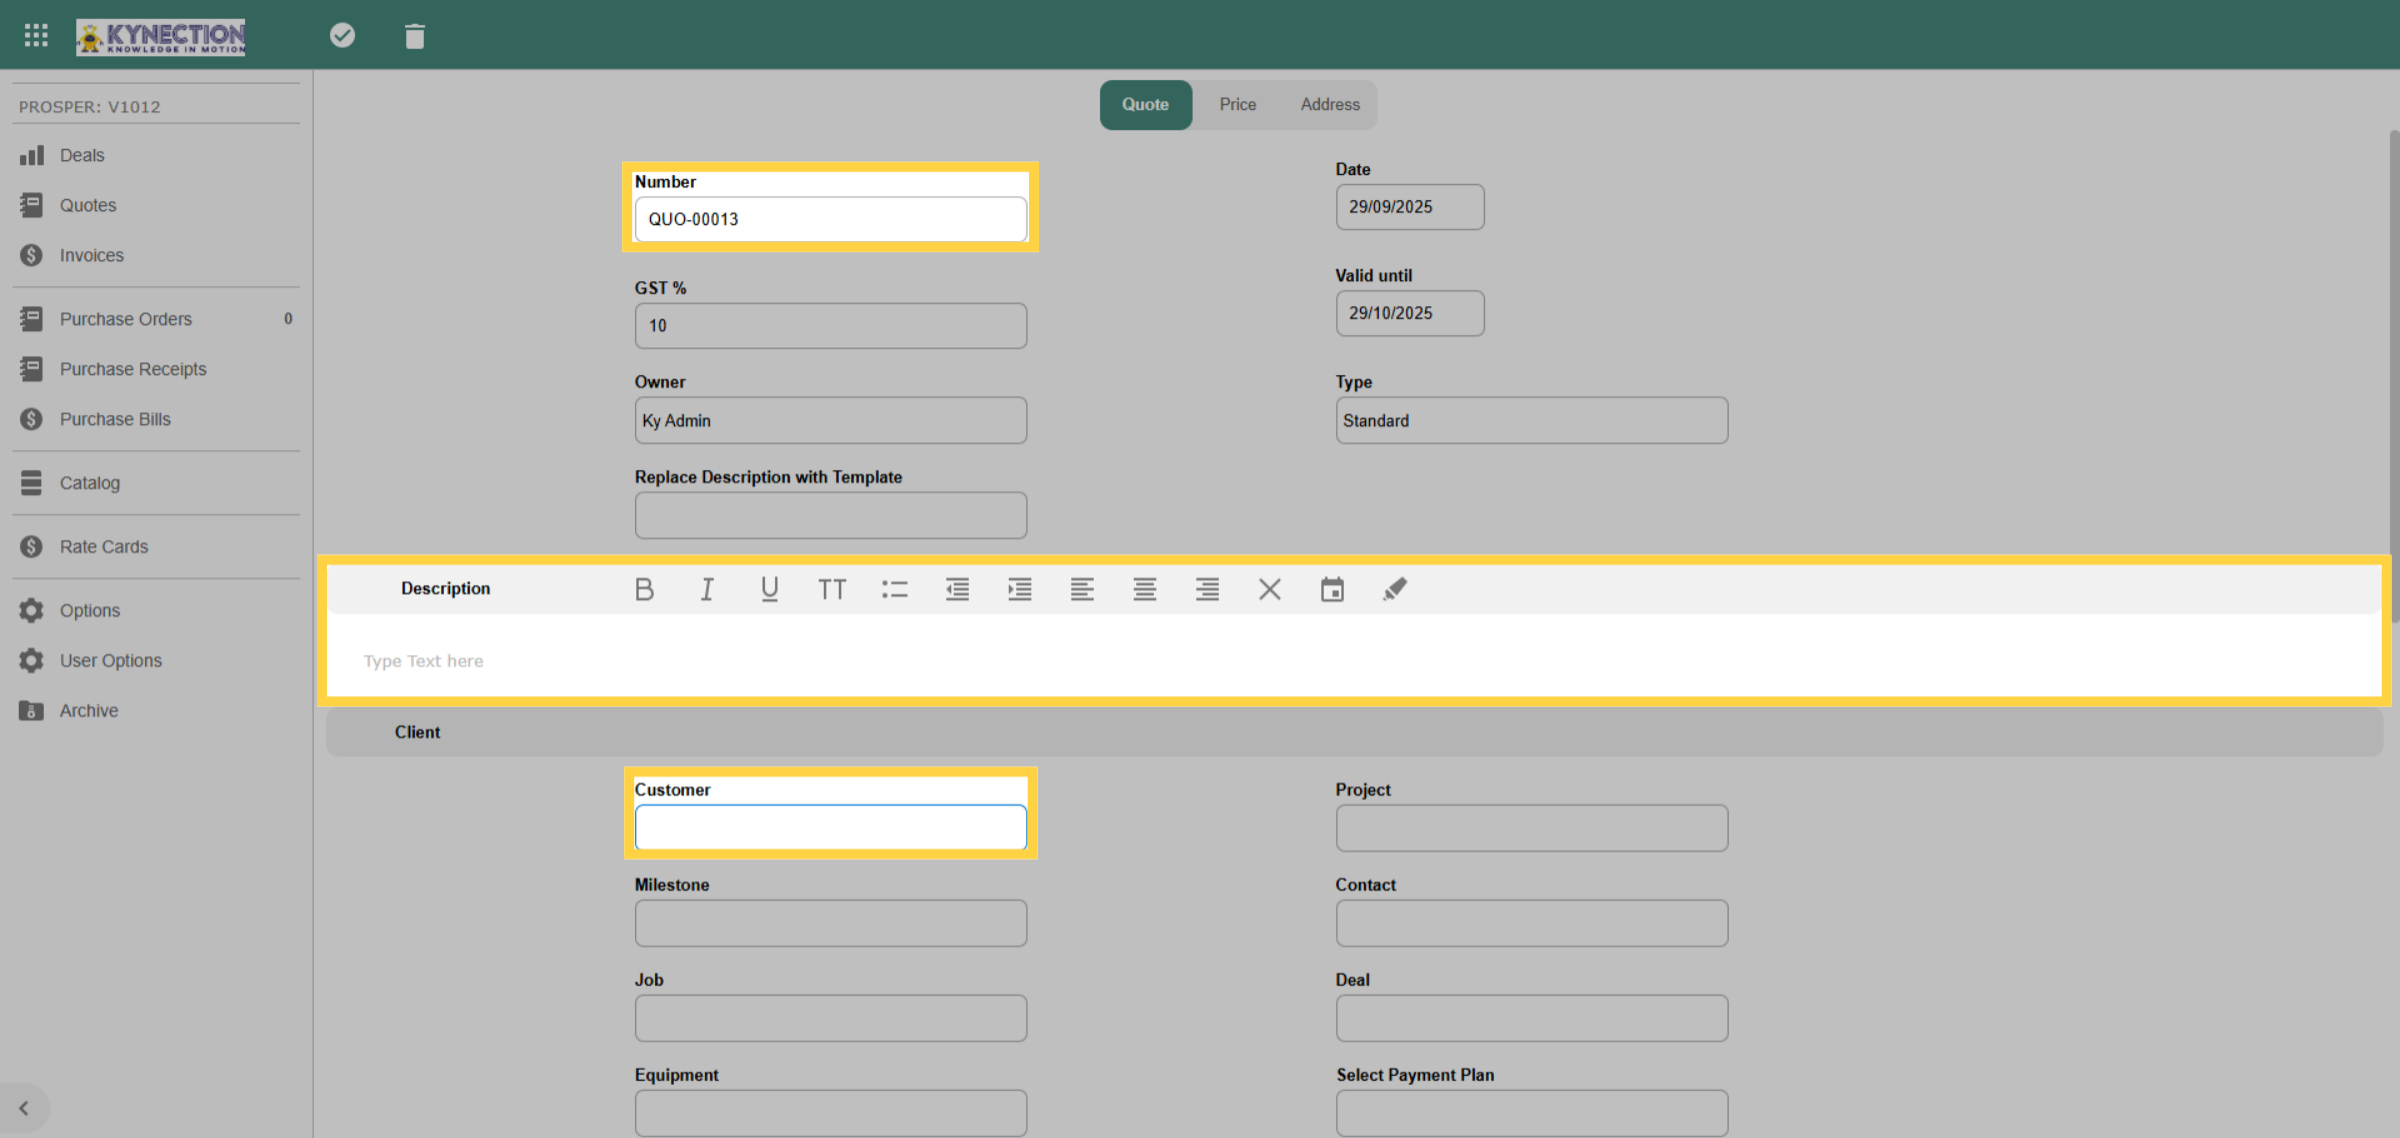
To create a new quote, click the plus icon. The quote number will be generated automatically, but you can modify it as needed. Please enter the relevant quote details, including a clear description, and select the customer.
7. Existing Project
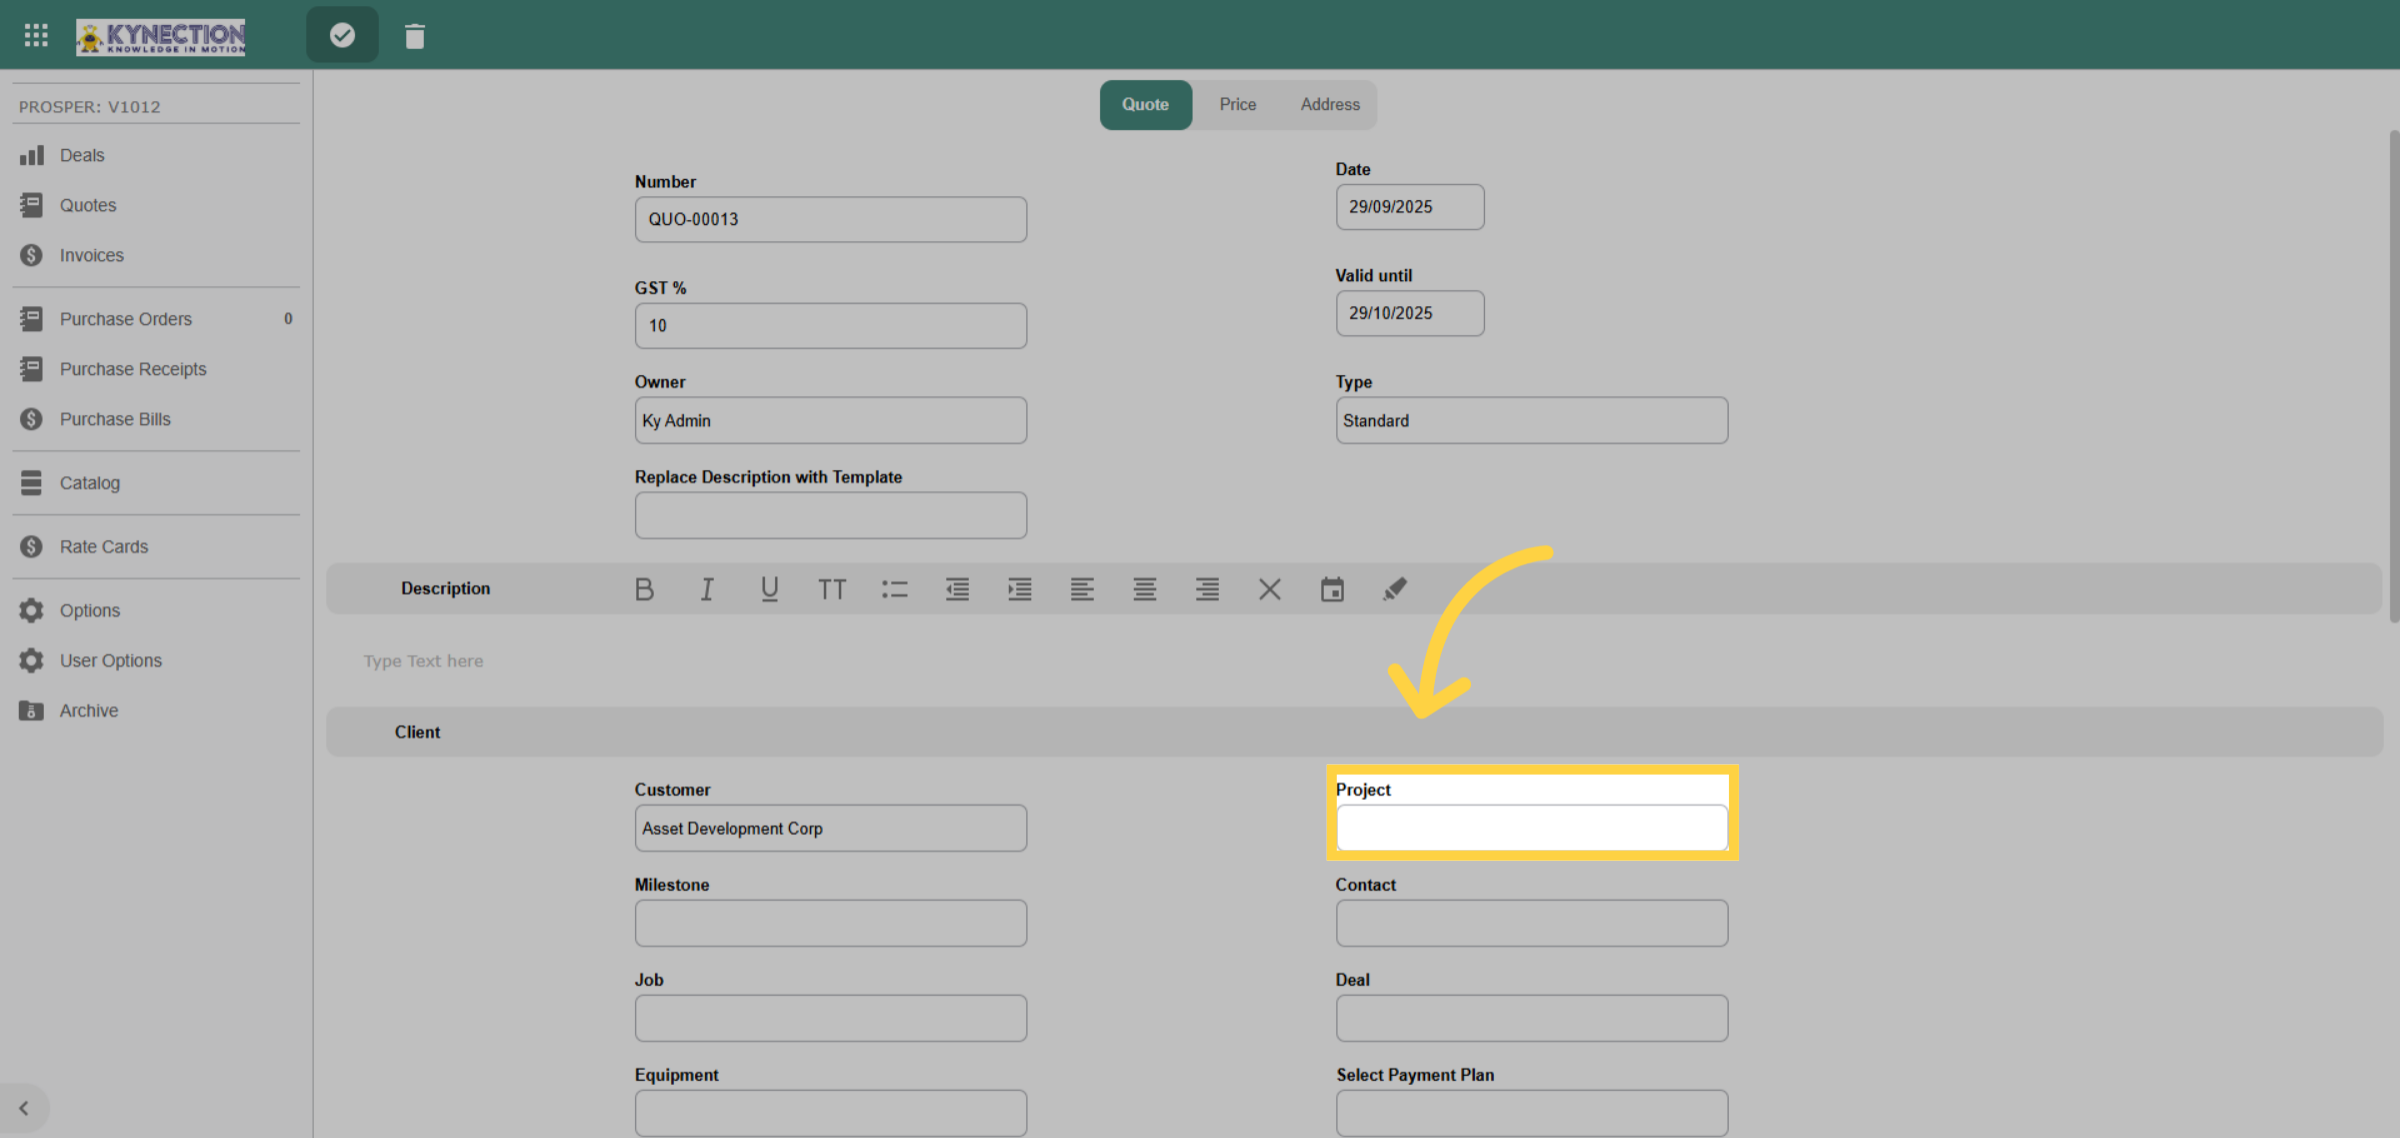
To select an existing project, simply choose it from the list provided. If the project isn't listed, a new one will be created automatically as part of the workflow, which will be covered in a subsequent step. To finalise your selection, click the tick icon in the toolbar.
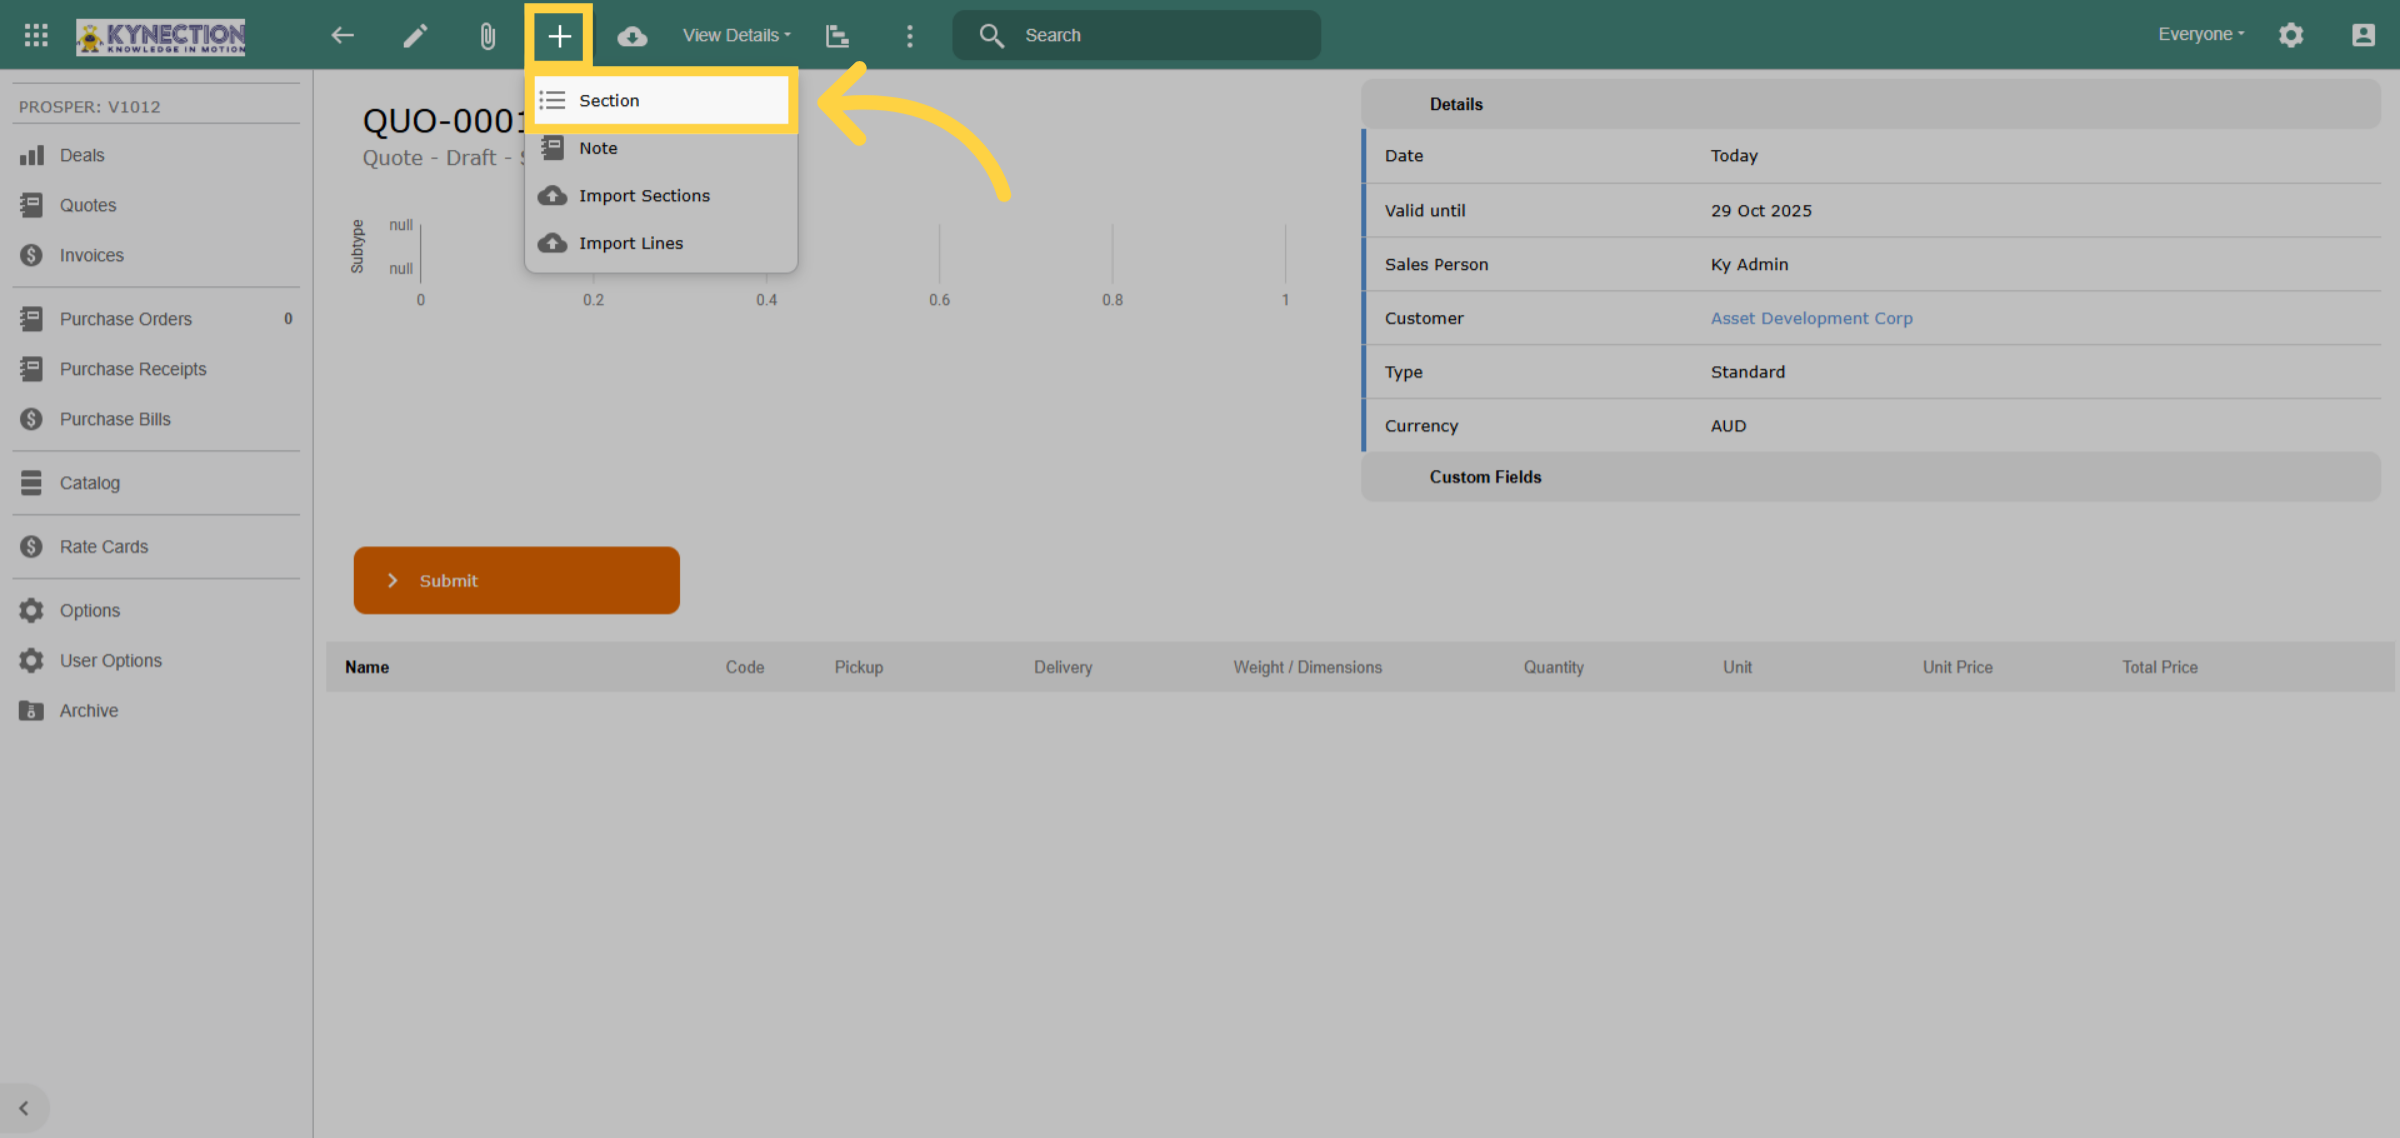
8. Add Section
Add a new section by clicking the plus icon in the toolbar. Each section you create within a quote becomes a milestone for your project. The milestone name should be relevant to the task as the milestones become the task descriptions for scheduling and job creation.
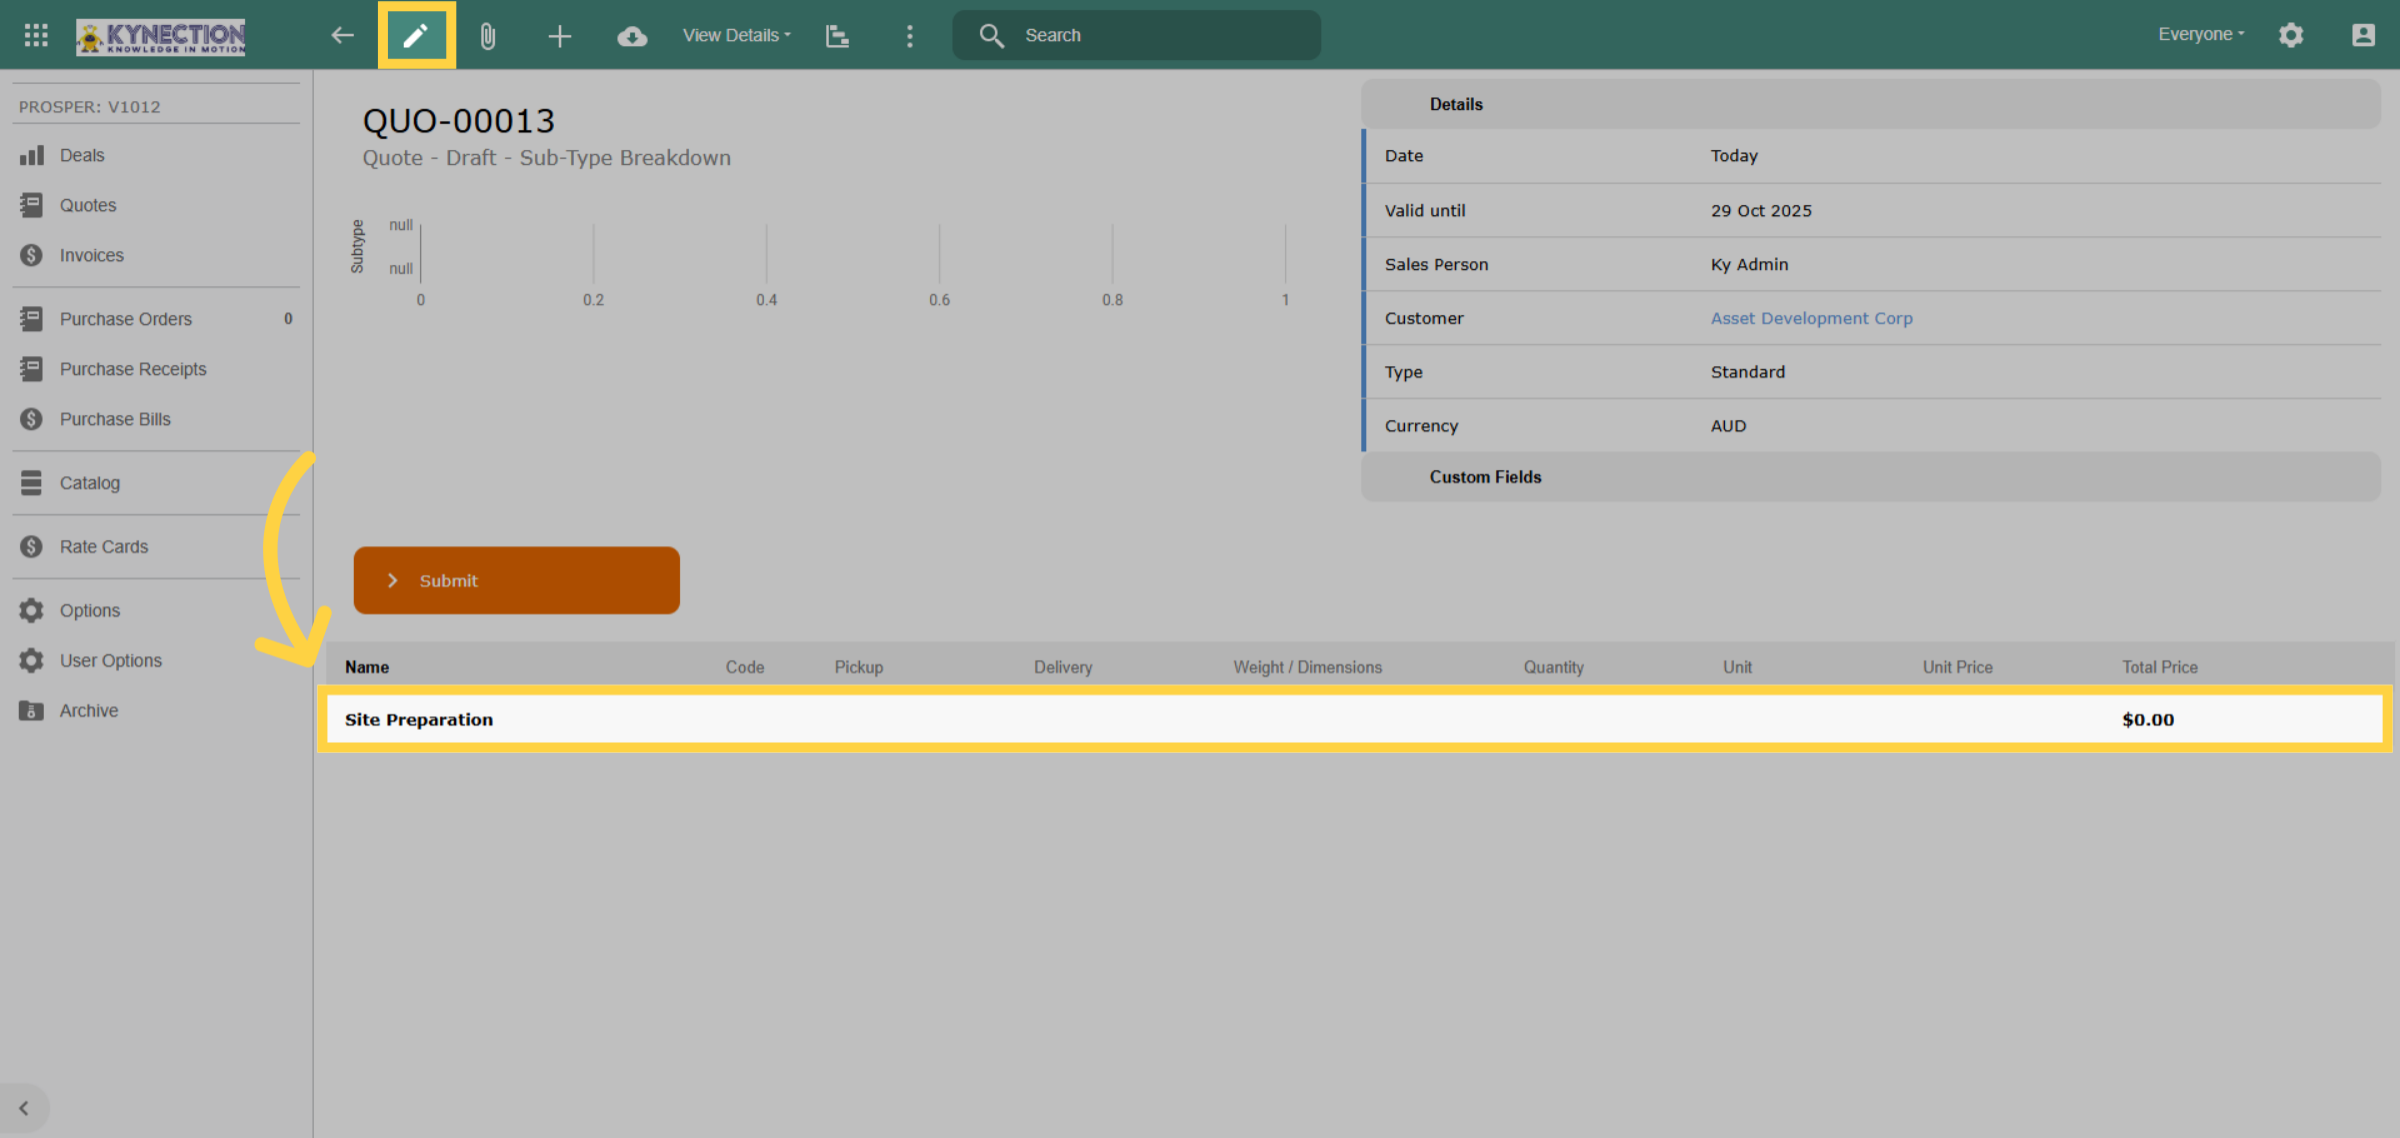
9. Edit Section
Select the section name to begin building the quote.
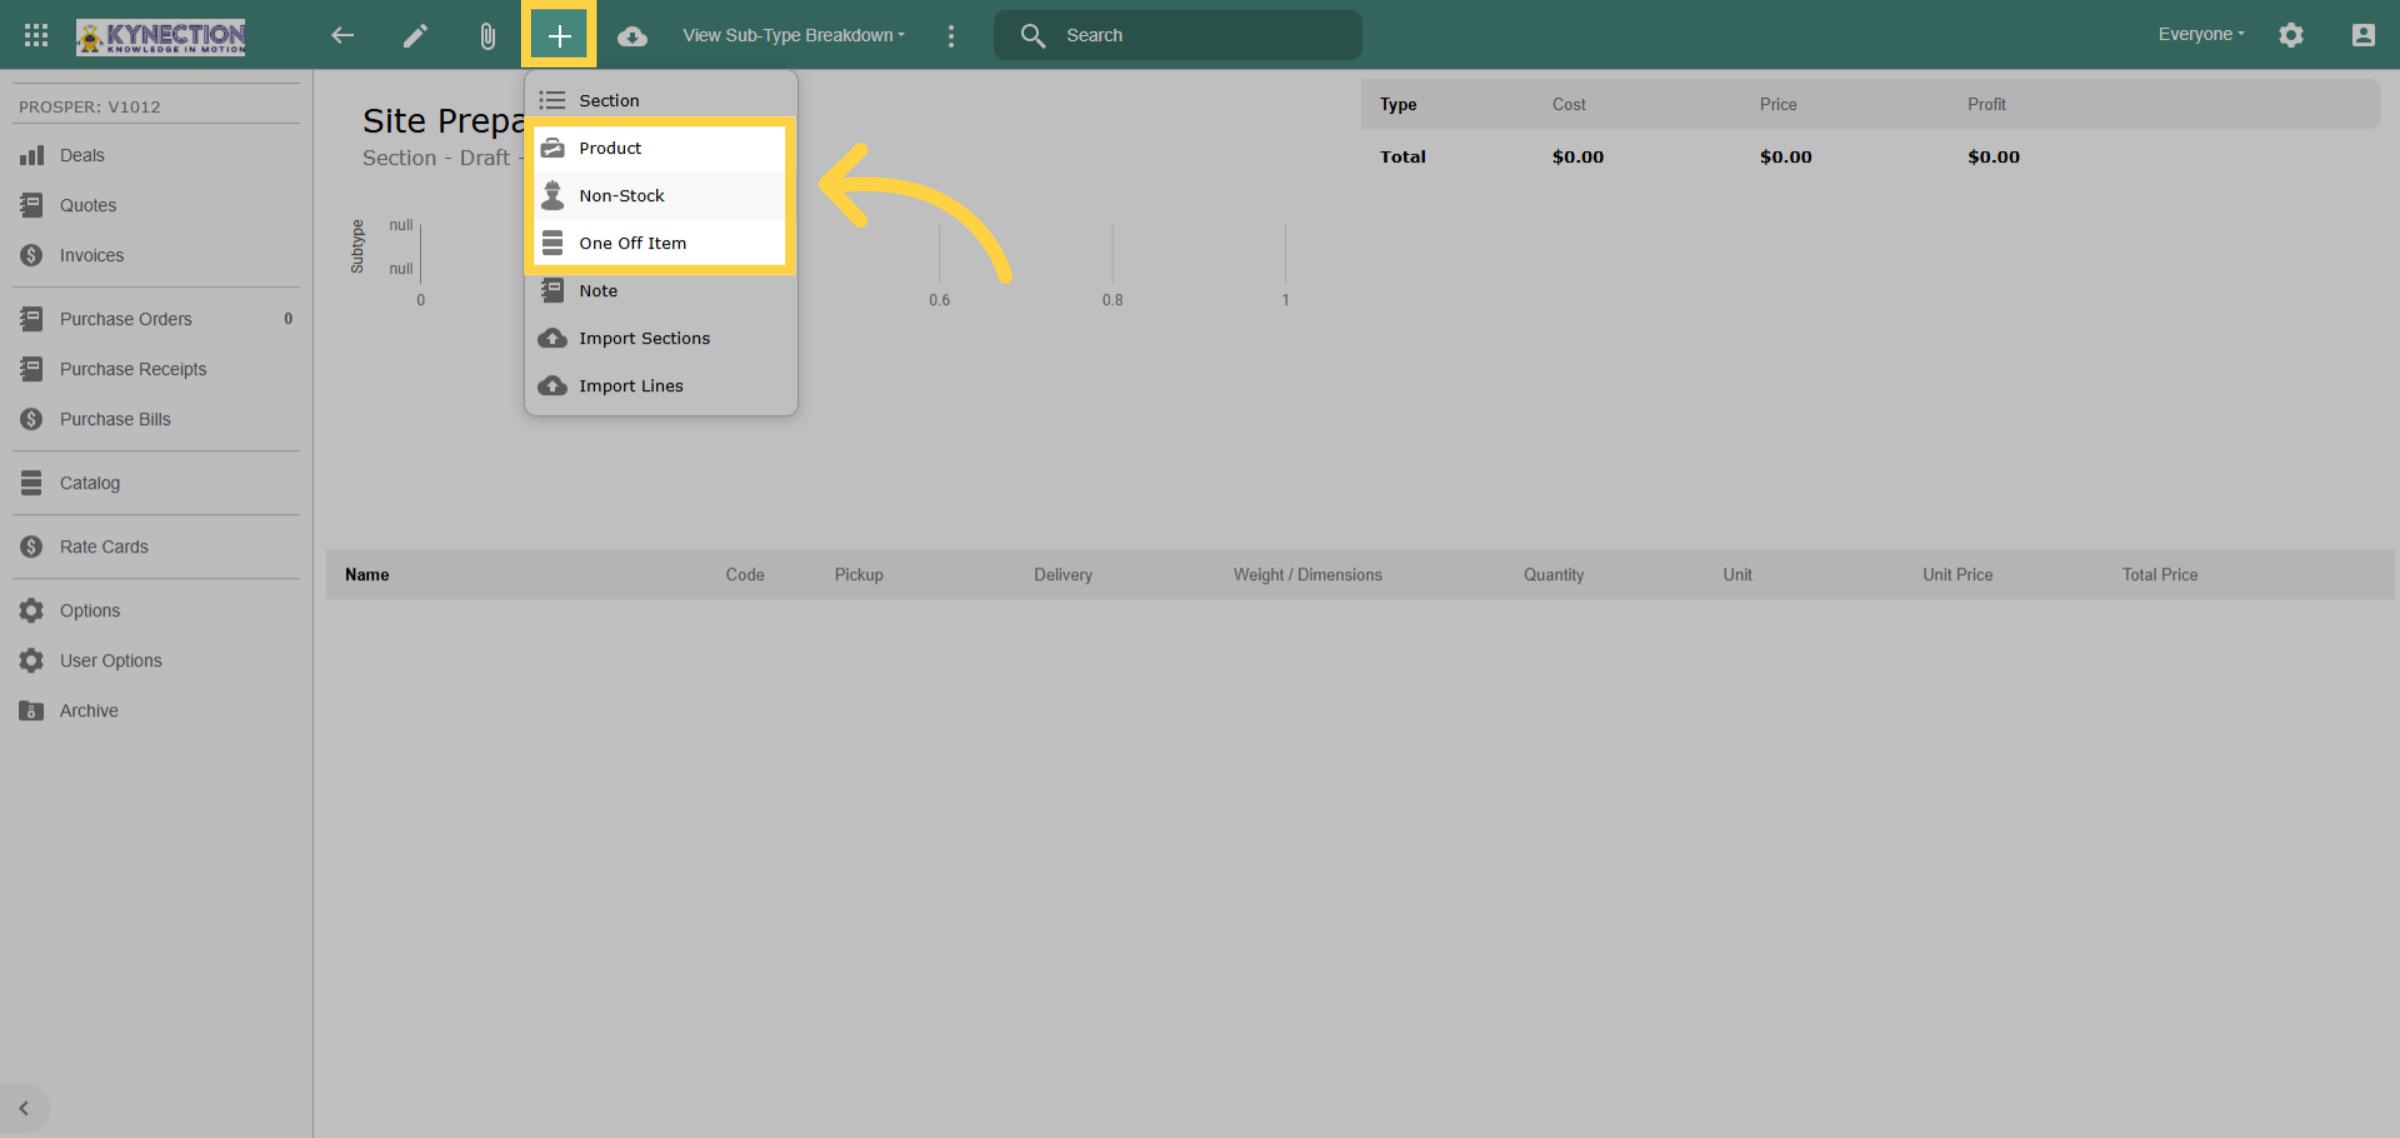
10. Billable Item Type
Choose an item type from the following options: Stock, Non-Stock, or One-Off Item. For this demonstration, we will select Non-Stock.
11. Item Category
To add an item, navigate to the non-stock sub-folders and select the desired product category. For this example, we’ll choose "Equipment." Keep in mind that the available categories may differ based on your company's specific configuration.
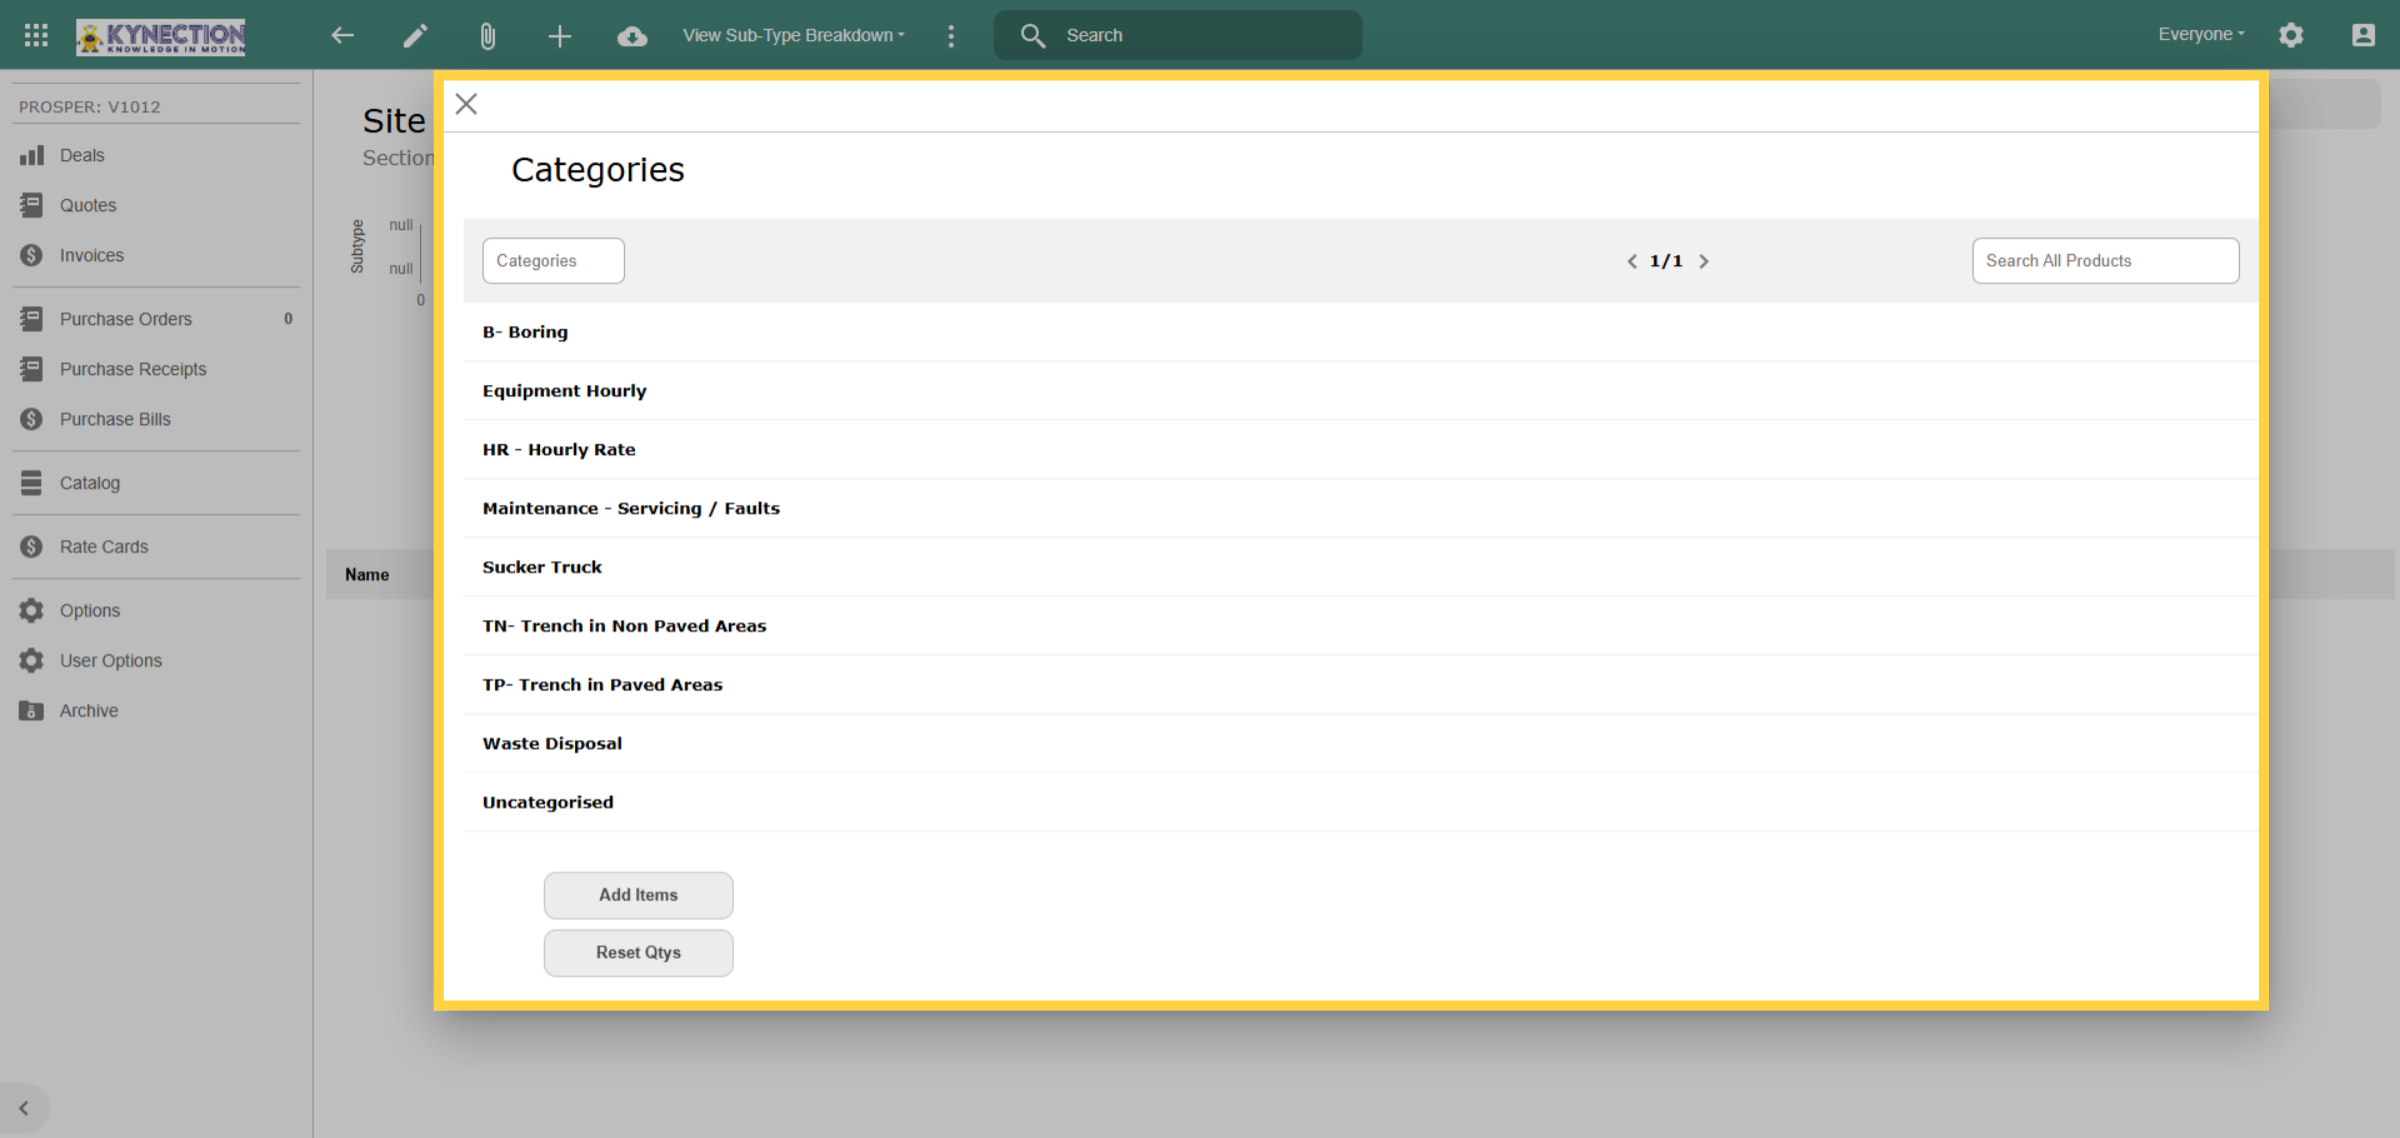
12. Add Items
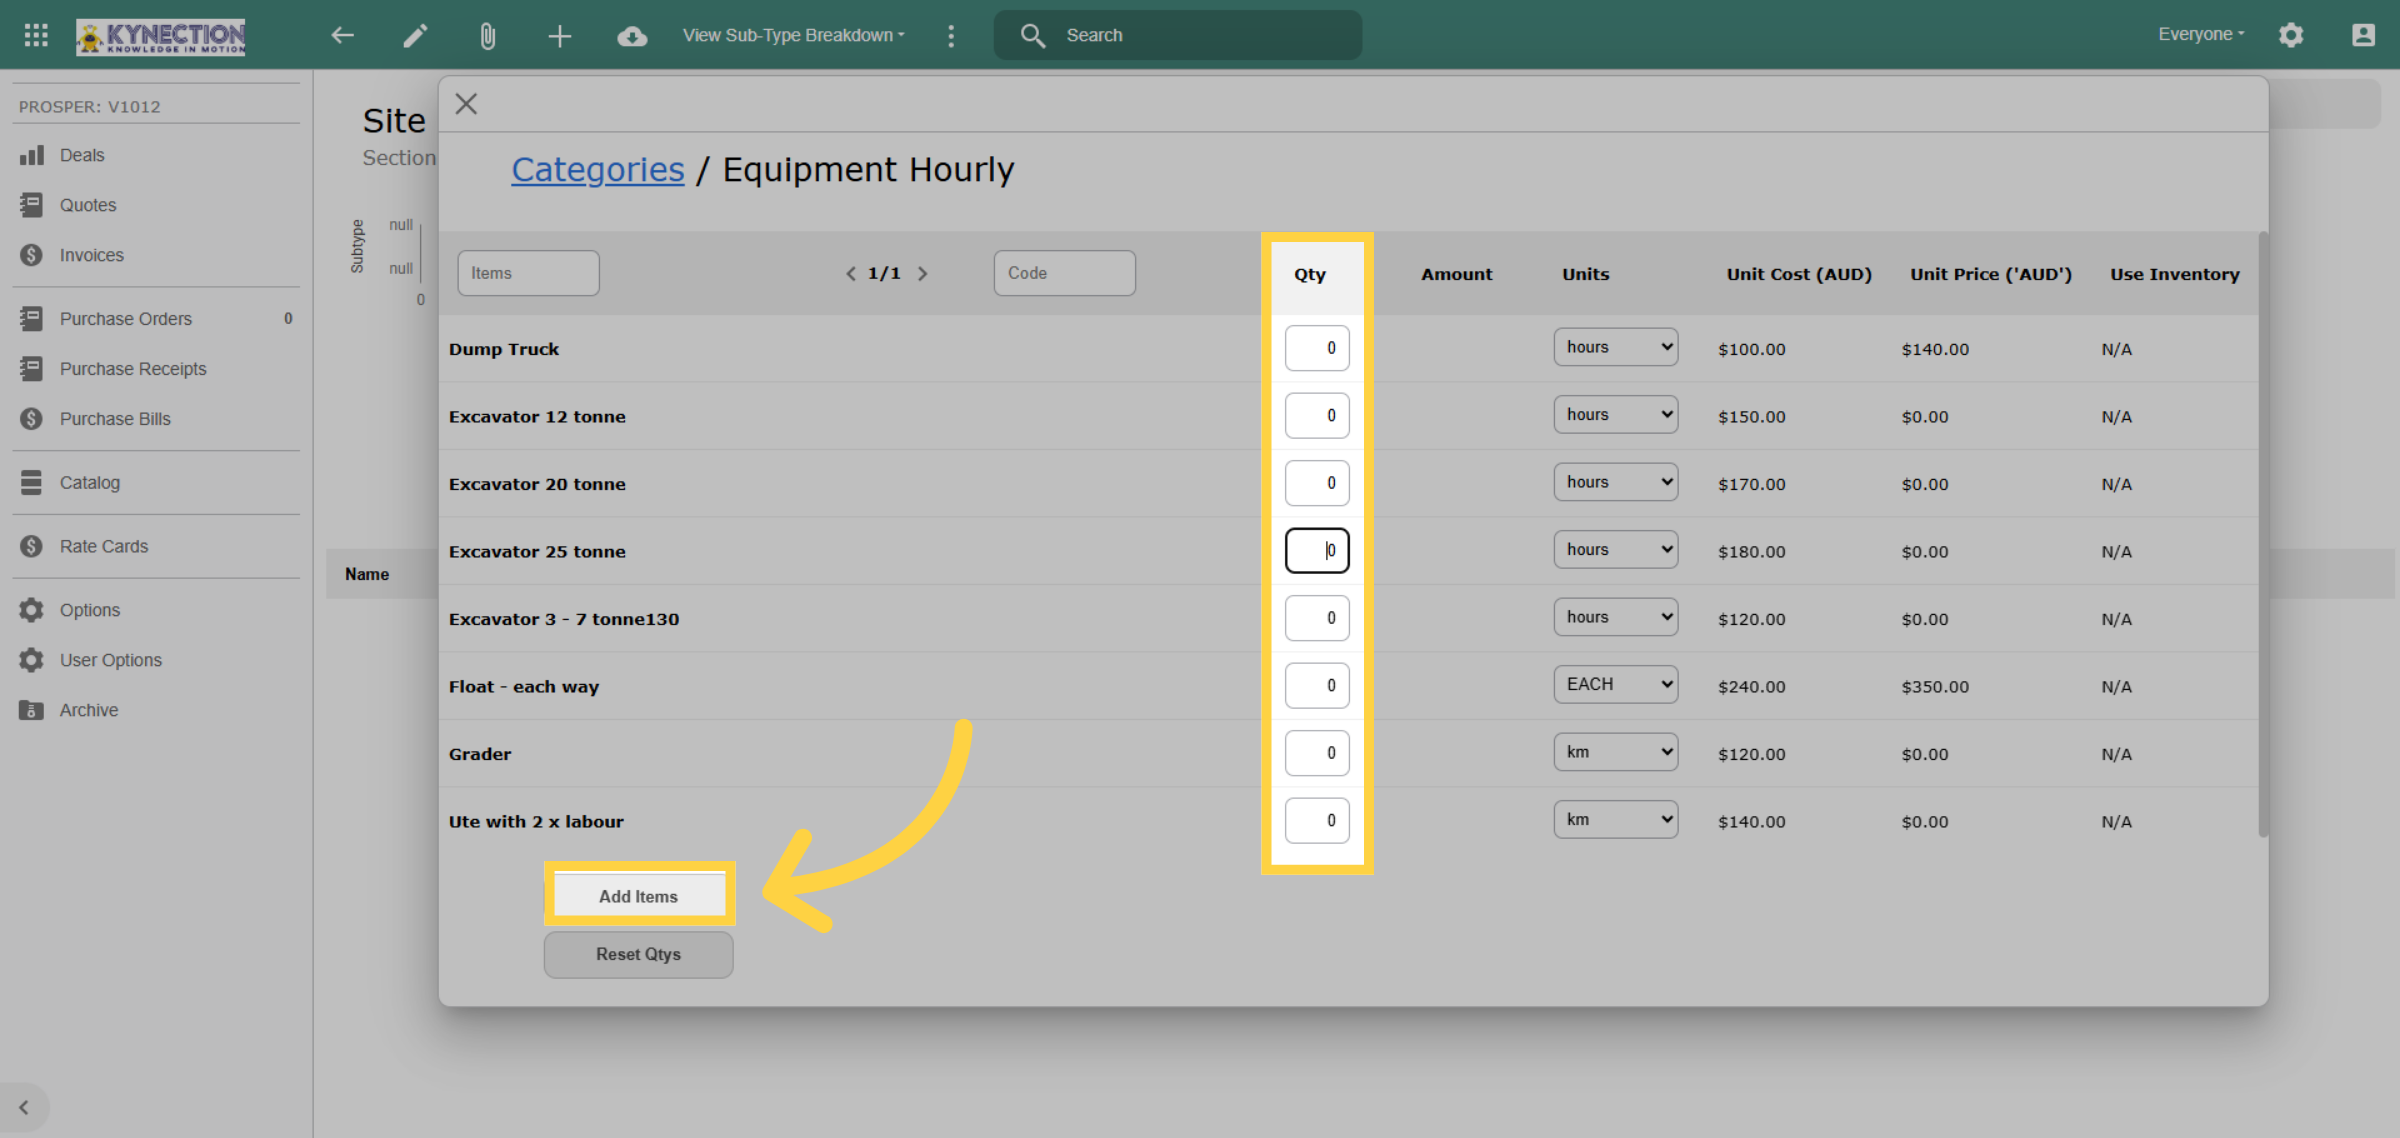
Specify the required quantity before clicking "Add Items." After adding all line items, return to the quote using the back arrow.
13. Submit Quote
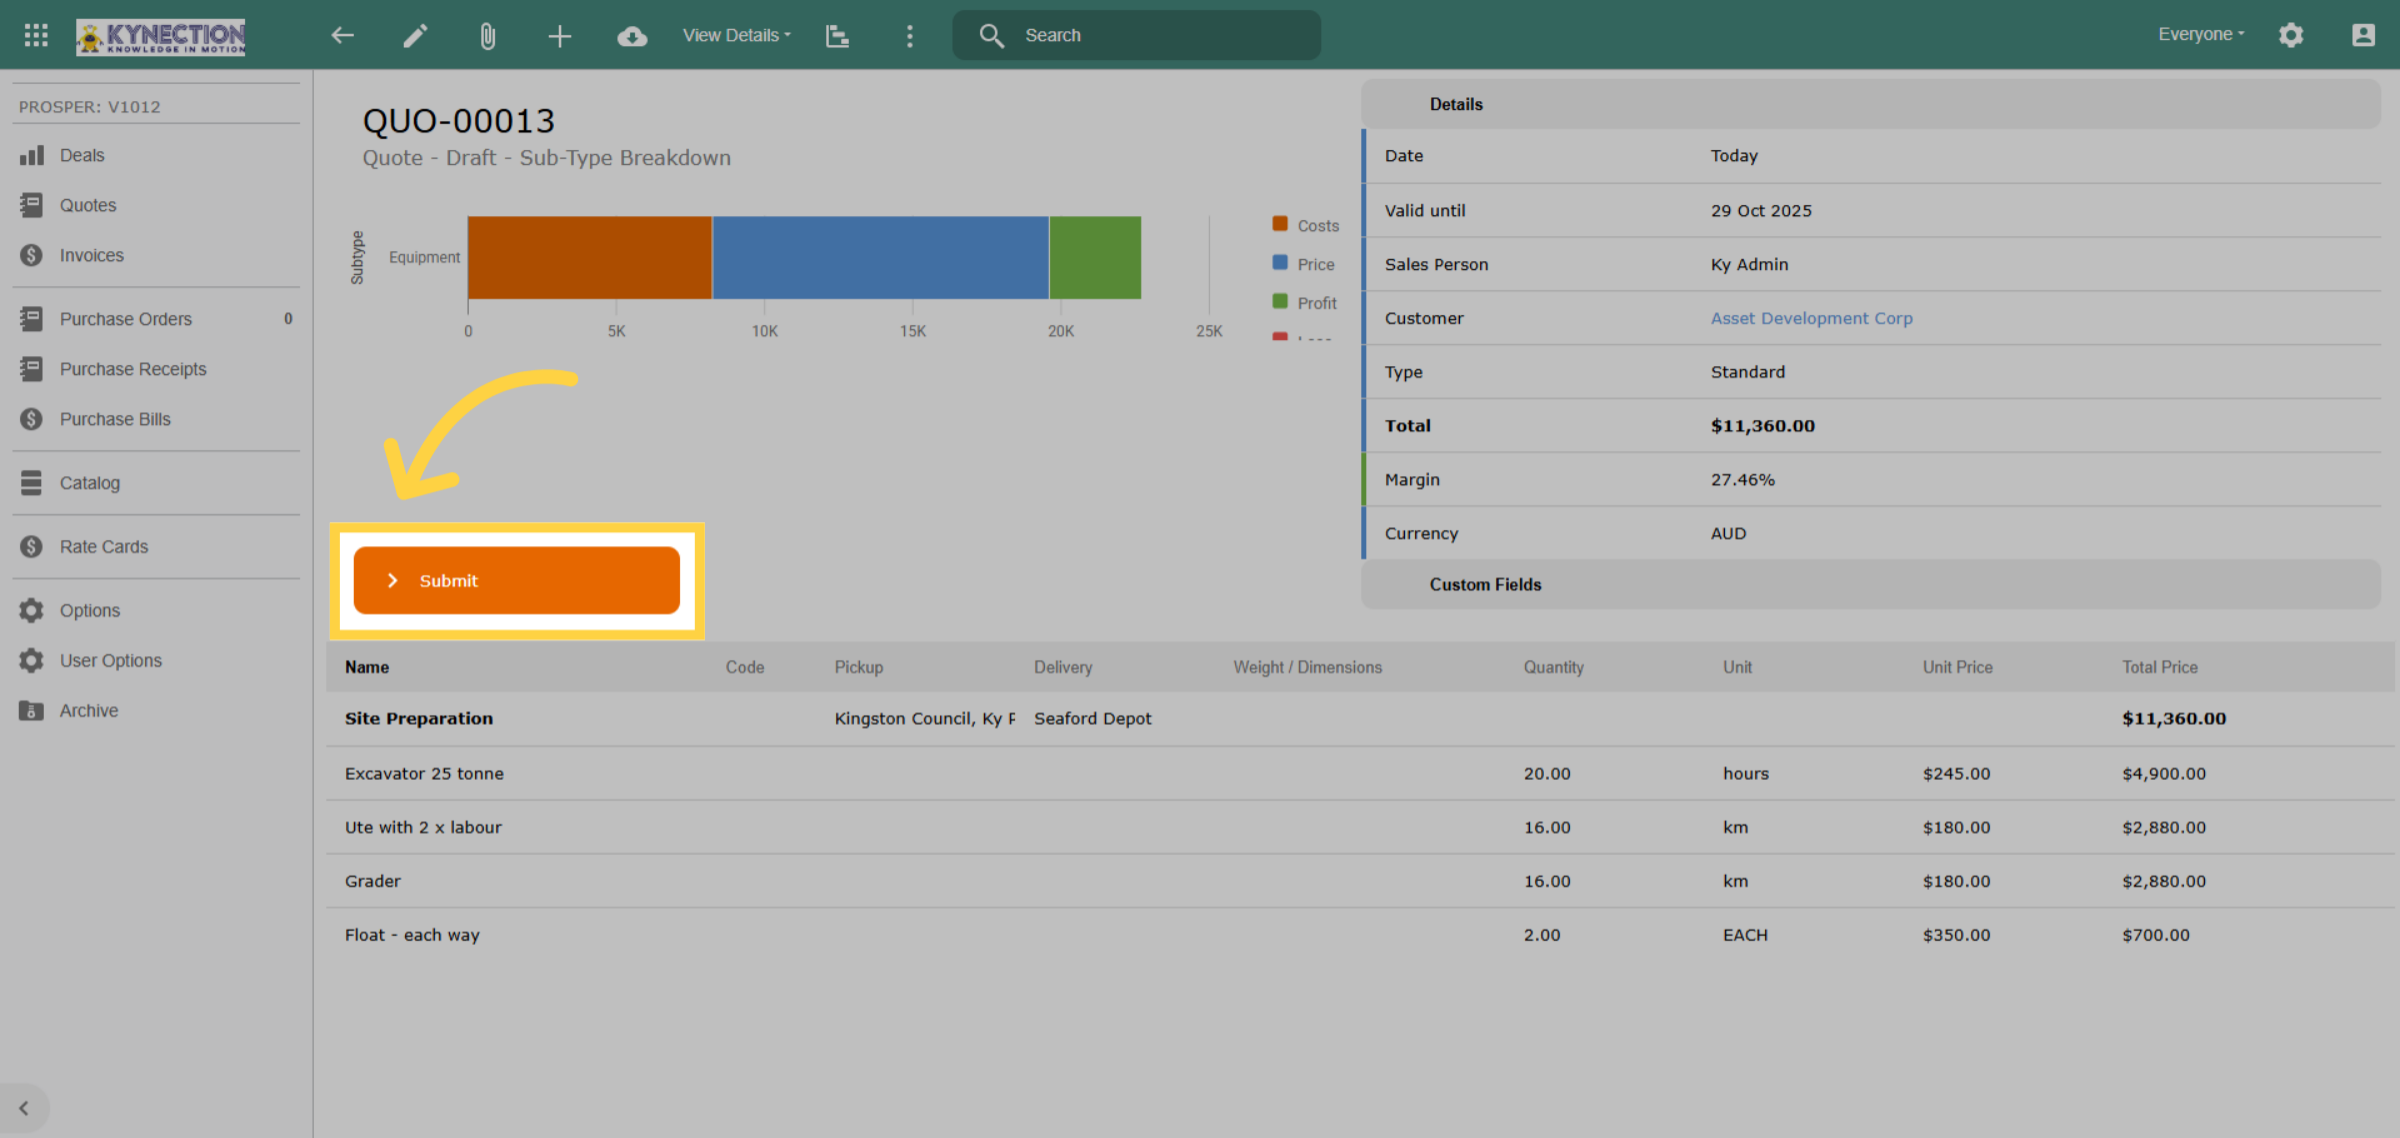
Continue to build the quote by adding sections and items against the sections. Once complete, use the 'Submit' button to finalise the quote.
14. Quote Approval
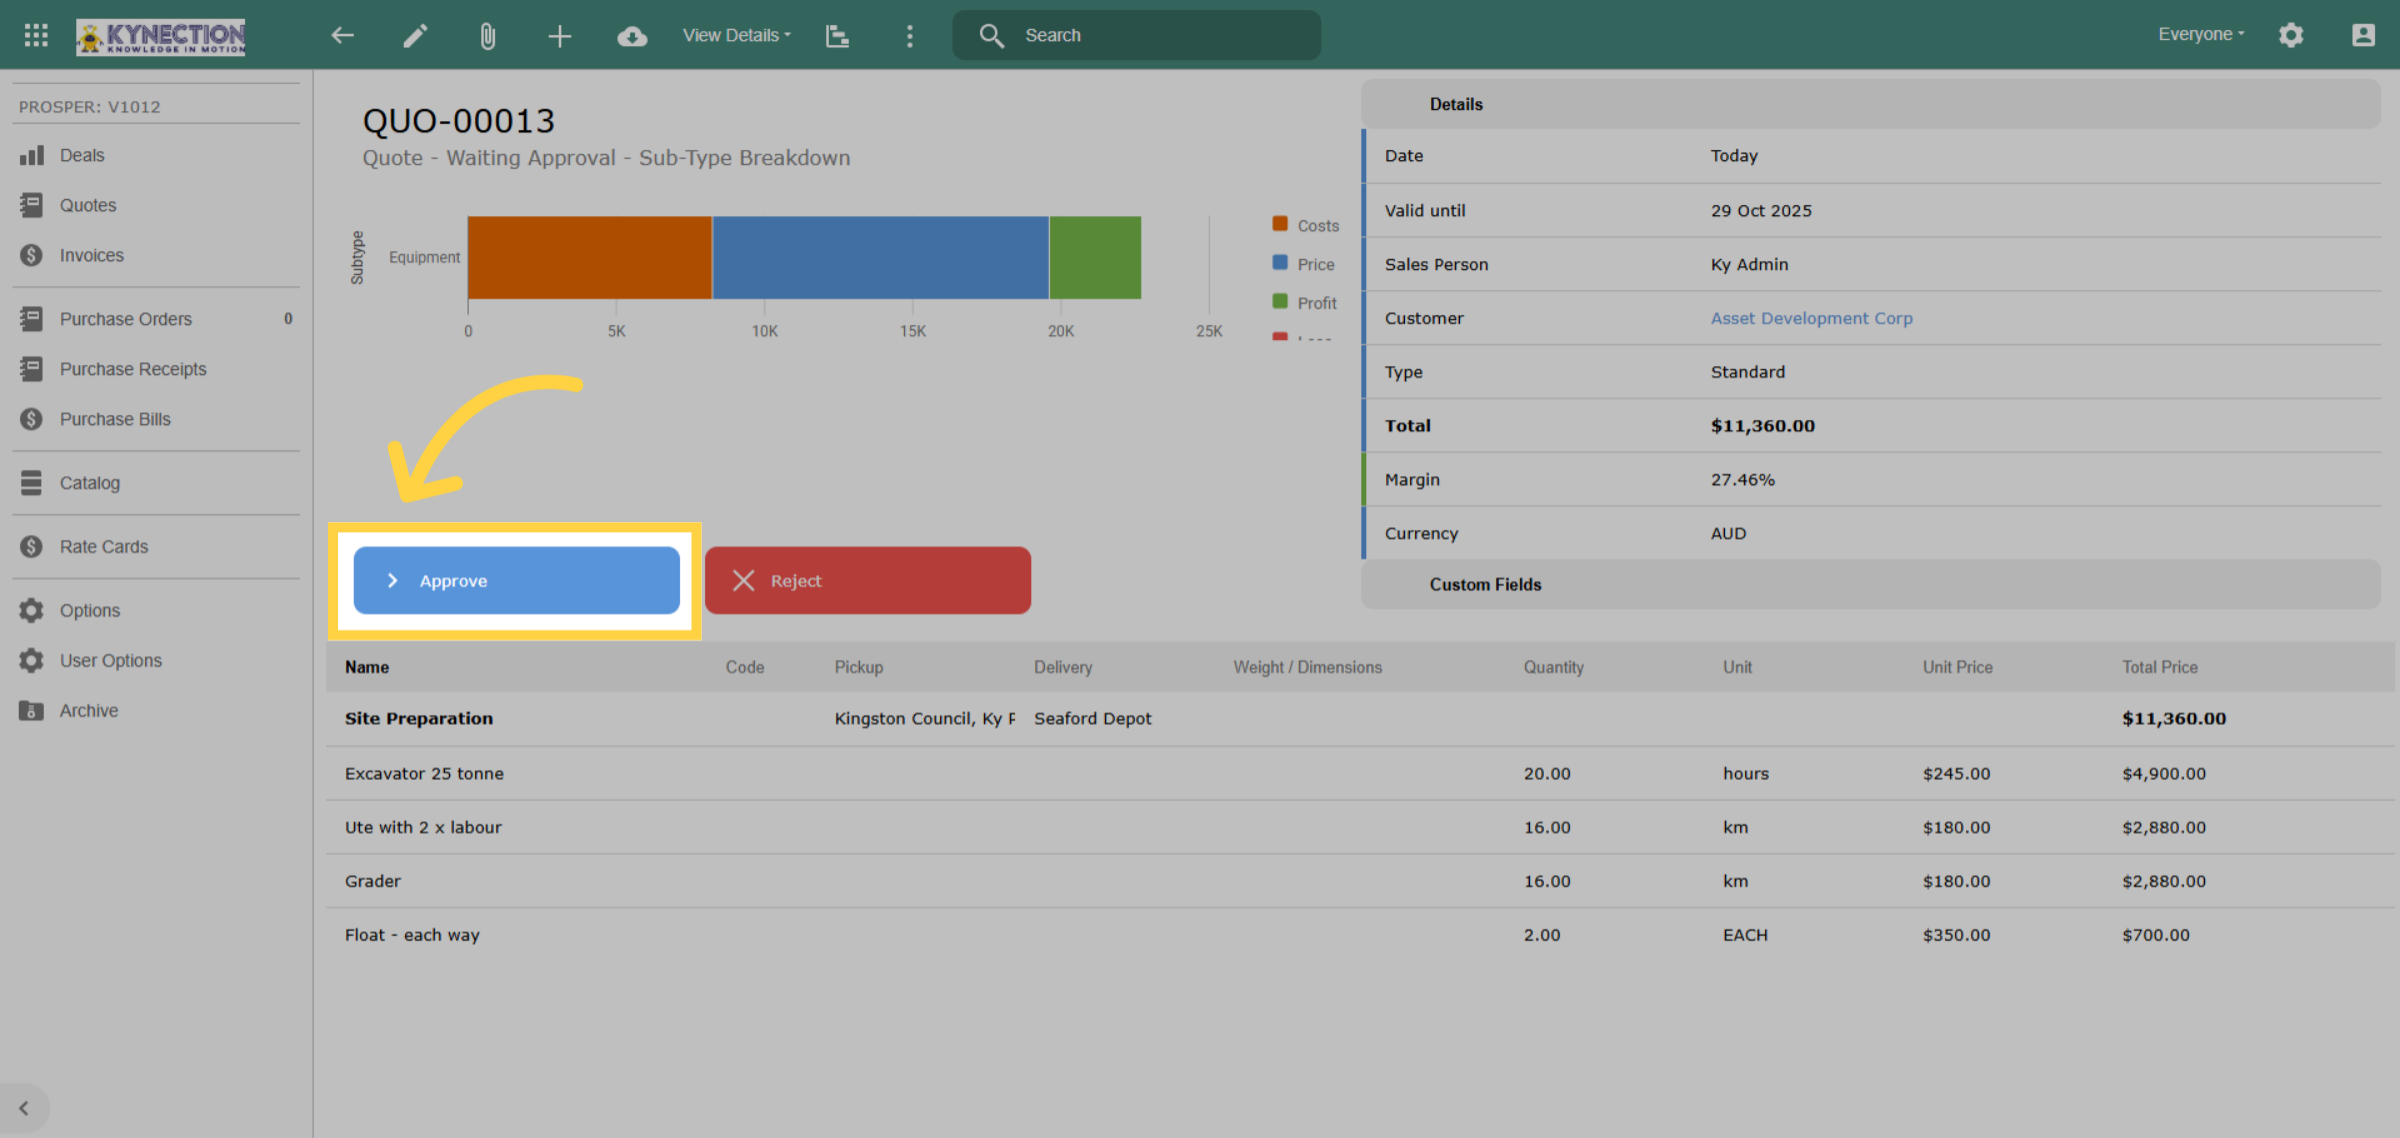
You can set up delegation of authority for quote approvals. Once configured, this feature allows designated managers to review and approve quotes, streamlining your approval process for greater efficiency.
15. Confirm Quote
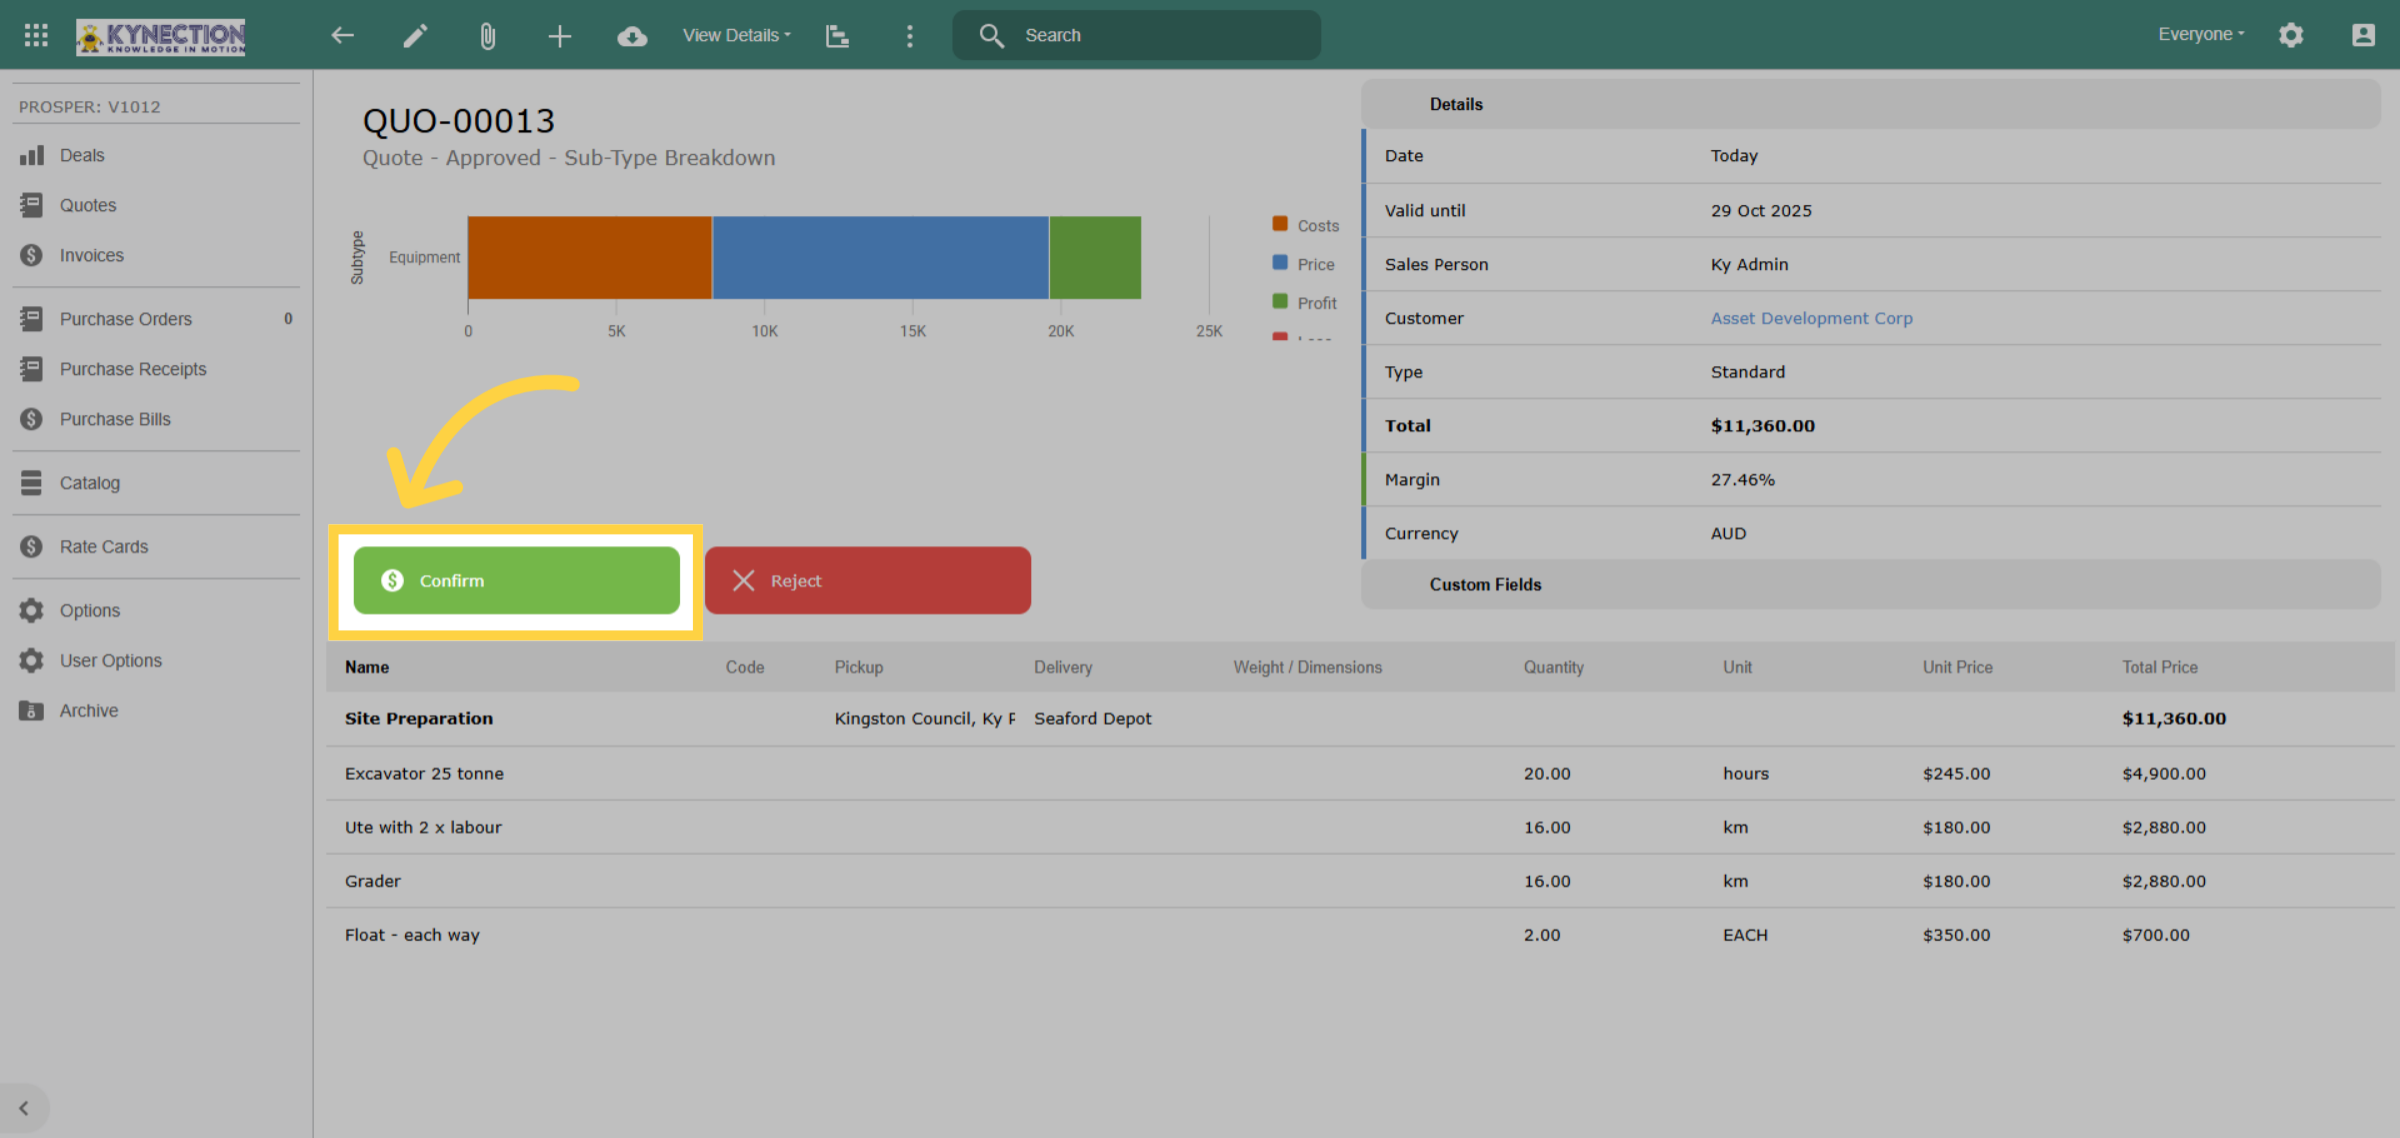
Once the Quote has been approved, proceed to confirm it. After confirmation, take a moment to review the details, including the date, customer information, section specifics, and any related projects, if applicable.
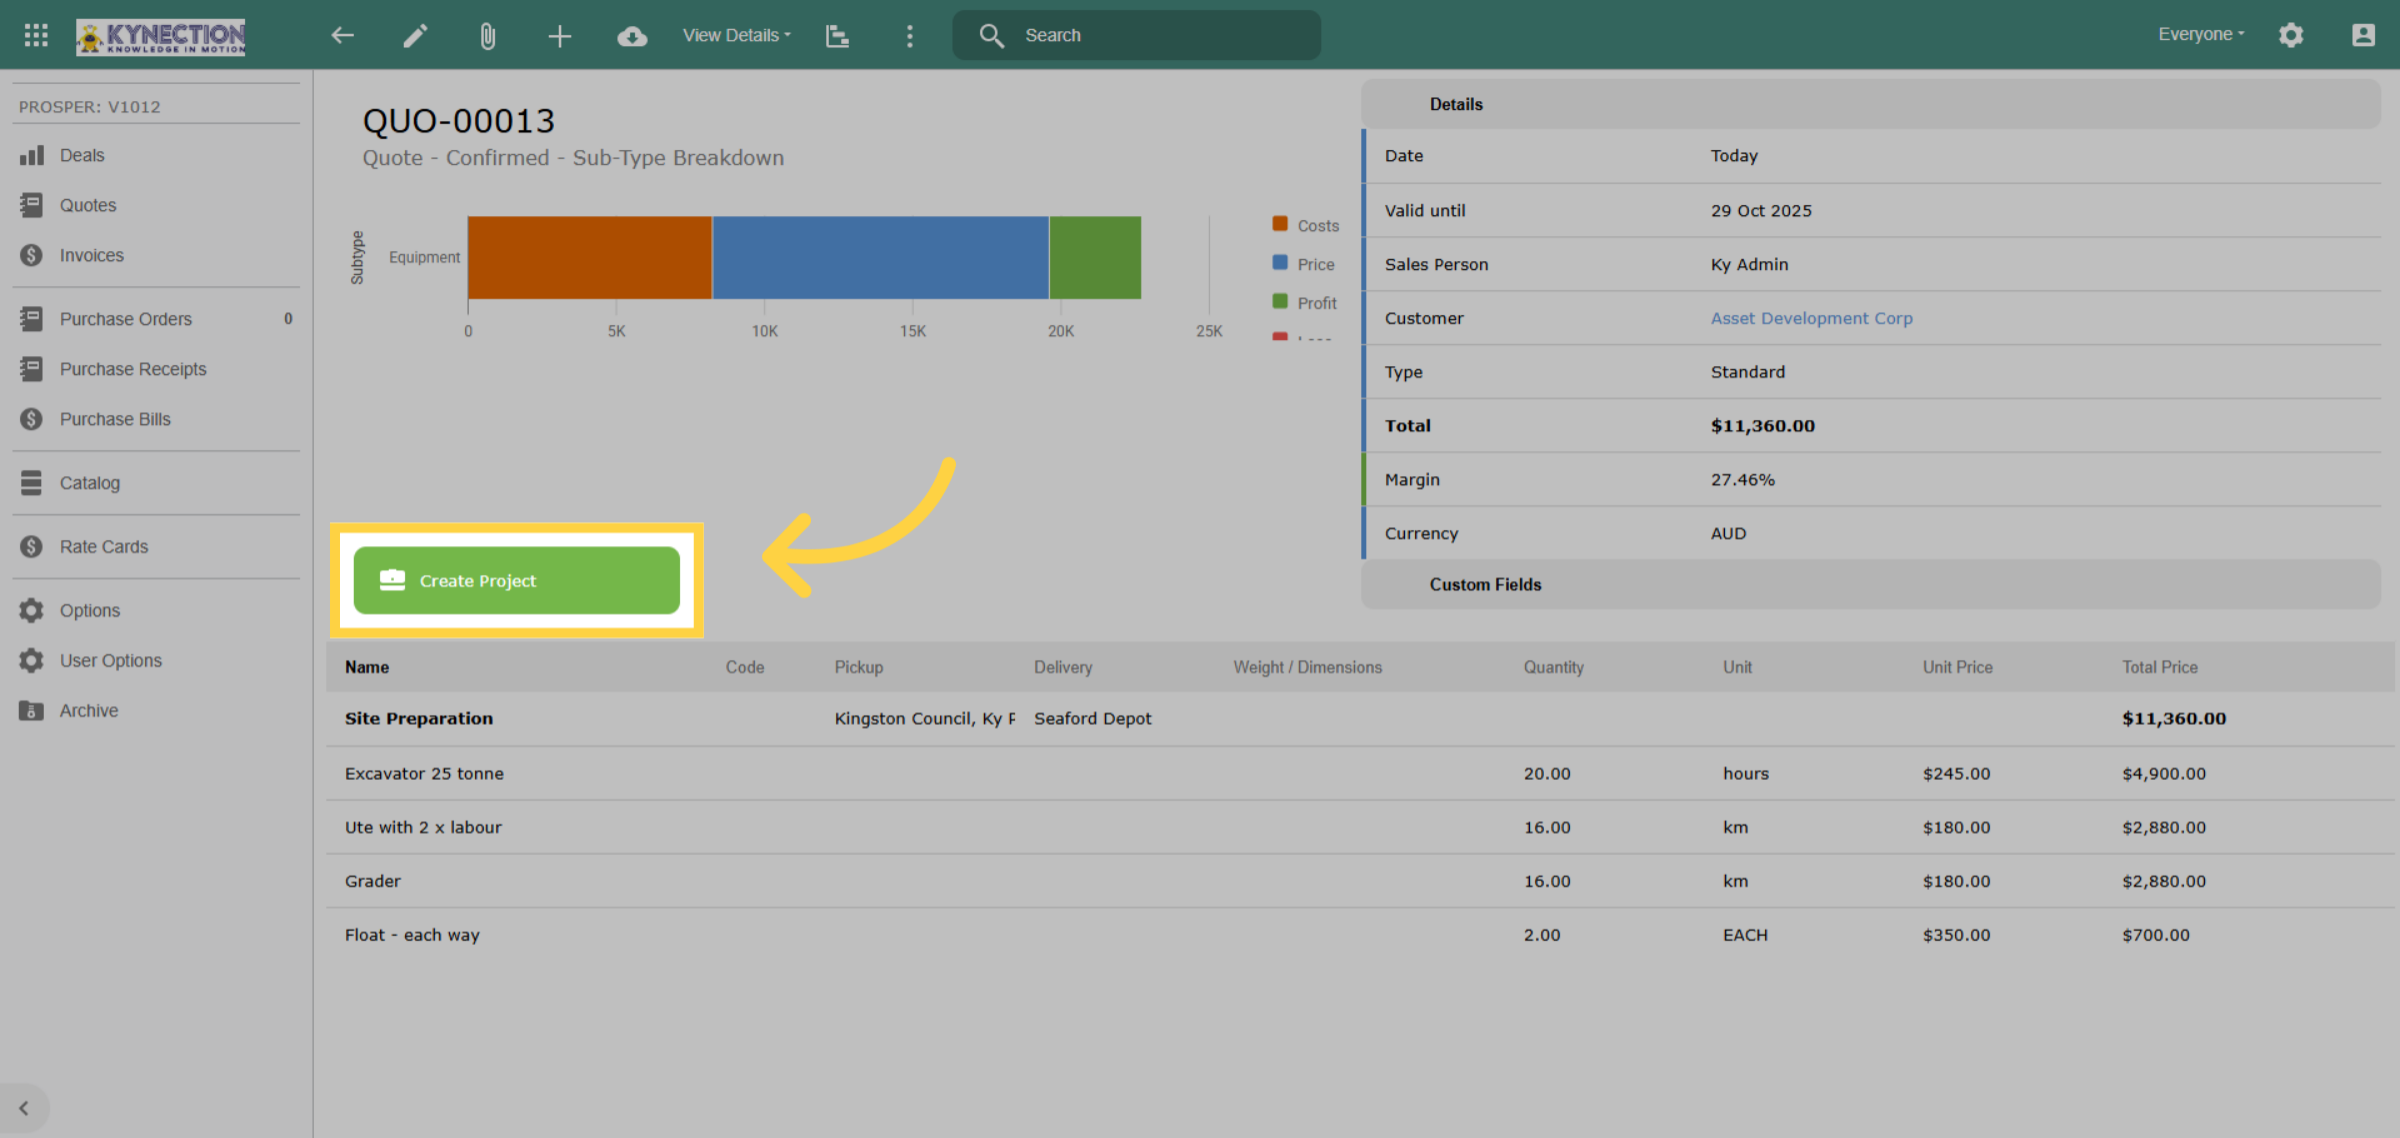
16. Create Project
If a project wasn't created and linked during the quoting process, you can easily initiate a new project from the quote by clicking the "Create Project" button.
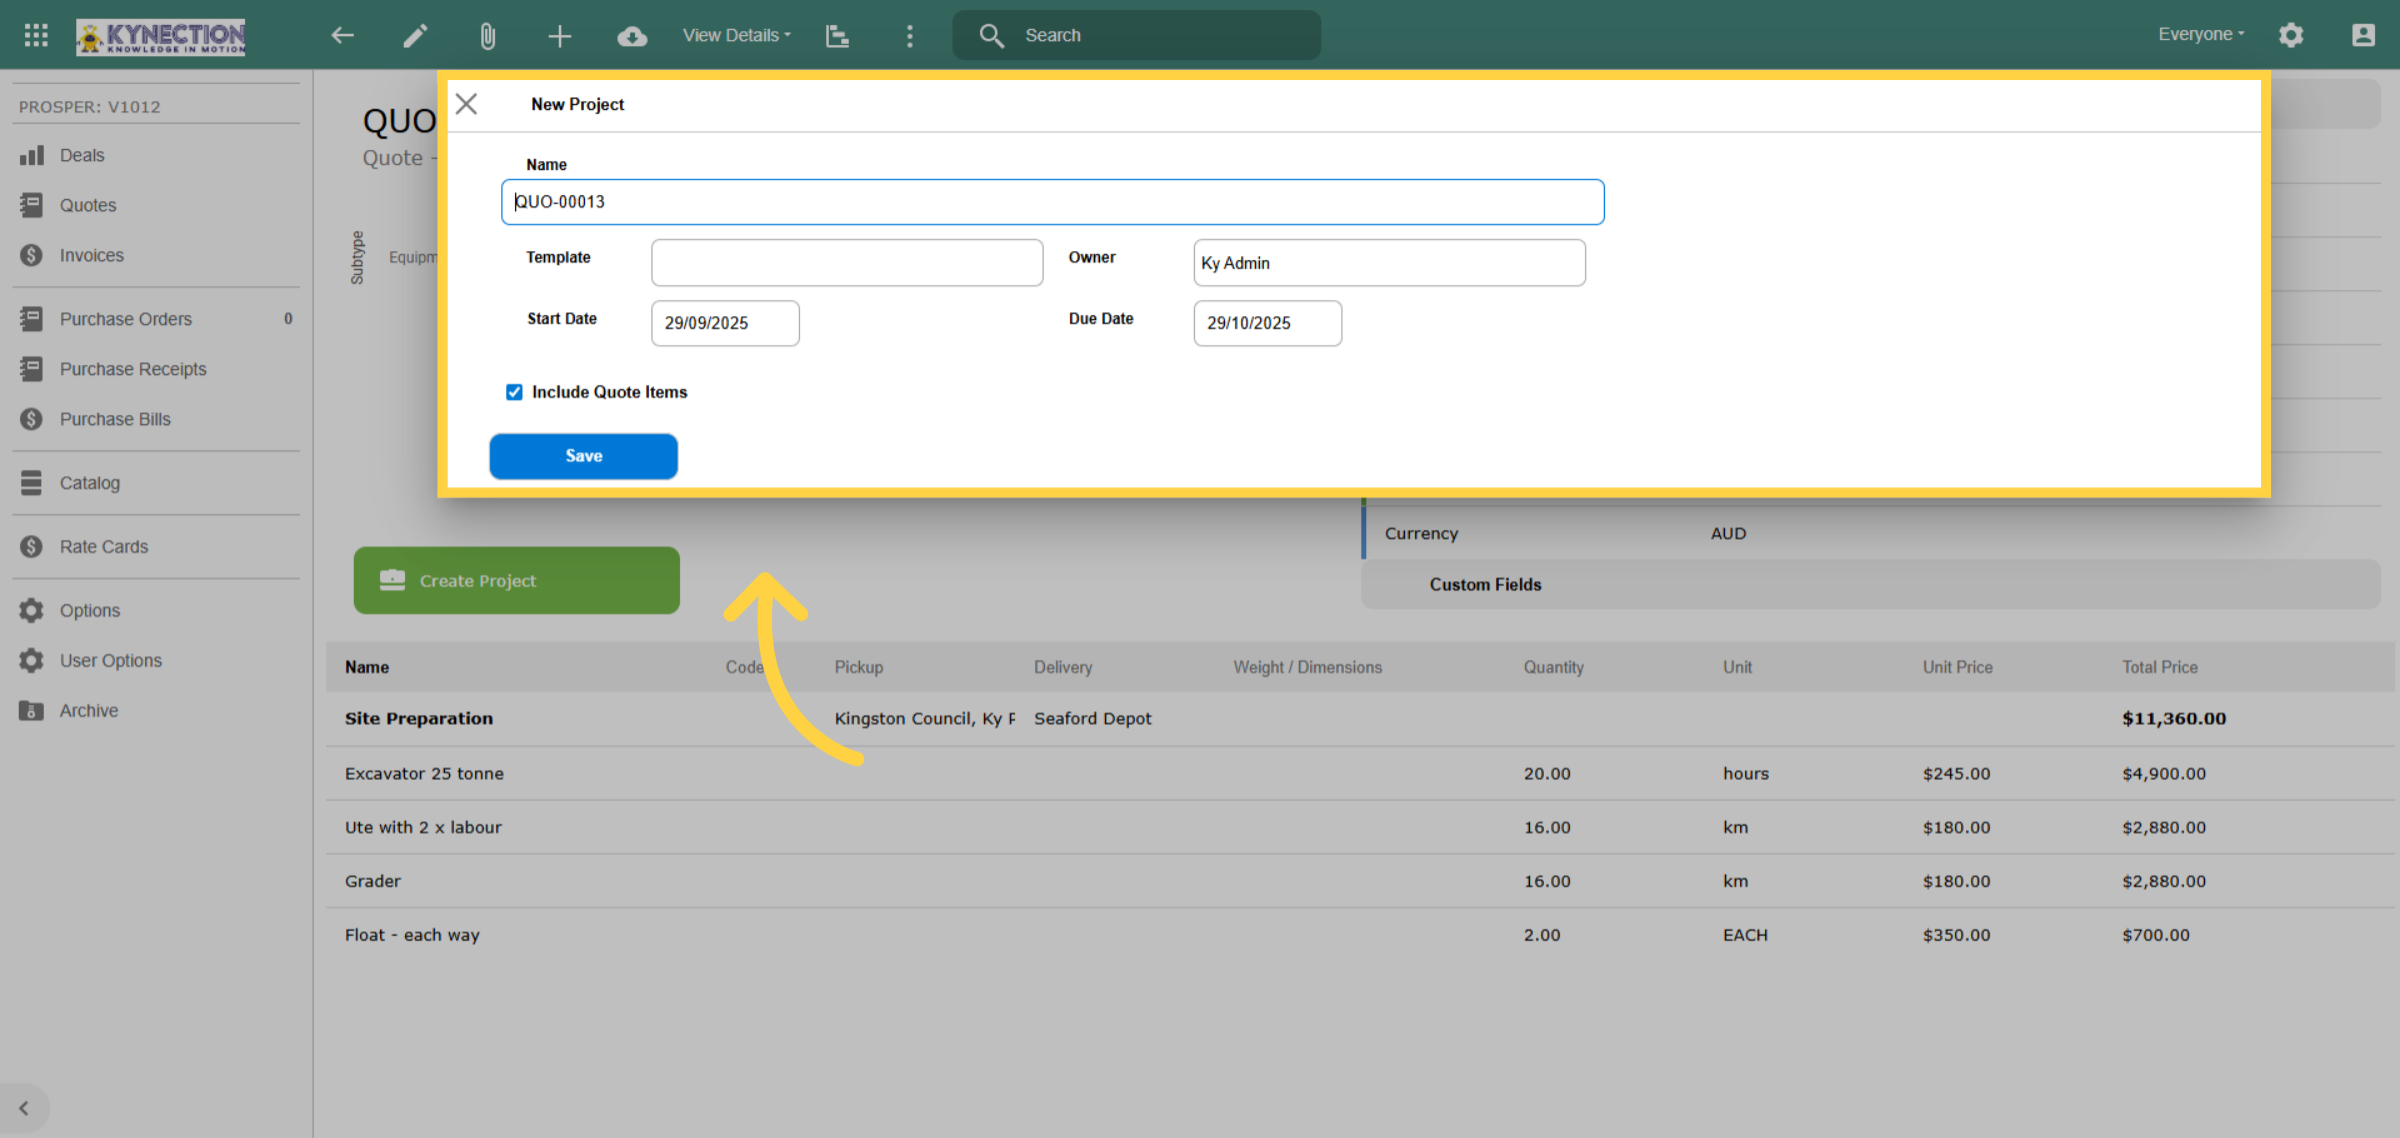
17. Project Name
The project name will automatically default to the quote name, but it can be edited if desired. Select "Save" and then click "OK" in project creation pop-up.
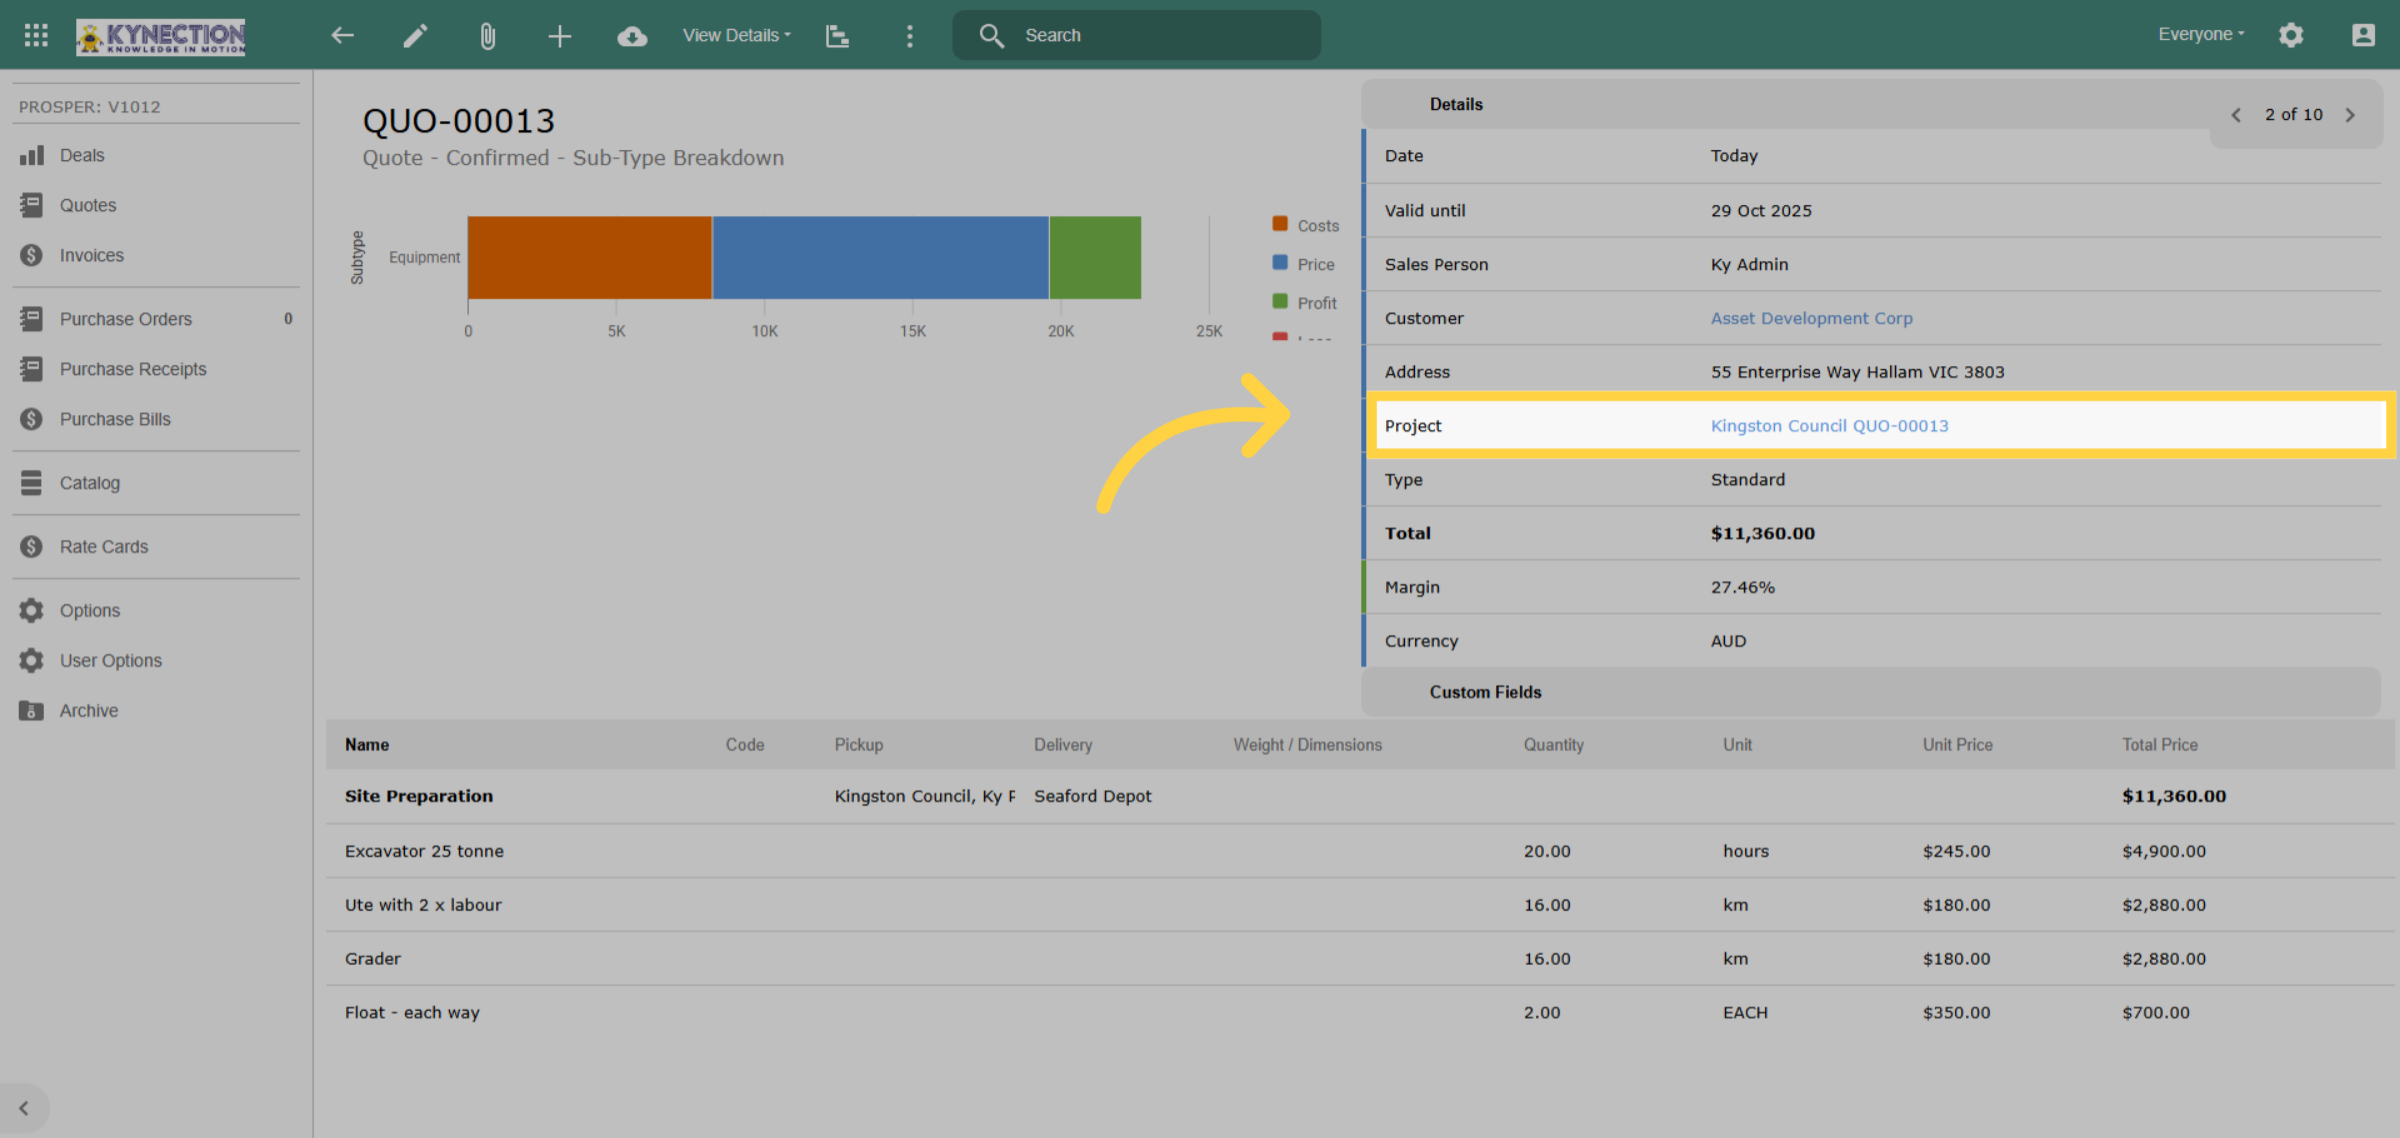
18. Linked Project
The project has been successfully created and linked to the quote. You can now choose to view the project. Invoices are associated with the project's milestones and are issued directly from the project.
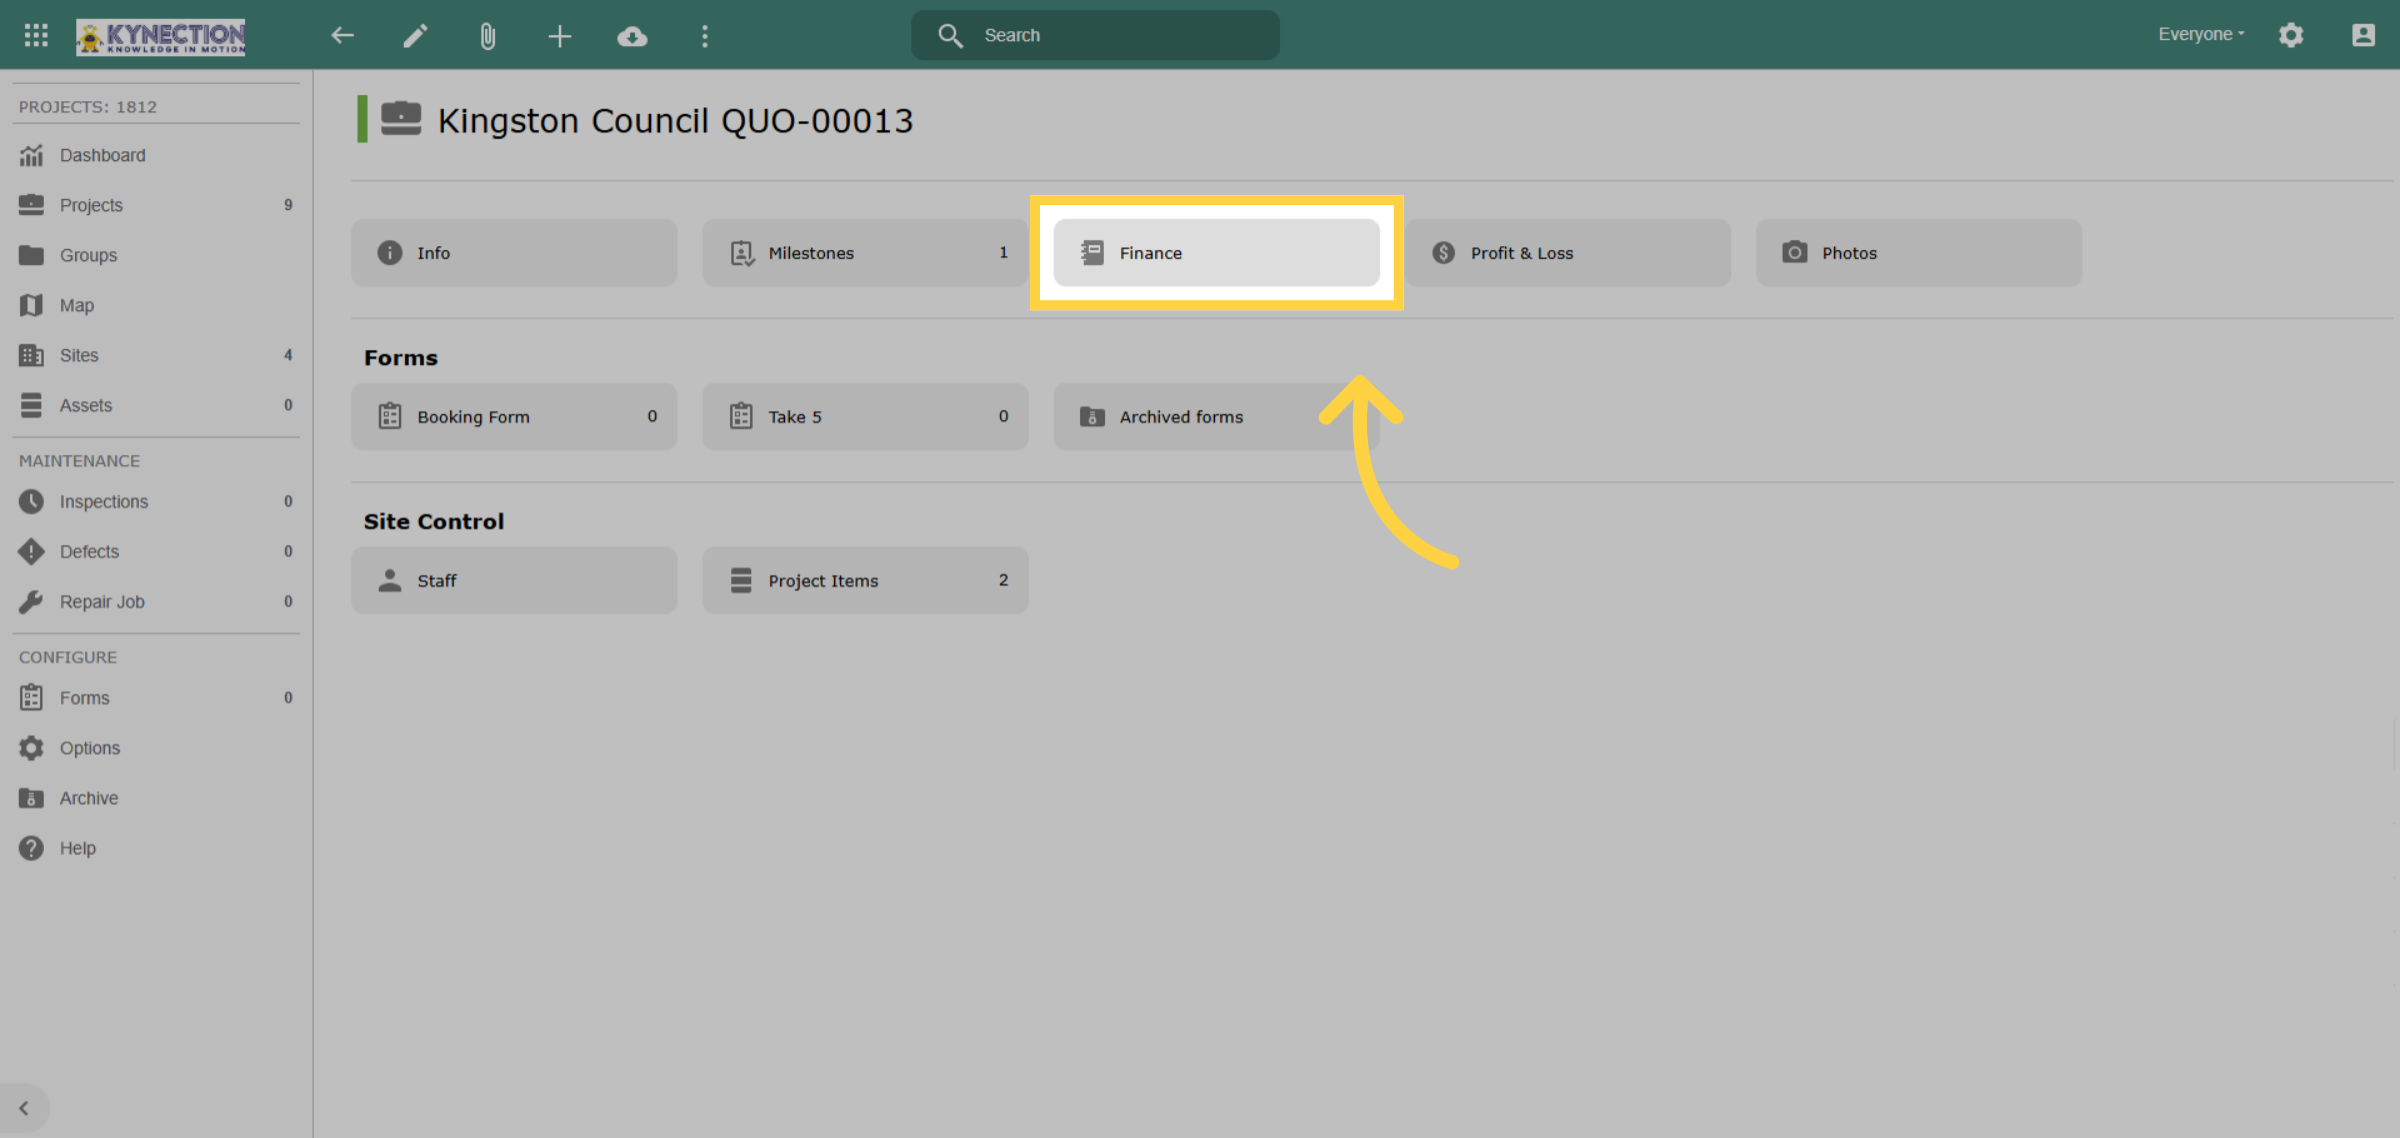
19. Finance Section
After selecting the project, navigate to the Finance tab. This section includes all financial details related to the project, such as billing information, payment schedules, and progress claim history.
20. Raise Invoice
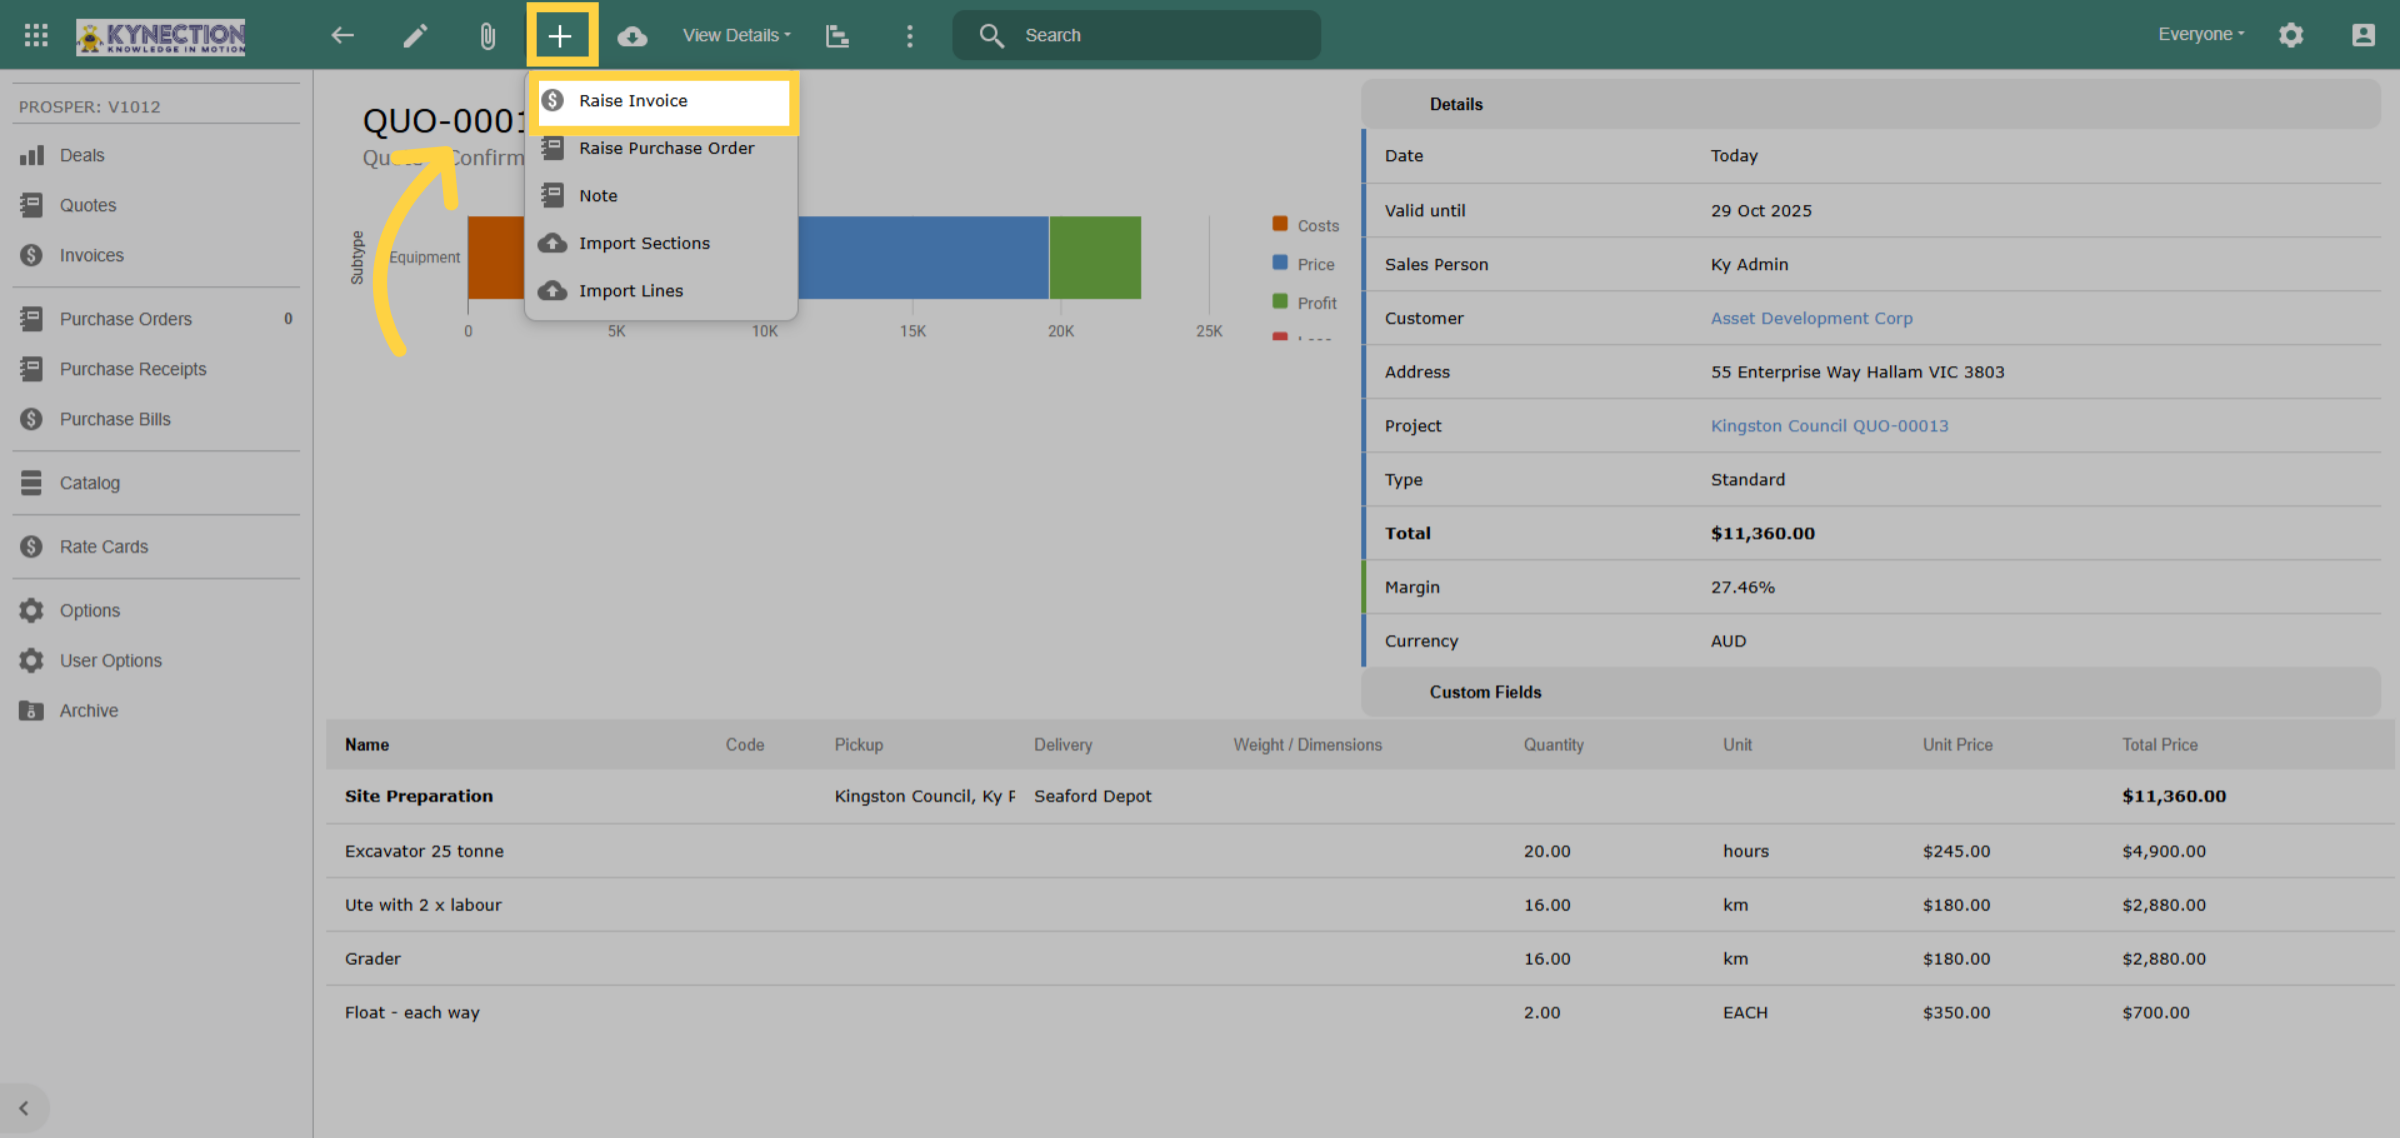
From the Finance section or Milestone, select the plus icon to add a new invoice. Other options include raising a purchase order against the project or from the finance page, raising a quote. For submitting a progress claim or invoice, select the Invoice option.
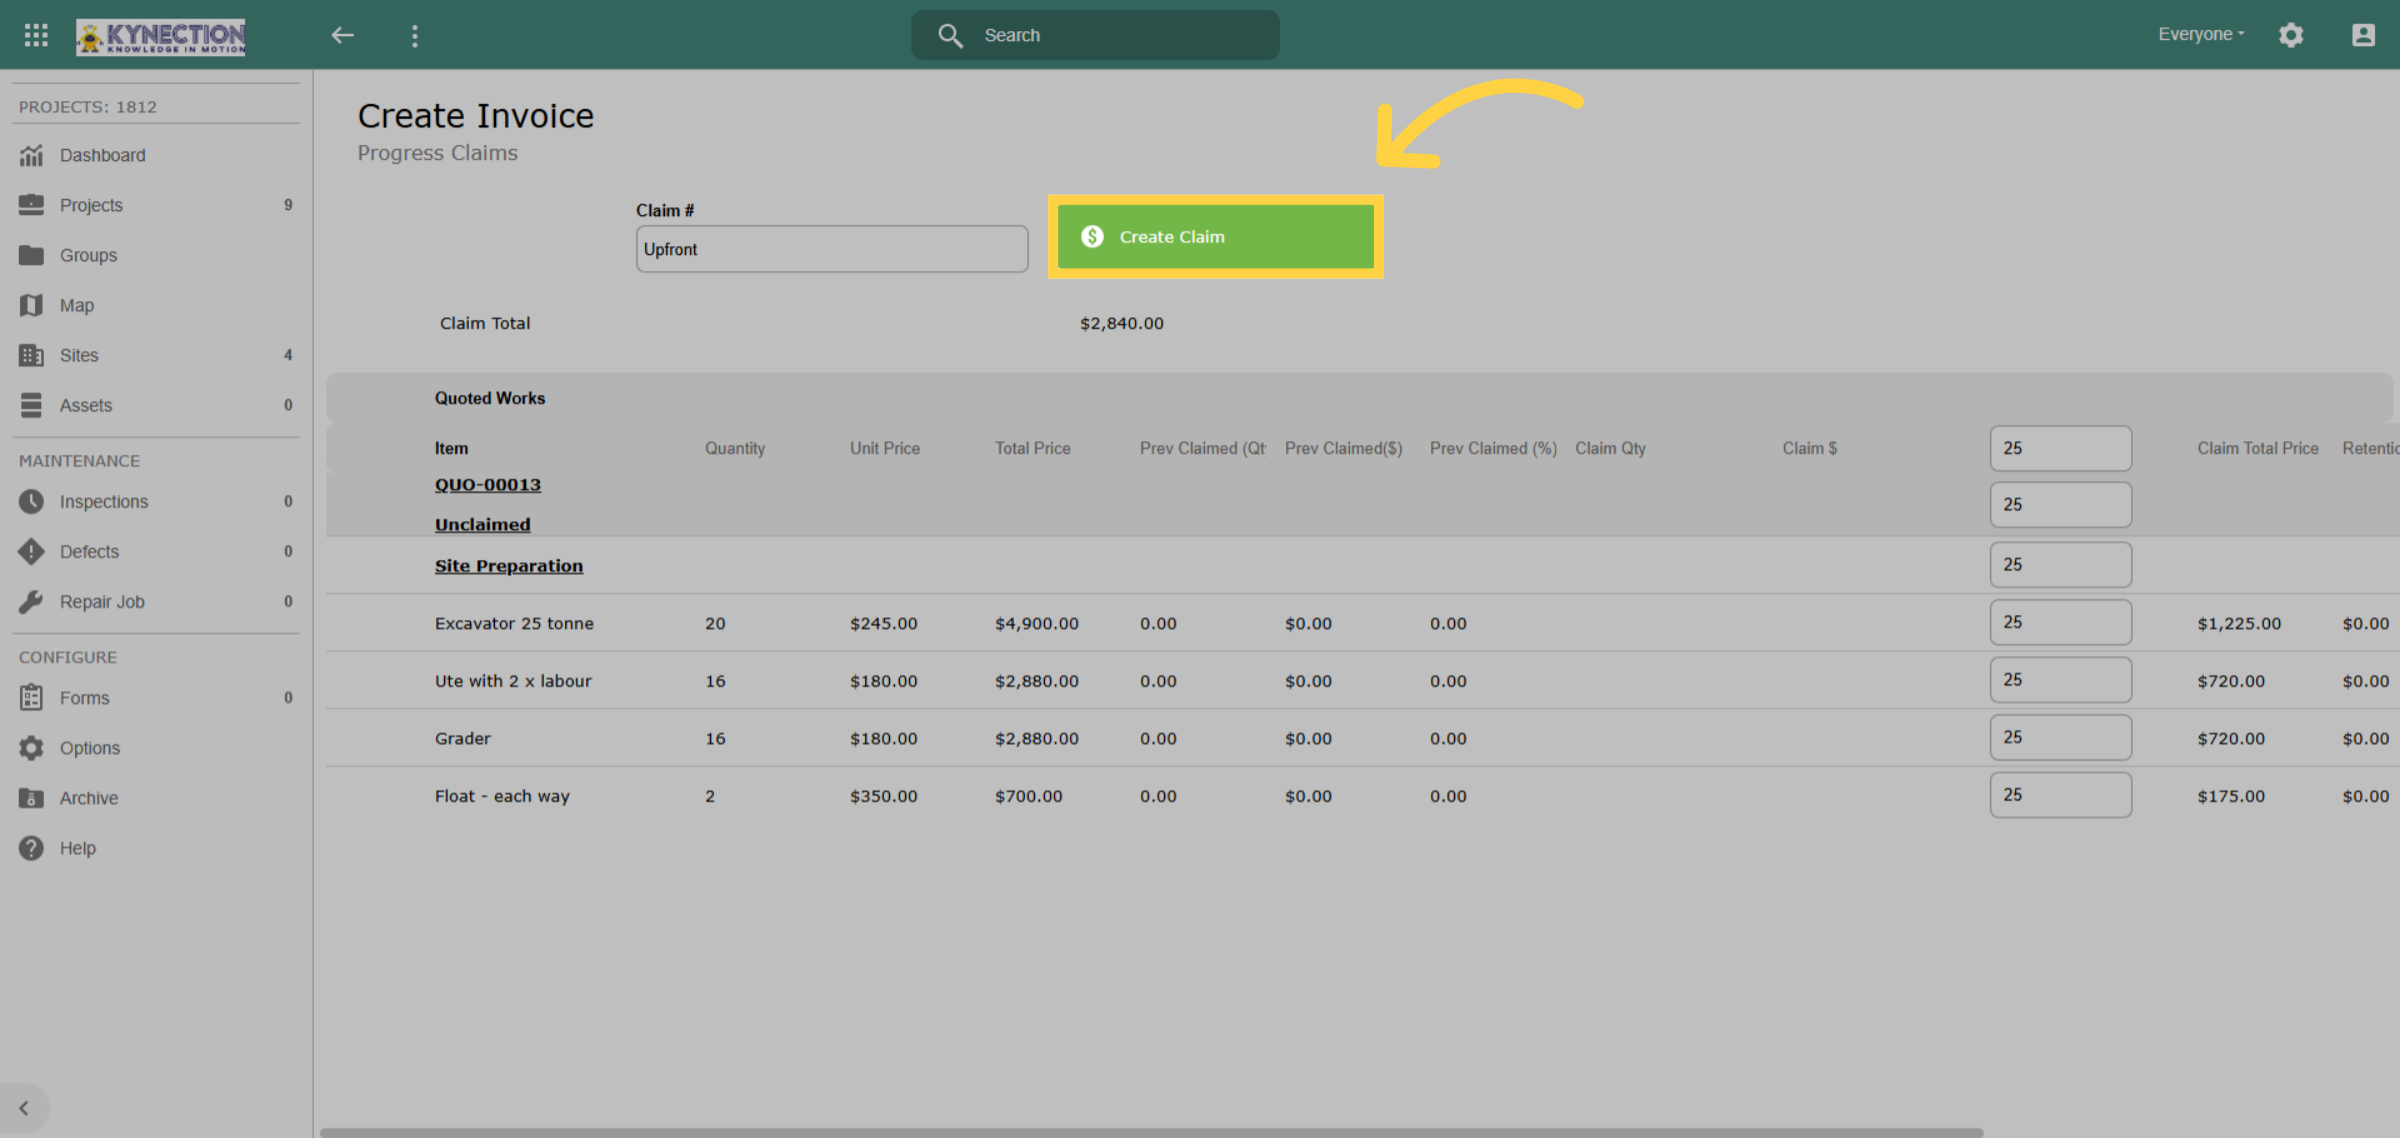
21. Upfront Progress Claim
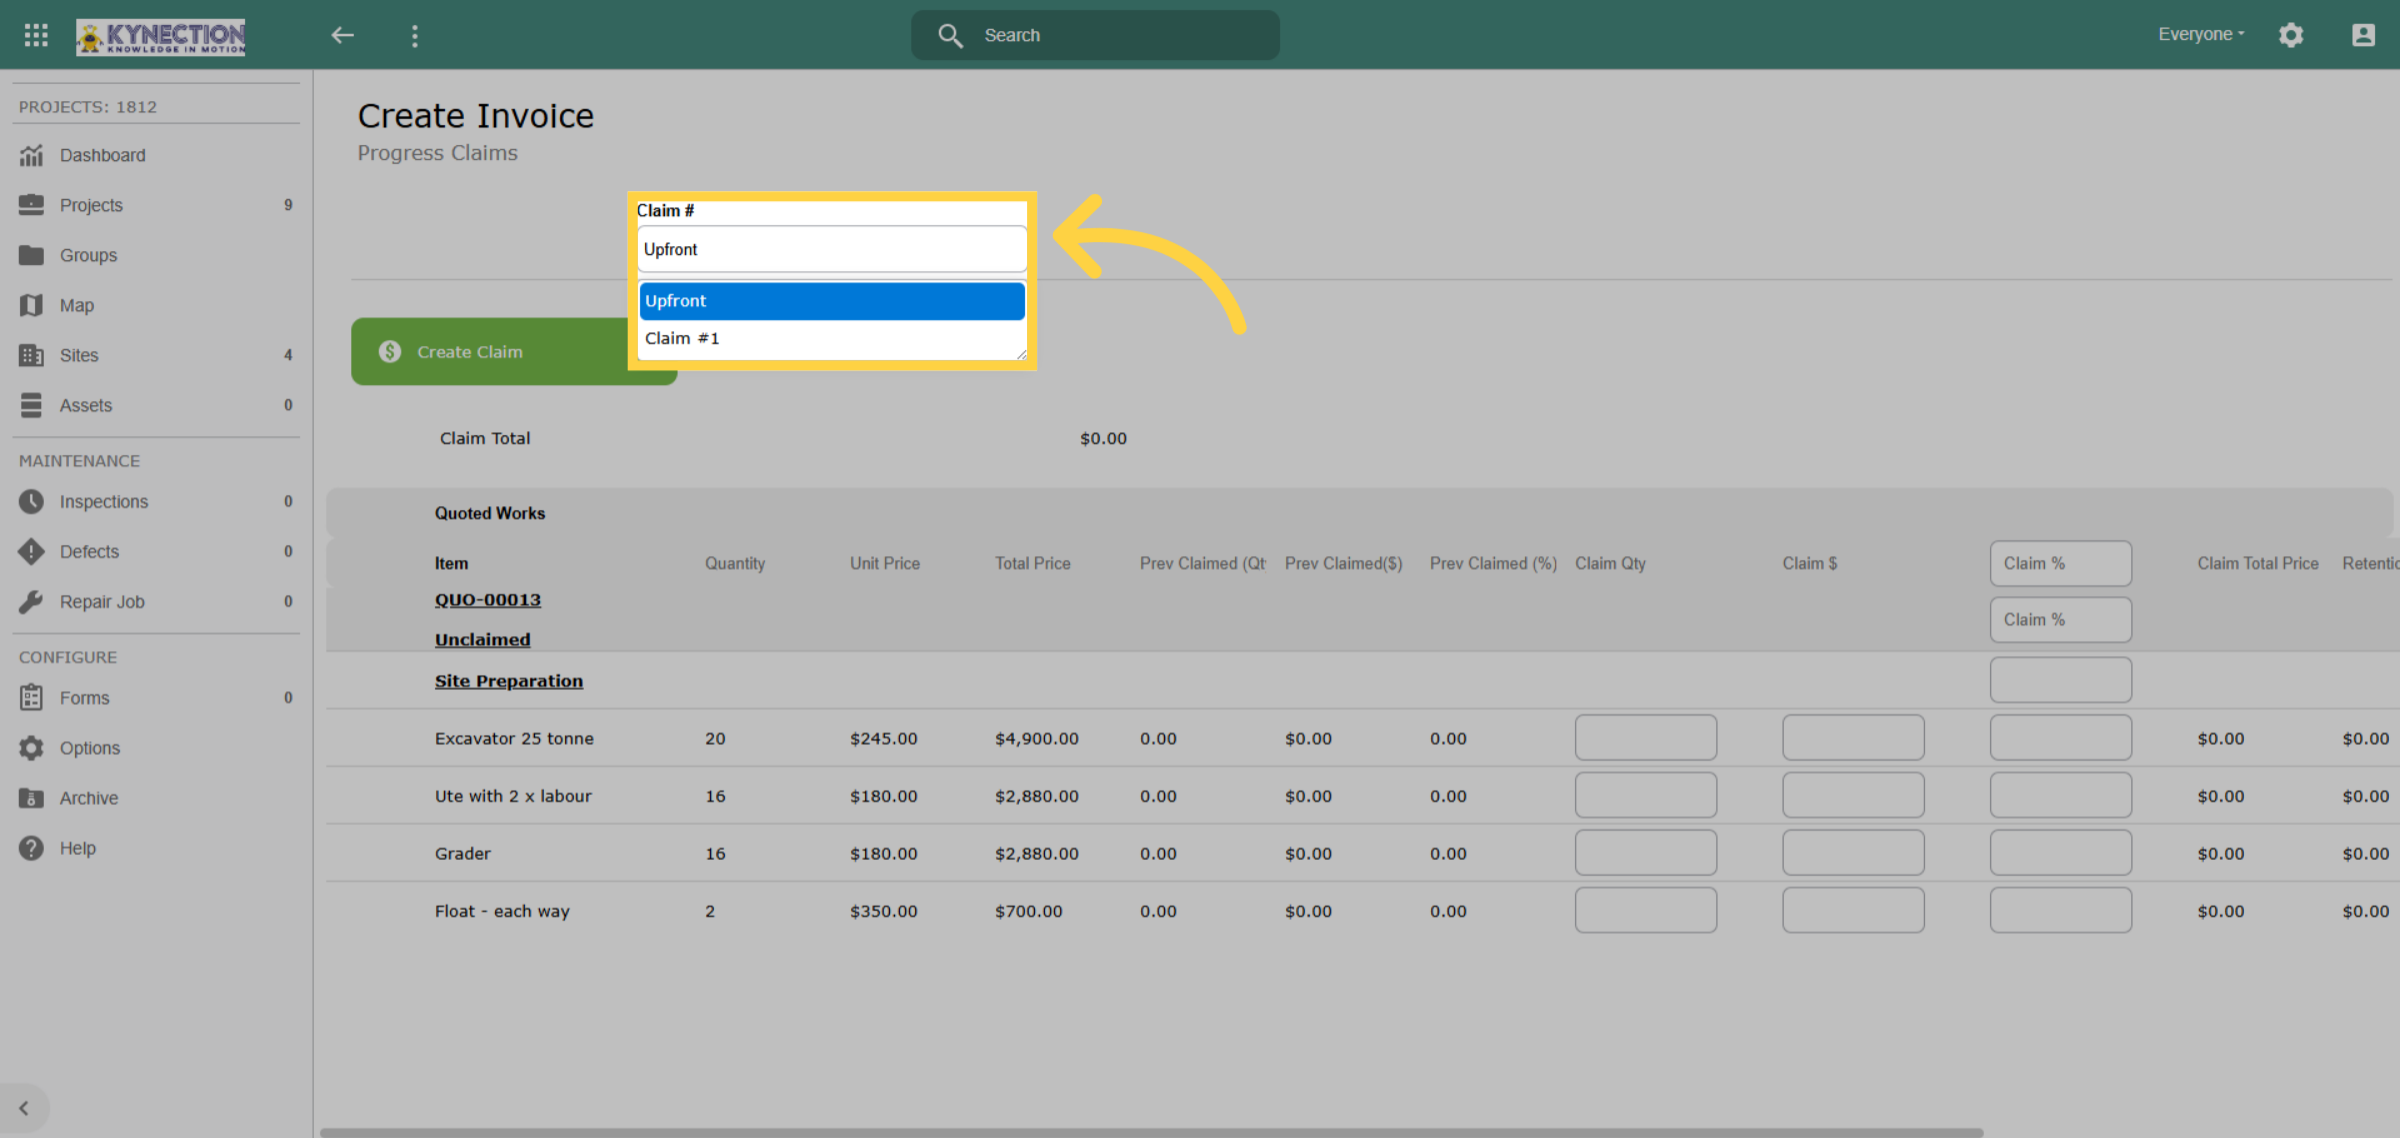
Select the Claim Type. In this example, "Upfront" is chosen, signifying that the invoice pertains to the project's initial phase. After making your selection, you can input essential details, including the upfront cost, the scope of the foundational work, and any pertinent information. This will generate a progress claim for the initial payment.
22. Claim Quantity
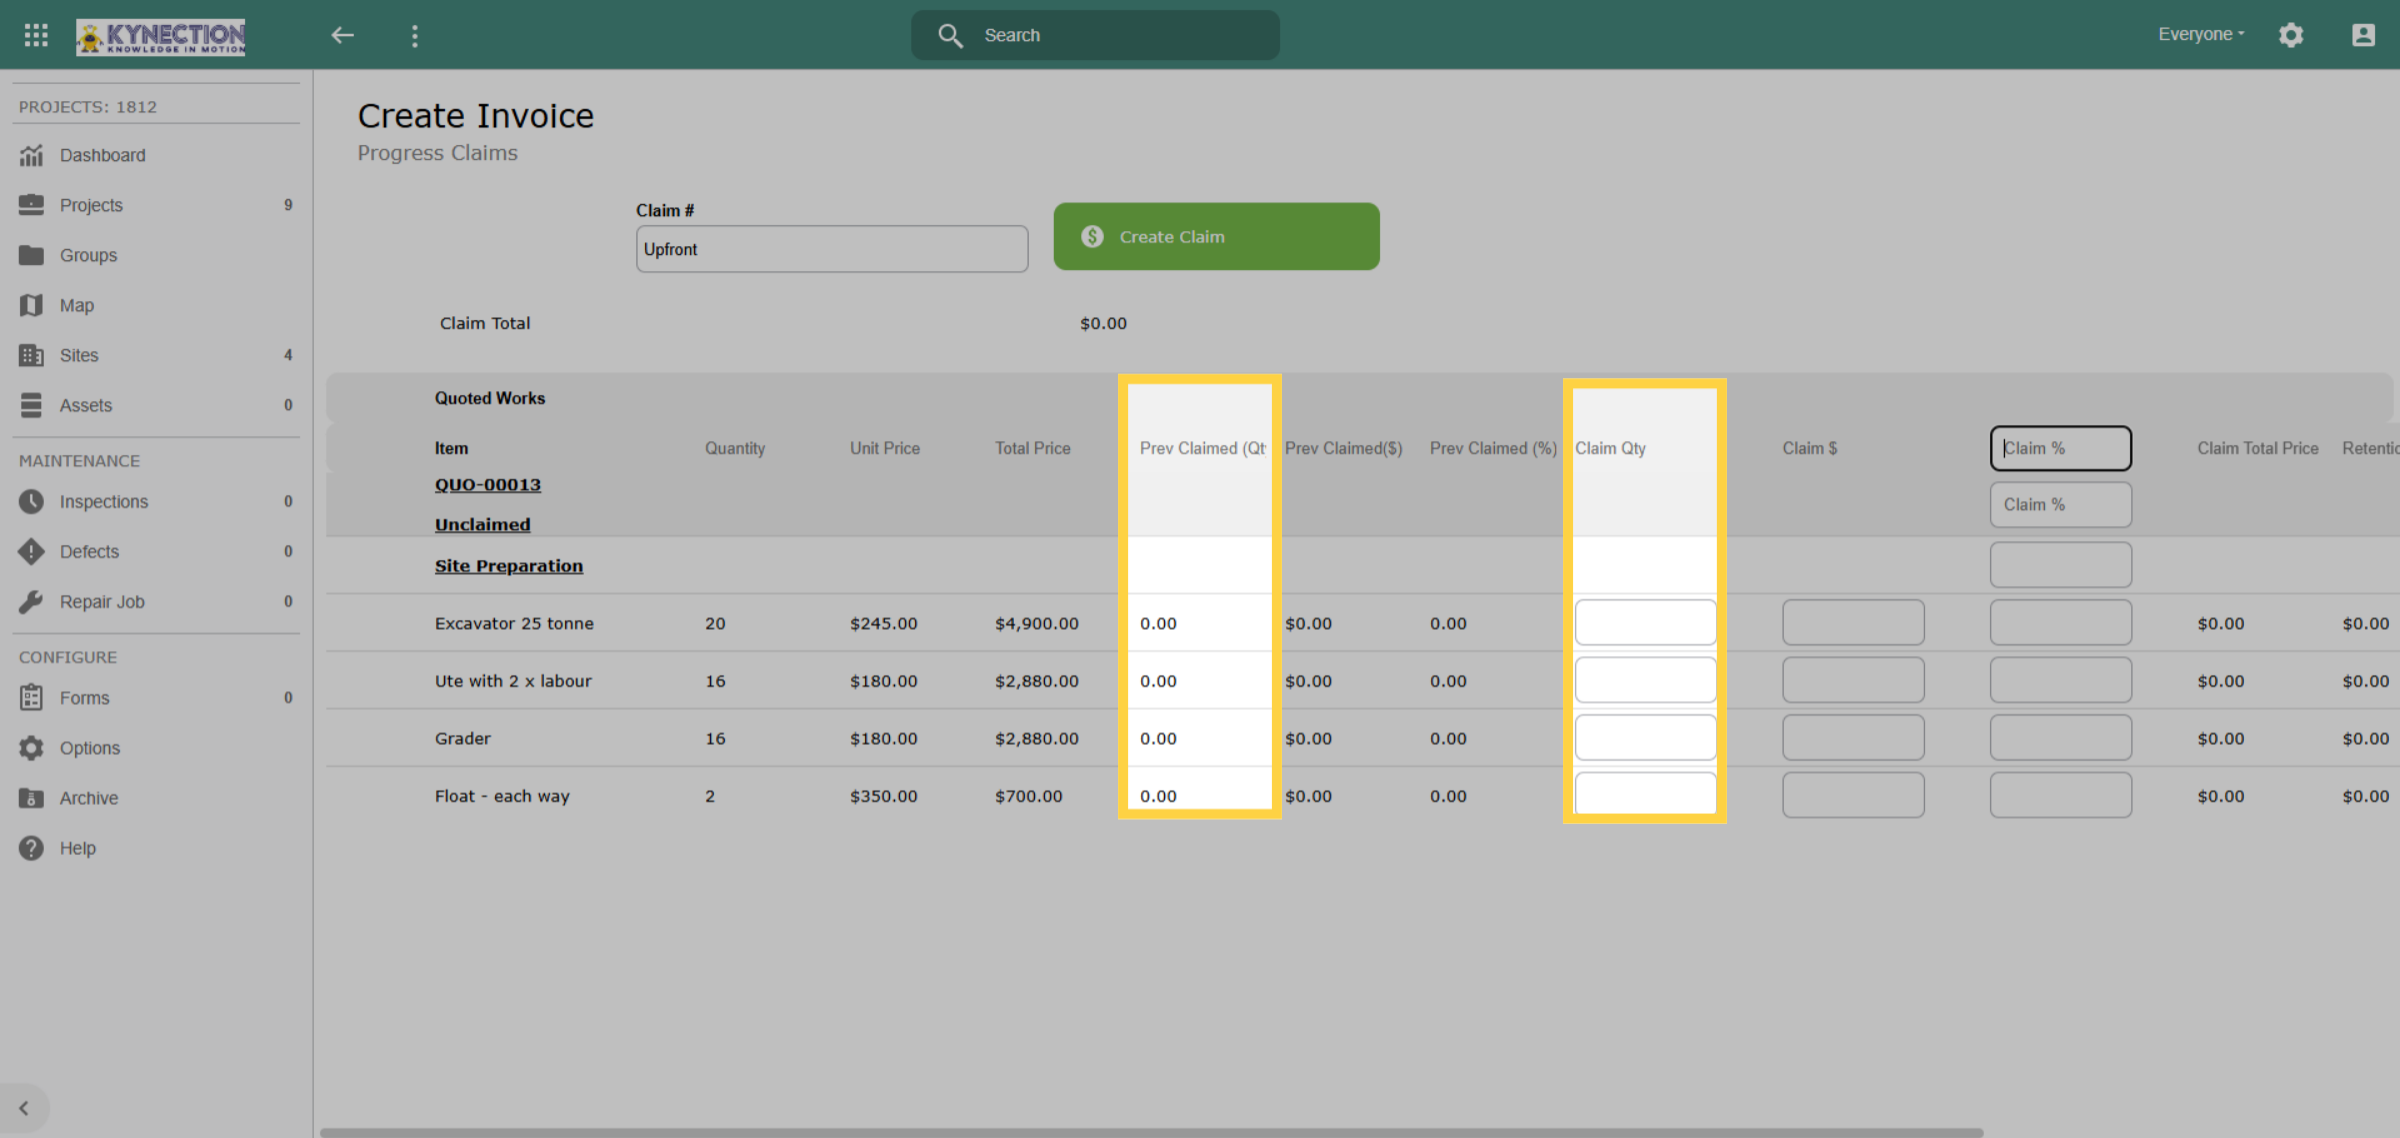
To enter the claim quantity, start by reviewing the completed work. For quantity-based claims, the system automatically updates the item completion quantity based on the jobs entered, displaying the total completed quantity for all unclaimed jobs. This approach streamlines the entry of claim quantities by consolidating all job totals efficiently.
23. Claim Pertentage
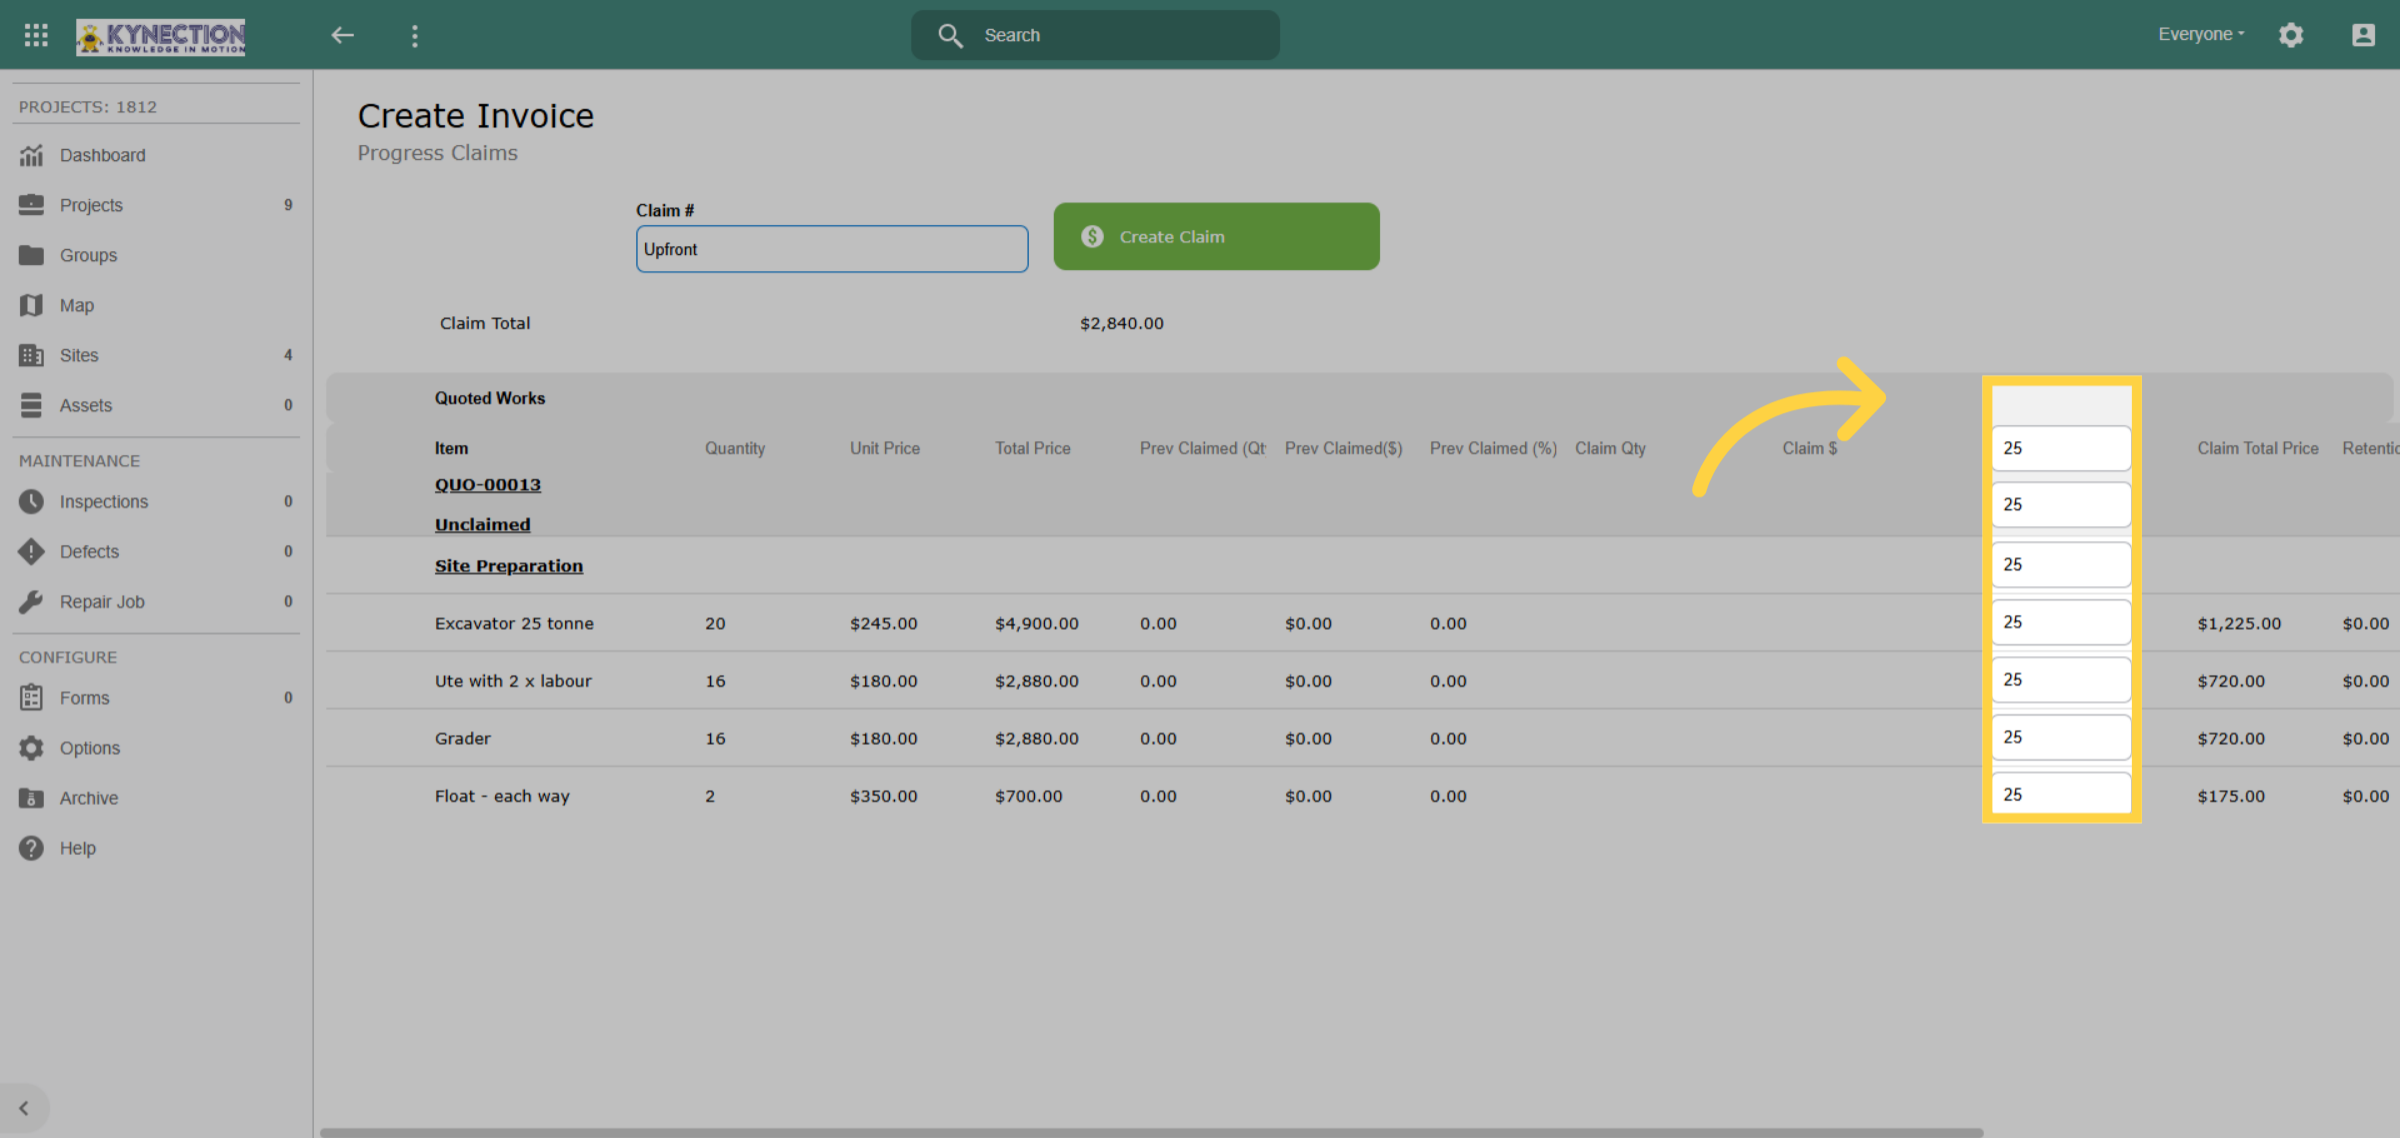
To submit a claim using a percentage, enter the percentage in the designated field and hit enter. The system will automatically calculate the corresponding amount based on the total value of the project or milestone, ensuring an accurate reflection of the work completed. Once you finalise your entry, proceed to review and submit your claim.
24. Create Claim
Once all required fields, including the claim quantity,, are entered, choose Create Claim. This generates the progress claim or invoice. Submit it for approval or processing. This officially records the submission in the system.
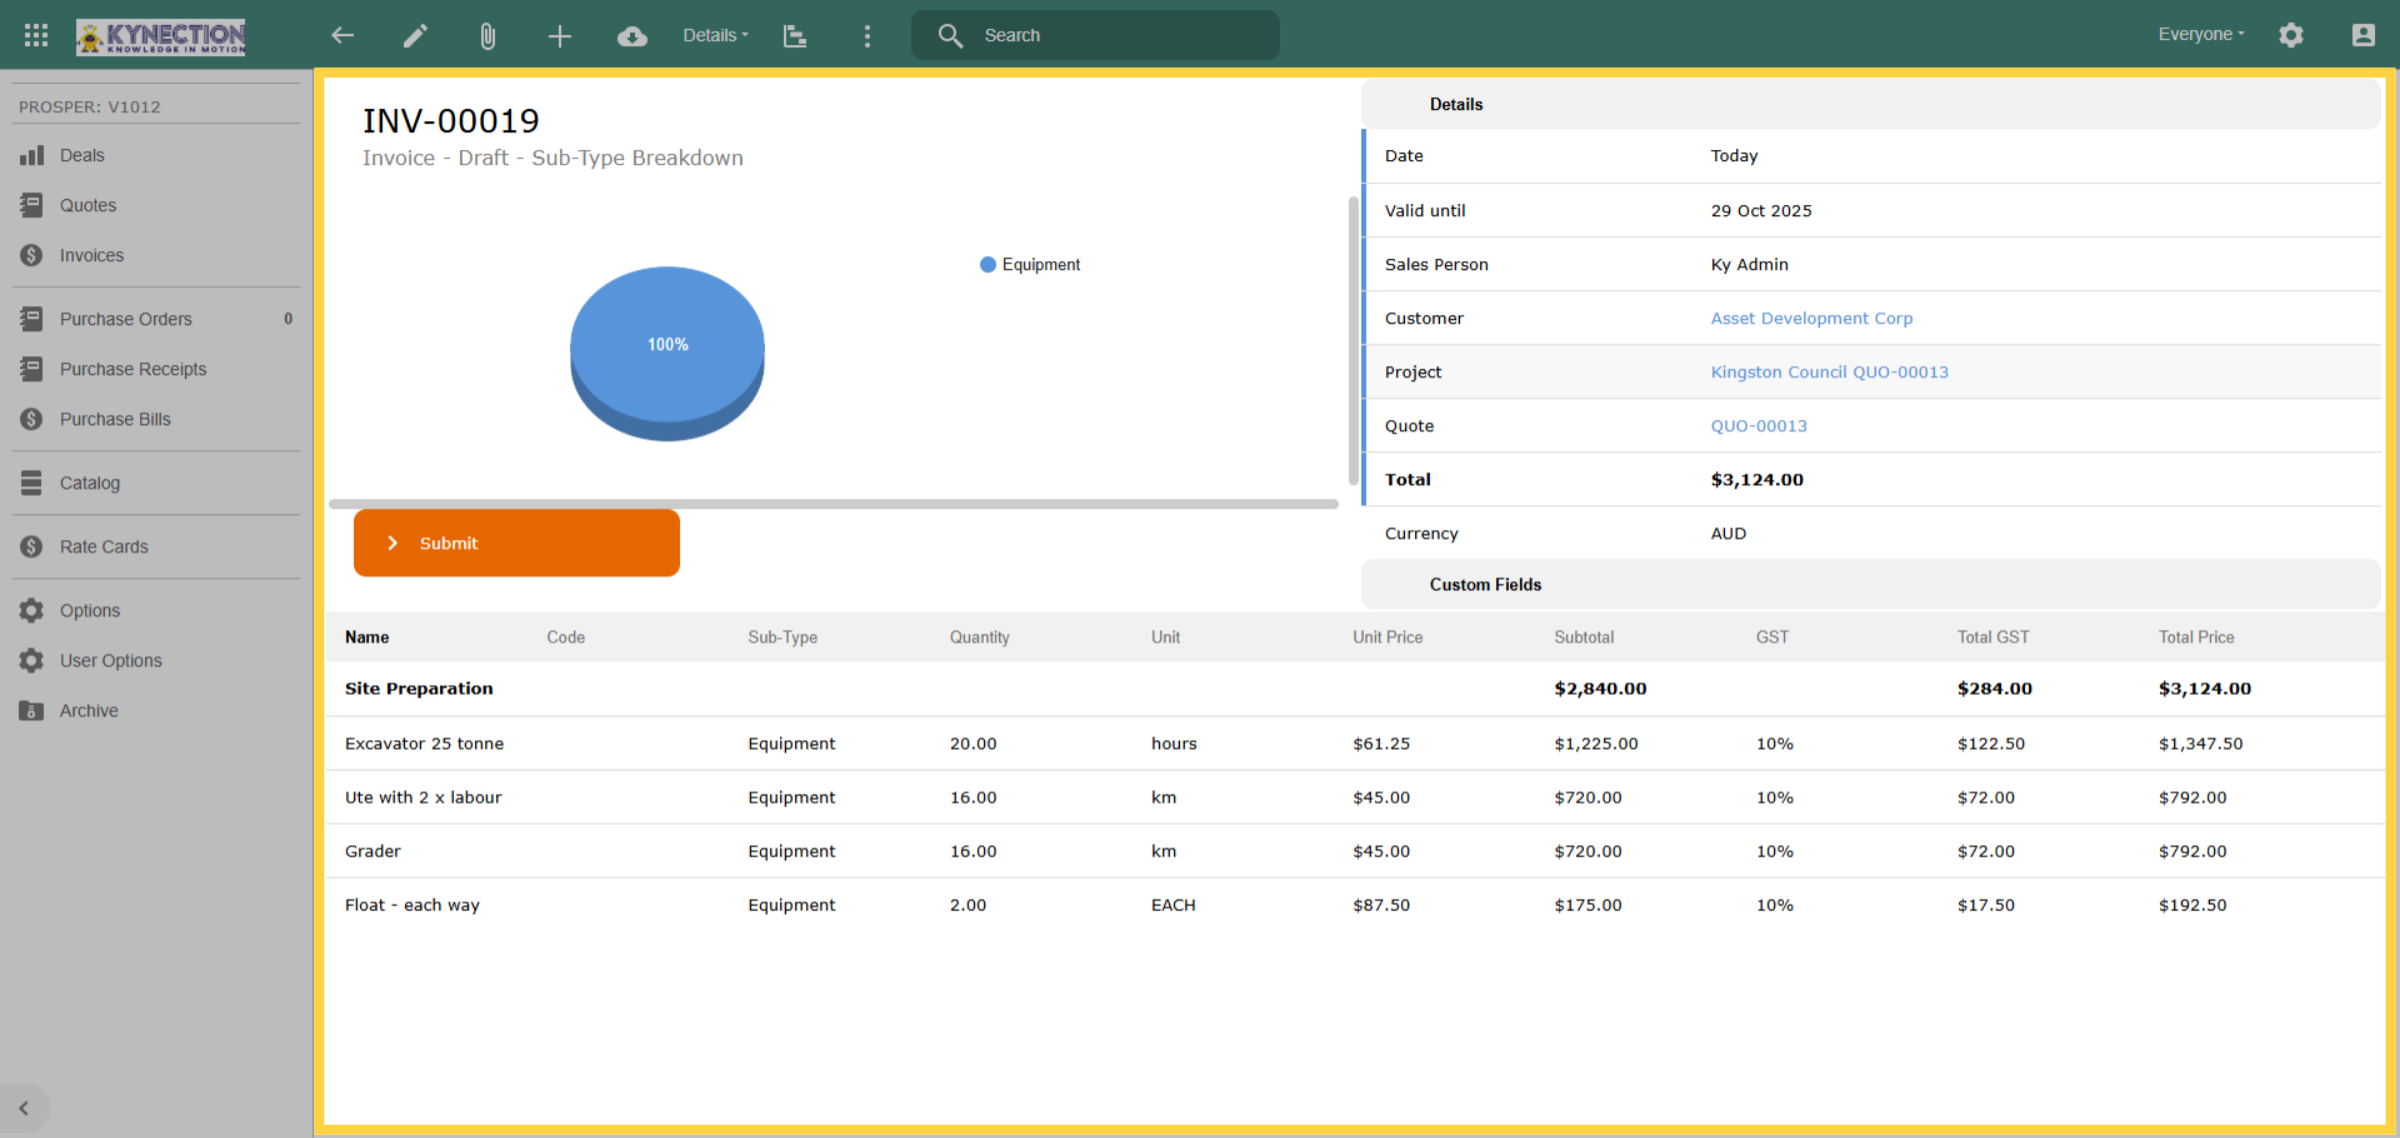
25. Draft Invoice
Once you create the progress claim the invoice details will be displayed. Click the Submit button to finalise and submit the invoice for approval or processing. Invoices can also be raised through jobs.
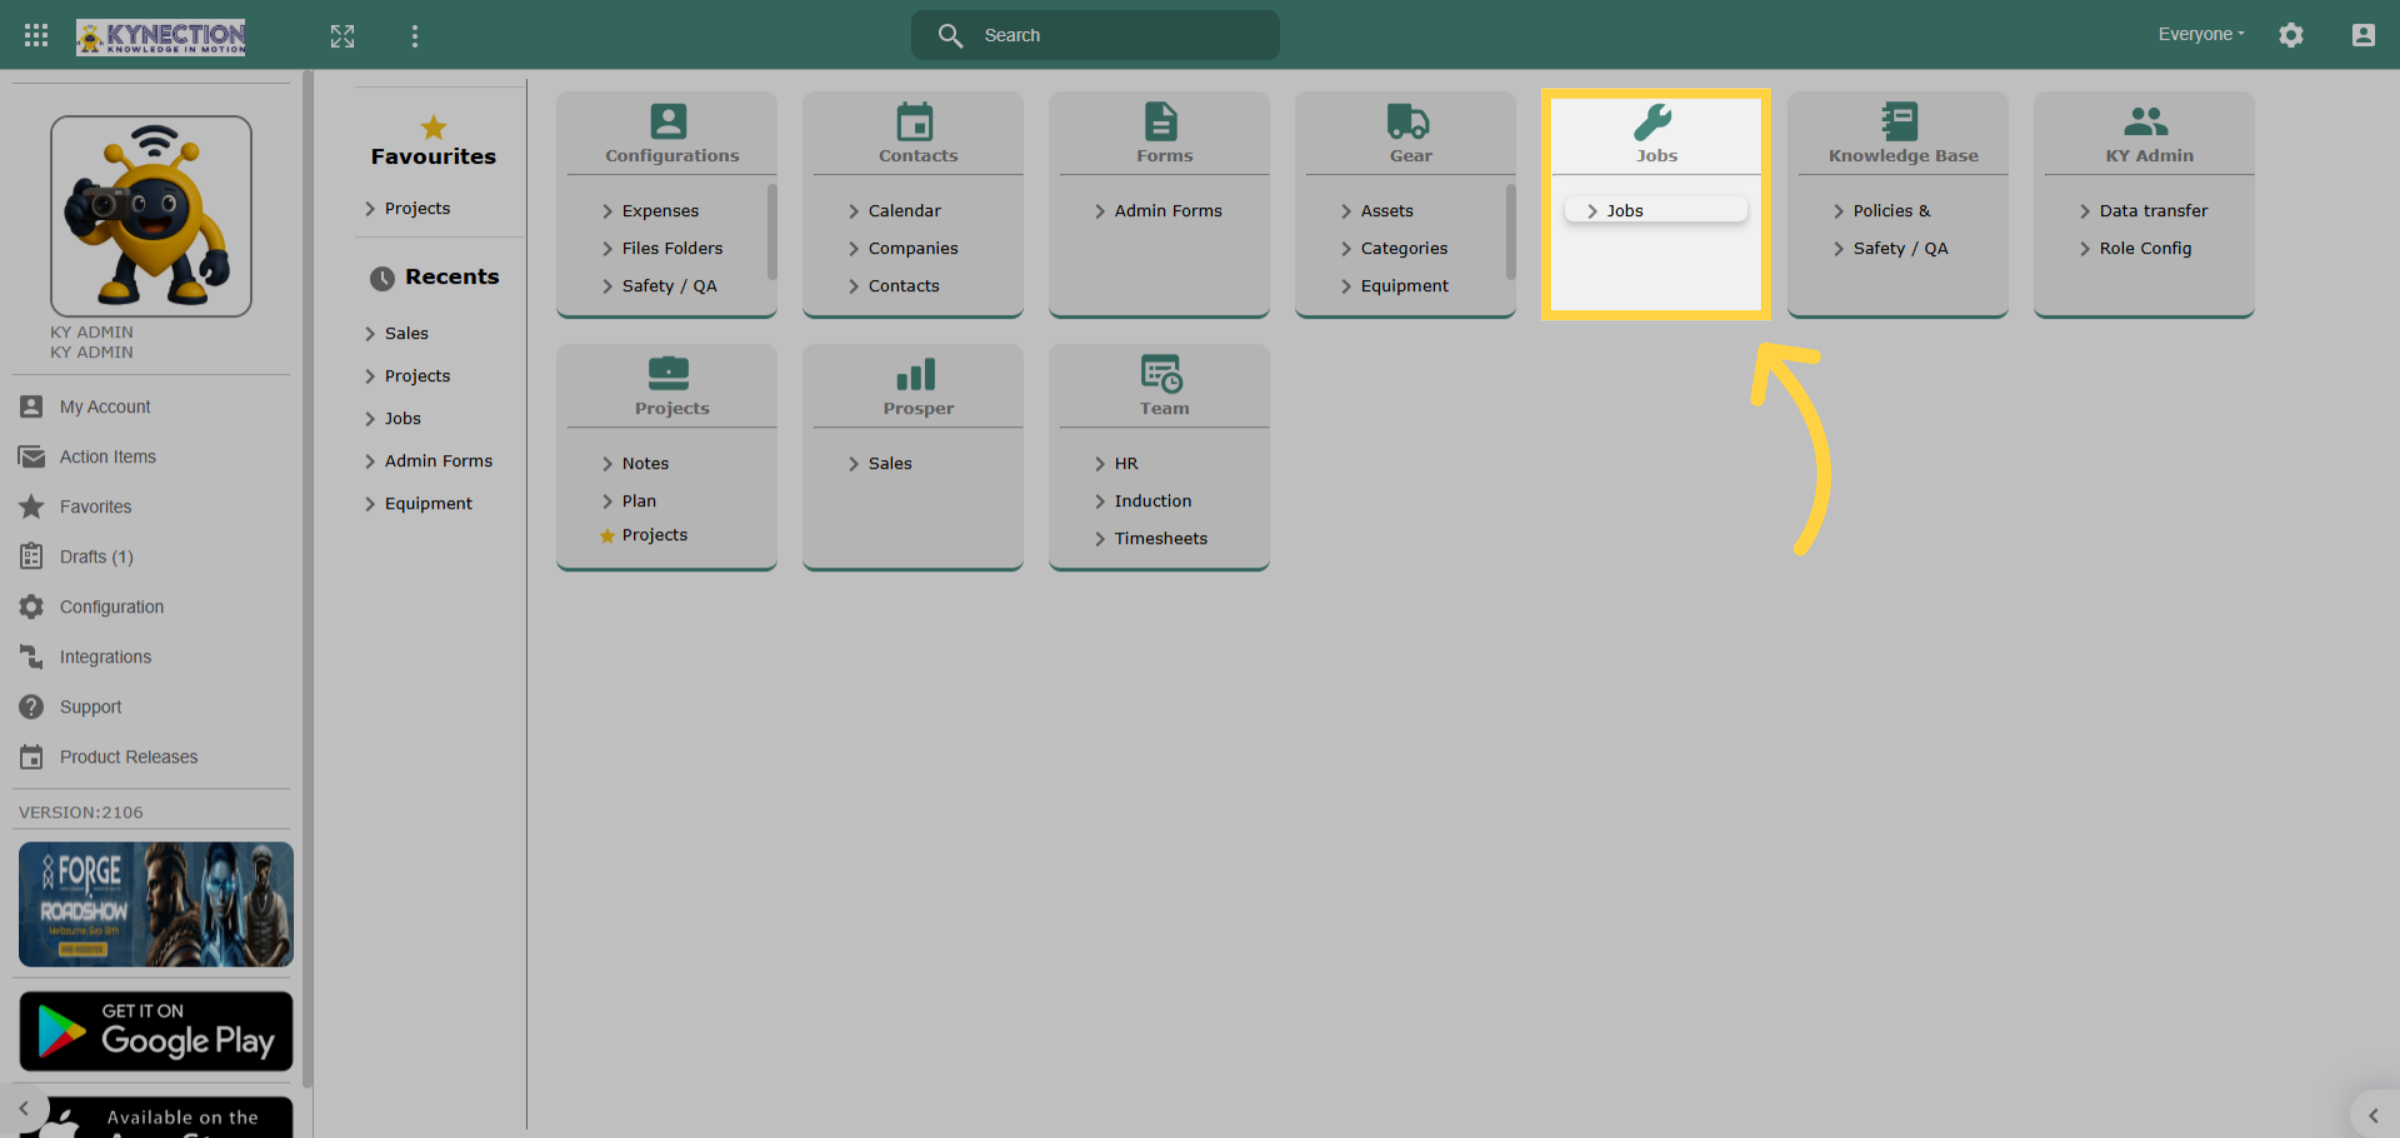
26. Invoicing from Jobs Module
Access the Jobs module to initiate the invoicing process for jobs that are not tied to milestones.
27. Completed and Approved Jobs
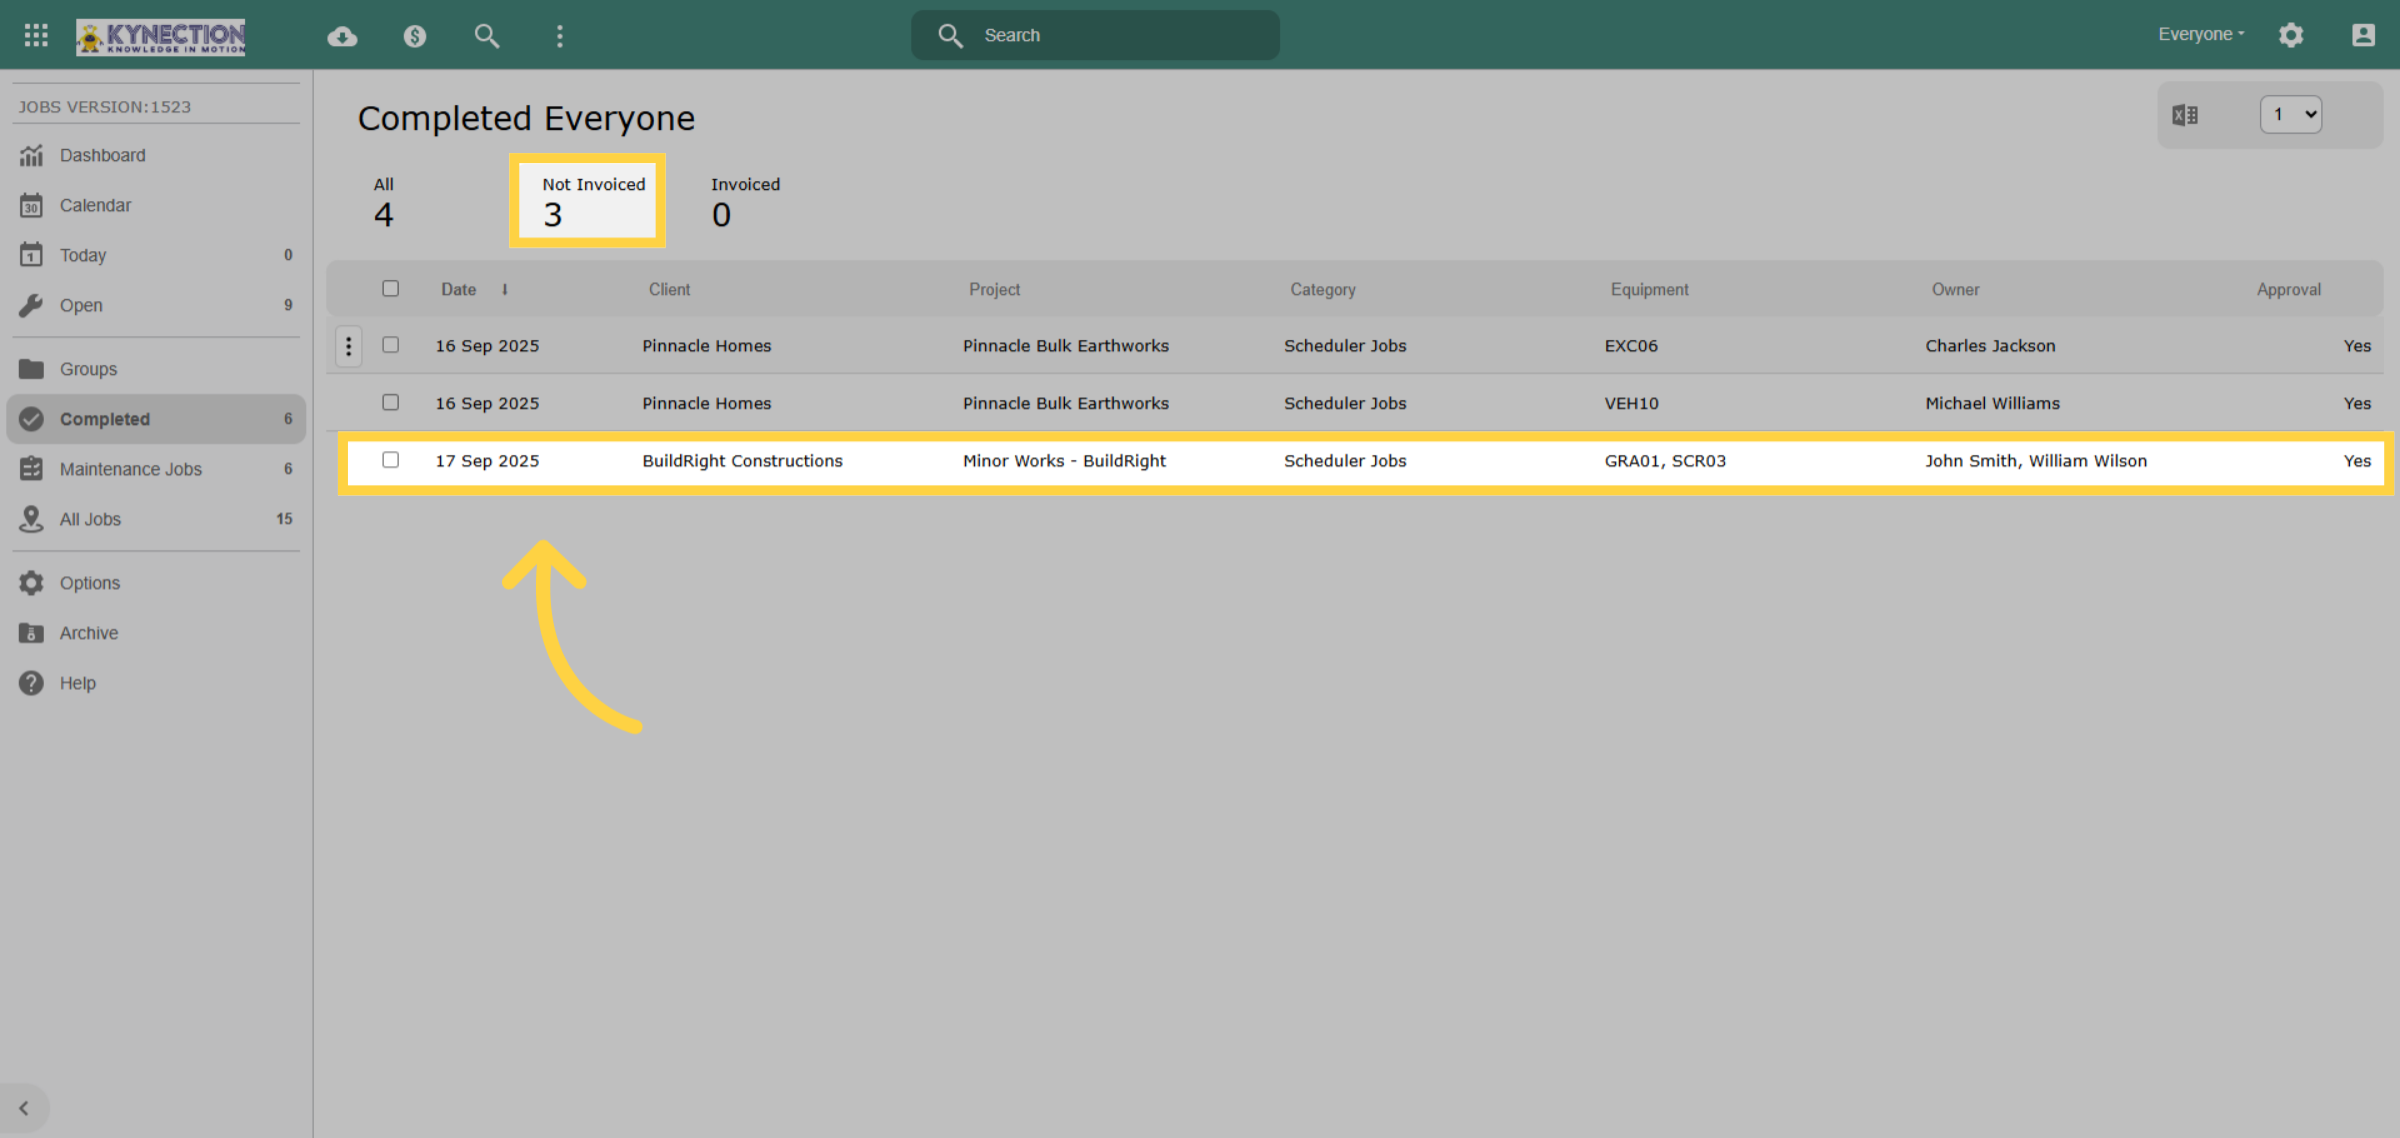
Jobs must be completed and approved before they can be invoiced. The Tab for "All" contains all completed jobs, including invoiced jobs. Once a job is completed and approved but not yet invoiced, it will be listed under the "Not Invoiced" tab.
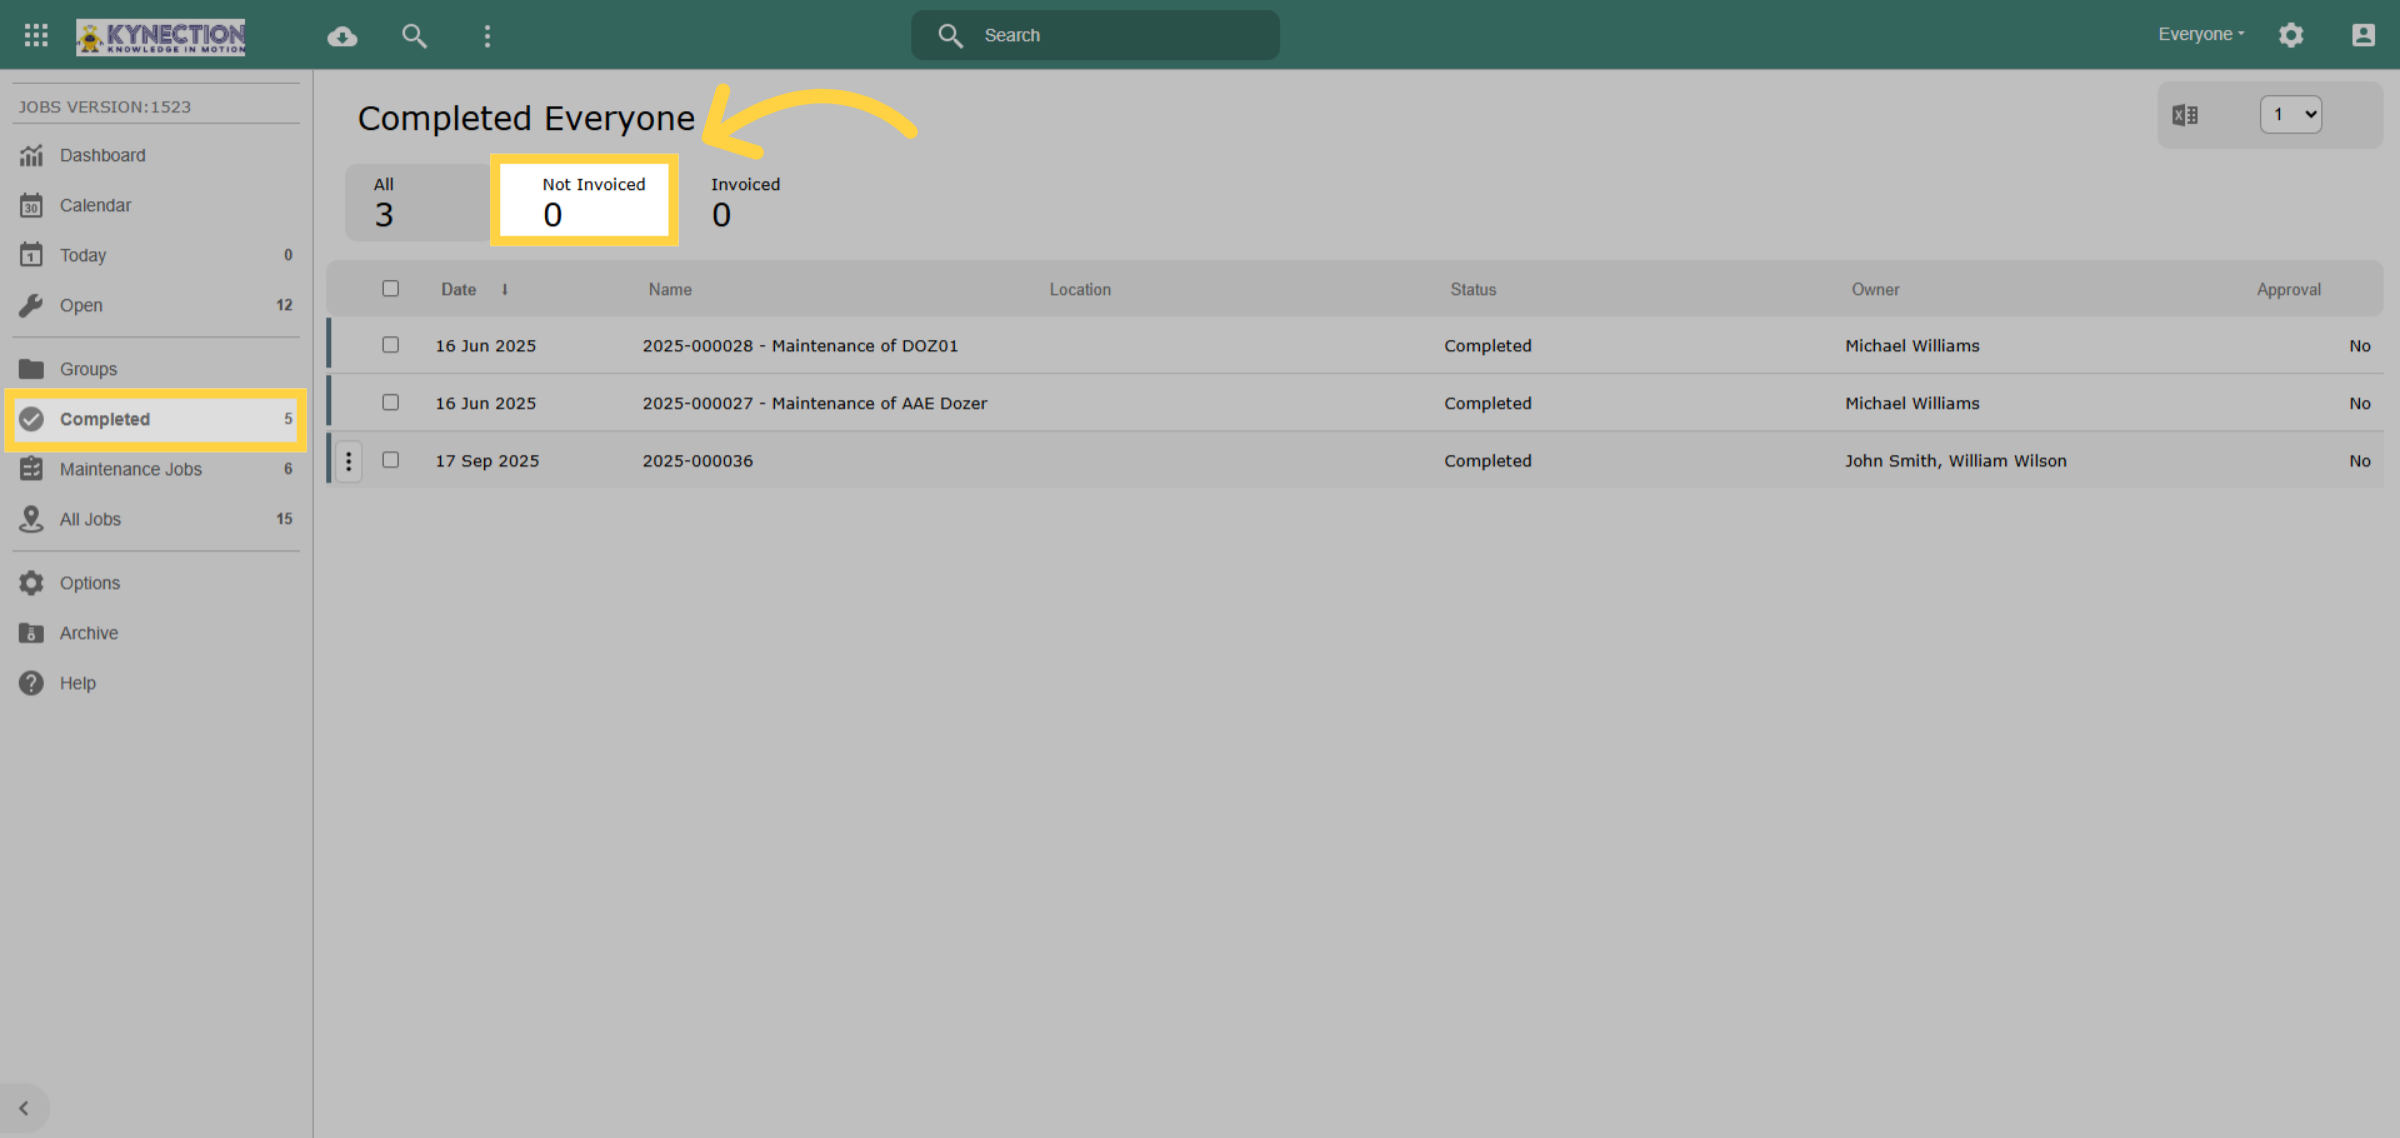
28. Invoice Single Job
Select the job you wish to invoice. In this example, we will concentrate on creating an invoice for one specific job.
29. Check Job Details
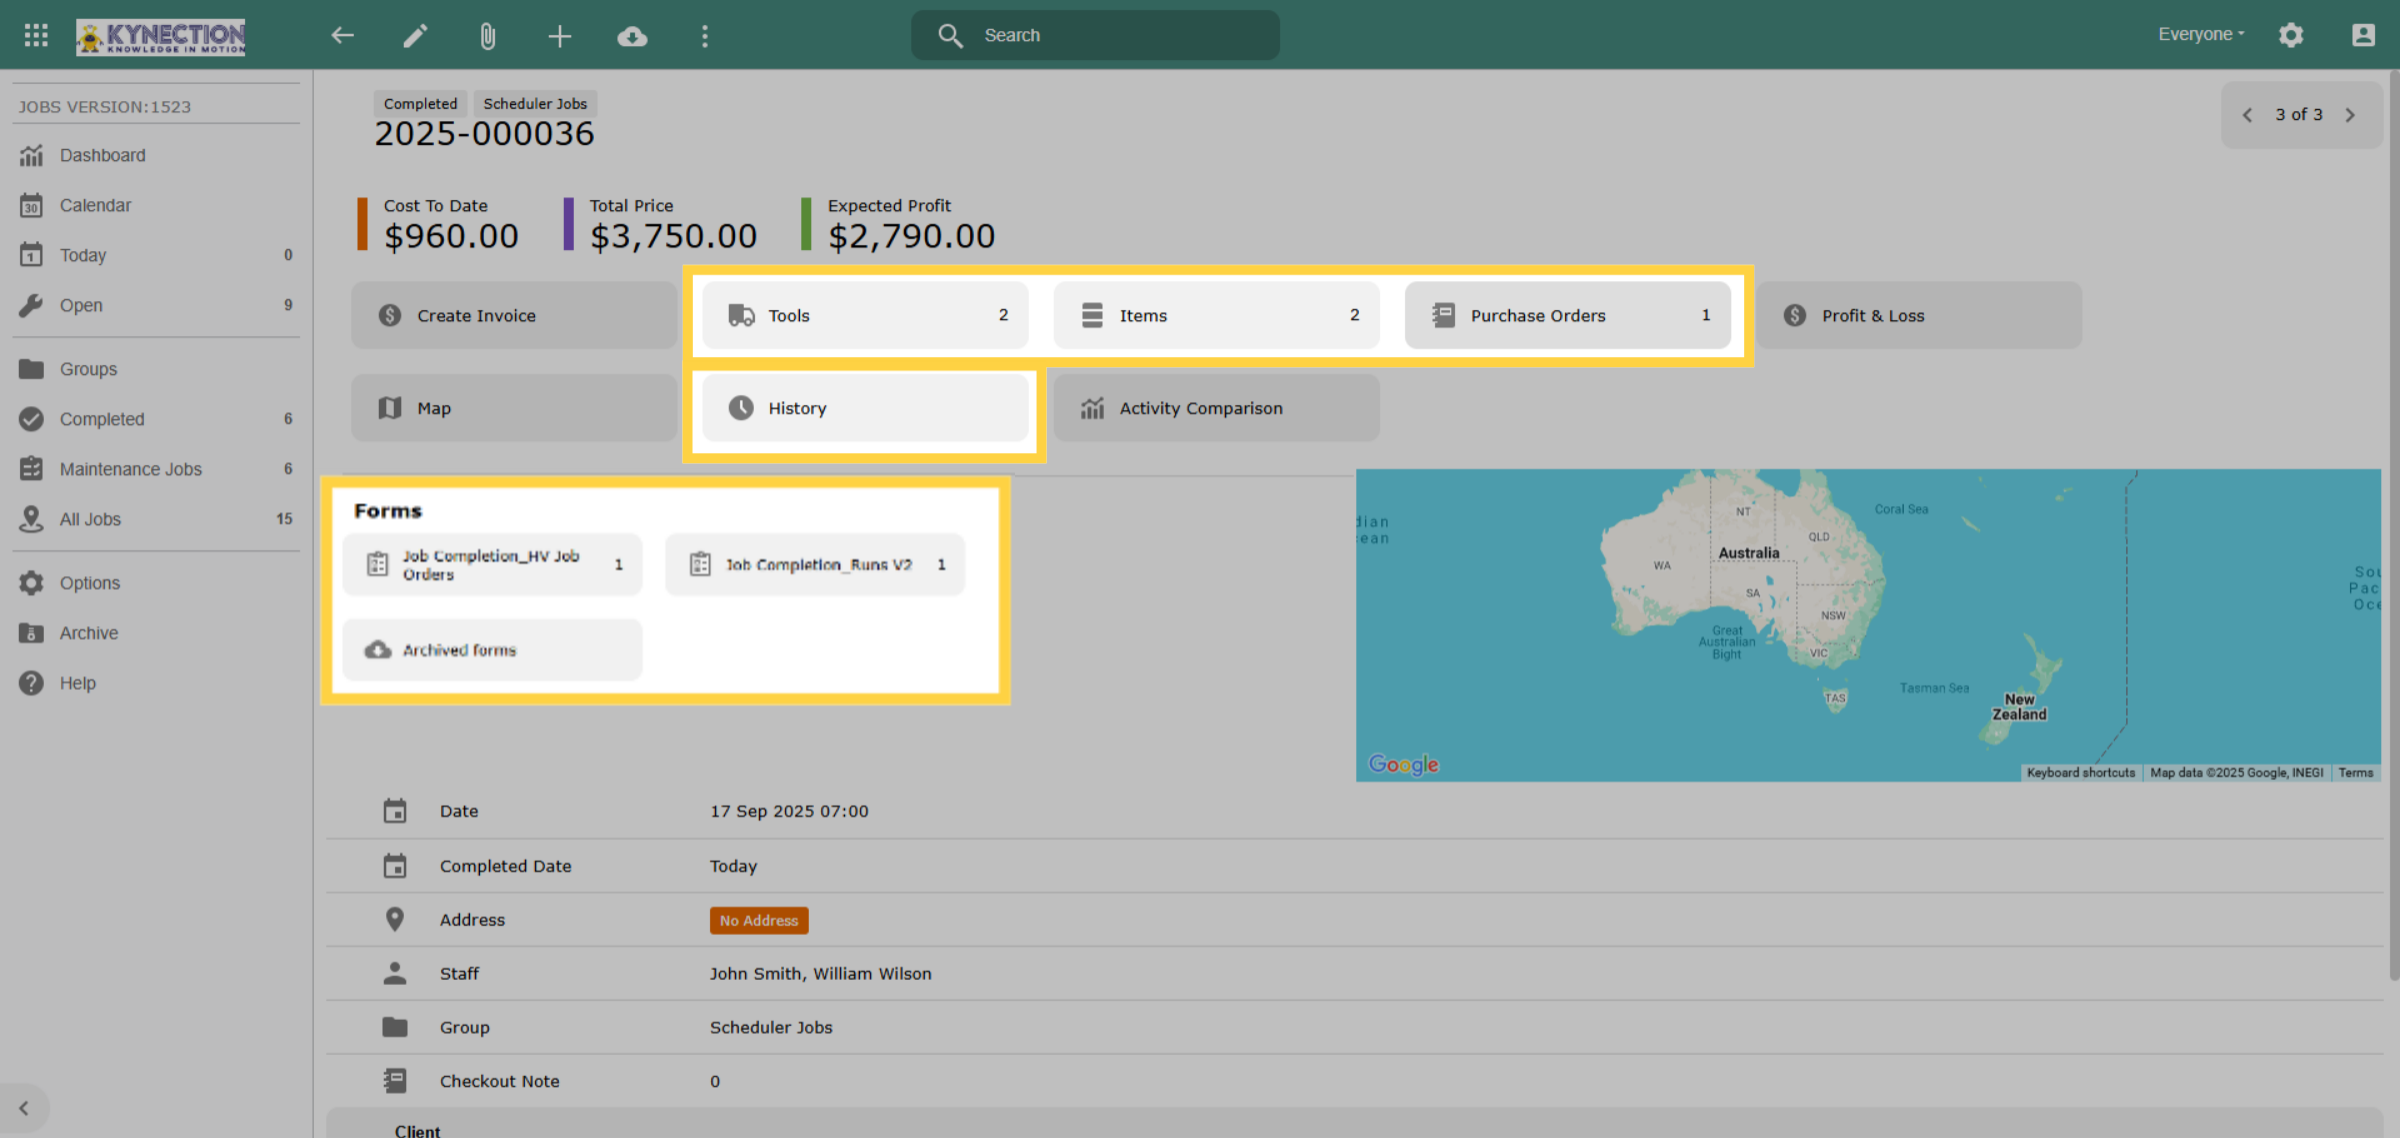
The Items tab displays the invoice line items. Please compare these items with the job details to verify their completeness. Check the forms for items that could impact invoicing. In this example we can see a linked purchase order.
30. Linked Purchase Order
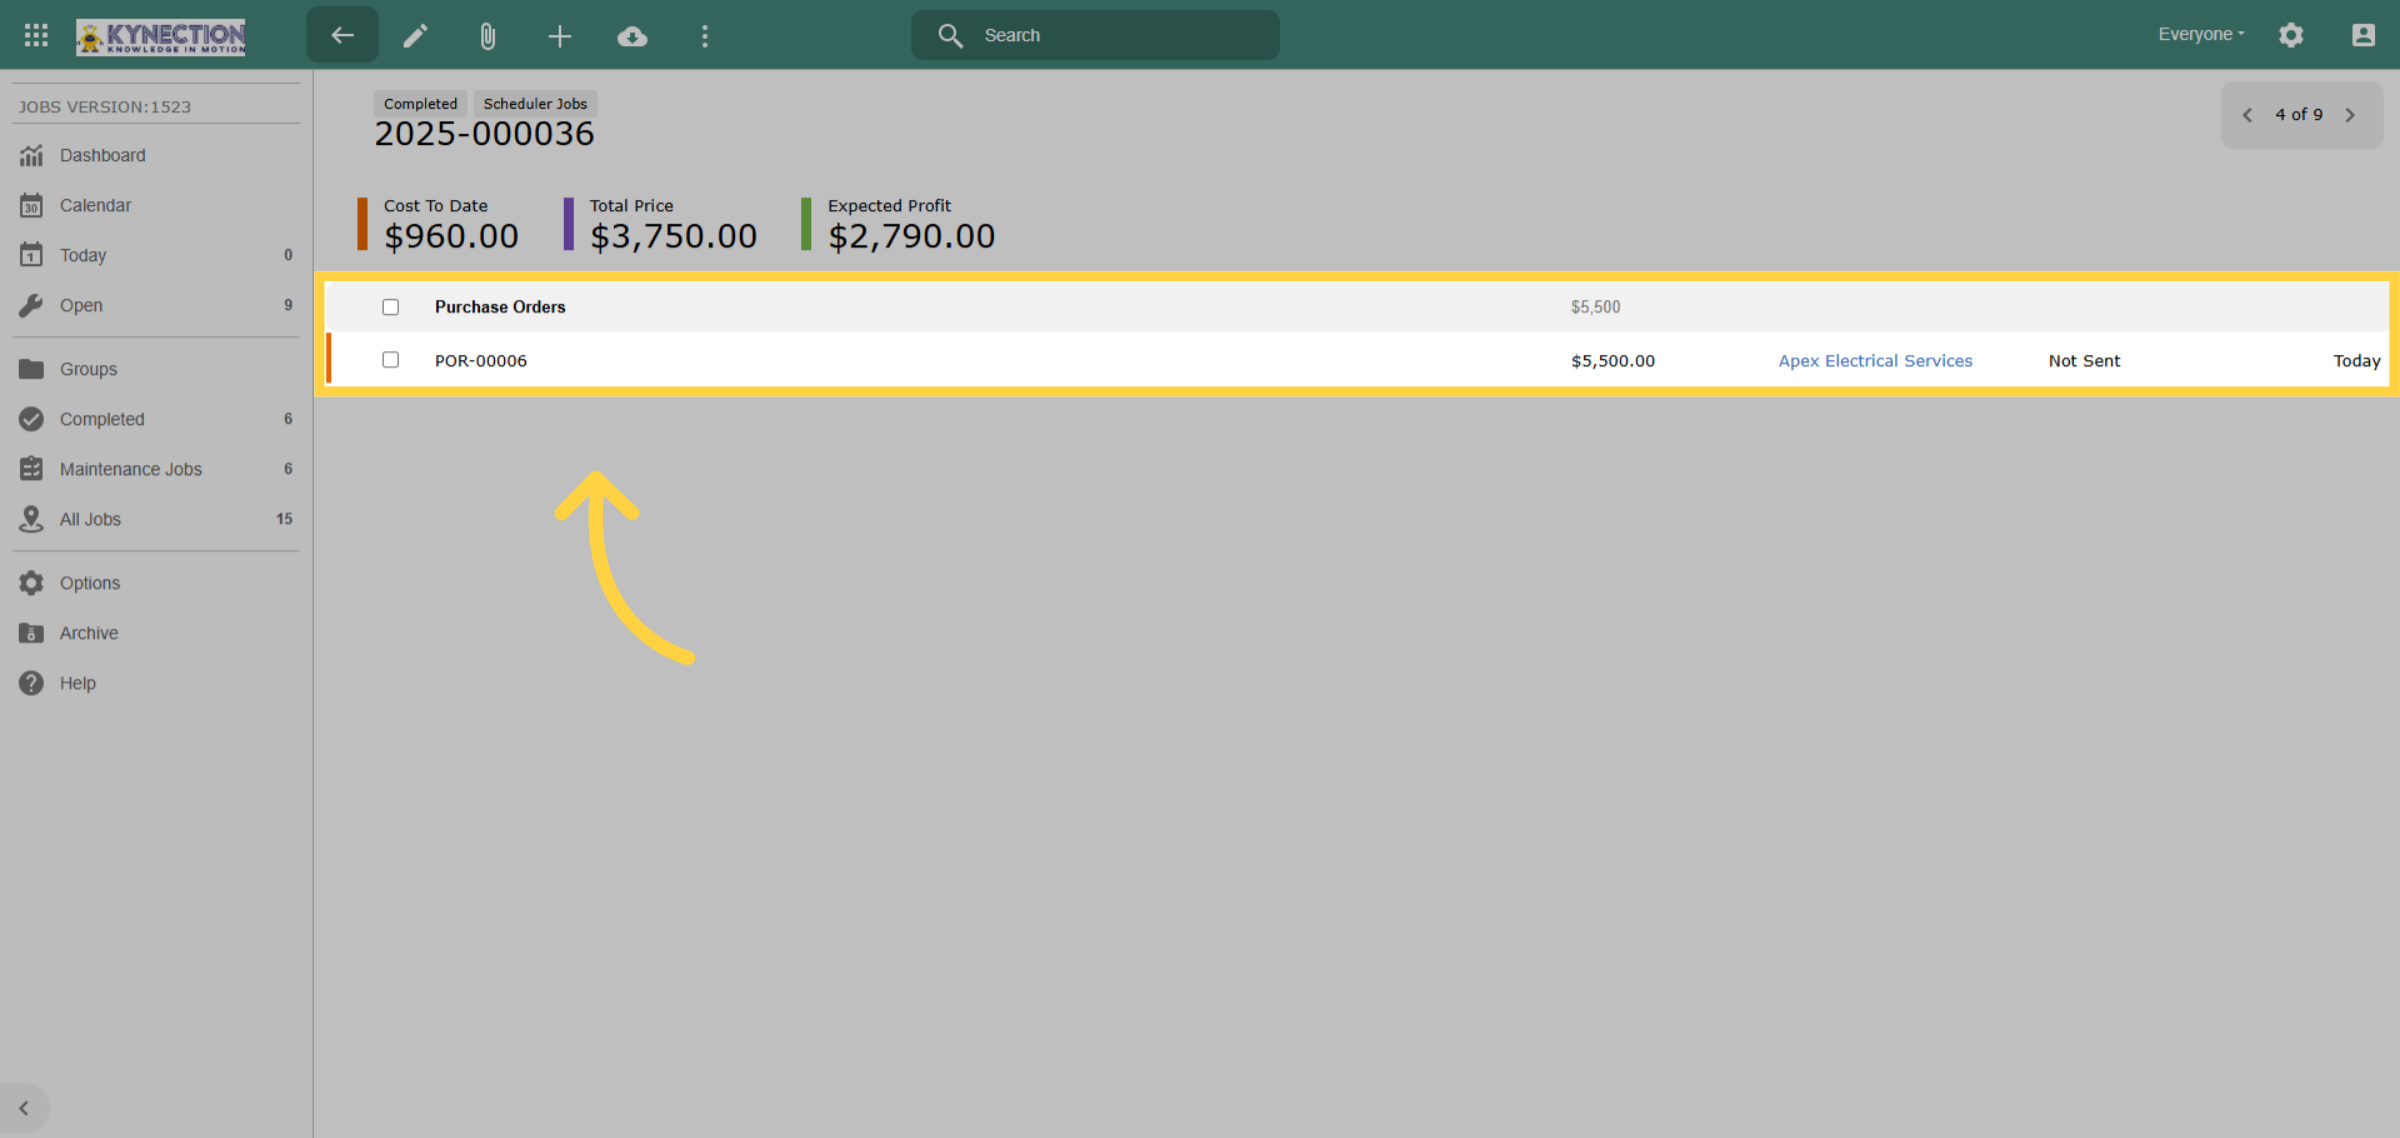
The purchase order tab is only visible if a purchase order has been raised against the job. Check if the goods are to be on-charged to the customer, and if so, review the purchase order against the line items.
31. Add Catalog Items
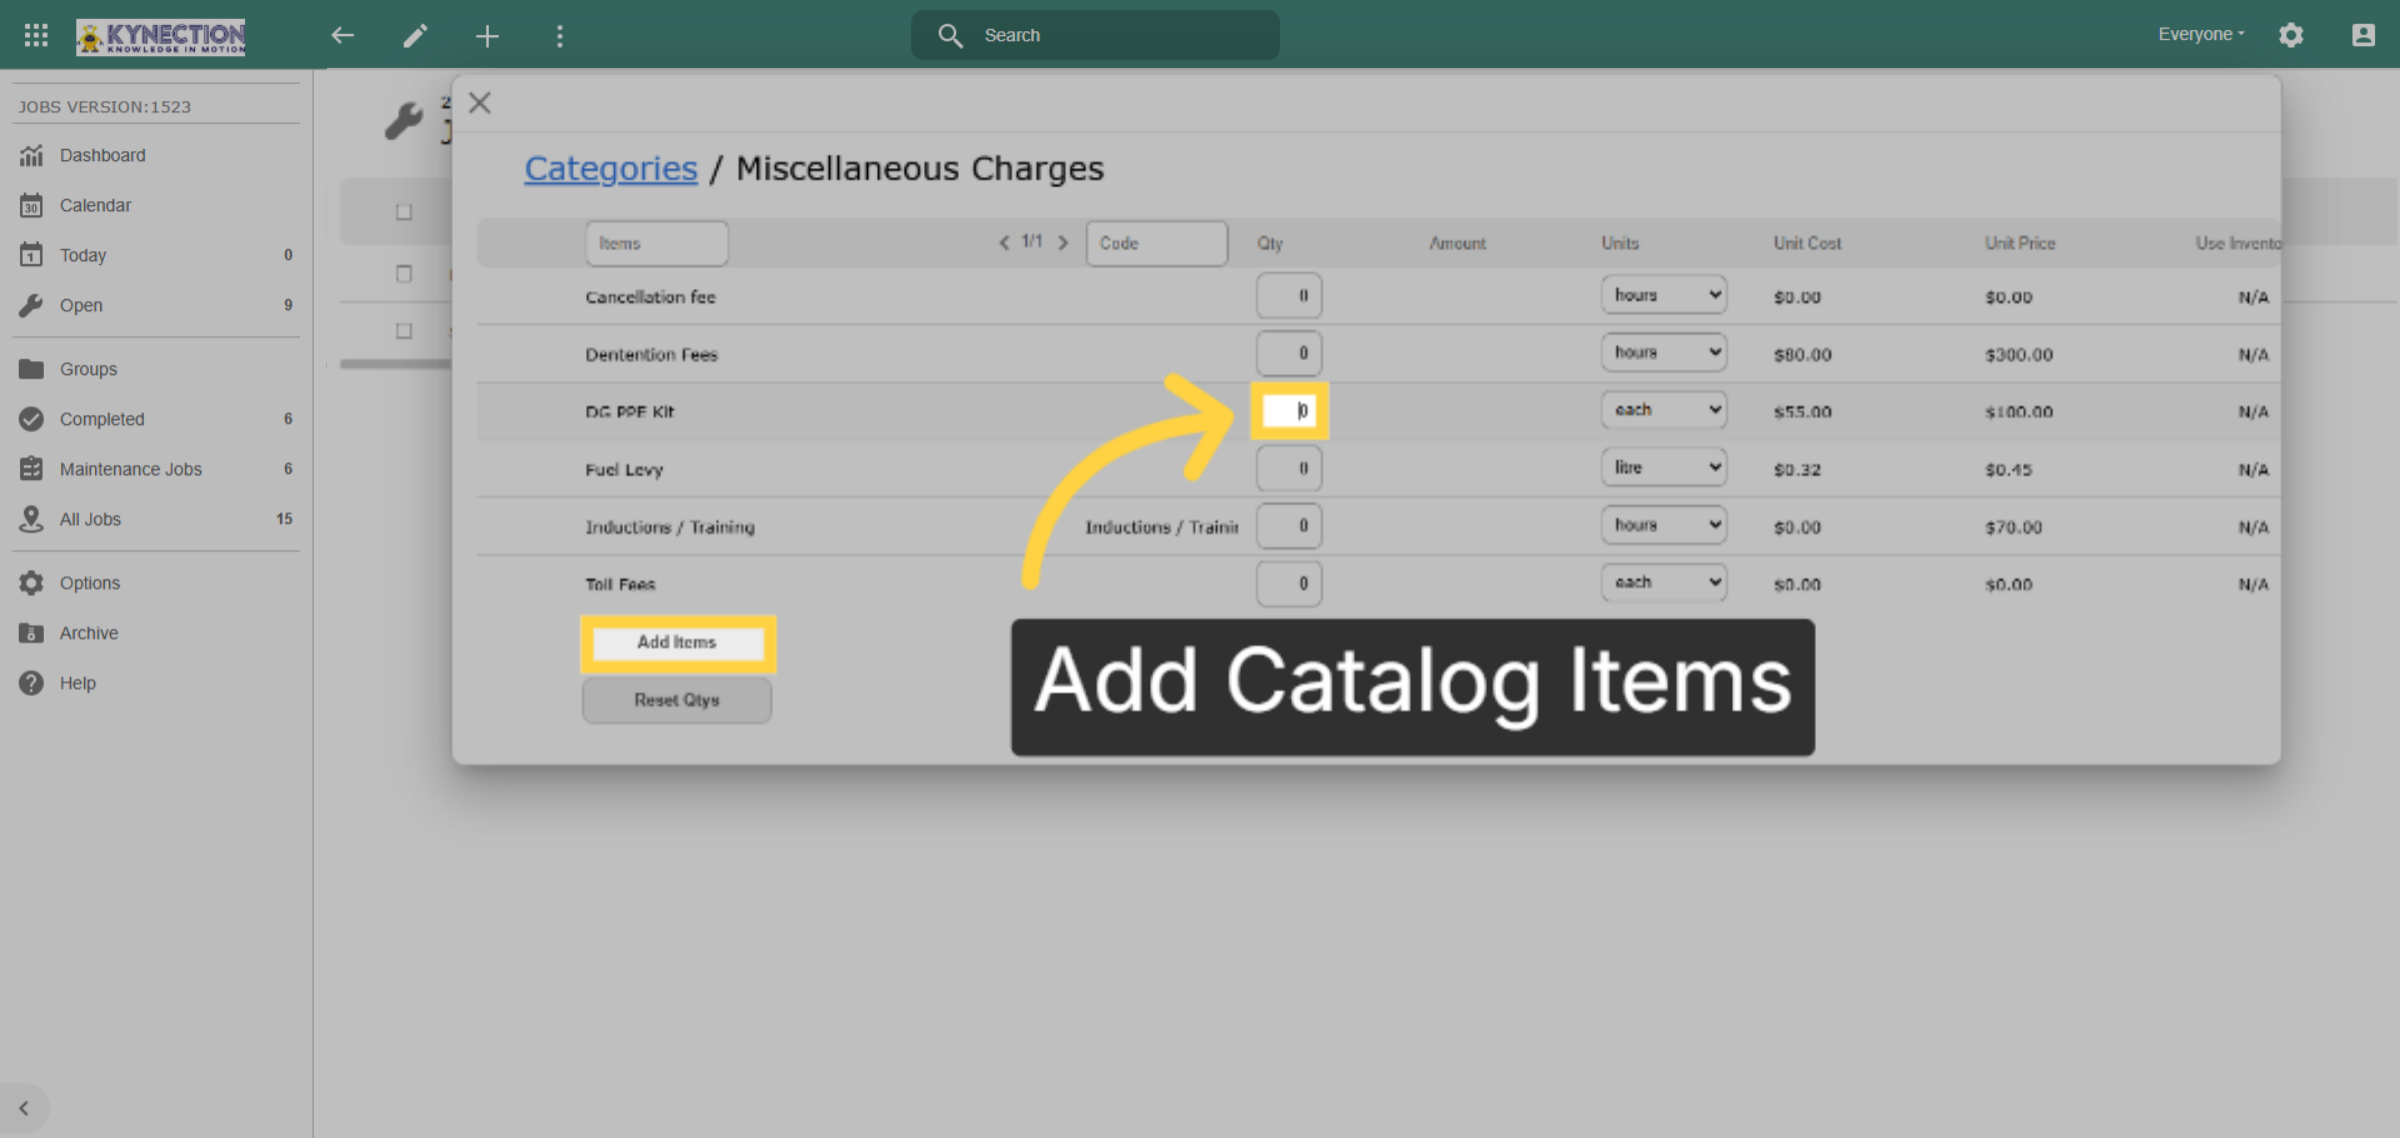
To add items, click the plus icon, select the appropriate category, and choose the specific item. Once added to the job, you can easily edit its cost, selling price, and quantity. It is essential to include all items, both chargeable and non-chargeable, to ensure accurate job costing.
32. Edit Items
To edit line items, click on the desired entry. Next, select the pencil icon in the toolbar to open the editing screen. After making your changes, be sure to save them by clicking the tickbox in the toolbar.
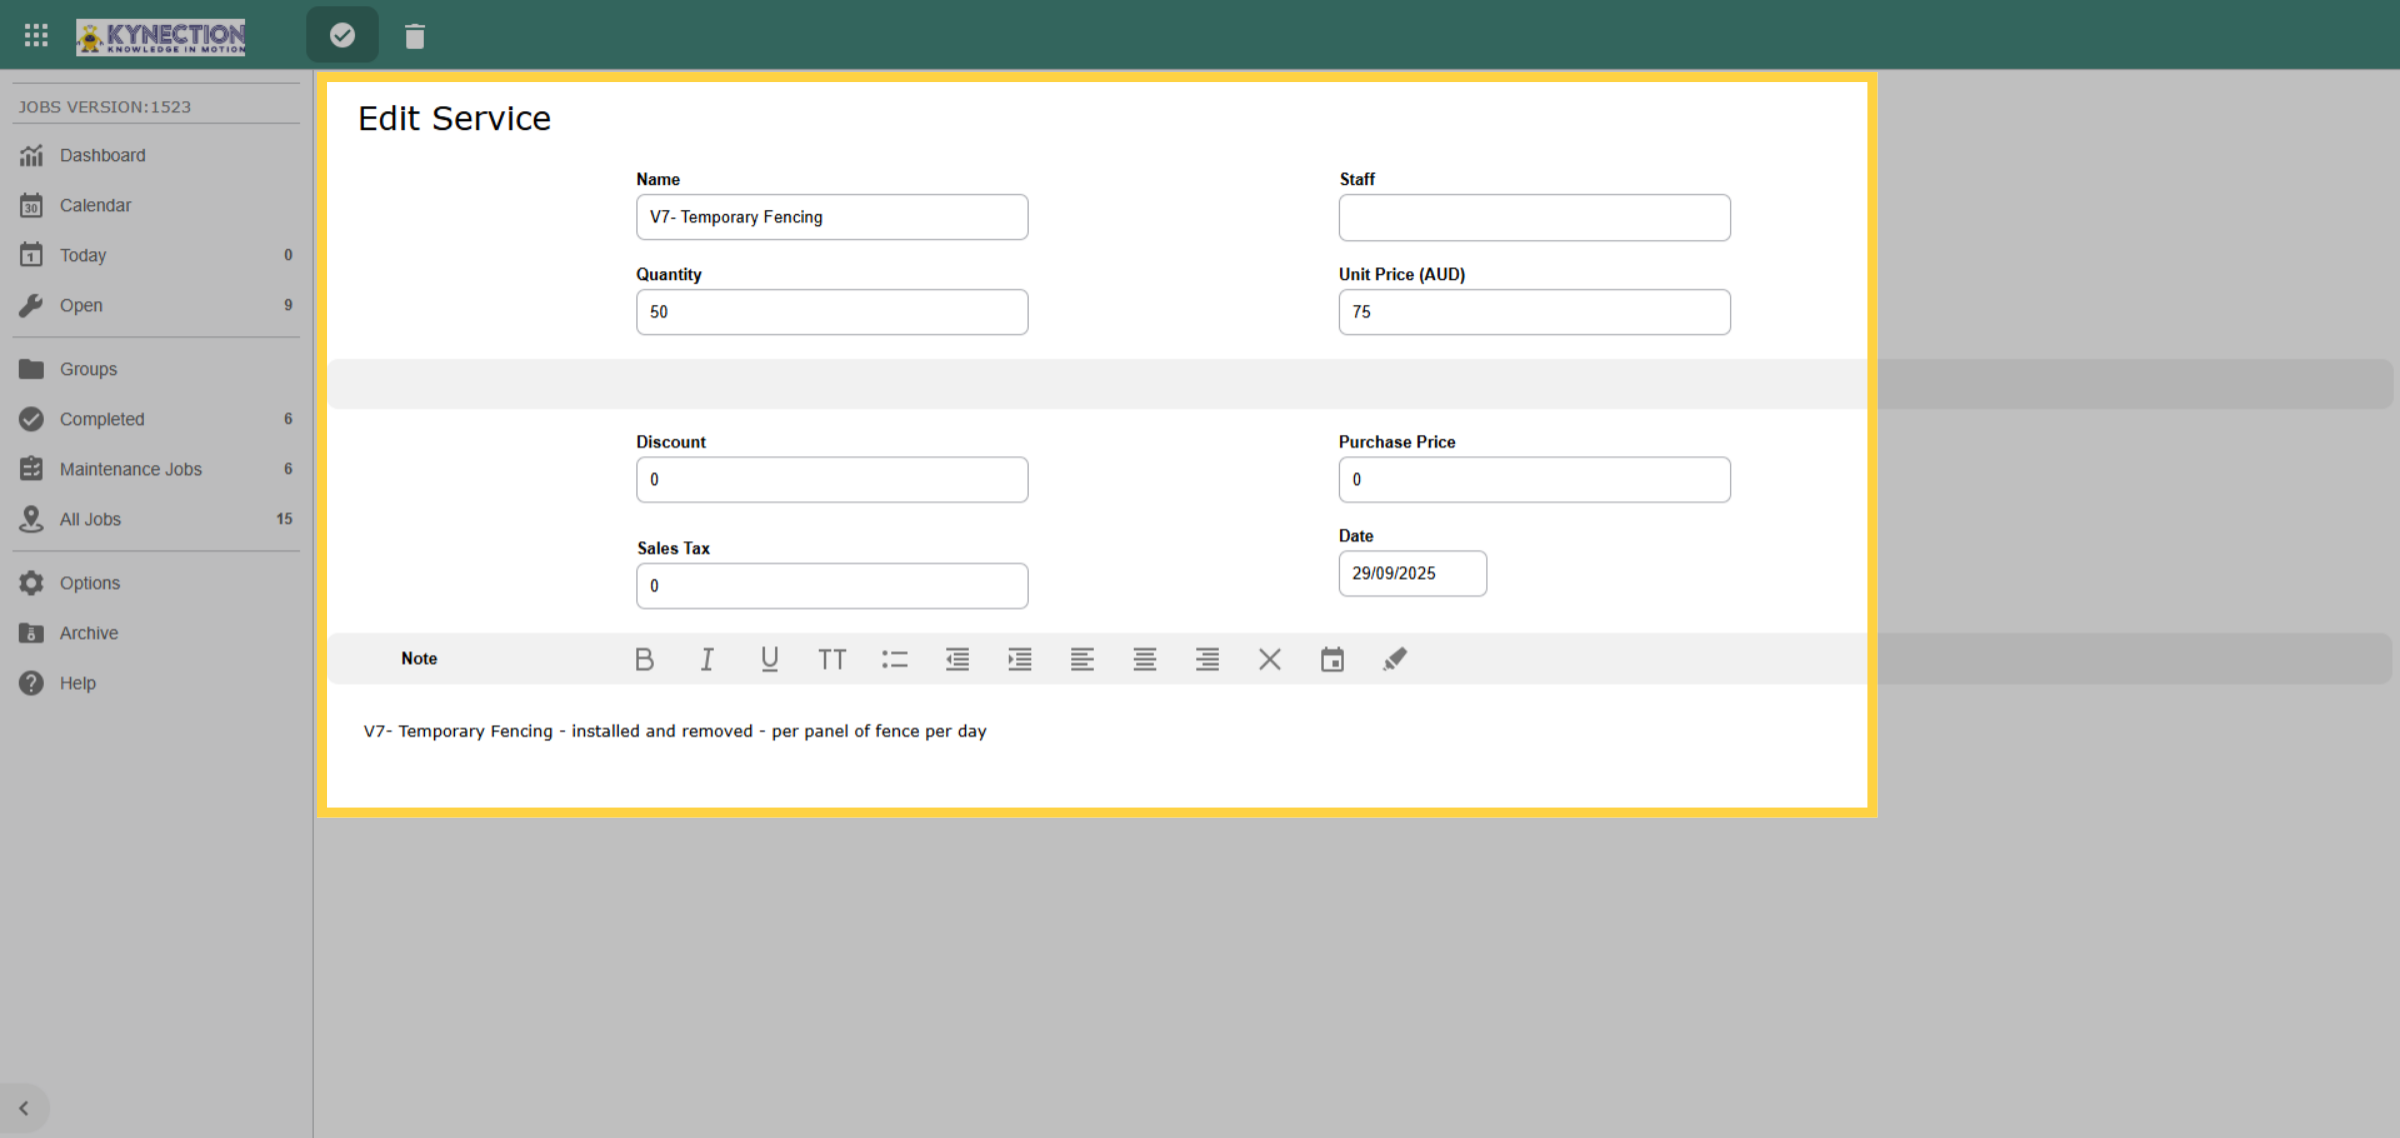
33. Create Invoice
When your job items are ready for invoicing, head to the "Create Invoice" tab. A confirmation pop-up will confirm your intention; jclick "Create Invoices" to complete the process.
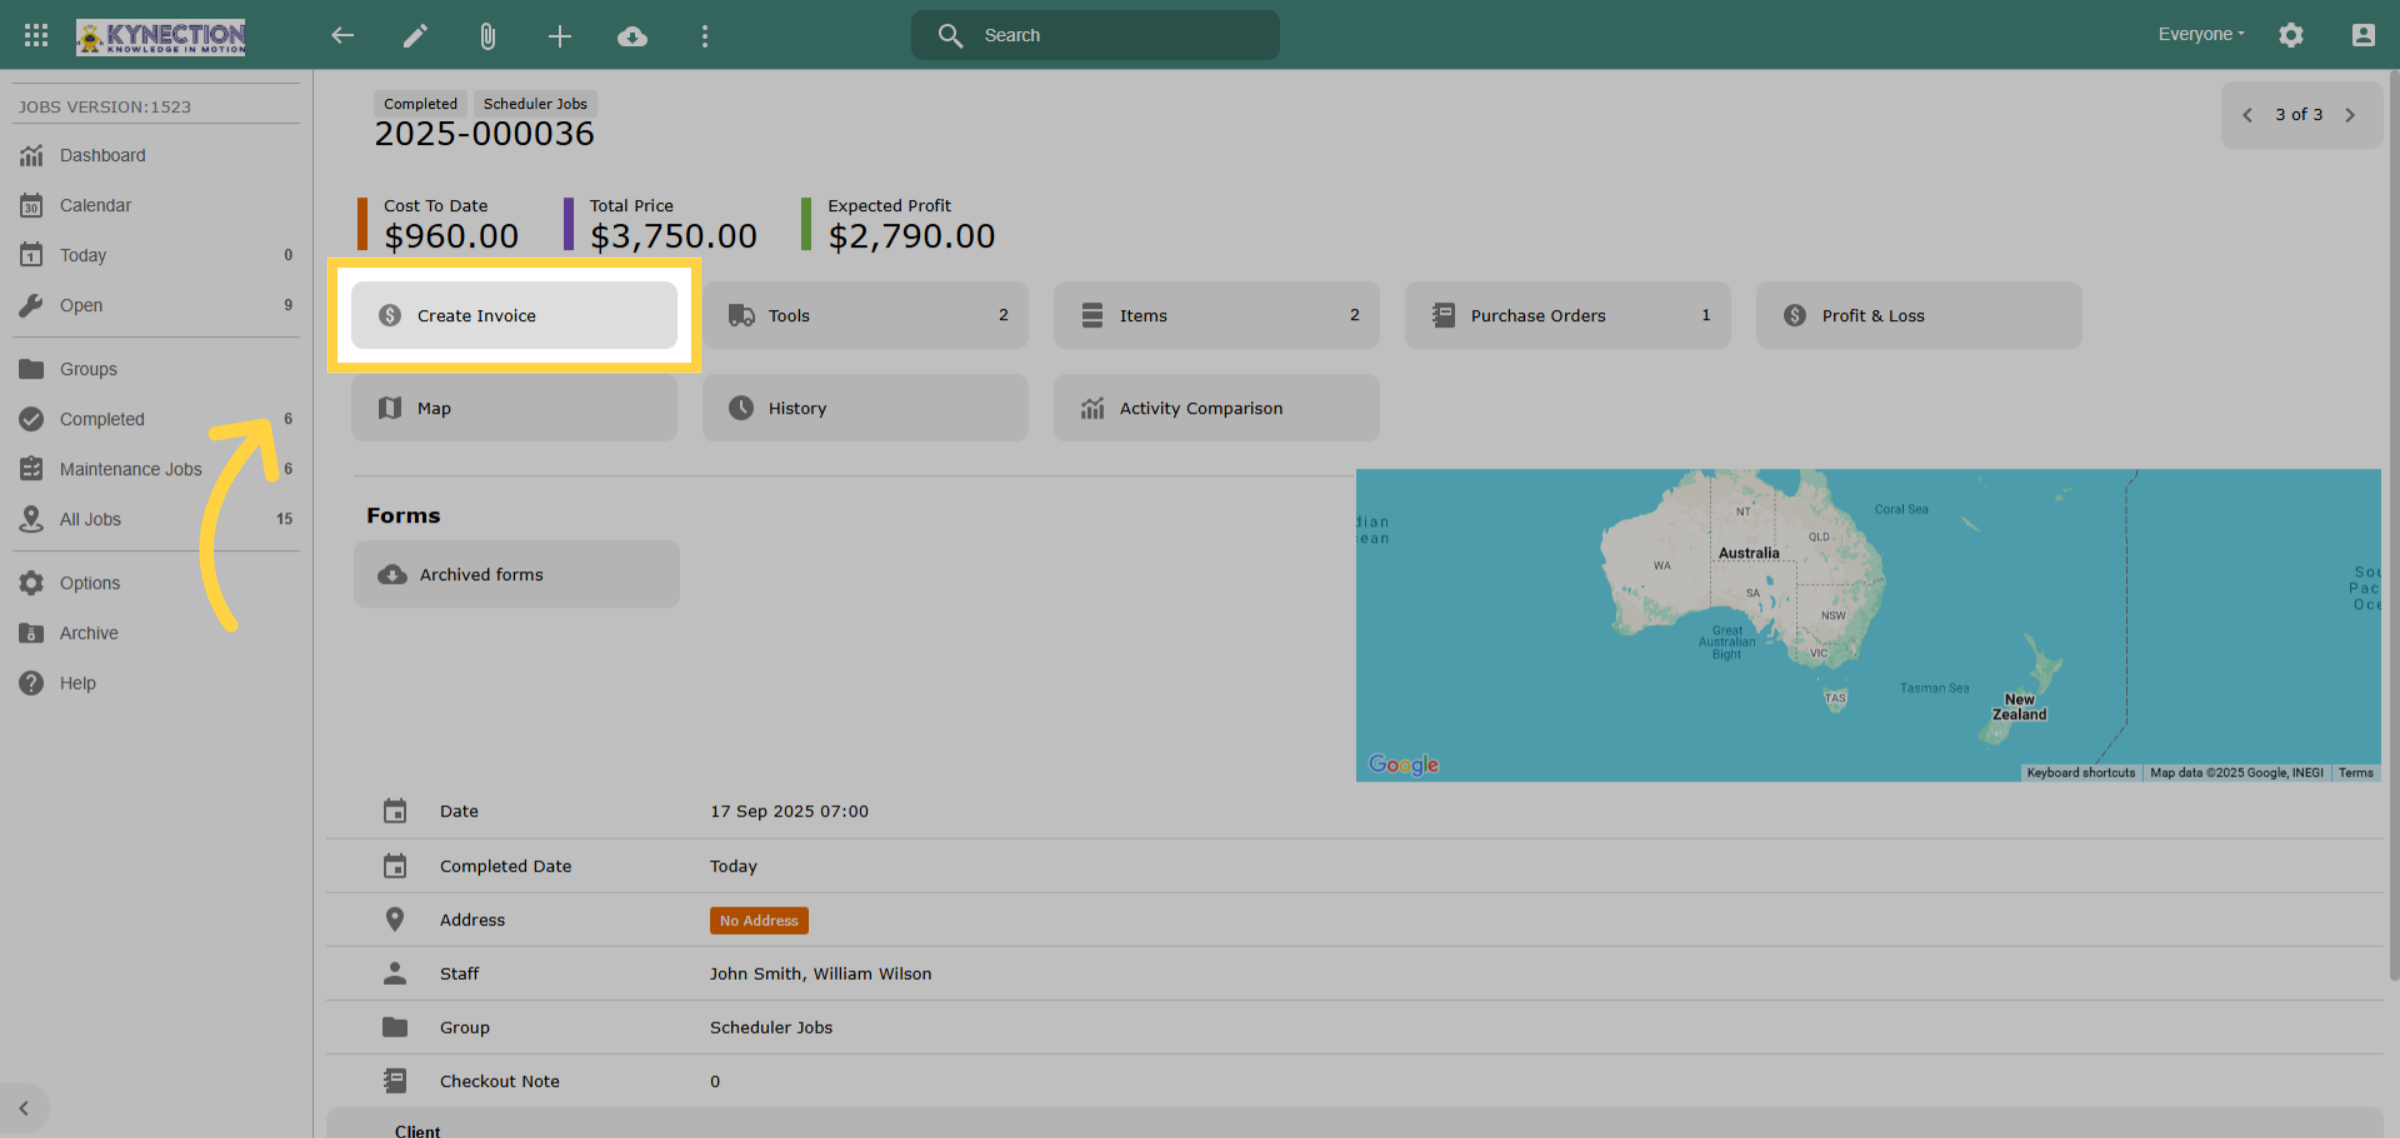
34. Draft Invoice
Upon confirming the invoice, you will be redirected to the Invoicing tab within the Sales module, where you can review the draft invoice. The first column on the left color-code invoices, with each color representing the categories outlined at the top of the screen.
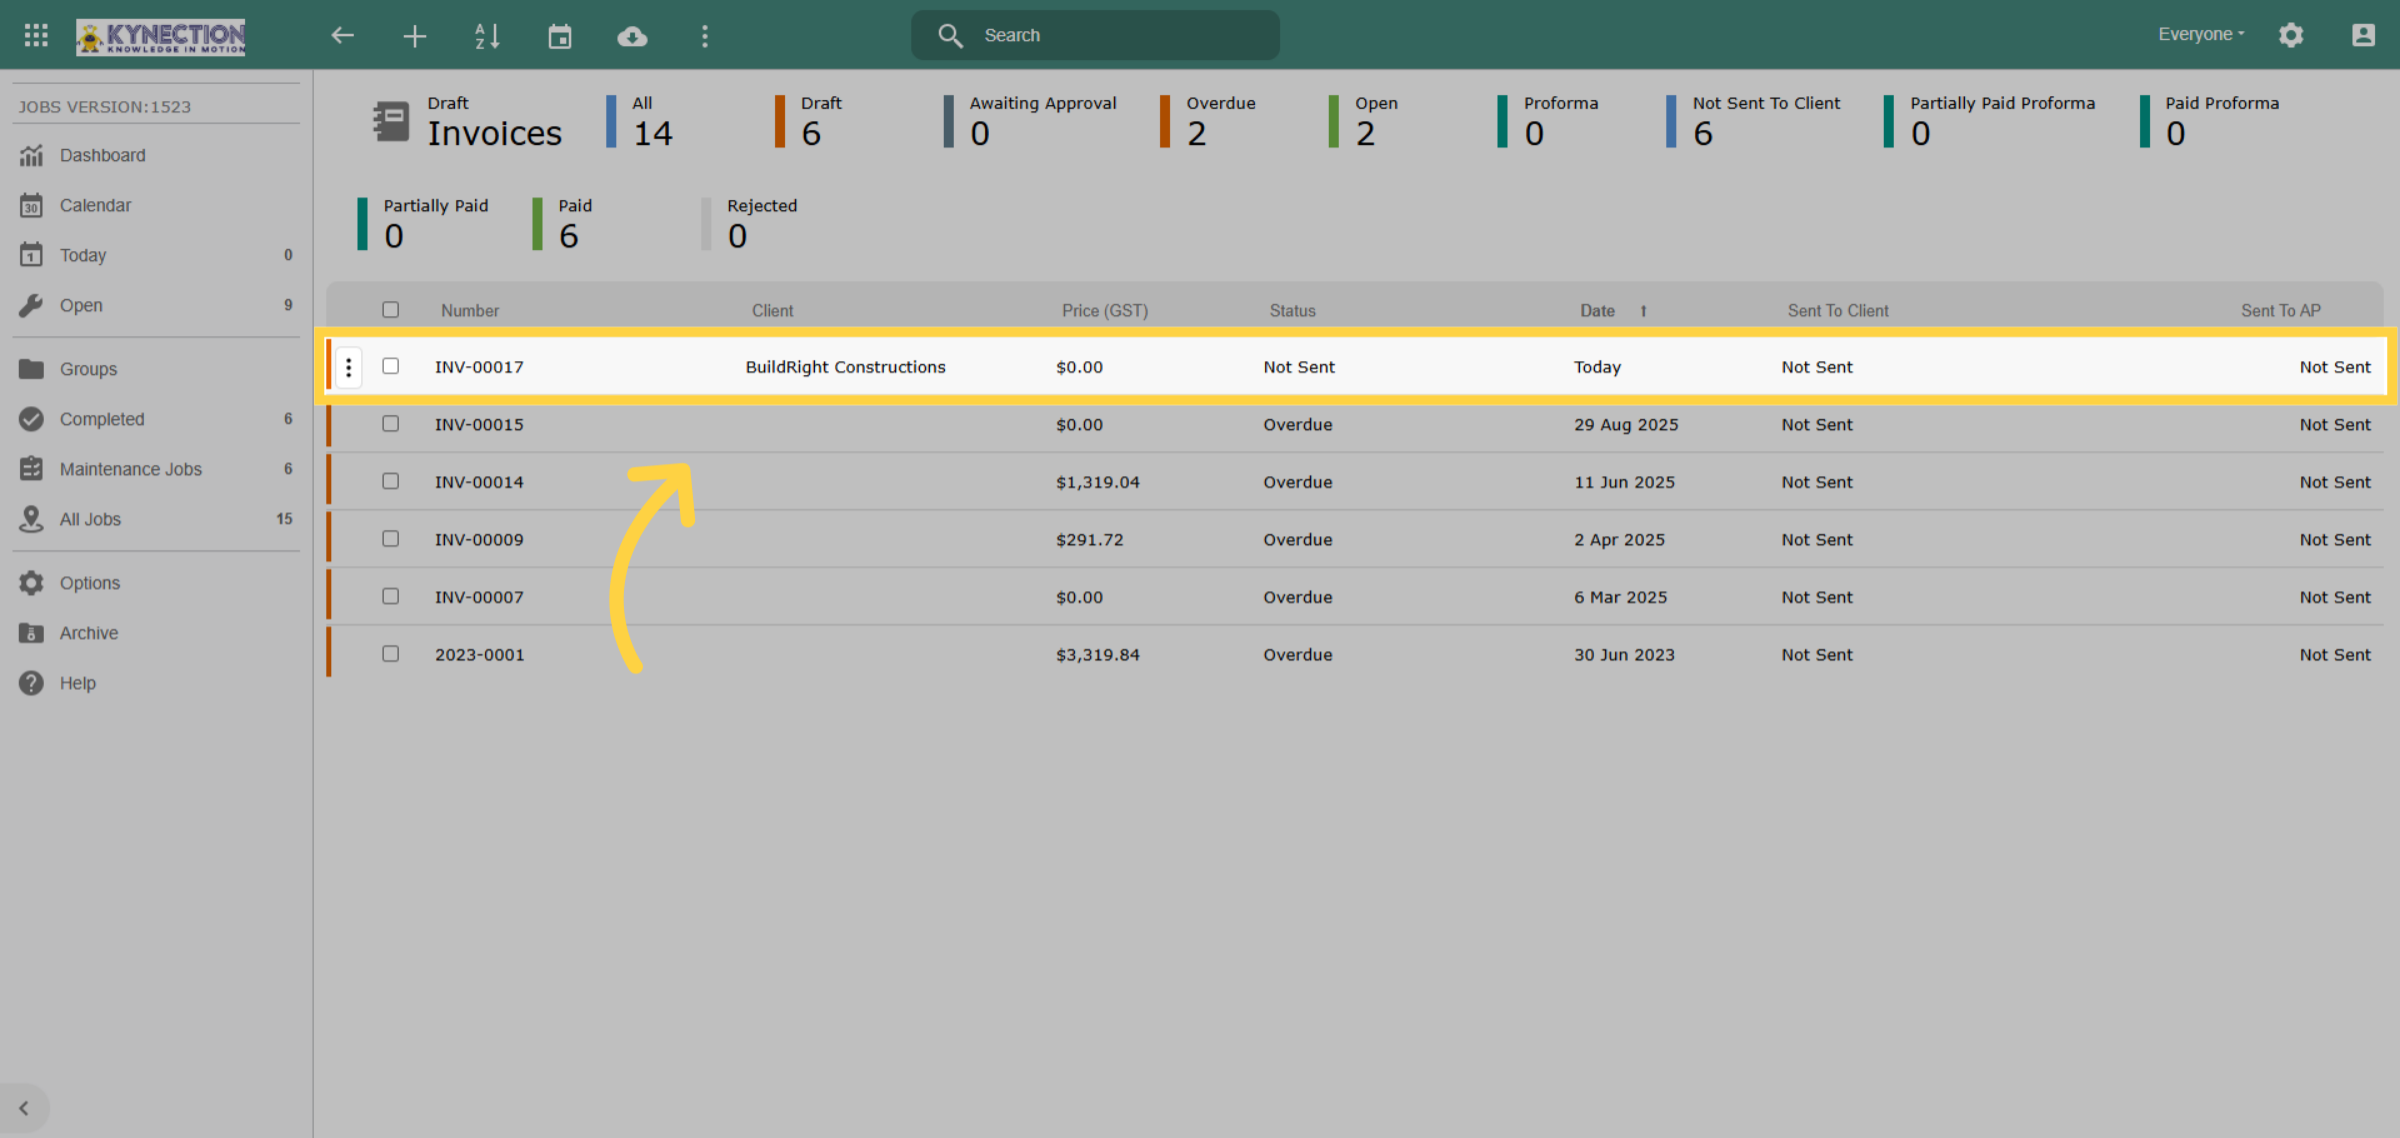
35. Invoice Multiple Jobs
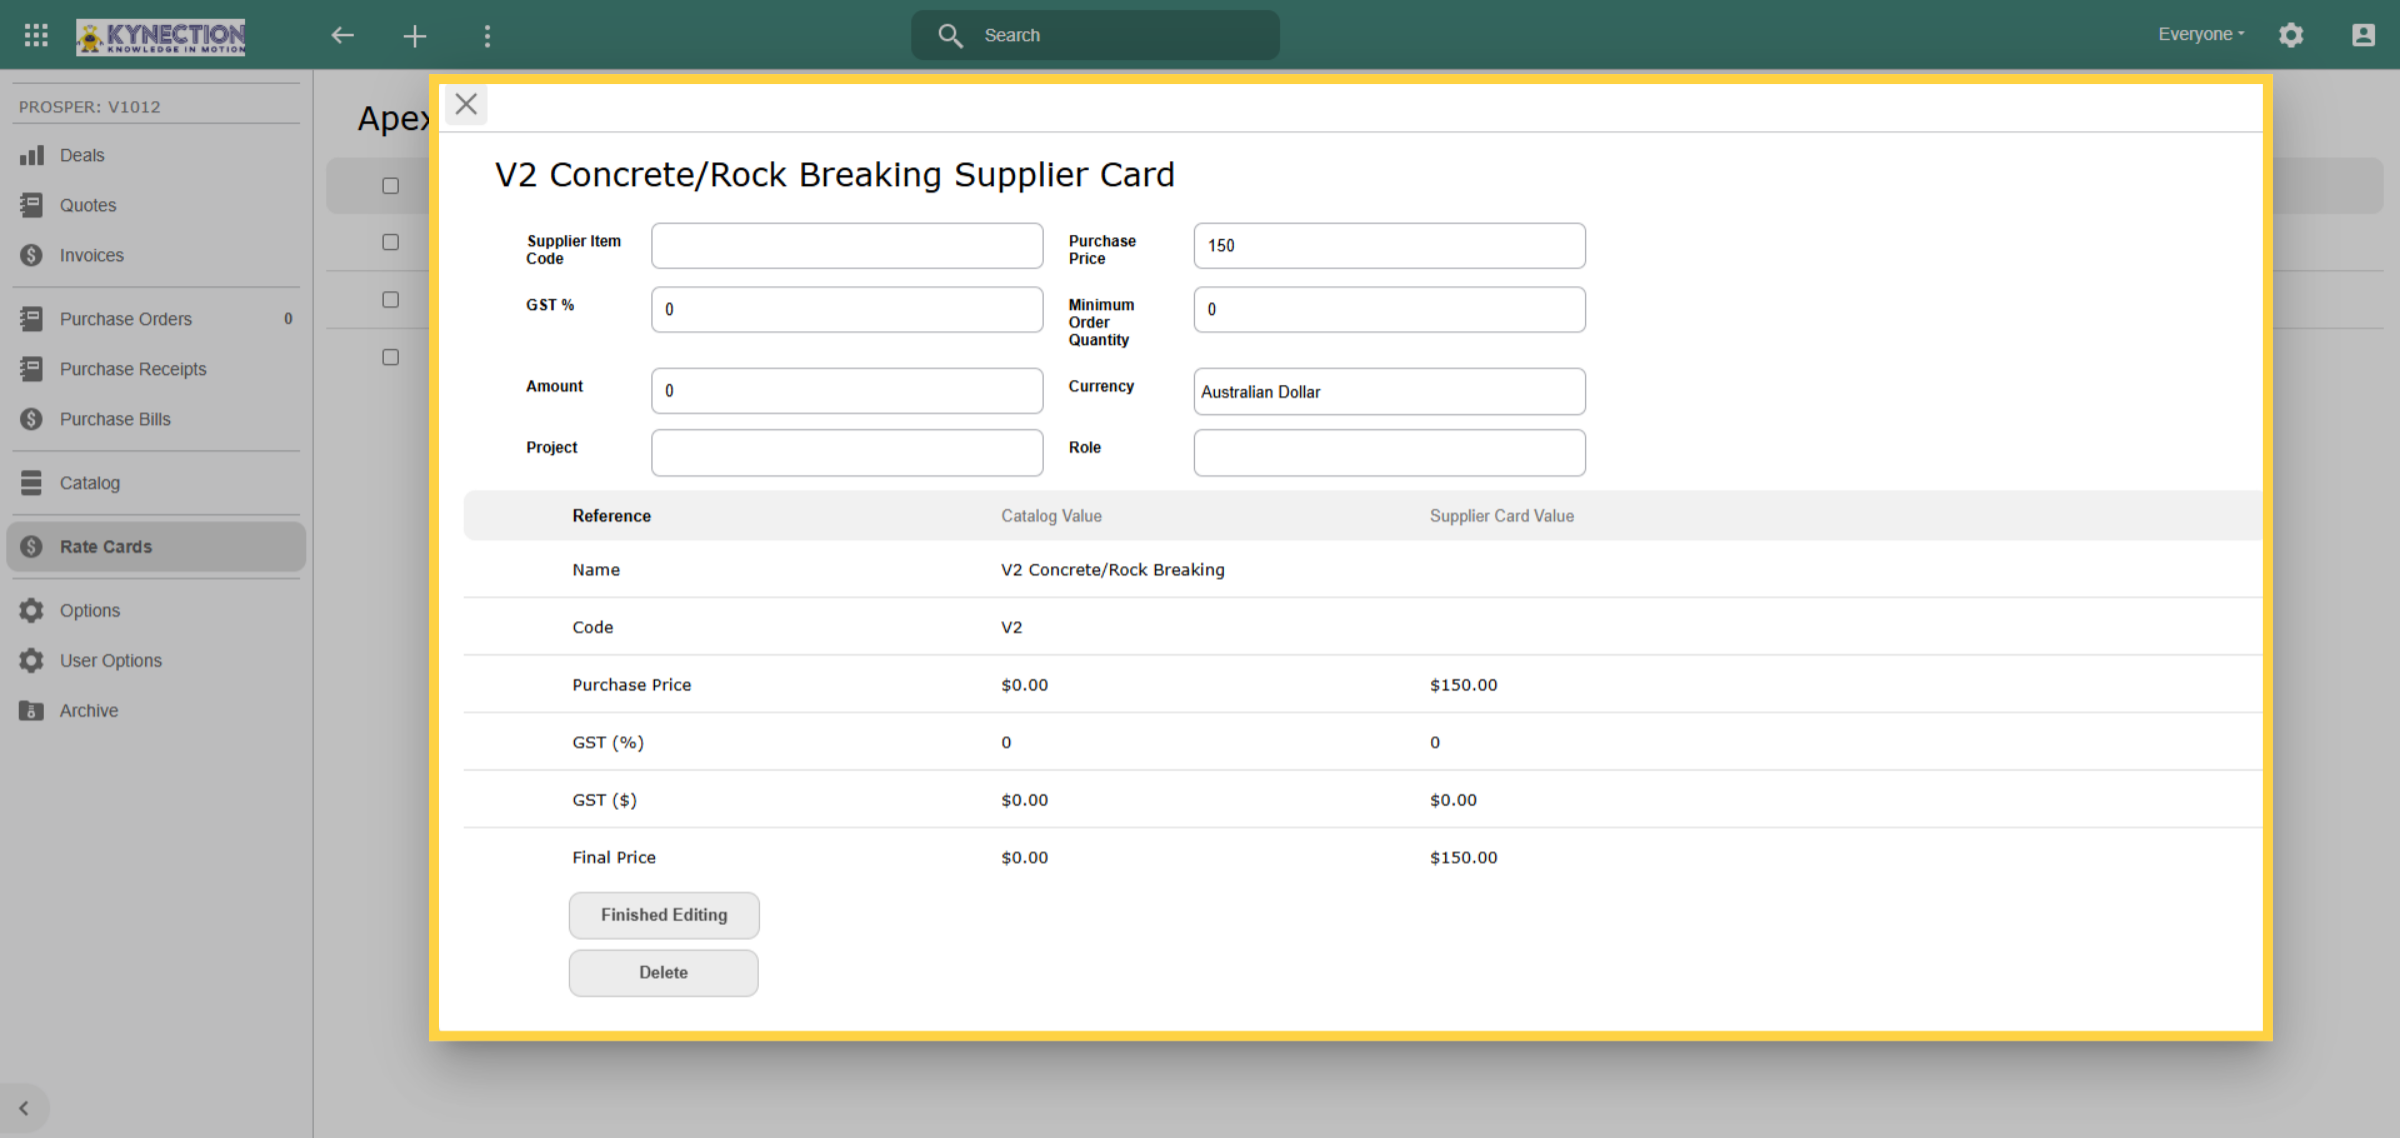
The "Not Invoiced" tab in the Completed Jobs section allows for batch invoicing. To start, select the jobs linked to the same client, then click the dollar sign icon in the toolbar.
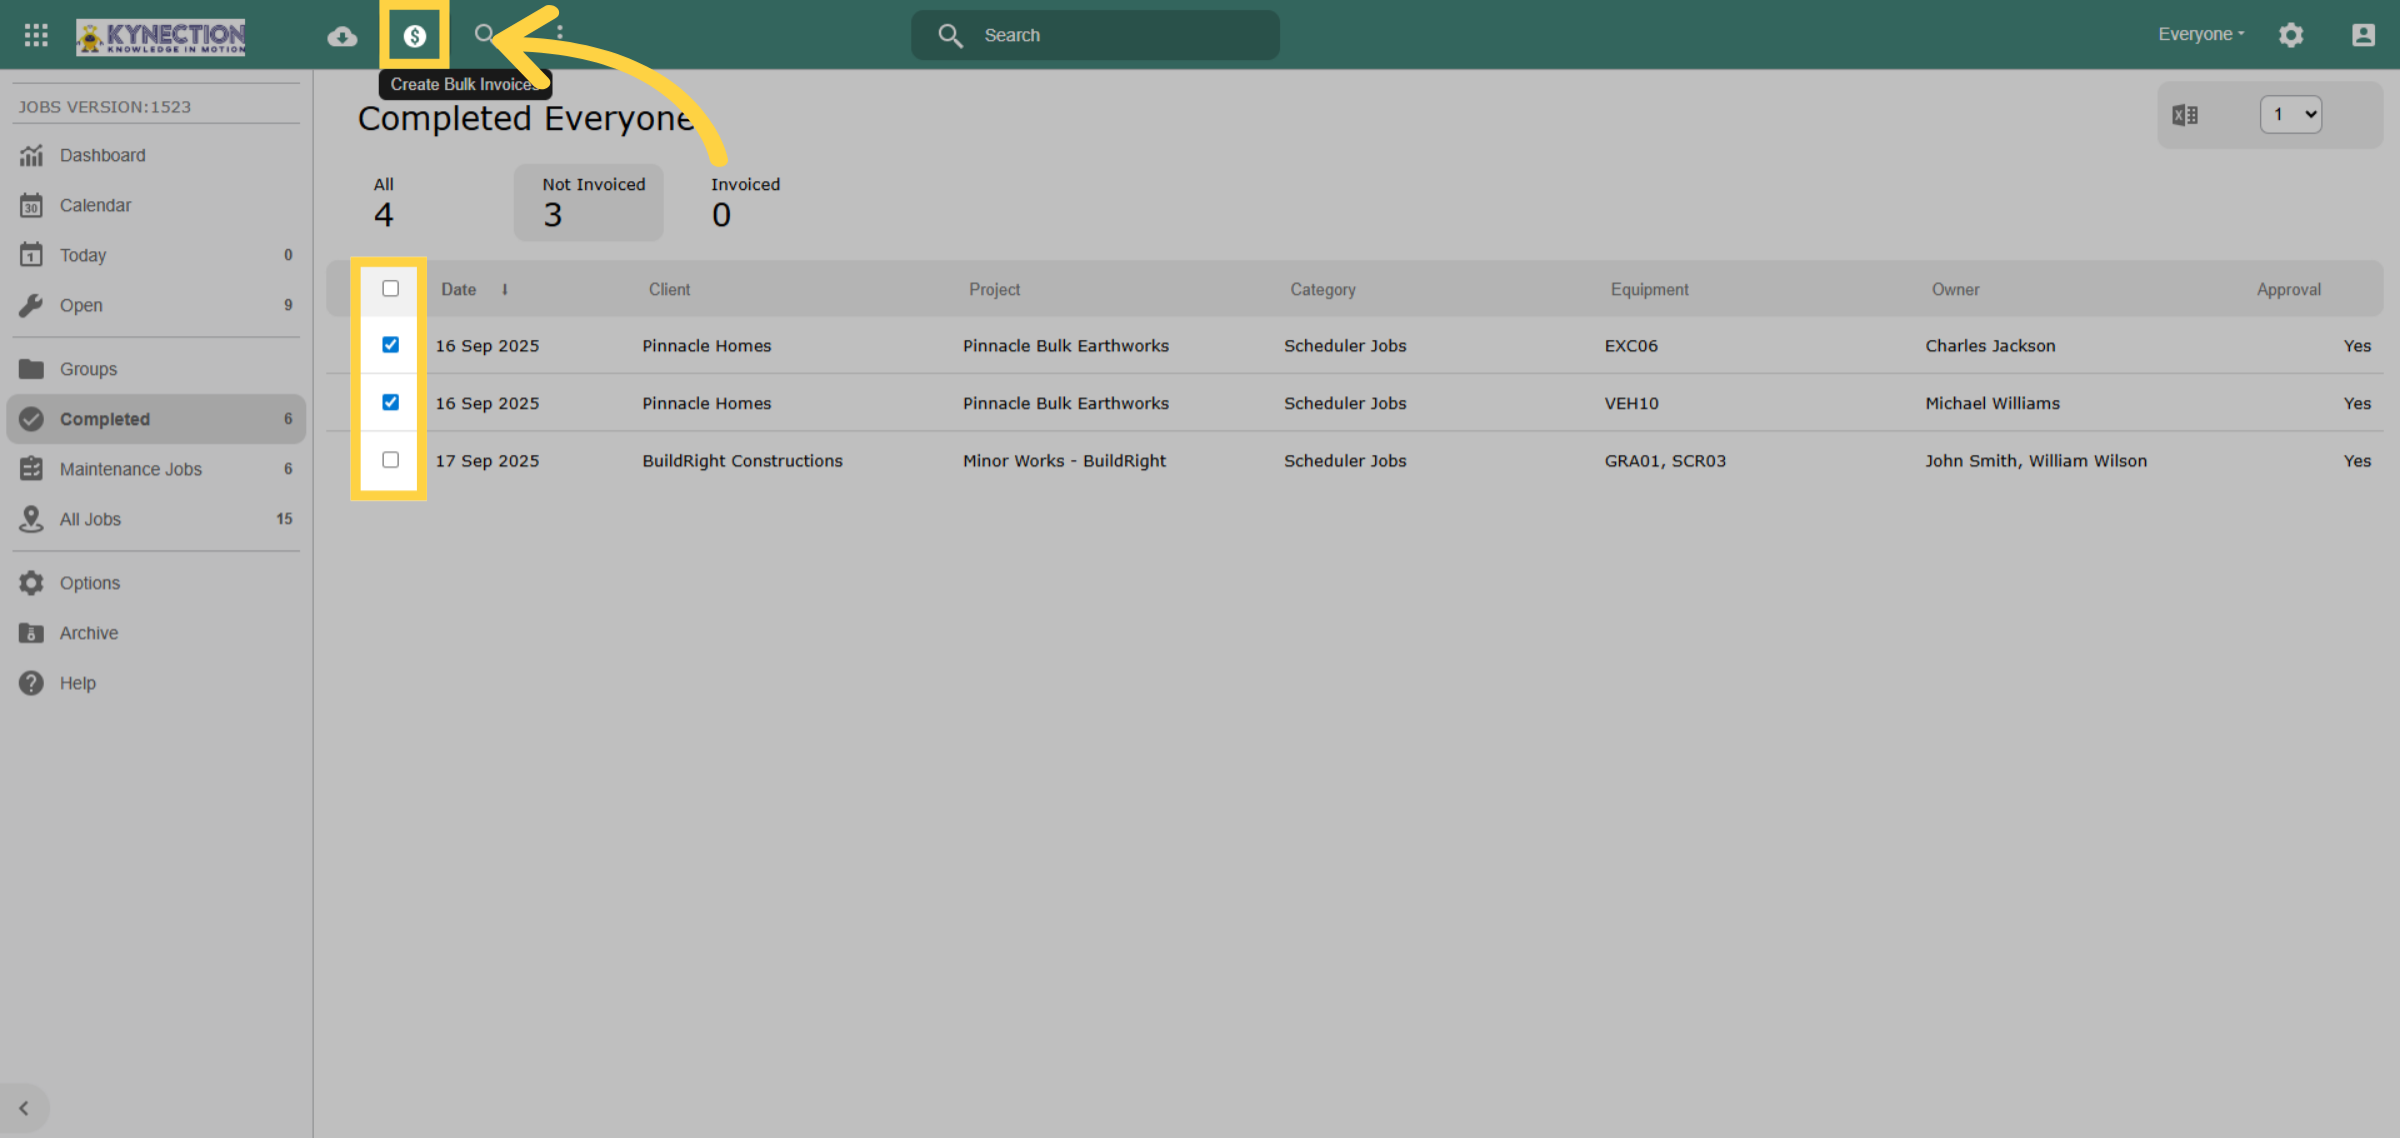
36. Confirm Number of Invoices
Ensure that only a single invoice is generated in the Create Invoices pop-up screen. If multiple invoices are generated, confirm that the selected companies are the same. Once you click "Create Invoices," a prompt will appear asking if you would like to view the invoices right away.
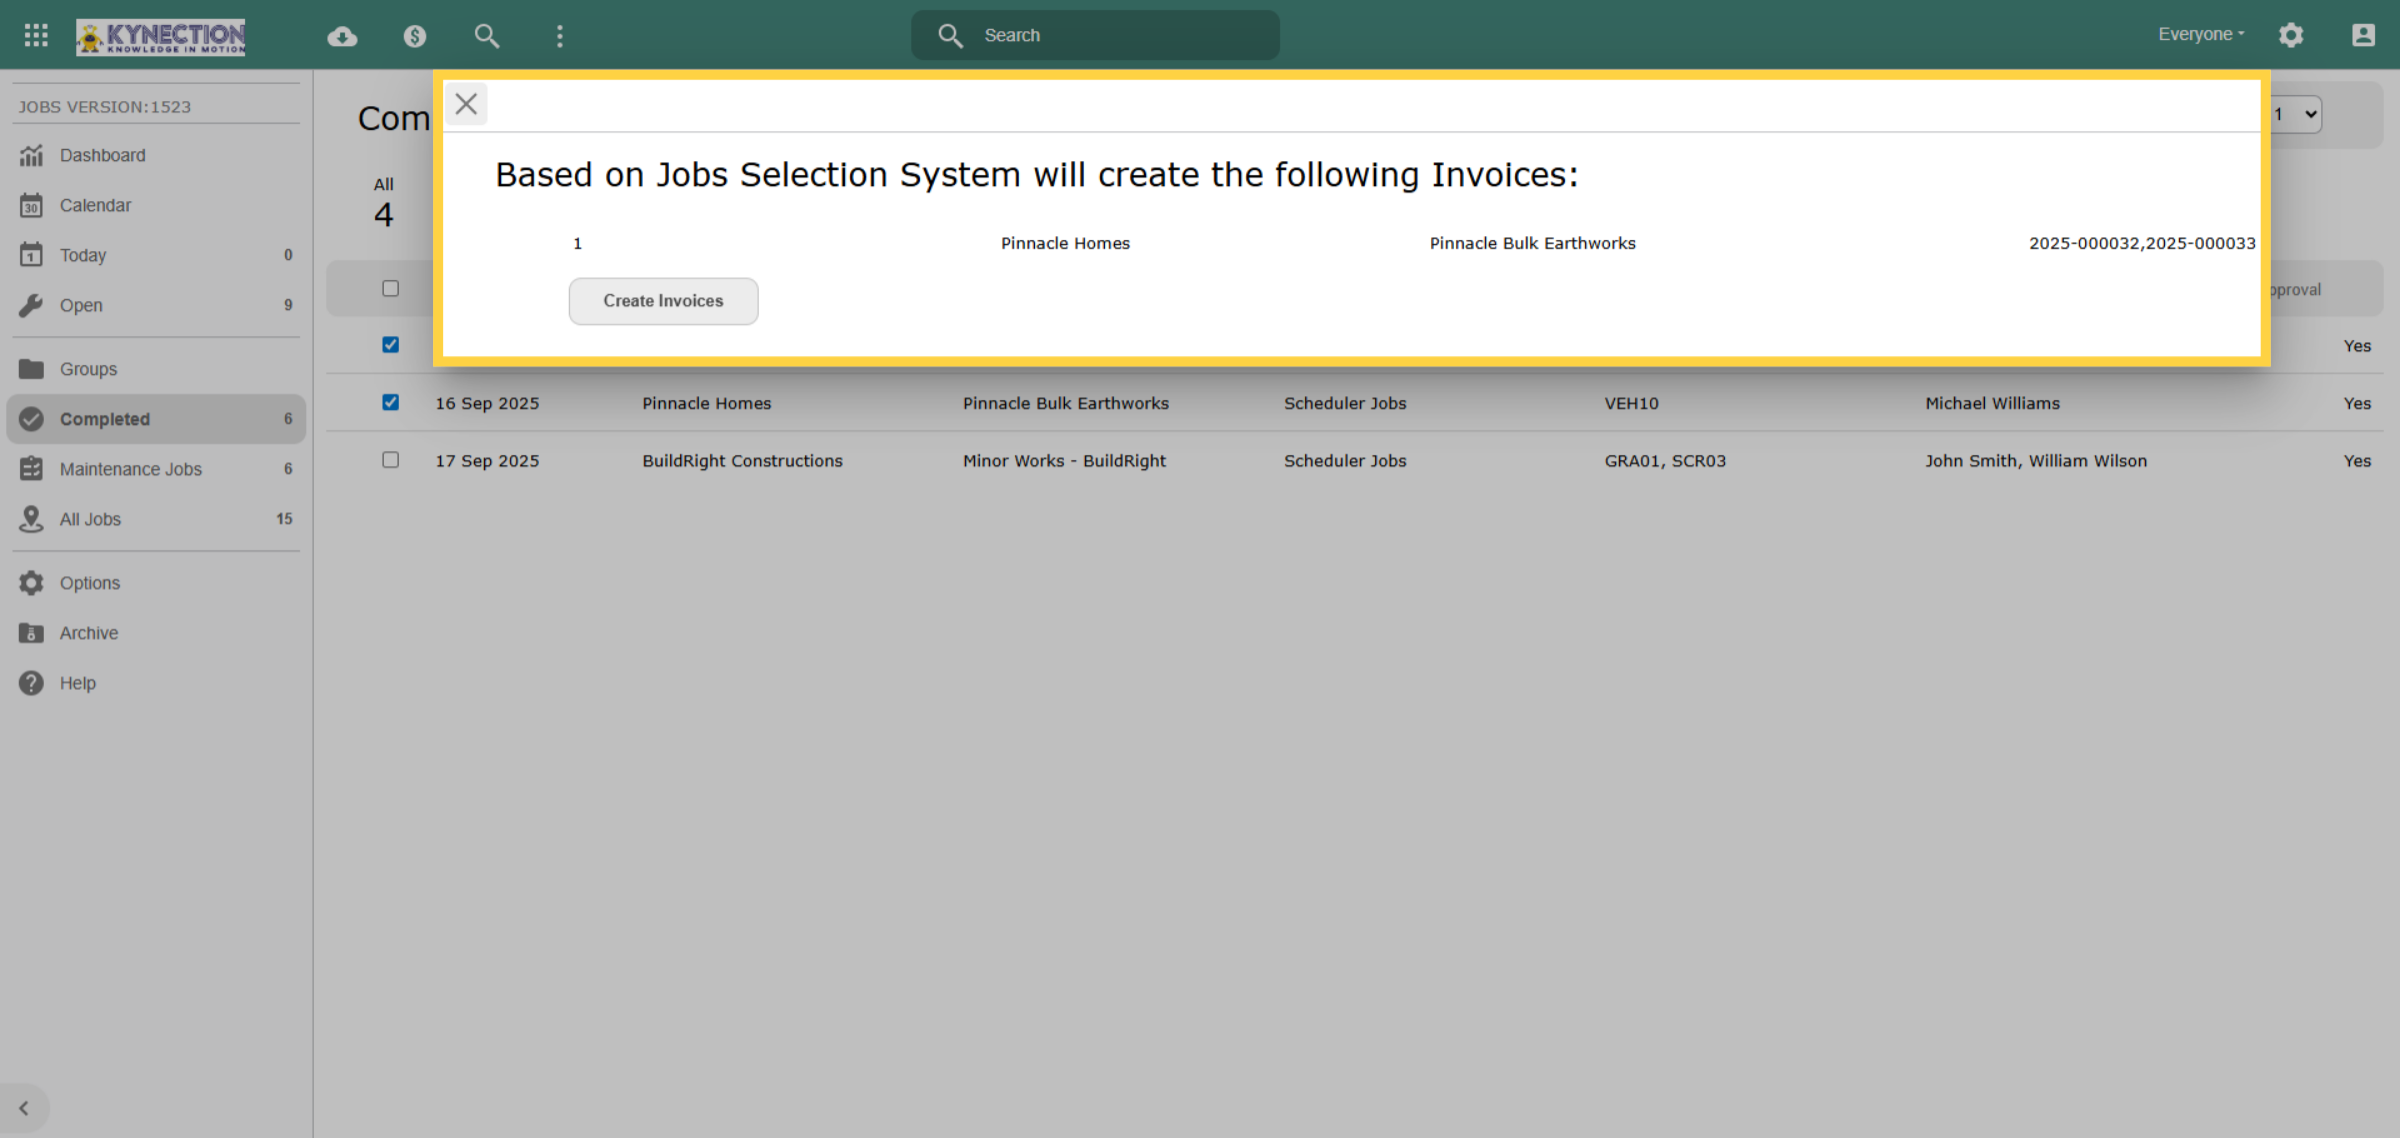
37. View Invoice
The view invoice selection will redirect you to the Sales Module, where you can view the draft invoice. While modifications can be made during the draft stage, any changes to the invoice amount will require you to update the job items to ensure the amounts correspond.
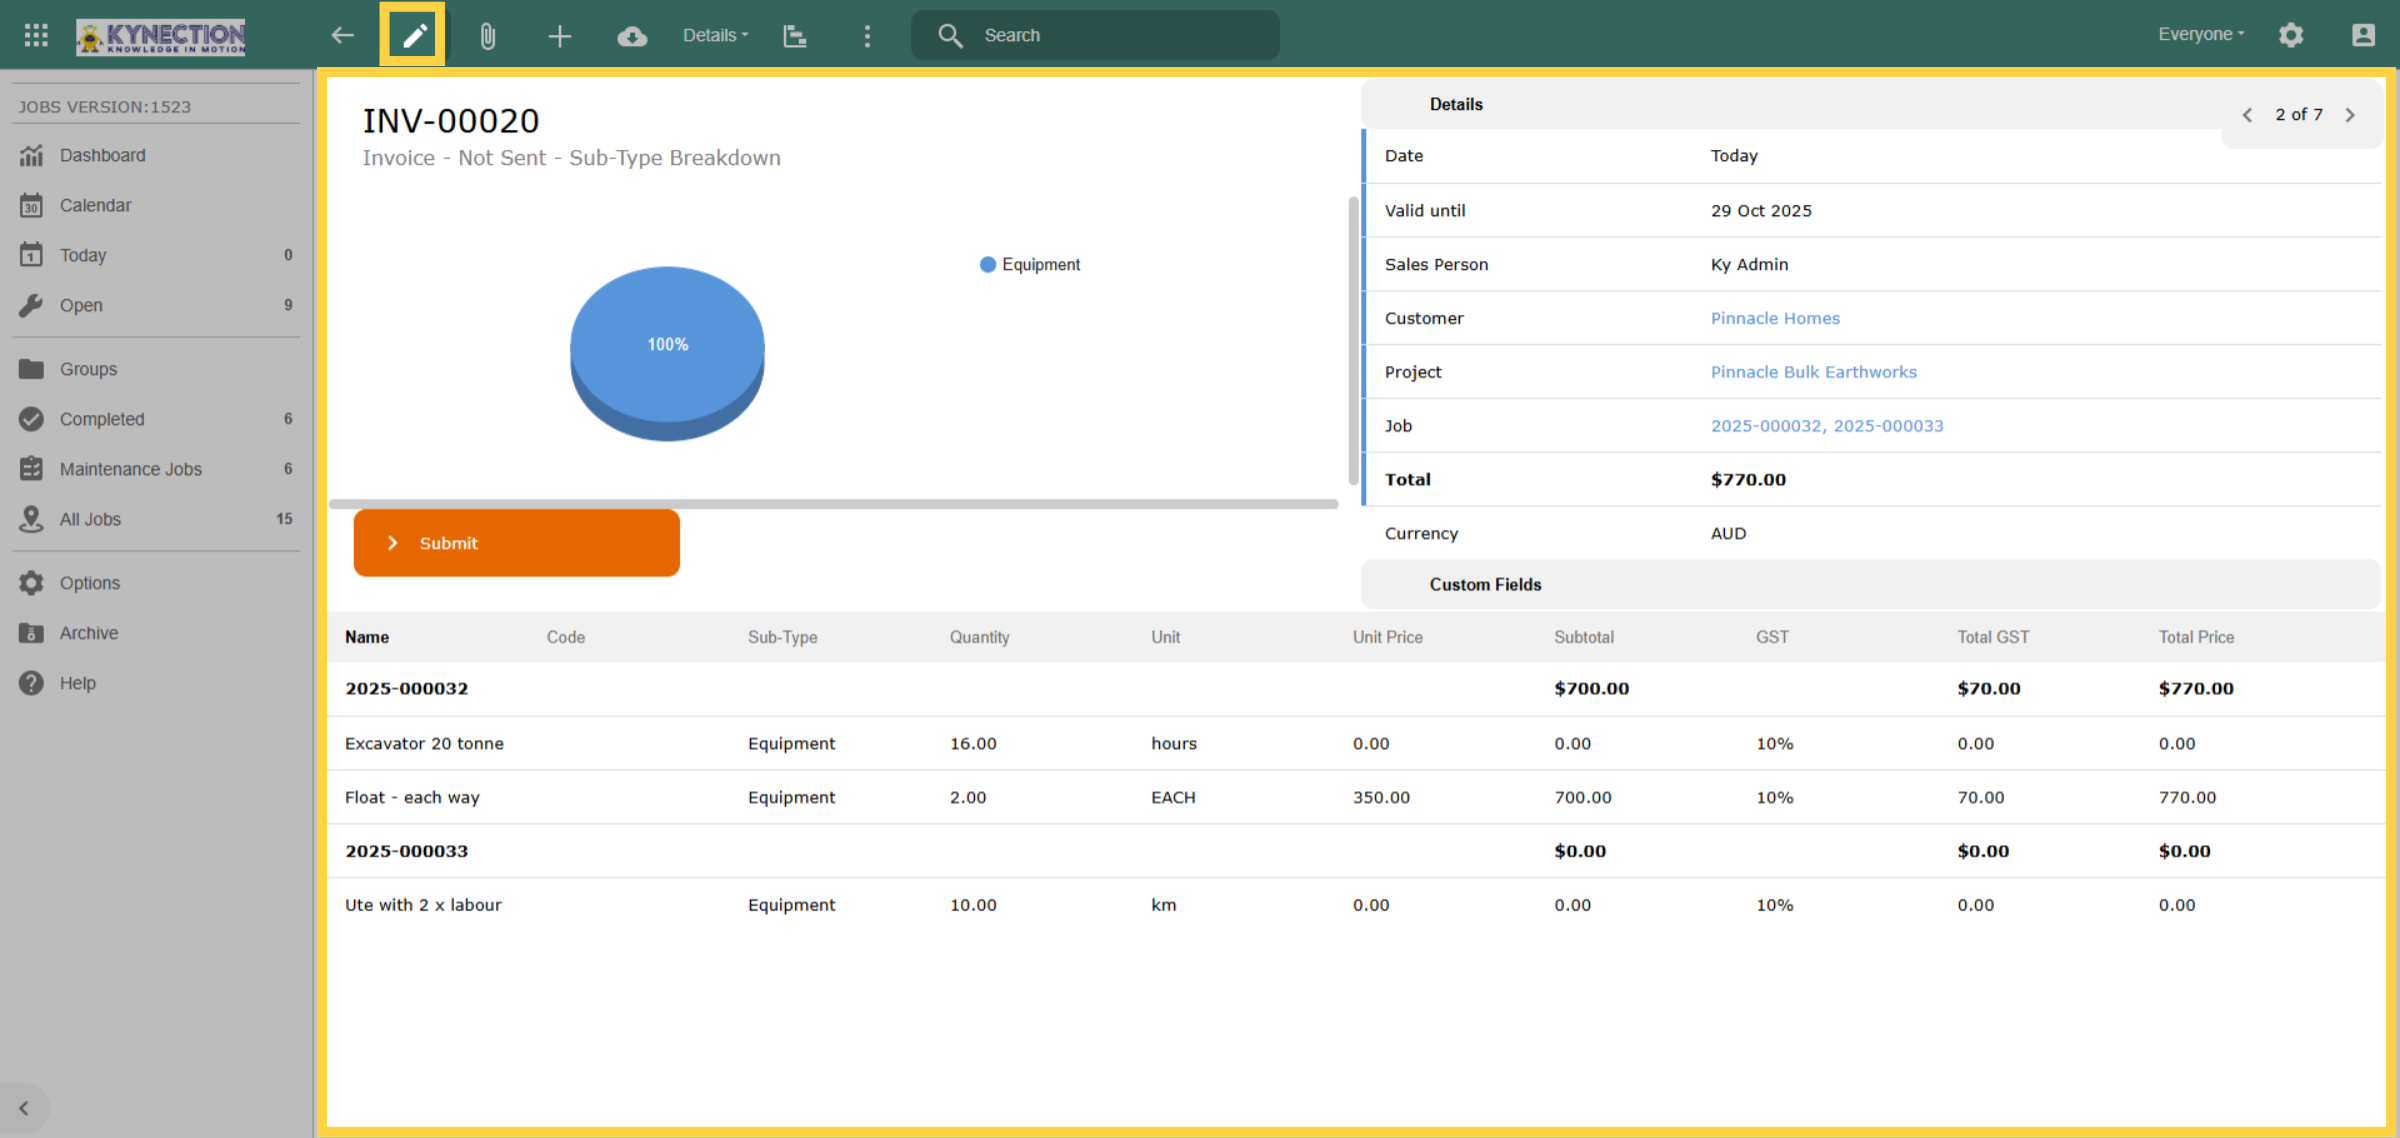
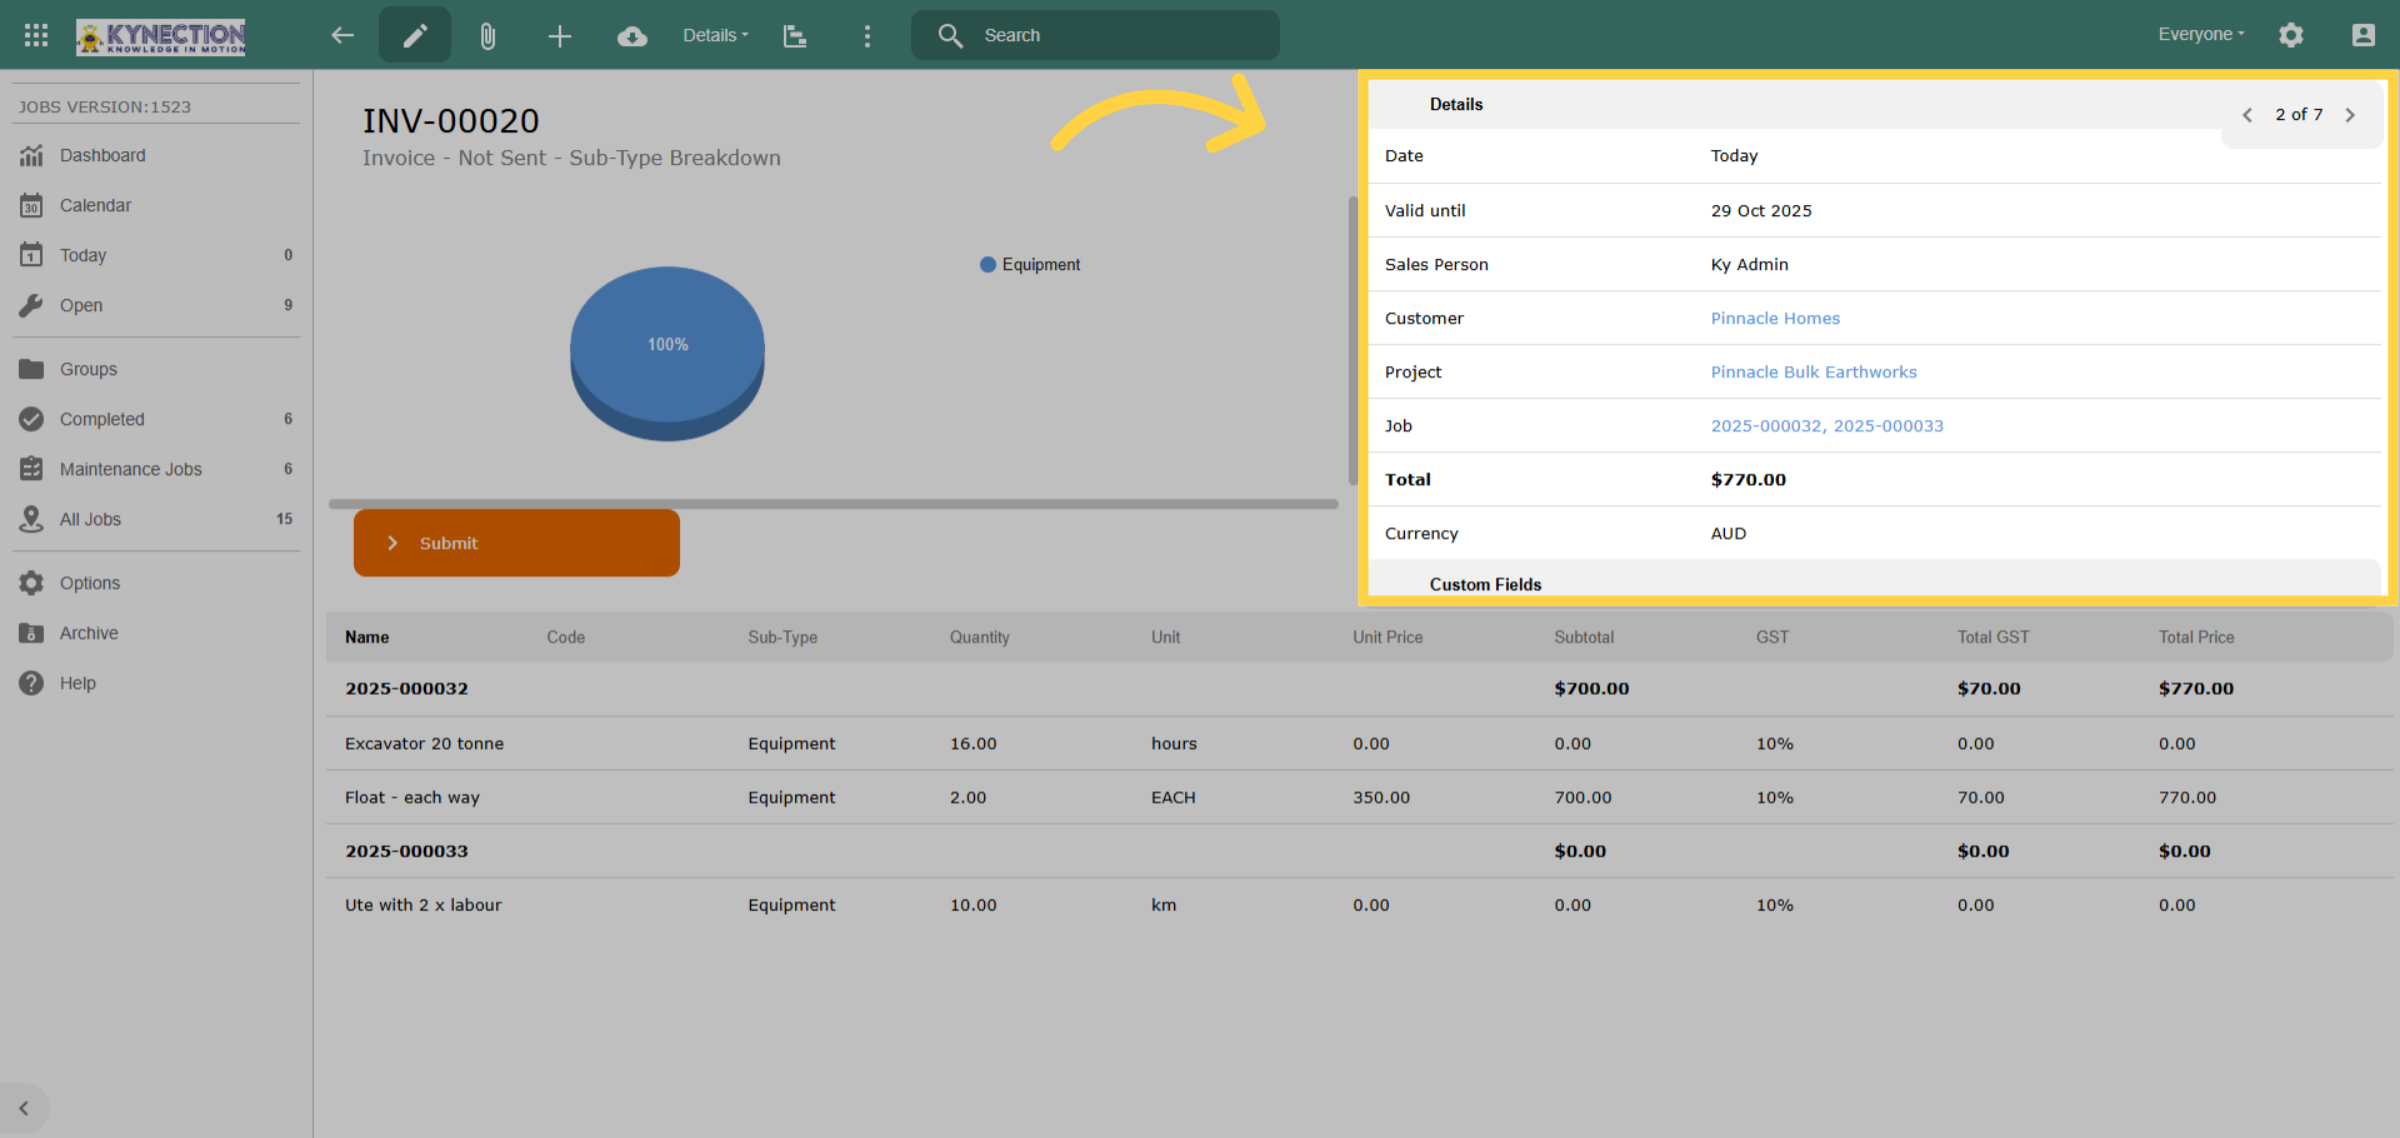
38. Invoice Details
When an invoice is created, the invoice date is established, and the due date is determined based on the payment terms associated with the customer record. Key details—like customer name, quote, job number, and project—are highlighted in blue as hyperlinks for easy reference to the invoice.
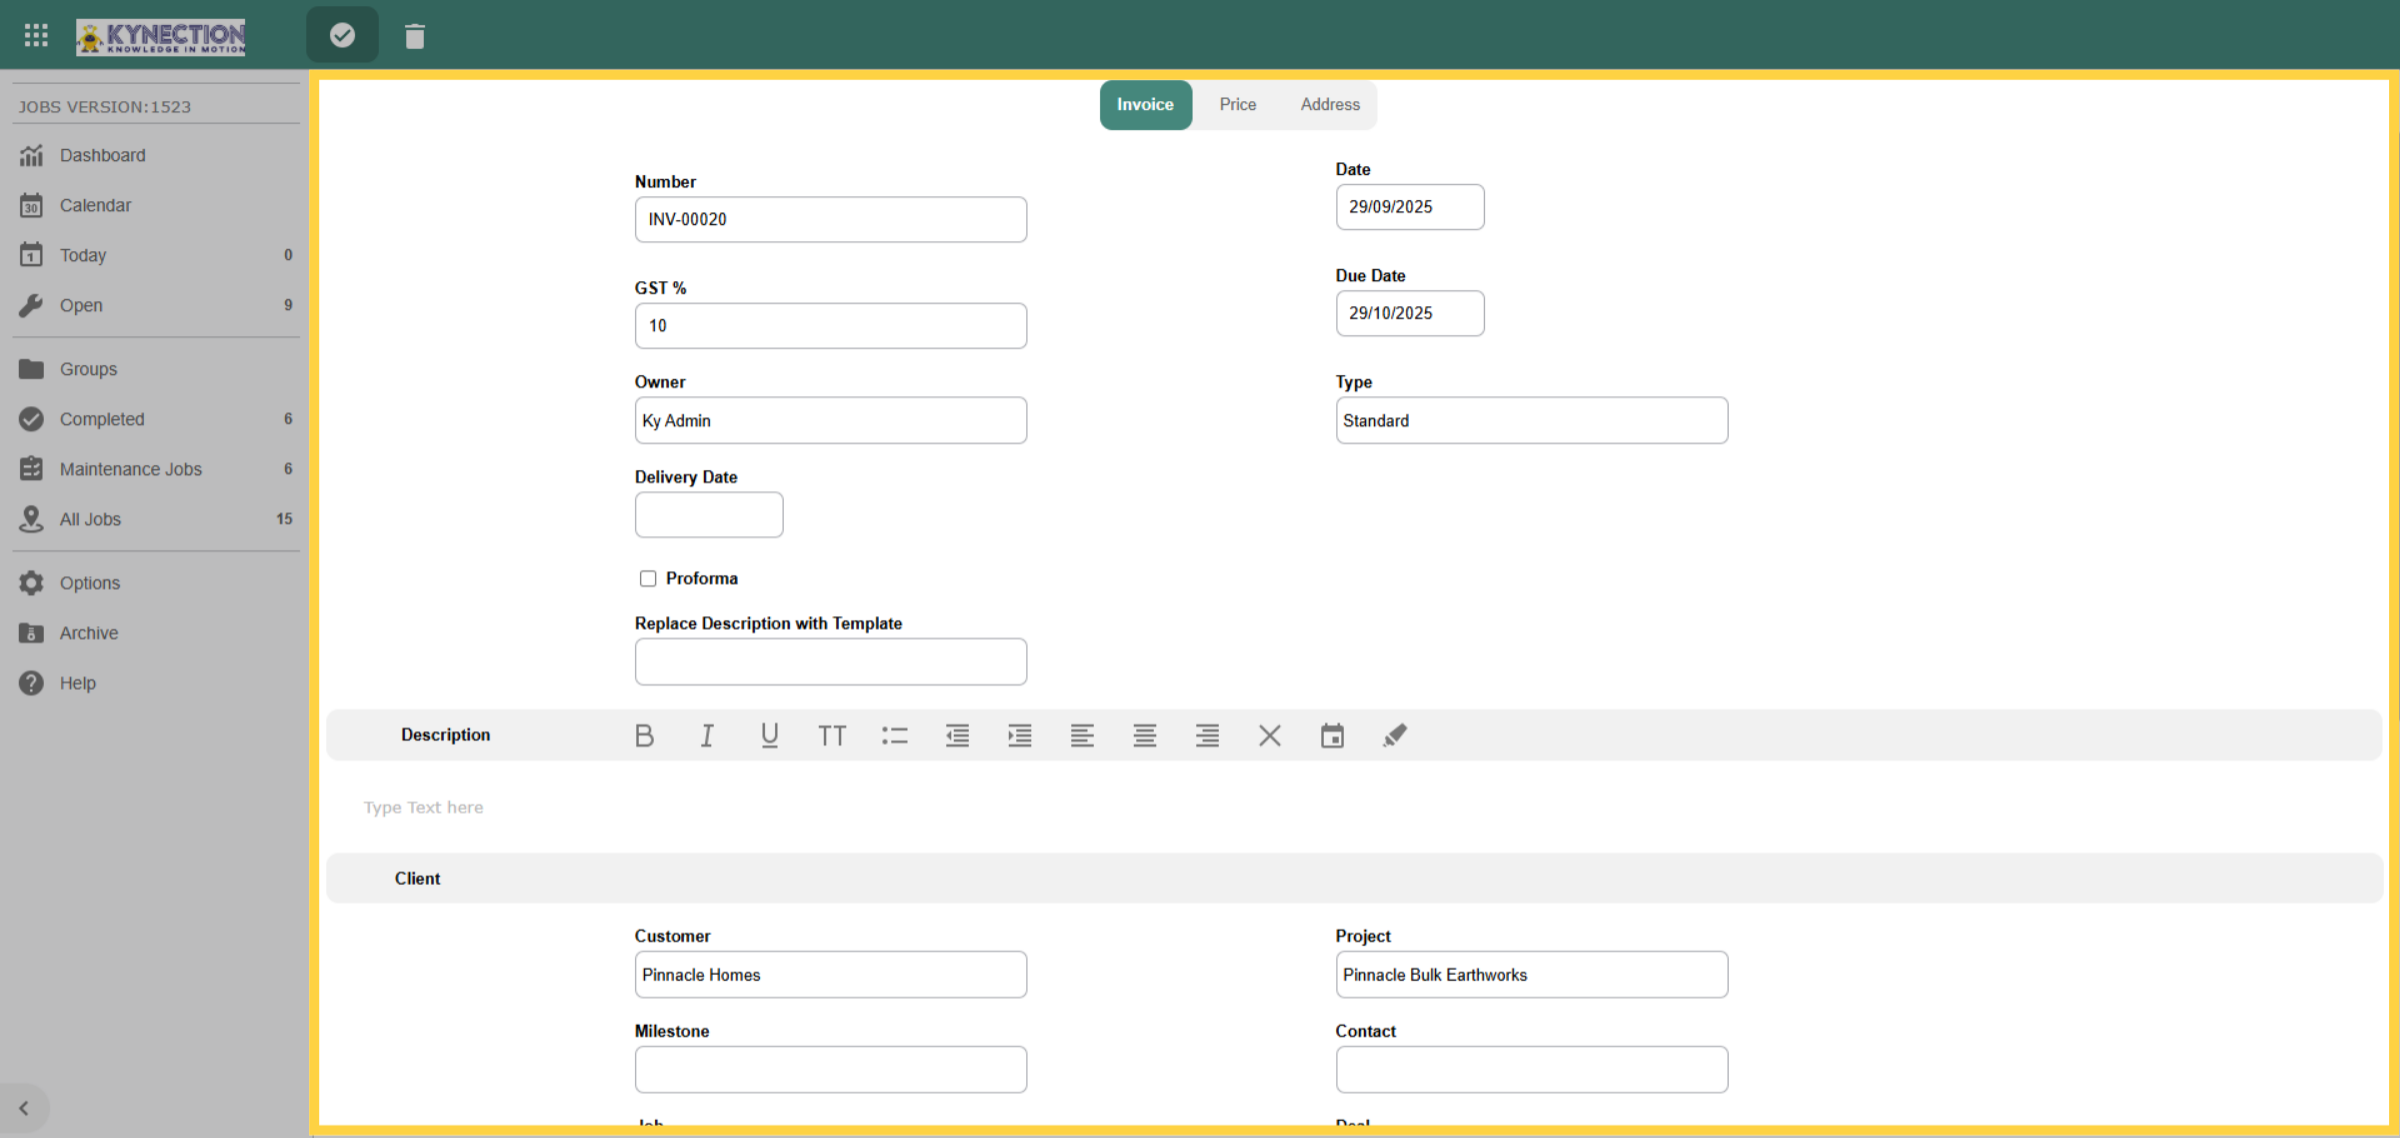
39. Edit Invoice
To update details such as the invoice date or to include a client purchase order, click the pencil icon in the toolbar to open the edit screen..
40. Reorder Invoice Lines
To reorder the invoice lines, click the triangle-shaped toolbar icon to access the editing screen, then simply click and drag the lines to arrange them as desired.
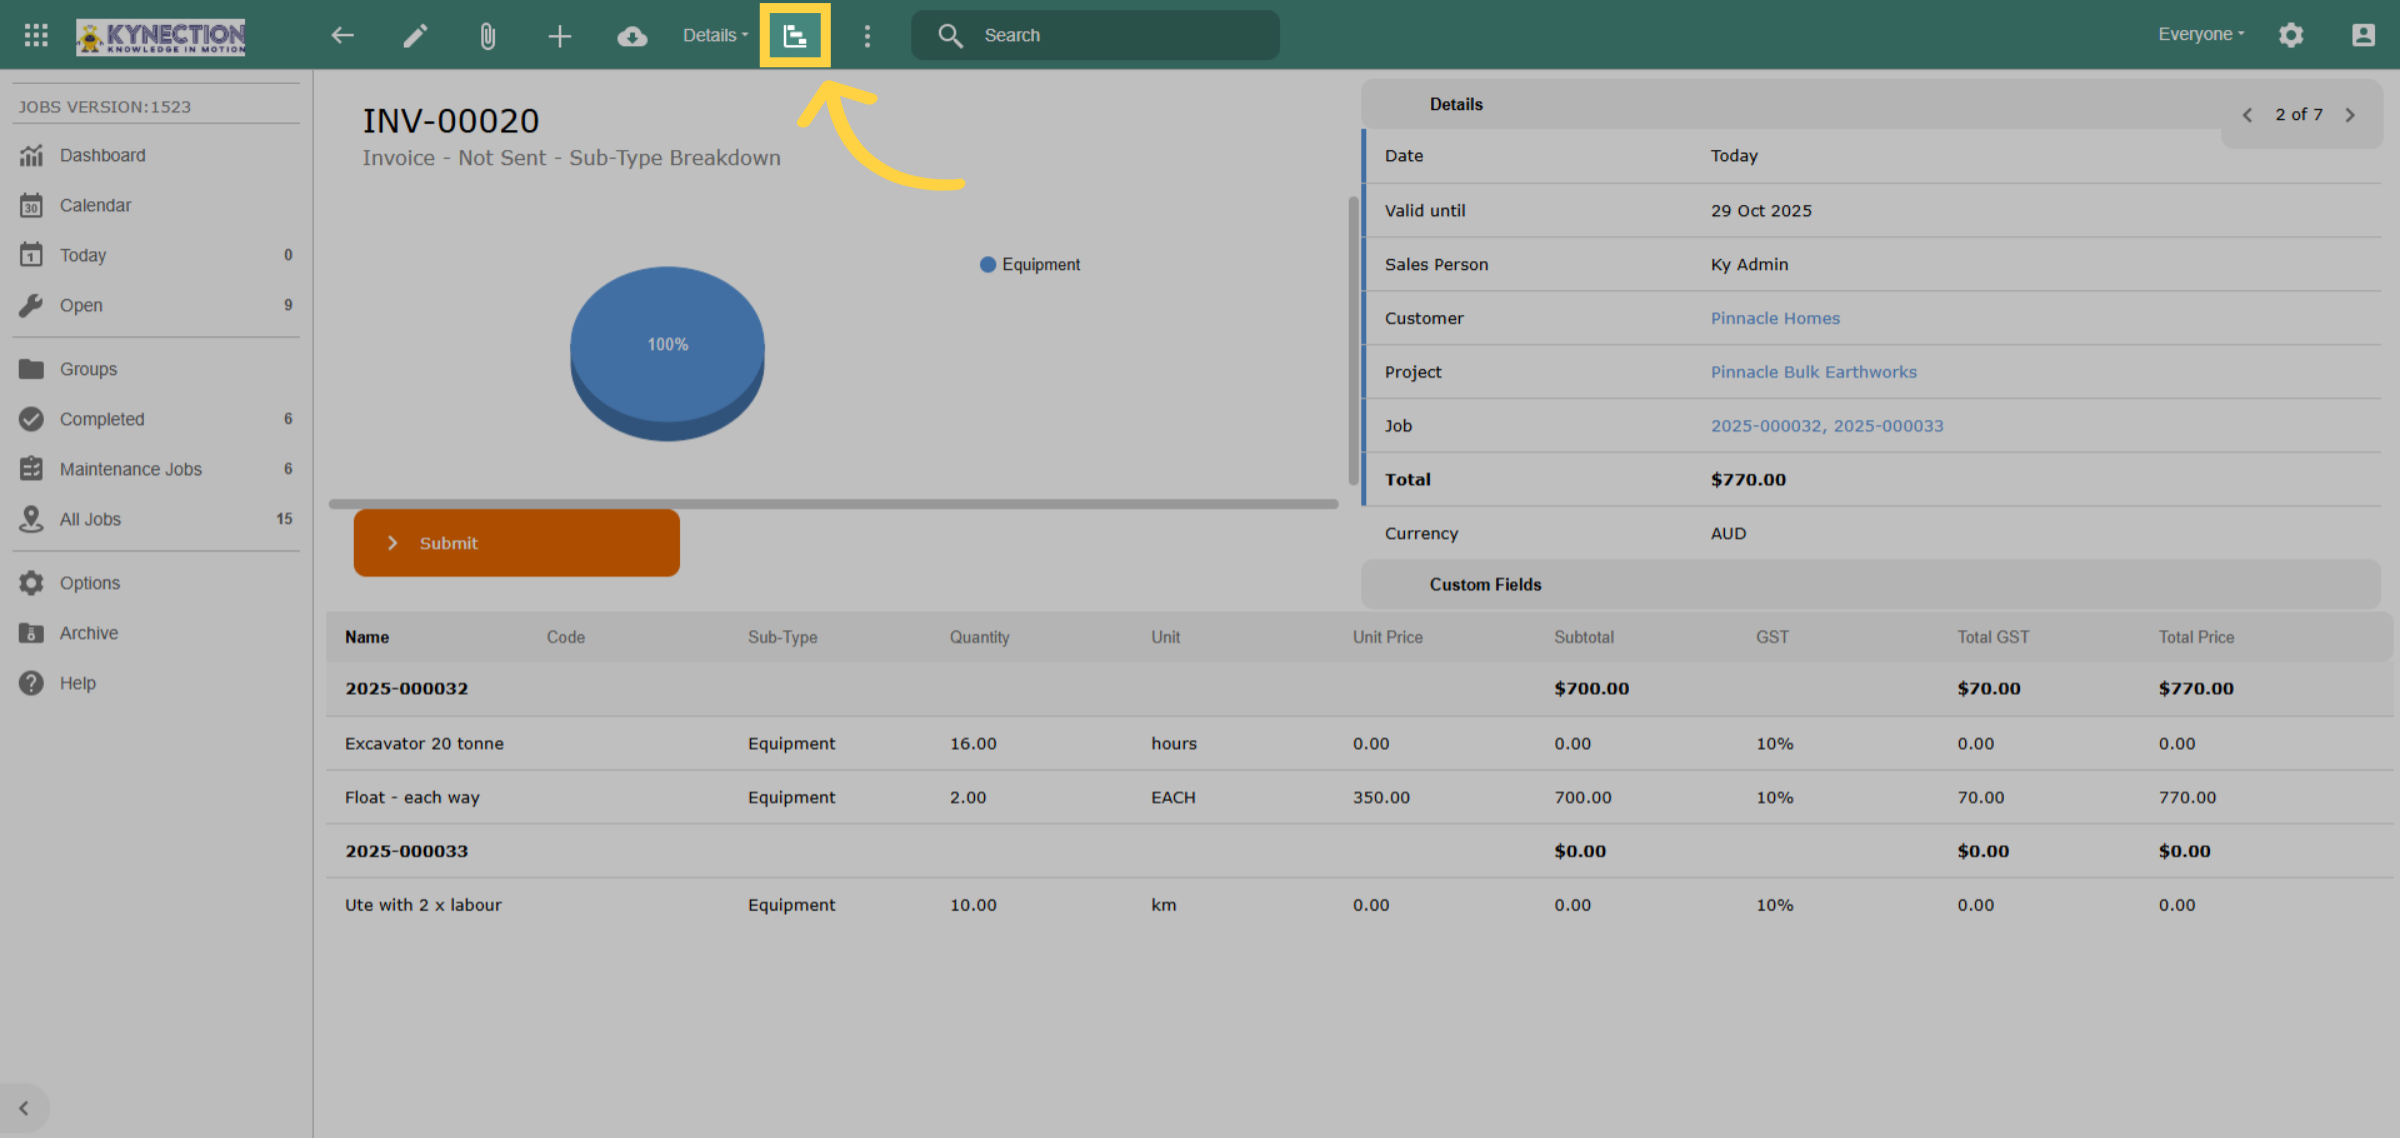
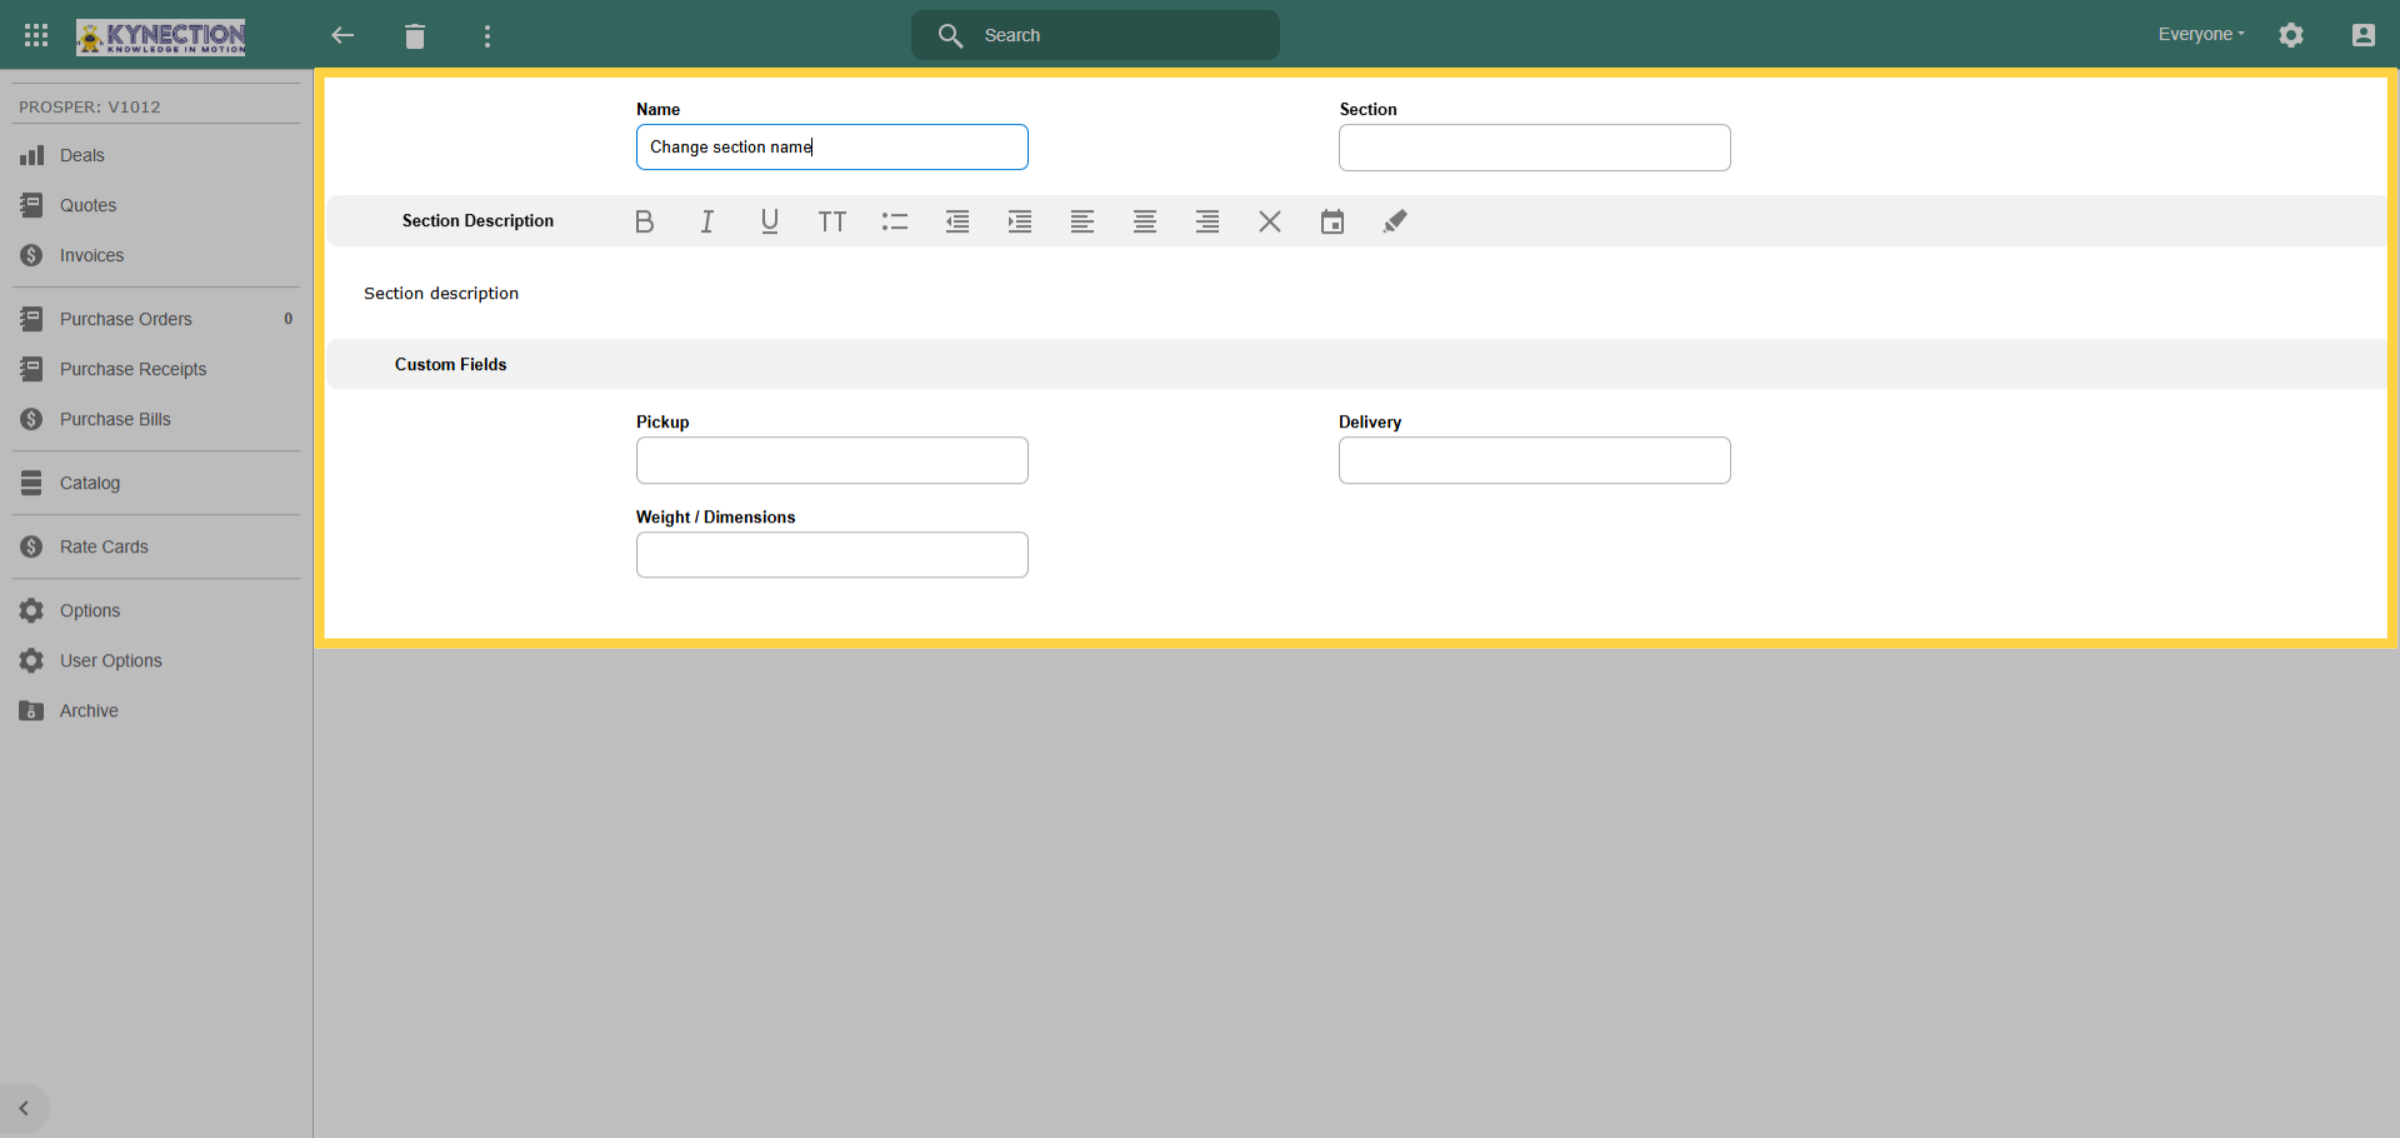
41. Edit Section Header
To rename the section header, click on the section header and use the pencil icon to edit the section name or add description.
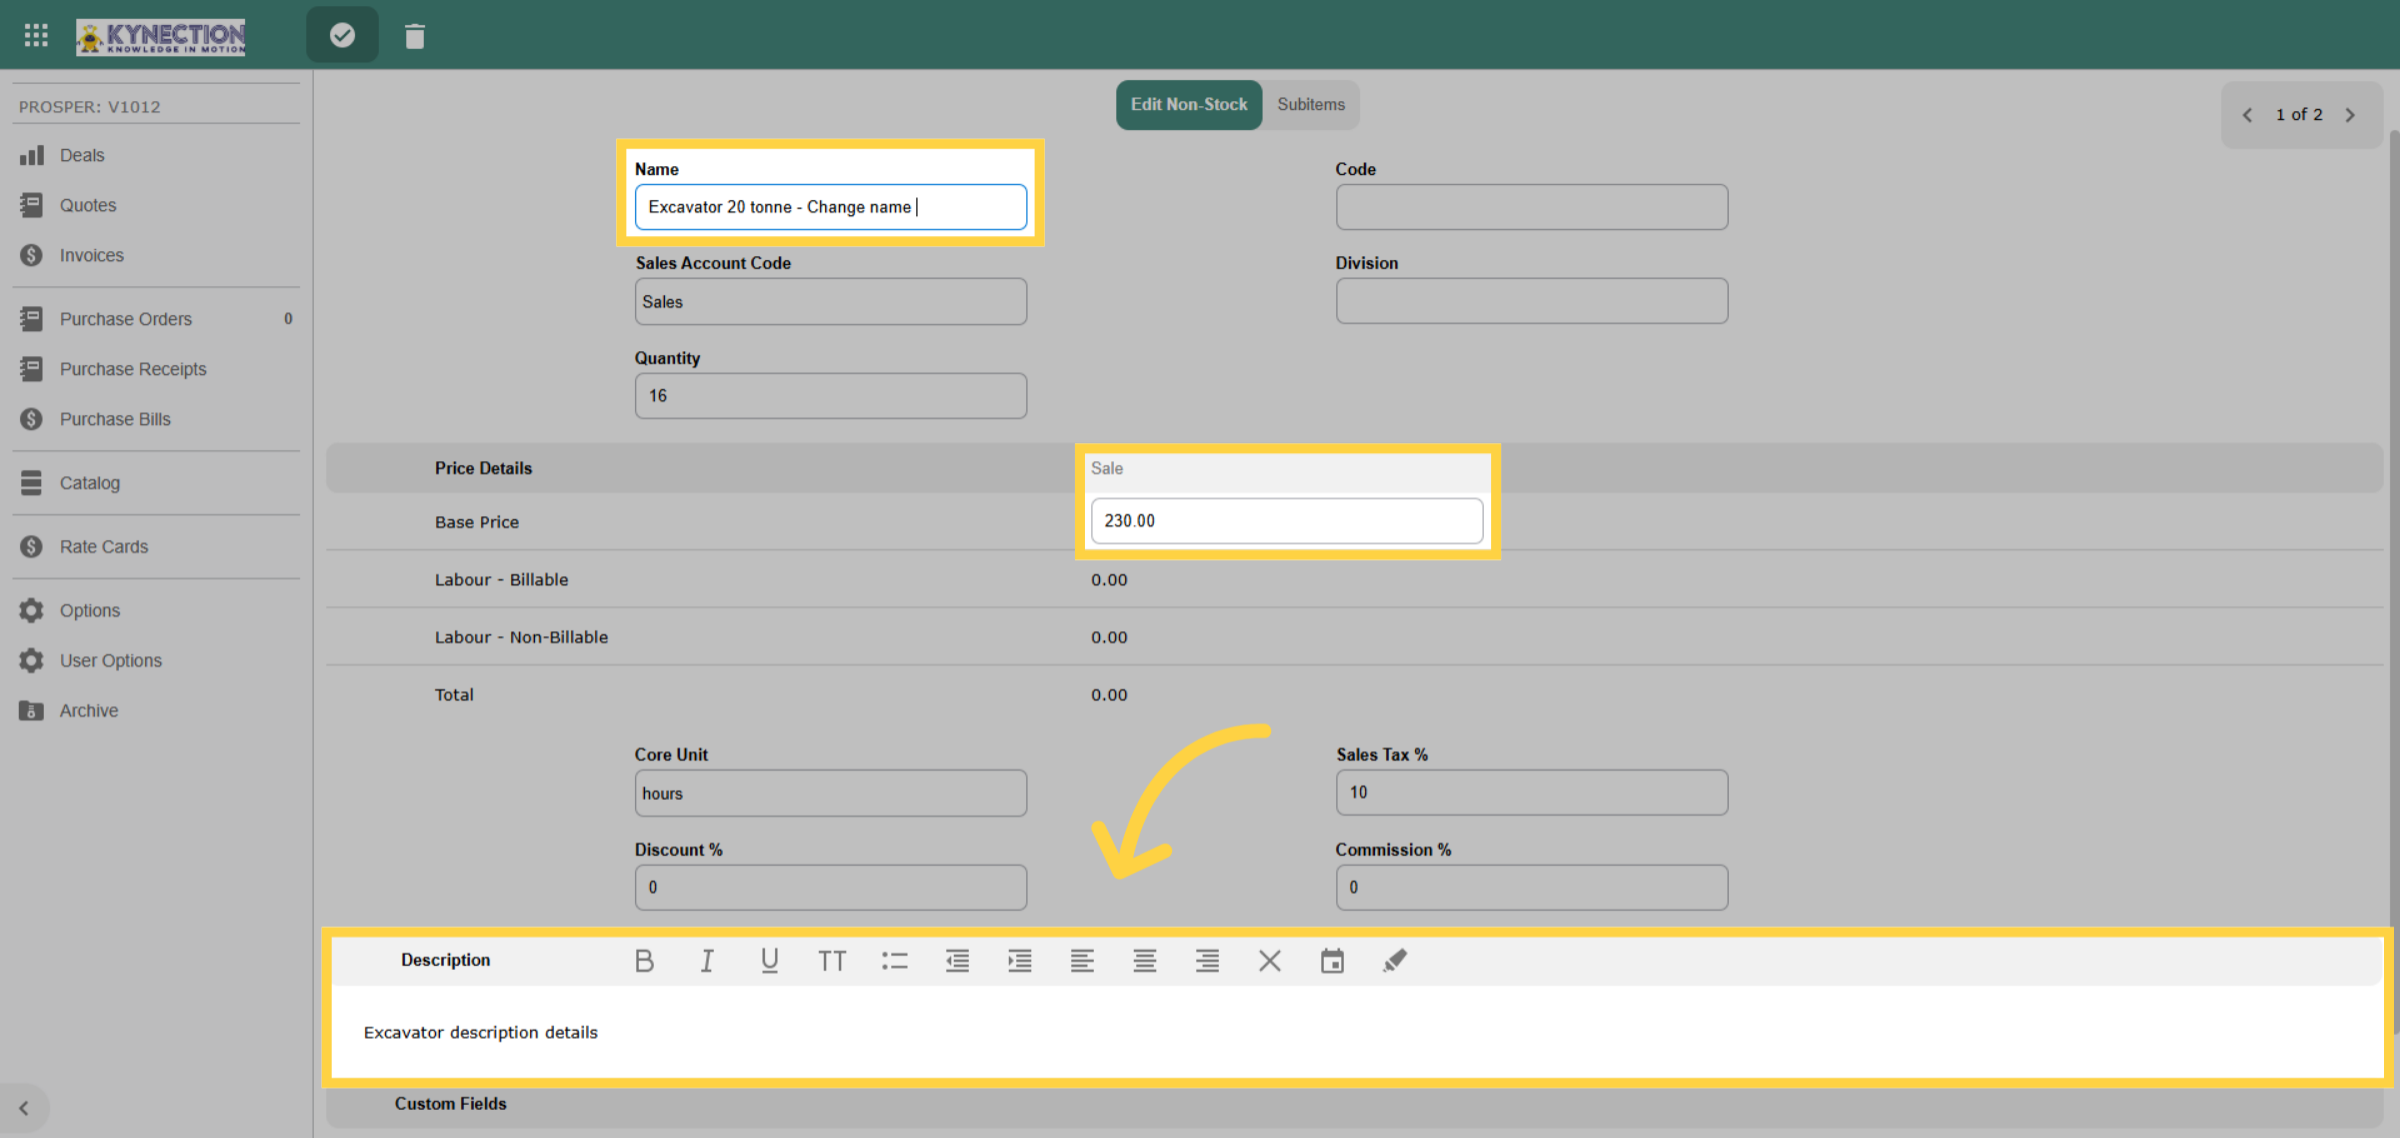
42. Editing Invoice Line Items
To edit invoice items, select the header and then select the item to edit.You can add descriptions to each invoice line, which will display beneath the line item name. Additionally, you can edit both the item name and its base price. However, please note that discrepancies will arise if the total of the items in the job does not align with the invoice total.
43. Preview Invoice
Preview the invoice as a PDF, download it, or export to Excel using the toolbar. If there are errors, click the pencil to edit items or the bin icon to delete the draft invoice, which can be more efficient than modifying both the invoice and job items separately.
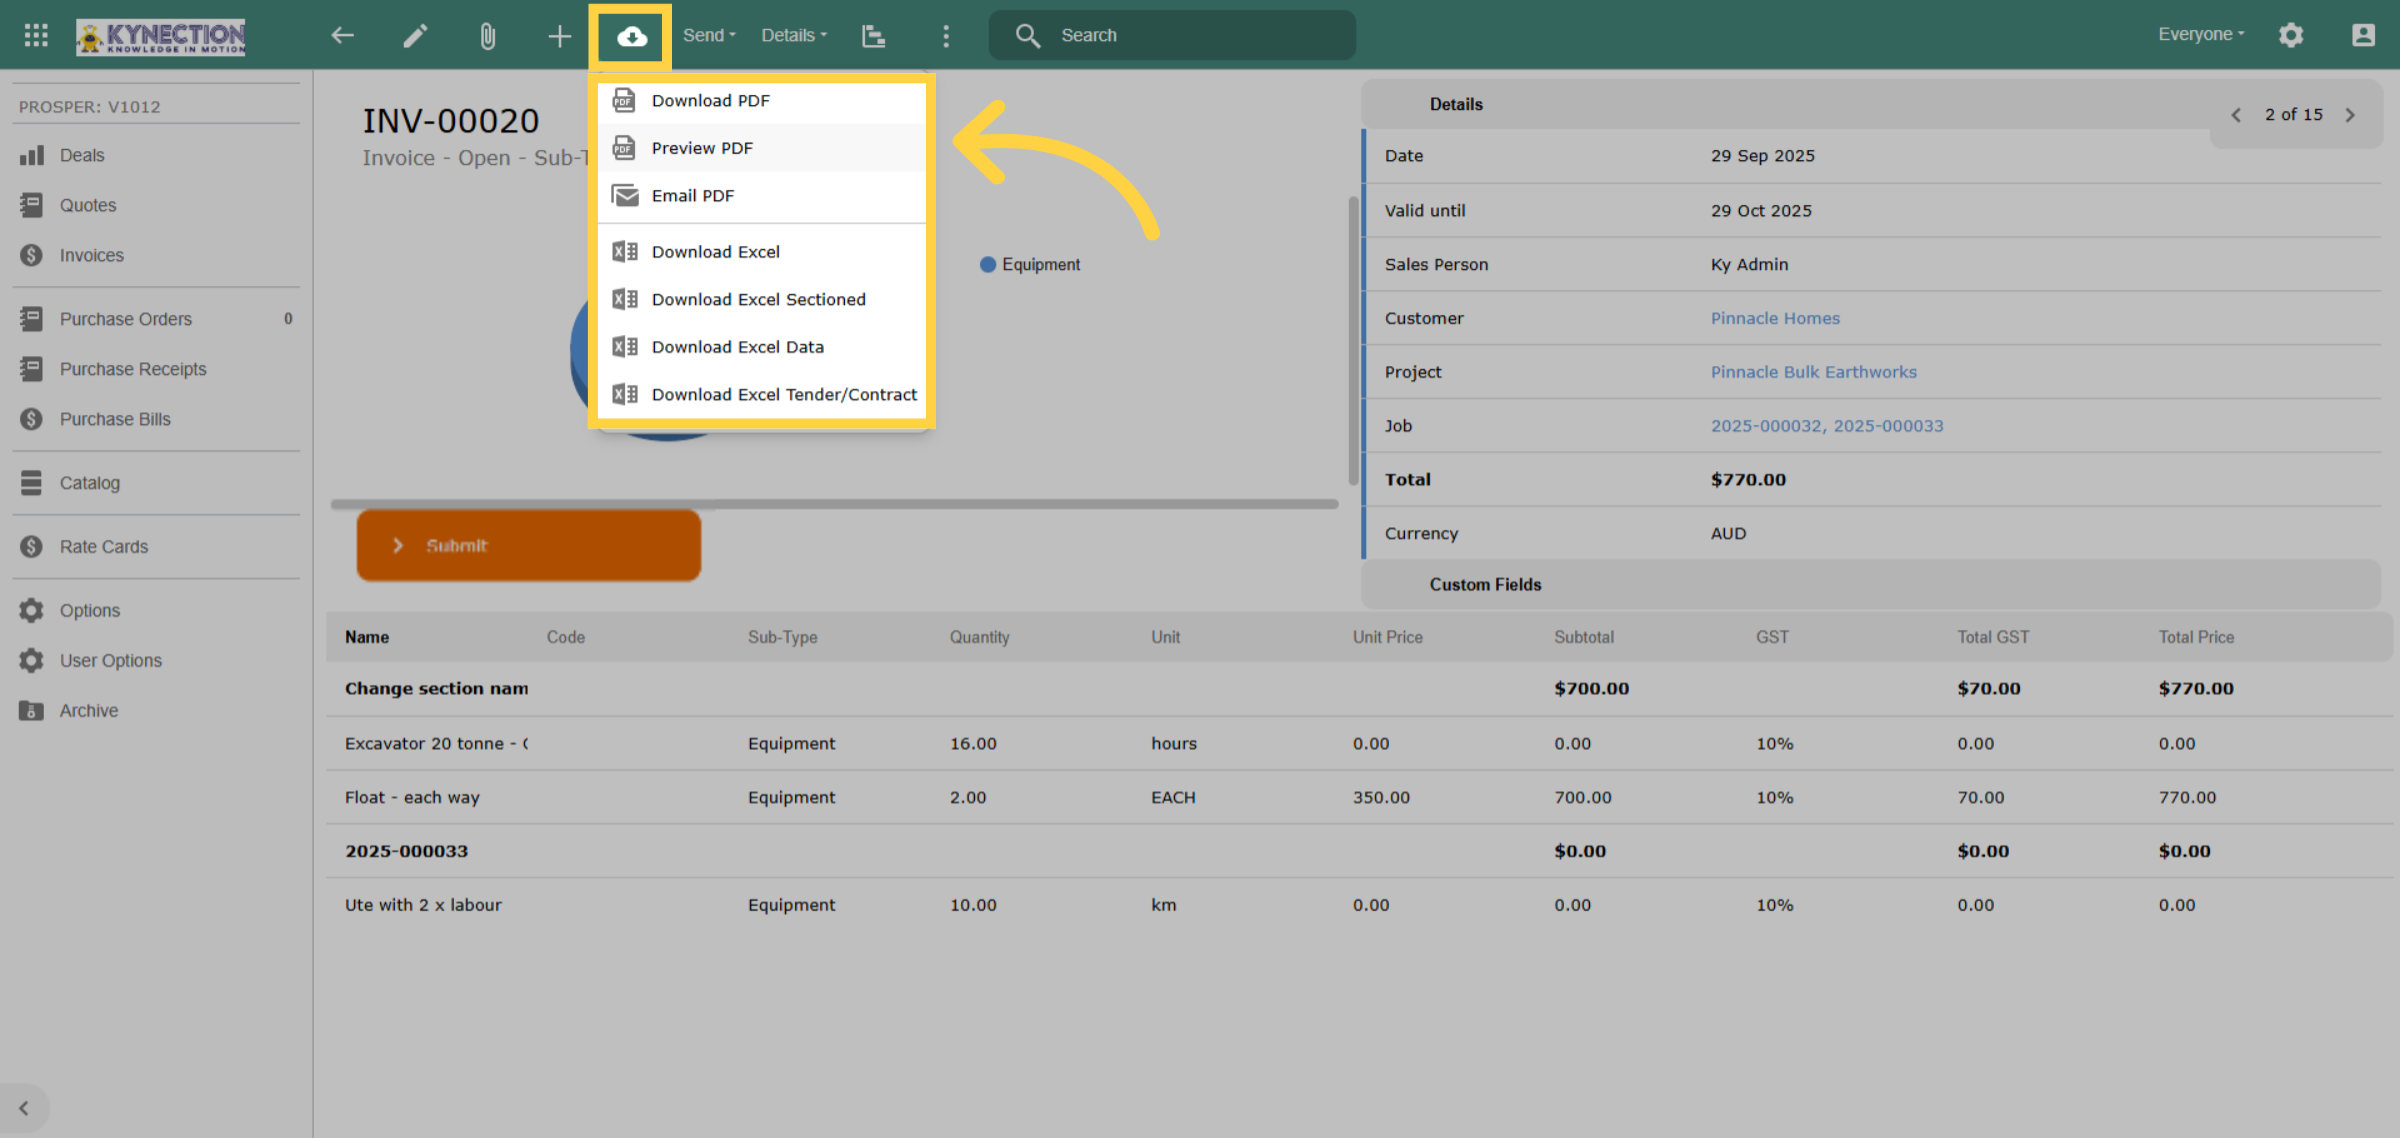
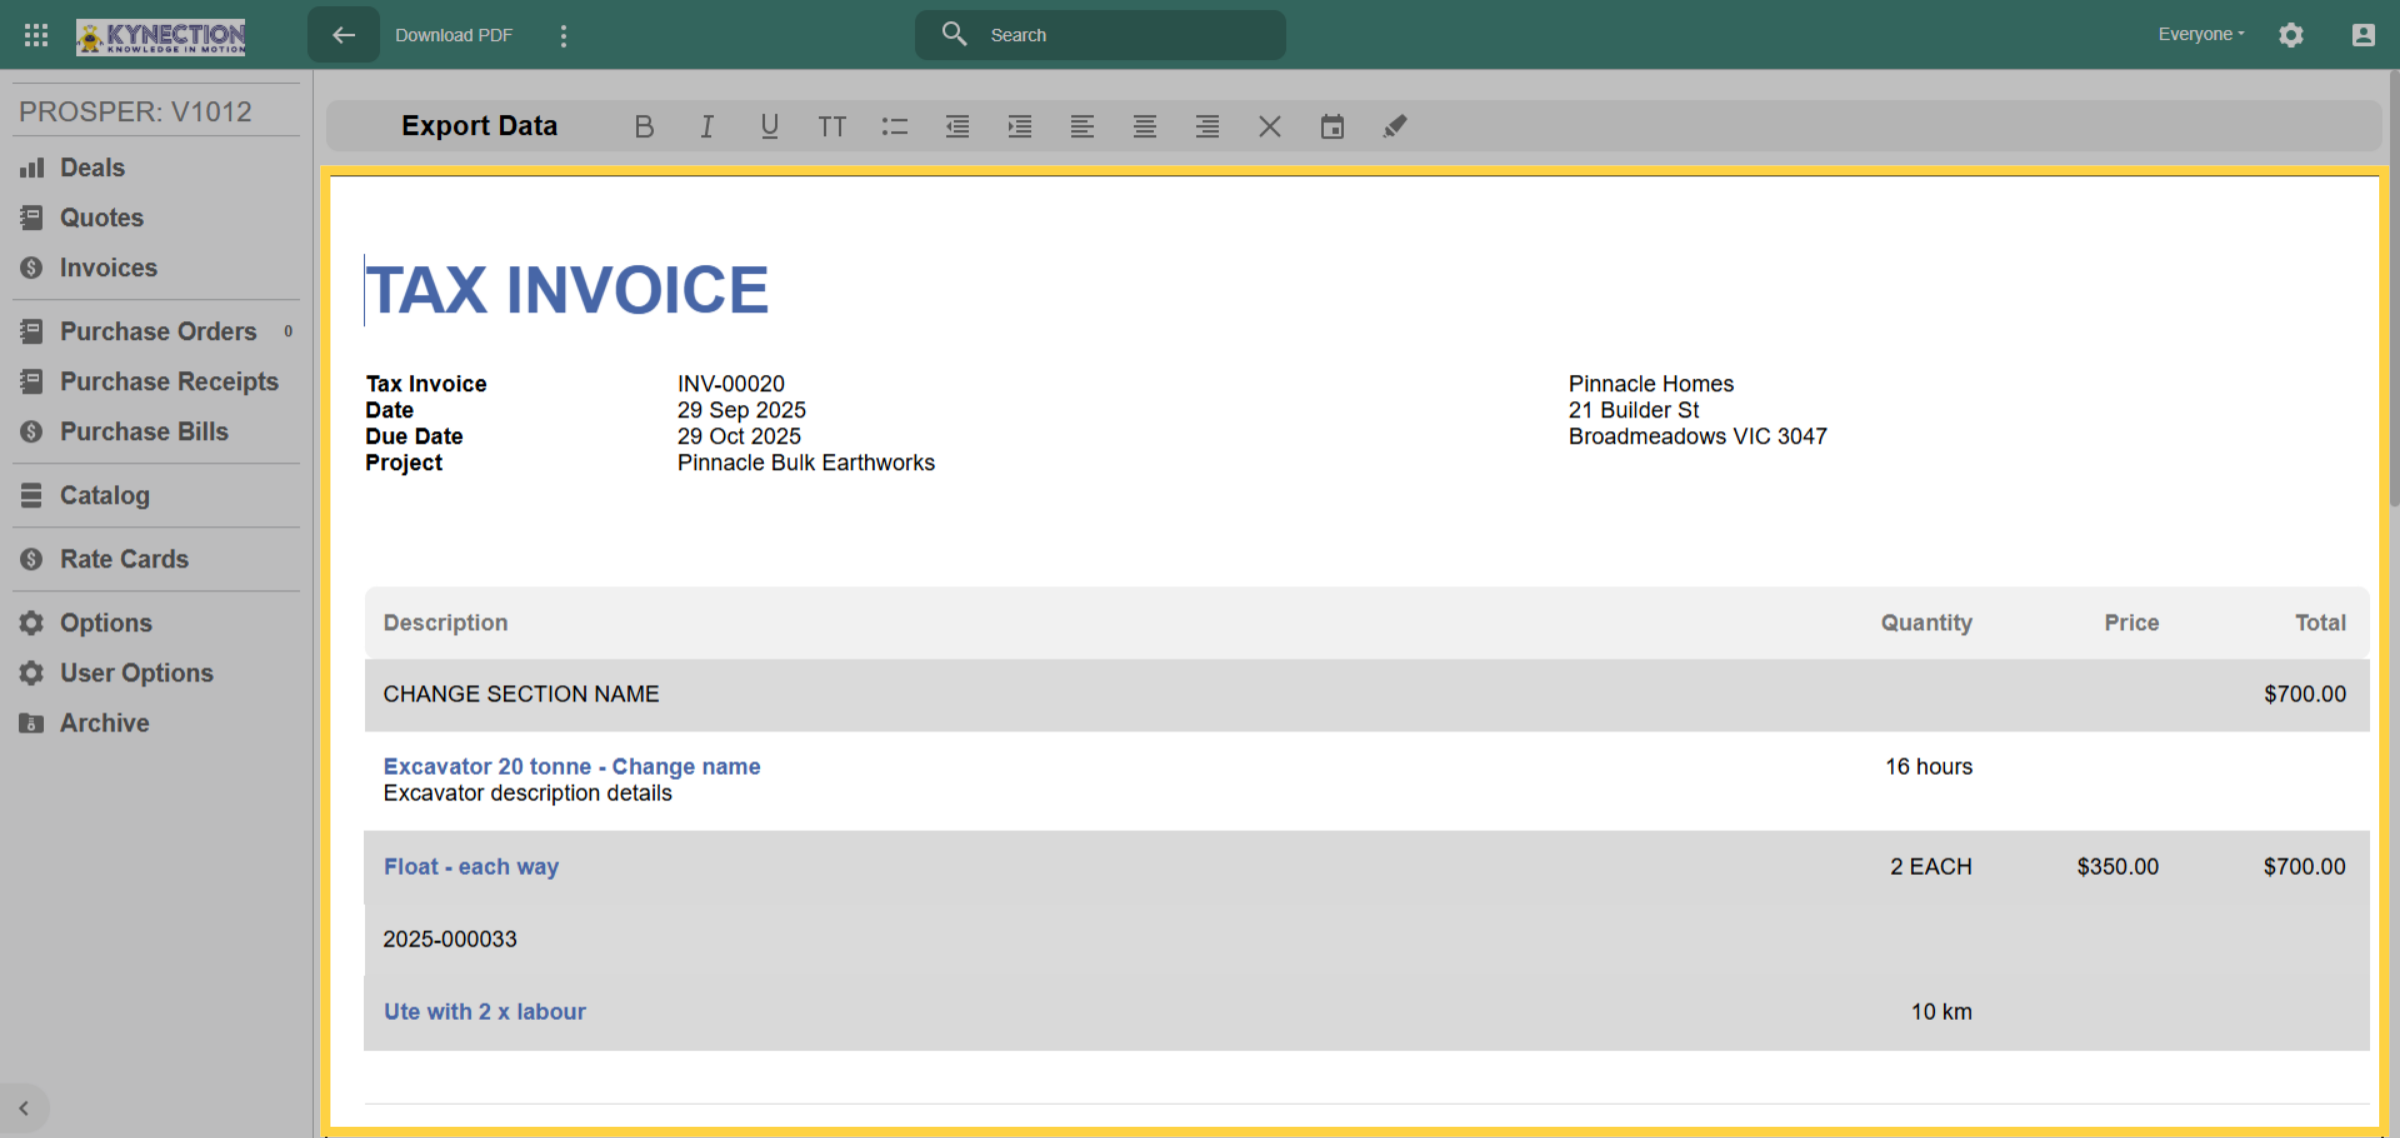
44. PDF Preview
From the preview we can see the changes made to the section heading and description added to the line item.
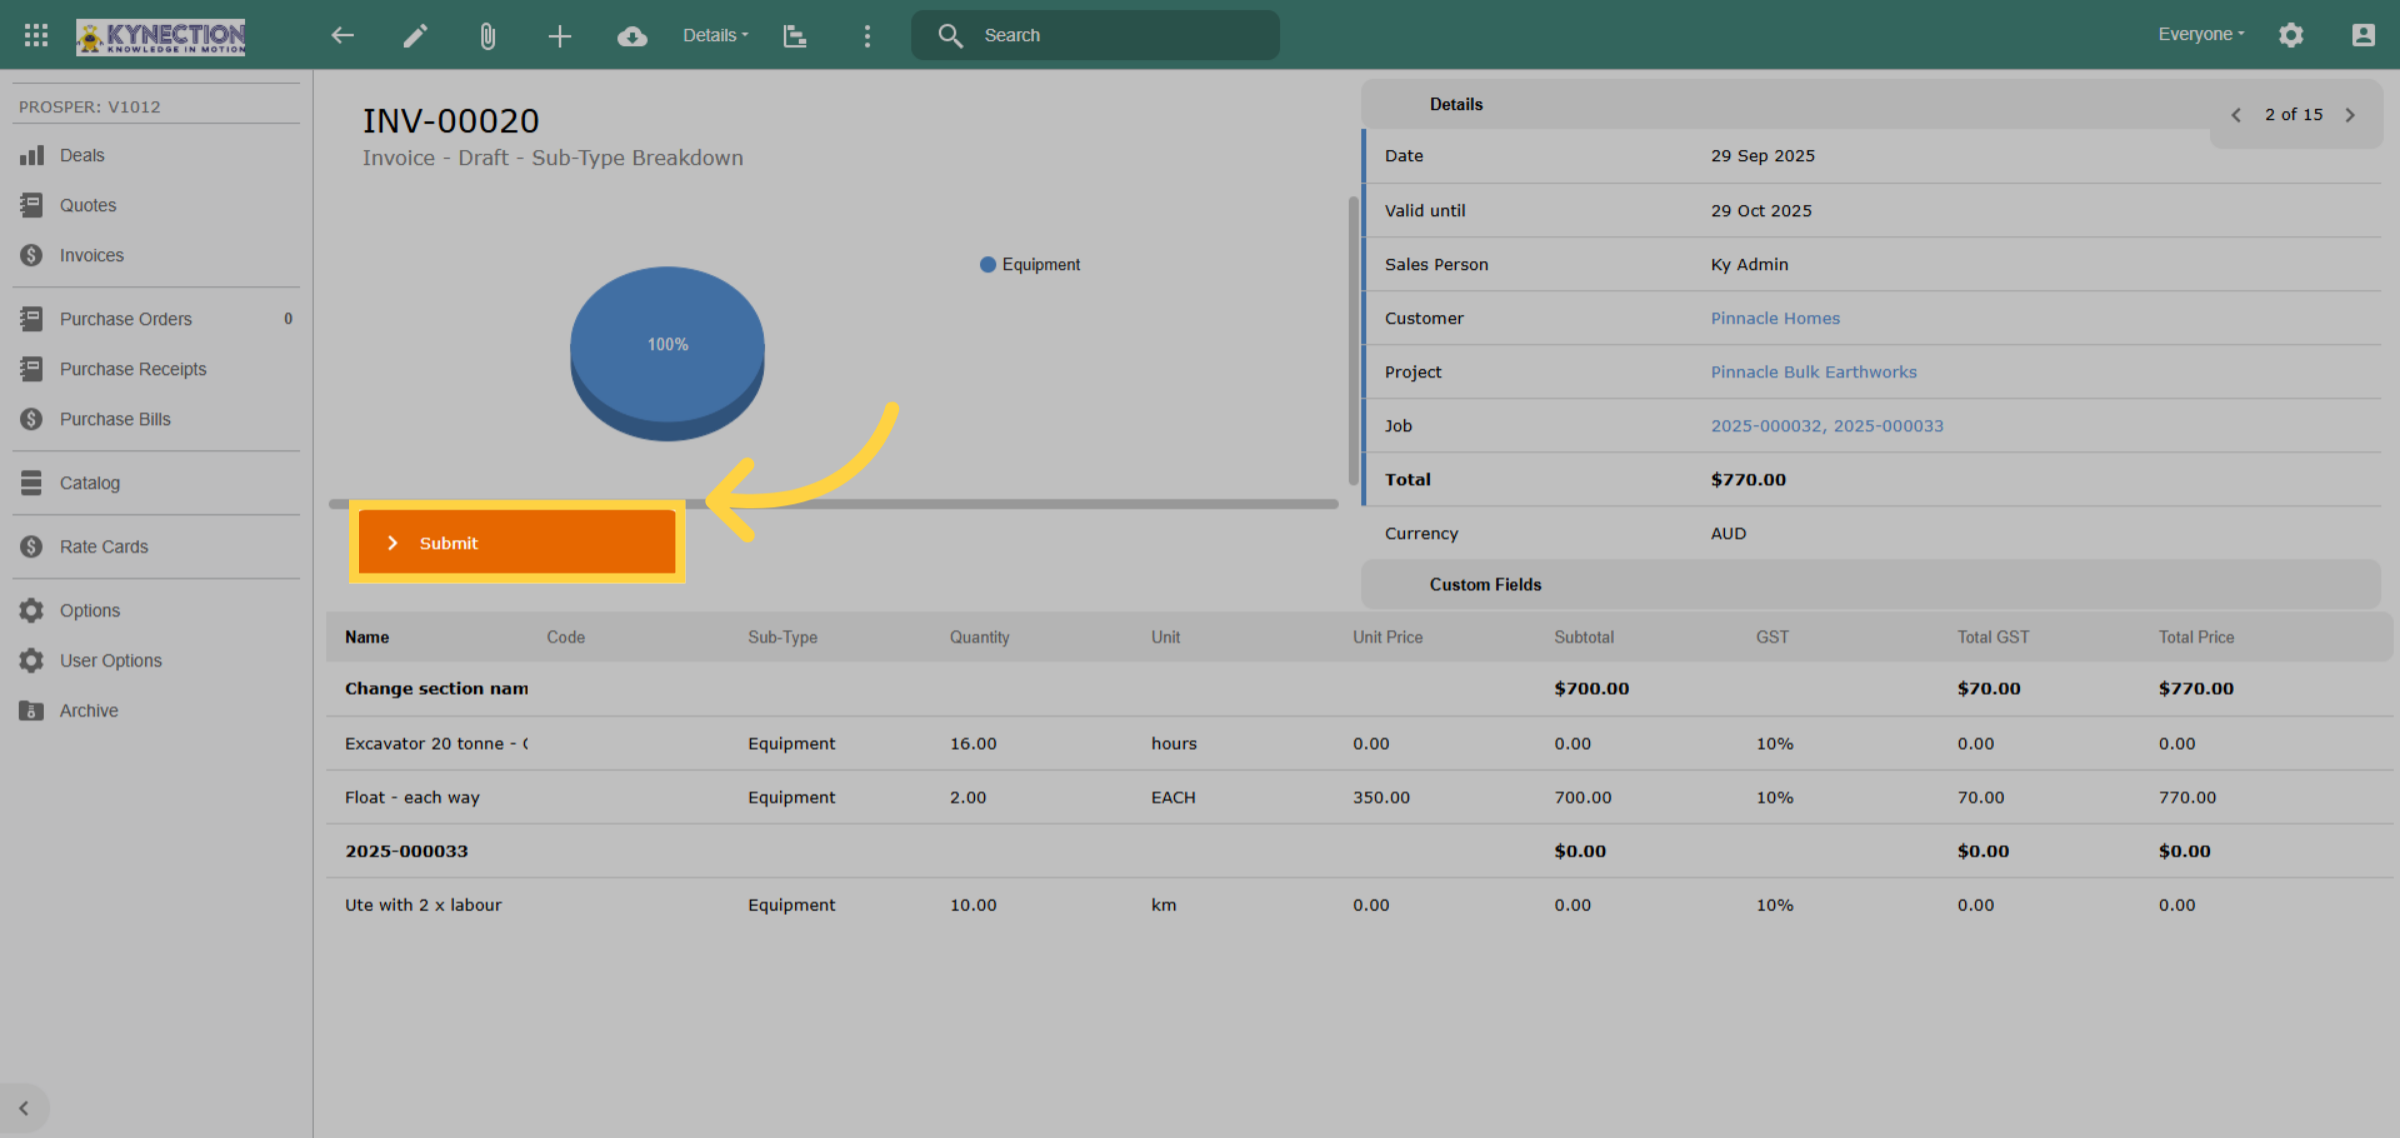
45. Submit Invoice
After finalising the invoice, click the orange "Submit" tab to lock it, preventing further changes. This action doesn't send the invoice to the customer; the next steps depend on your invoice-sending configuration, whether through KIM or your accounting software.
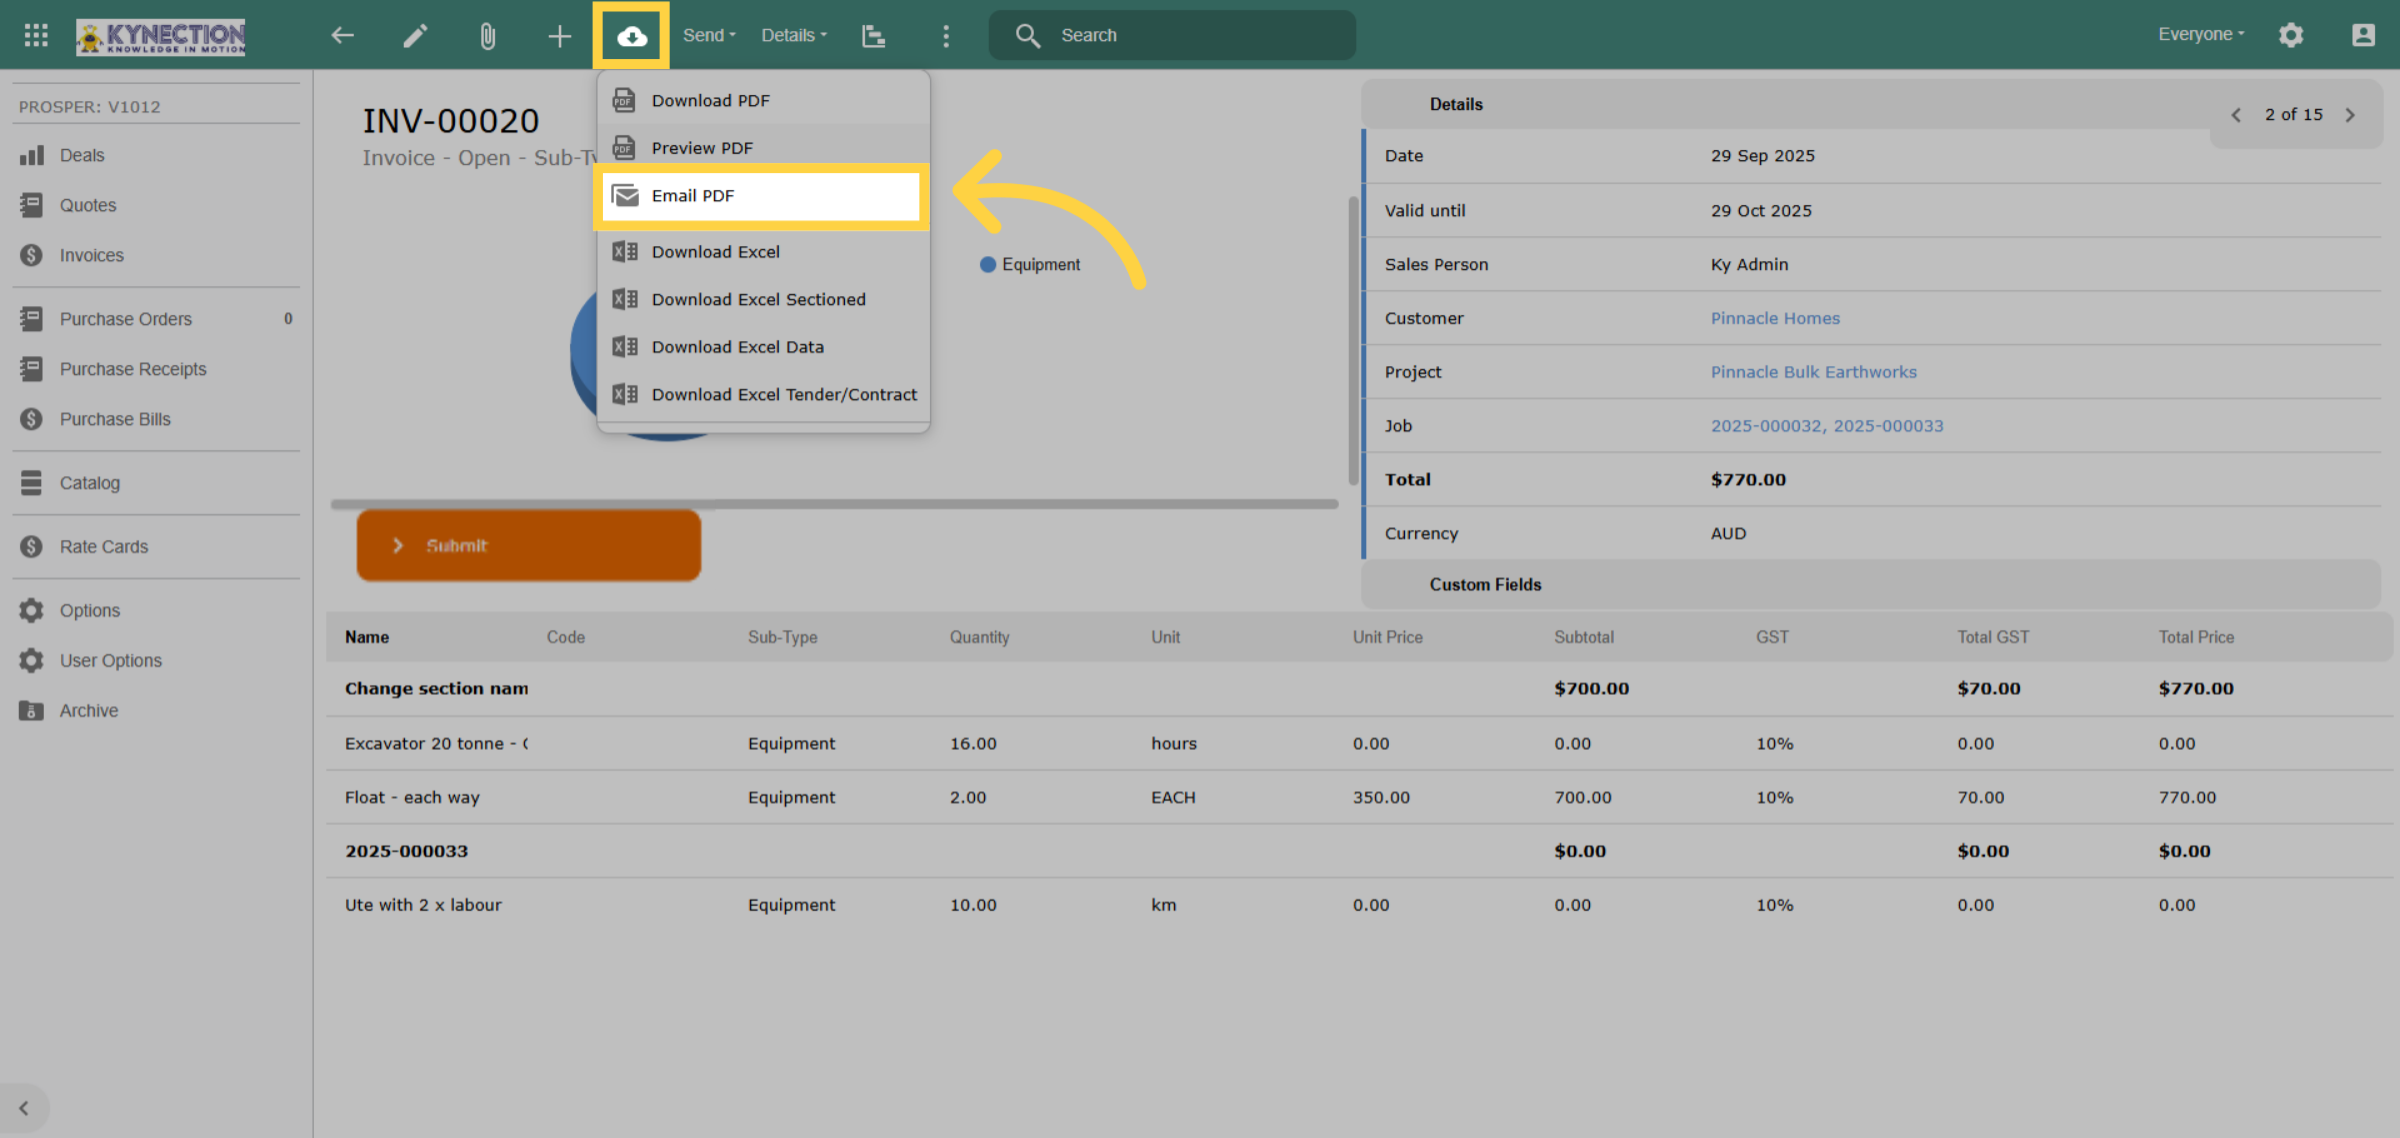
46. Email PDF
The "Email PDF" option in the export function generates an email pop-up with the invoice attached and pre-fills the recipient's email from the customer record. Additionally, sending the email to the client automatically uploads the invoice to your accounting software.
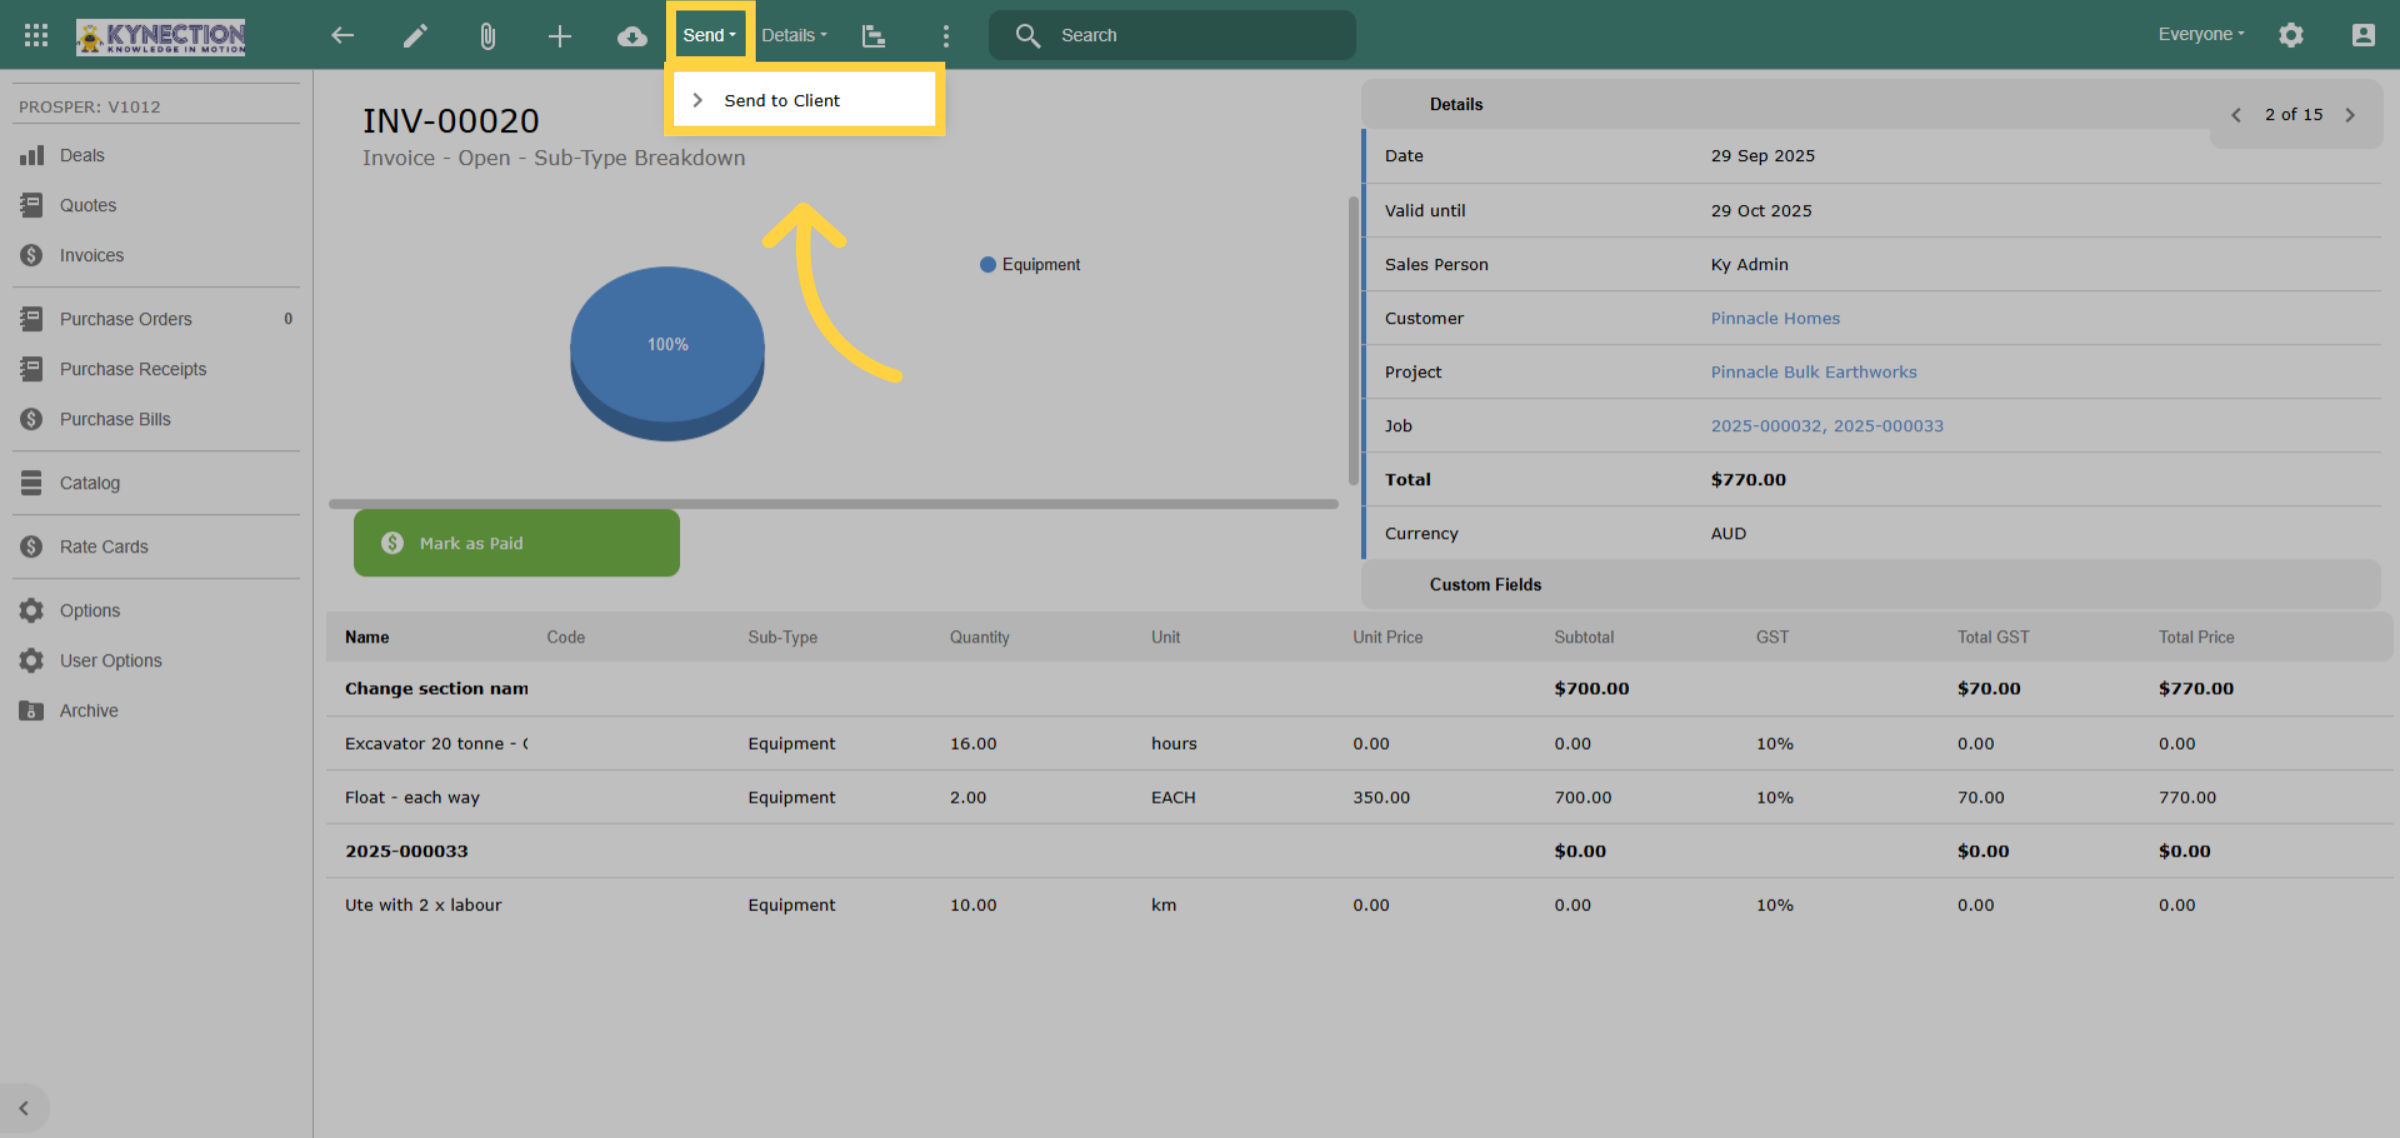
47. Send to Client
The Send option in the toolbar is specifically intended for delivering invoices directly to clients, rather than for integration with the accounting package. This feature is especially useful if a client needs a copy of the invoice after it has already been sent.
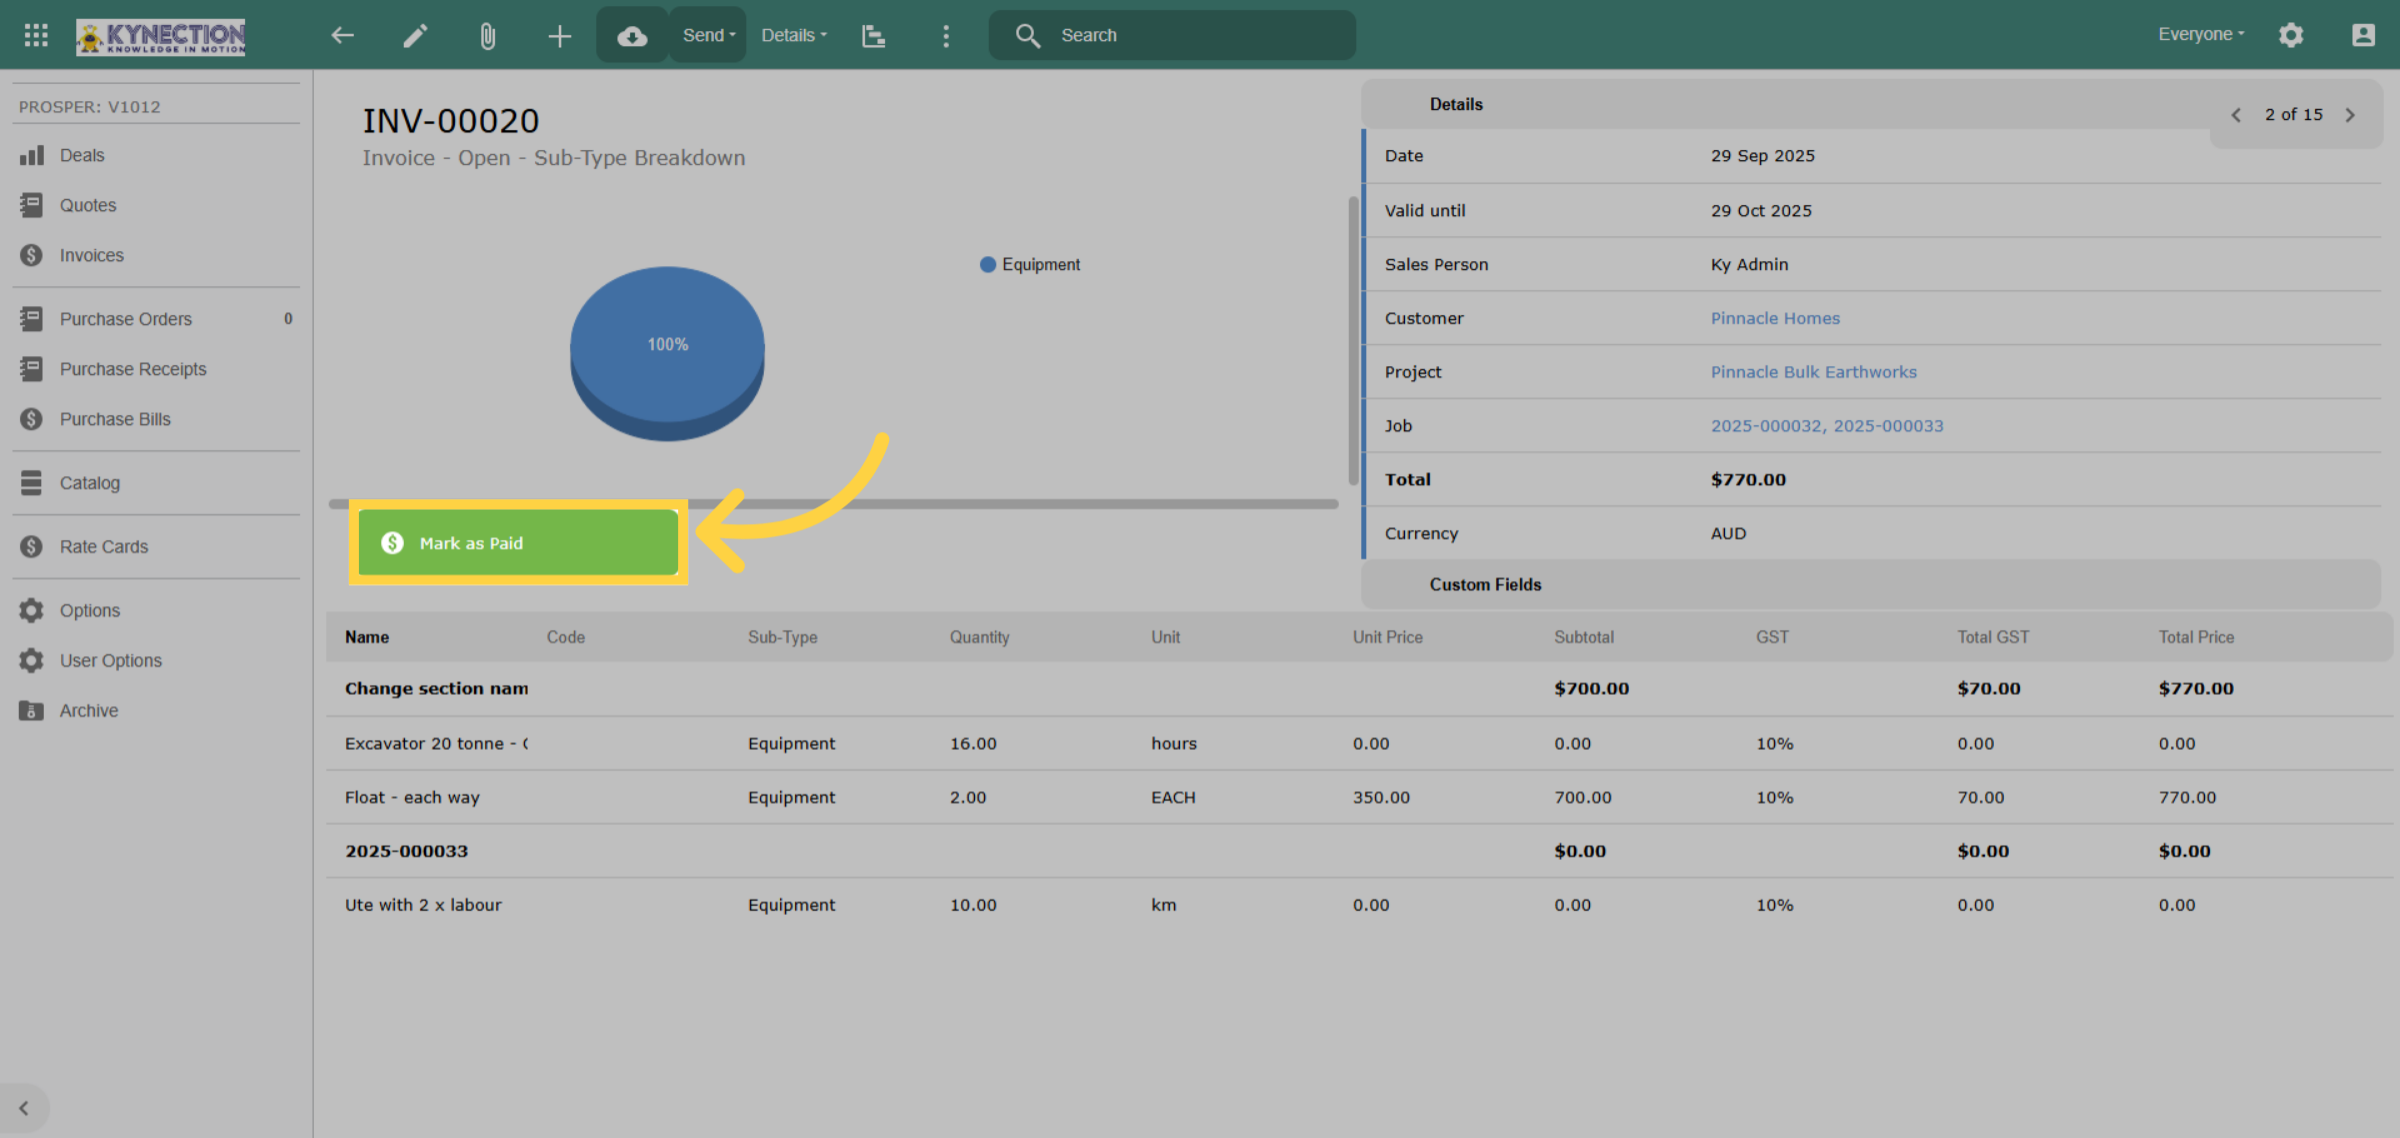
48. Mark as Paid
Clicking the "Mark as Paid" button opens a pop-up that displays the invoice total and the current date. You can save to confirm or edit for partial payments.
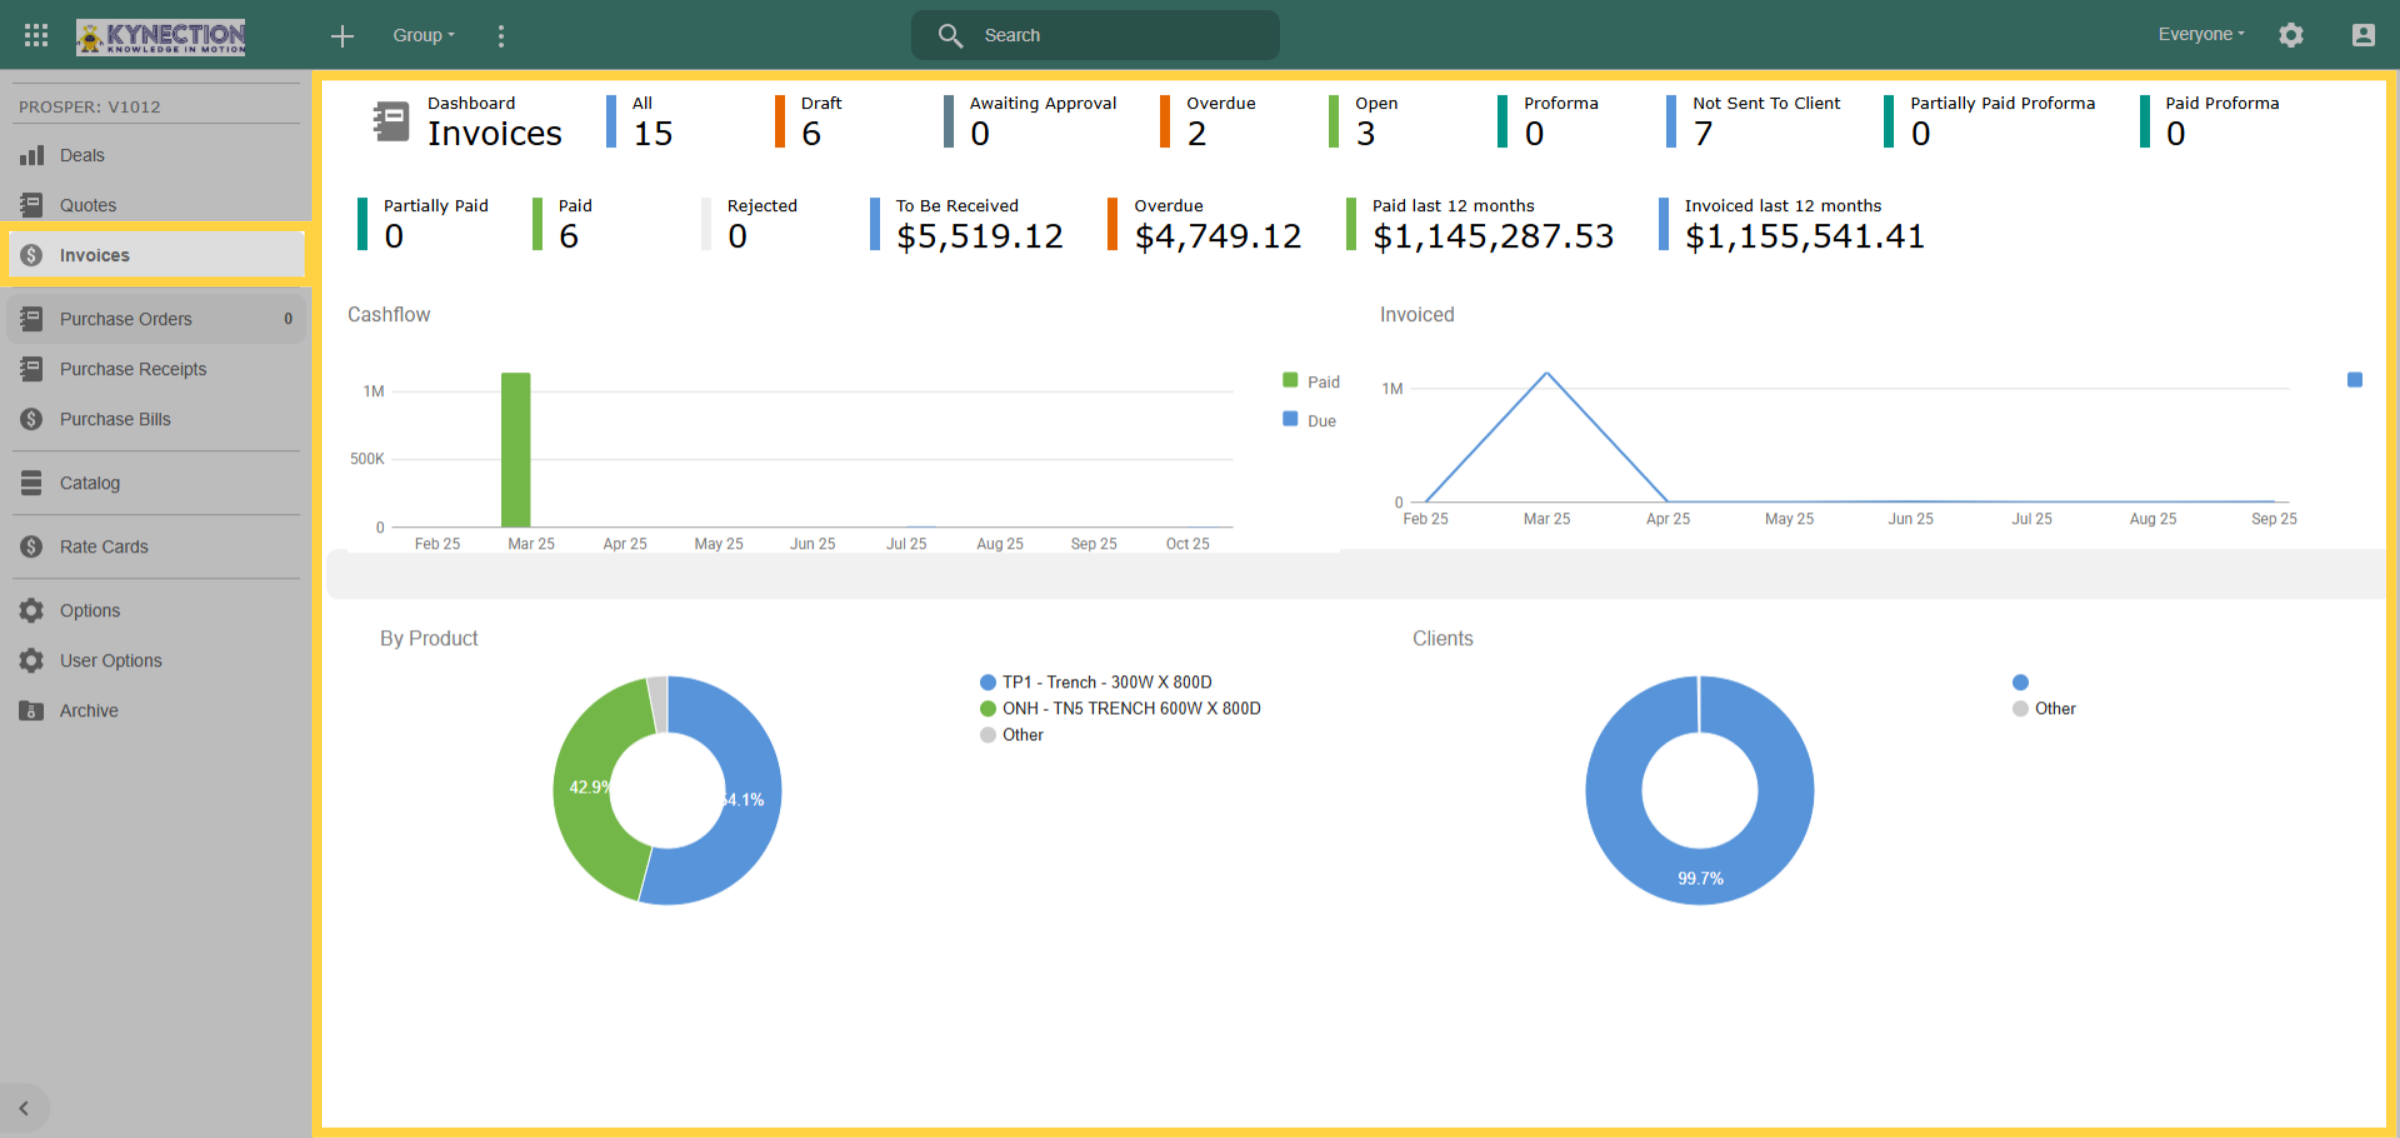
49. Invoices
The invoices section from the left hand pane provides a comprehensive list of all invoices. Each invoice features a color-coded flag on the left, representing its status in line with the lifecycle stages above.
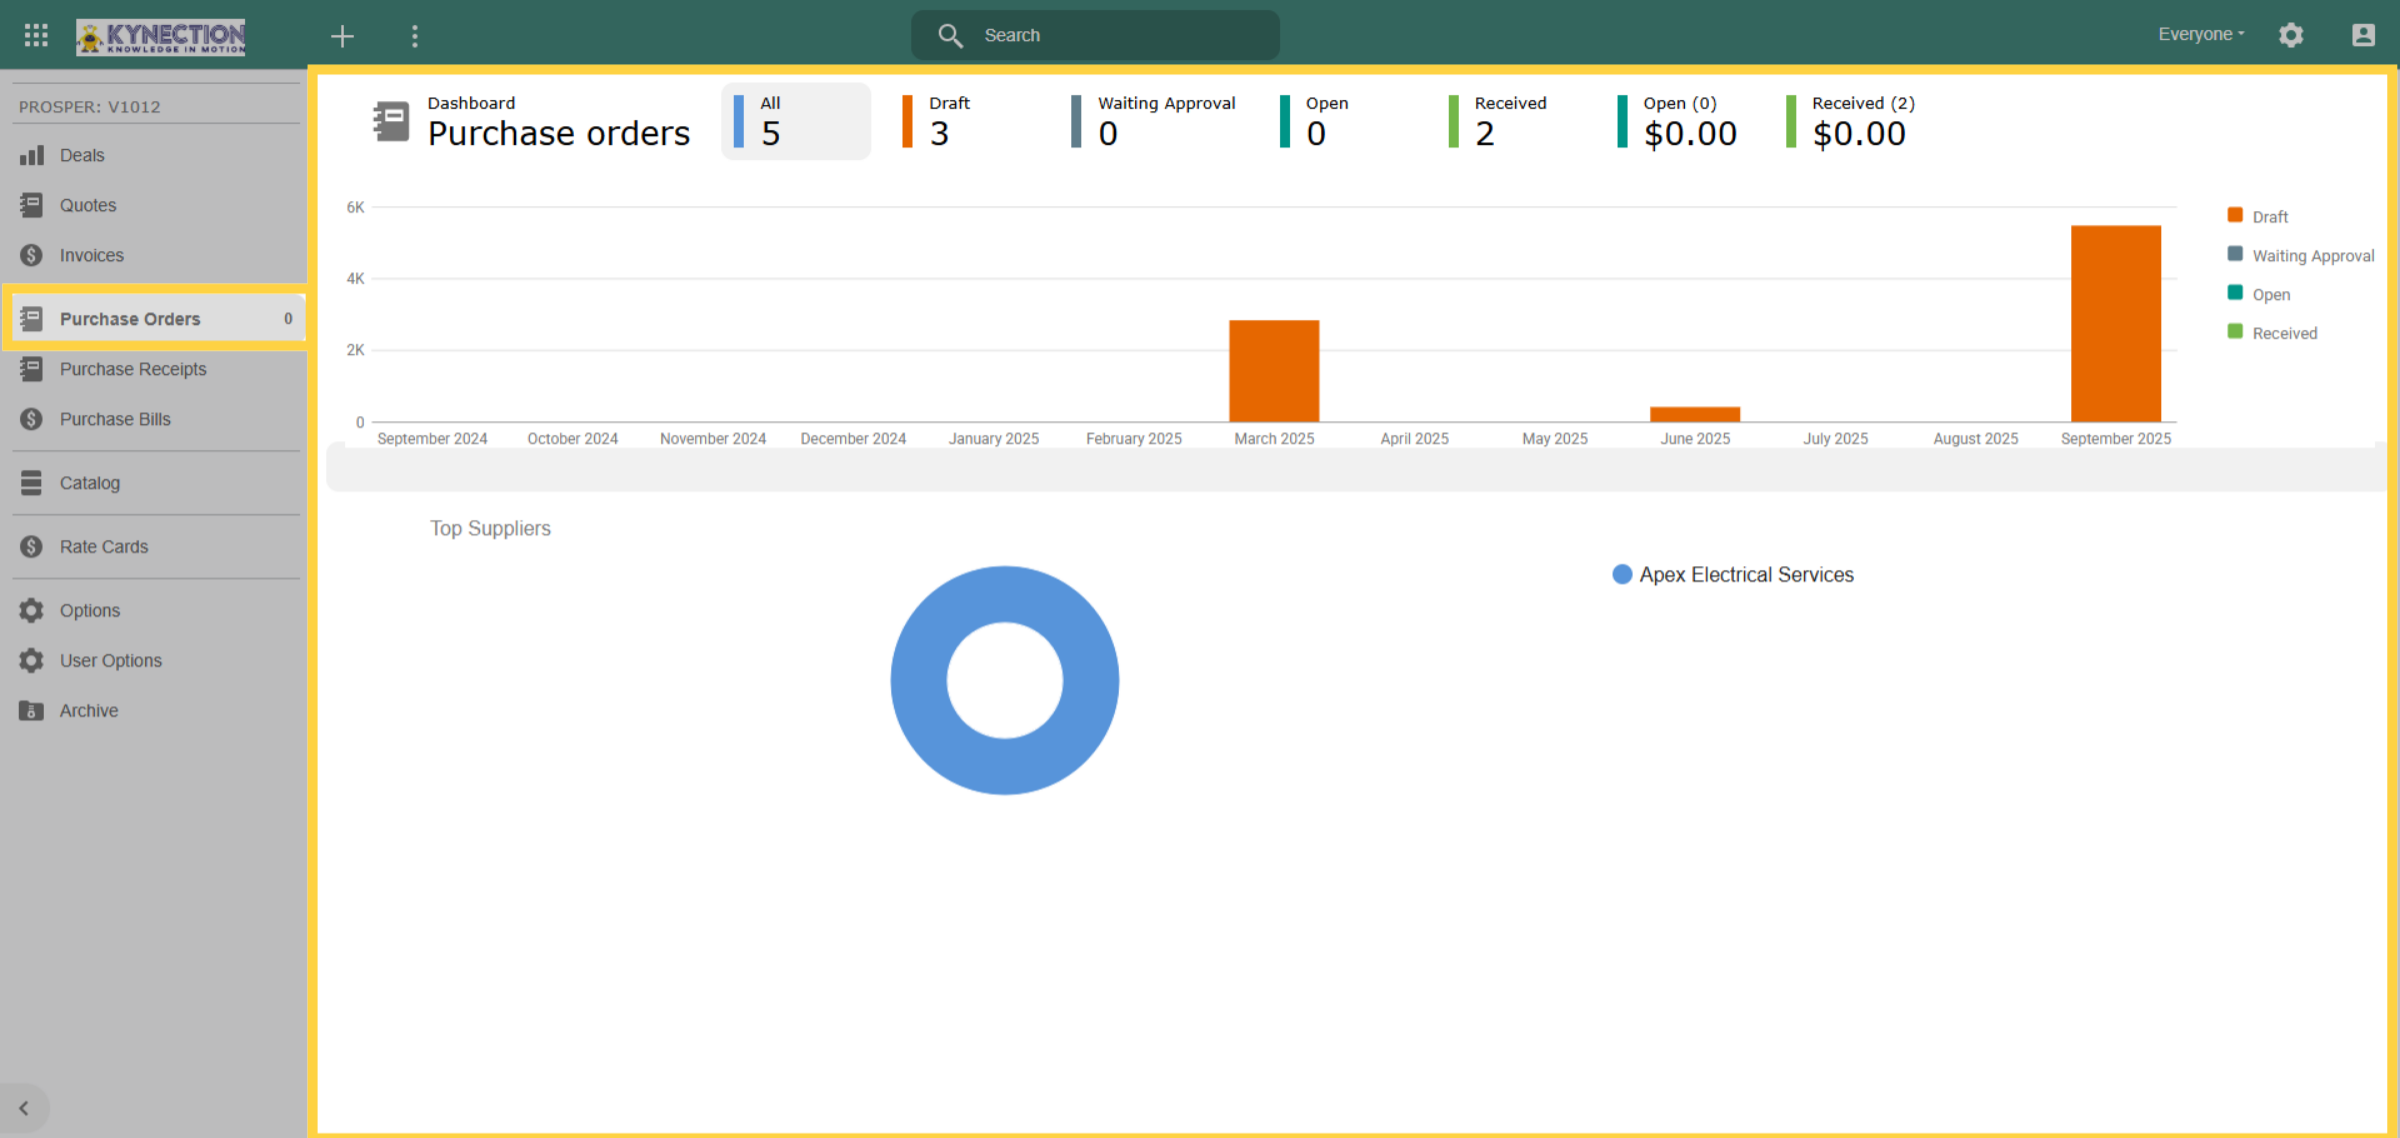
50. Purchase Orders
Next, let’s explore purchase orders. Click the Purchase Order tab in the left pane to access the Purchase Orders Dashboard. Here, you can view all purchase orders or filter them by status using the top menu.
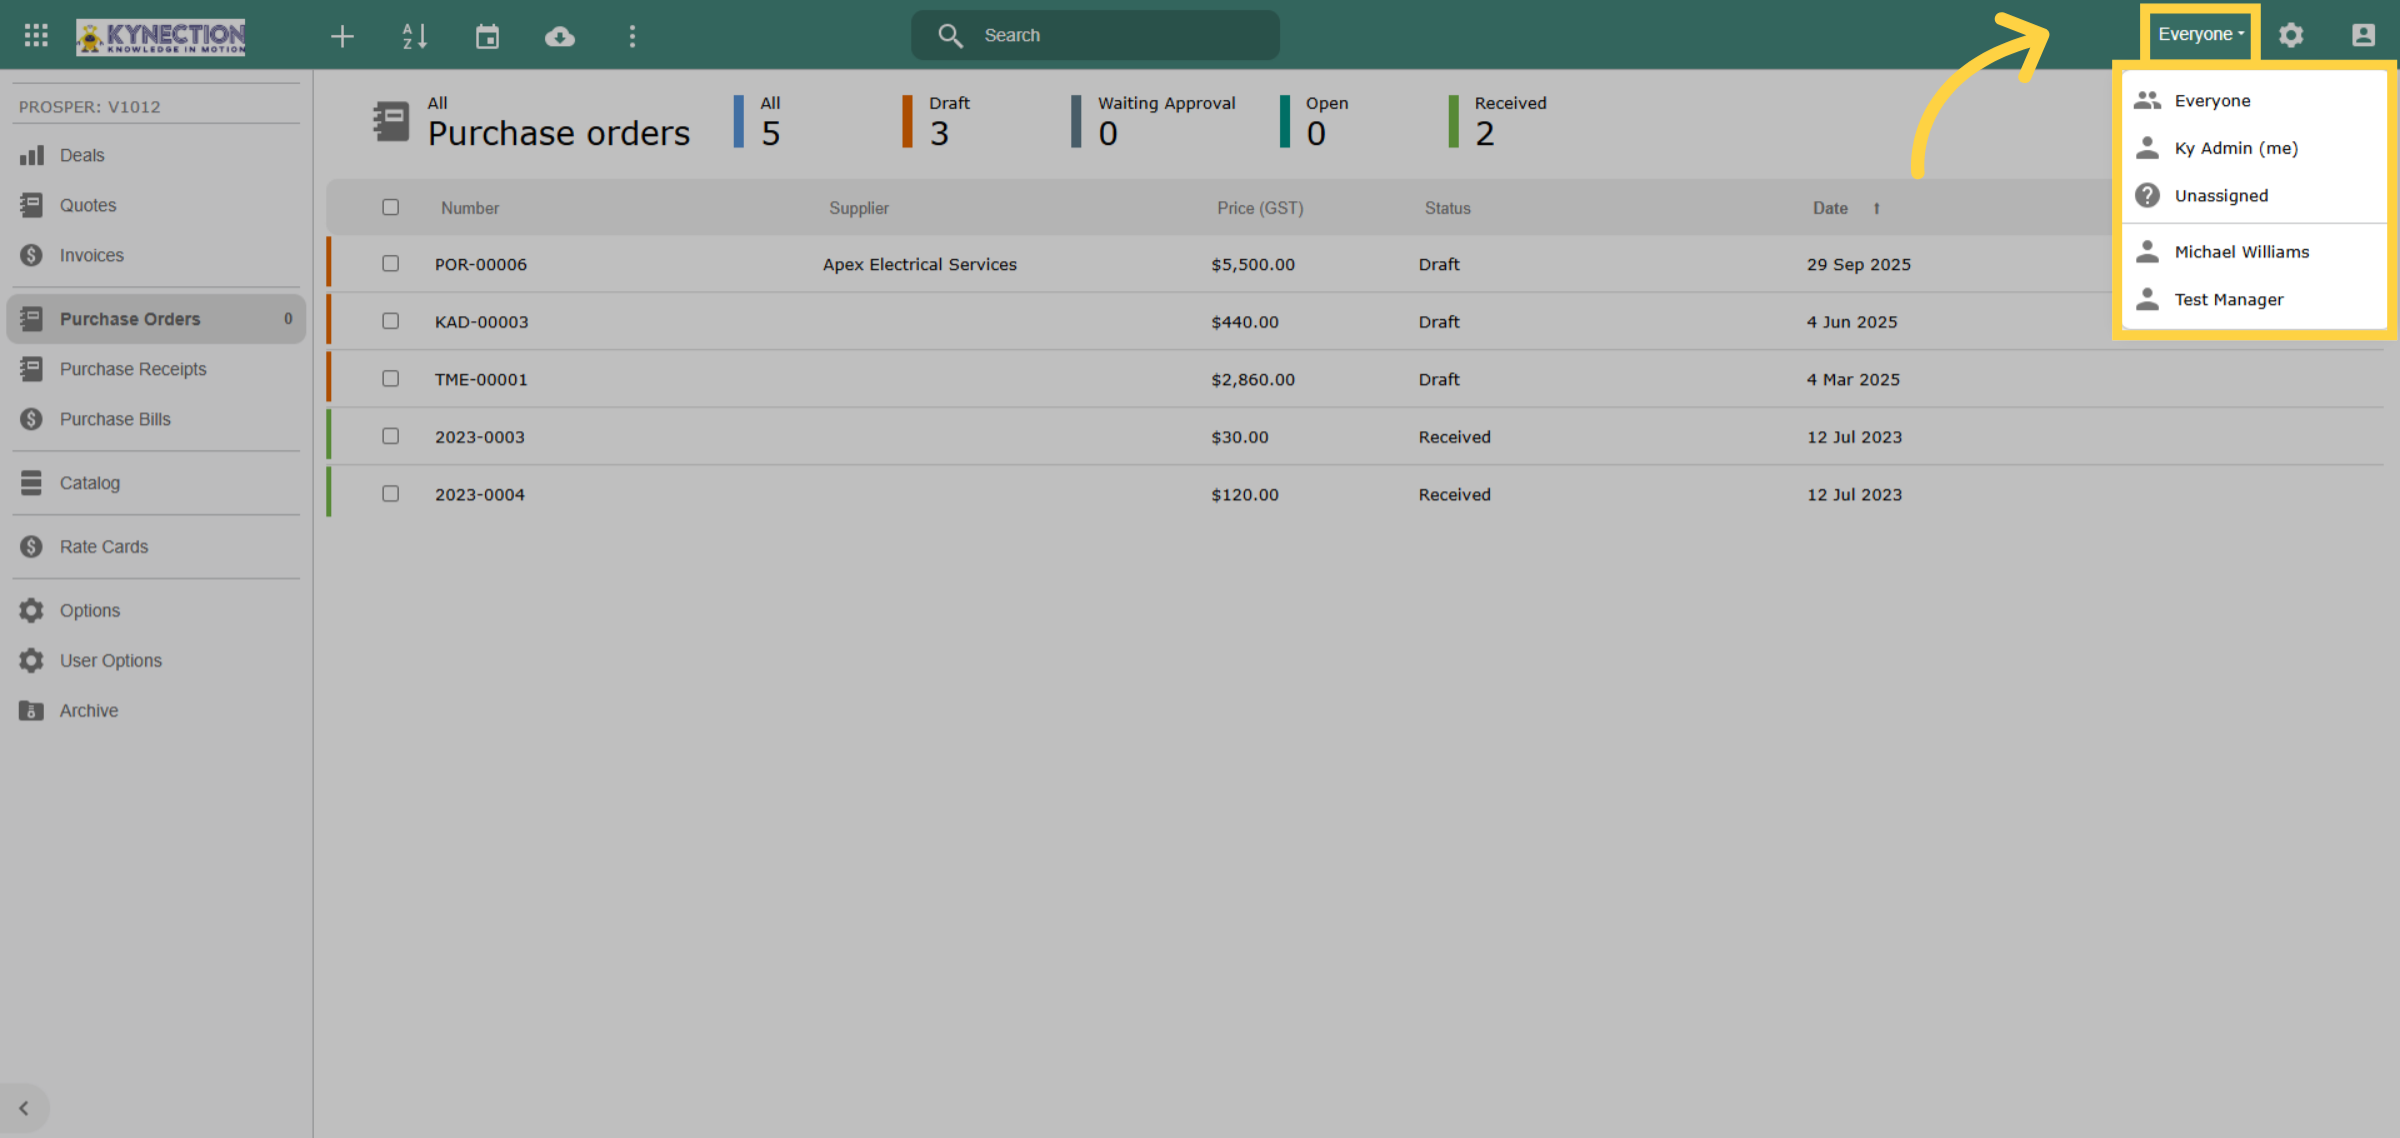
51. View Everyone
The default view displays contributions from all users. To view entries from a specific individual, select their name from the dropdown menu.
52. Create New Purchase Order
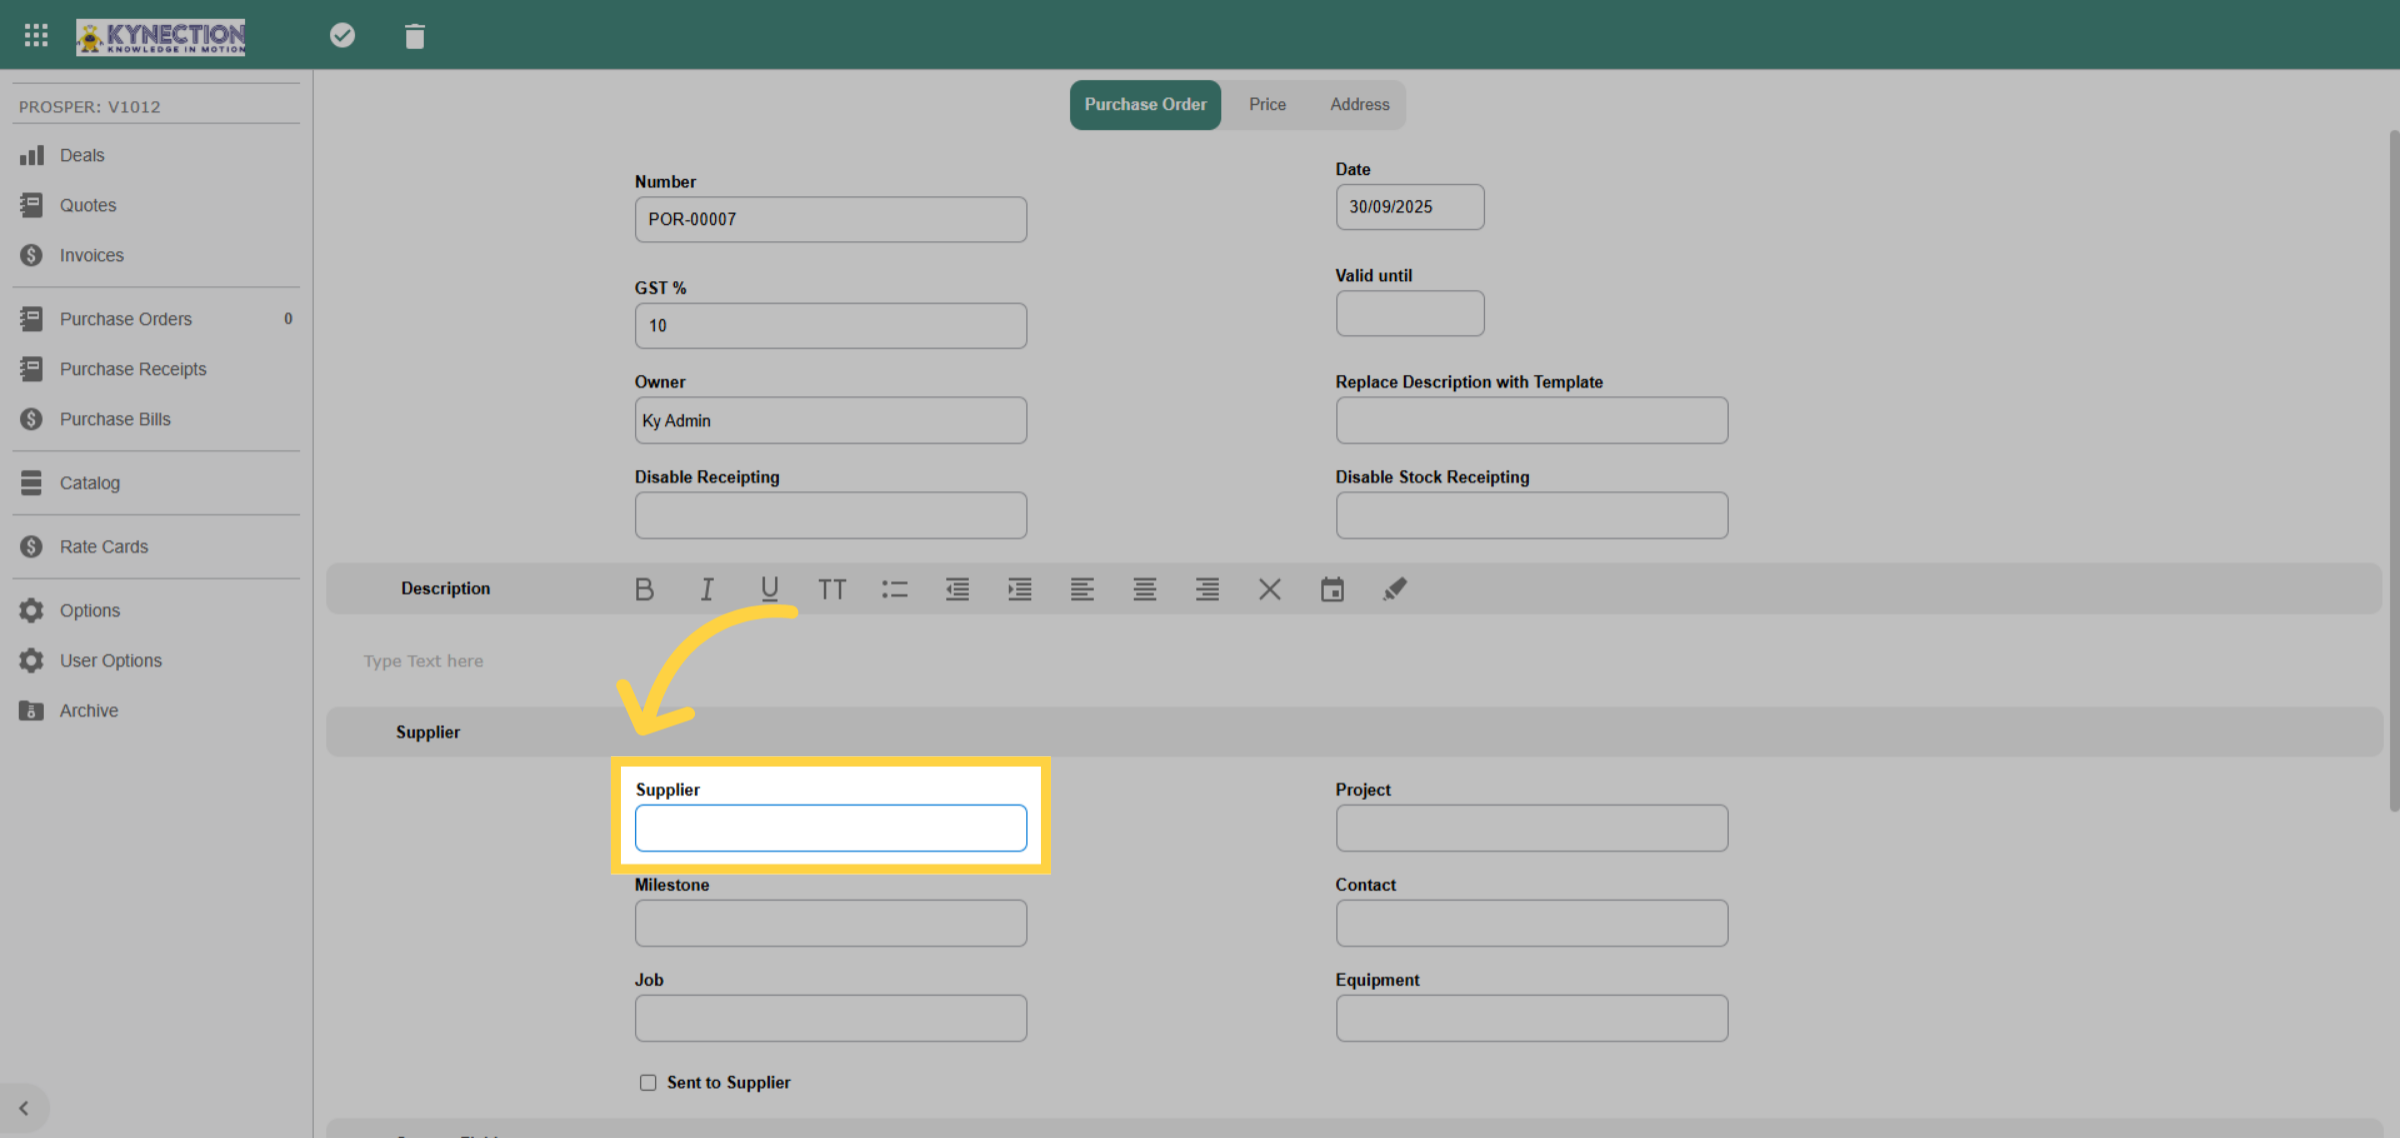
To create a new purchase order, click the plus icon in the toolbar. Choose a supplier from the list, or add a new one by selecting the "Add New" option. Link purchase orders to projects or jobs via the dropdown menus in the supplier section. Finally, save your entries by clicking the tick icon in the toolbar.
53. Add Purchase Order Items
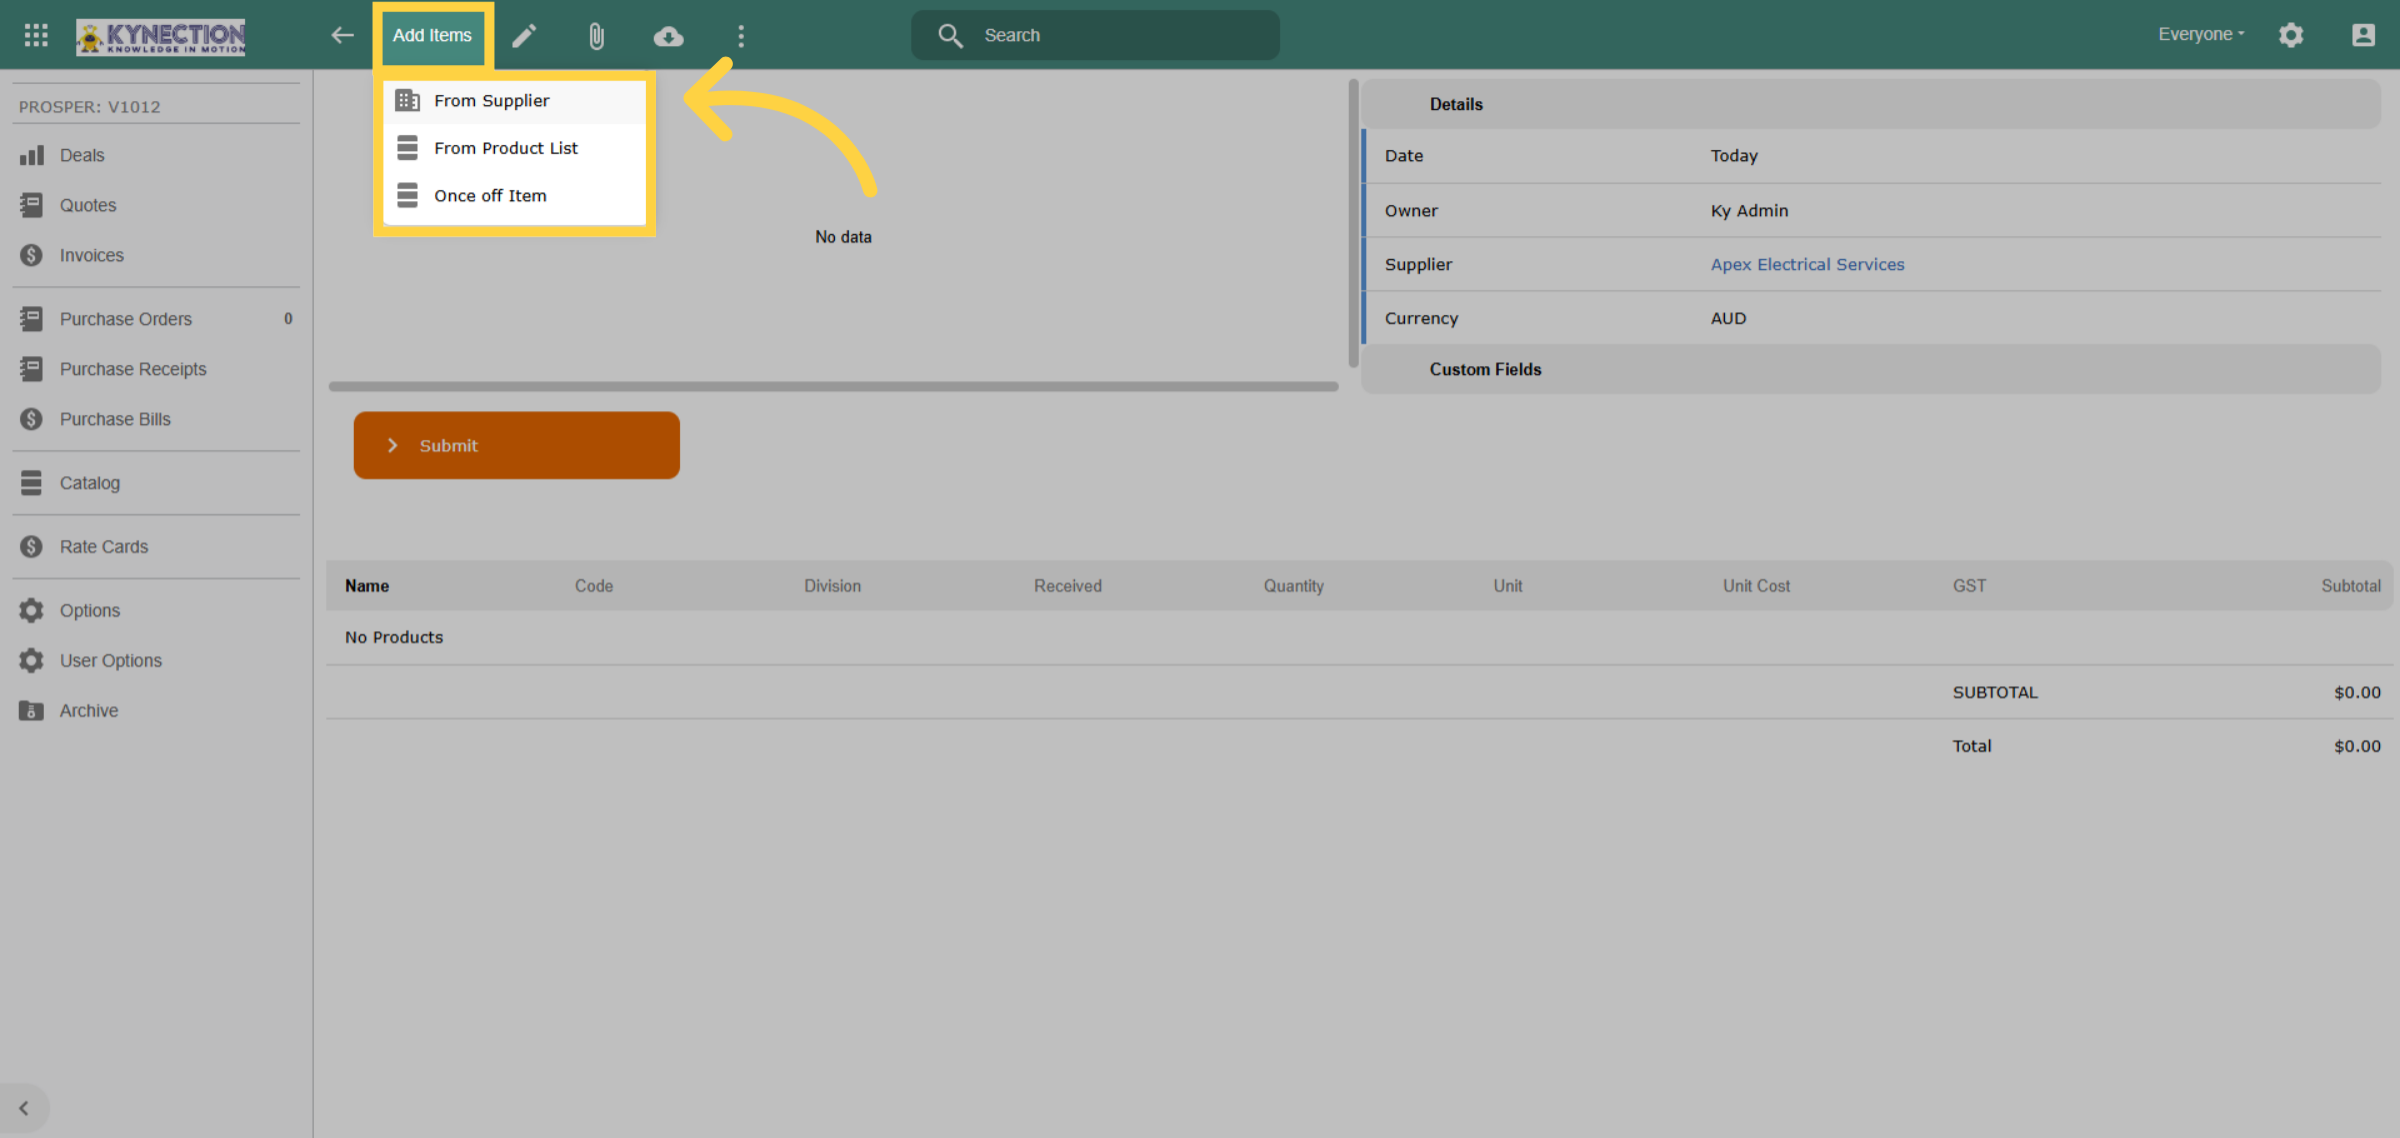
To add items, use the "Add Items" function. The option "From Supplier" links to items from the supplier rate card, while "From Product List" links to catalog items. Once ready, submit your purchase order. Purchase order approvals can be configured as needed.
54. Receive Items
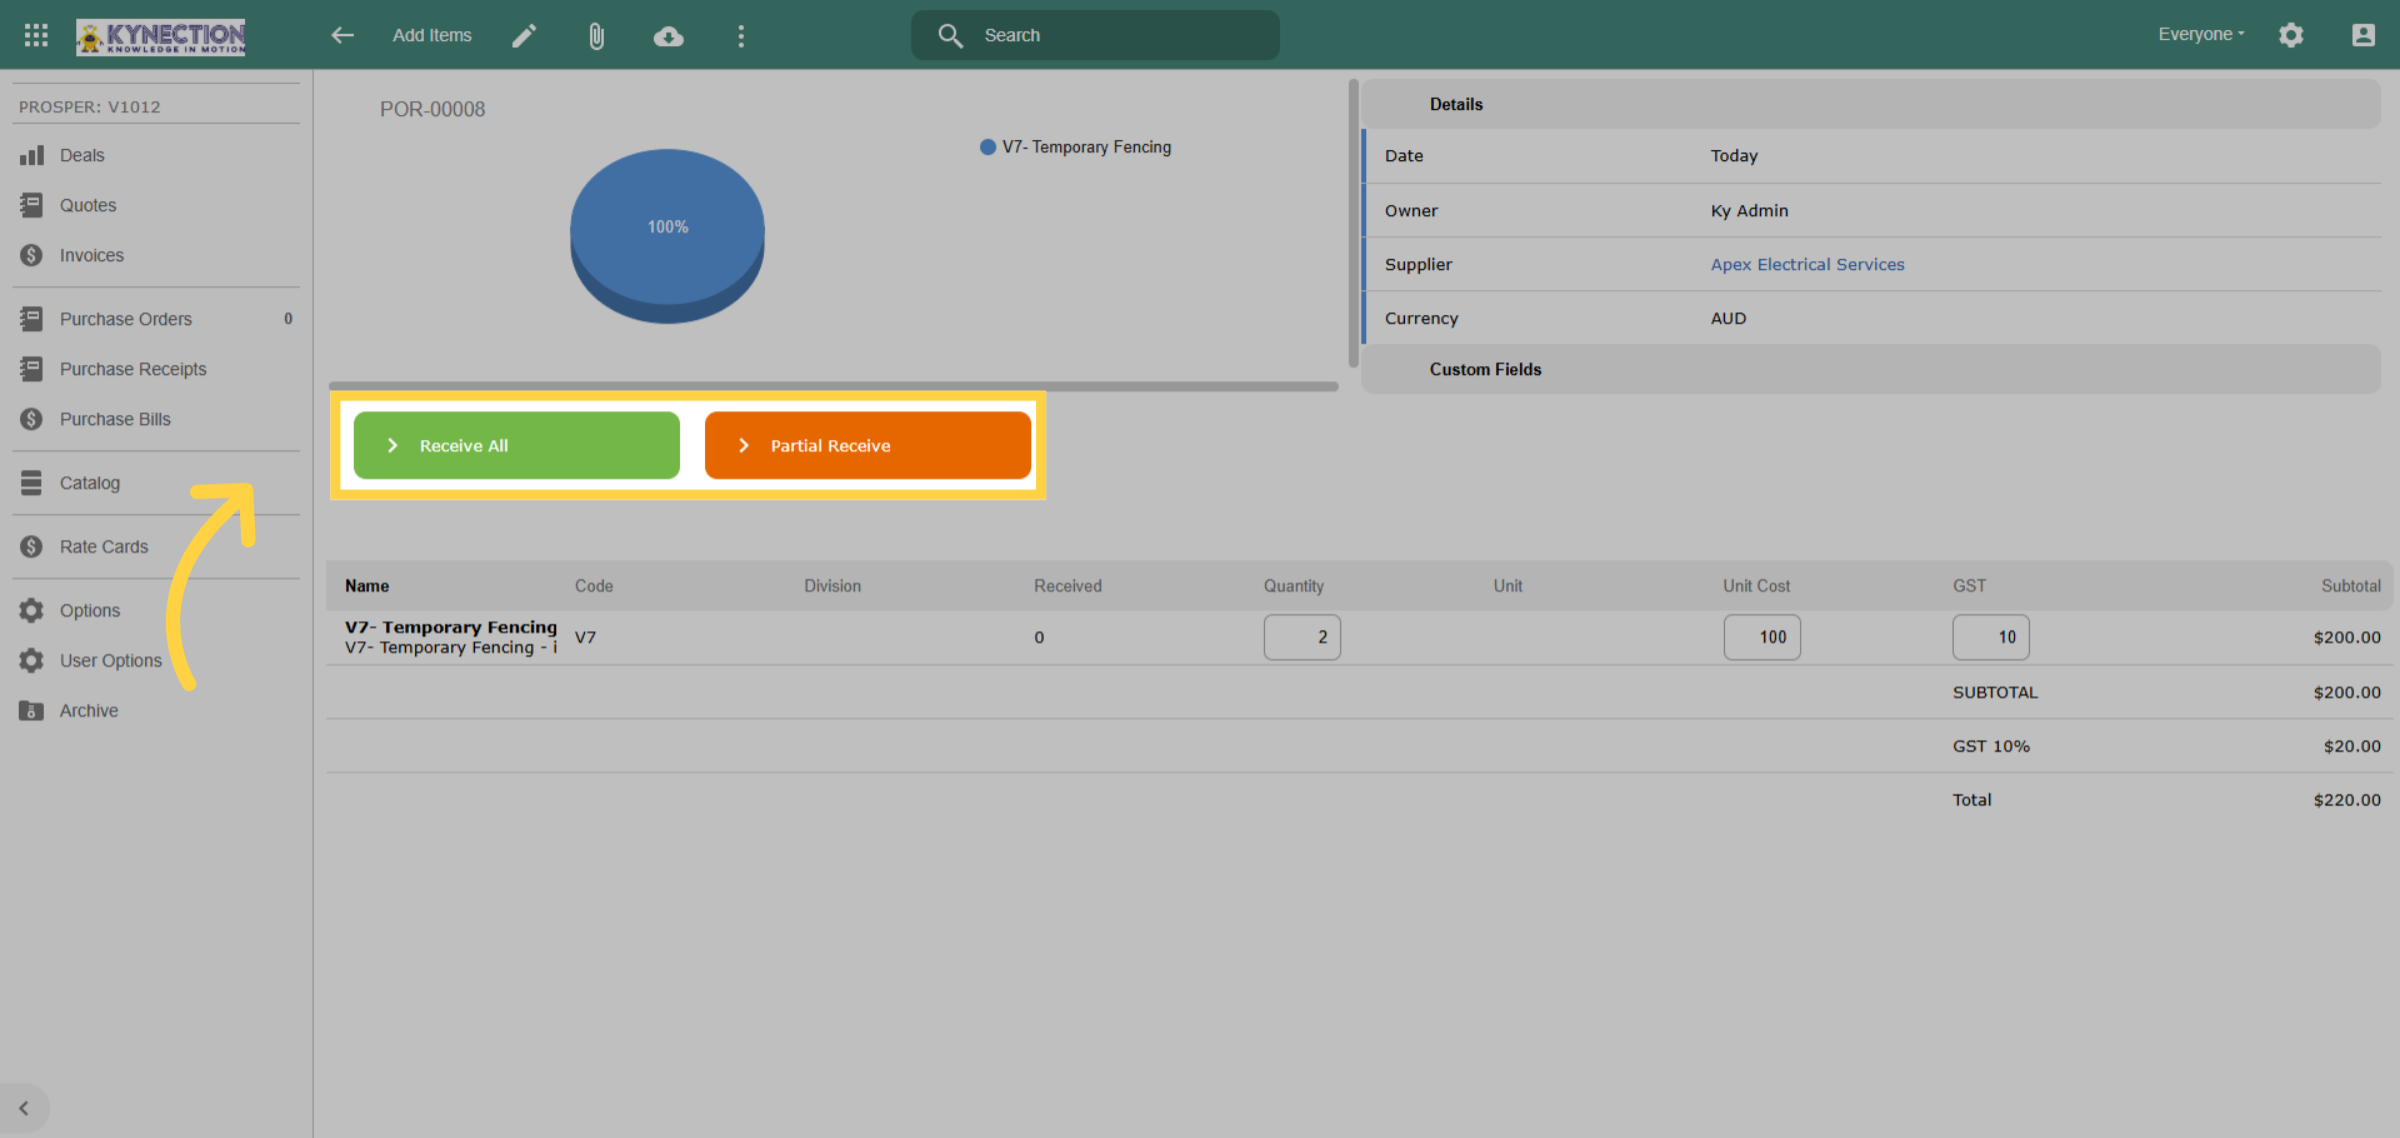
Upon receipt of the goods, update the purchase order by selecting "Receive All" if the complete order is fulfilled, or "Partial Receive" for any backordered items. If opting for "Receive All," please confirm your receipt in the pop-up window.
55. Partial Receive
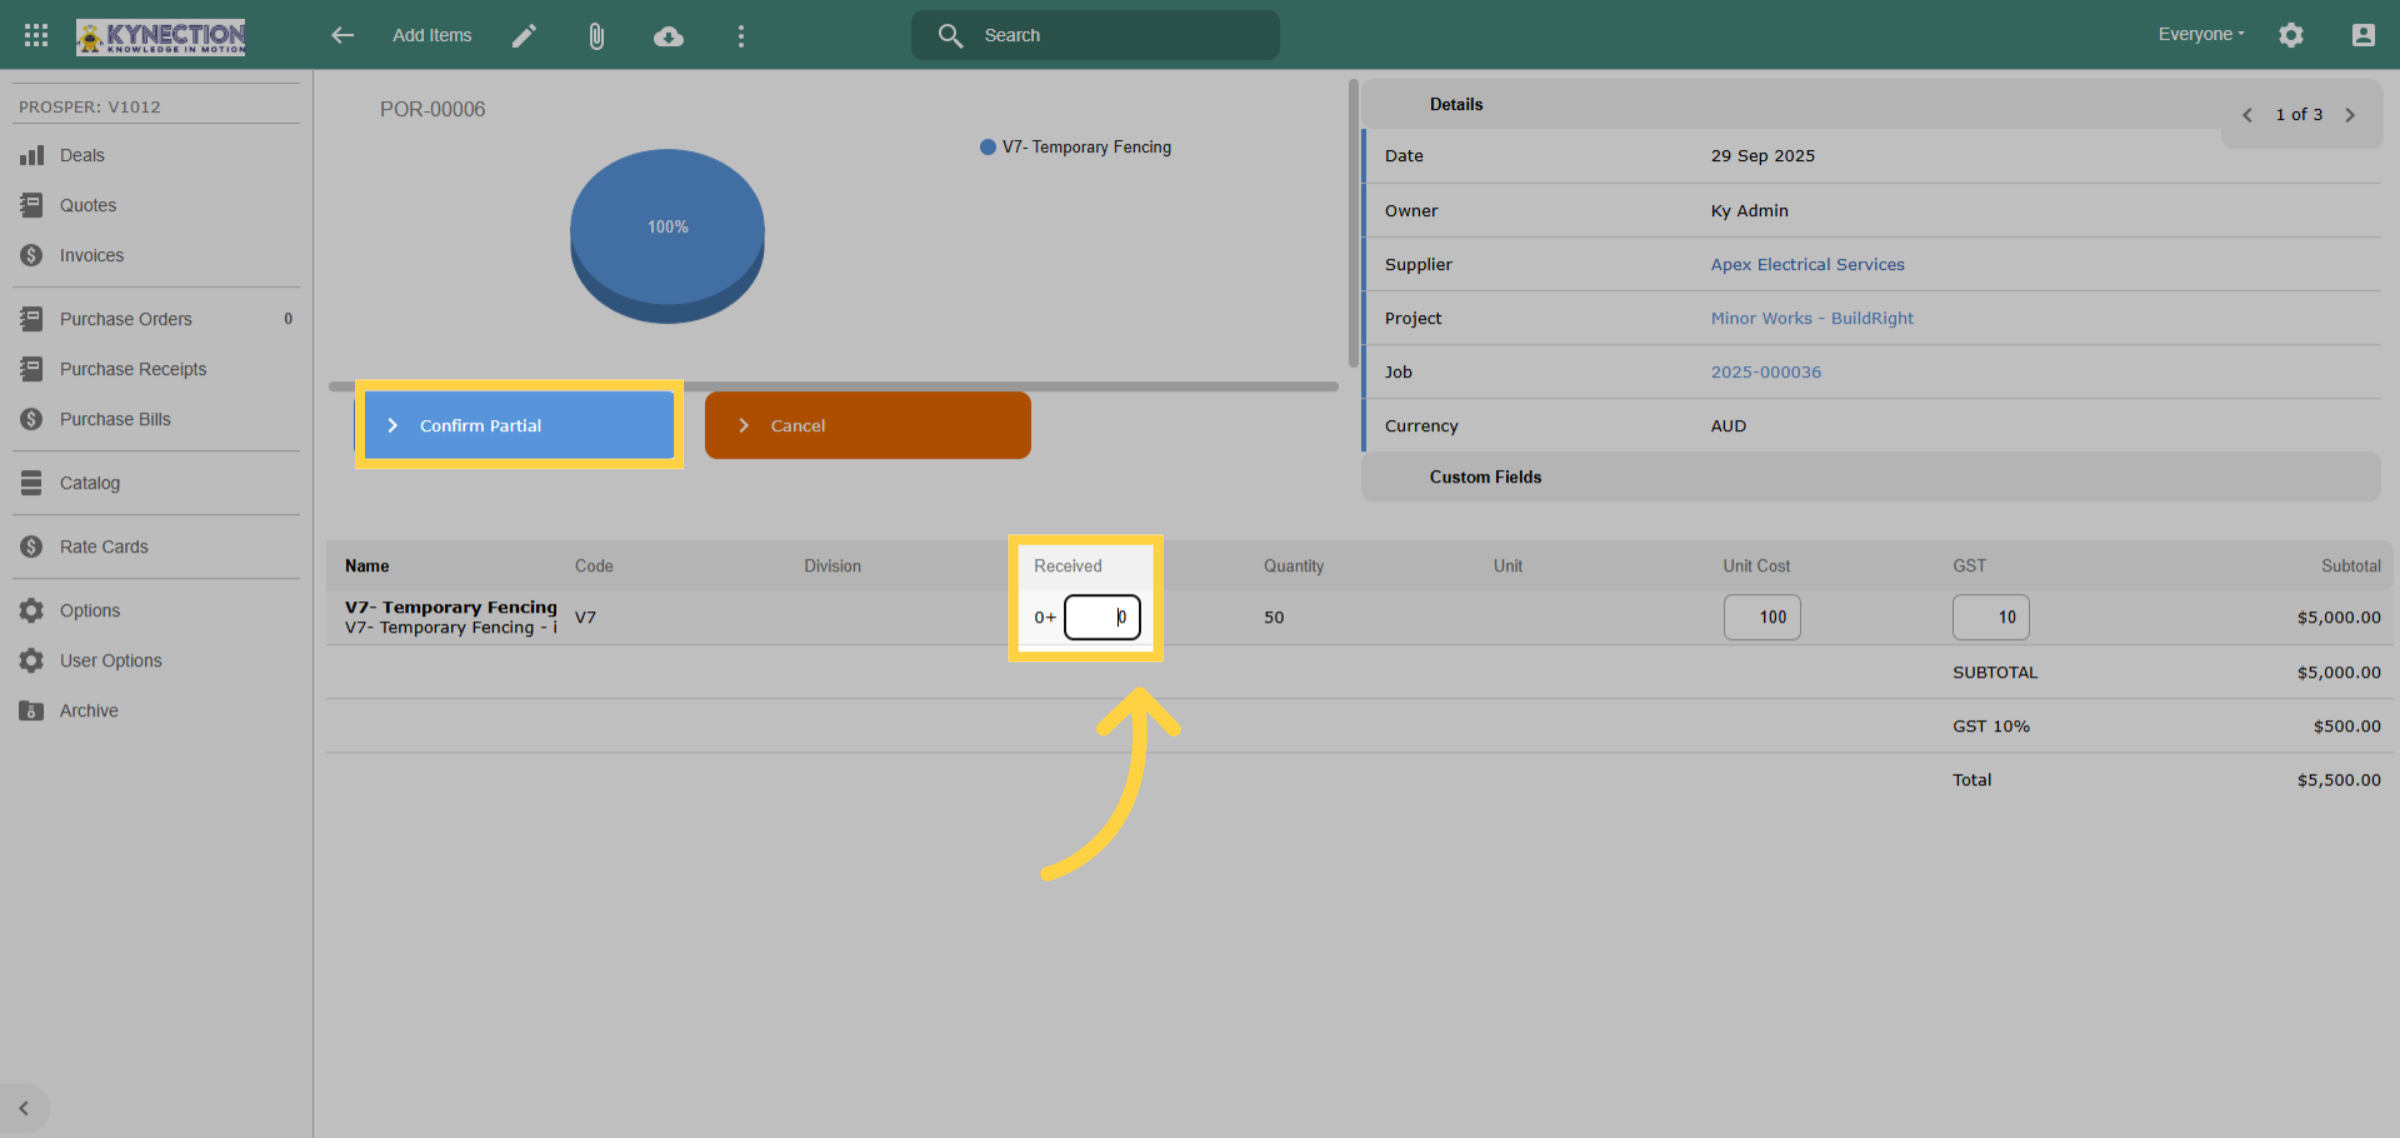
Partial Receive allows you to access the received field to document the quantity supplied by the vendor. Subsequently, the purchase order will revert to either receive all or partial receive status.
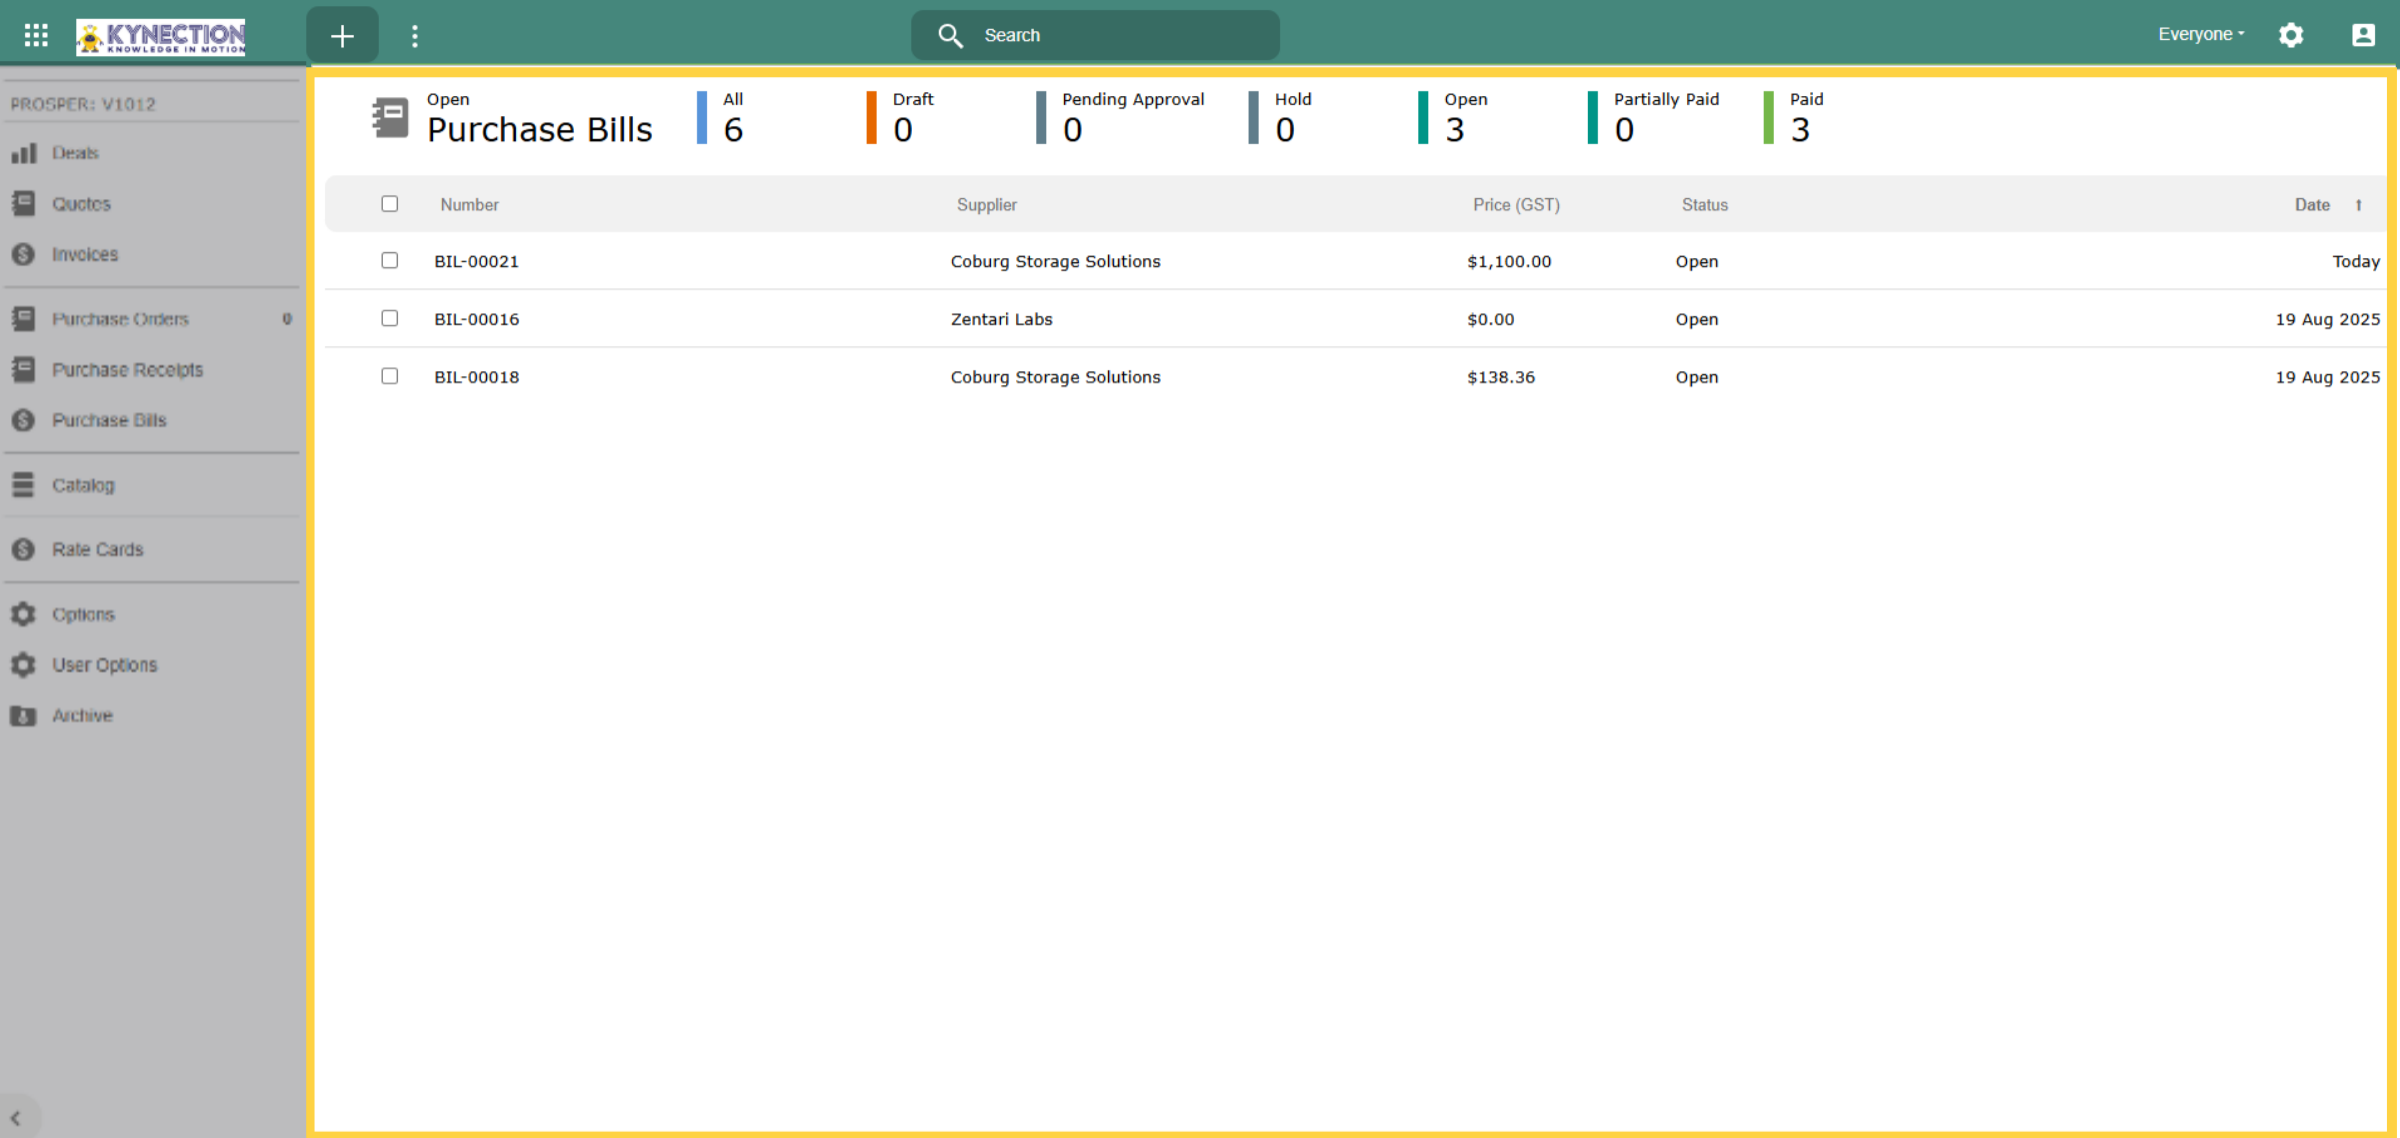
56. Purchase Bills
Access Purchase Bills from the left-hand pane. The landing page features the purchase bills dashboard, where you can view all purchase bills or filter by status using the top menu. When you receive a supplier invoice, click the plus icon in the toolbar to create a new purchase bill.
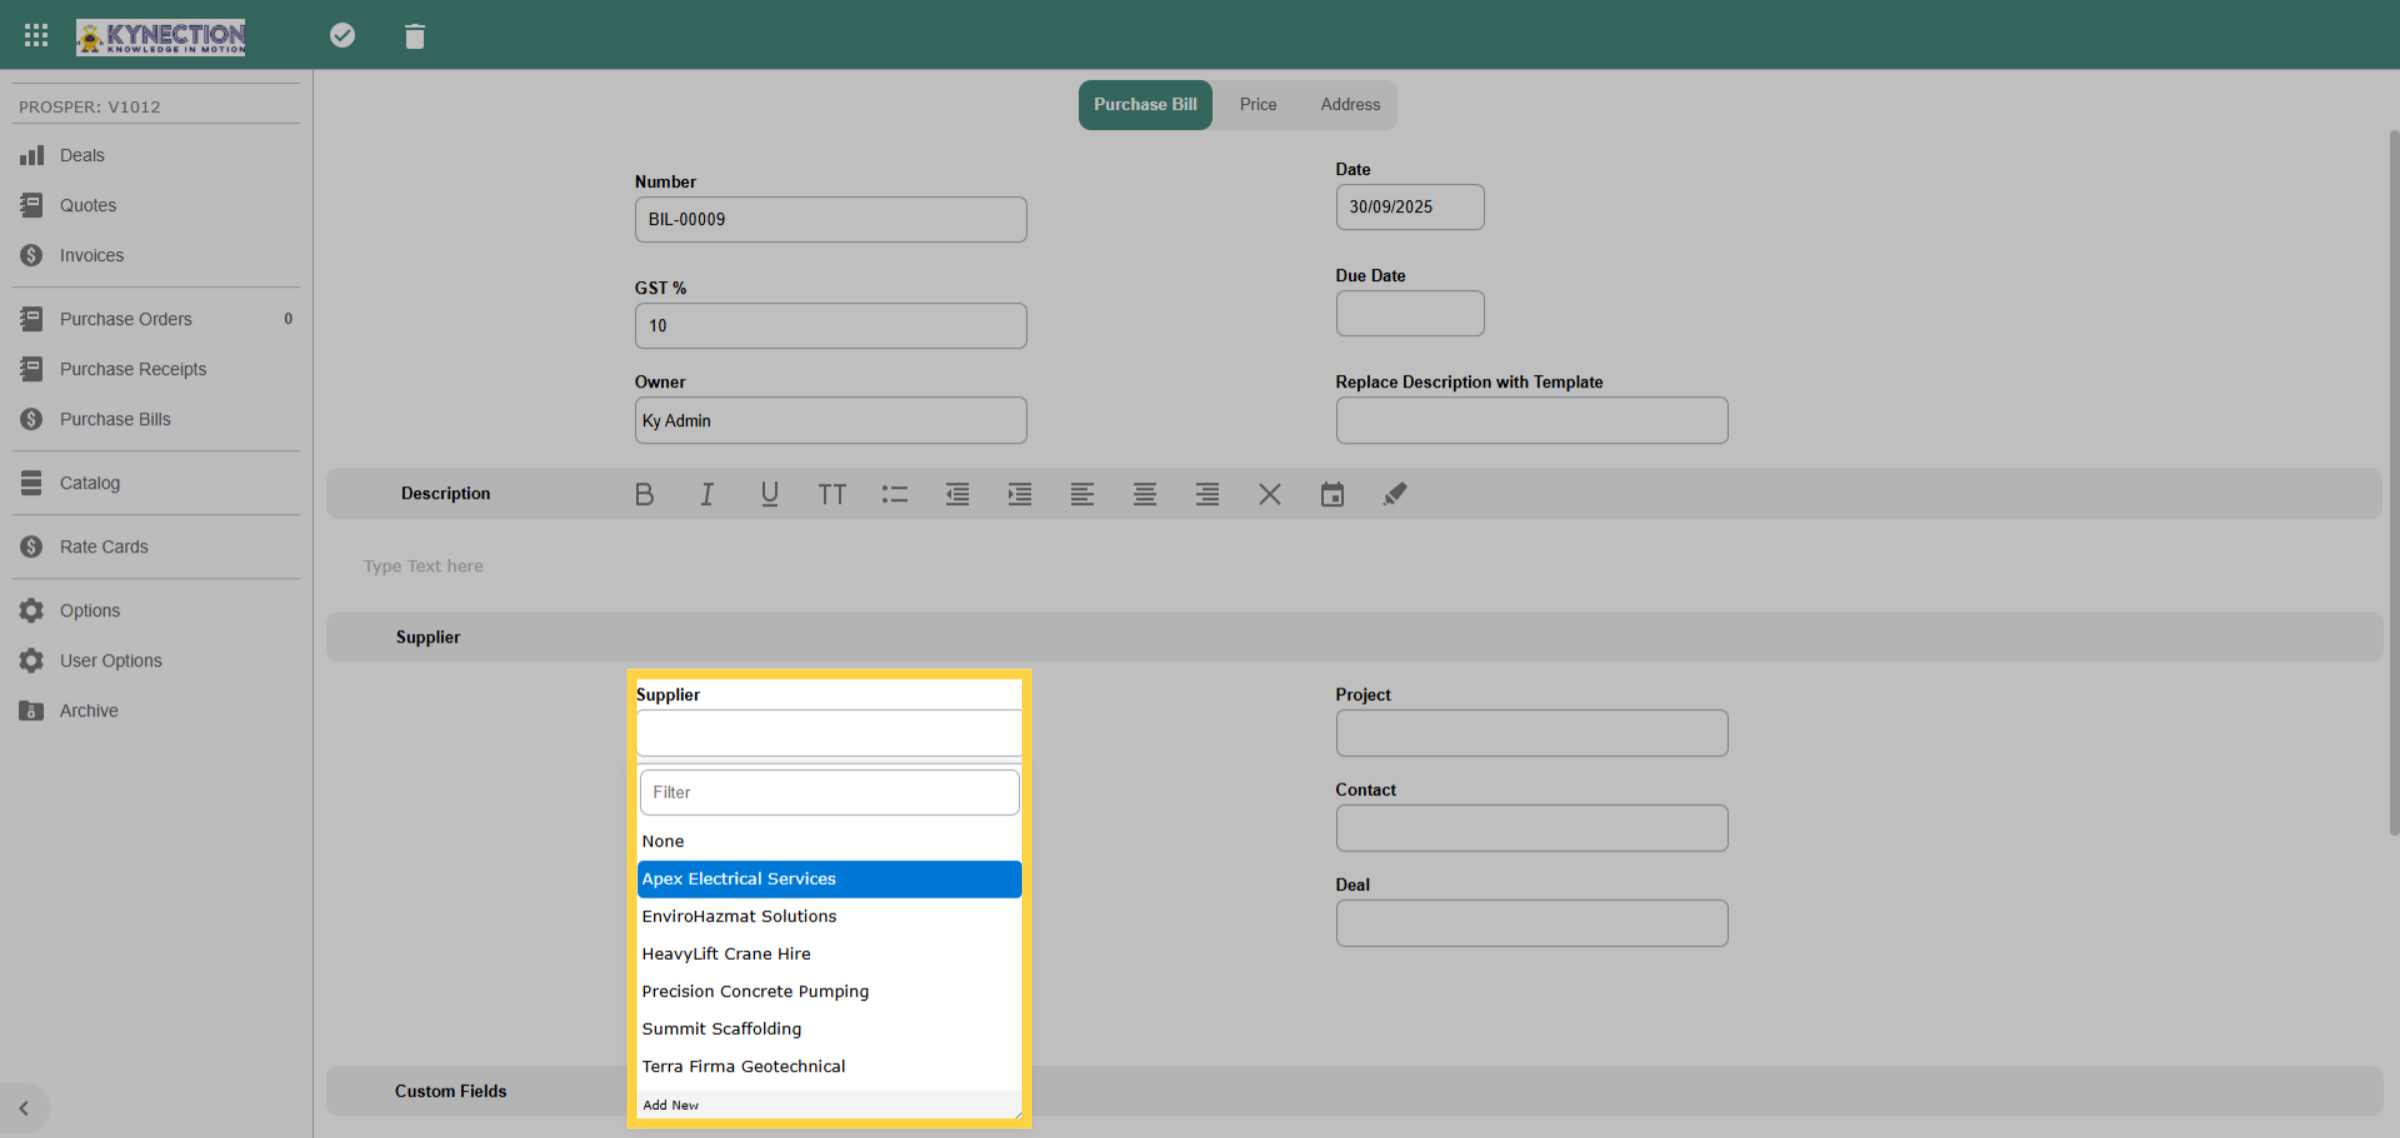
57. Create Purchase Bill
Select the supplier and input the due date and invoice number. After entering the information, save using the tick icon from the toolbar.
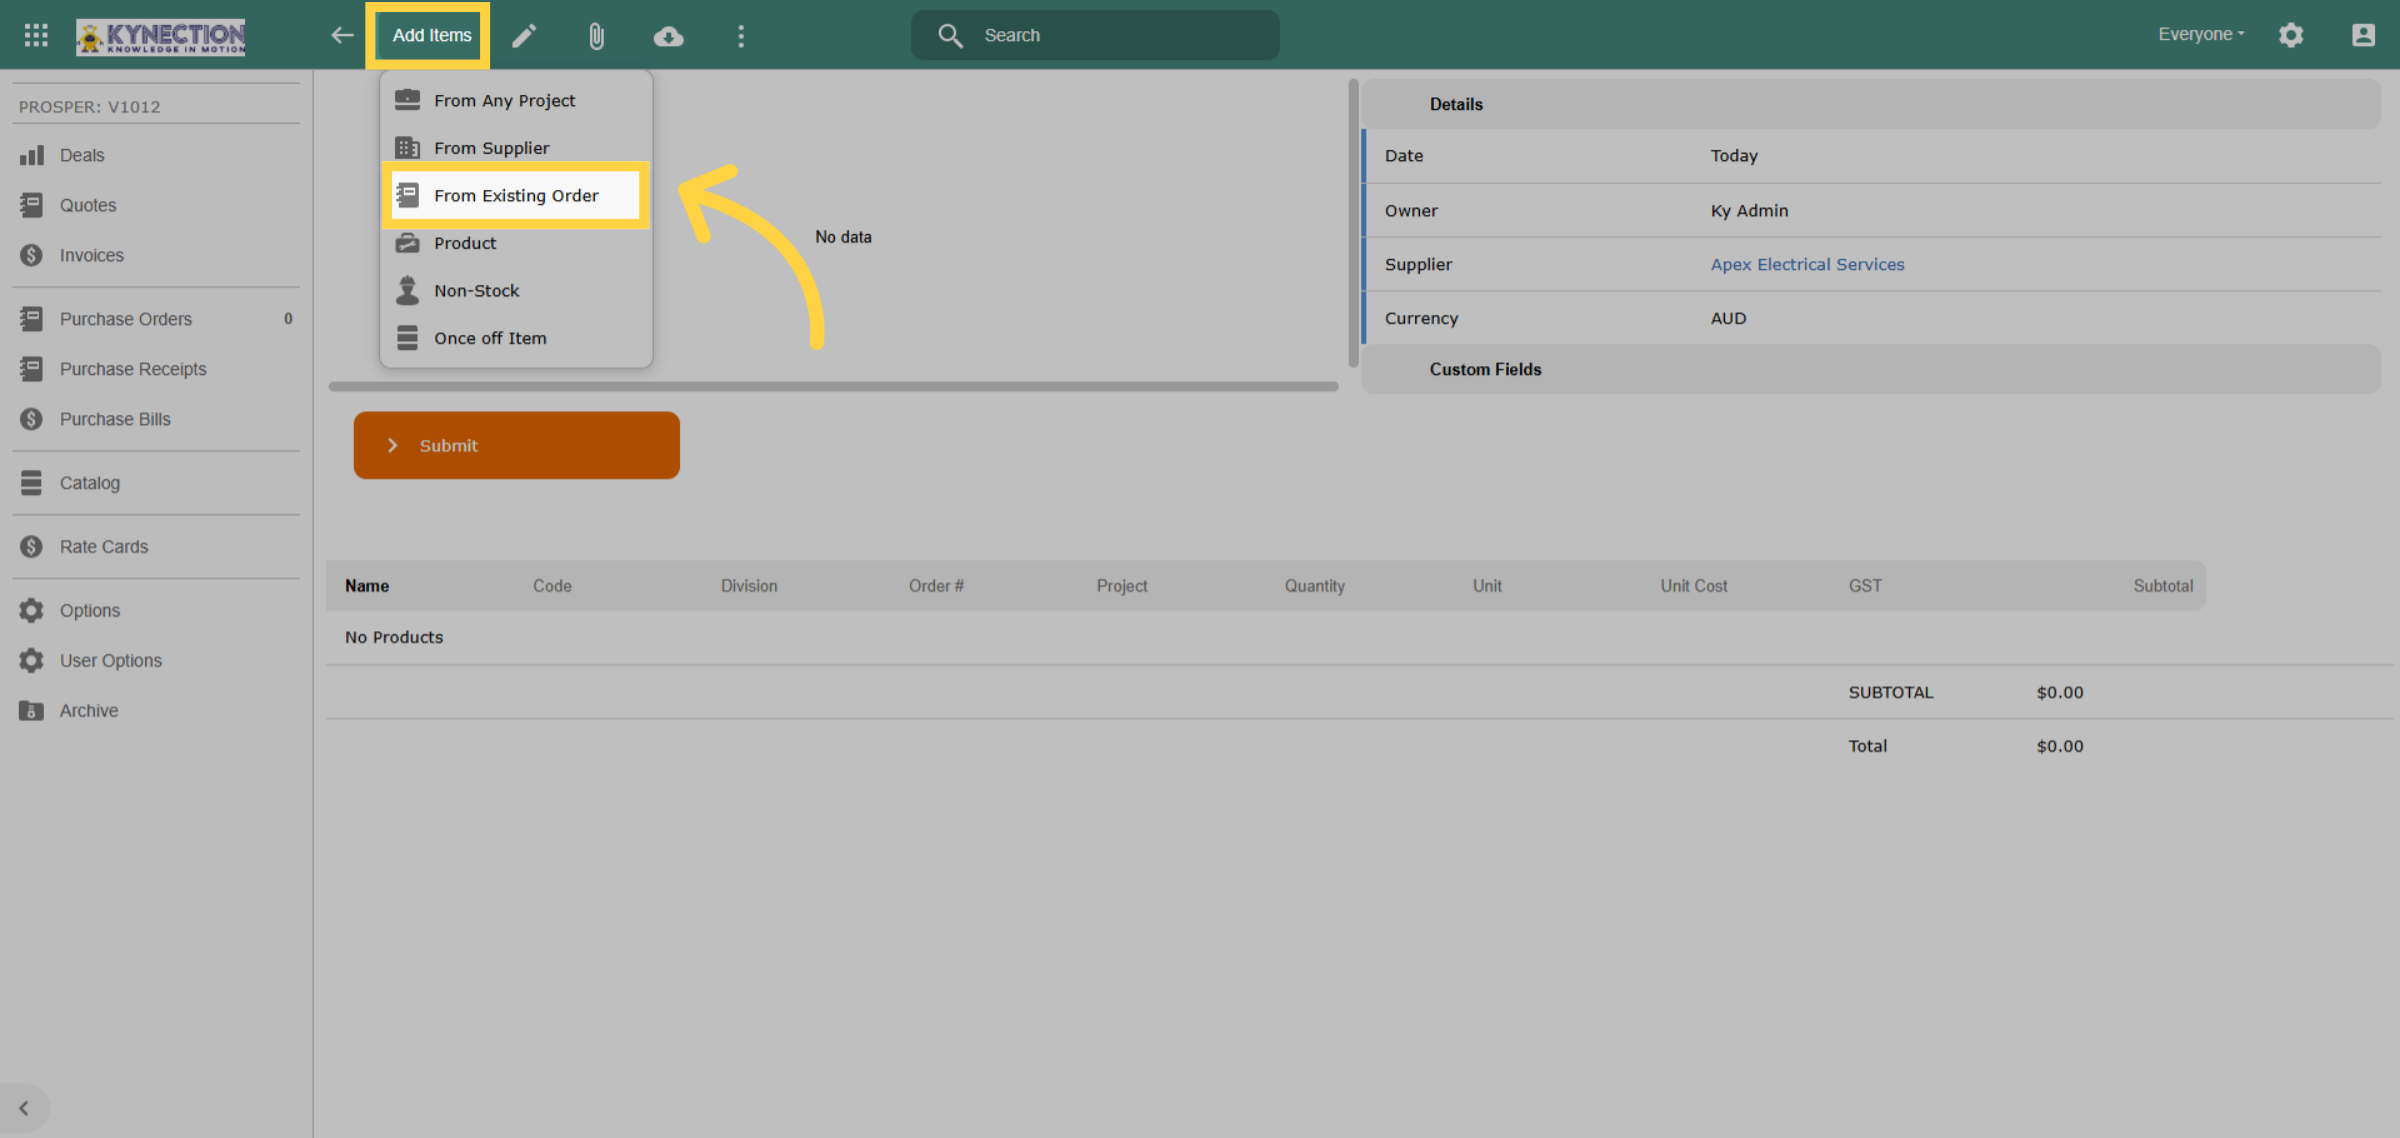
58. Add Purchase Order to Bill
To add an item, click "Add Item" and a pop-up will display a list of purchase orders associated with the supplier of the purchase bill. Select the relevant order. or orders, and submit.
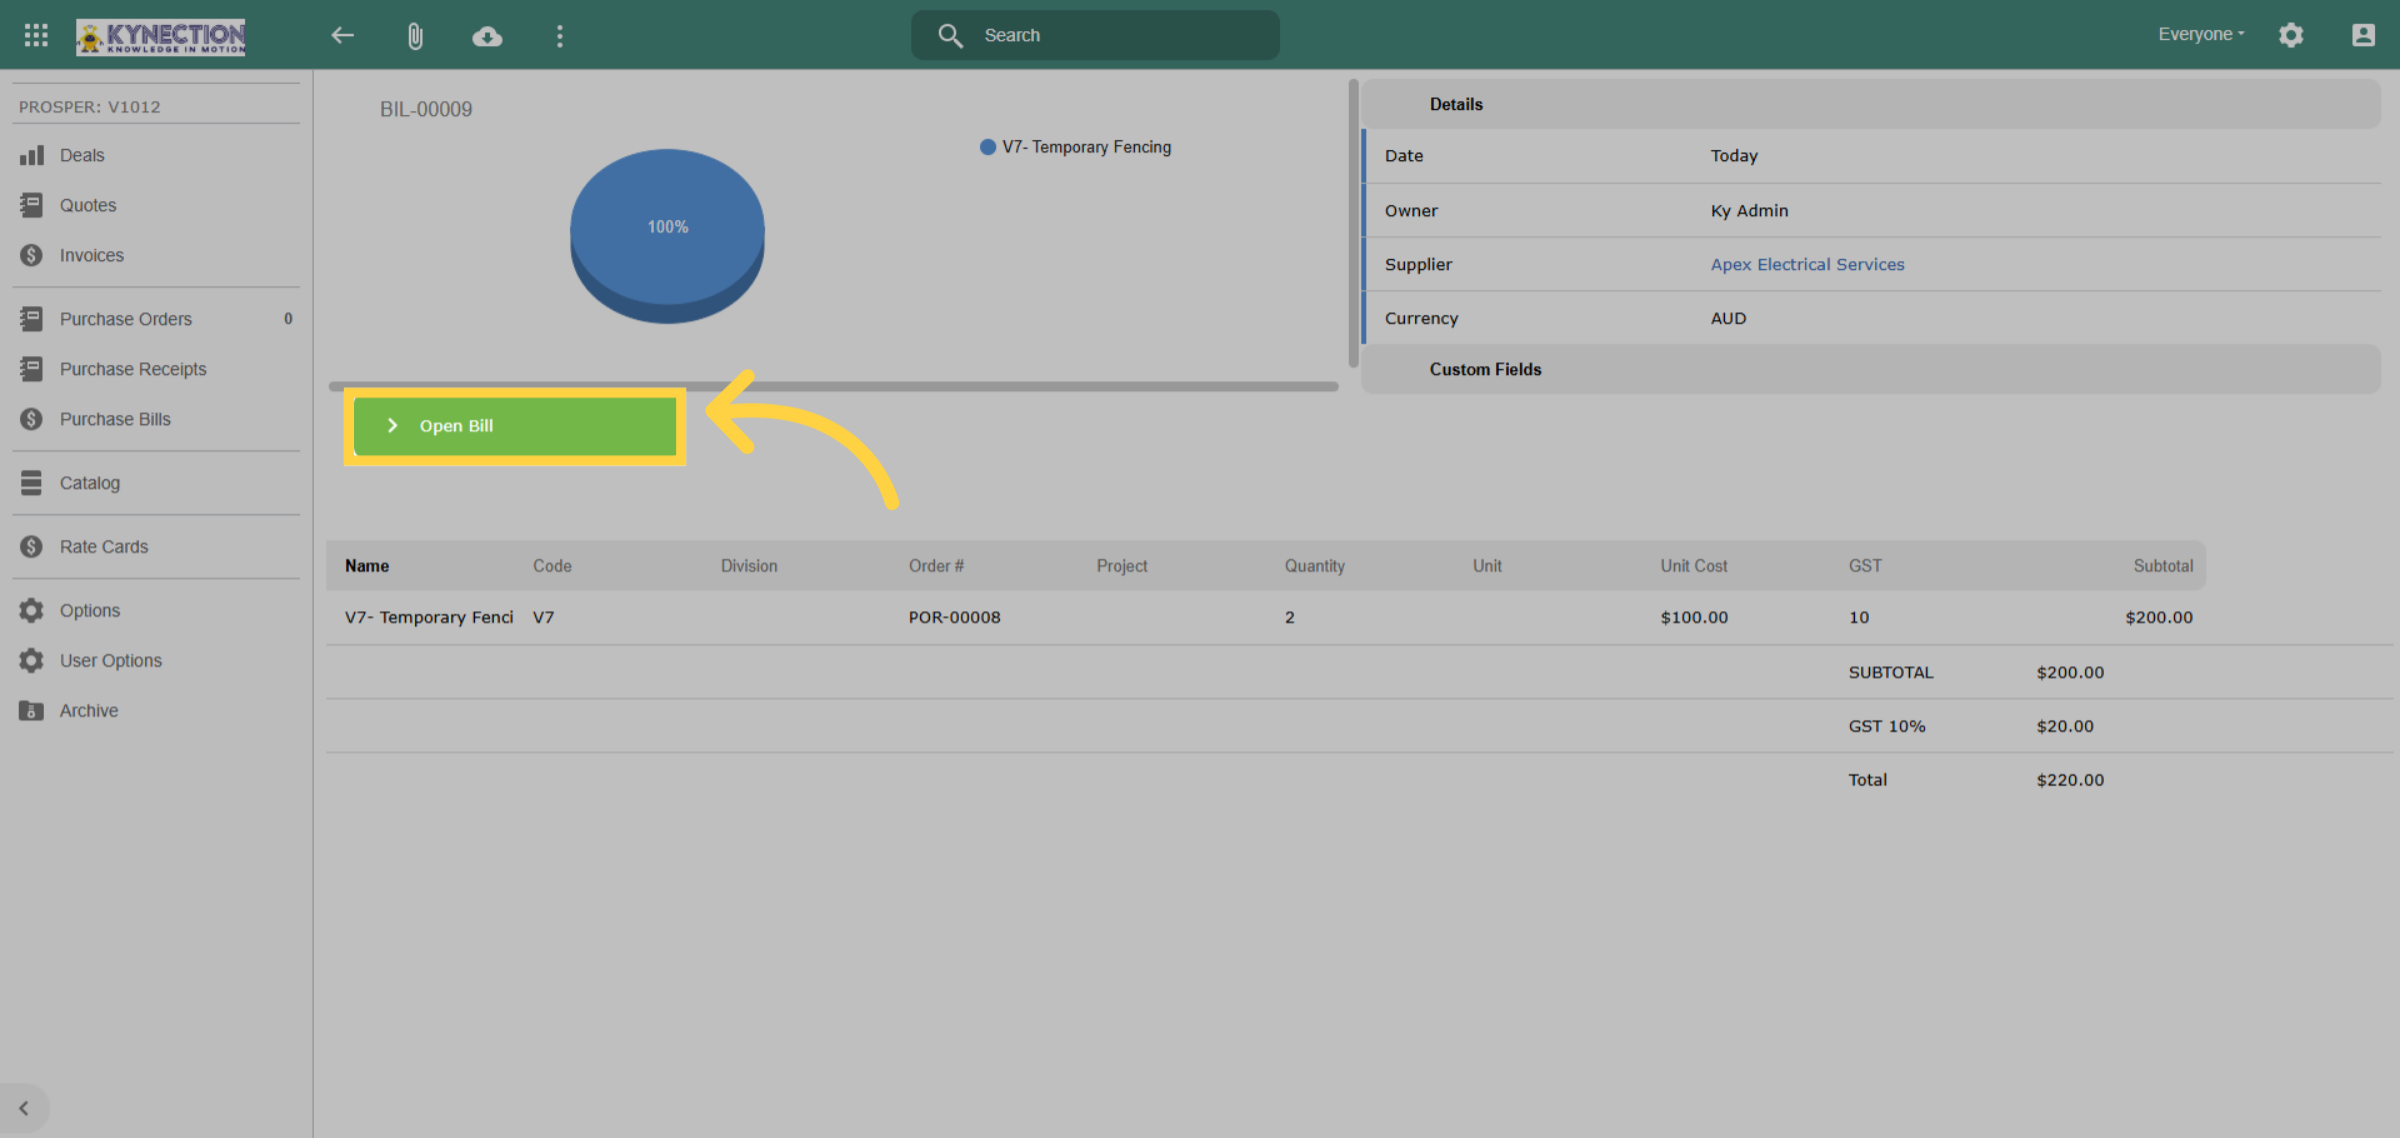
59. Open Bill - Mark as Paid
The purchase bill will initially display as an Open Bill. When you are prepared to transfer it to the accounting package, select the Open Bill tab. This action will change its status to Mark as Paid, prompting you to enter the payment amount and date.
60. Catalog Items
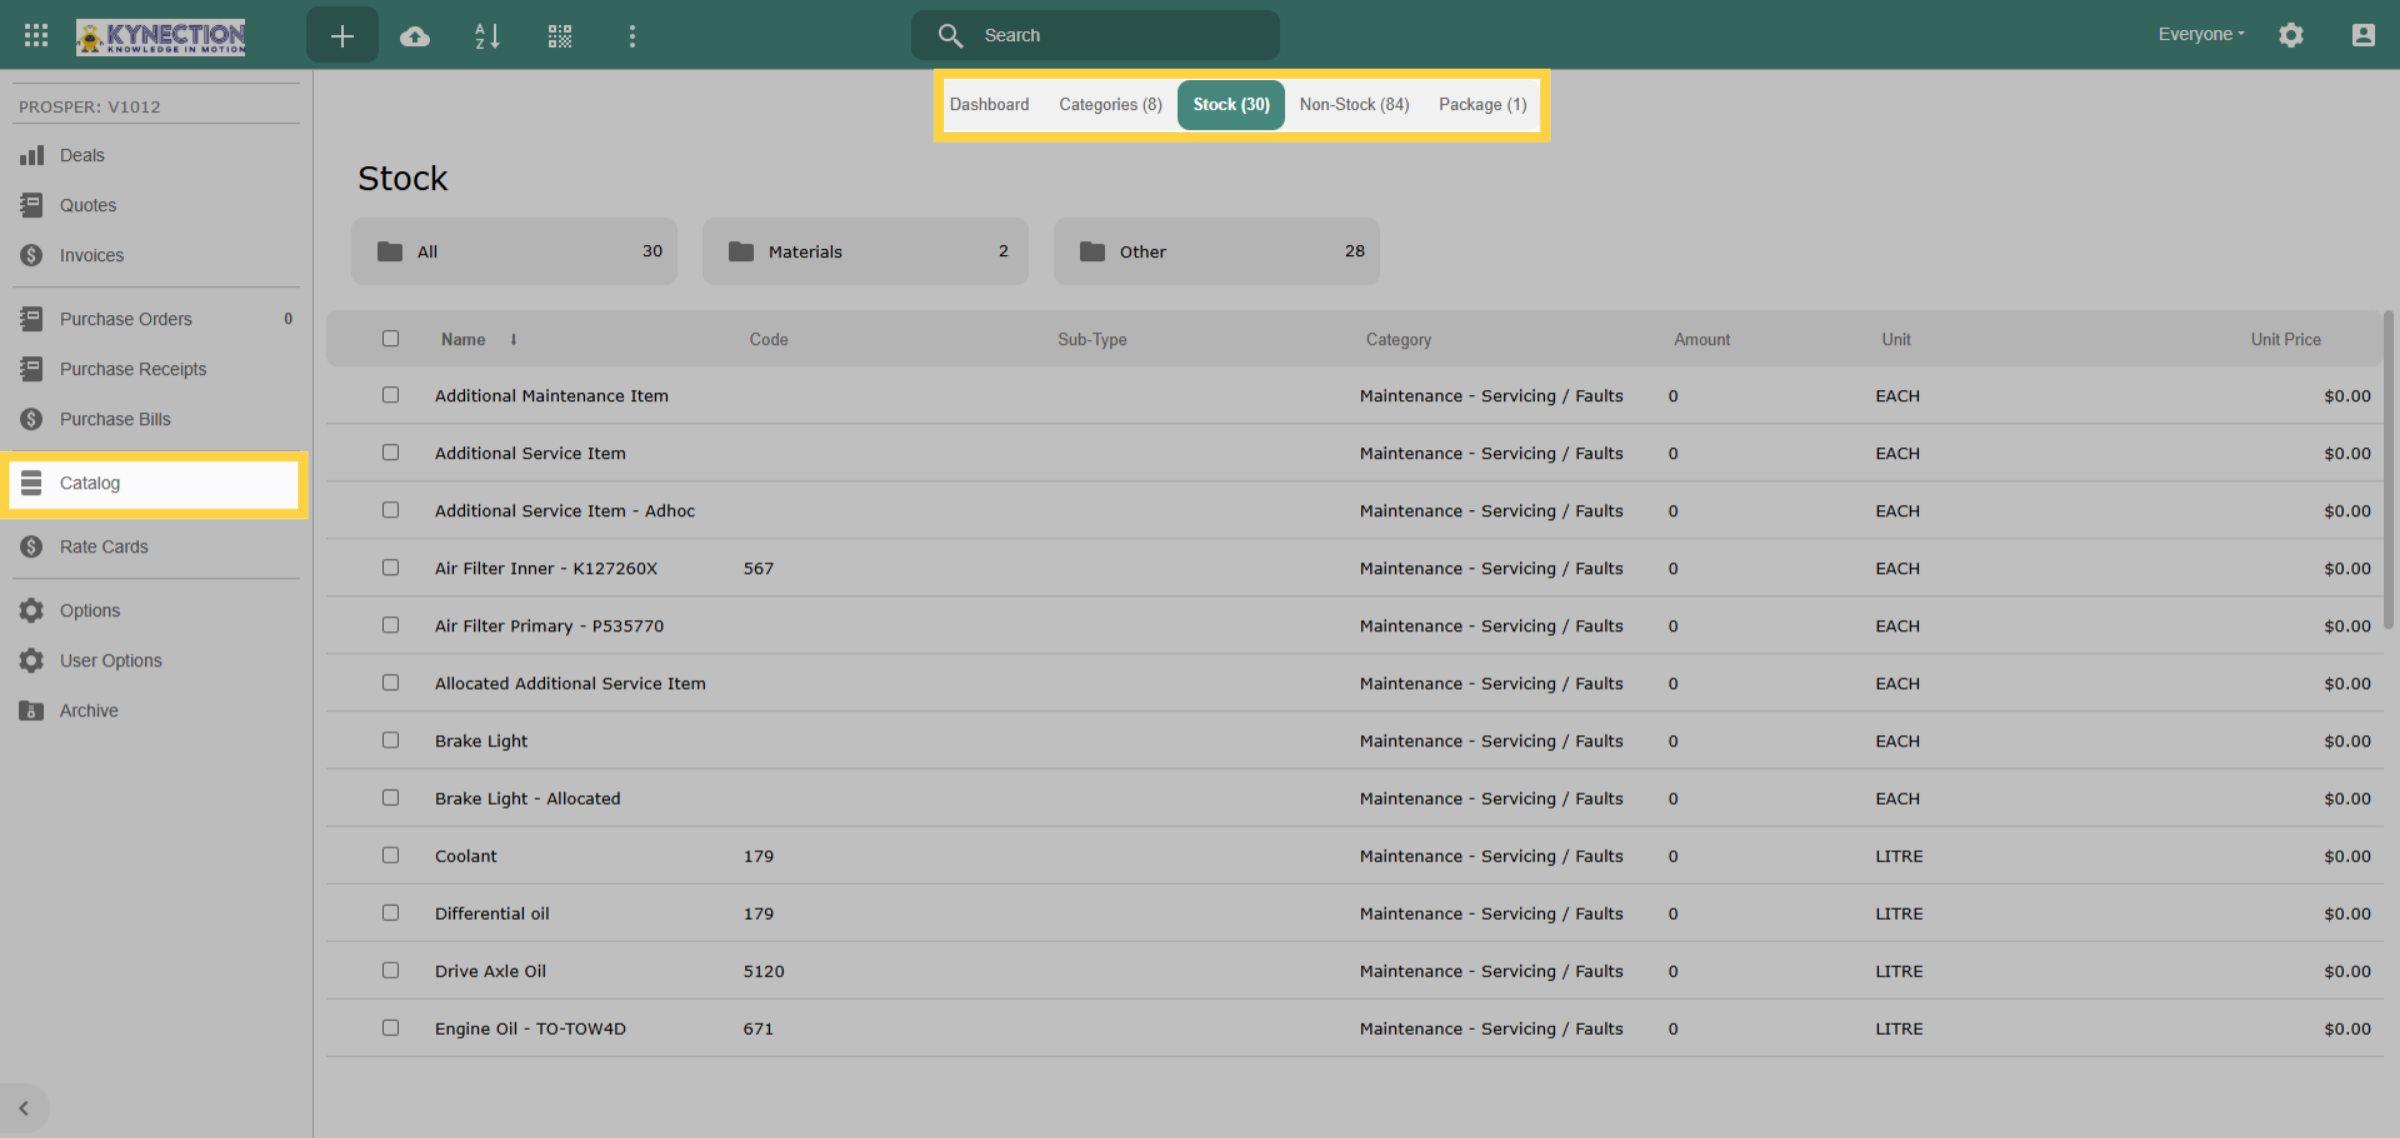
Catalog Items are divided into Stock and Non-Stock items. Non-Stock includes Equipment and Services, while Stock includes materials, each with tailored sub-categories. The Categories tab in the top menu lists all categories for both types.
61. Add Catalog Item
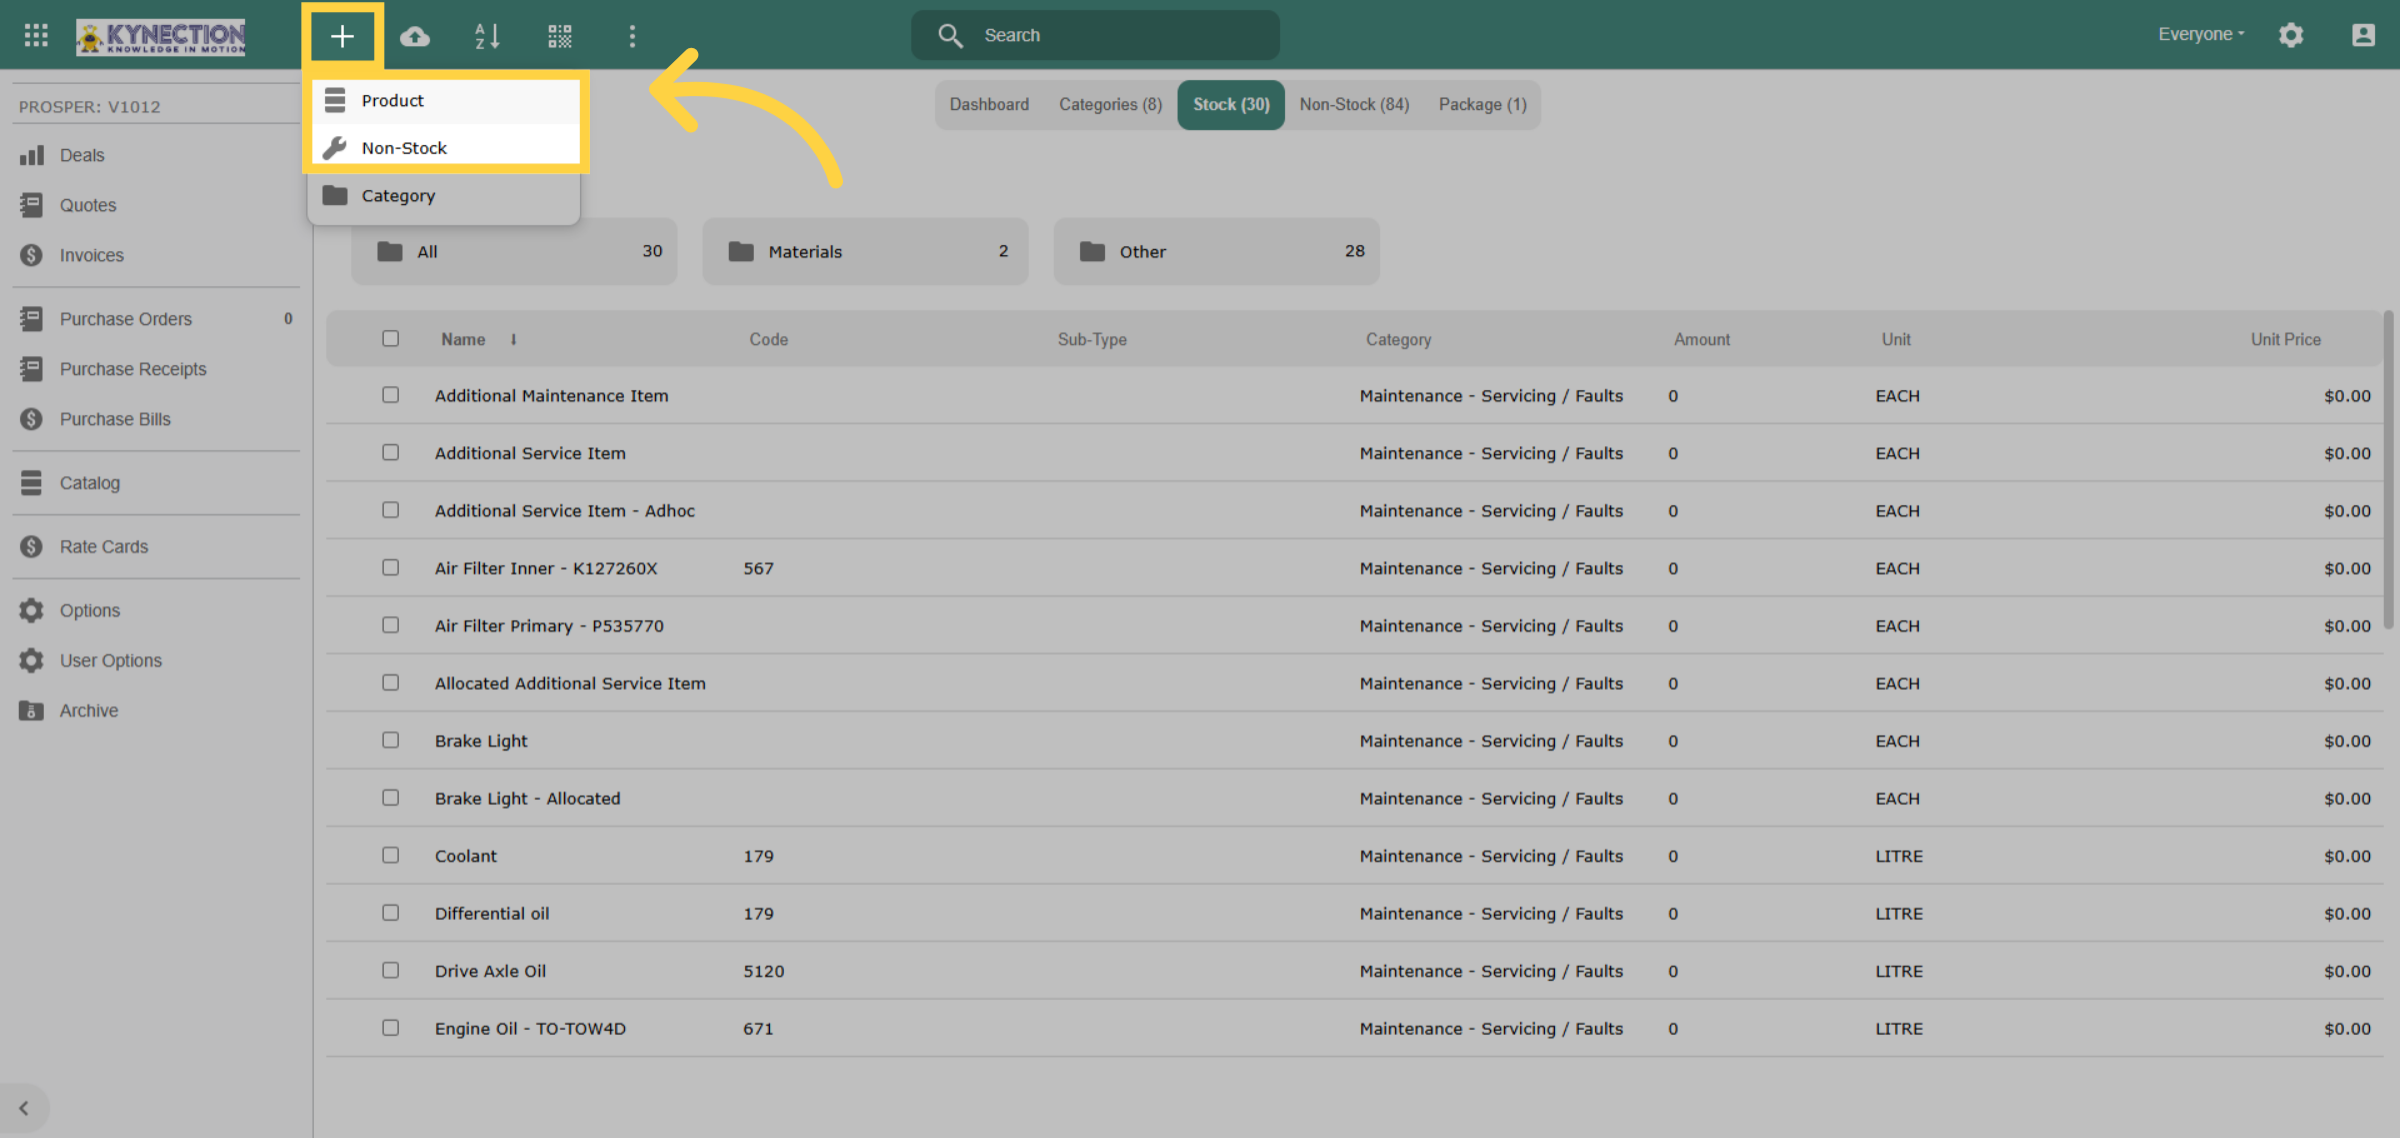
To add a new catalog item, click the plus icon on the toolbar. To include a stock item, choose "Product." For this example, we will select "Non-Stock."
62. Catalog Item Details
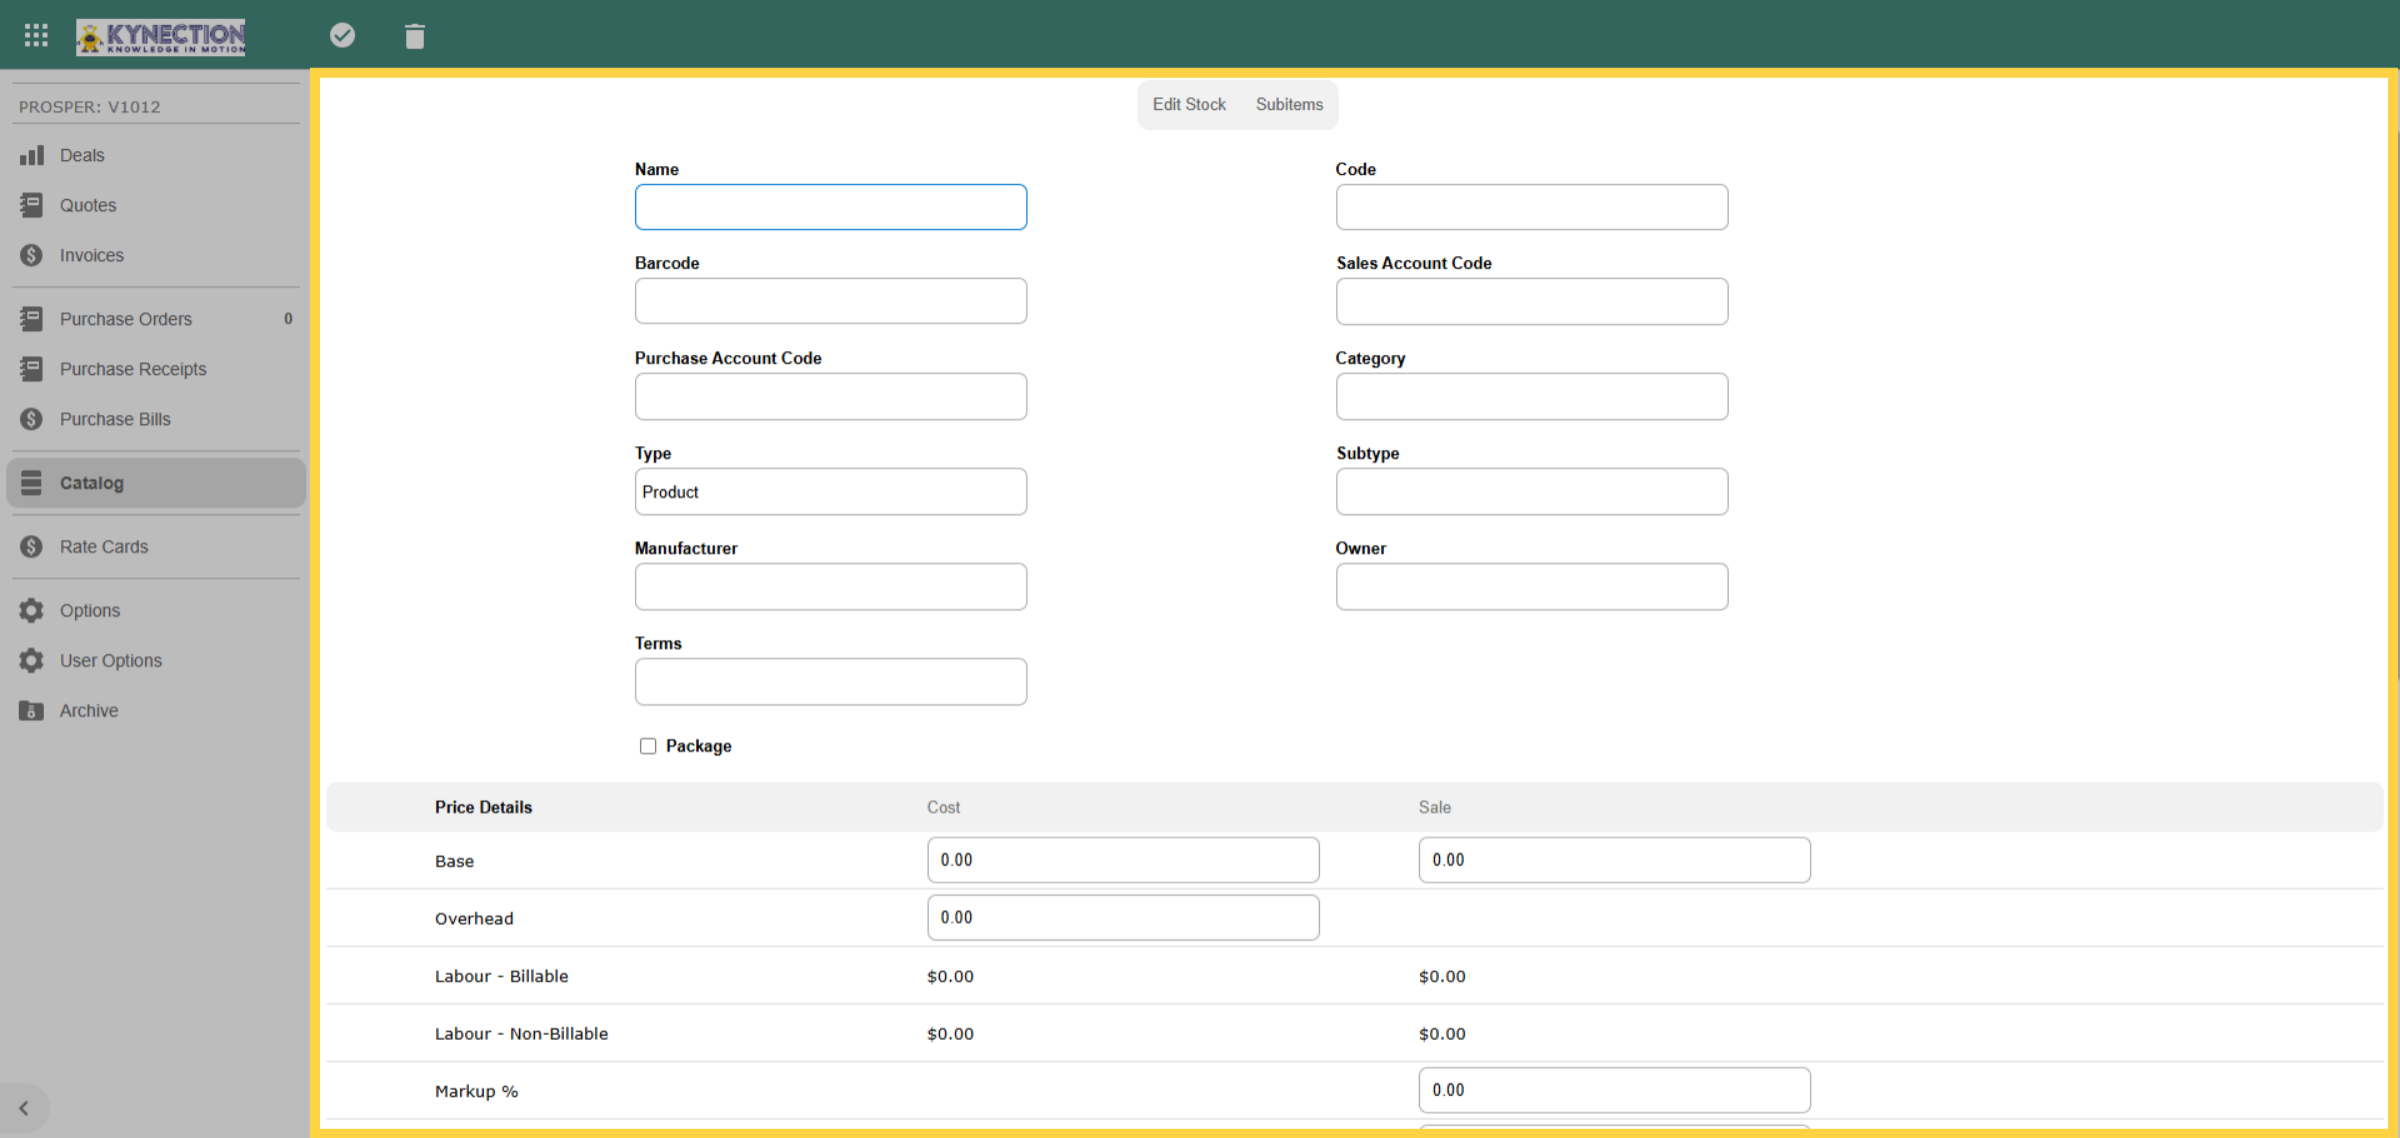
Name the catalog item per your company's convention. Provide details like Sales Account Code, Category, Type, and Subtype. For equipment, link it in the Equipment field. Include base price and sales details, recording standard pricing. Special prices are dealt with in customer rate cards.
63. Catalog Price Details
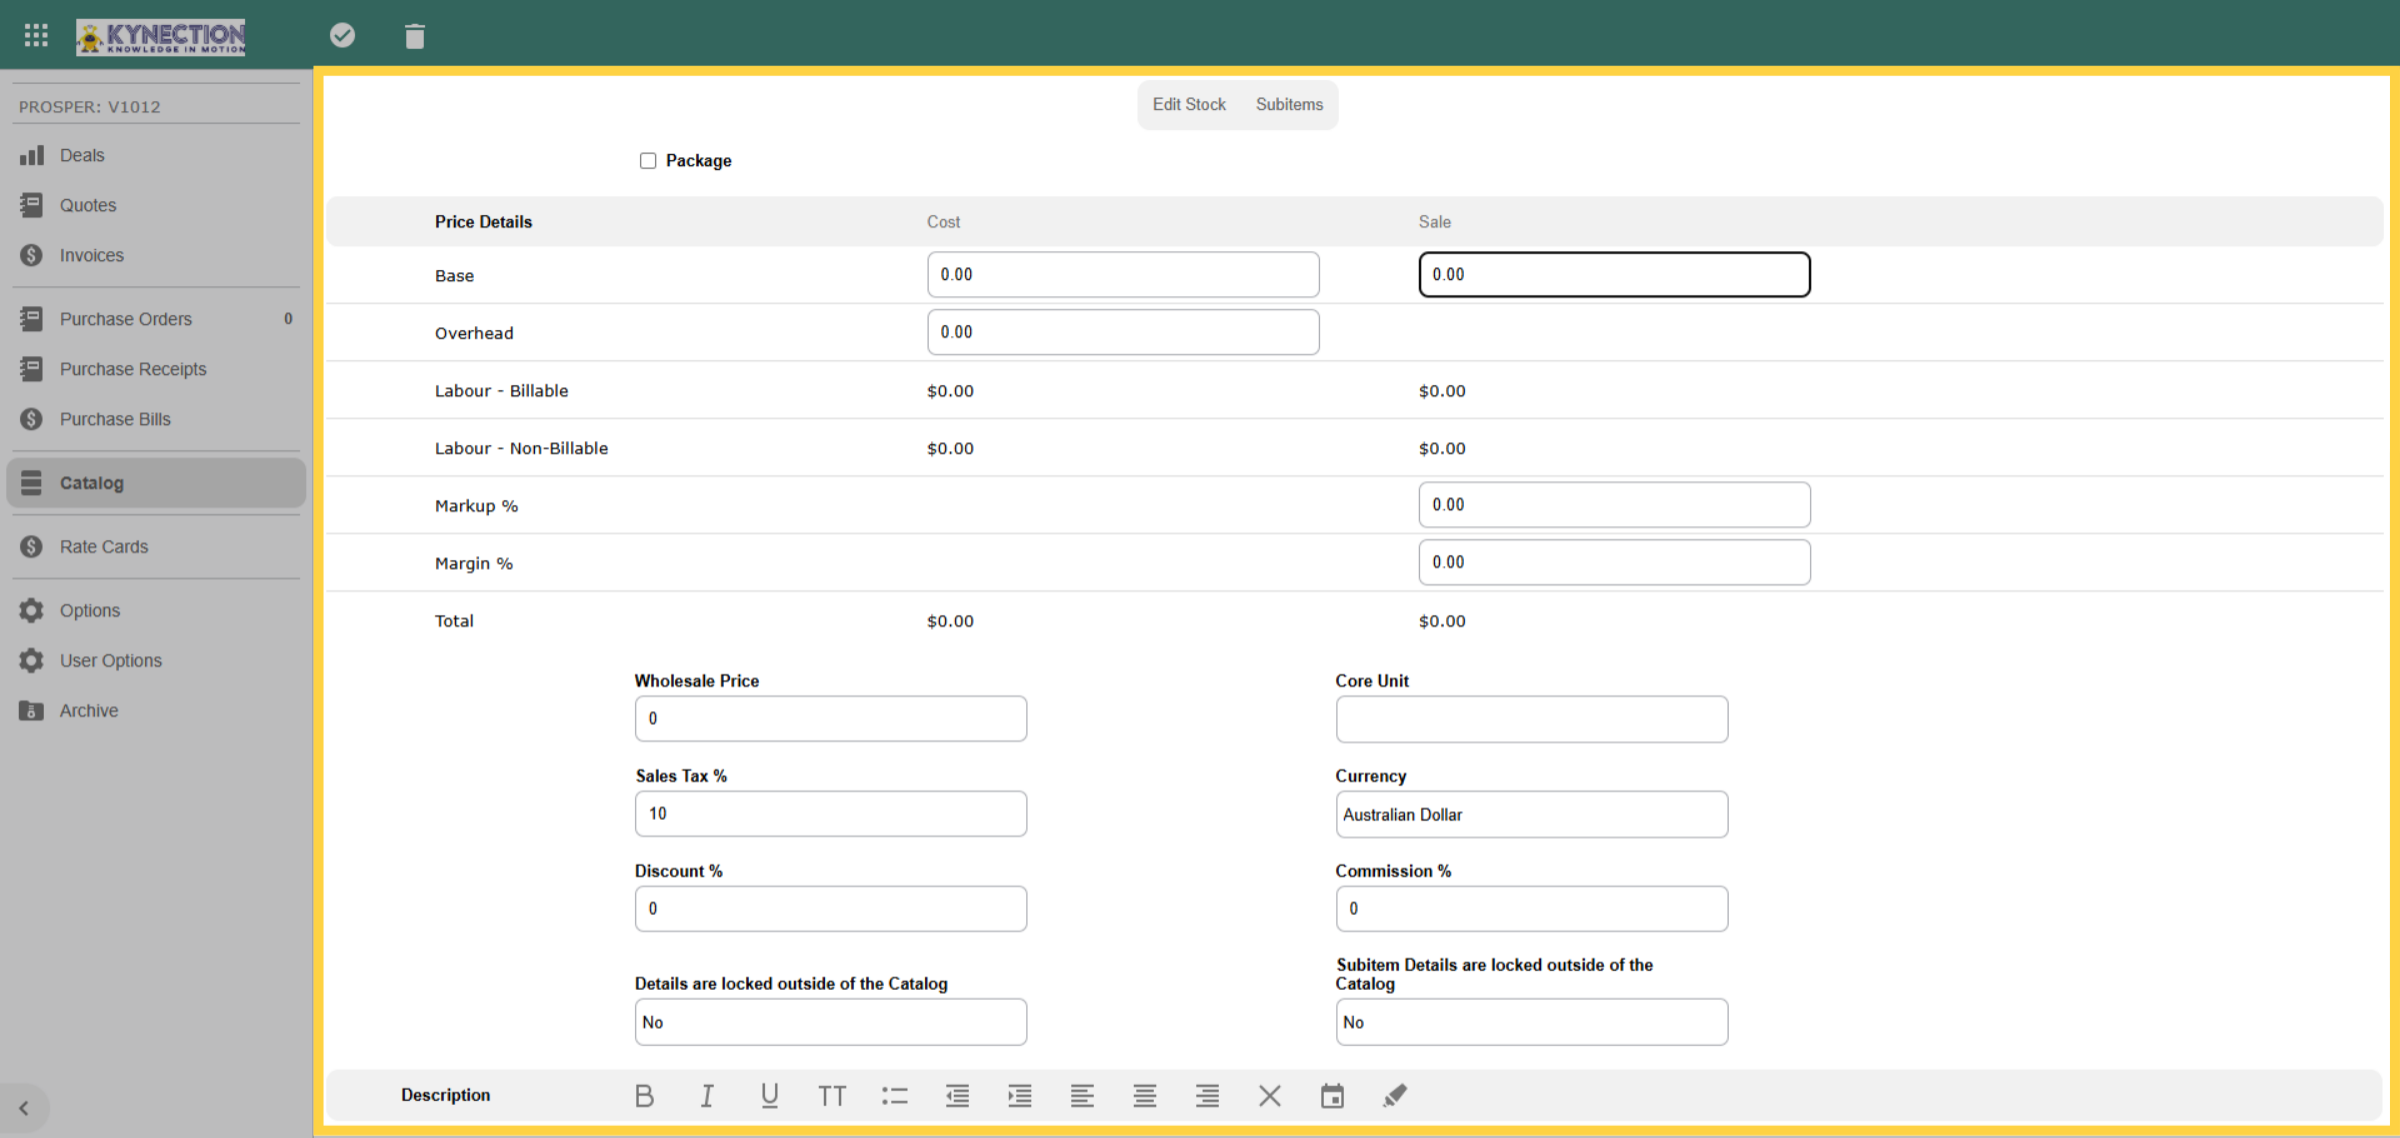
Choose the appropriate unit of measurement and verify that the Sales Tax and Currency fields are accurate. The Description and default supplier fields are optional. If needed, use the tab at the top of the screen to add Subitems.
64. Sub Items
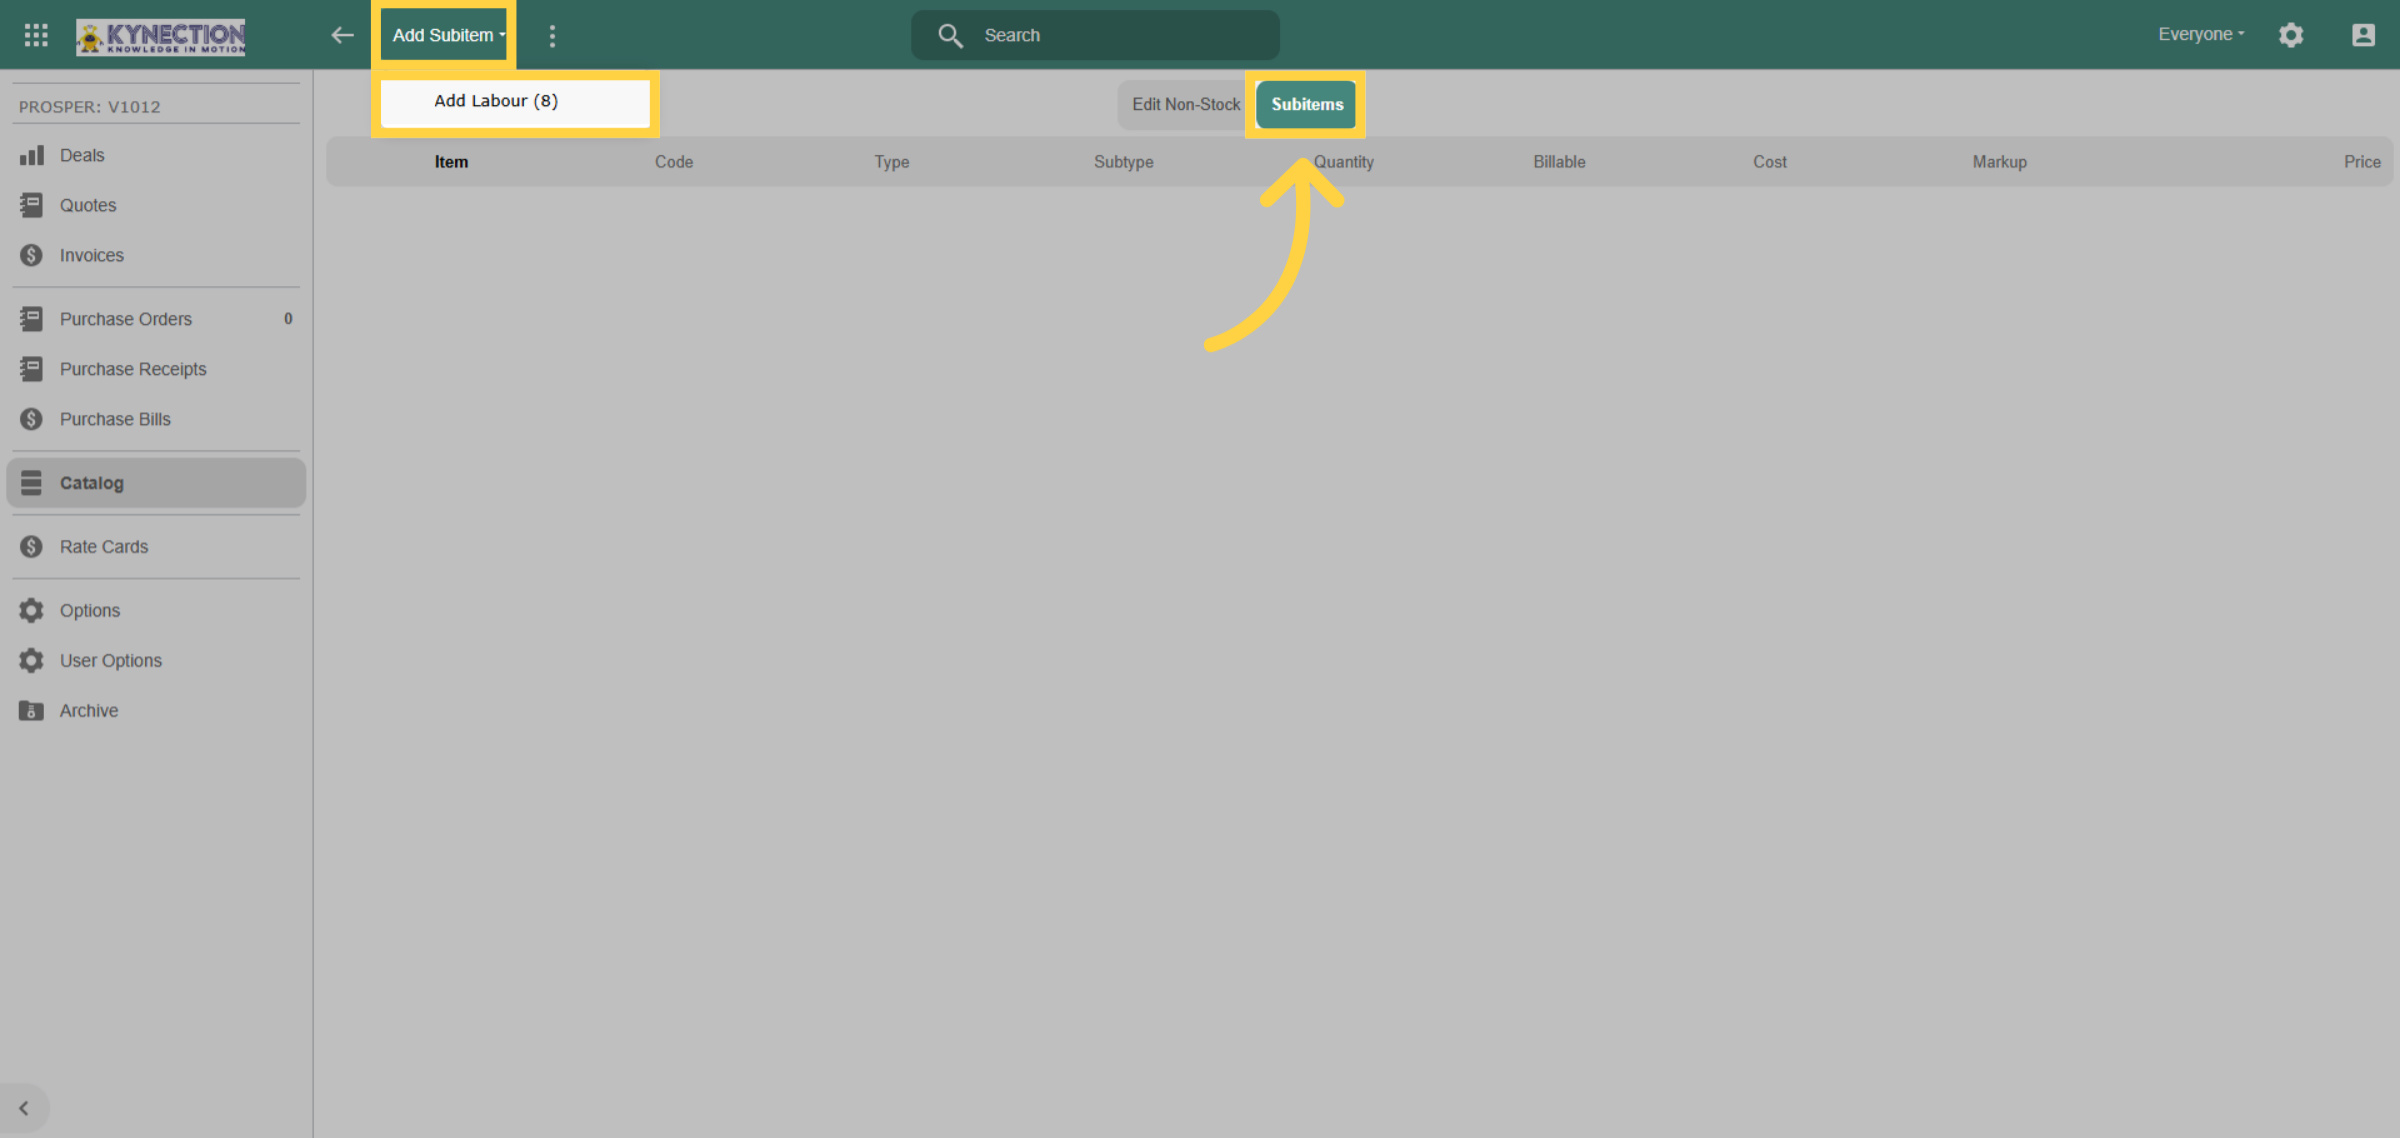
You can add labour as a sub-item to a catalog item, enabling more in-depth profitability analysis and smarter pricing and quoting strategies. To do this, navigate to the Catalog Item and select the Sub Item tab at the top of the screen, then choose the relevant labour item.
65. Rate Cards
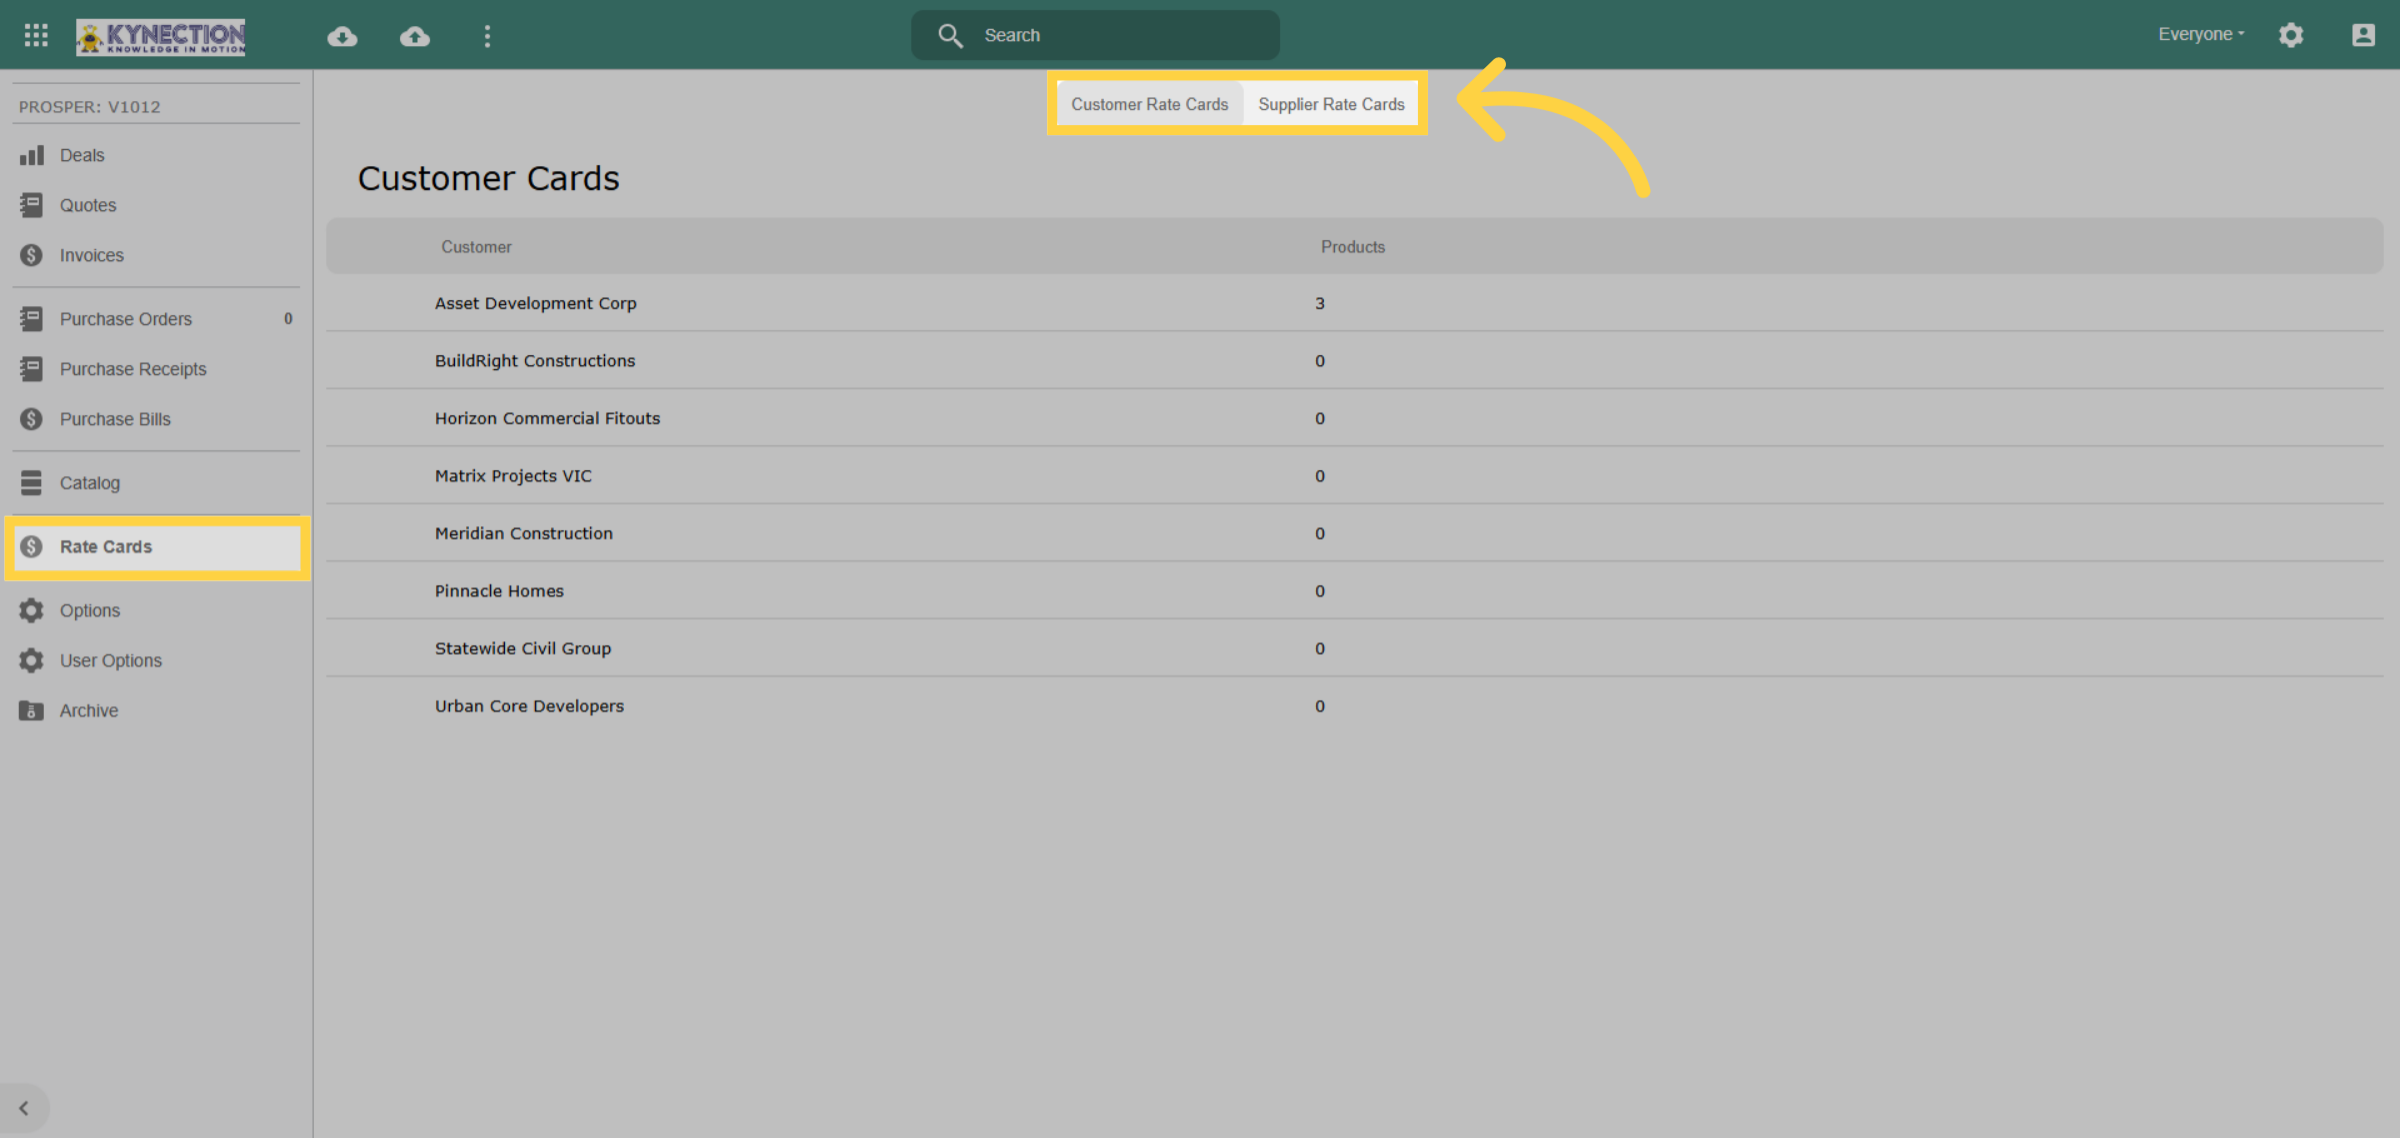
The Rate Cards section in the left-hand pane contains both customer and supplier rate cards. When a company is added to KIM, it is automatically included in the rates with zero products.
66. Customer Rate Cards
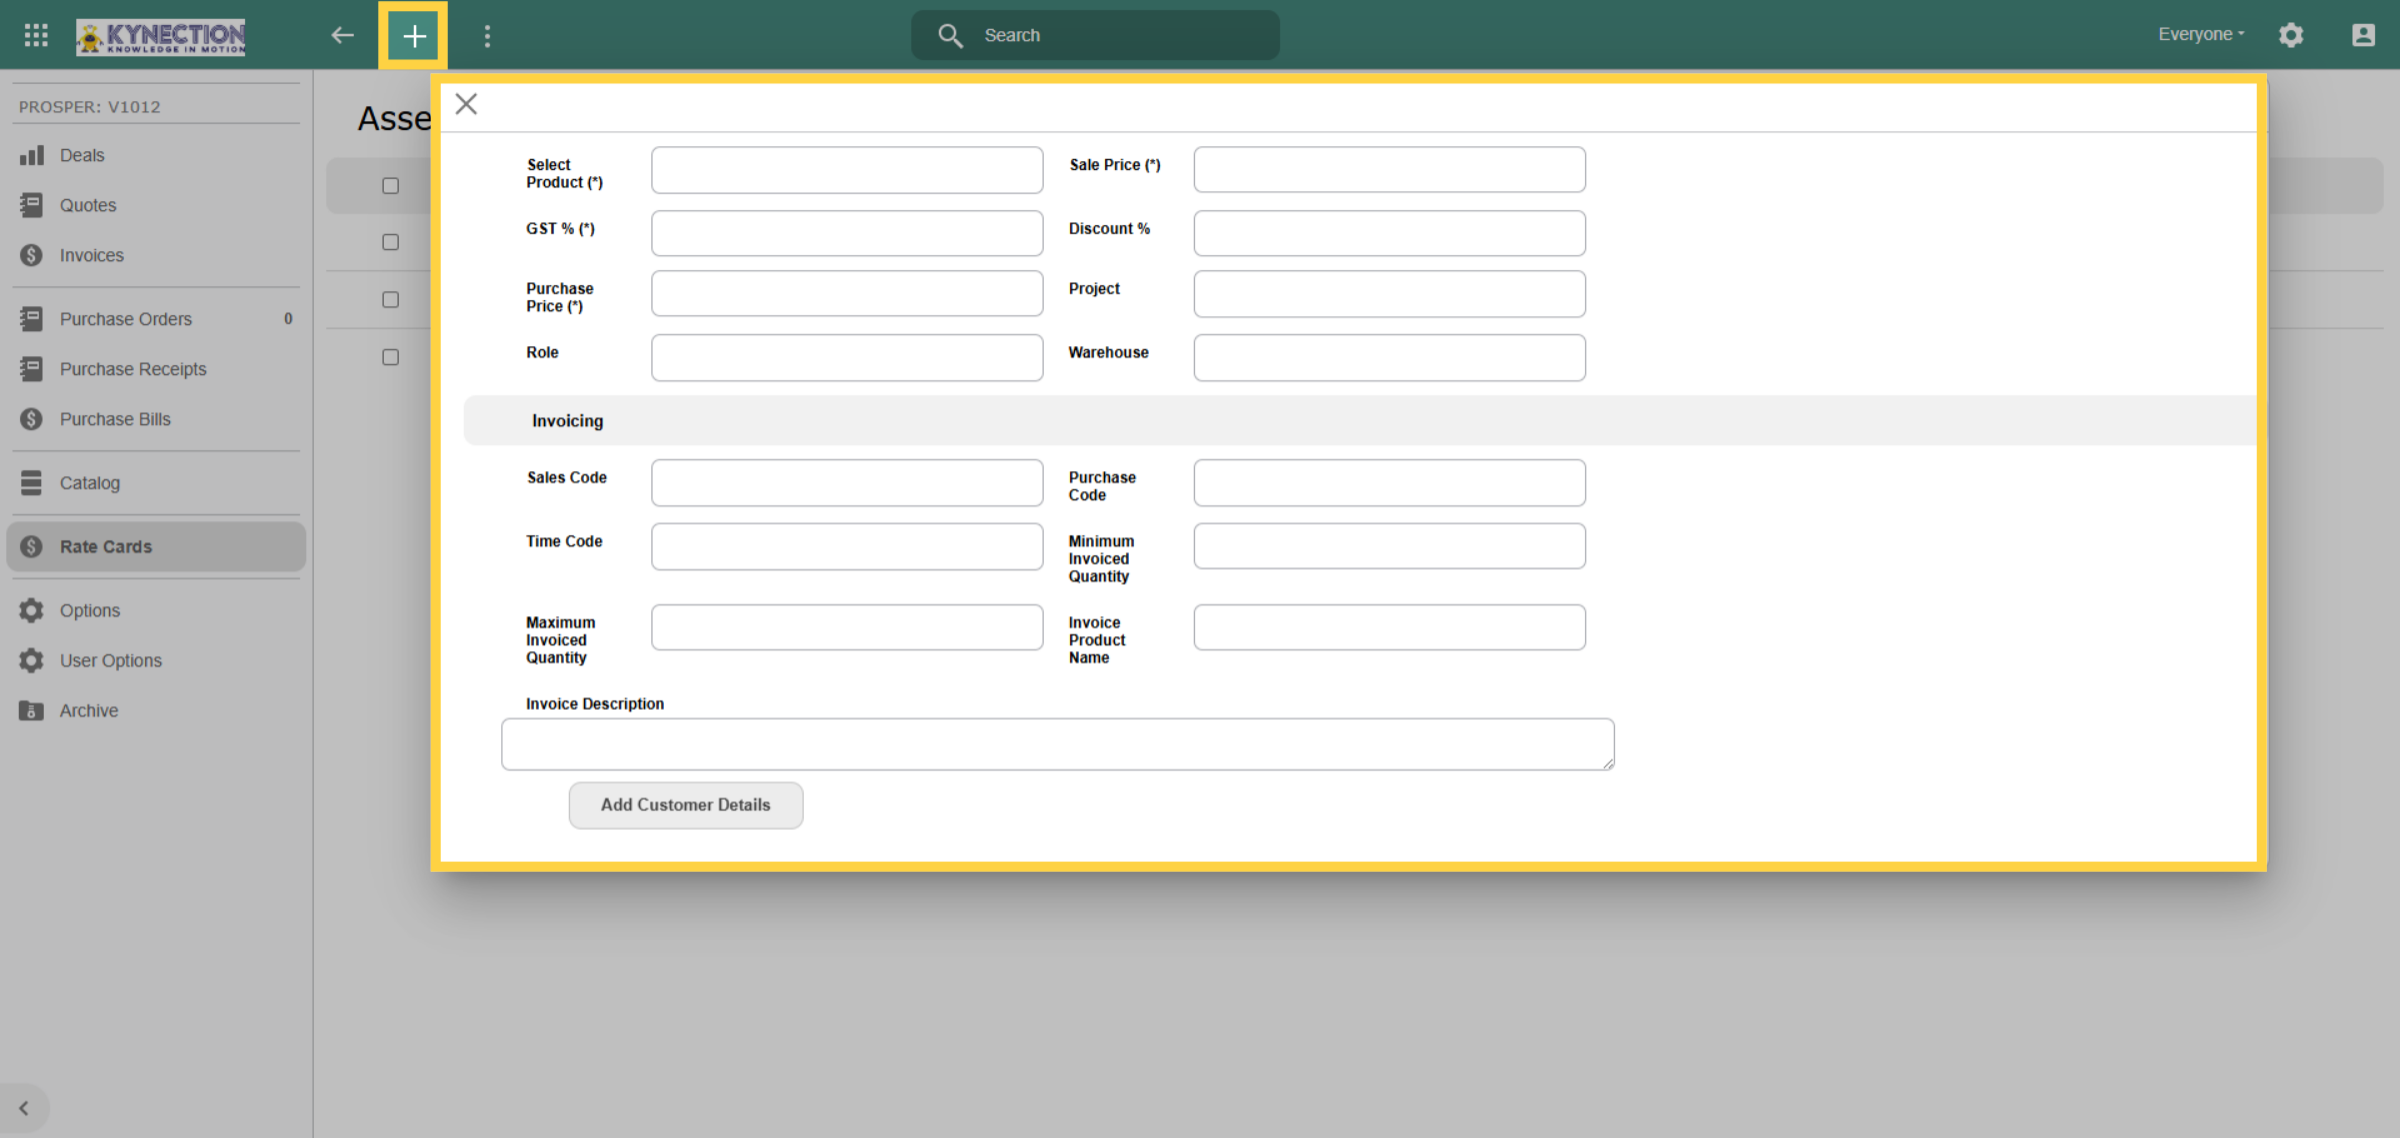
Rate cards are associated with both customers and projects, enabling you to assign project-specific rates as needed. While individual rates can be added using the plus icon, the import function streamlines the process for adding multiple rates.
67. Minimum Invoiced Quanity
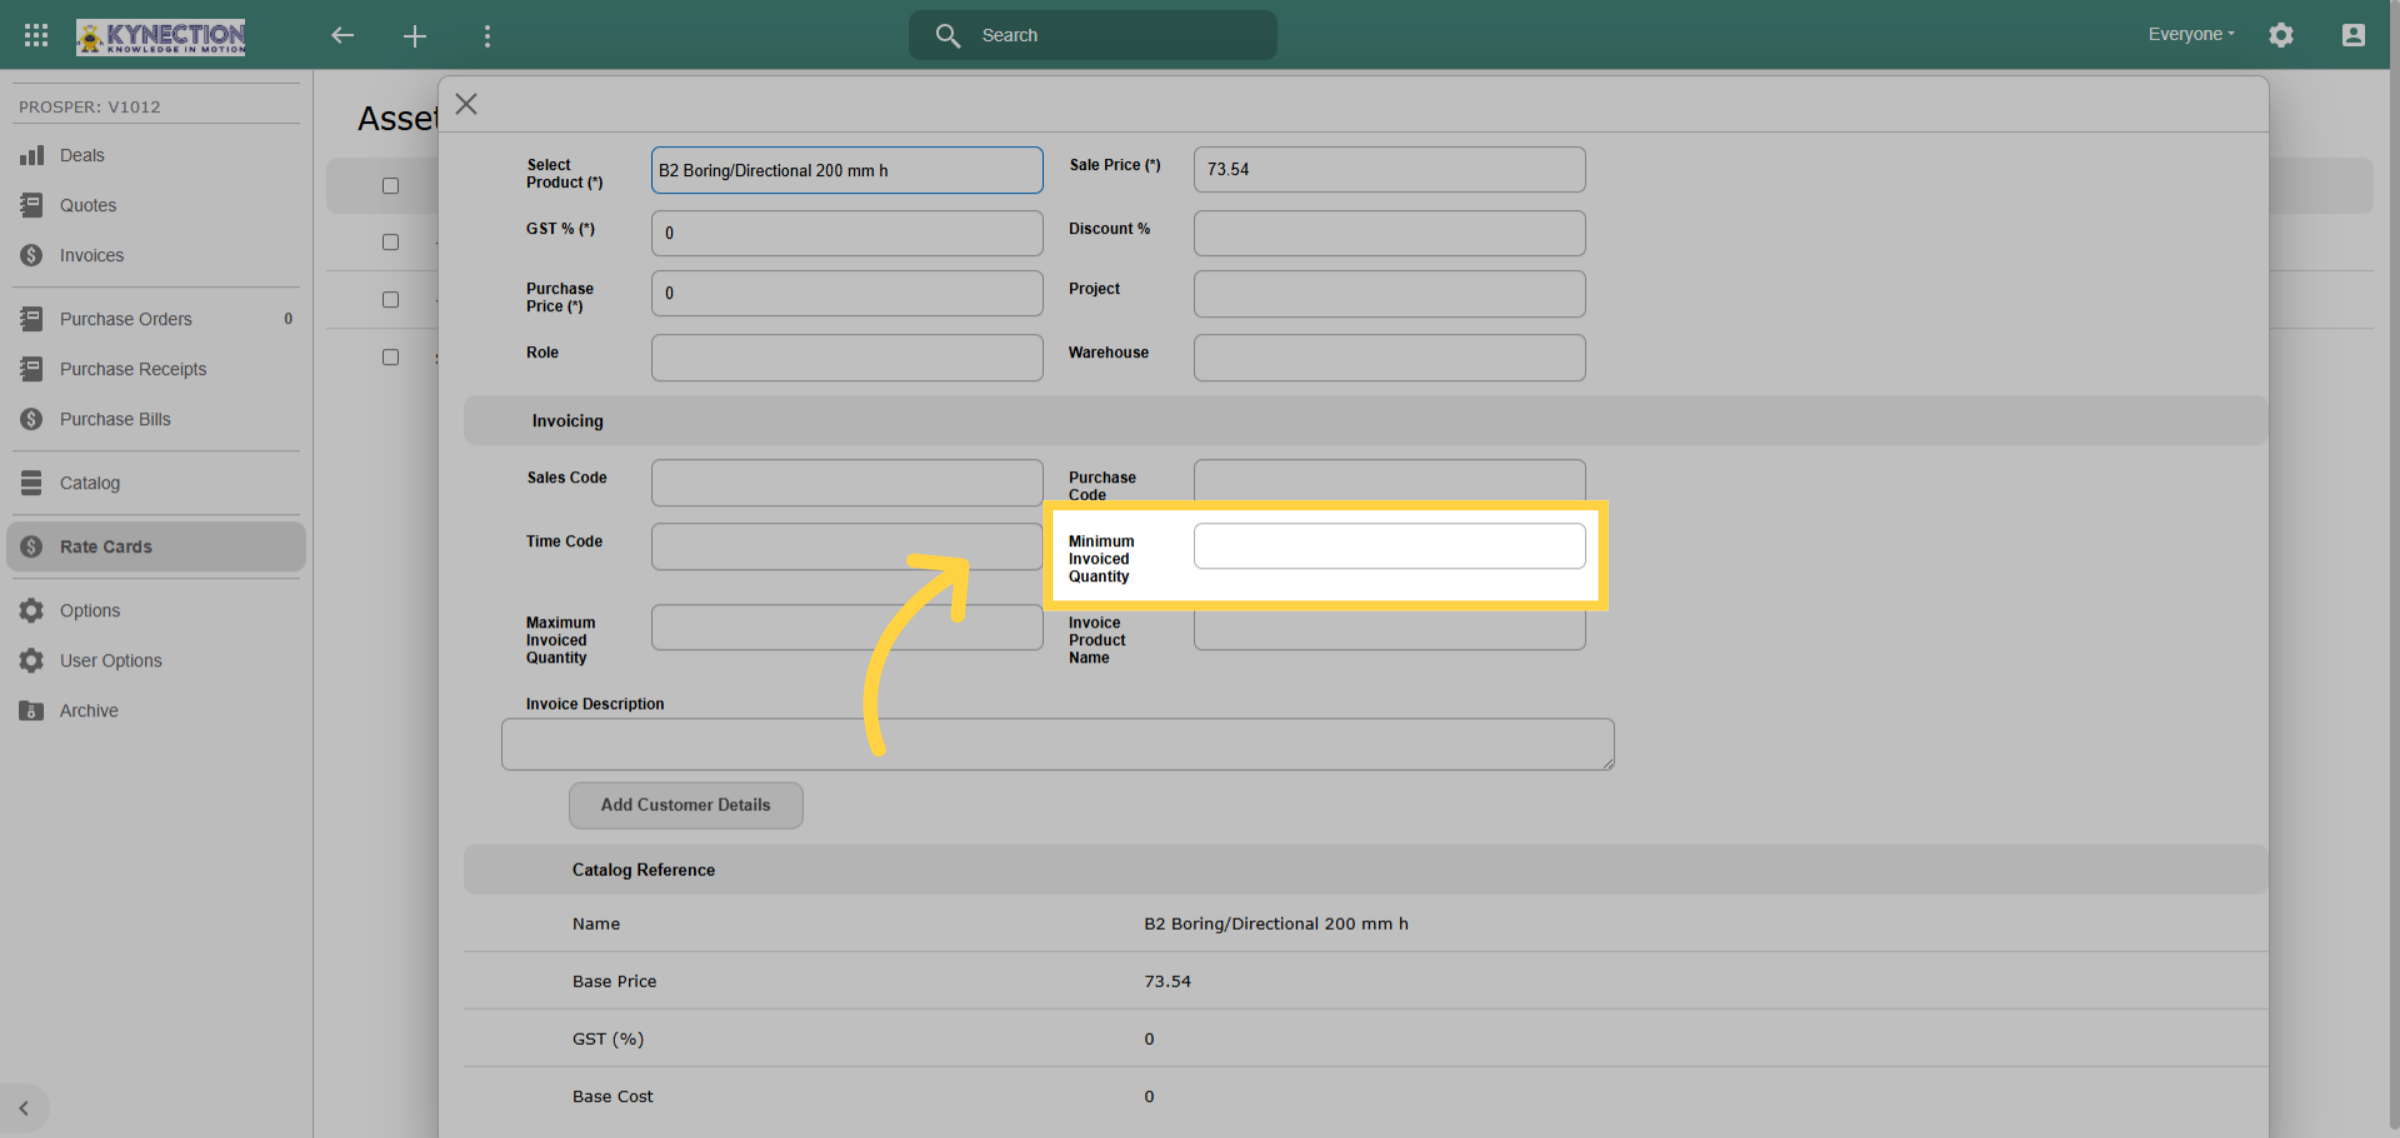
Customer rates are required only when they differ from the catalog price or the minimum invoiced quantity. Utilise the minimum invoiced quantity to automatically apply the base chargeable quantity.
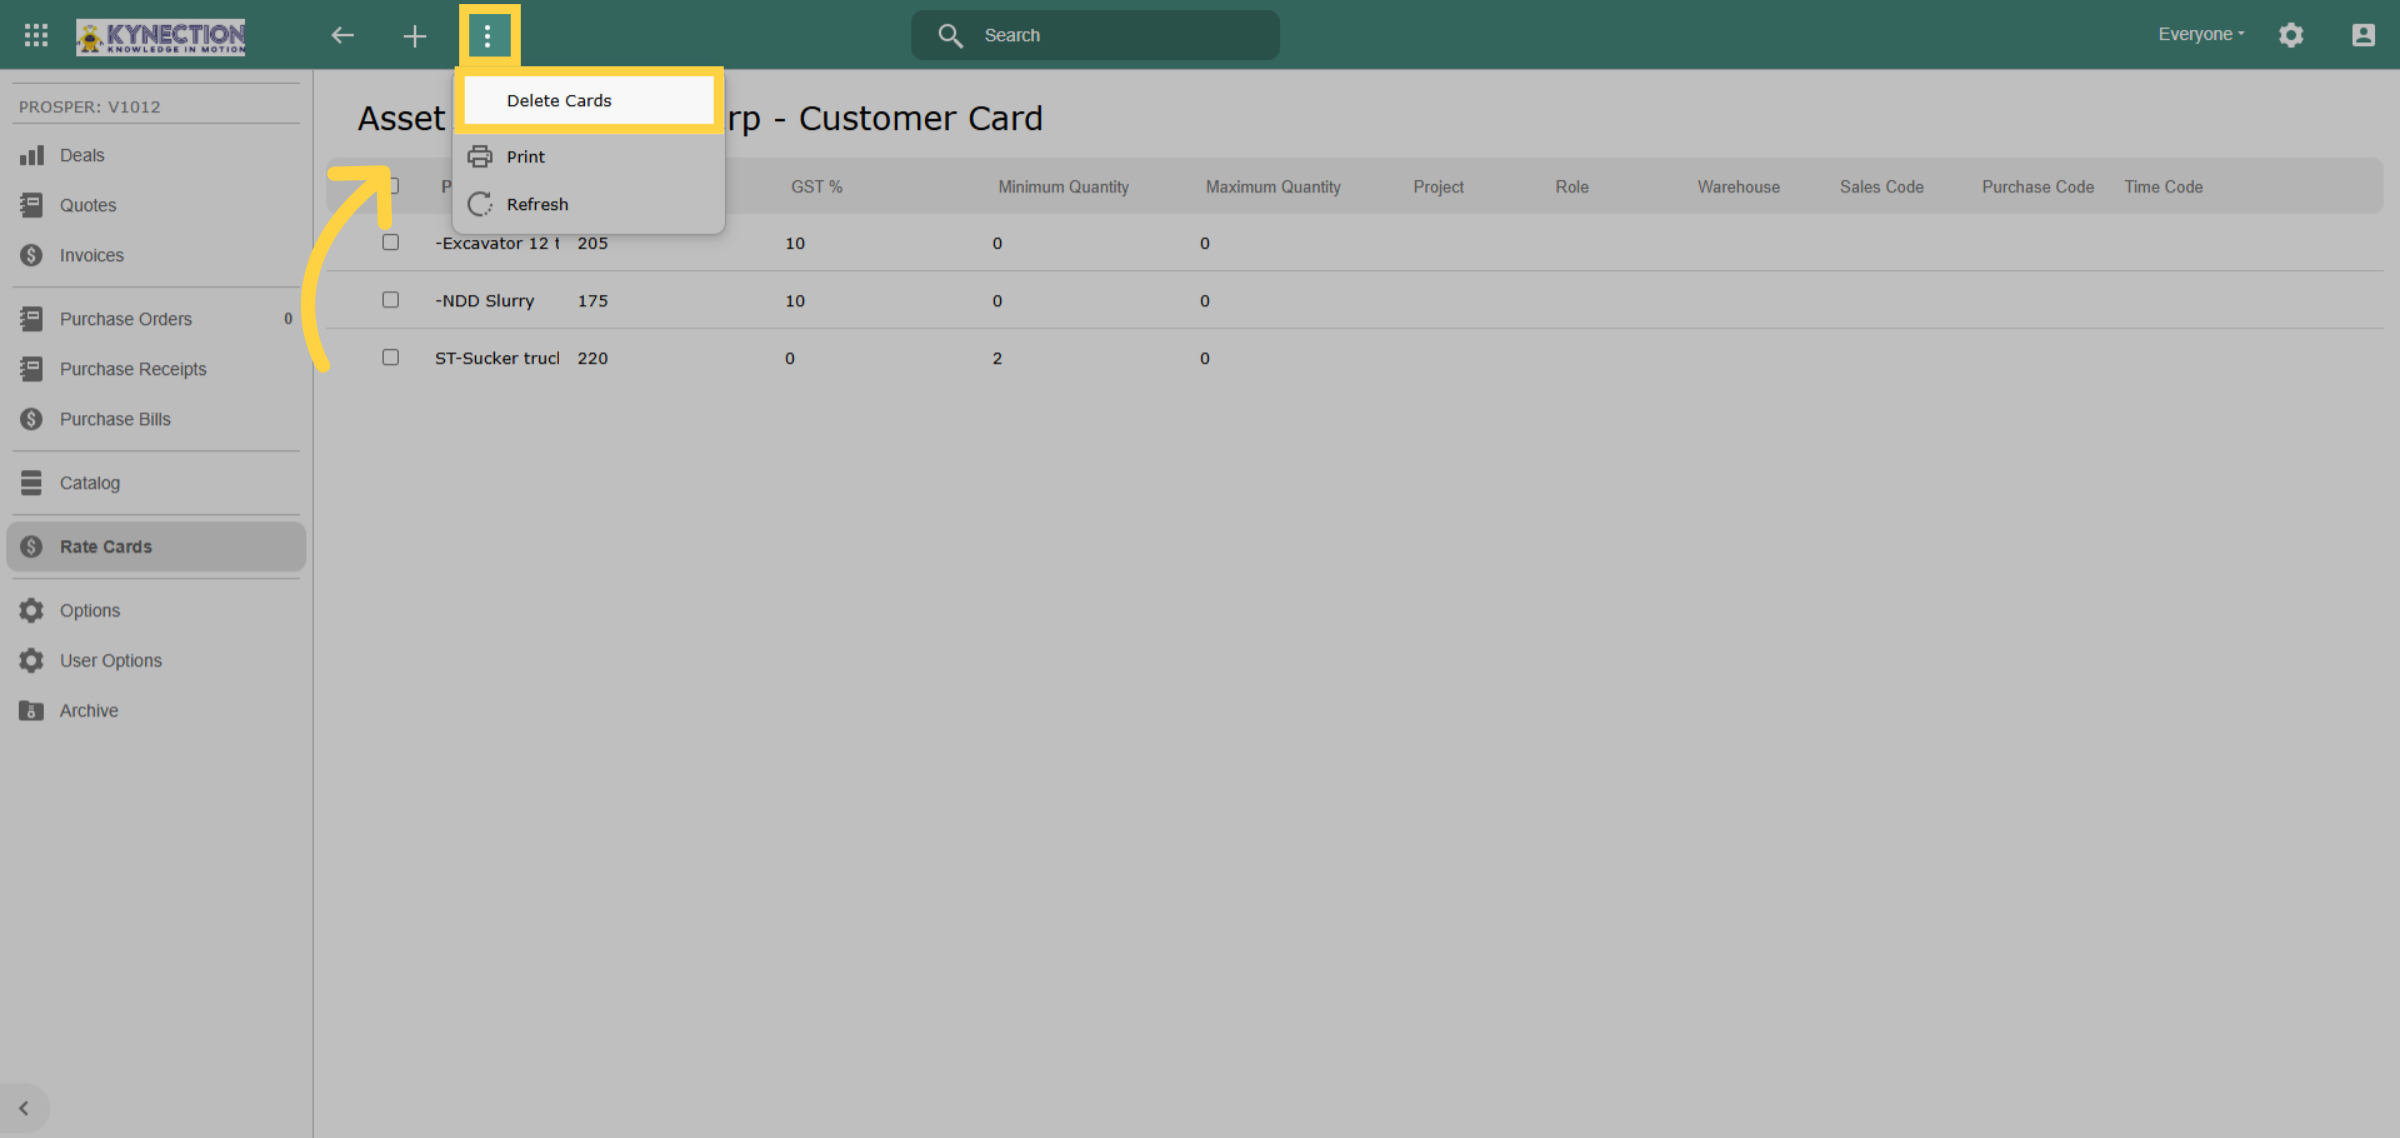
68. Delete Cards
Rates cards can be deleted in bulk by selecting the record checkbox then selecting the 3 dots from the toolbar to delete.
69. Supplier Rate Cards
Supplier Rate Cards are linked to purchase orders. To access them, click on Rates from the left-hand pane, then select Supplier from the top menu. When creating a purchase order, use the 'From Supplier' option to view the rates listed in KIM. Note that supplier items may need to be added to catalog items before including the supplier product cost.