This training guide is designed to help you master the Subby Contractor Portal, enabling you to effectively manage subcontractor information, allocate projects, and complete forms.
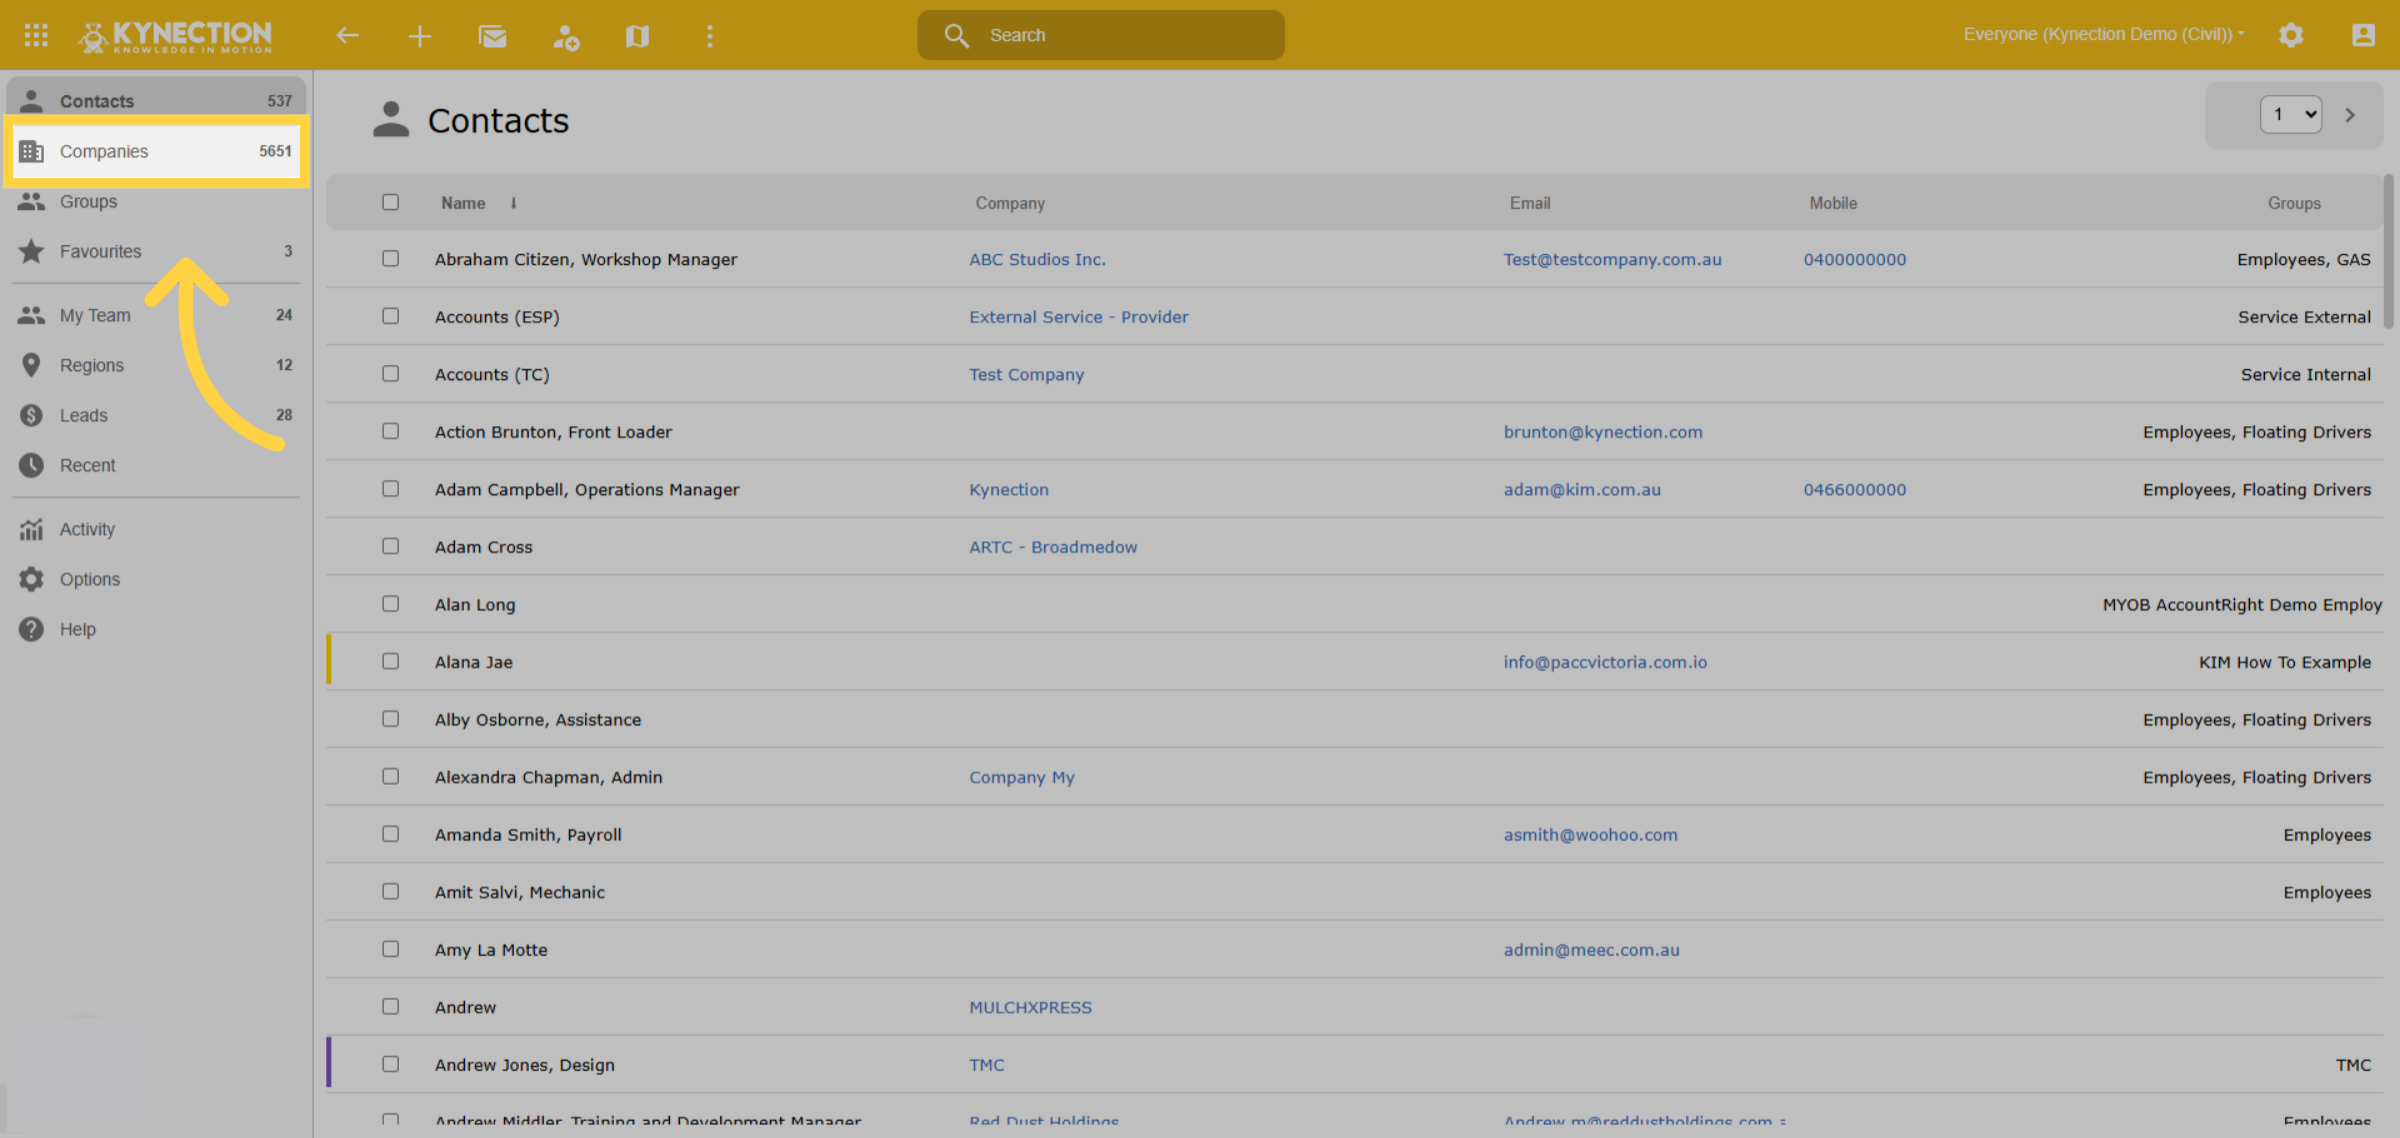
1. Open Companies List
To start, navigate to the Contacts module on the homedash board and select Companies.
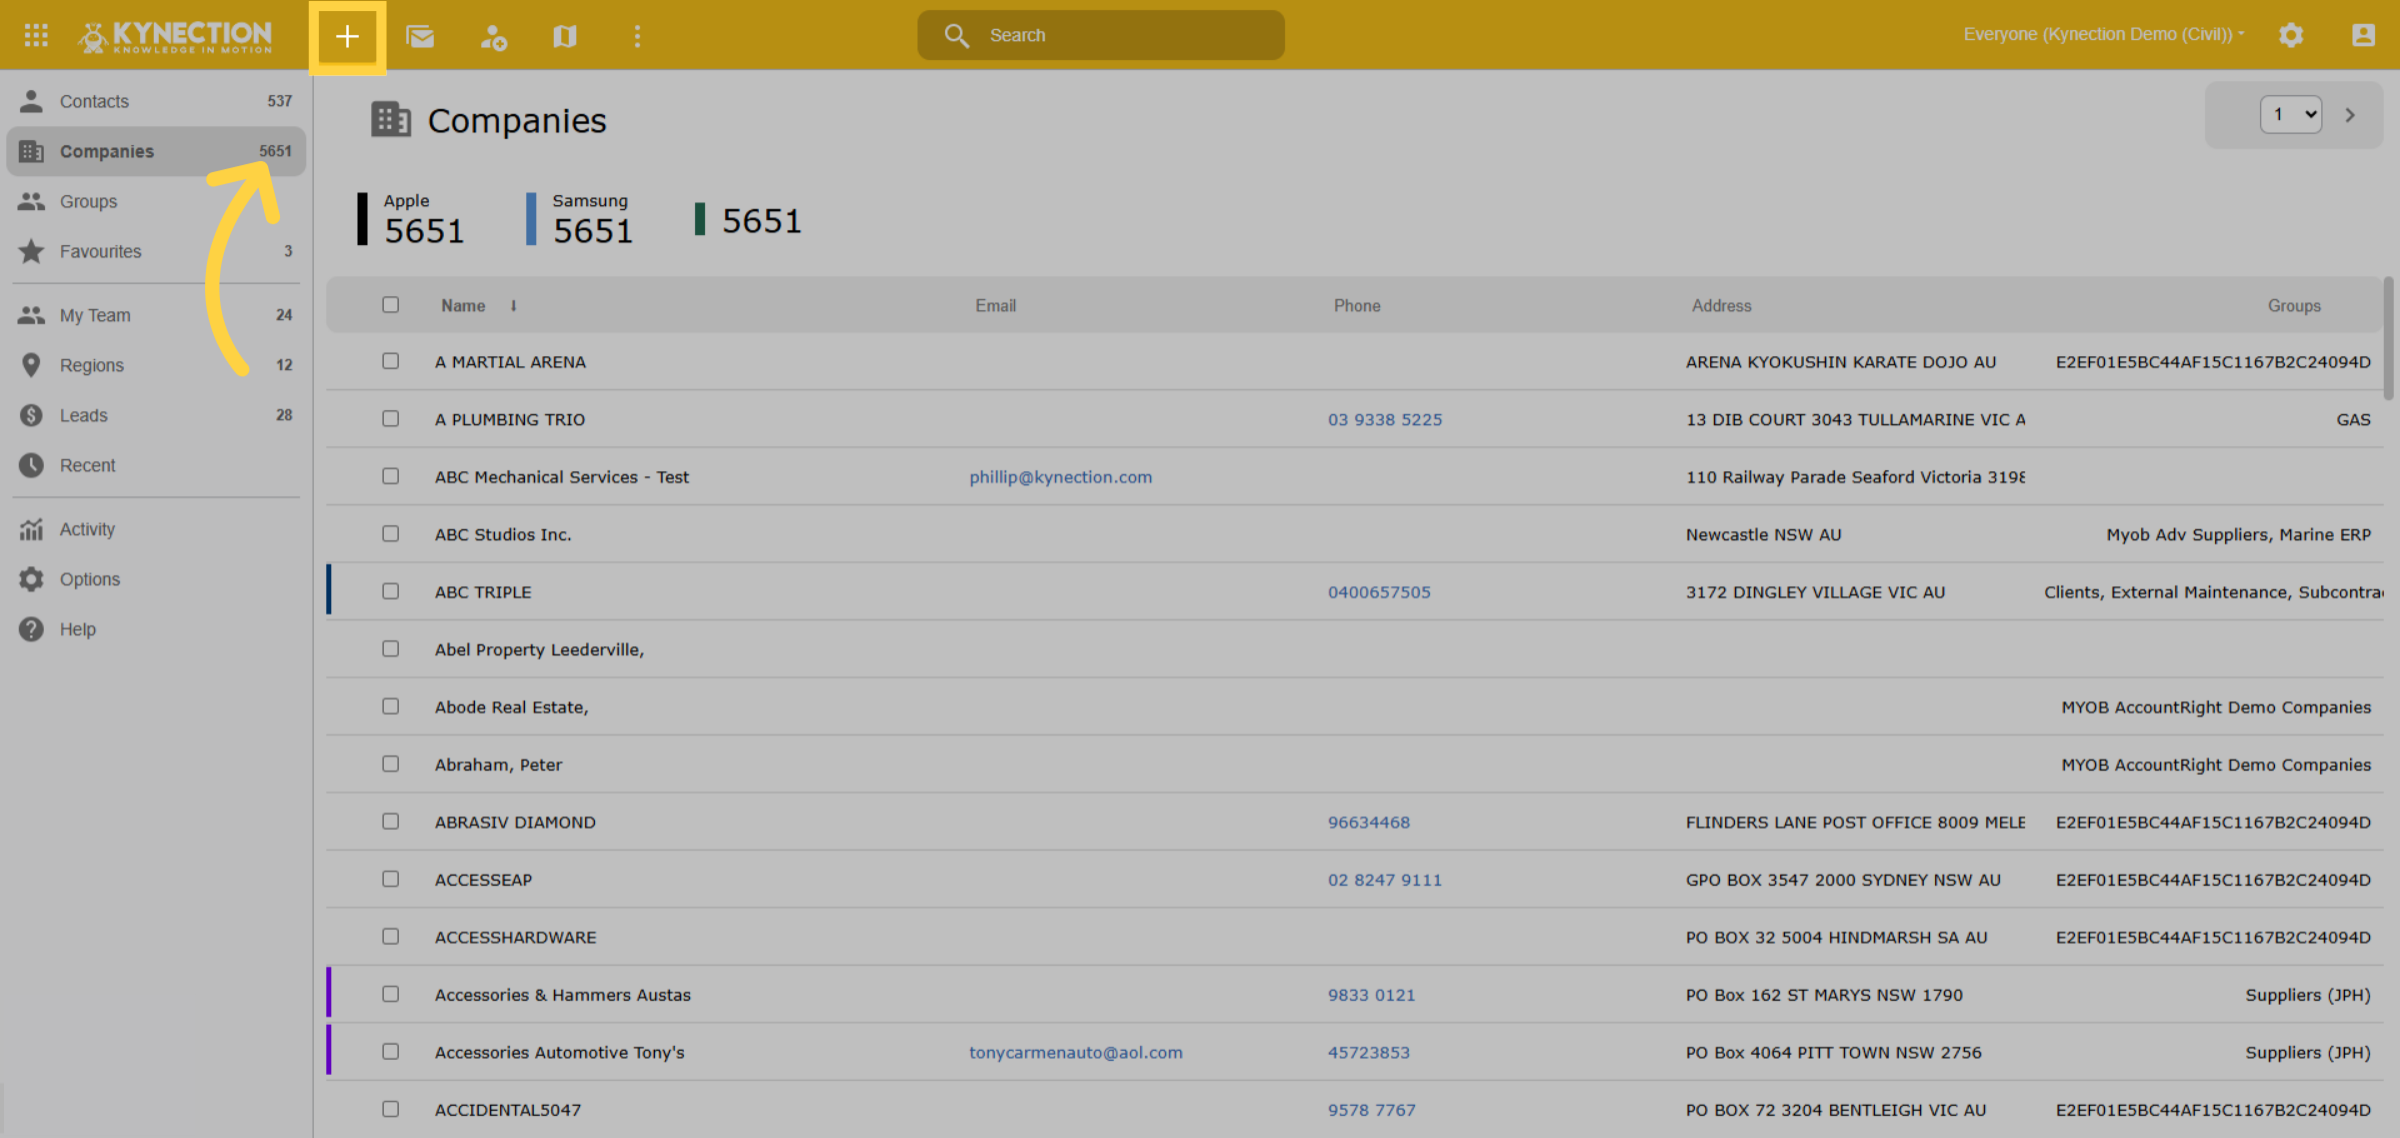
2. Create a Company
Select the plus icon to create a company.
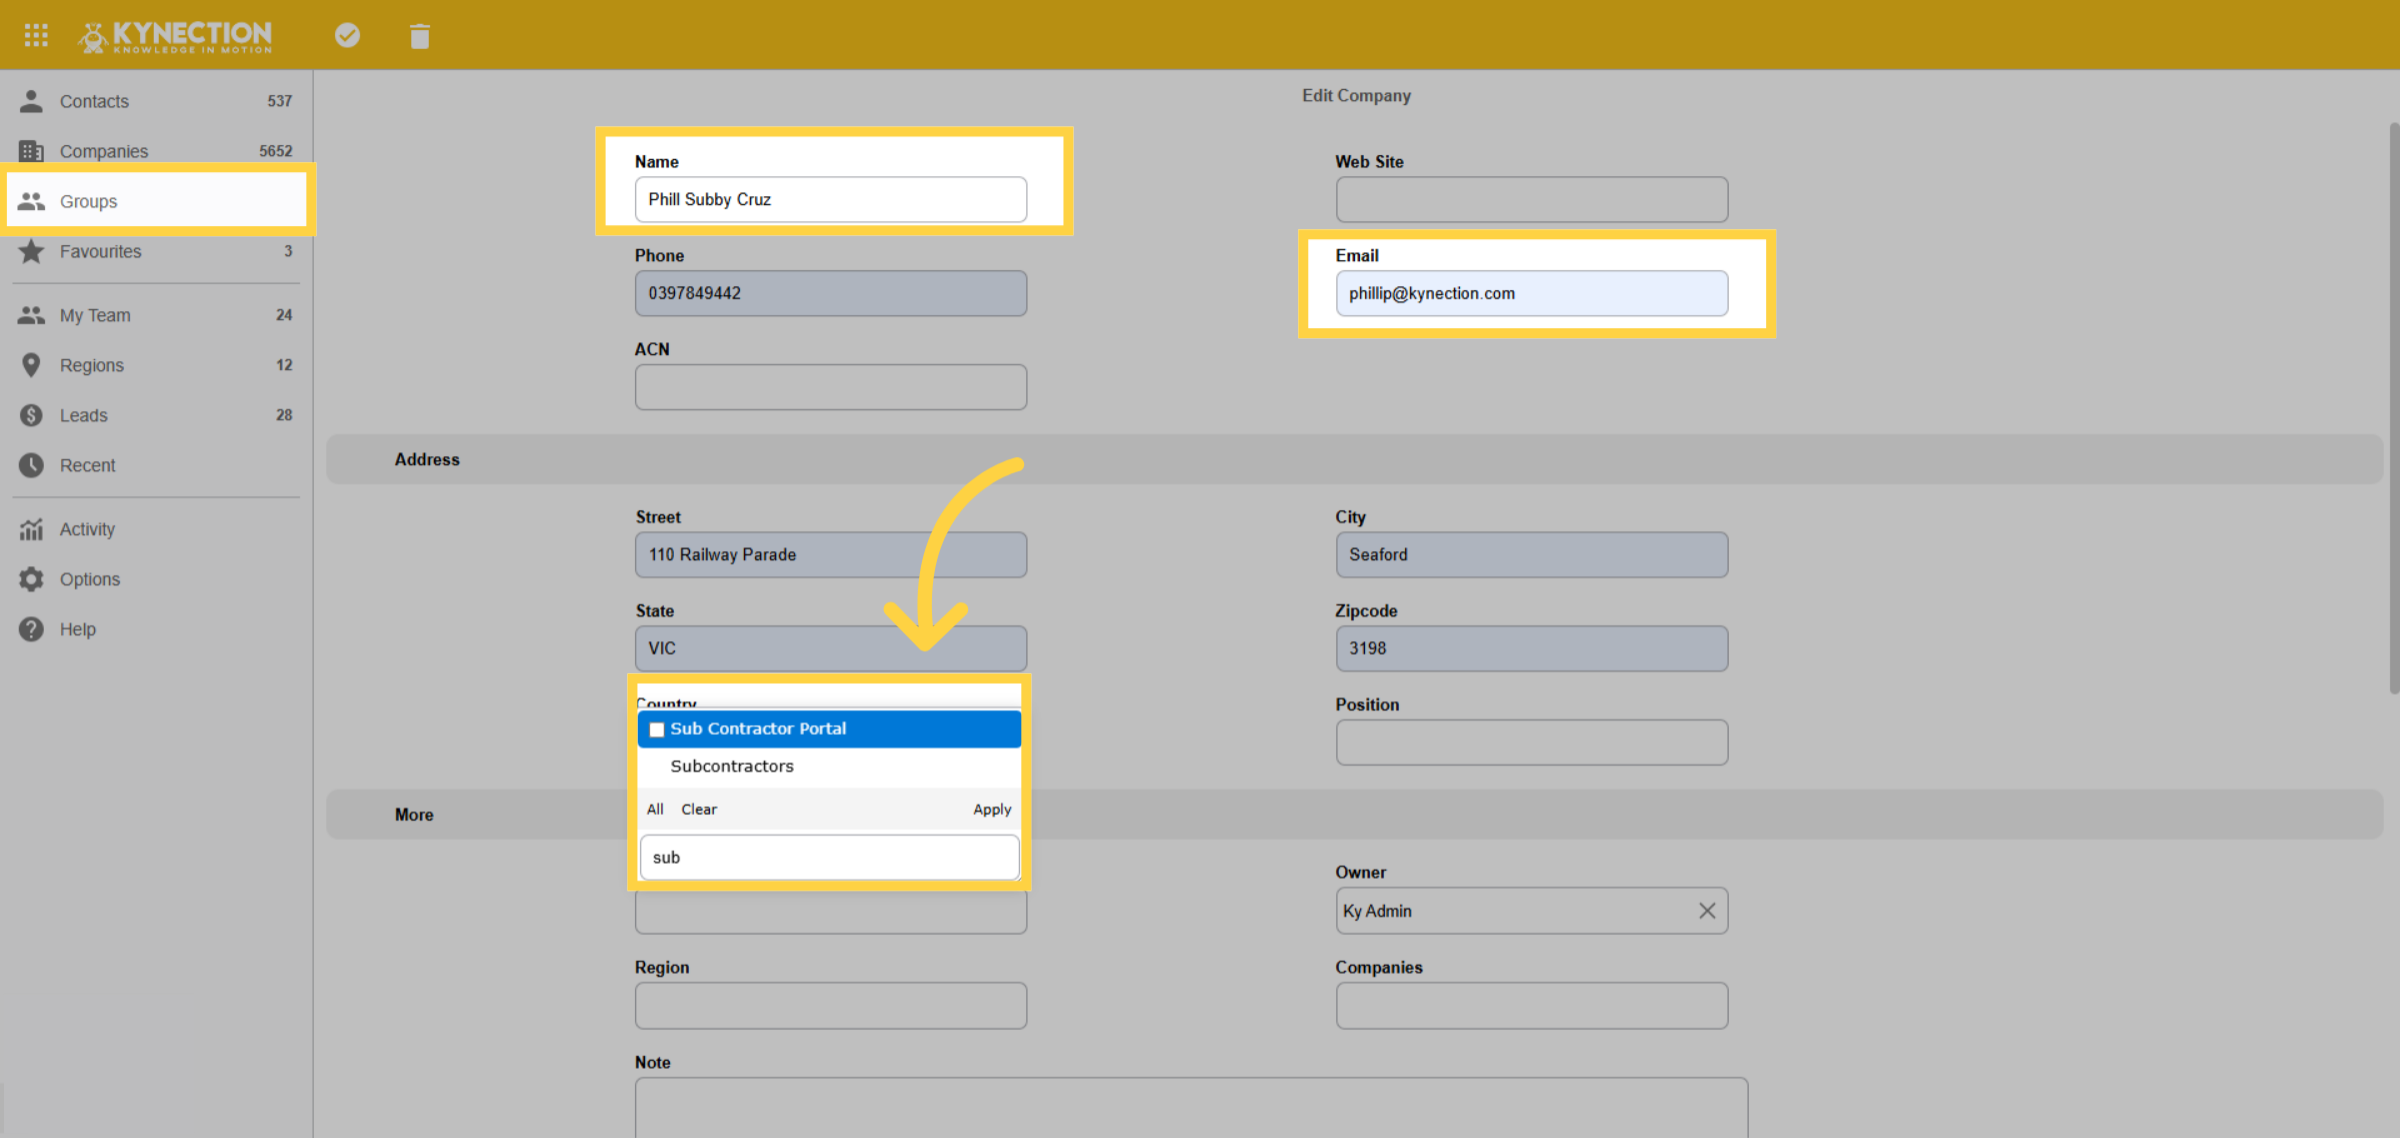
3. Open Sub Contractor Portal
Please complete the required details, ensuring the email field is accurate and the subcontractor group is selected. If no group exists, navigate to the Groups section in the left pane to create one.
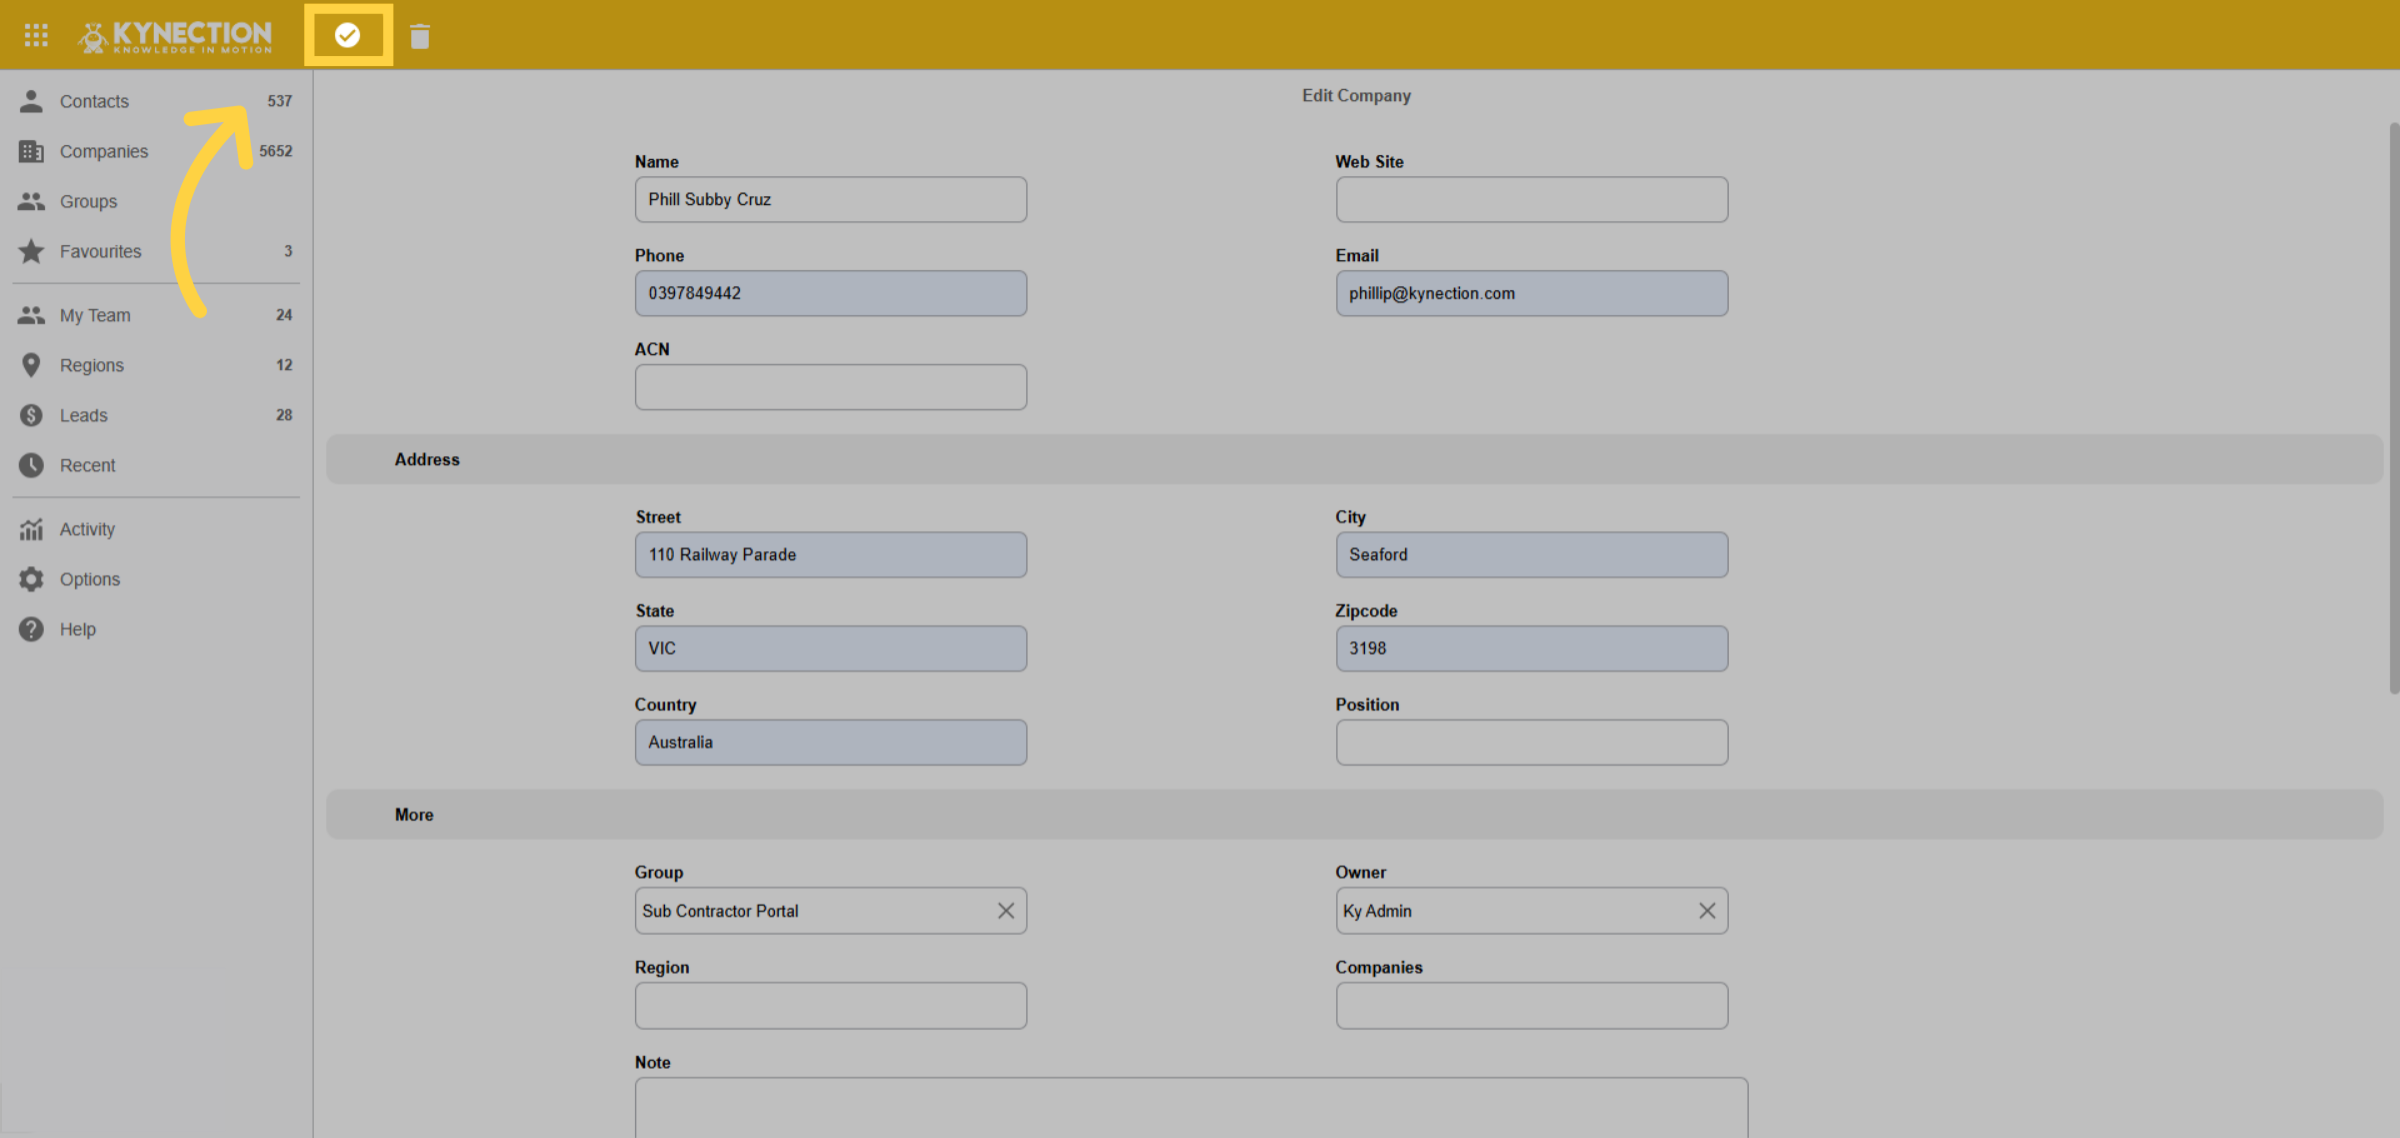
4. Save Company
Select the tickbox to save
5. Create Contacts
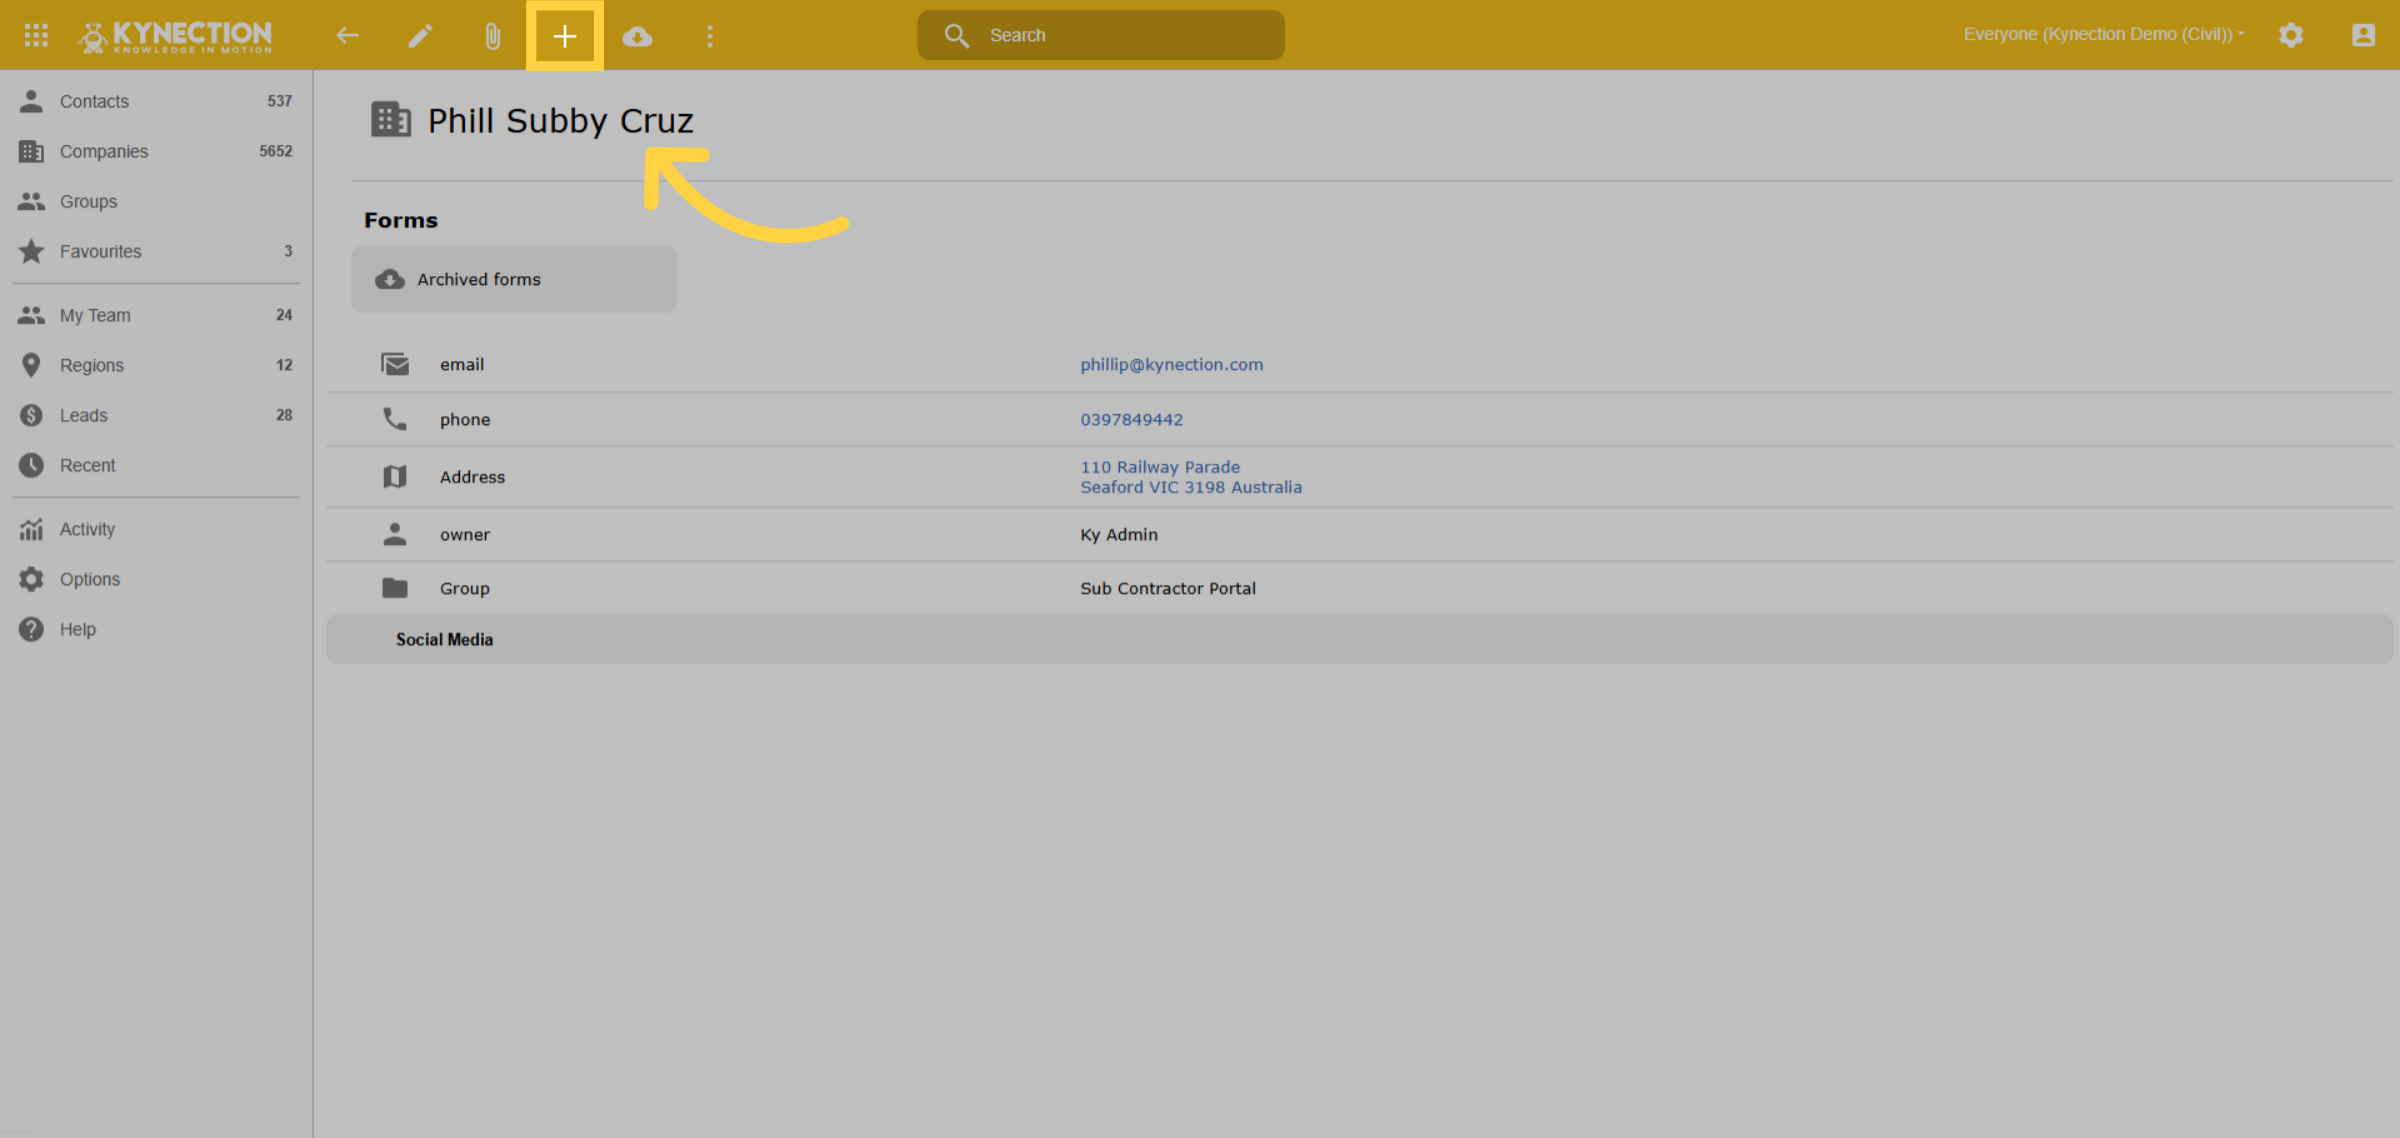
Once the company is created, be sure to add your Subby Contacts by clicking the plus icon.
6. Save Contact
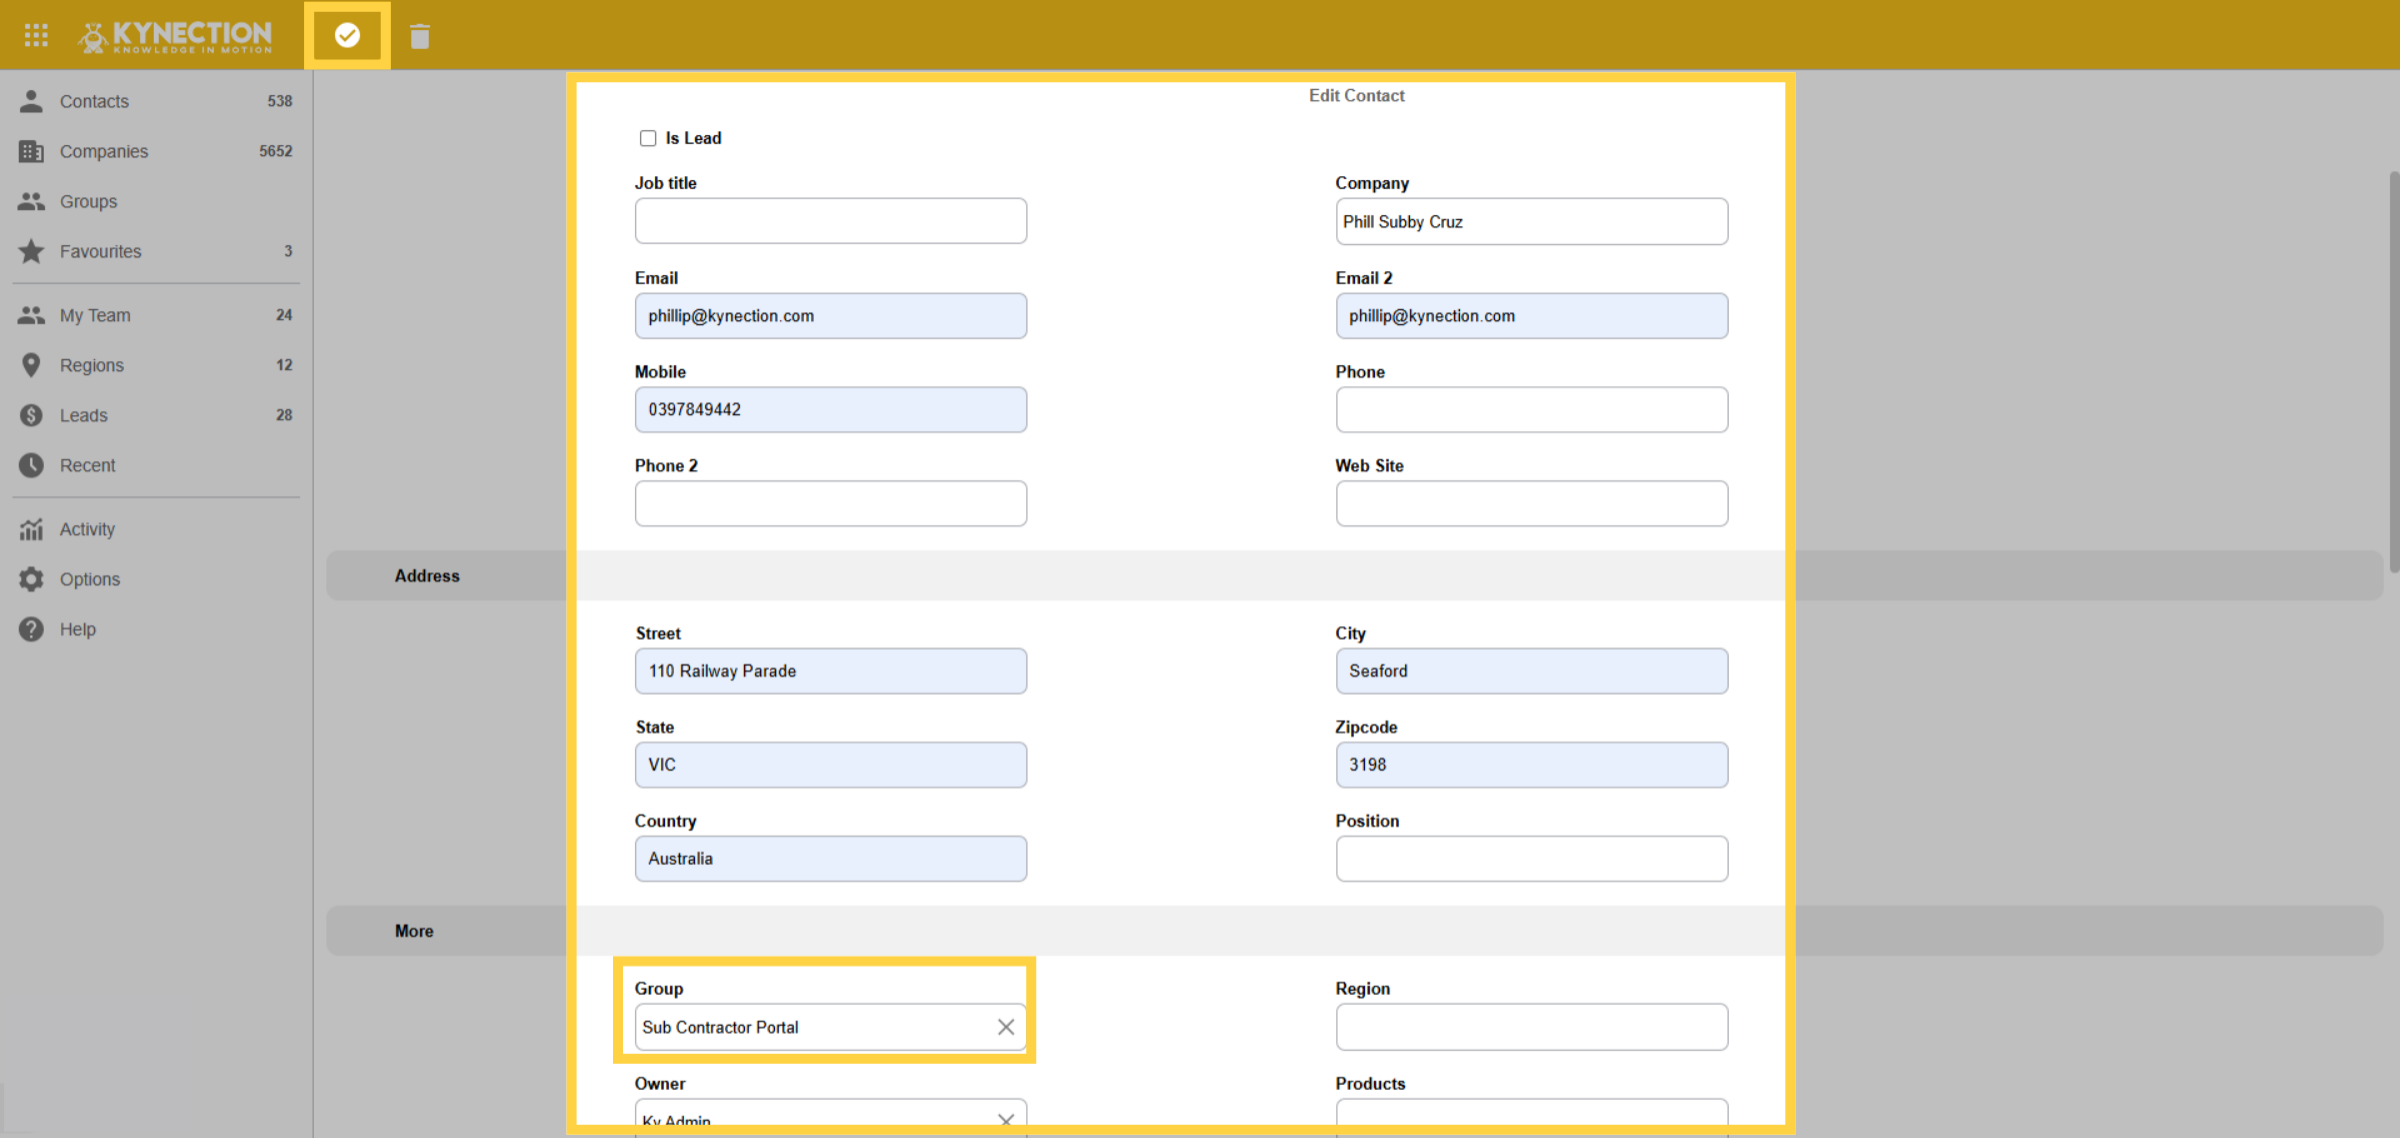
Ensure you fill in the details for the contacts, similar to the company creation process, and select the subcontractor group again. Select the tick box to save
7. Select Portal Section
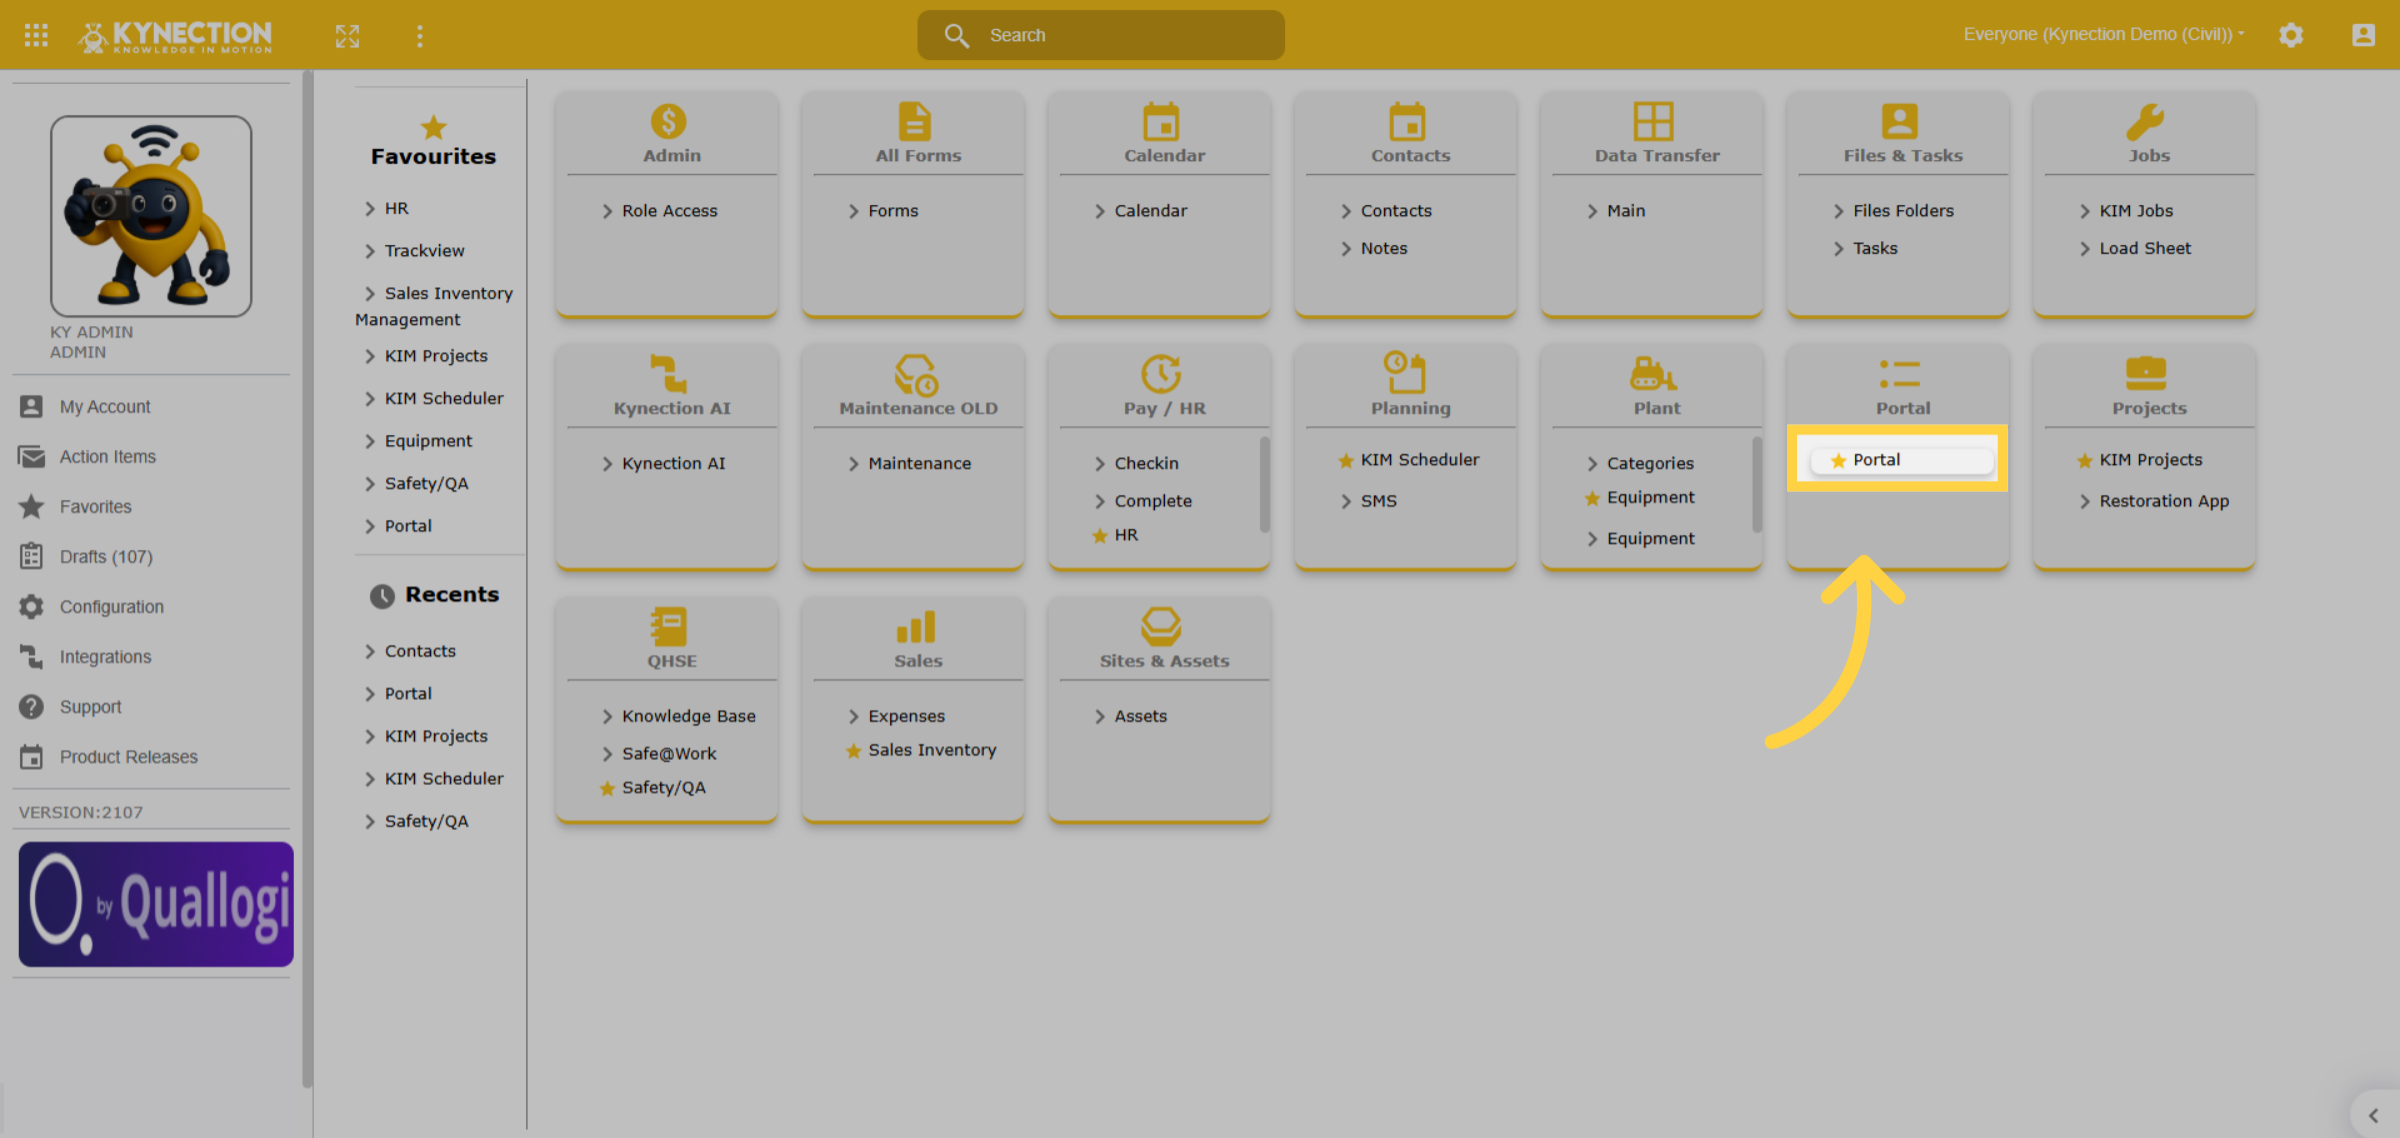
From the home dashboard, access the portal section.
8. Portdal Dashboard
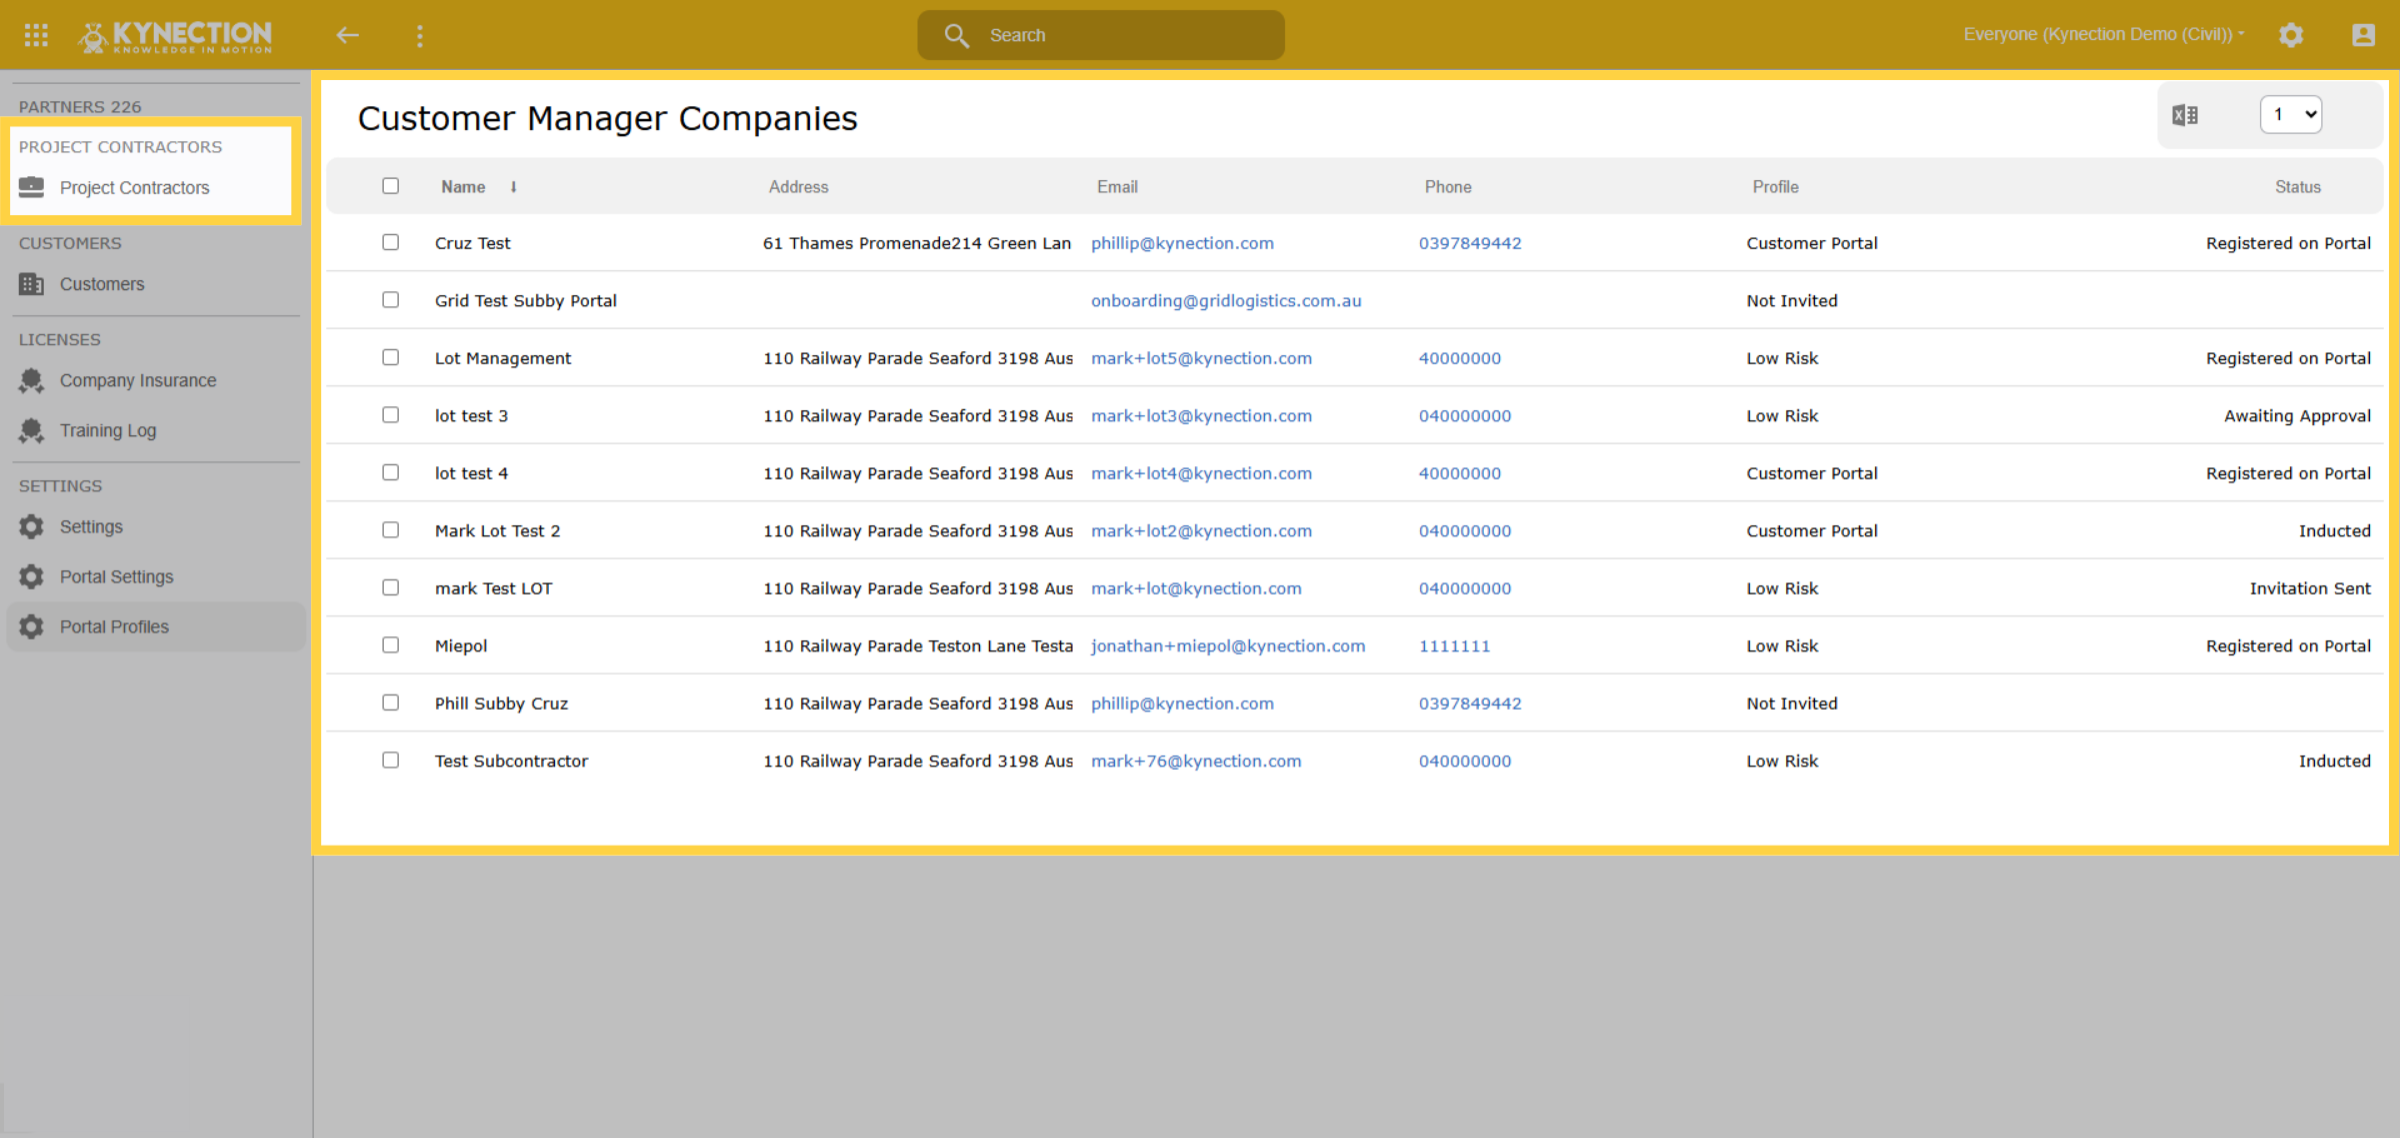
In the Project Contractors tab, you can view all the subcontractor companies you have invited to the portal.
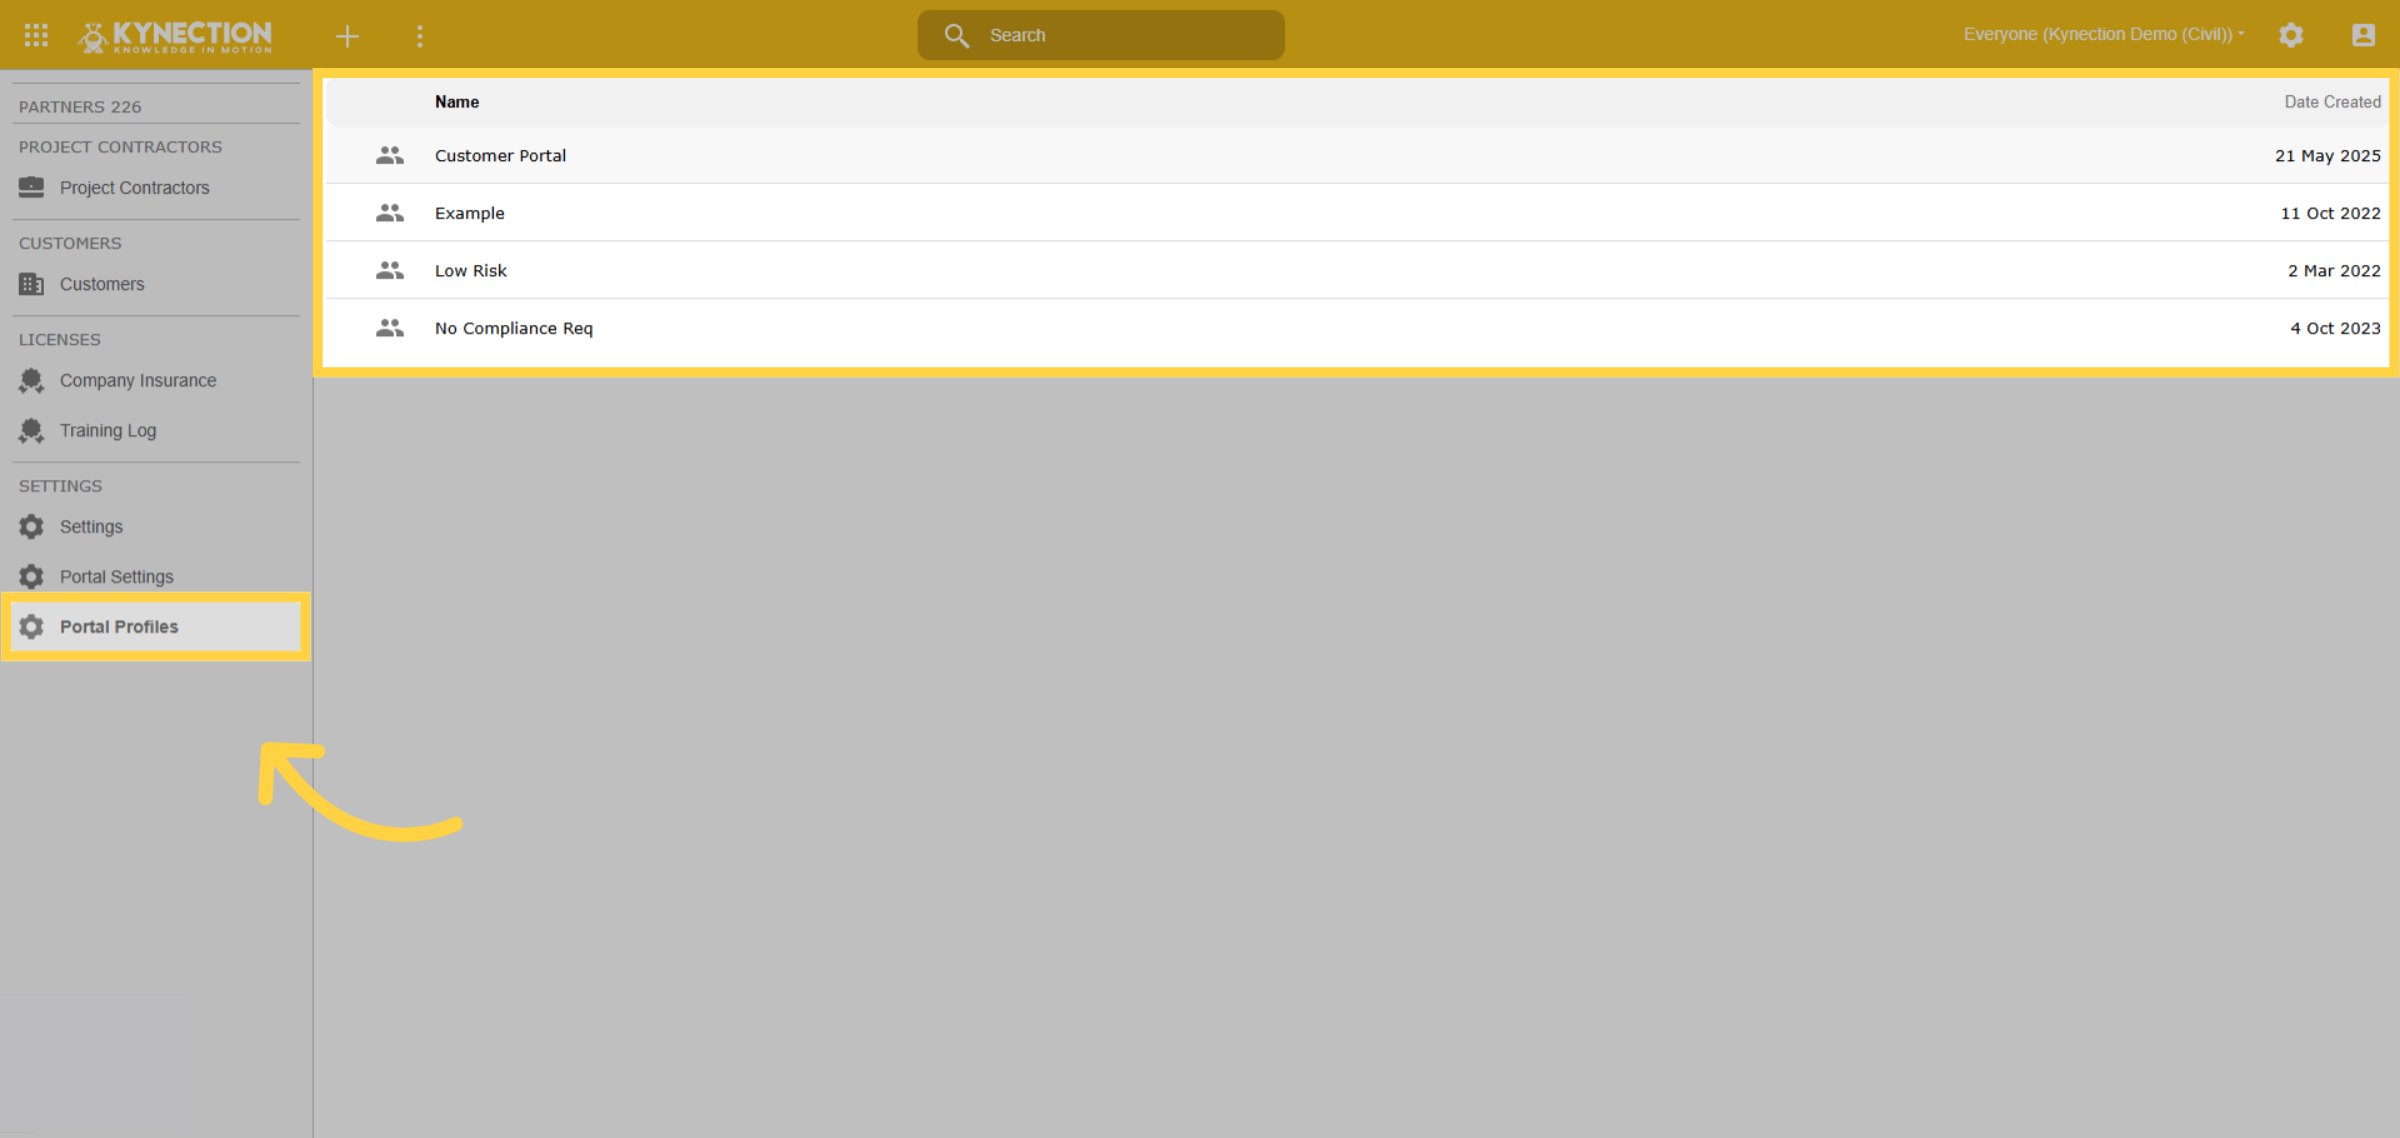
9. Portal Profiles
In the portal profiles, you can create, edit, and delete your profiles. Let's explore one as an example.
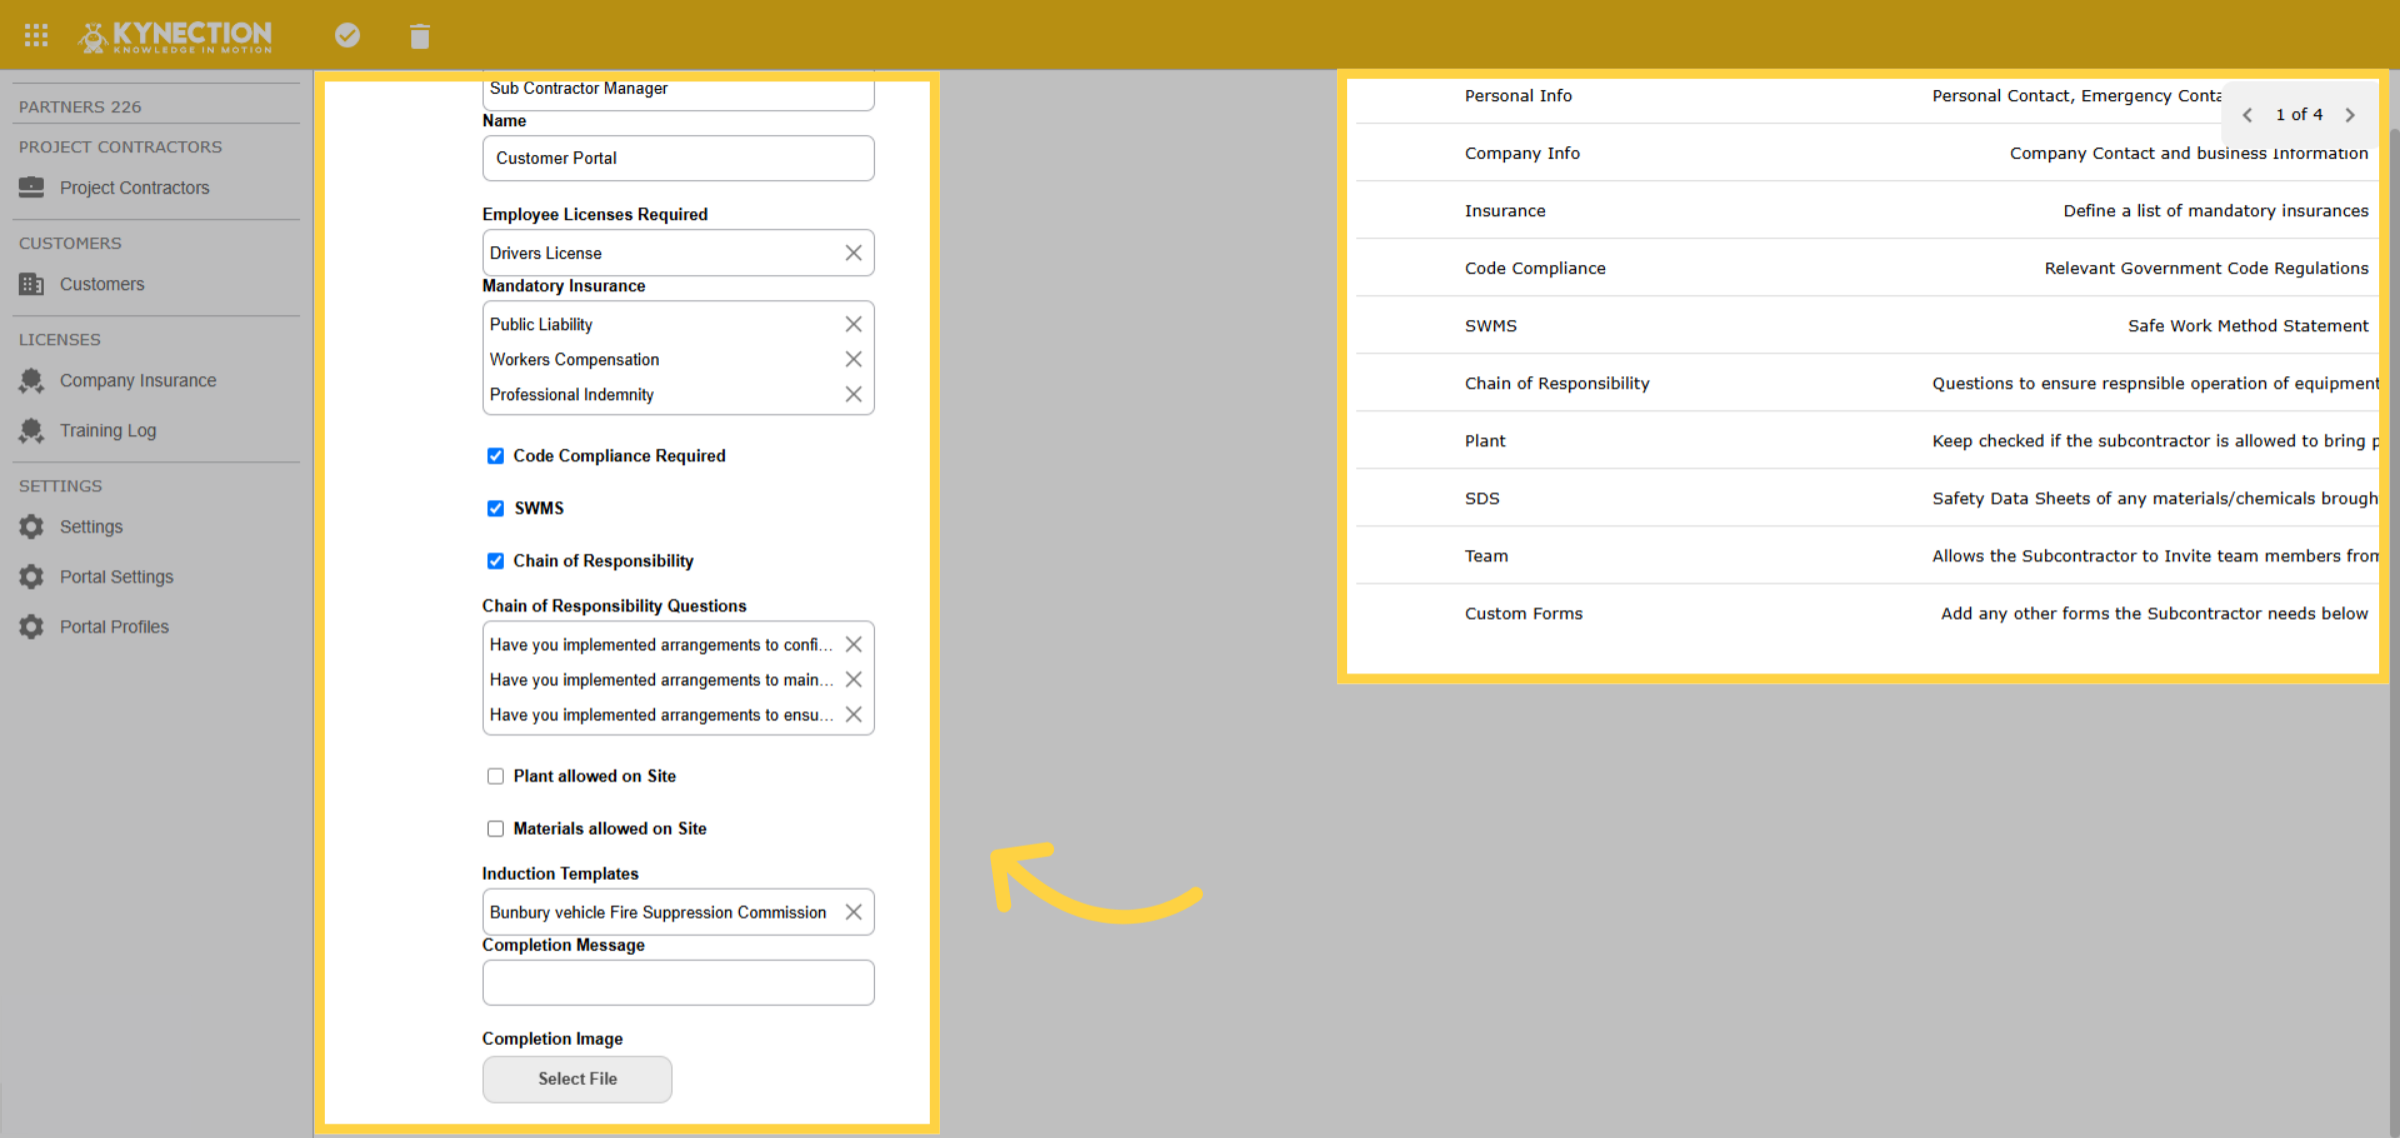
10. Profile Creation
During the Profile Creation process, there are several fields for your subcontractor to complete. These include the required licenses, mandatory insurances, code of conduct, Safe Work Method Statements, chain of responsibility questionnaire, and options to capture planned materials and usage.
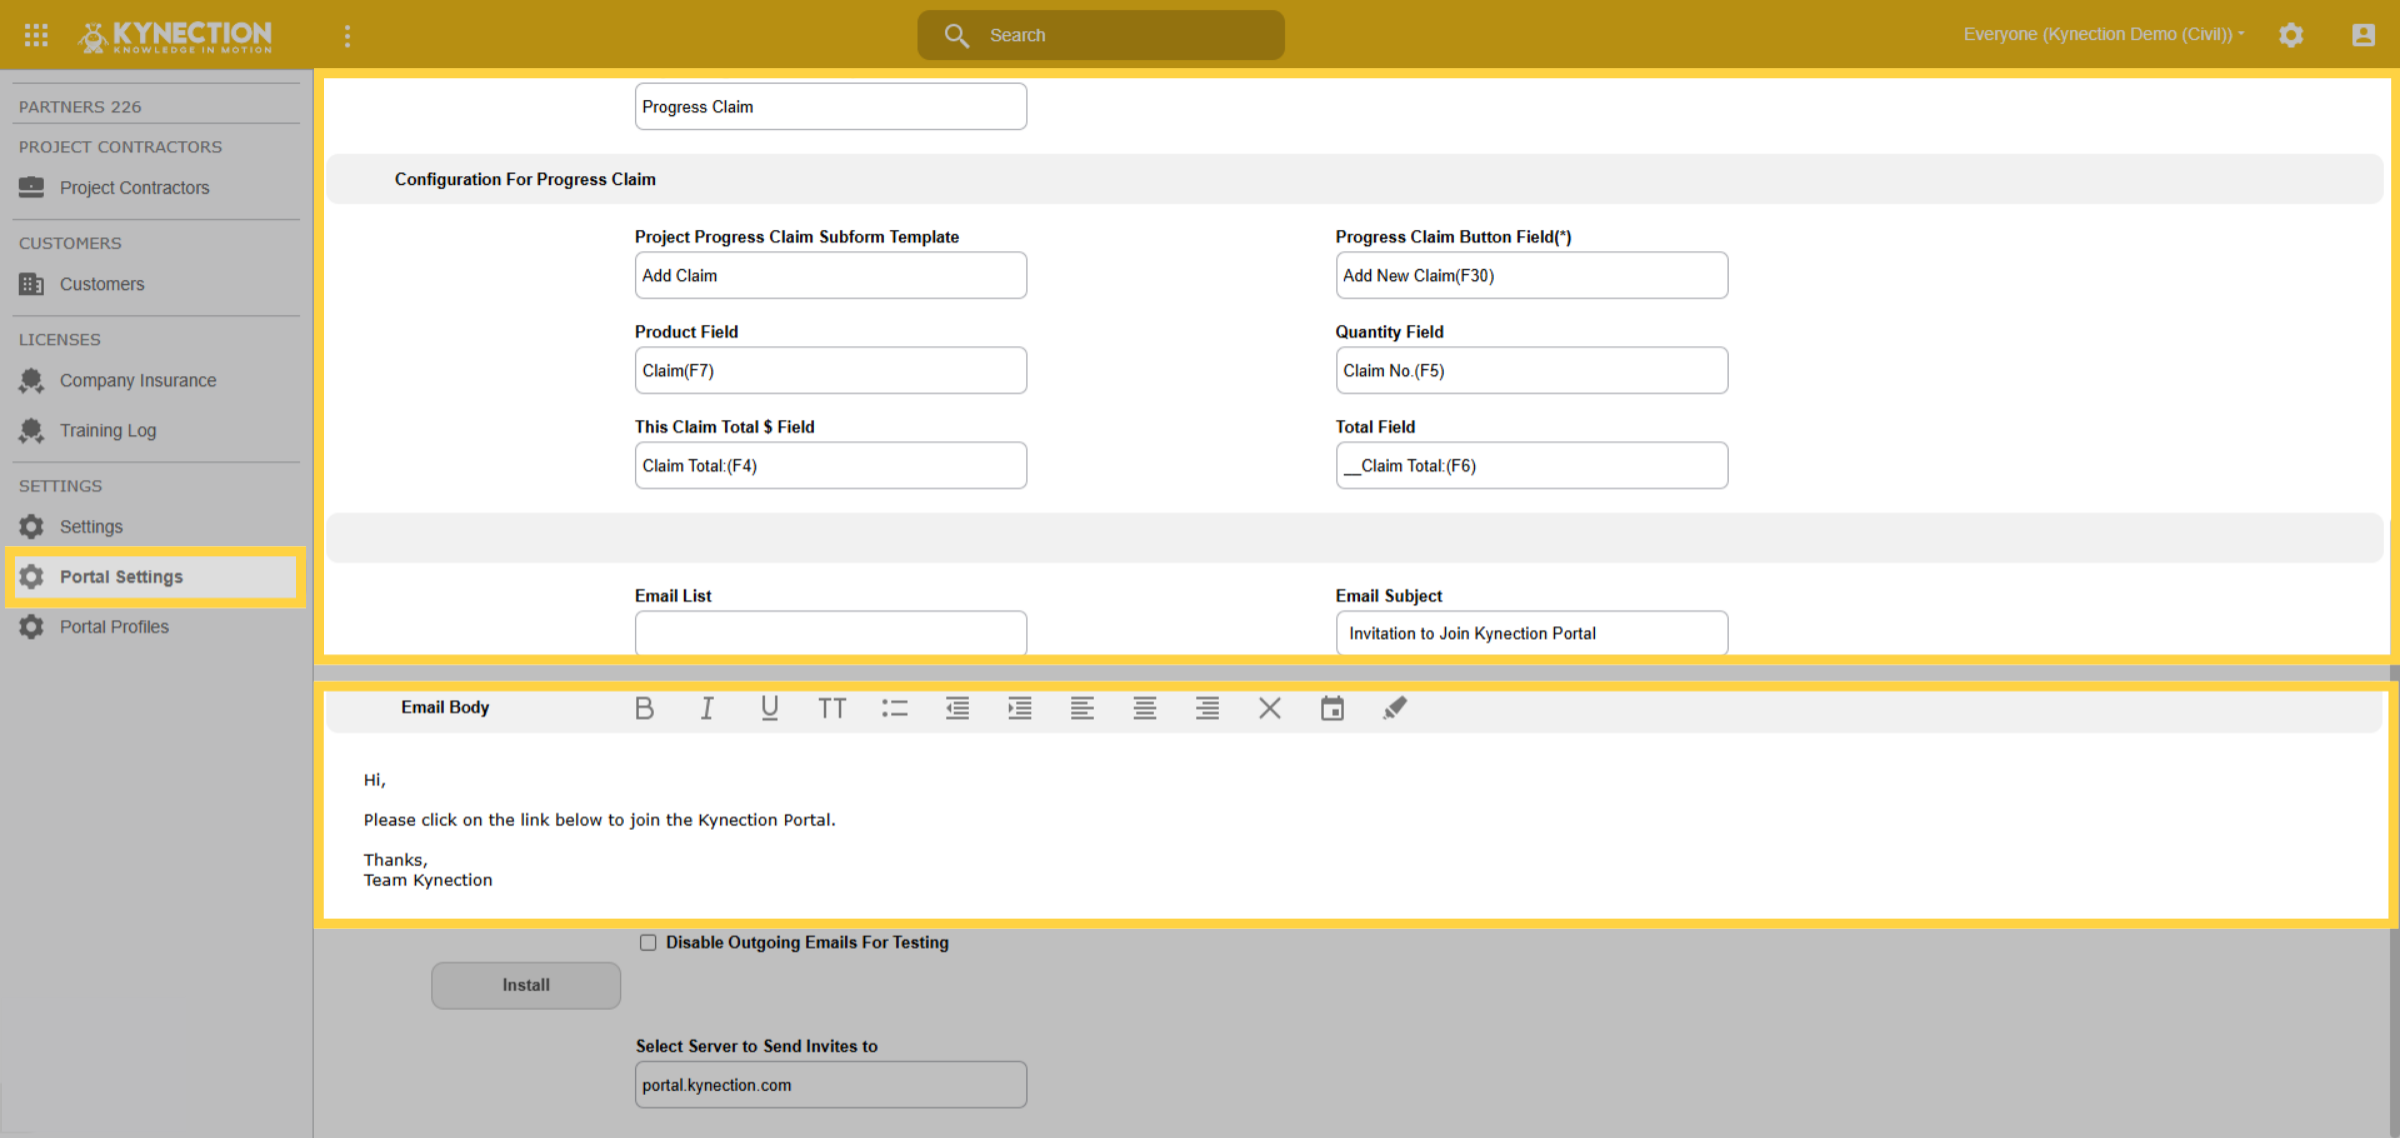
11. Portal Settings
In the Portal Settings tab, you can select the license forms, view the portal token, and set up the parameters for progress claims. Additionally, remember to provide the email body message that will be sent to subcontractors when they are invited to join the portal.
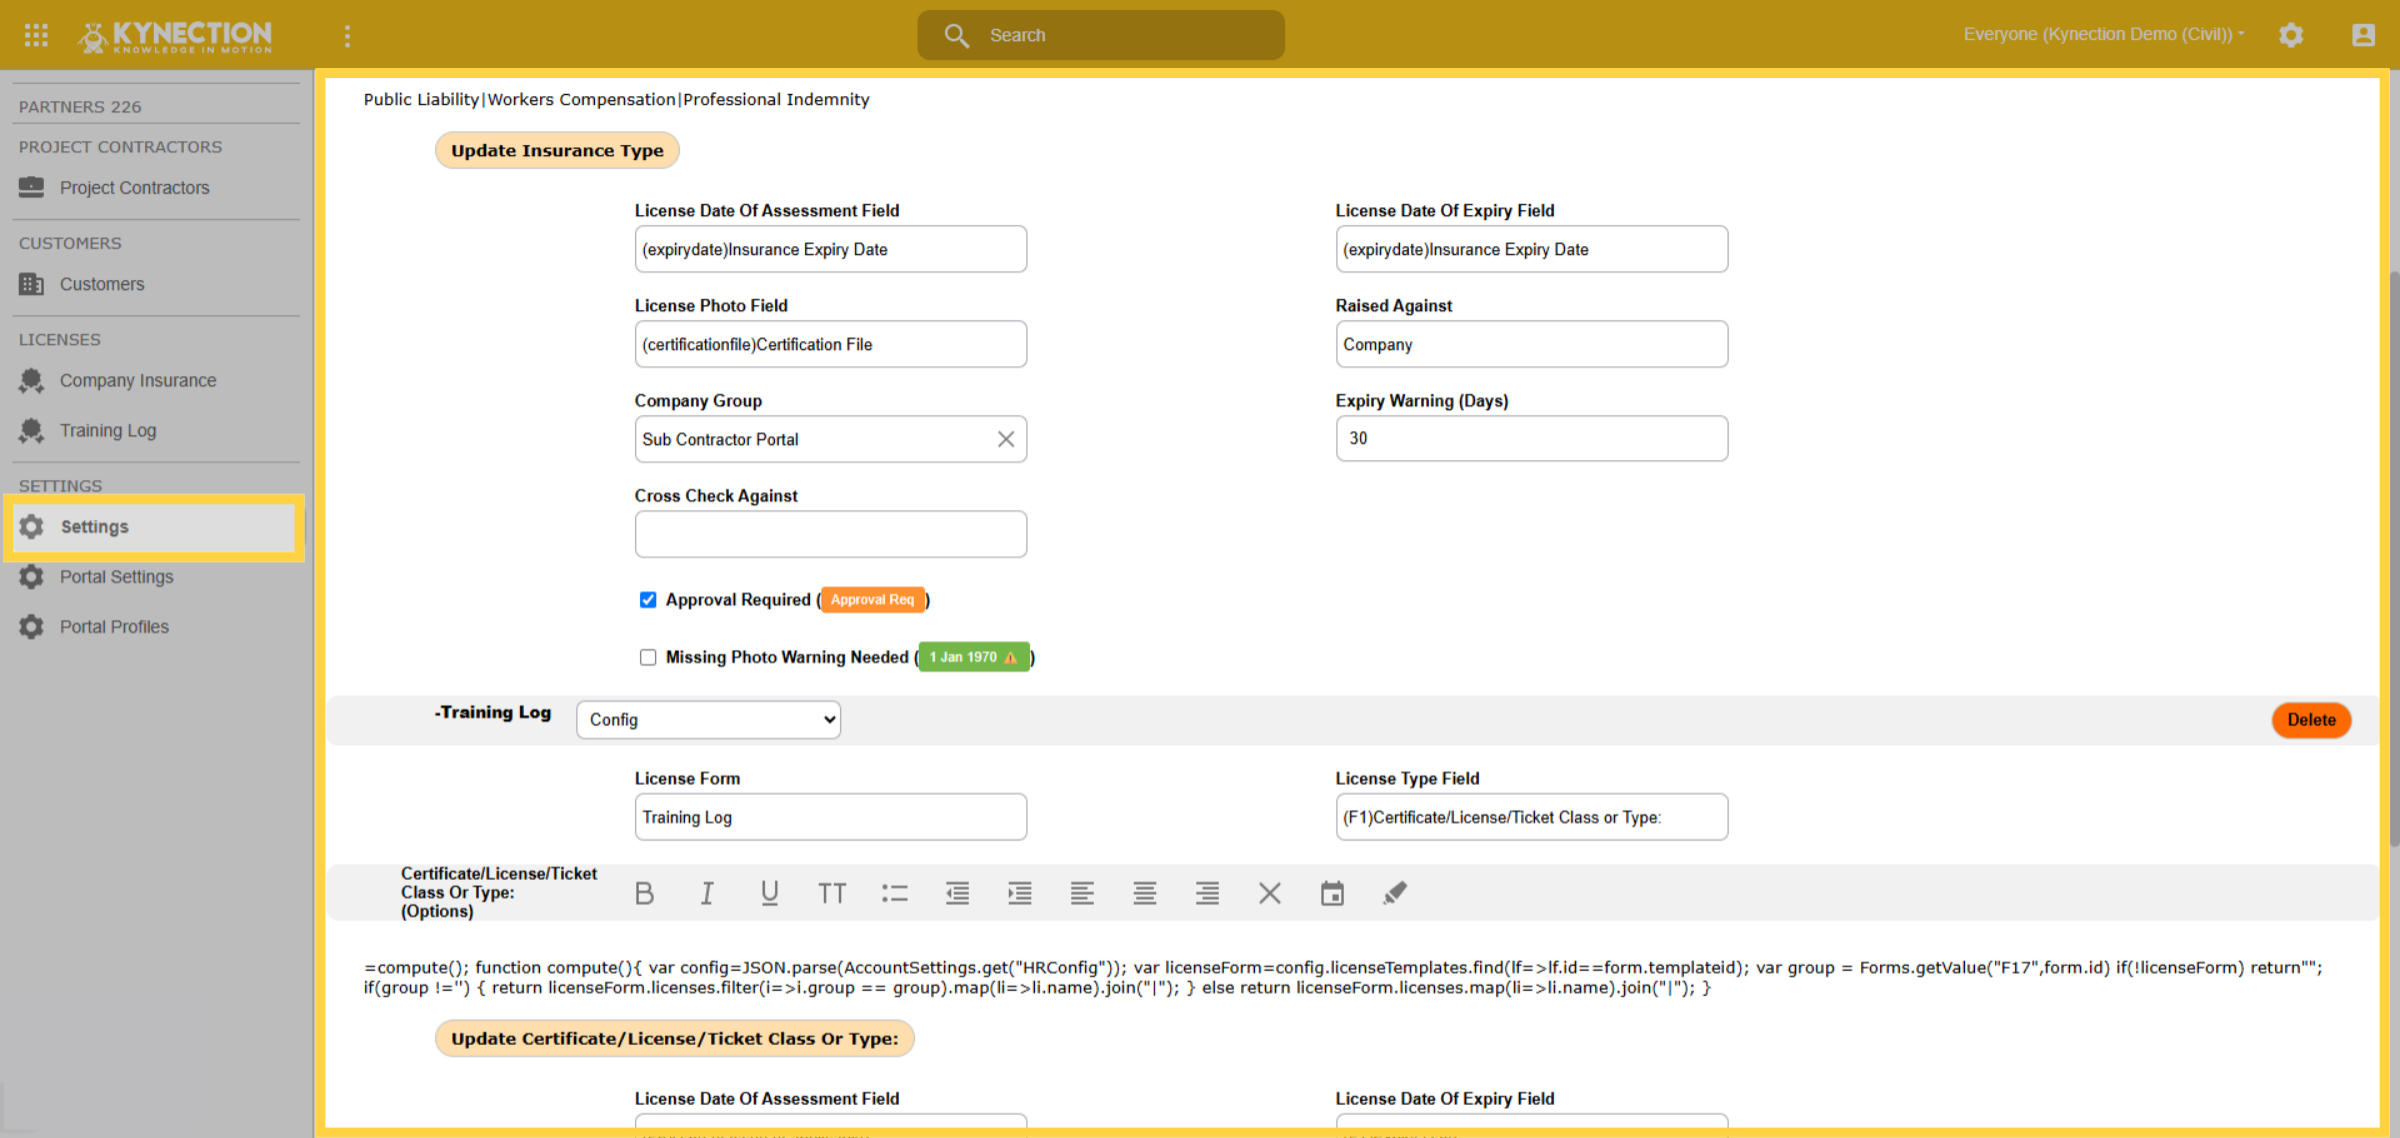
12. Additional Settings
In the settings tab, you can upload all the forms that subcontractors need to complete. These forms will be created in the Forms module of Kynection.
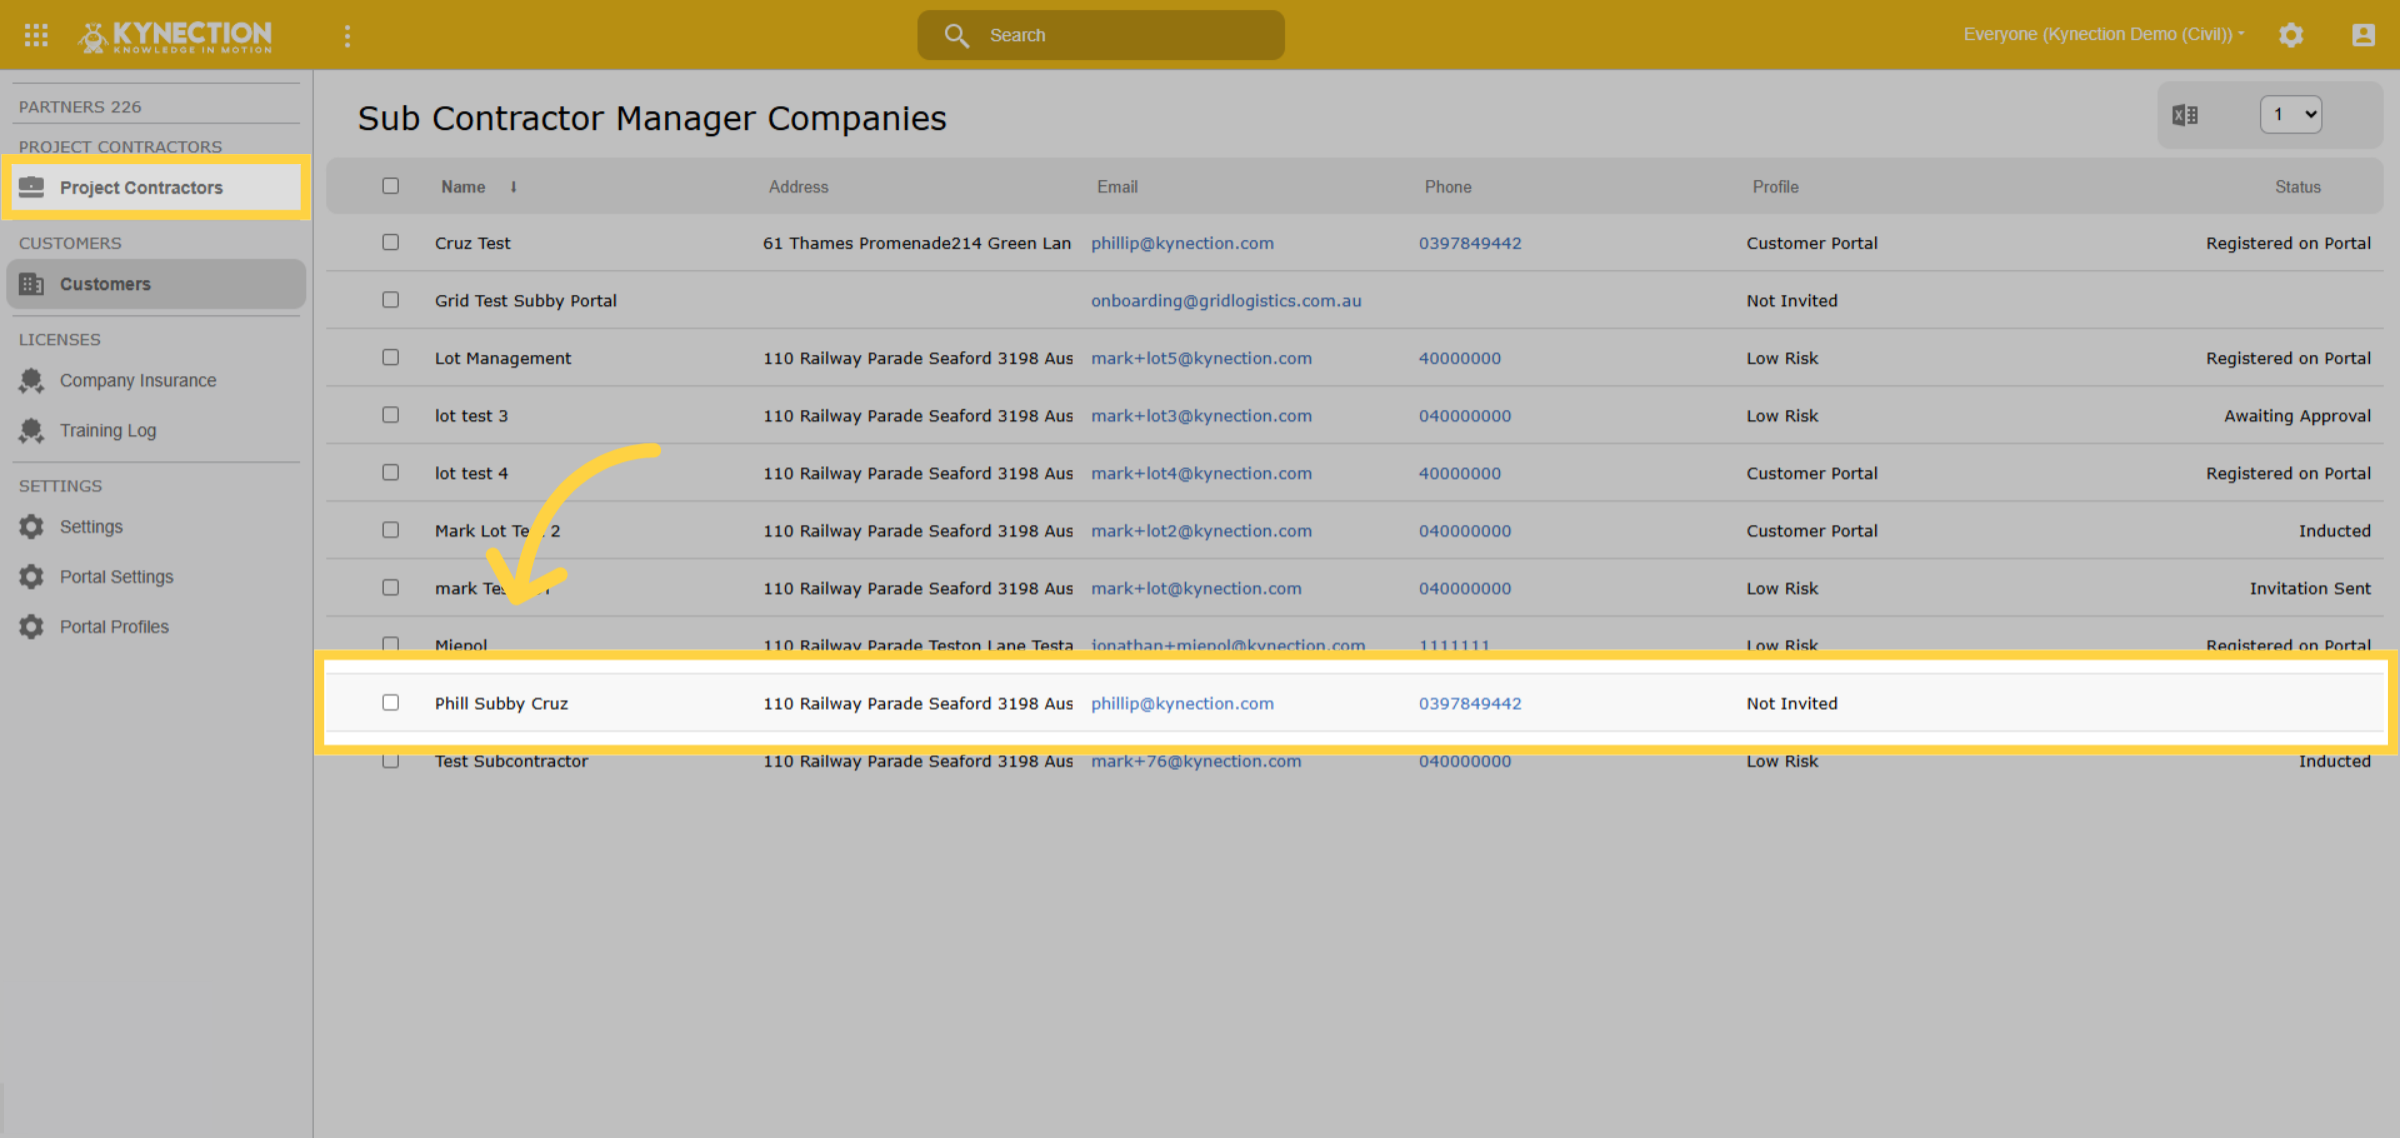
13. Select Subcontractor
Let's choose the newly created subcontractor company.
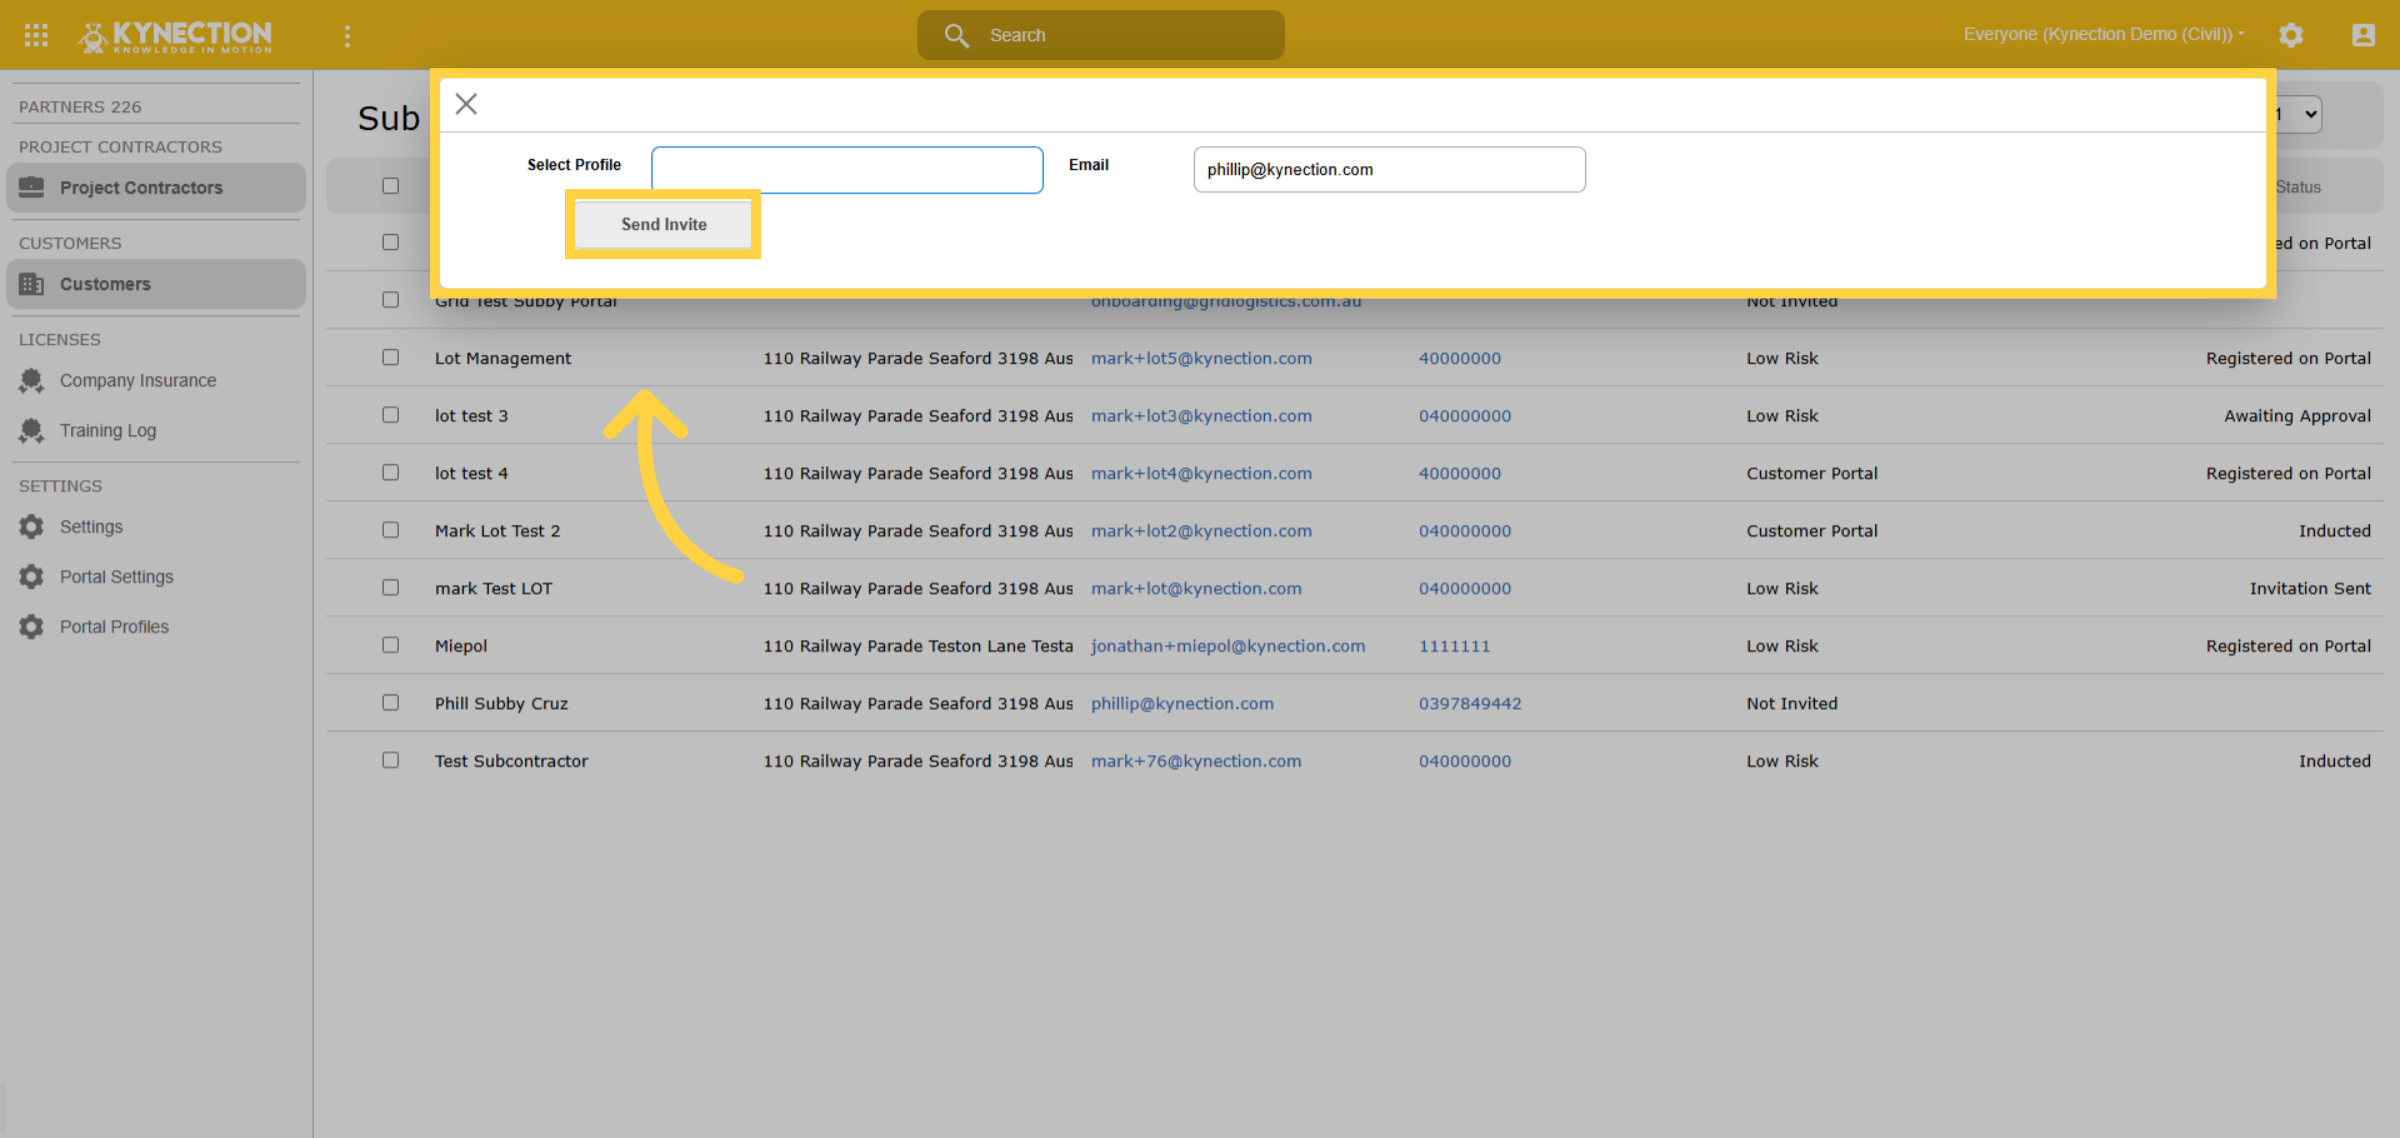
14. Send Invite
Choose the profile you want to send, enter the email, and click the send invite button.
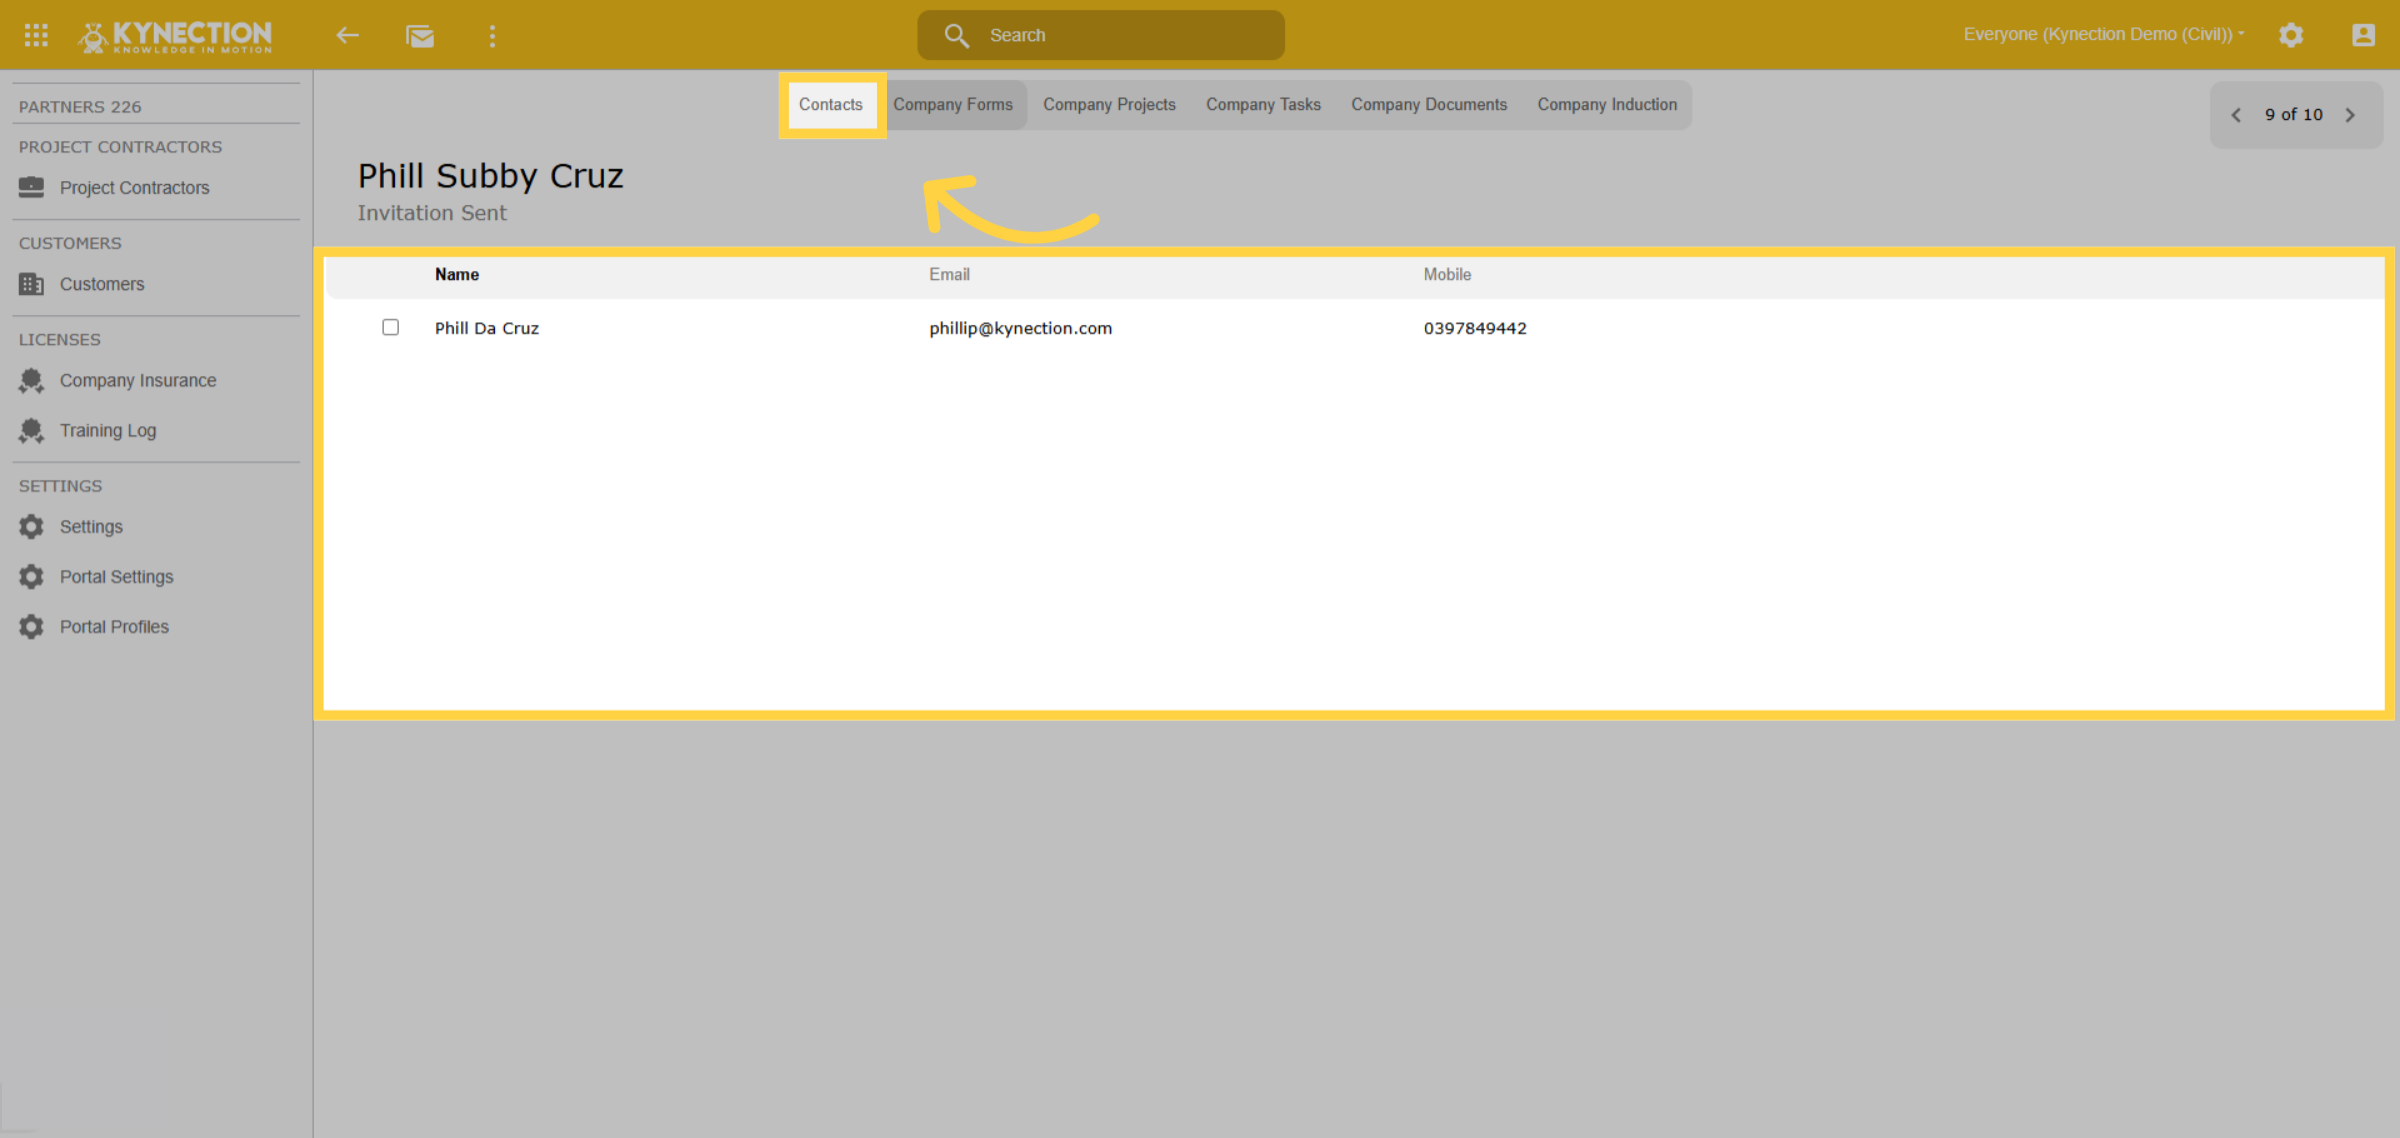
15. Subcontractor Dashboard
Within the selected subcontractor company, you'll find several tabs at the top, each containing important information about the company. Under the "Contacts" tab, you can view all contacts associated with that subcontractor.
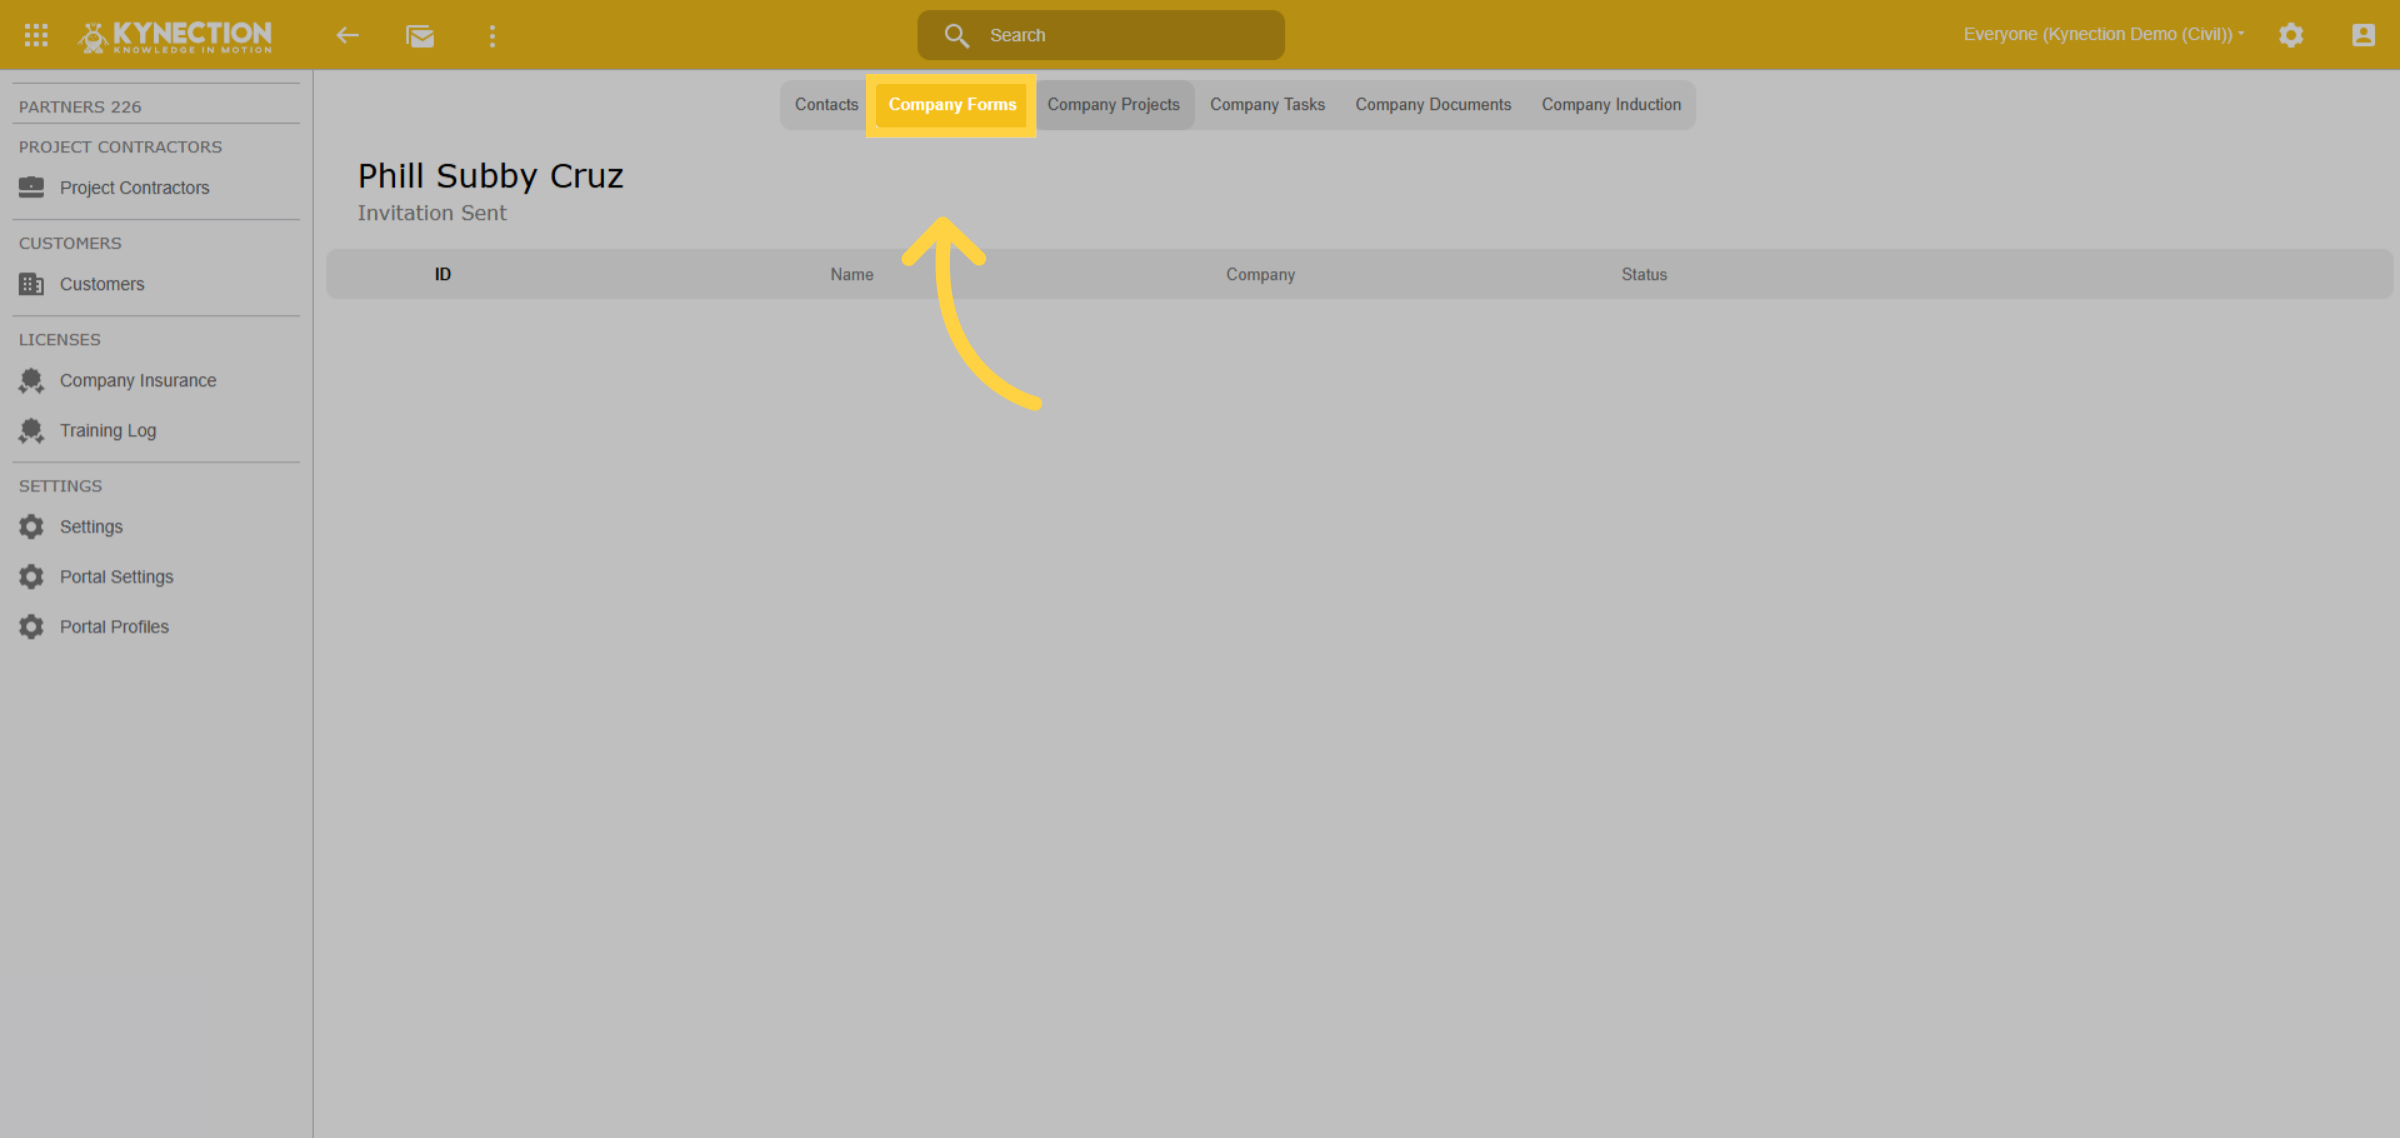
16. Company Forms
In the Company Forms tab, you can view all the insurance forms completed by the subcontractor.
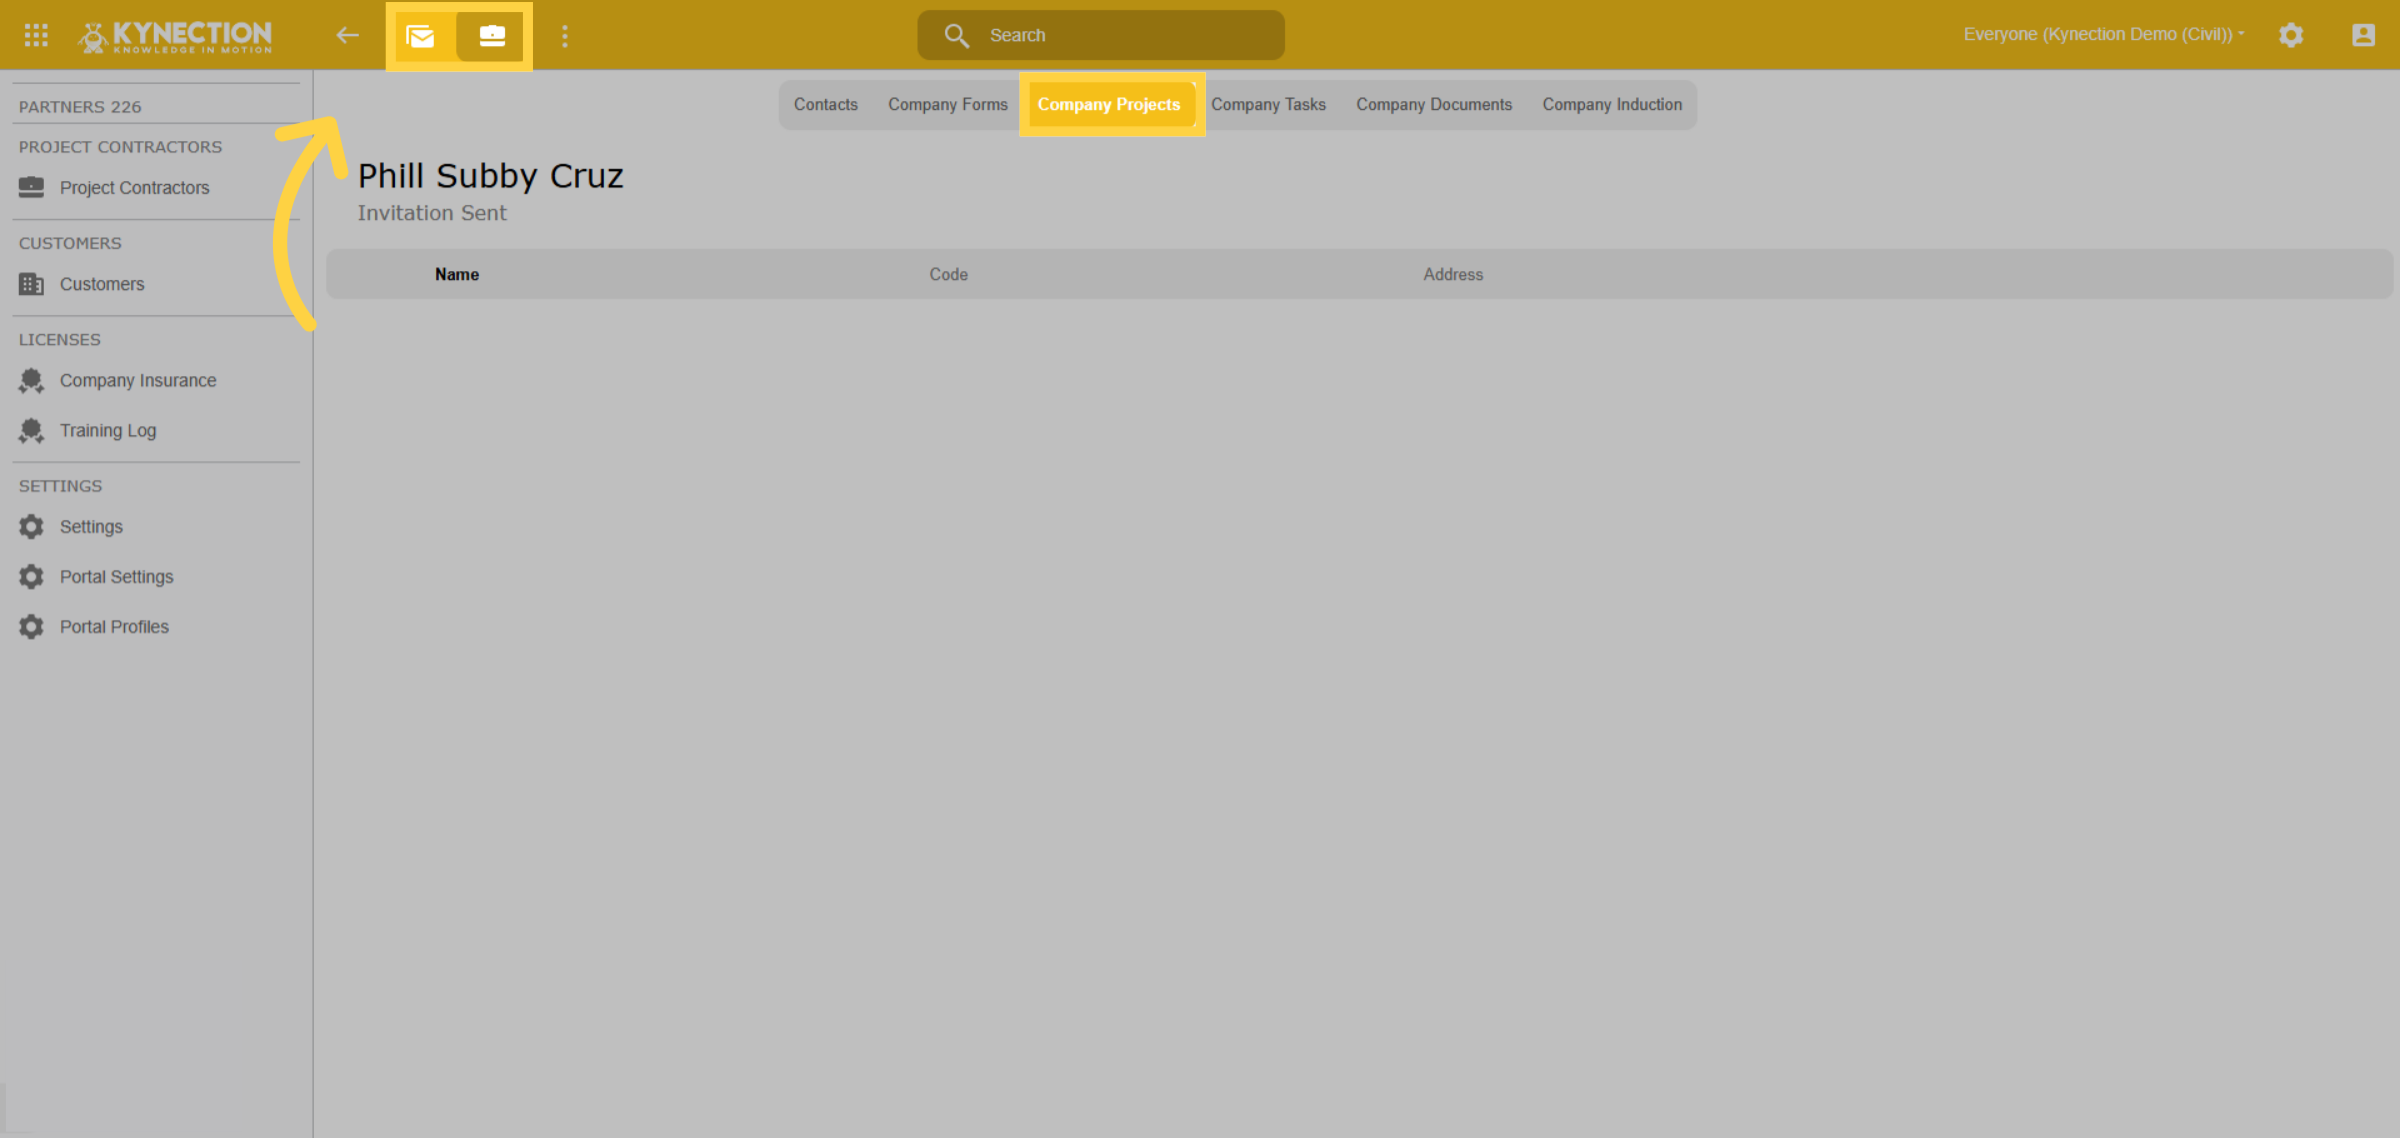
17. Project Tab
In the Projects tab, you'll find all projects to which you have invited the subcontractor. Select the briefcase icon to invite the subcontractor to a project, and the envelope icon to resend the invitation.
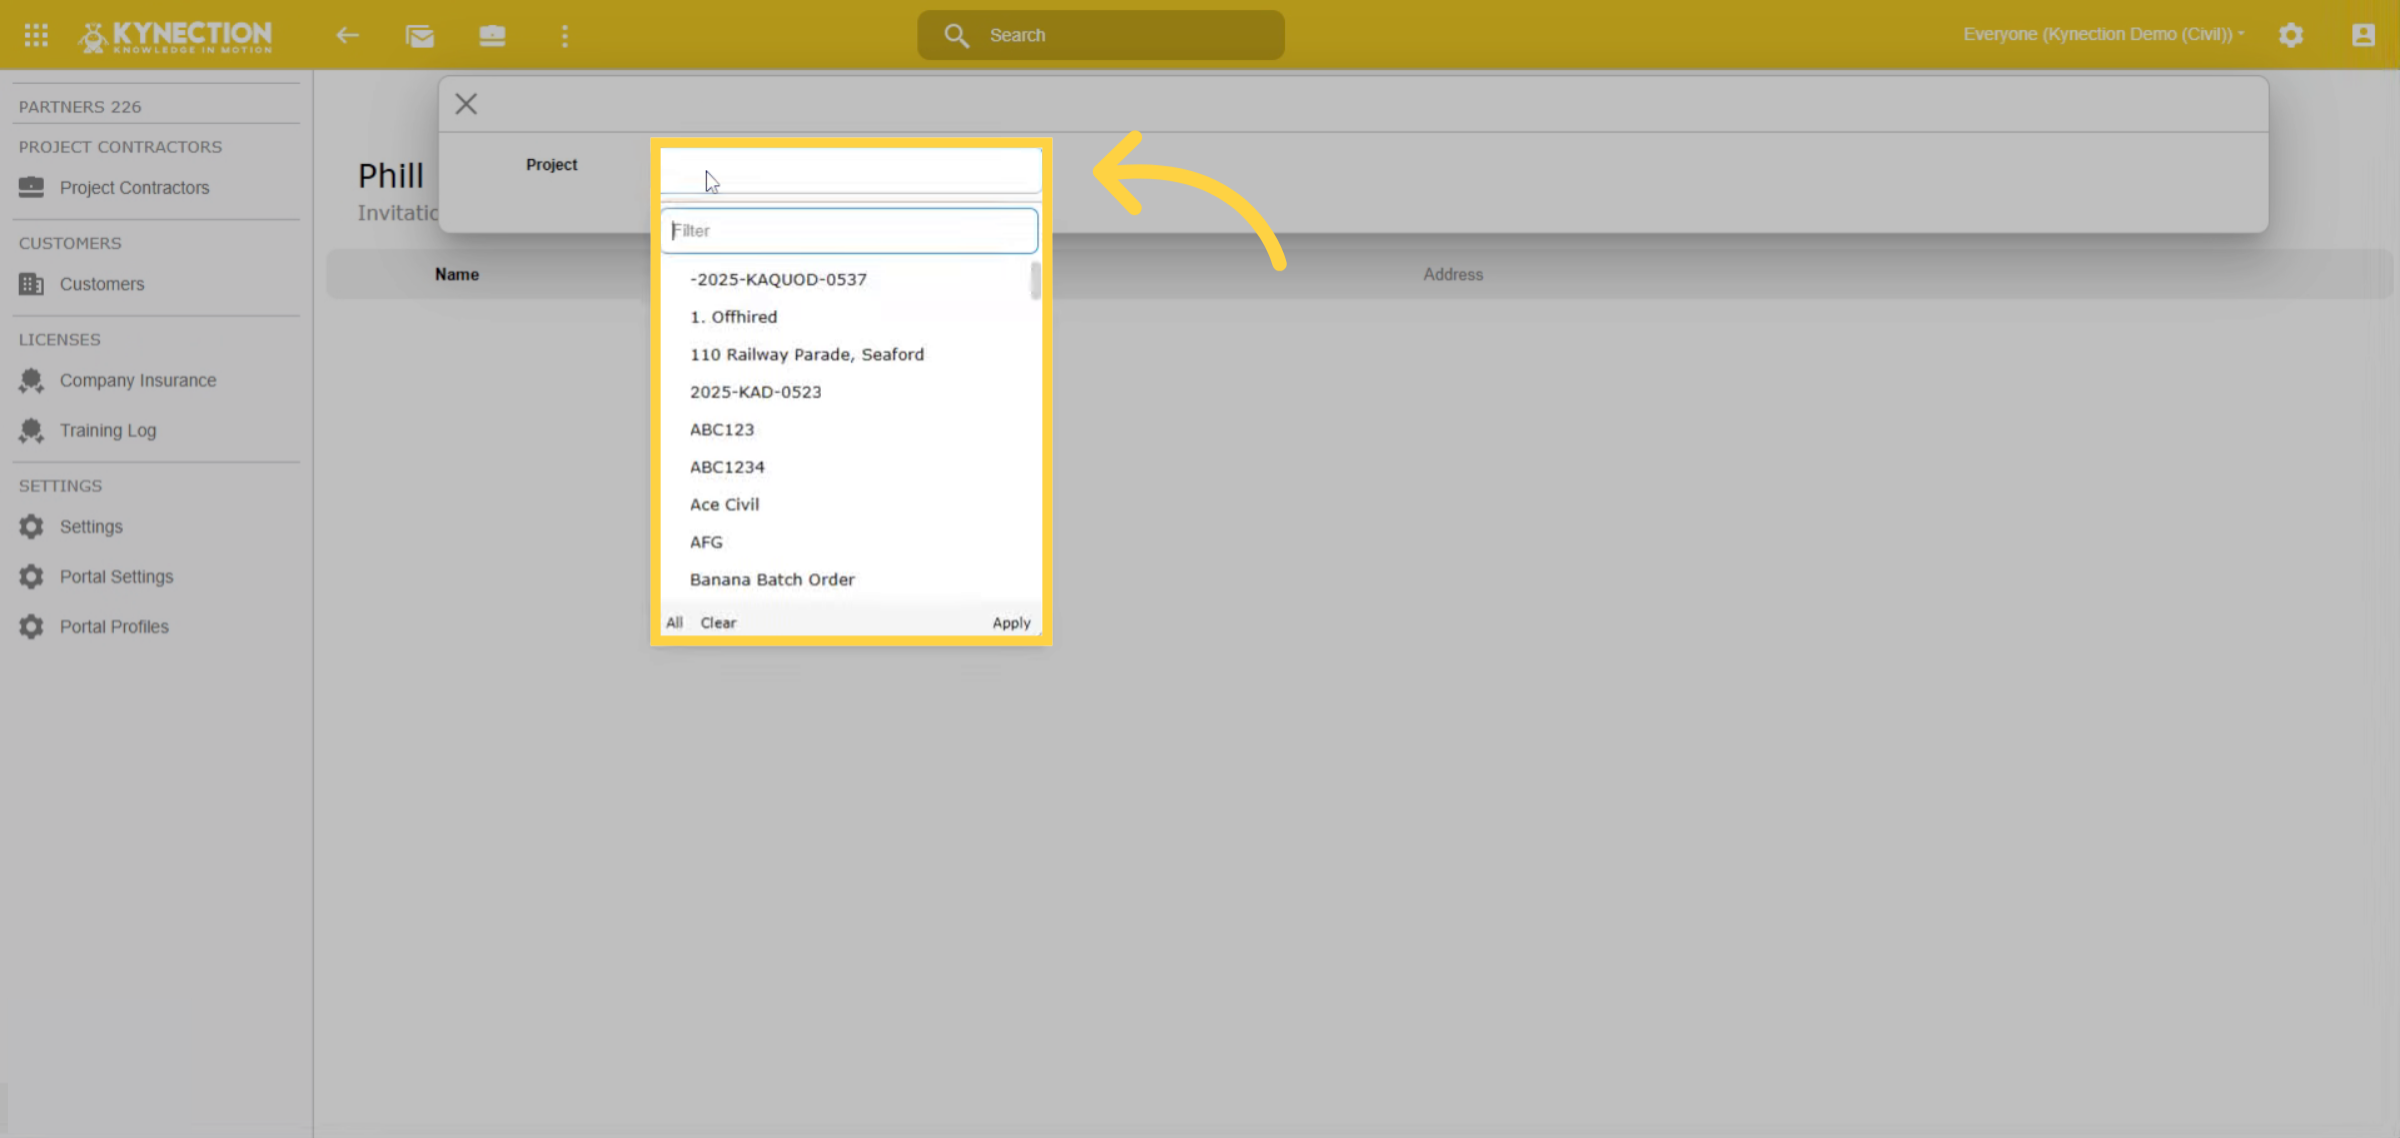
18. Enter Project Filter
Utilize the search bar filter to locate and select the project.
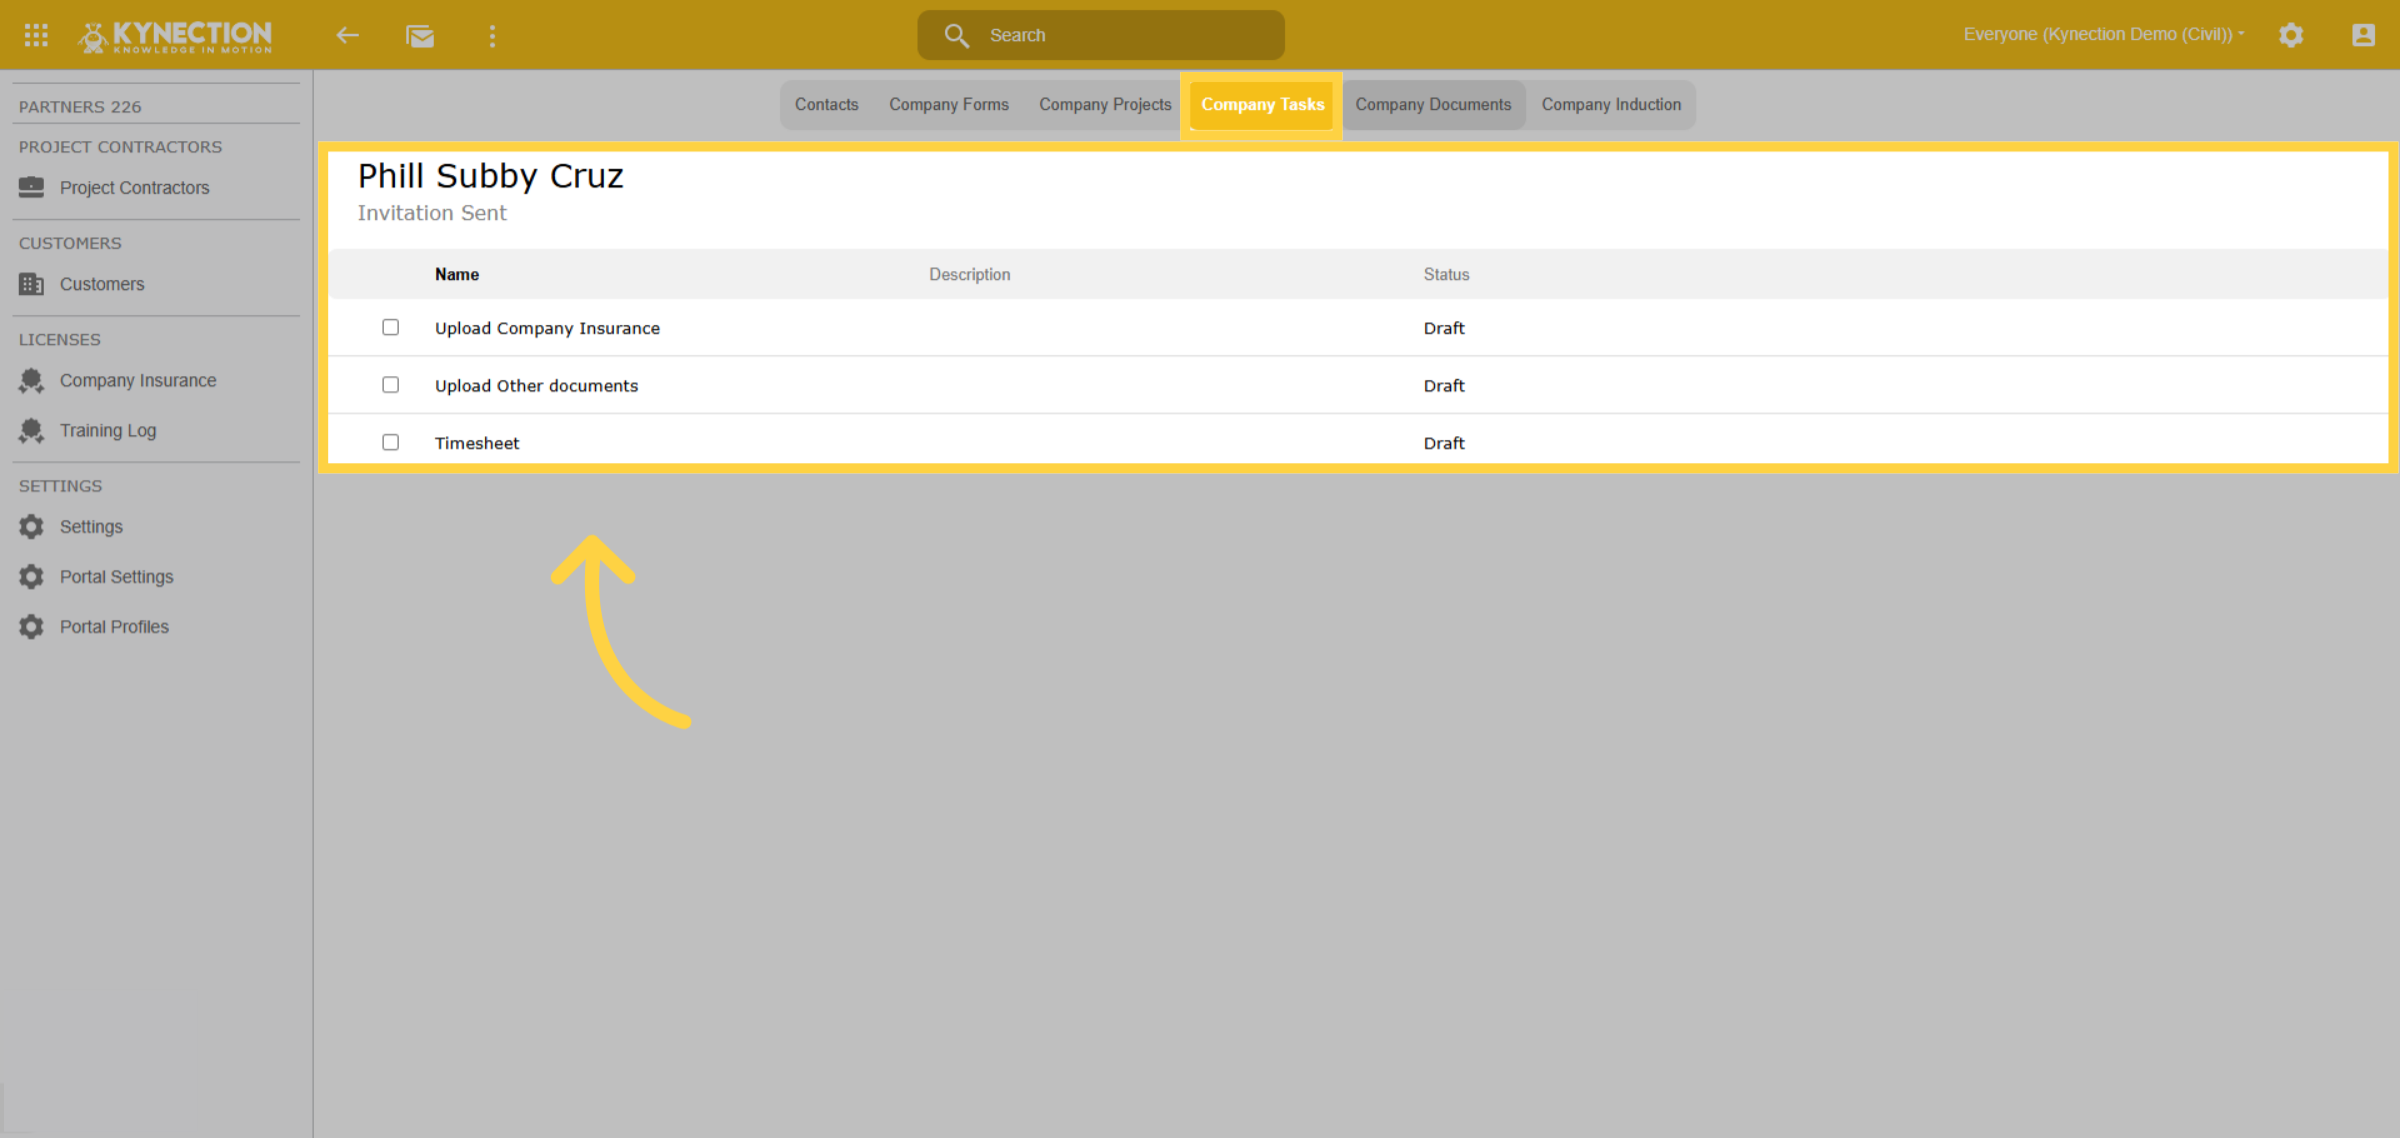
19. Company Tasks
The Company Tasks checkboxes allow you to view all tasks assigned to a specific subcontractor as per the established profile.
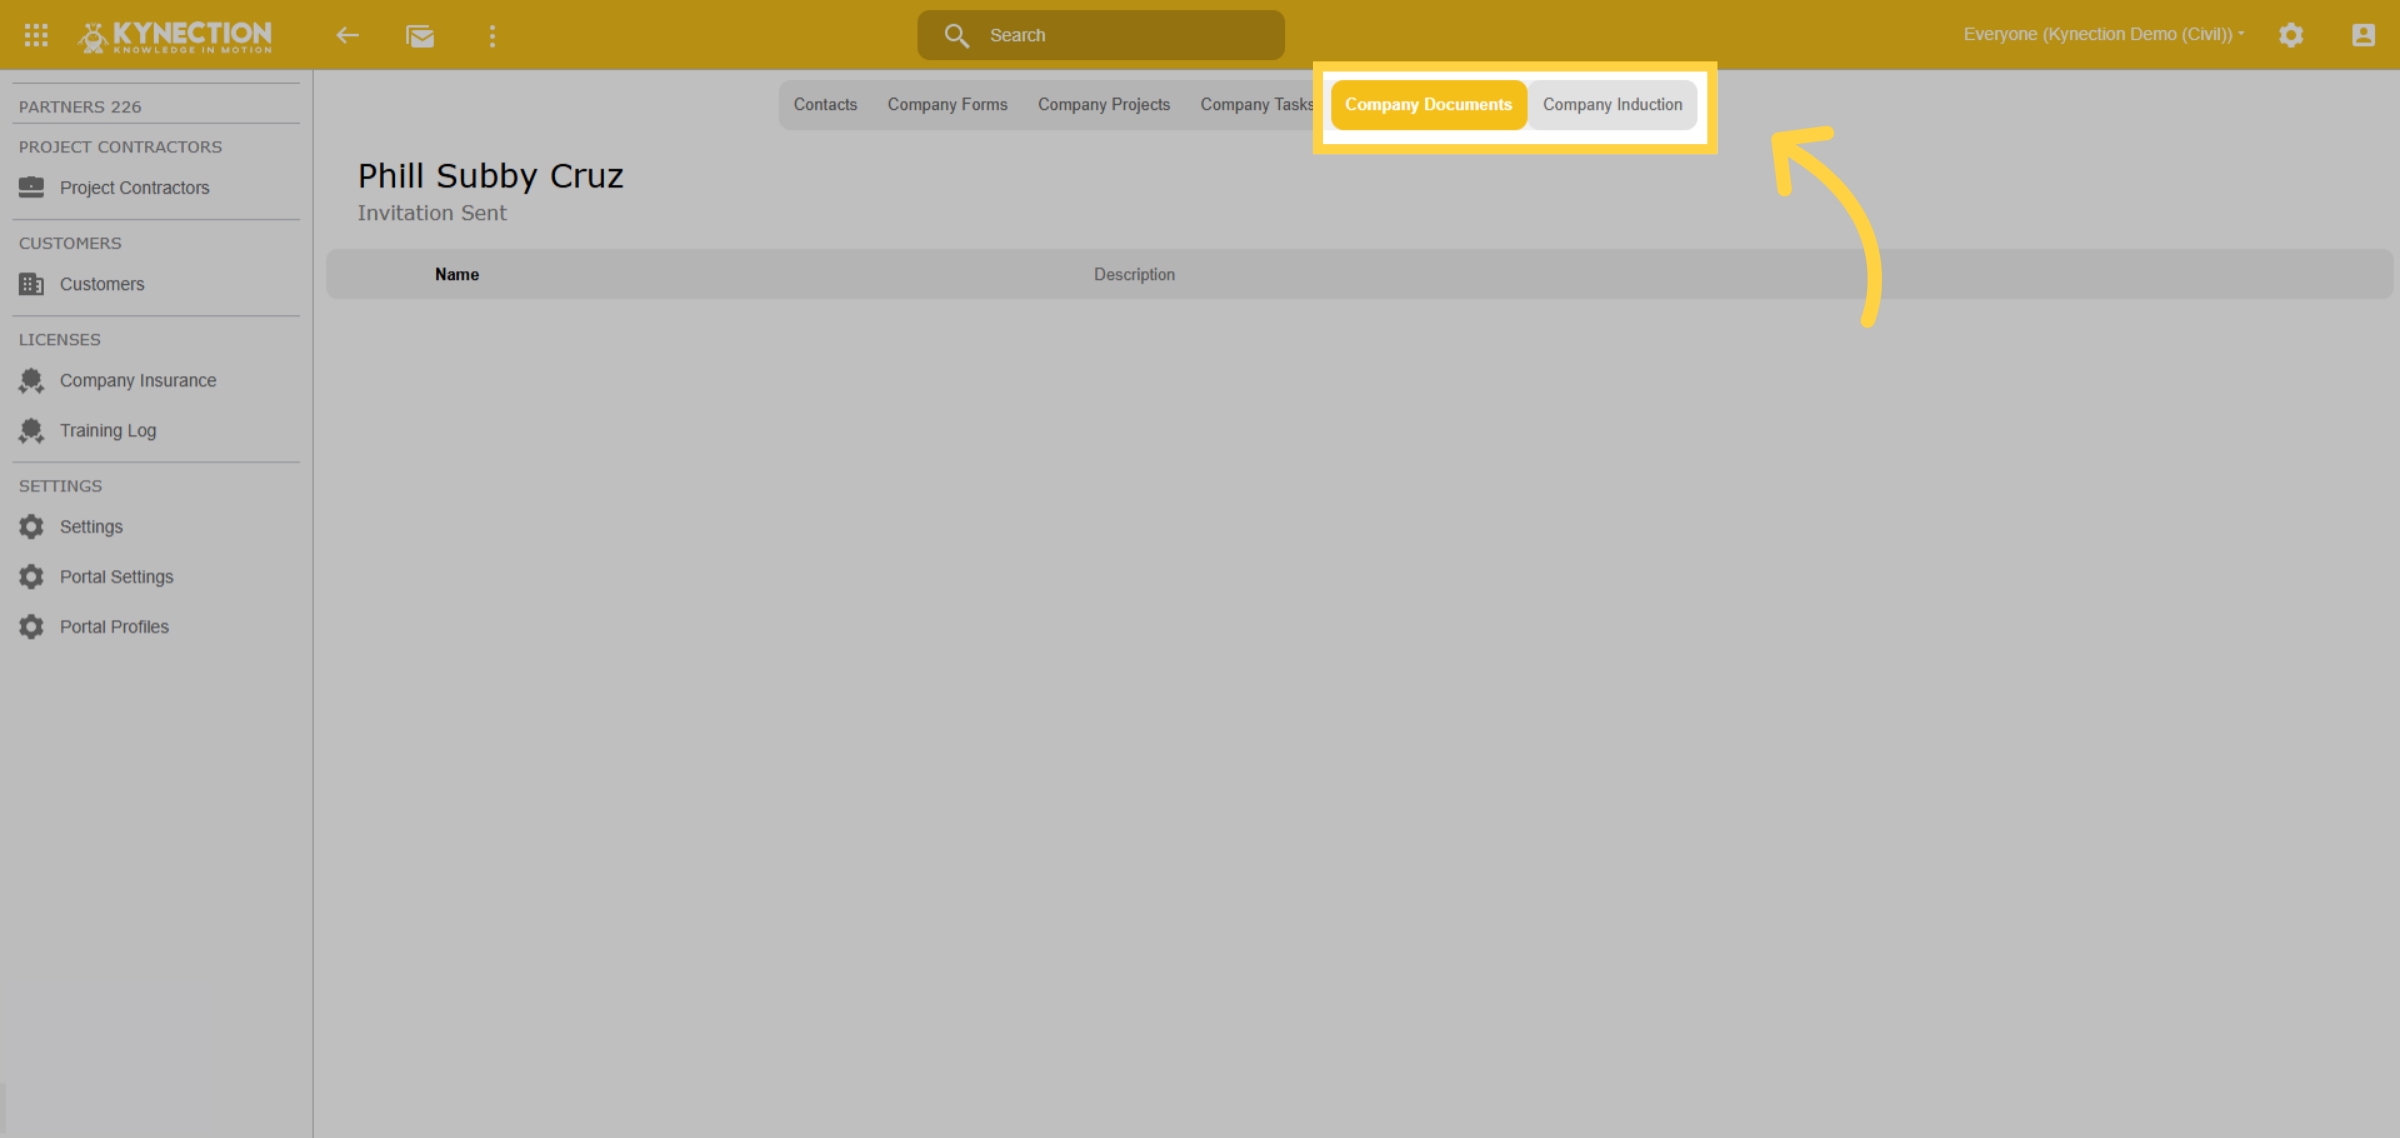
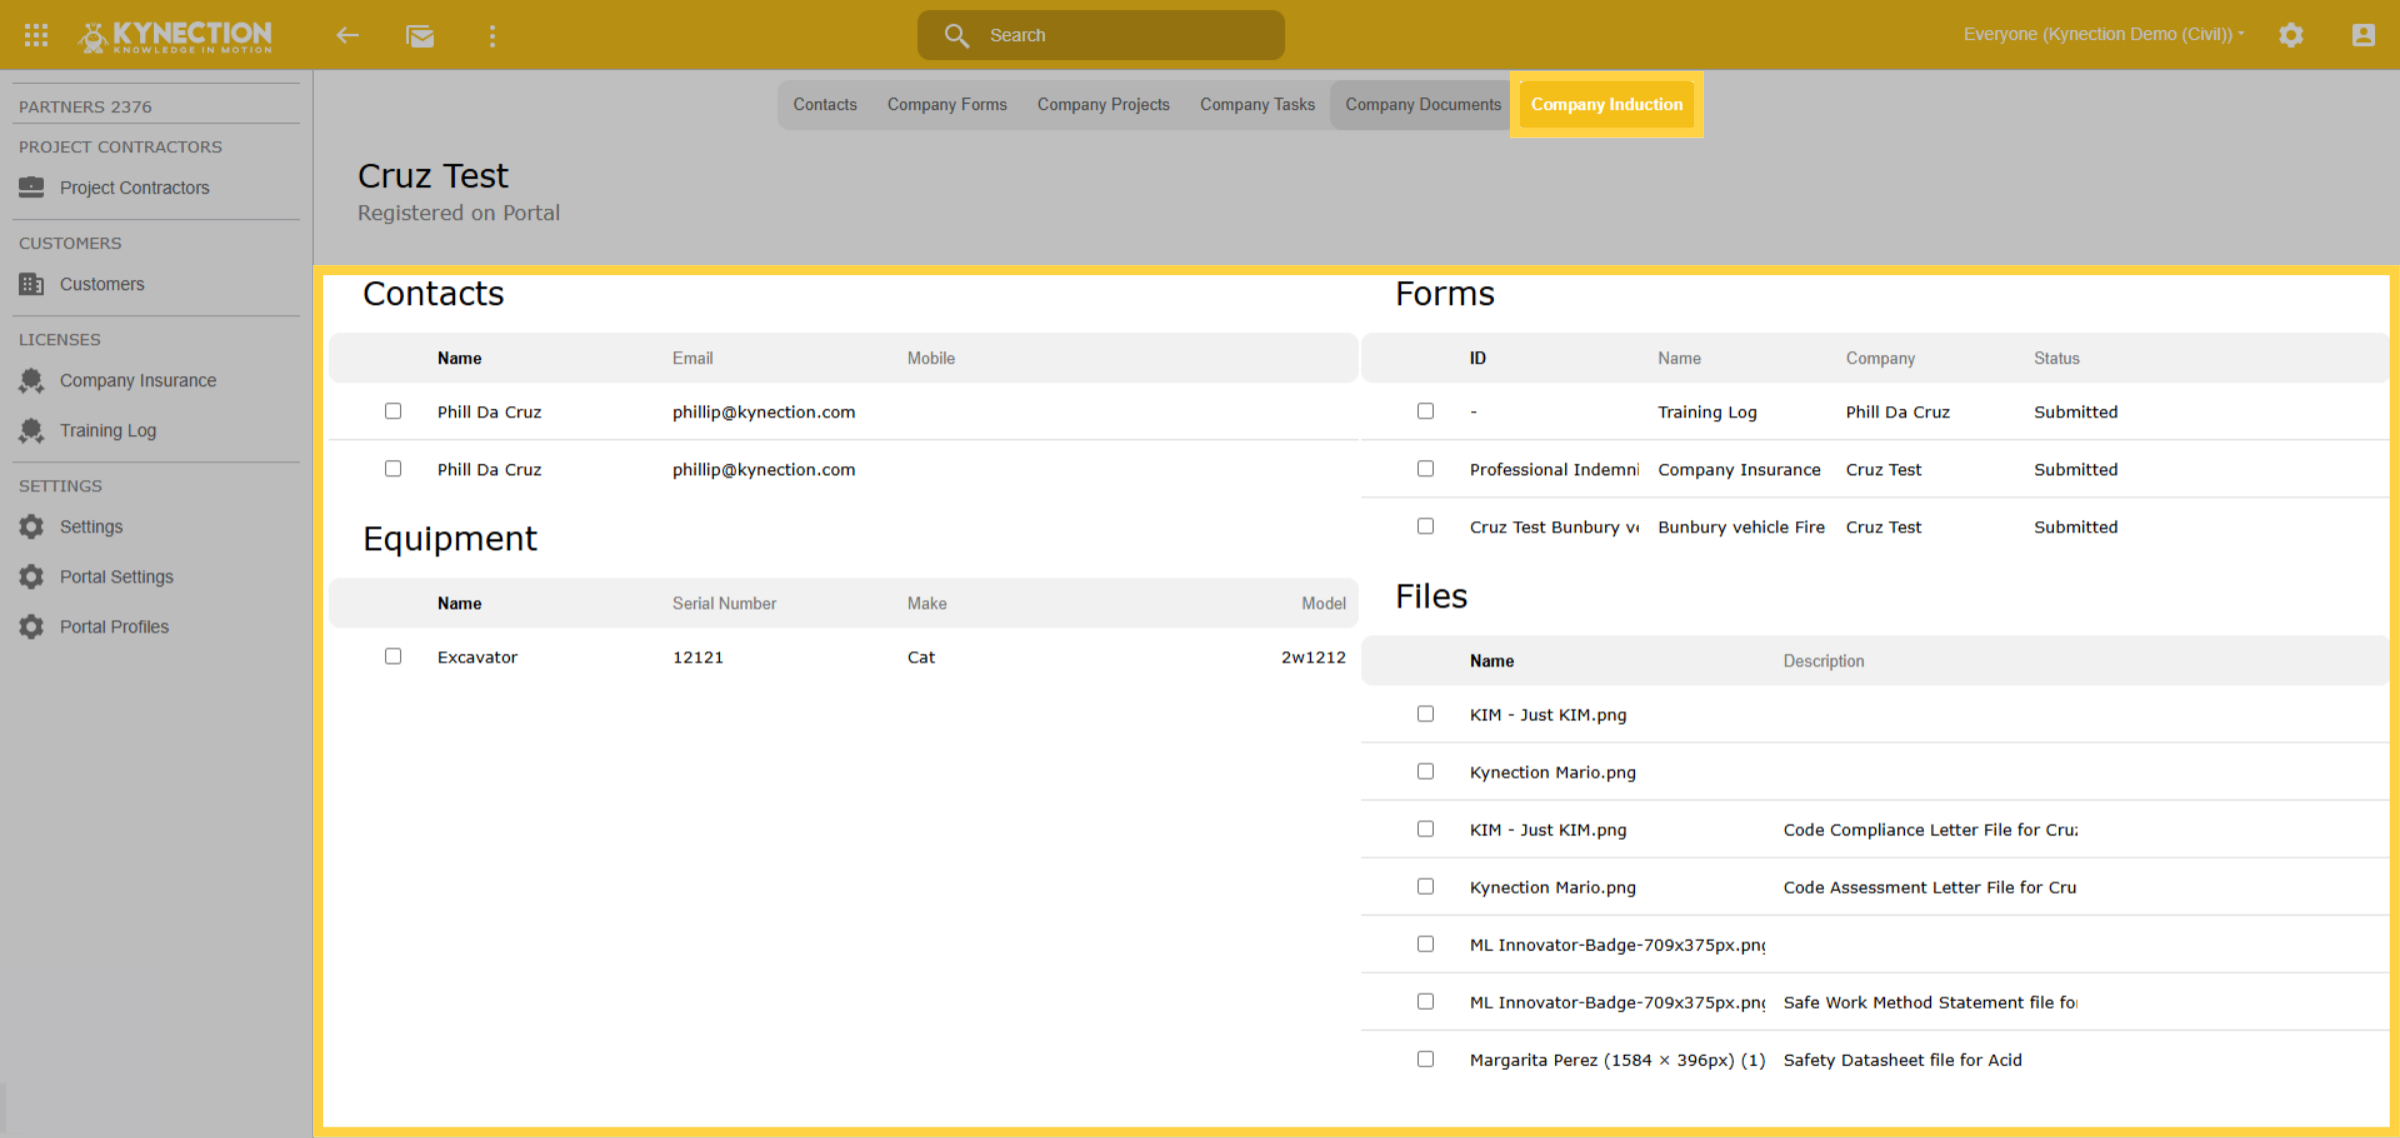
20. Company Induction
The company documents and inductions tabs provide access to all forms submitted by subcontractors, including SWMS, screenshots, licenses, files, and more.
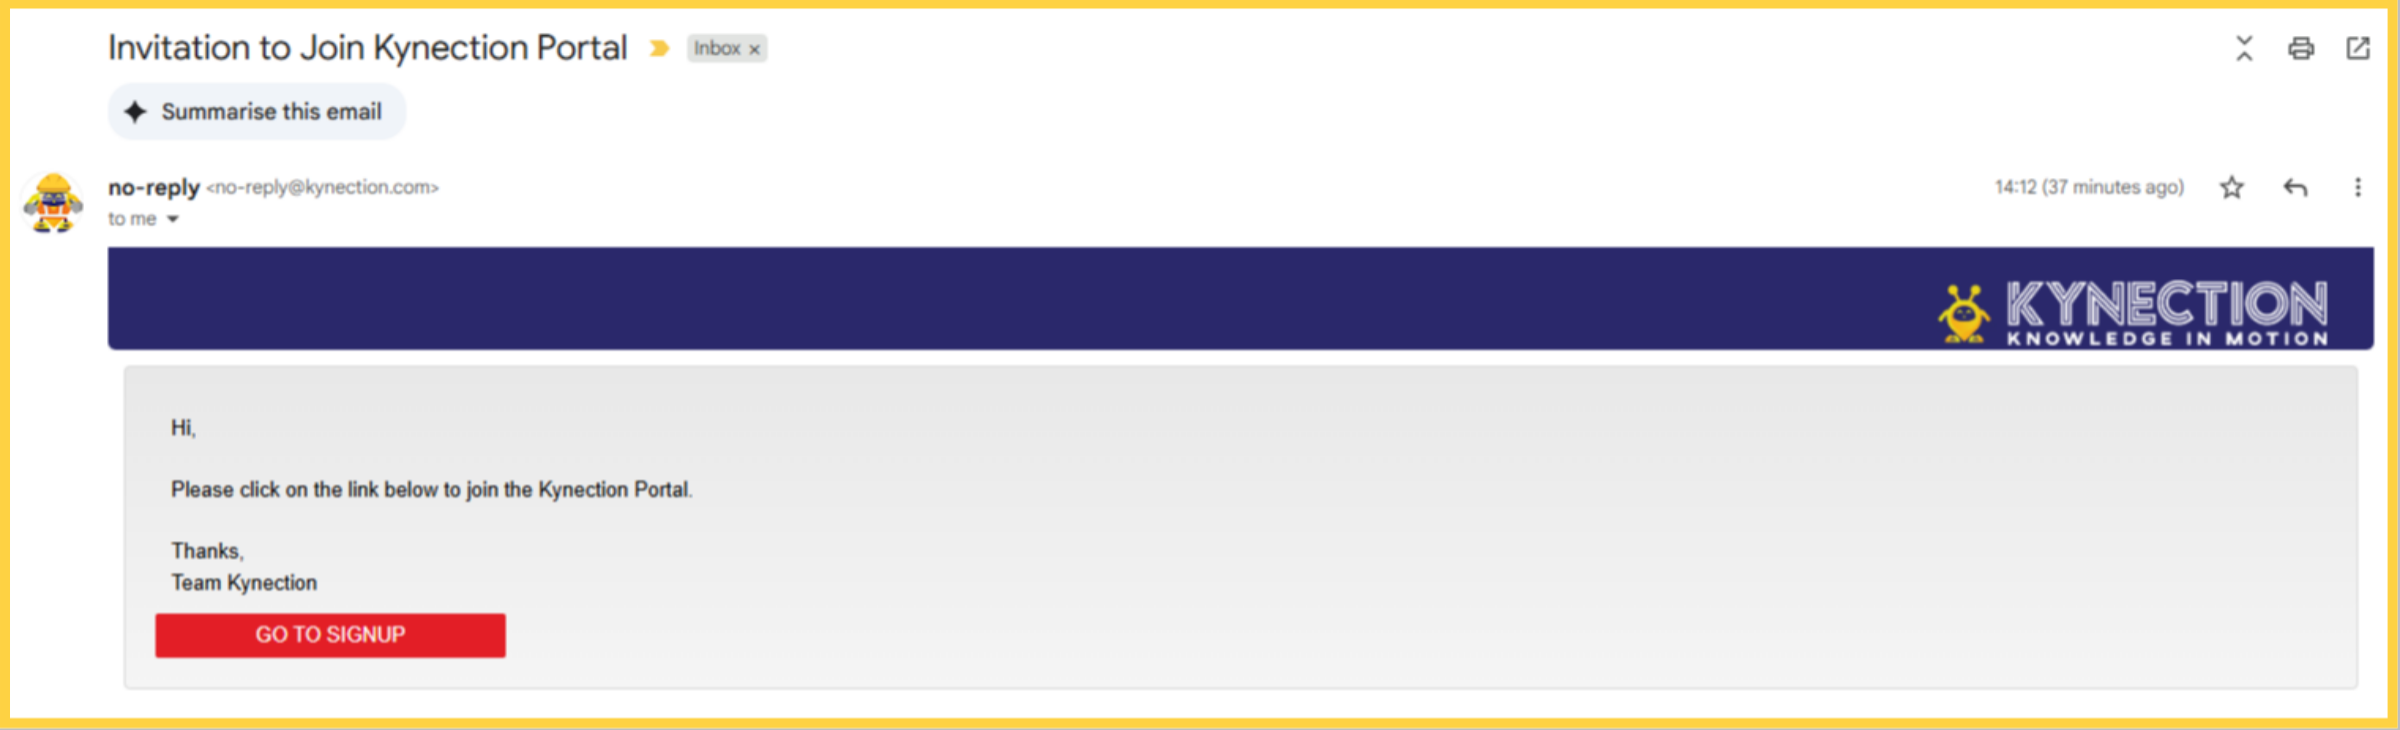
21. Email Invitation
Here is an example of the email invitation. Click the "Sign Up" button to proceed.
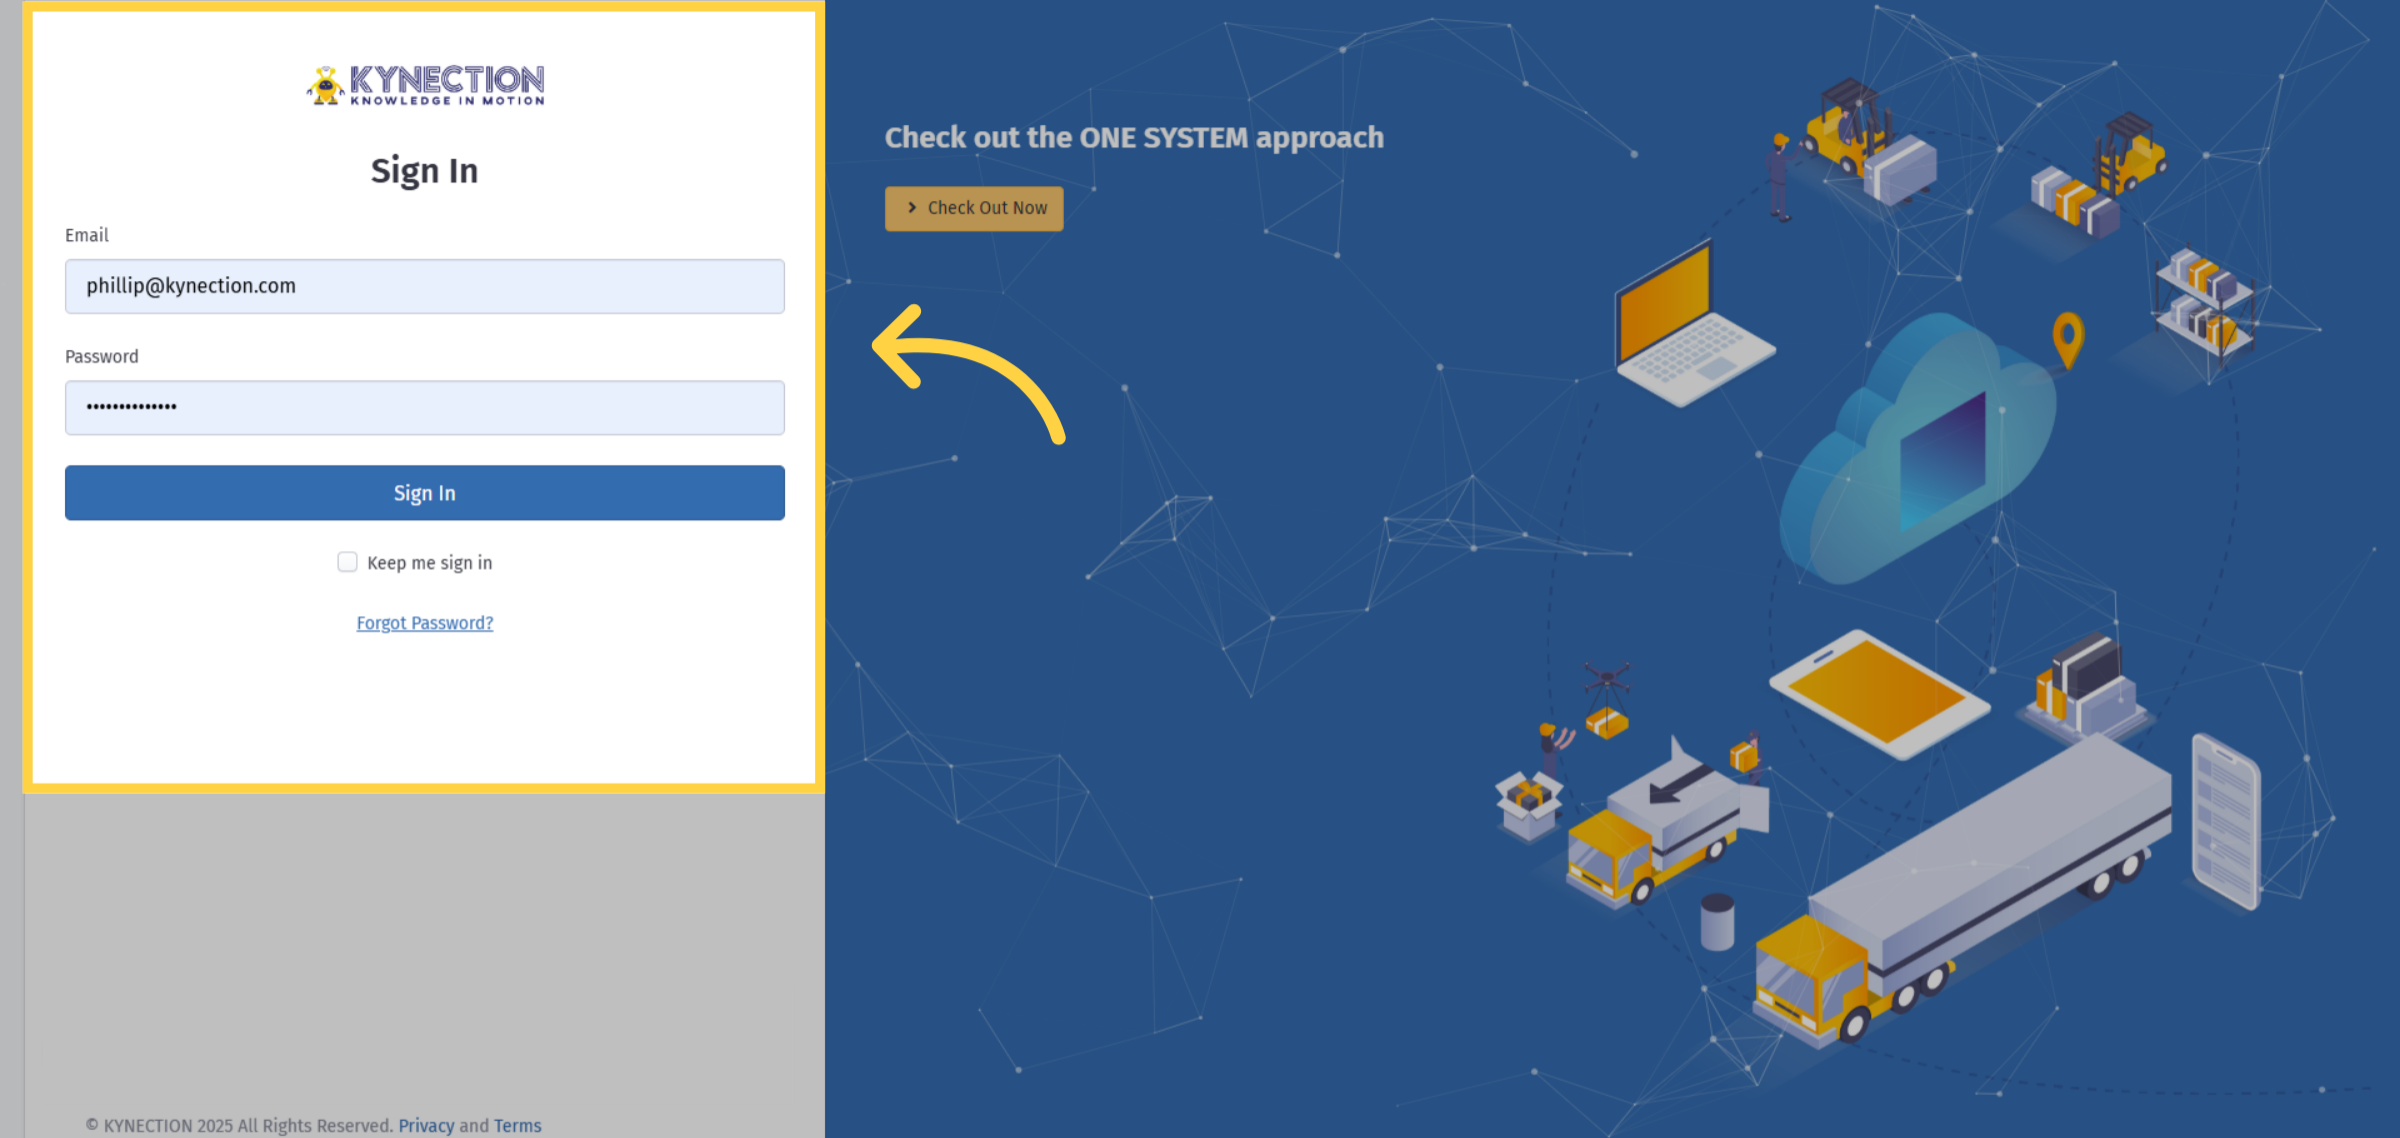
22. Portal Sign In
Upon clicking the sign-up button in the email, the subcontractor will be directed to the portal page to enter their email and create a password. Once completed, they can sign in.
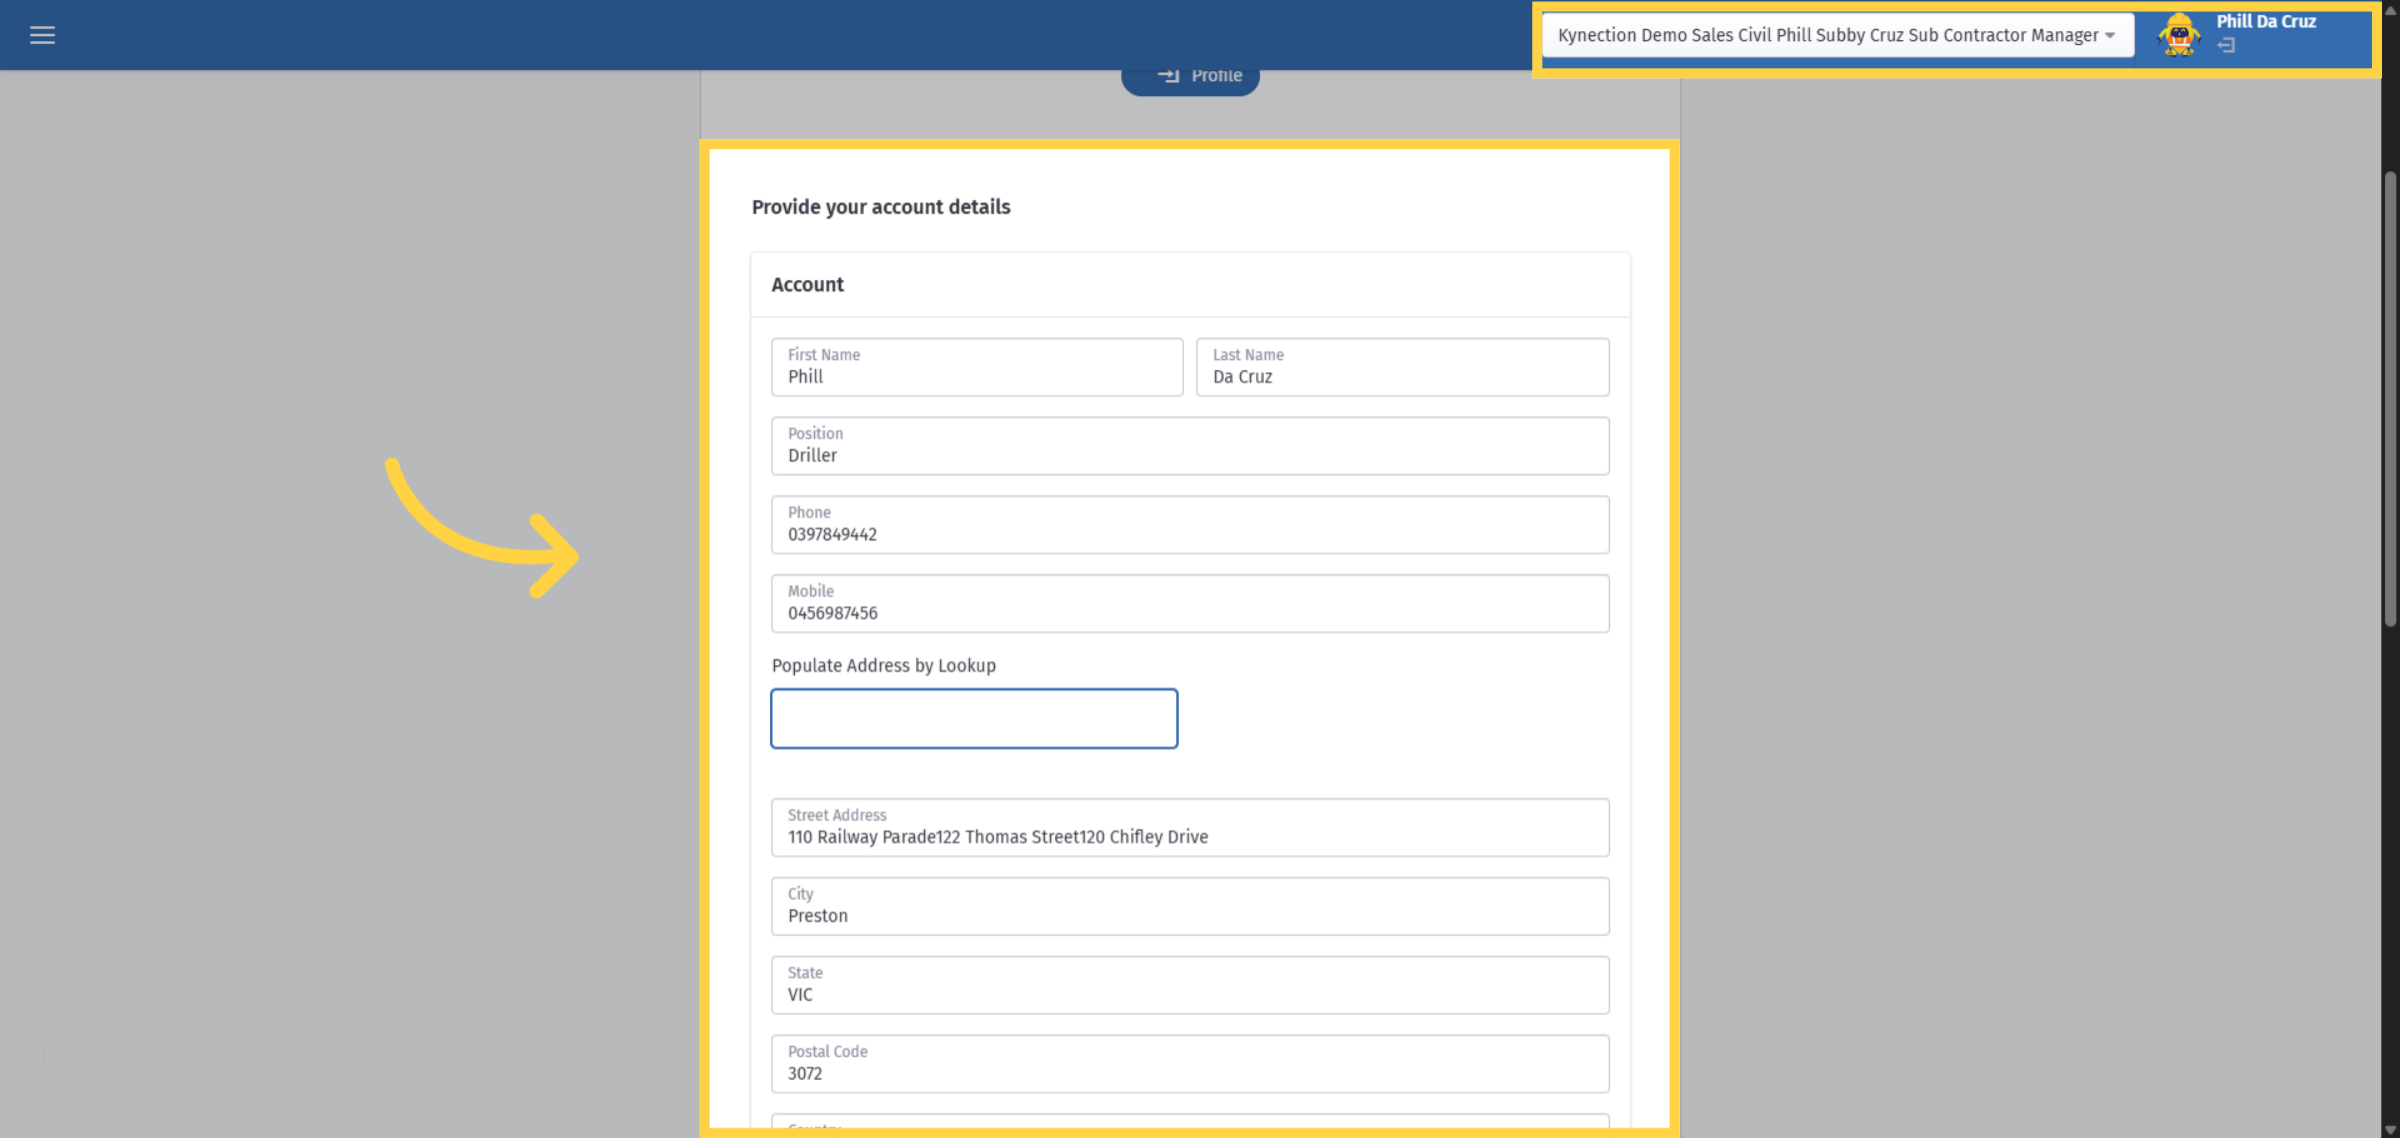
23. Induction Form
In the top right corner, you will find the listed subcontractor company, and a prompt will appear for you to complete the induction form.
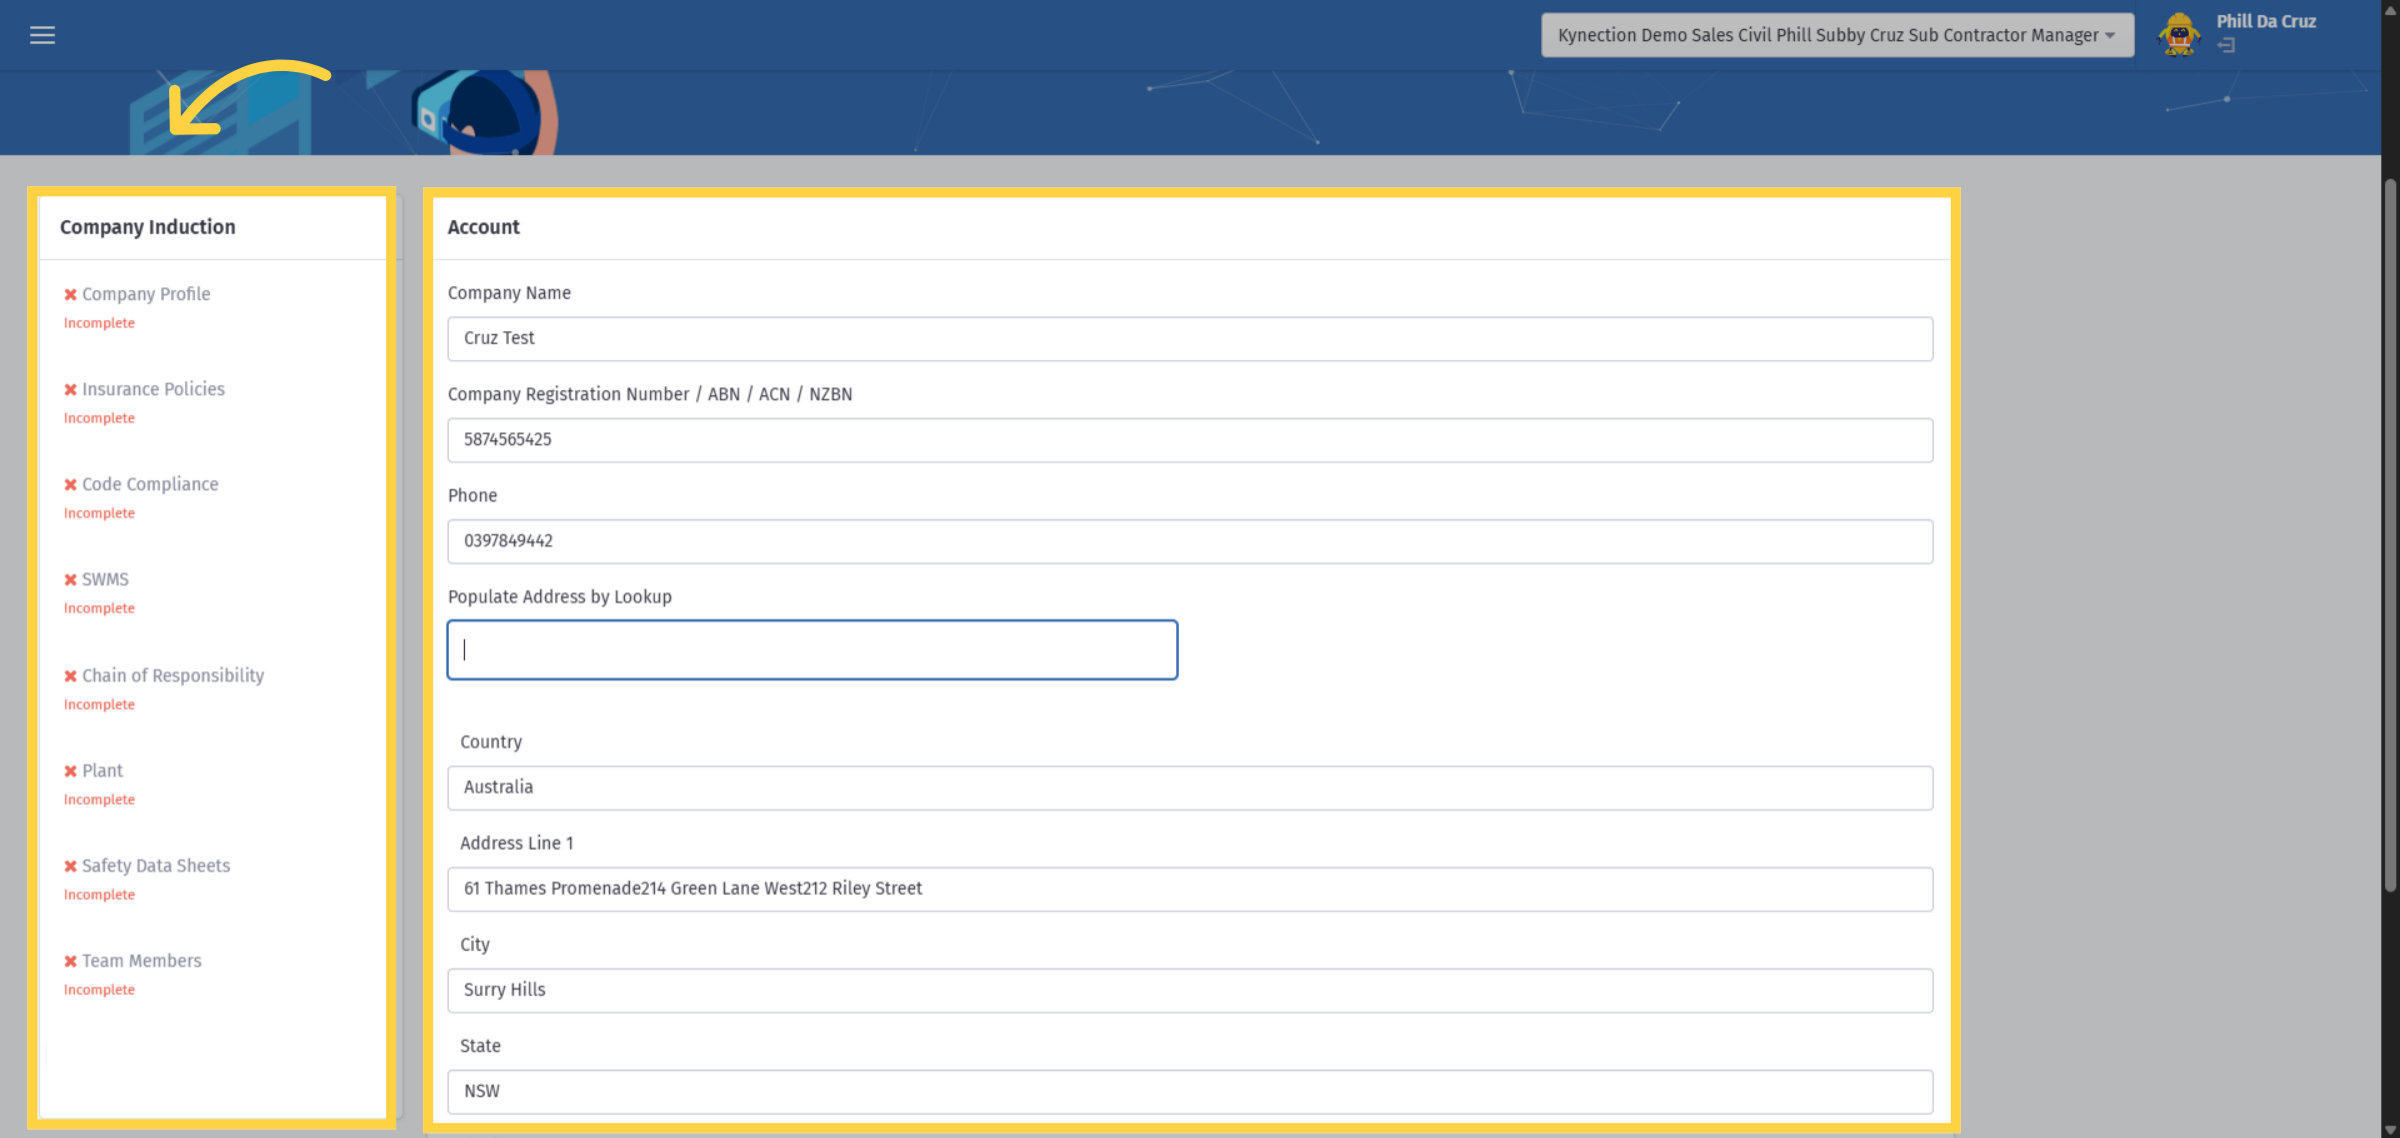
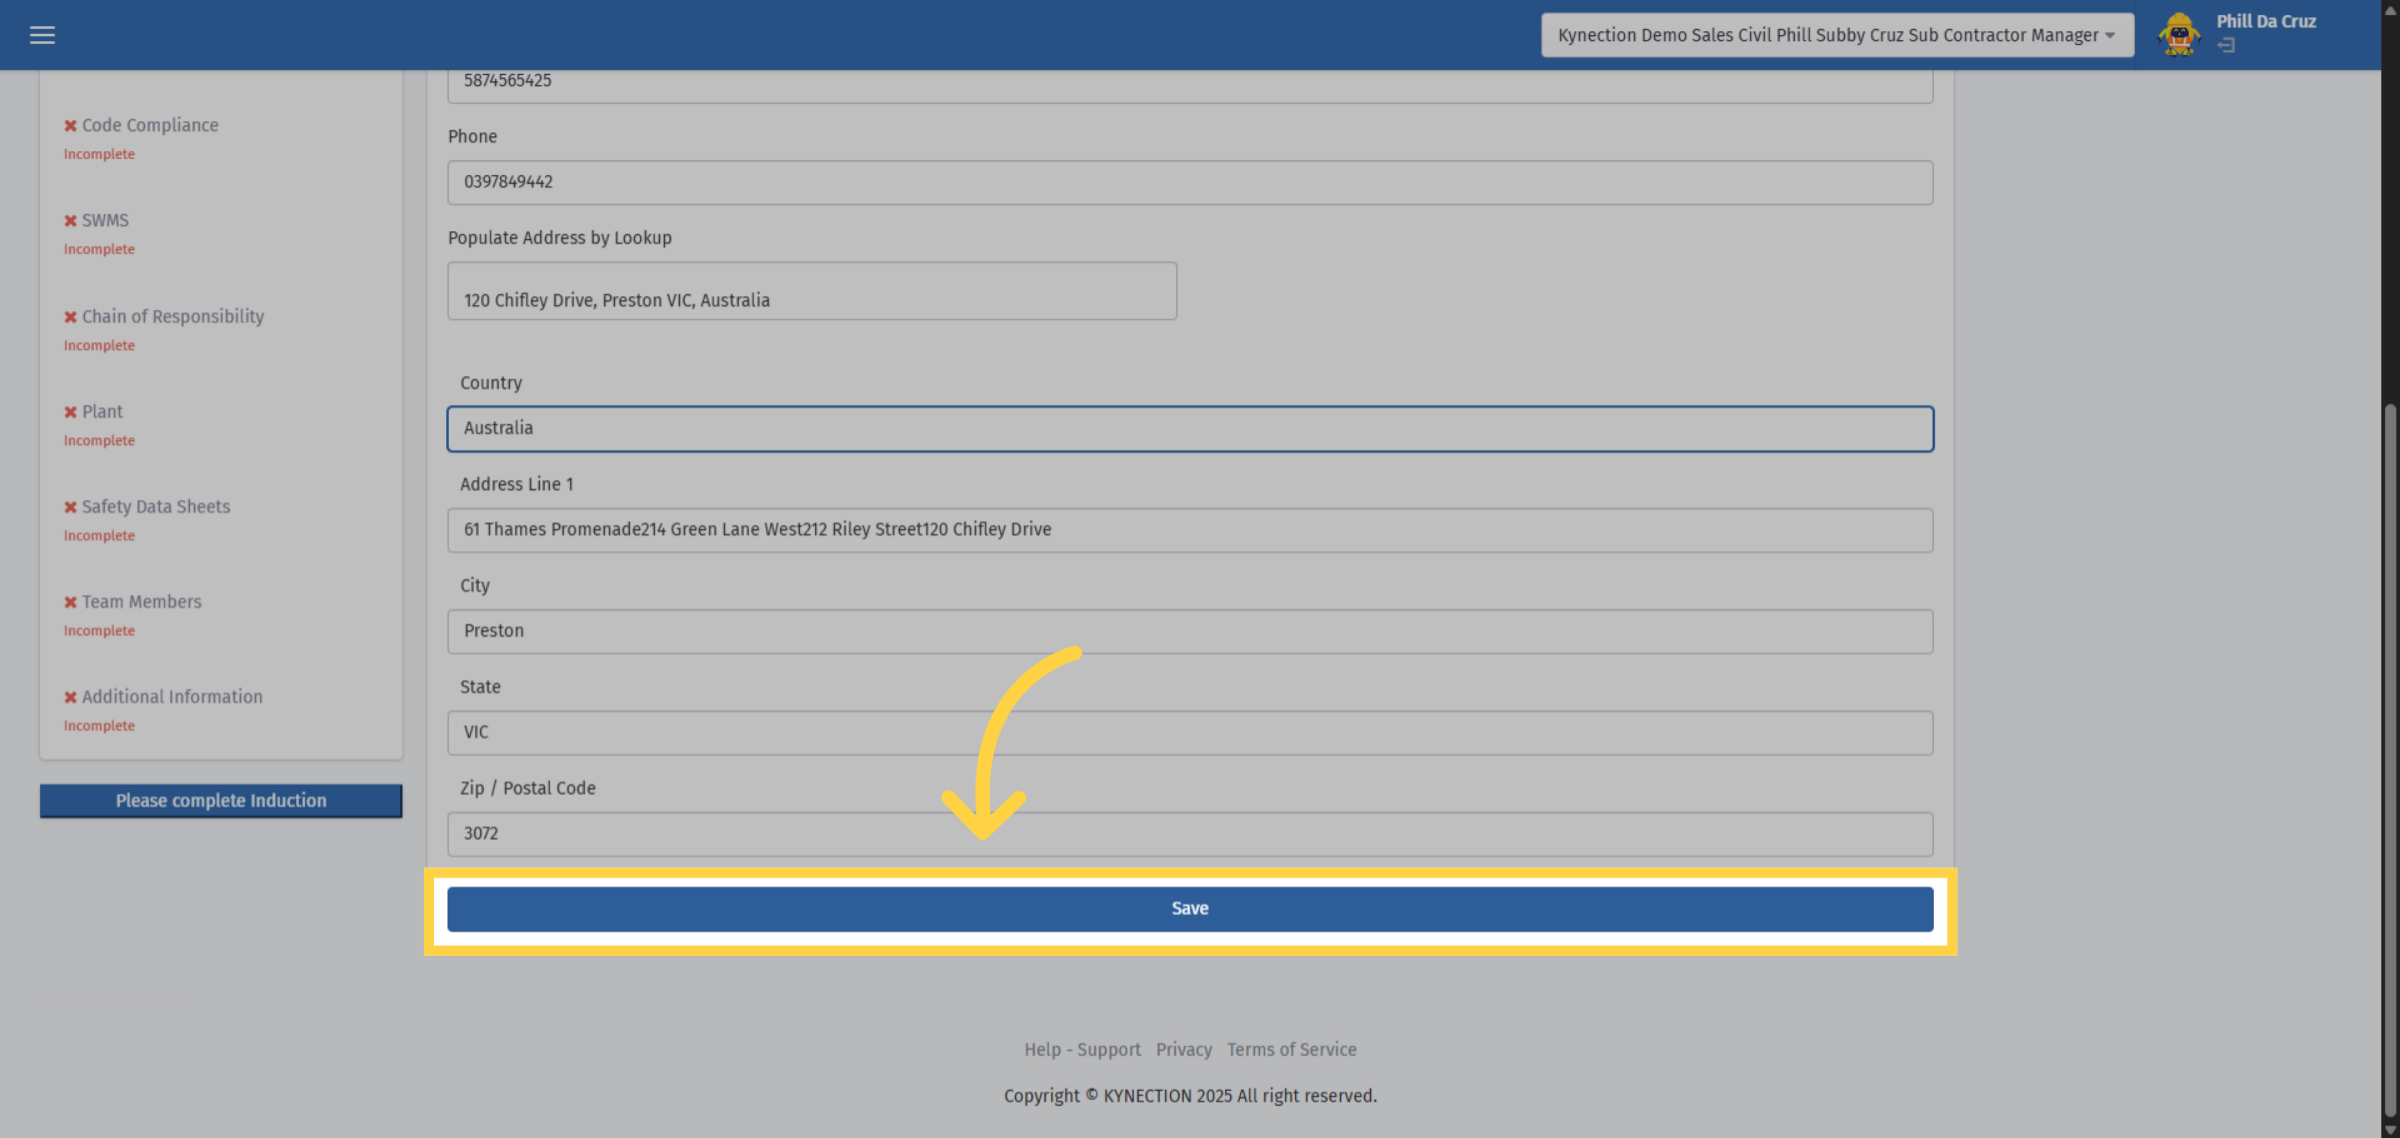
24. Populate Address by Lookup
On the left-hand pane, you'll find a checklist of items that need completion, all of which are configured within the Kynection port settings.
25. Save Details
Once all the details are filled, click save.
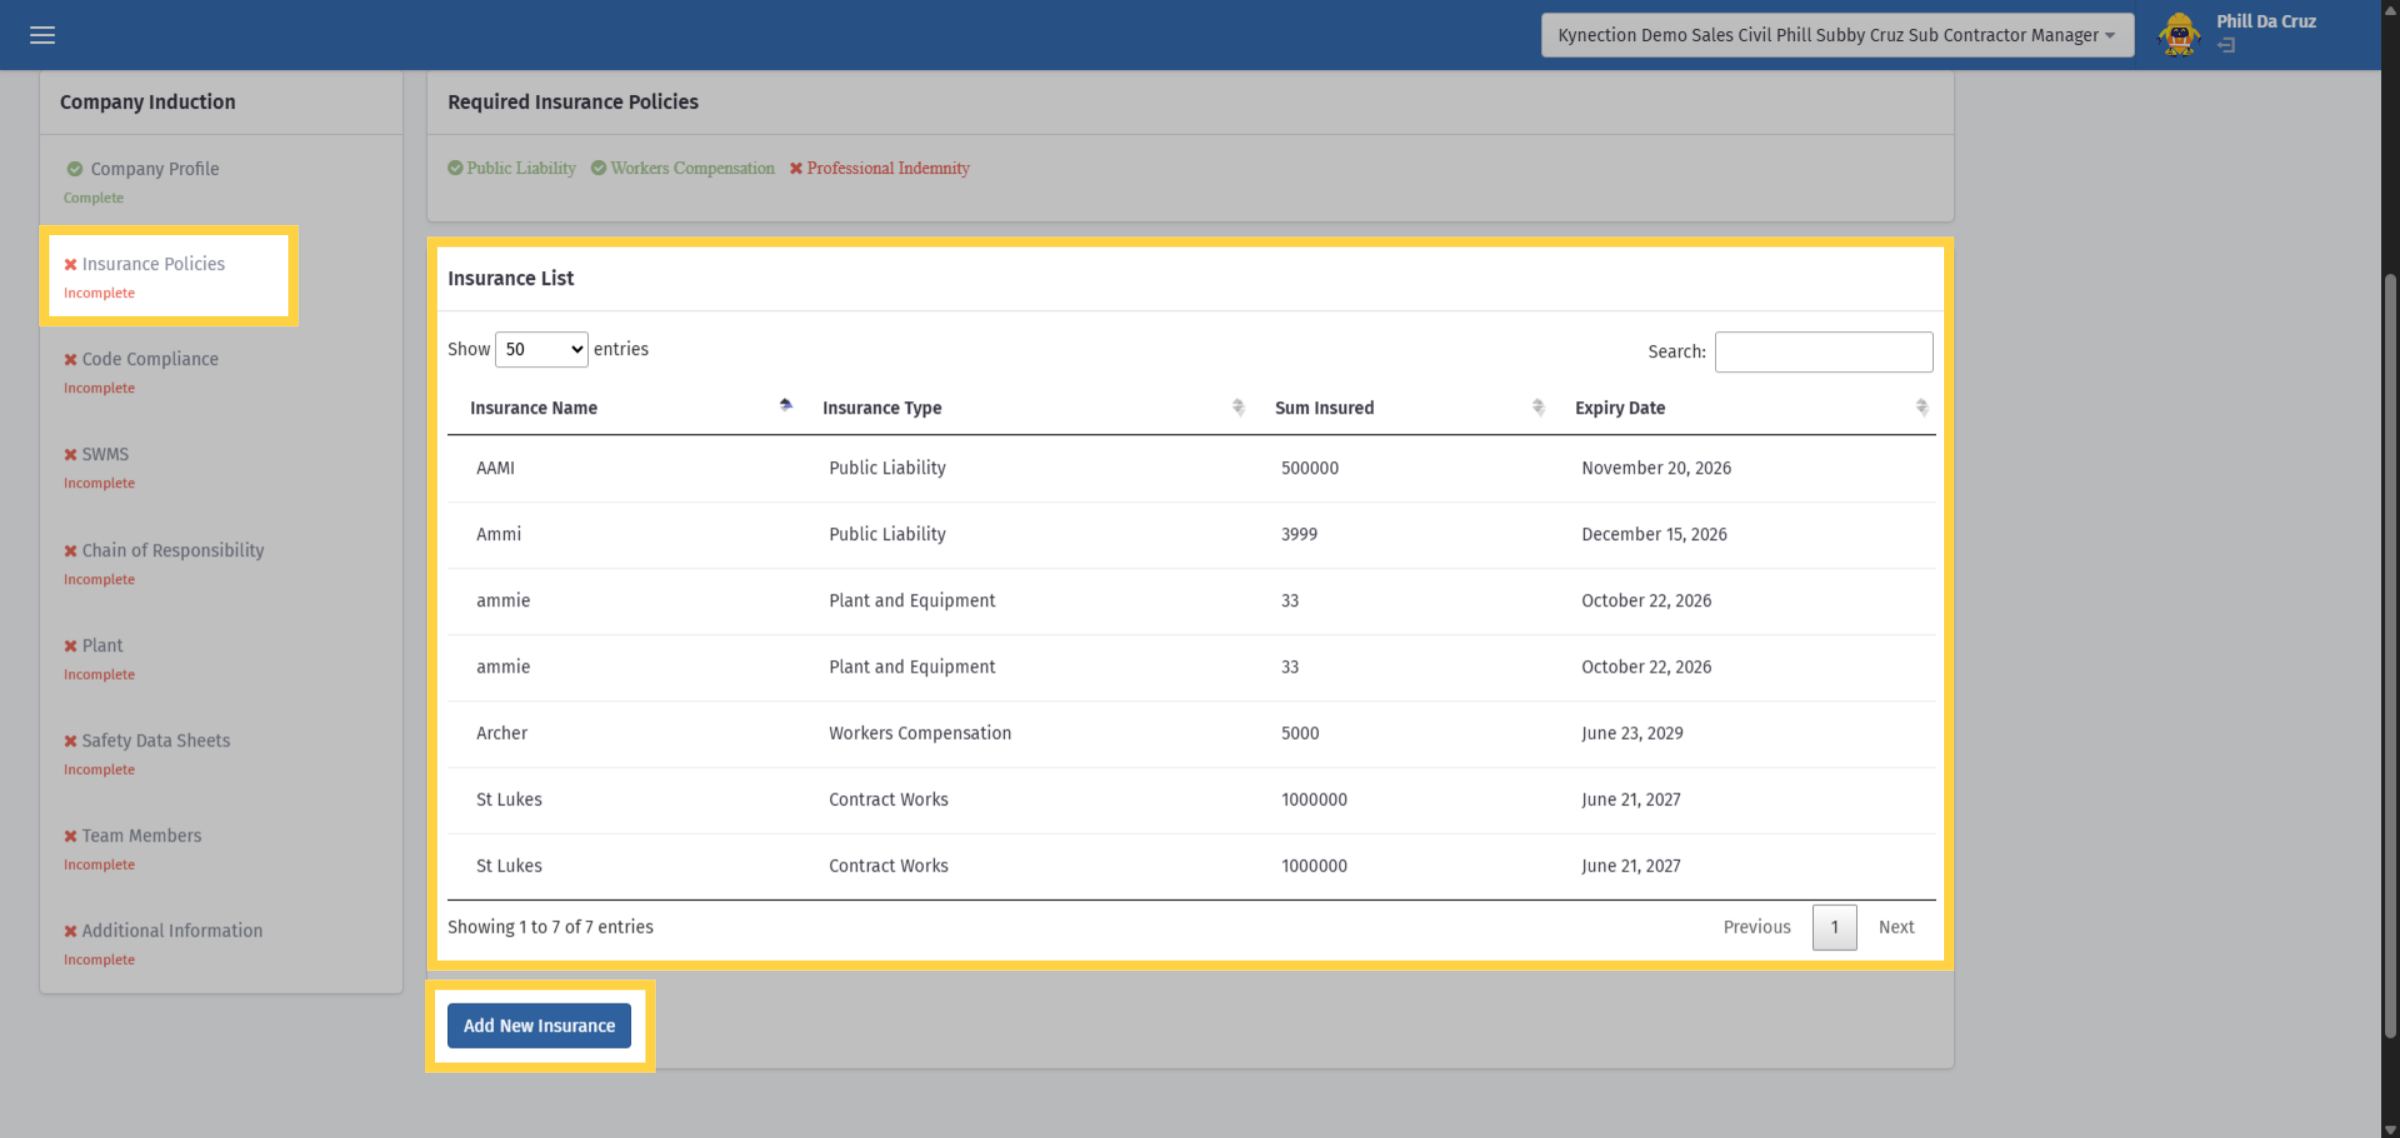
26. Insurance Policies
Here is a list of all the insurances uploaded by the sub contractor. To add a new insurance, please select the "New Insurance" button.
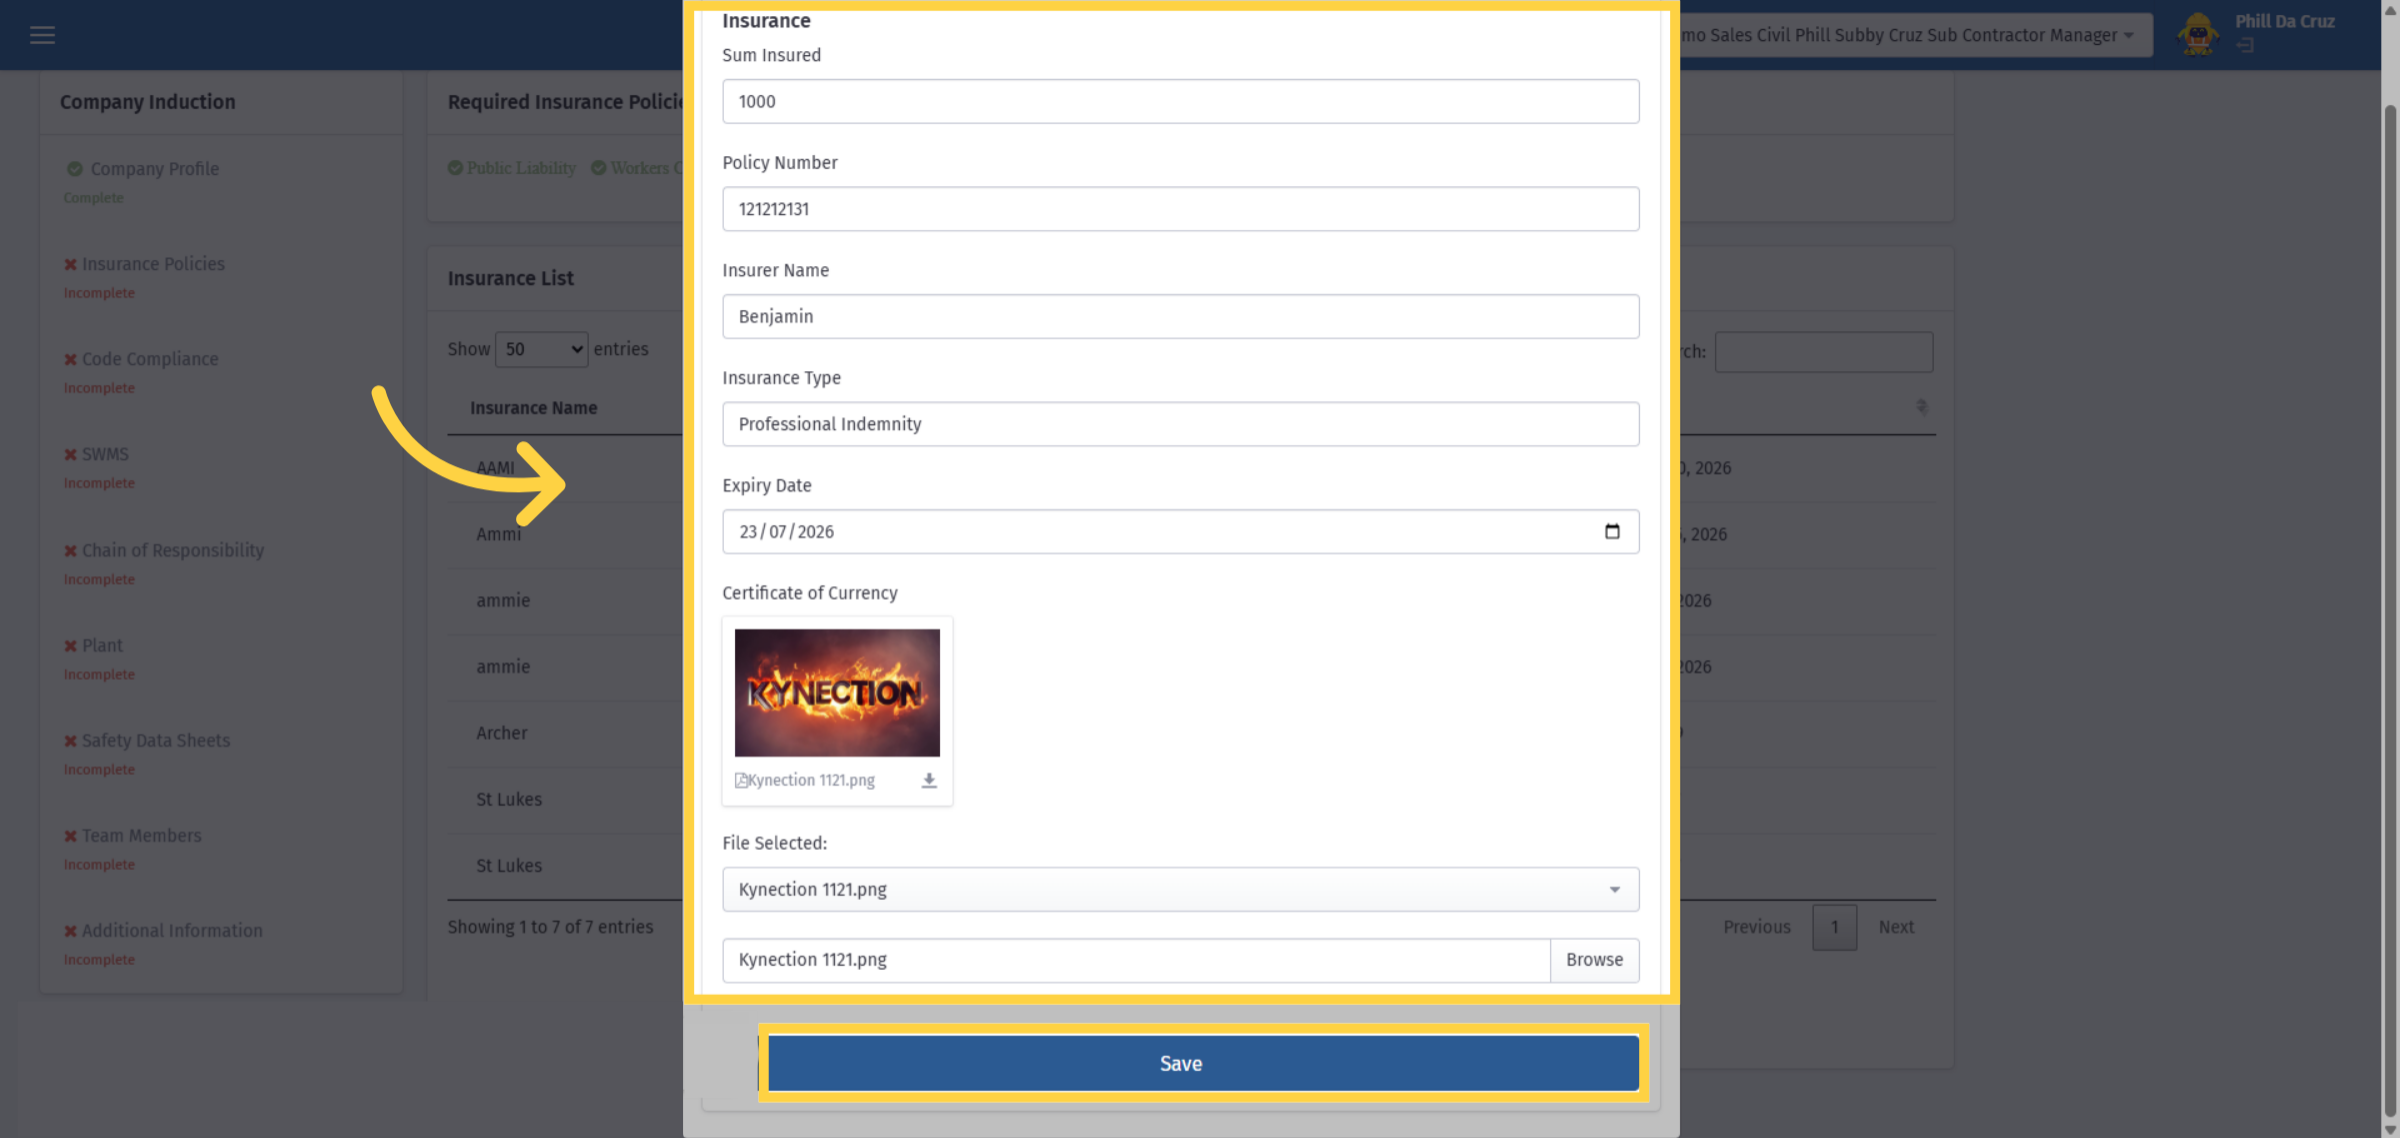
27. Save Insurance Information
Complete the mandatory fields, upload the certificate of currency, and select 'Save.'
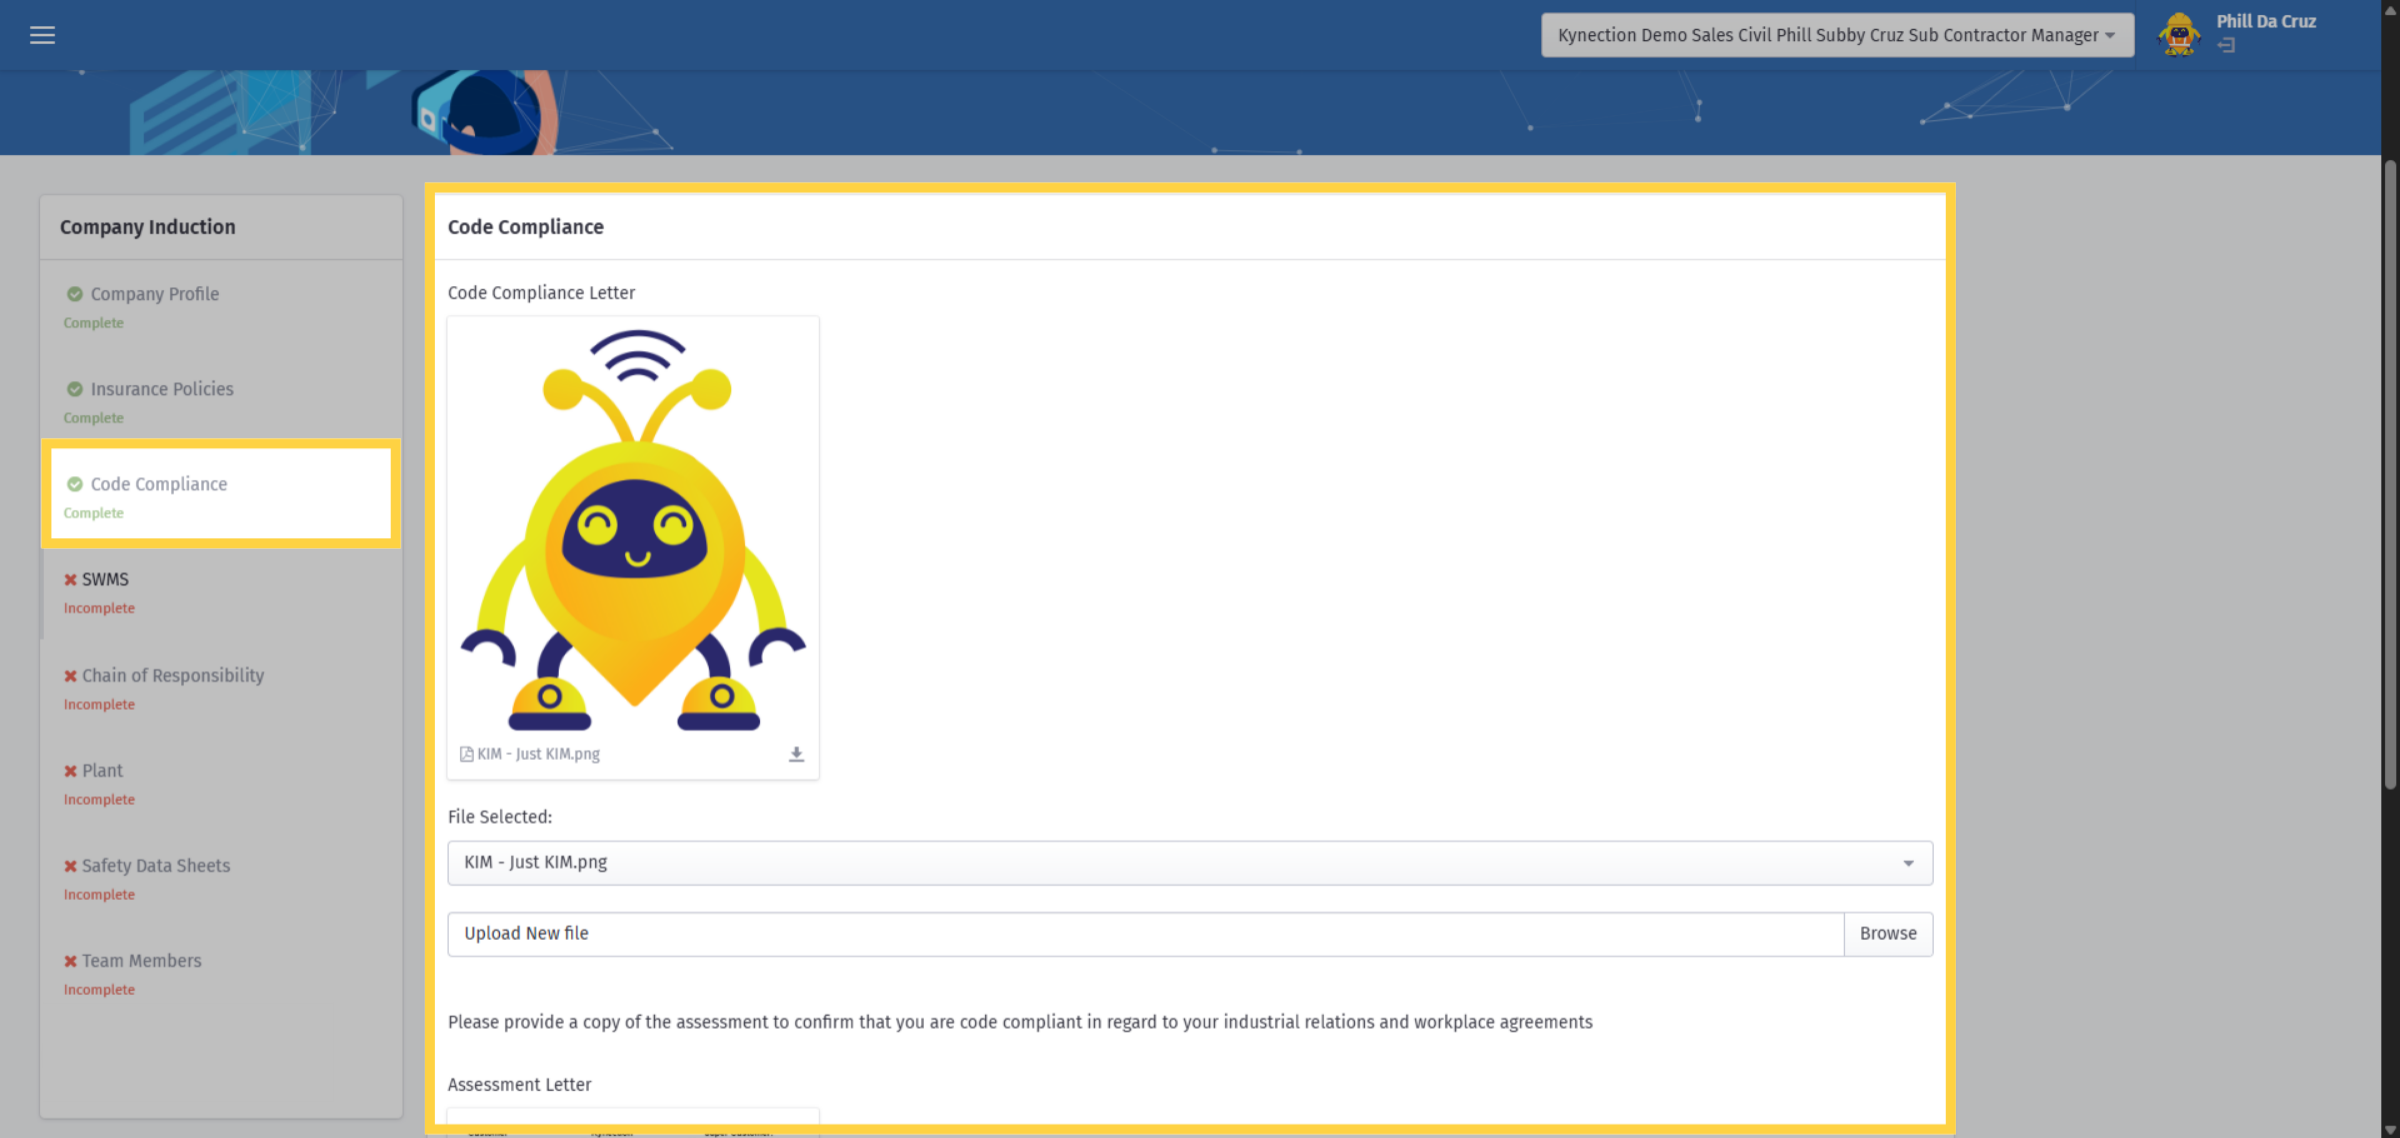
28. Code Compliance
Complete the code compliance form, upload the required evidence, and click 'Save'.
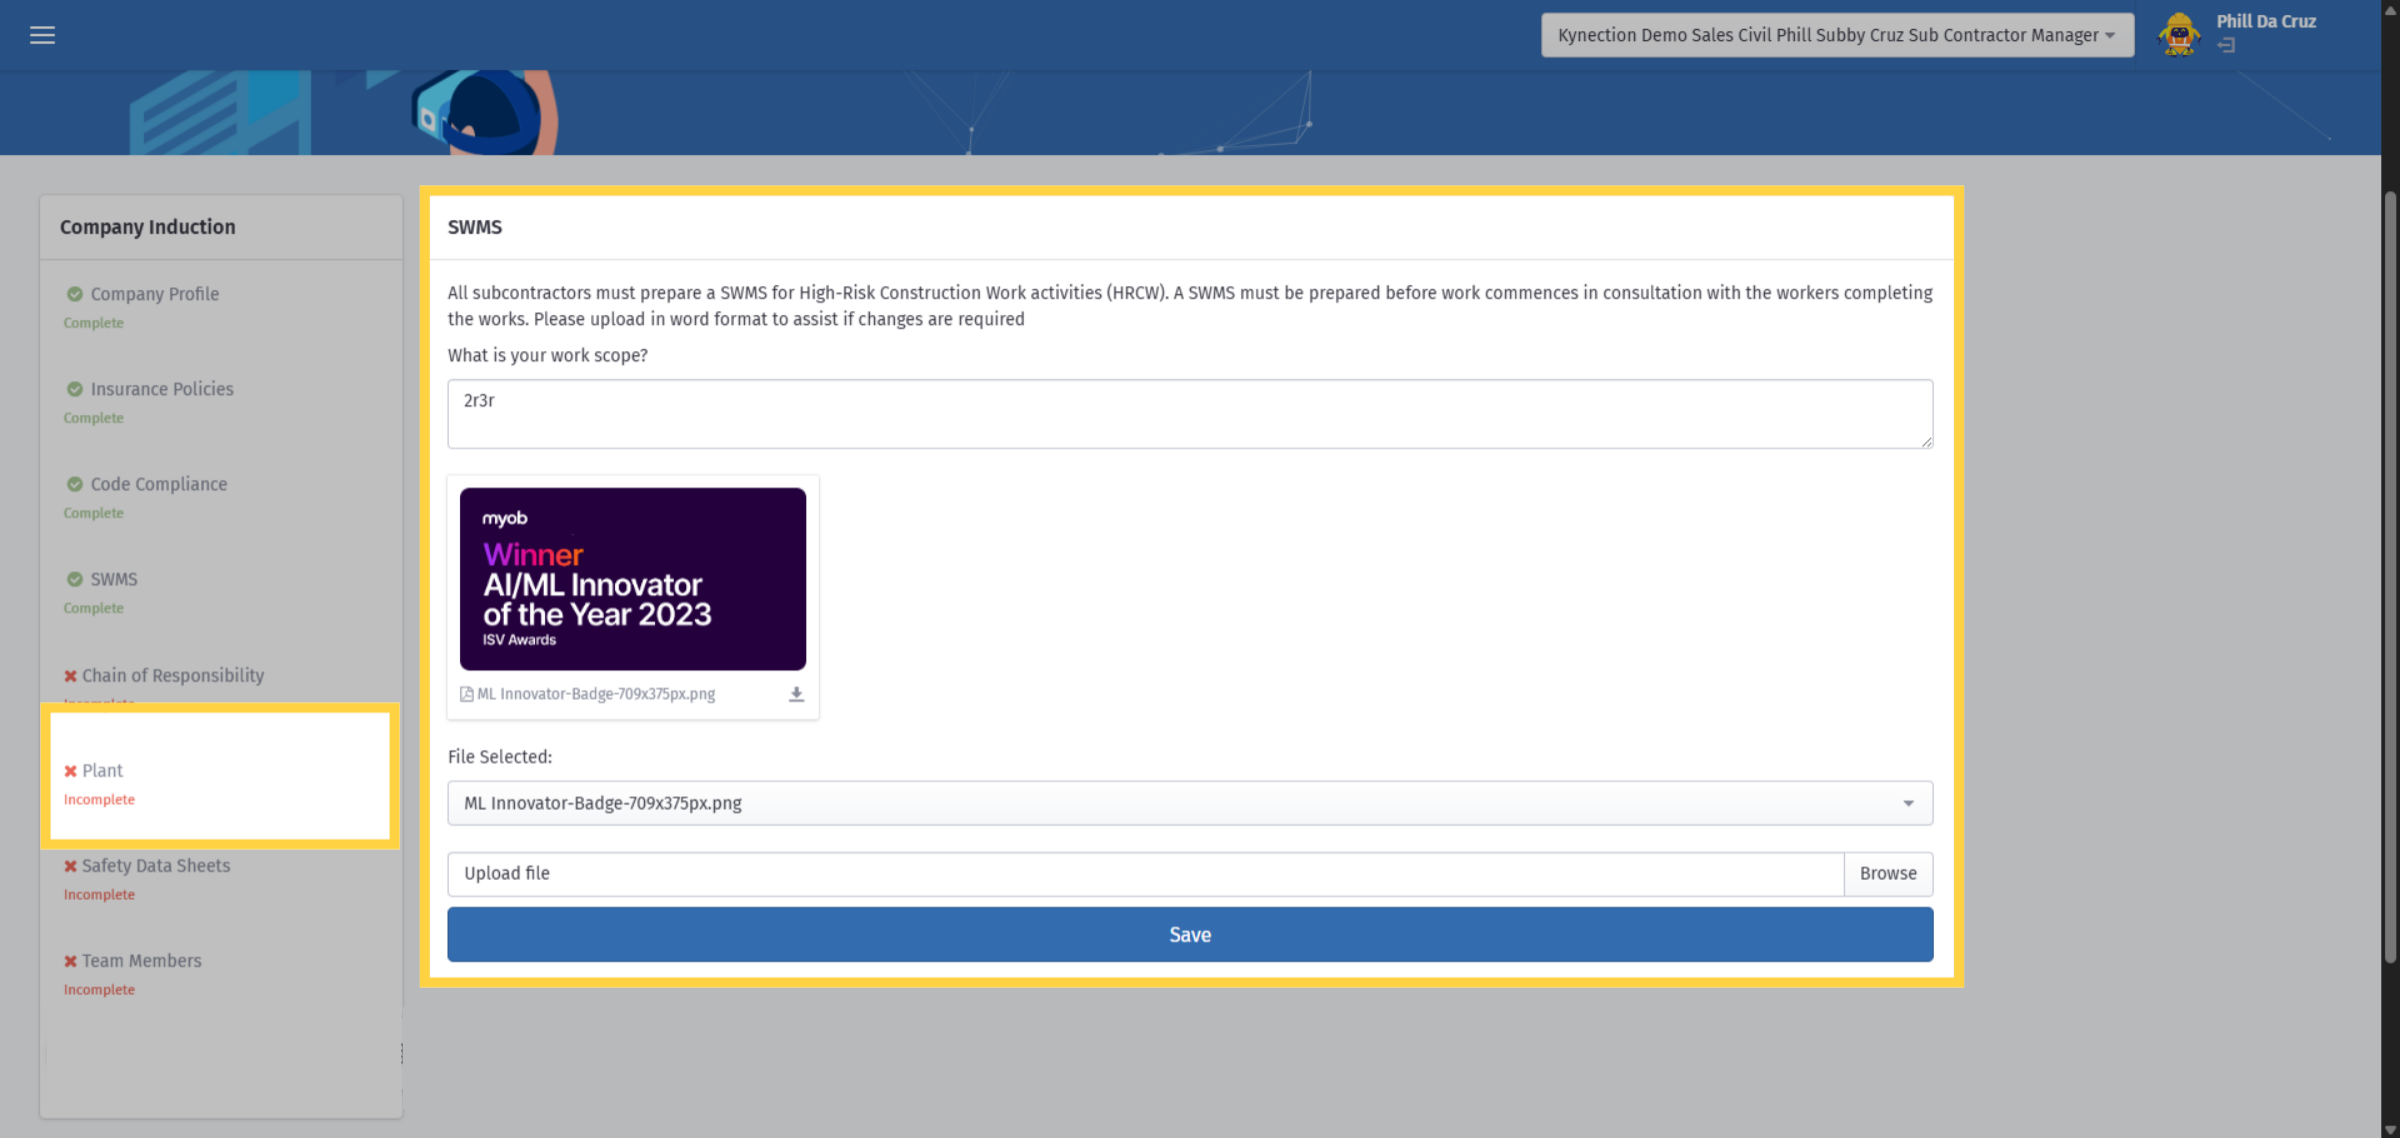
29. SWMS
Fill out the SWMS form, upload the necessary photos, and click 'Save'.
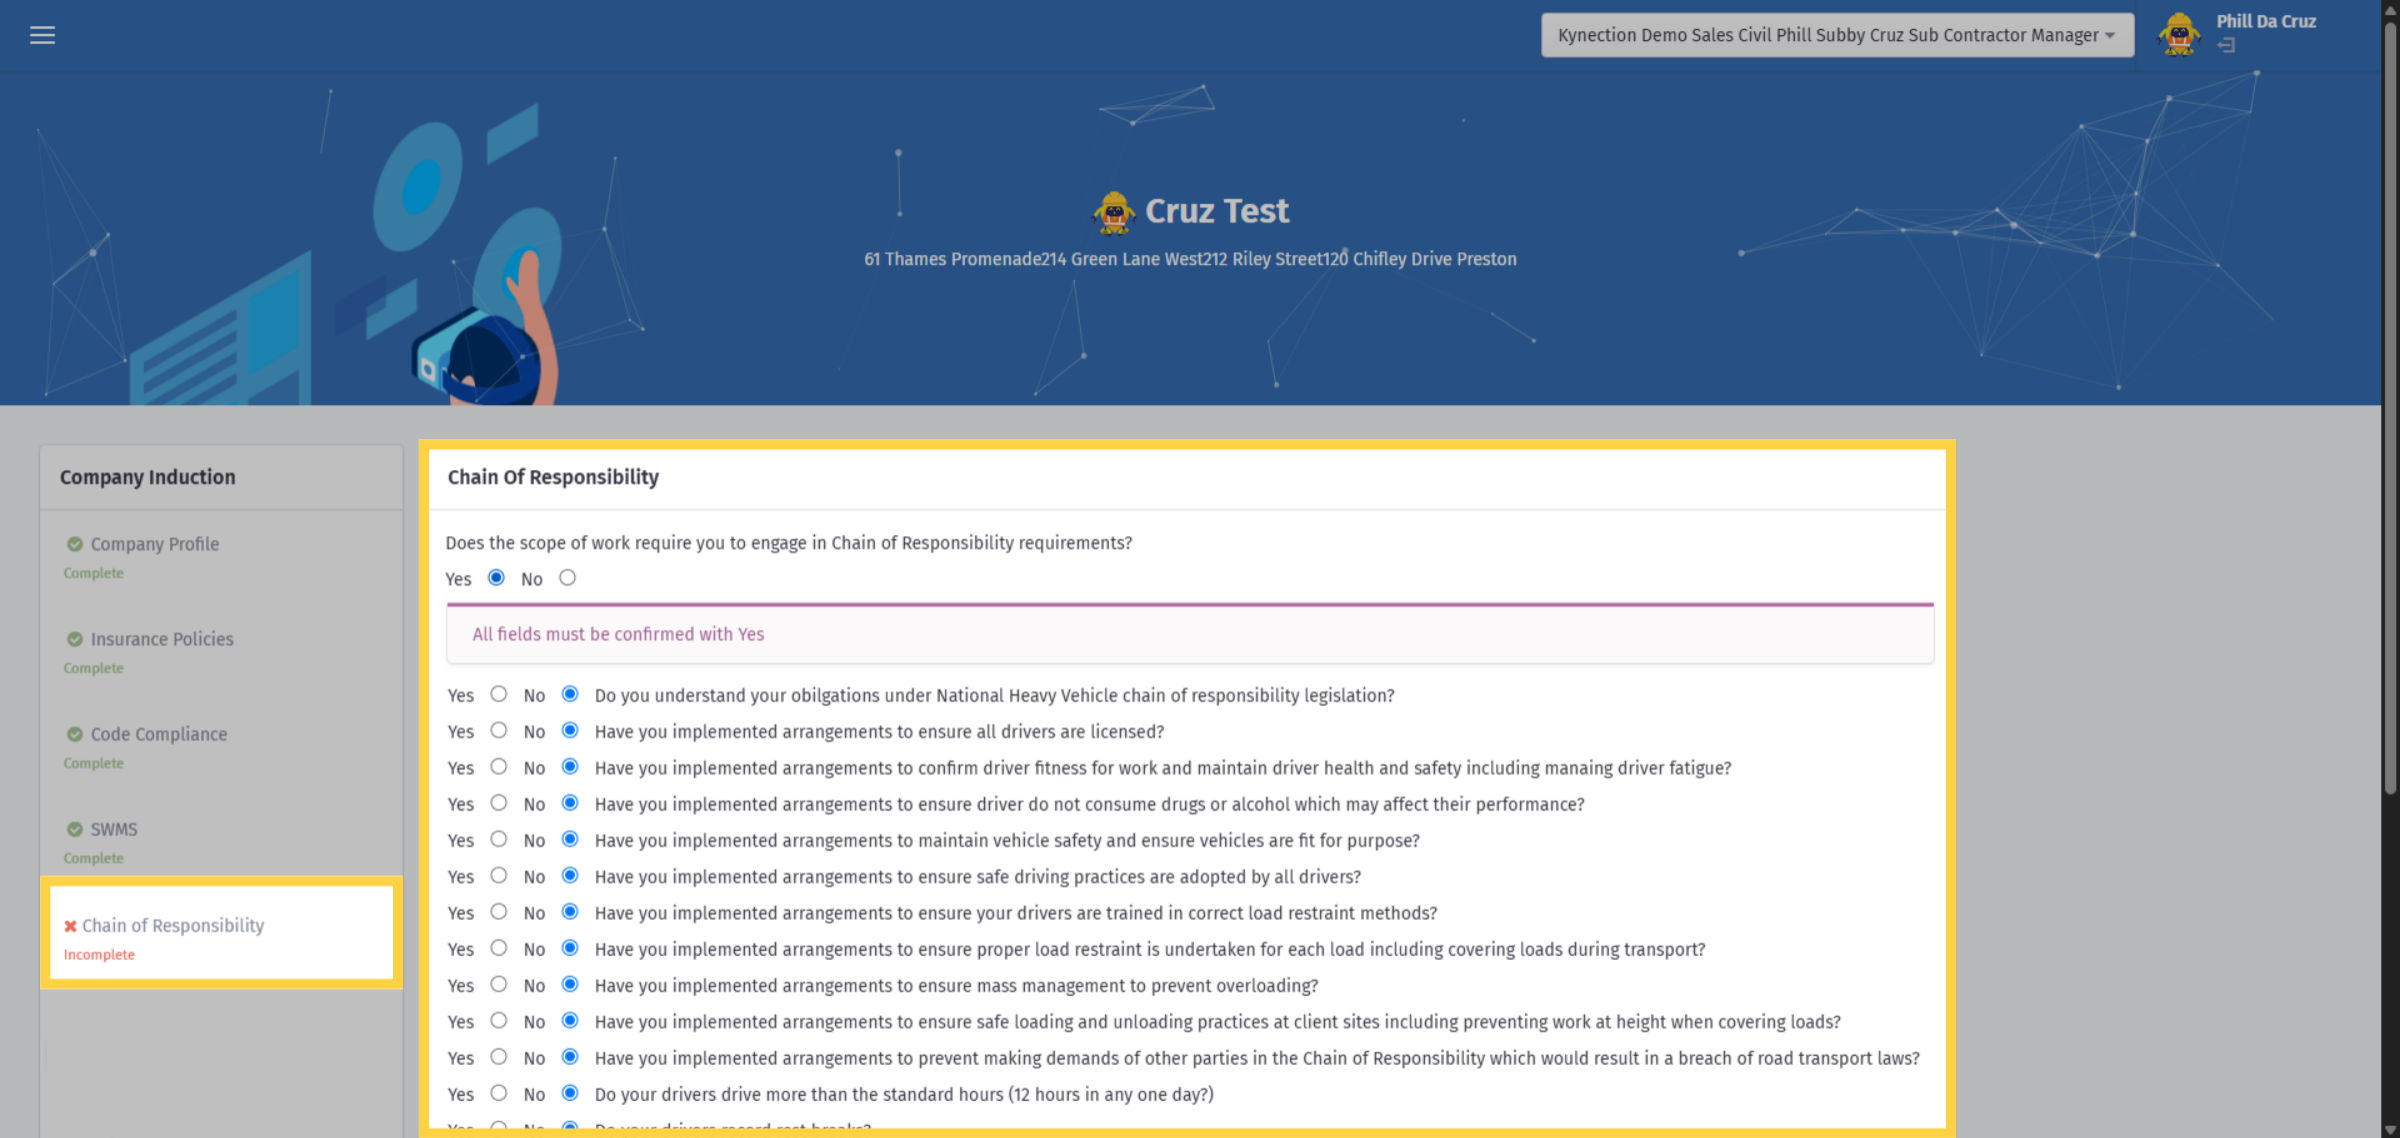
30. Enter Chain of Responsibility Response
Please answer all questions in the chain of responsibility questionnaire, then click "Save."
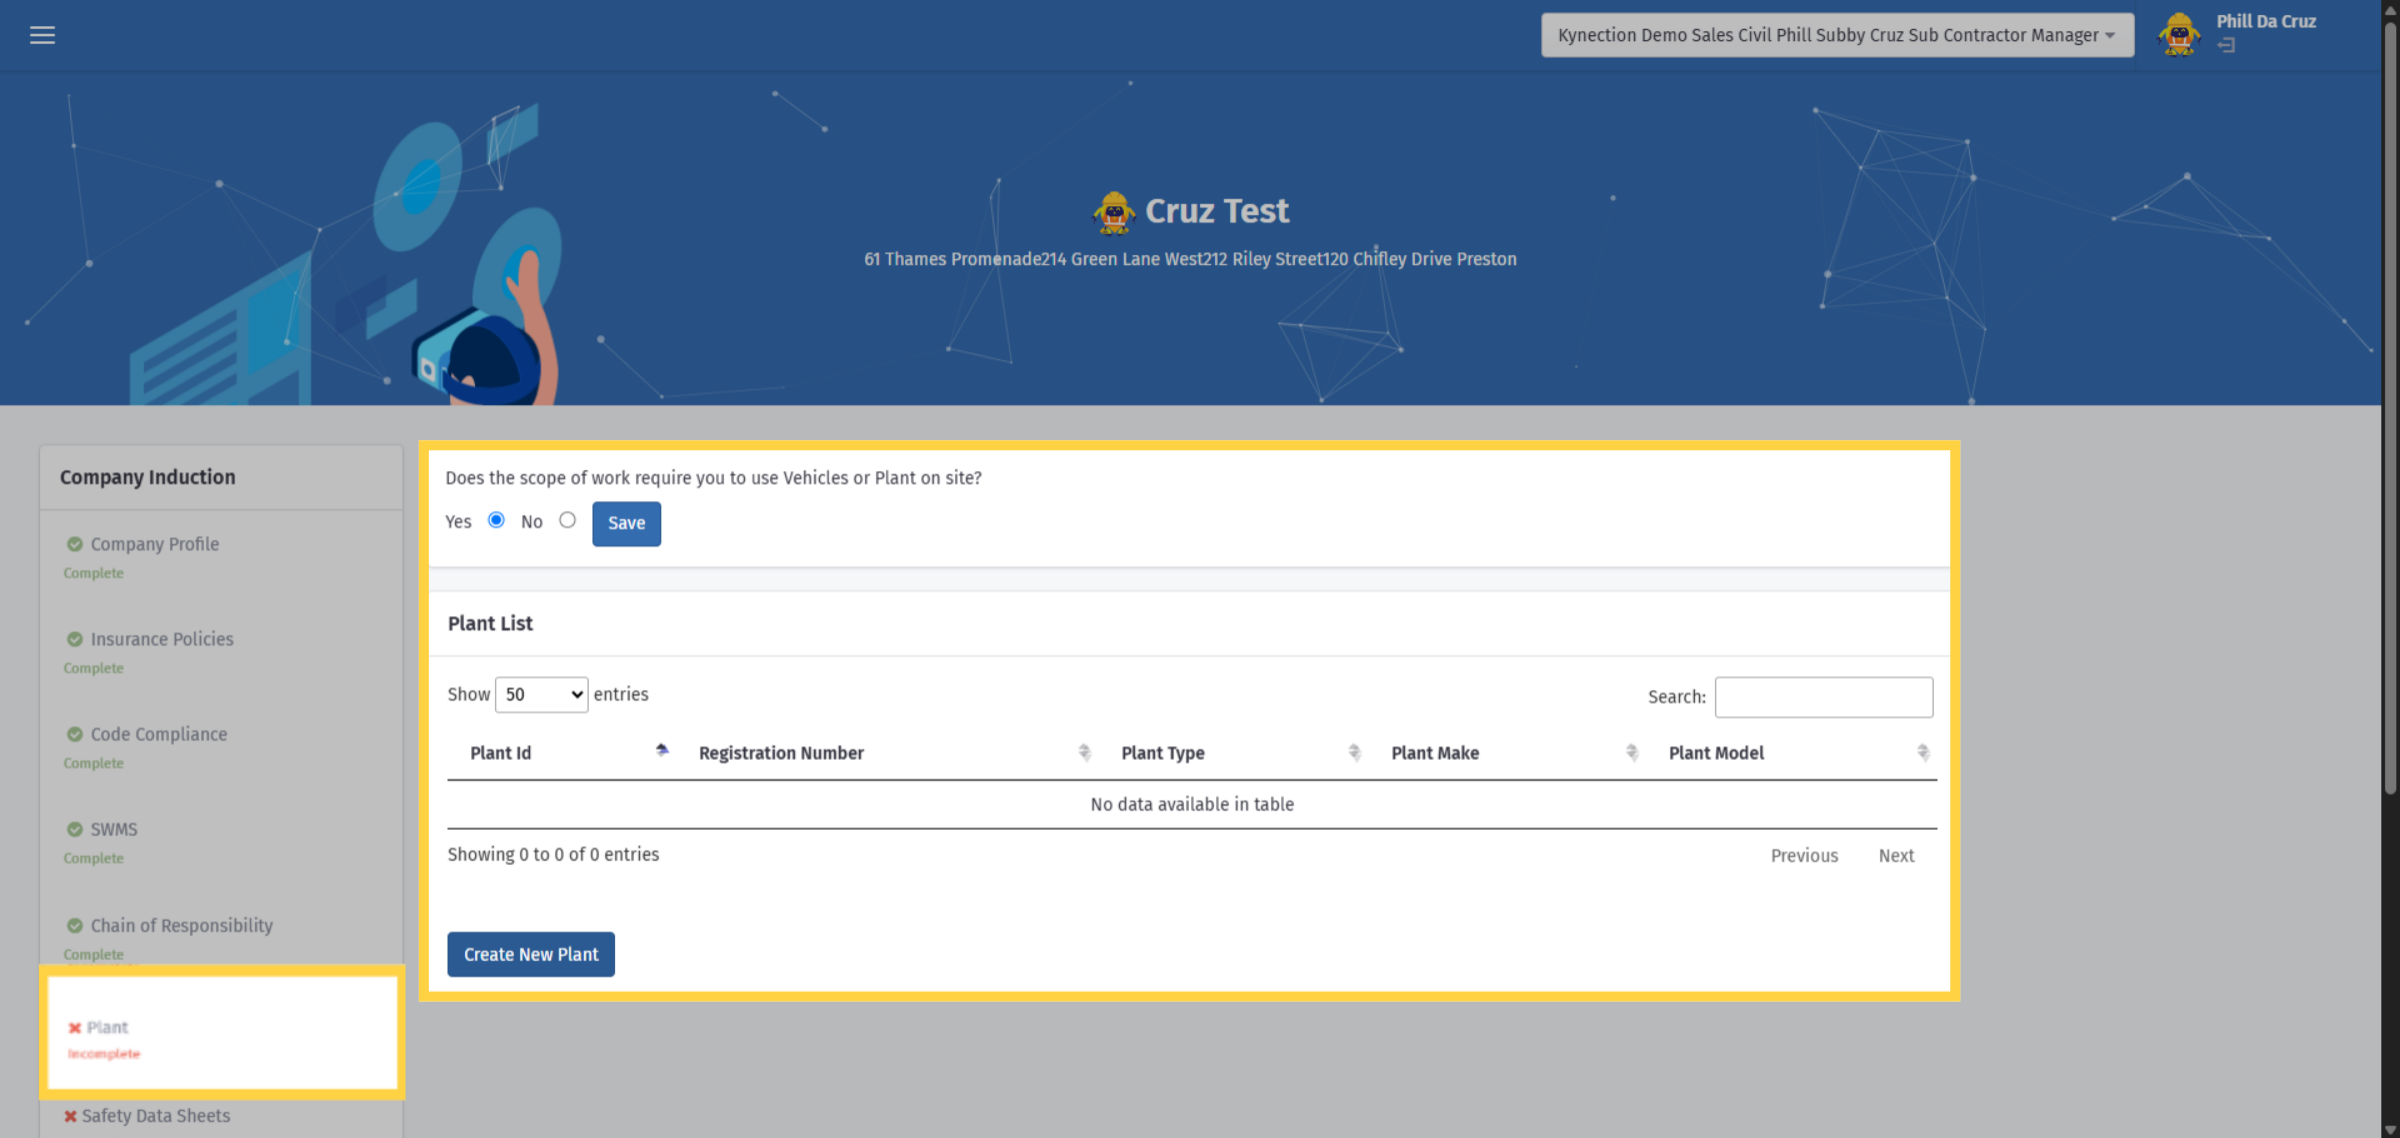
31. Create New Plant Entry
If the scope of work involves vehicles or equipment, either select the existing asset or click the "Create New Plant" button to add a new one.
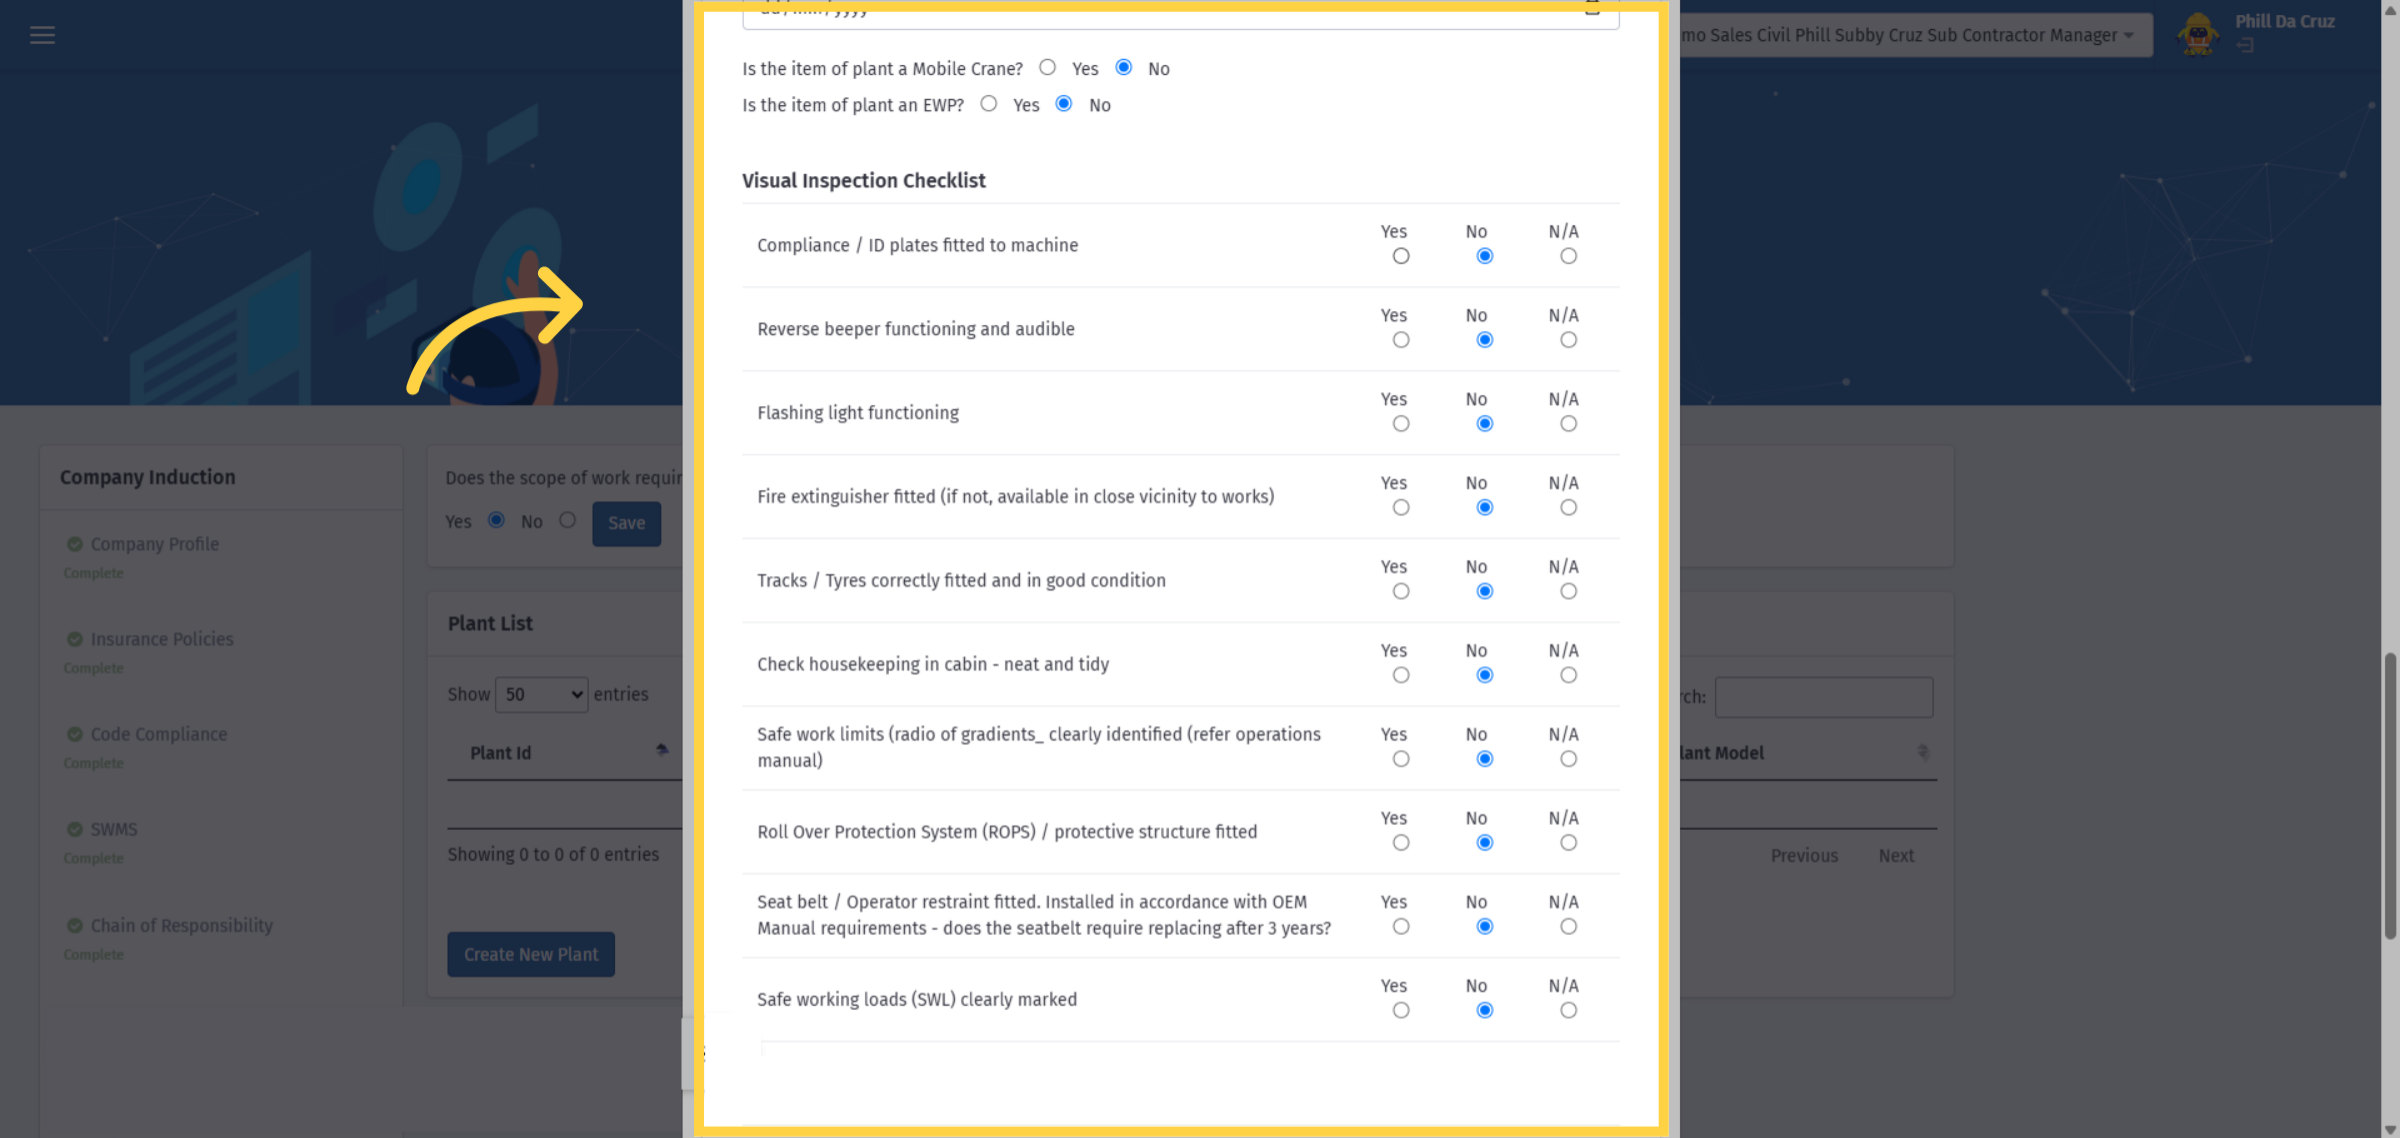
32. Plant Checklist
Provide all the details of the plant and complete the pre-start checklist form.
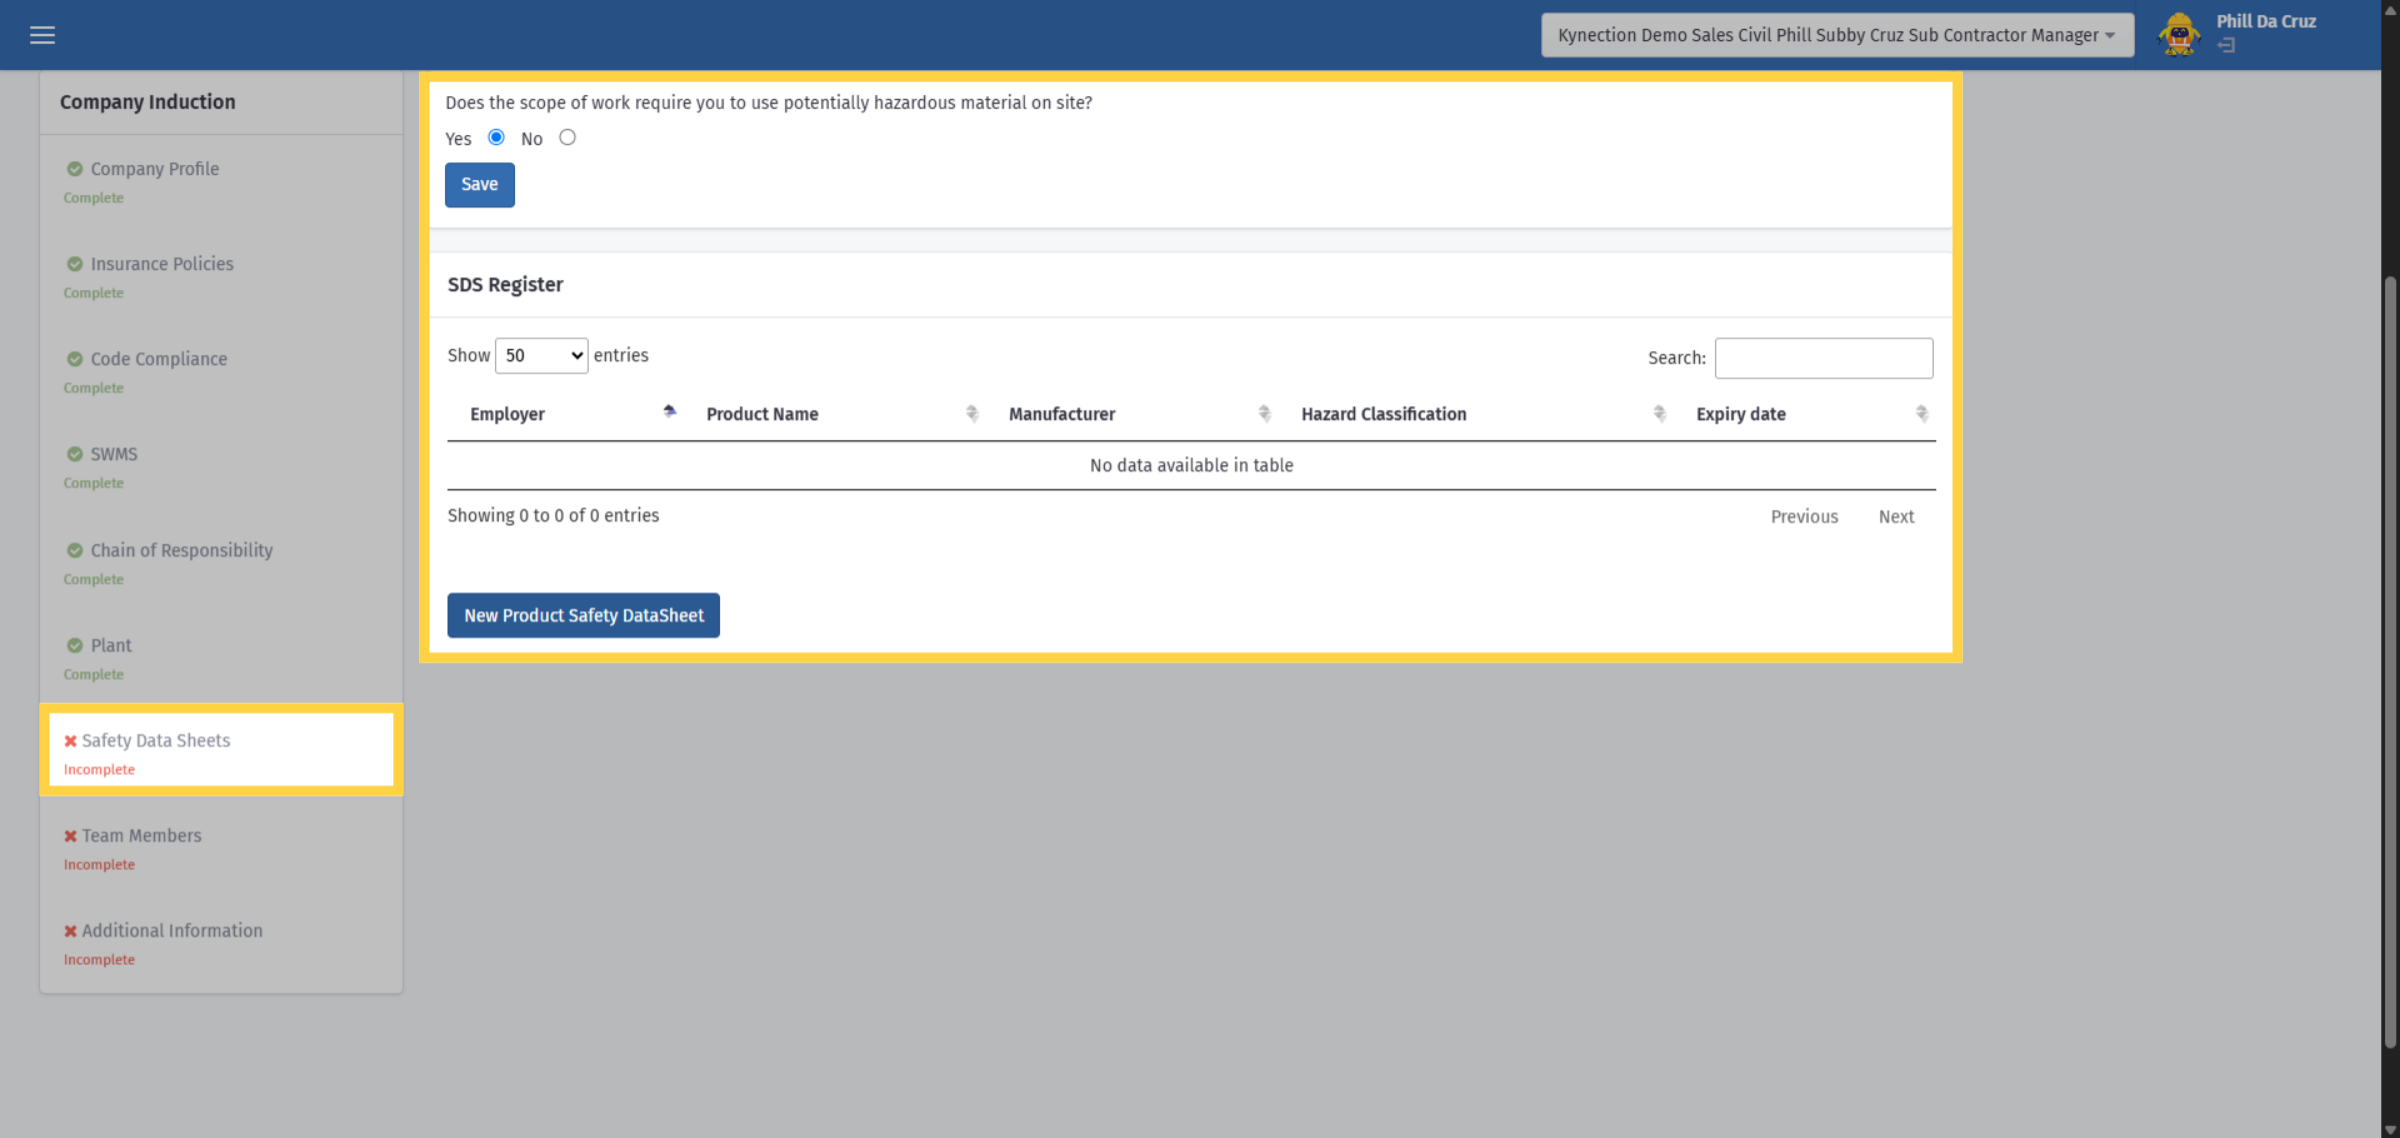
33. Add New Safety Data Sheet
If the project's scope involves a subcontractor potentially using hazardous materials on-site, please select the appropriate Safety Data Sheet (SDS) or add a new one.
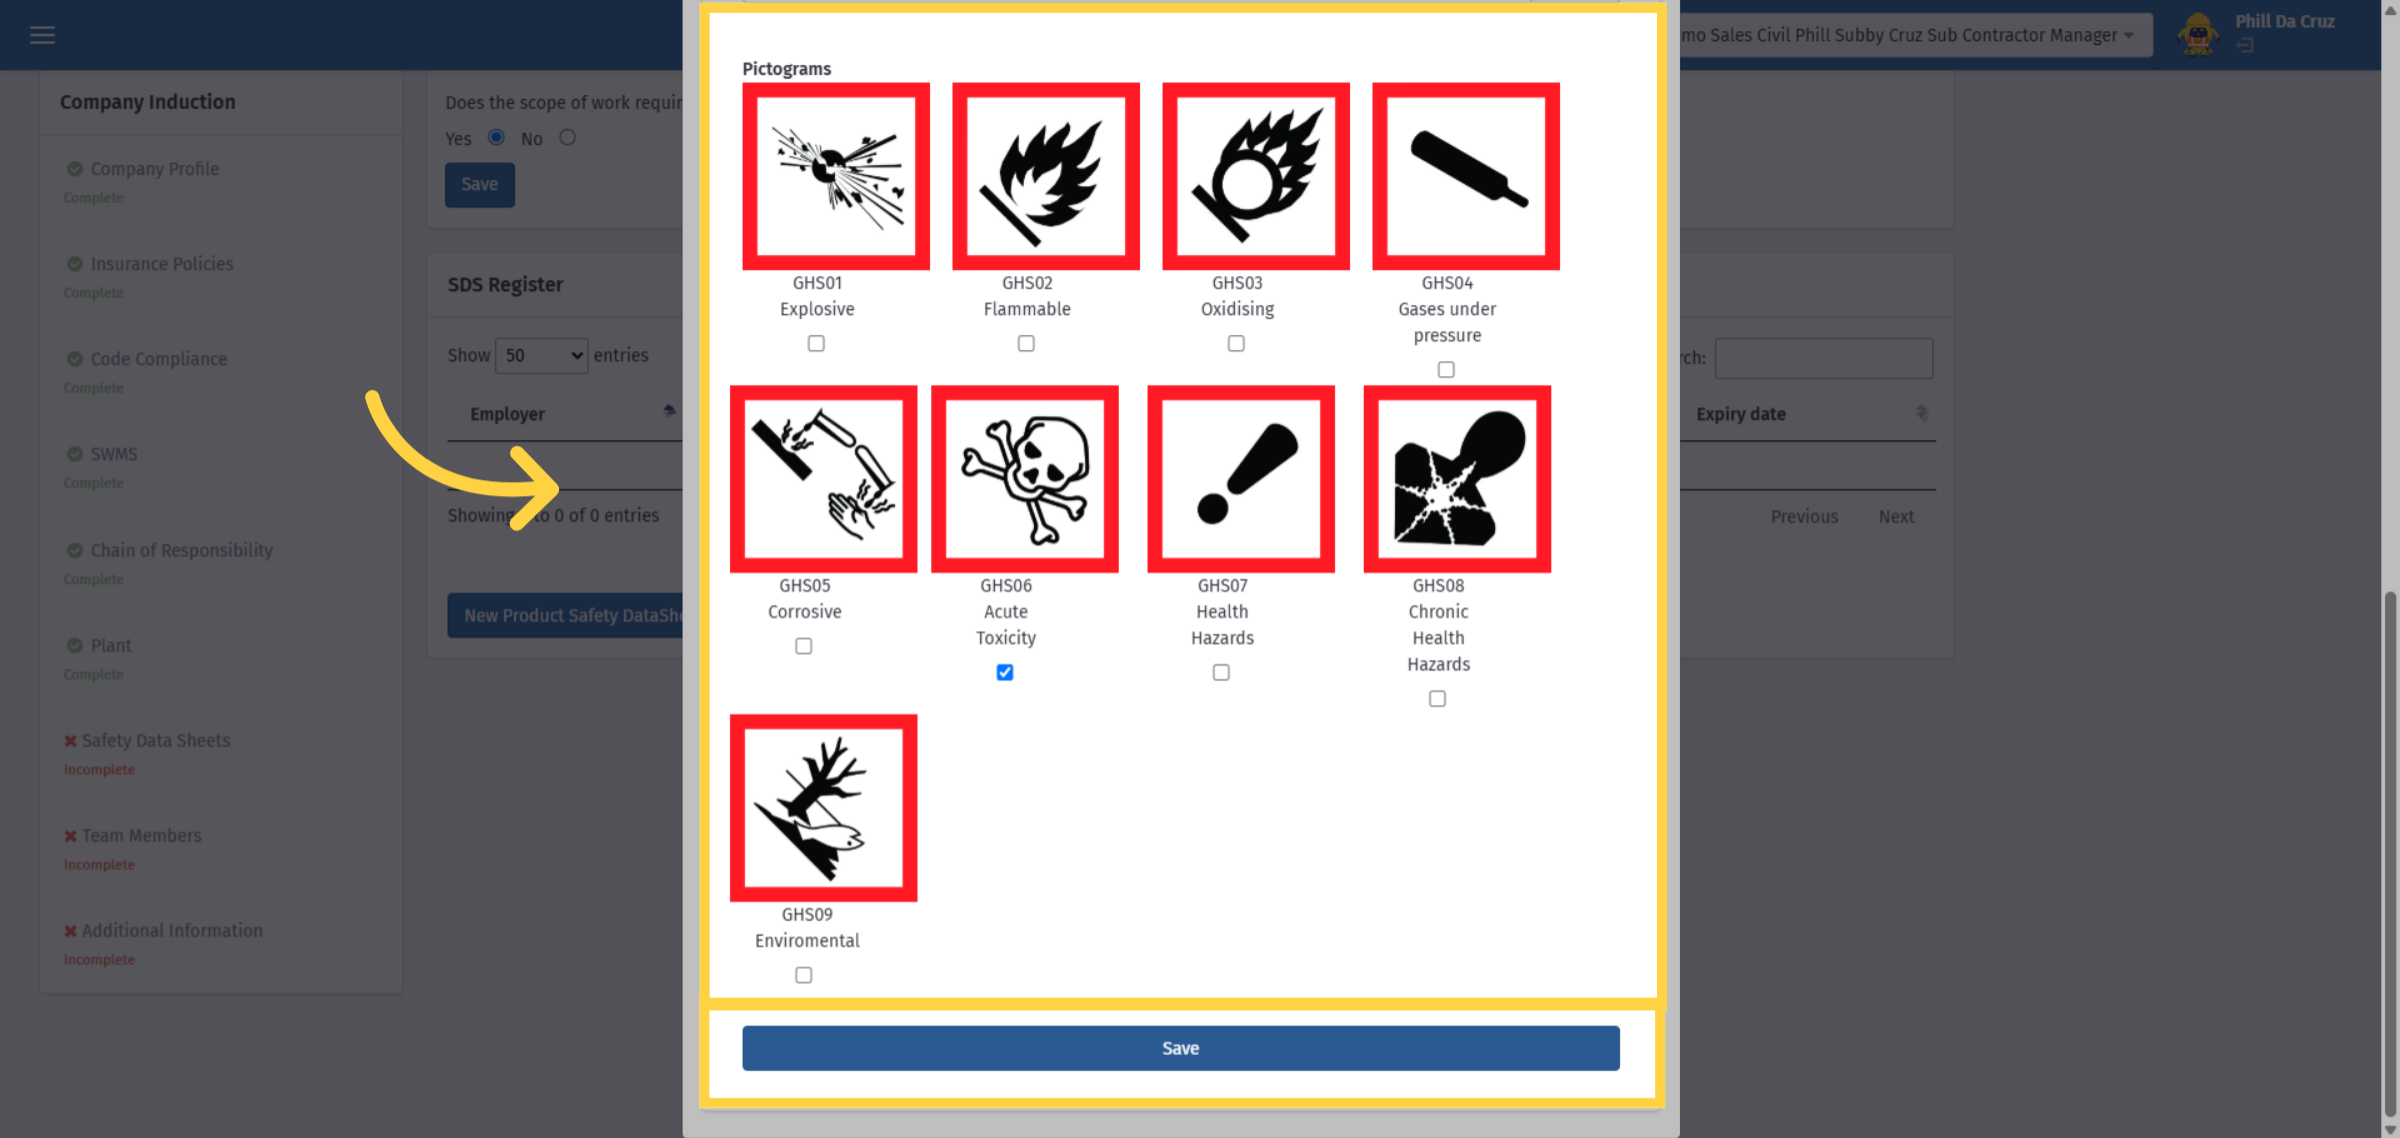
34. Save Safety Data Sheet
Complete all SDS details and click 'Save.'
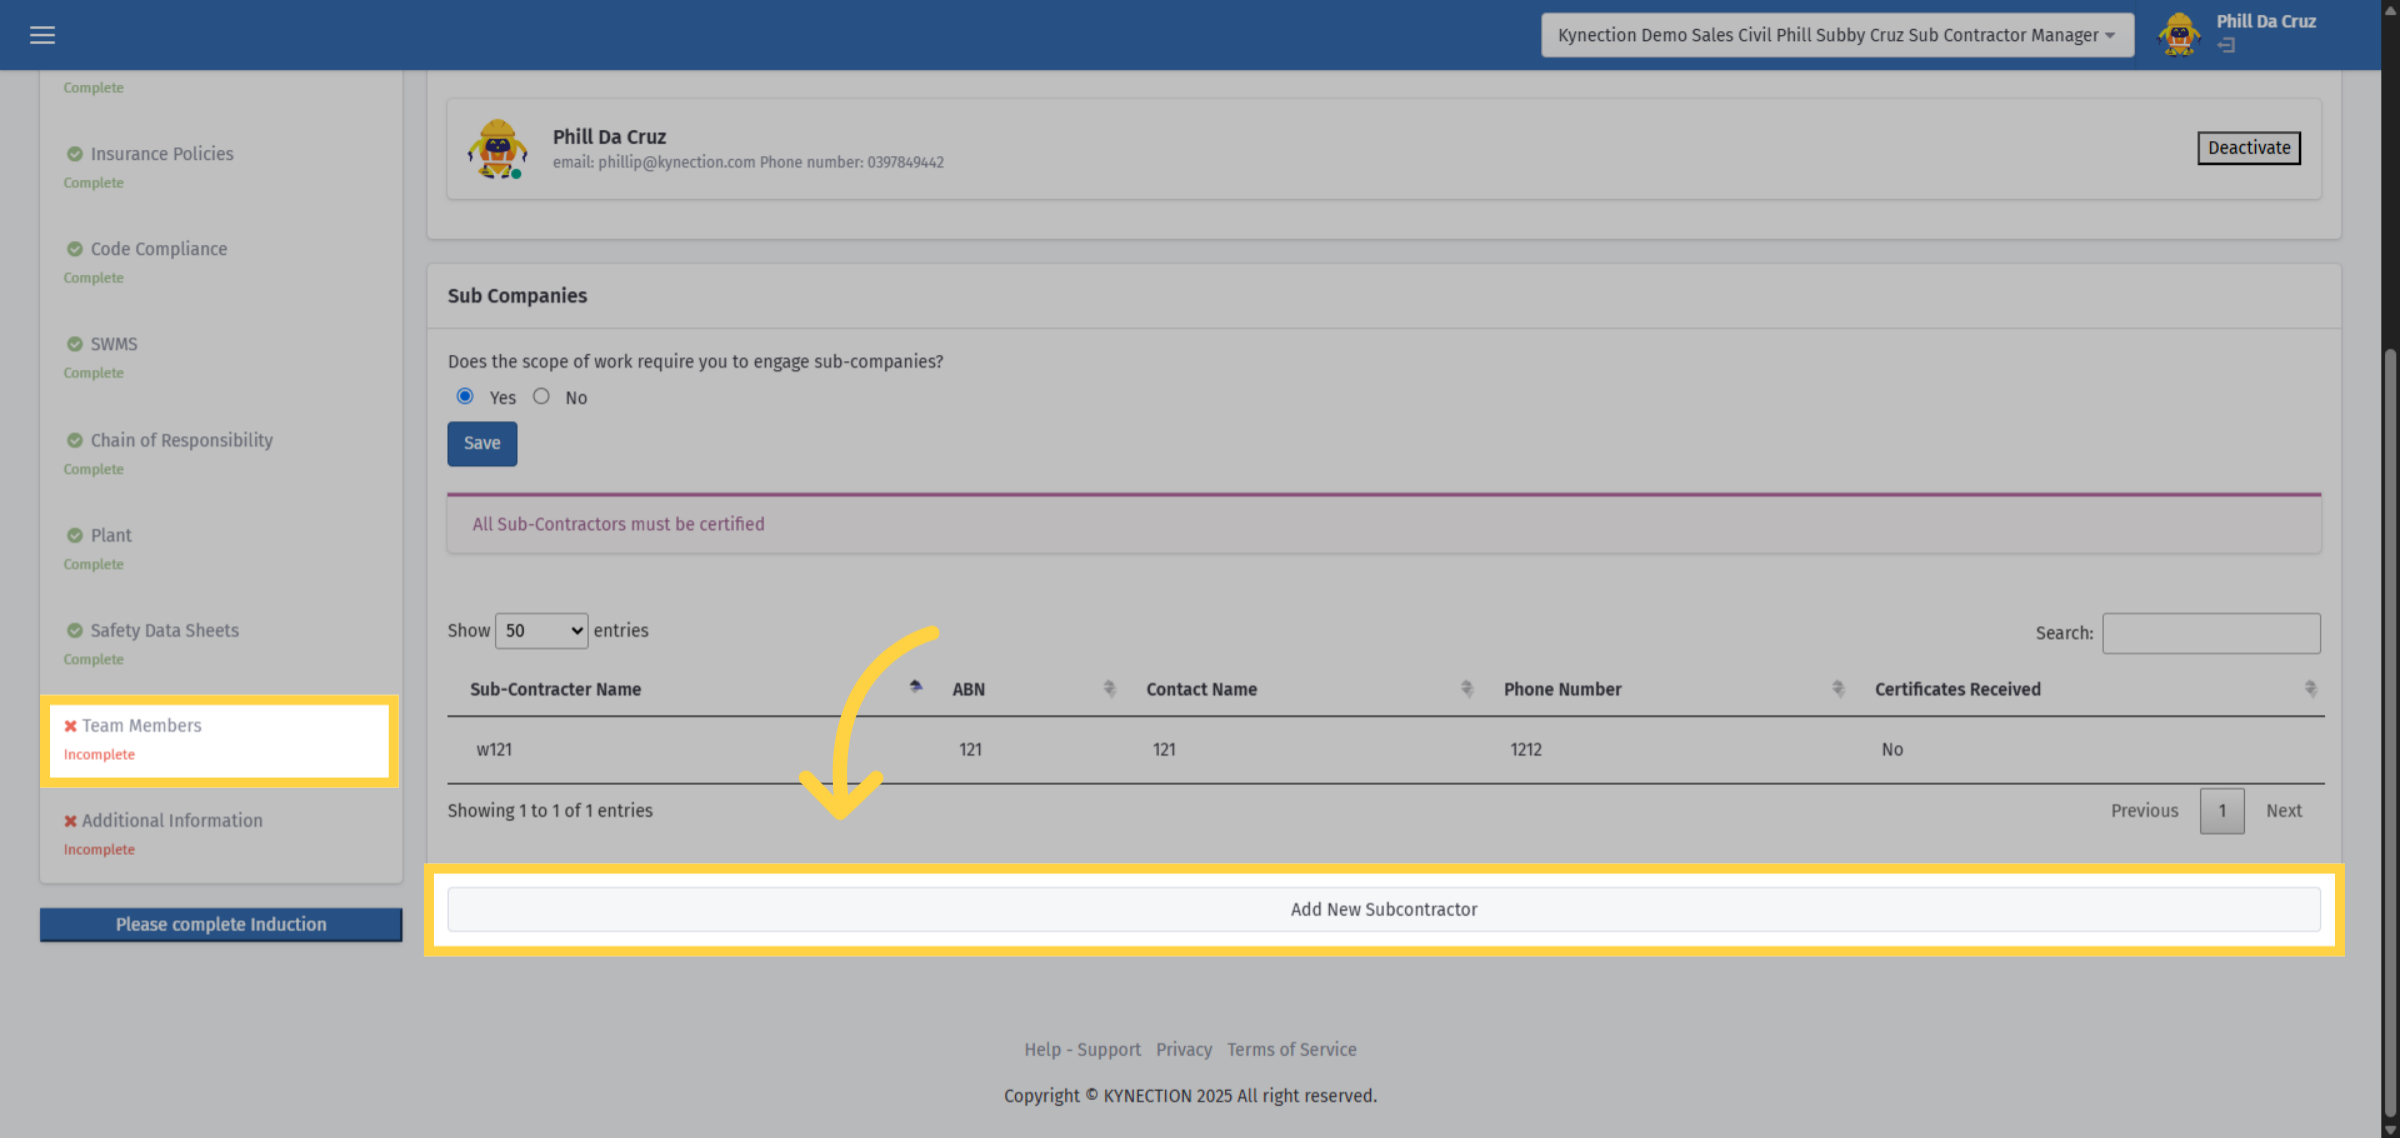
35. Add New Subcontractor
The Subcontractor can add more subcontractors to the portal by selecting the "Add New Subcontractor" option and filling out all the required fields.
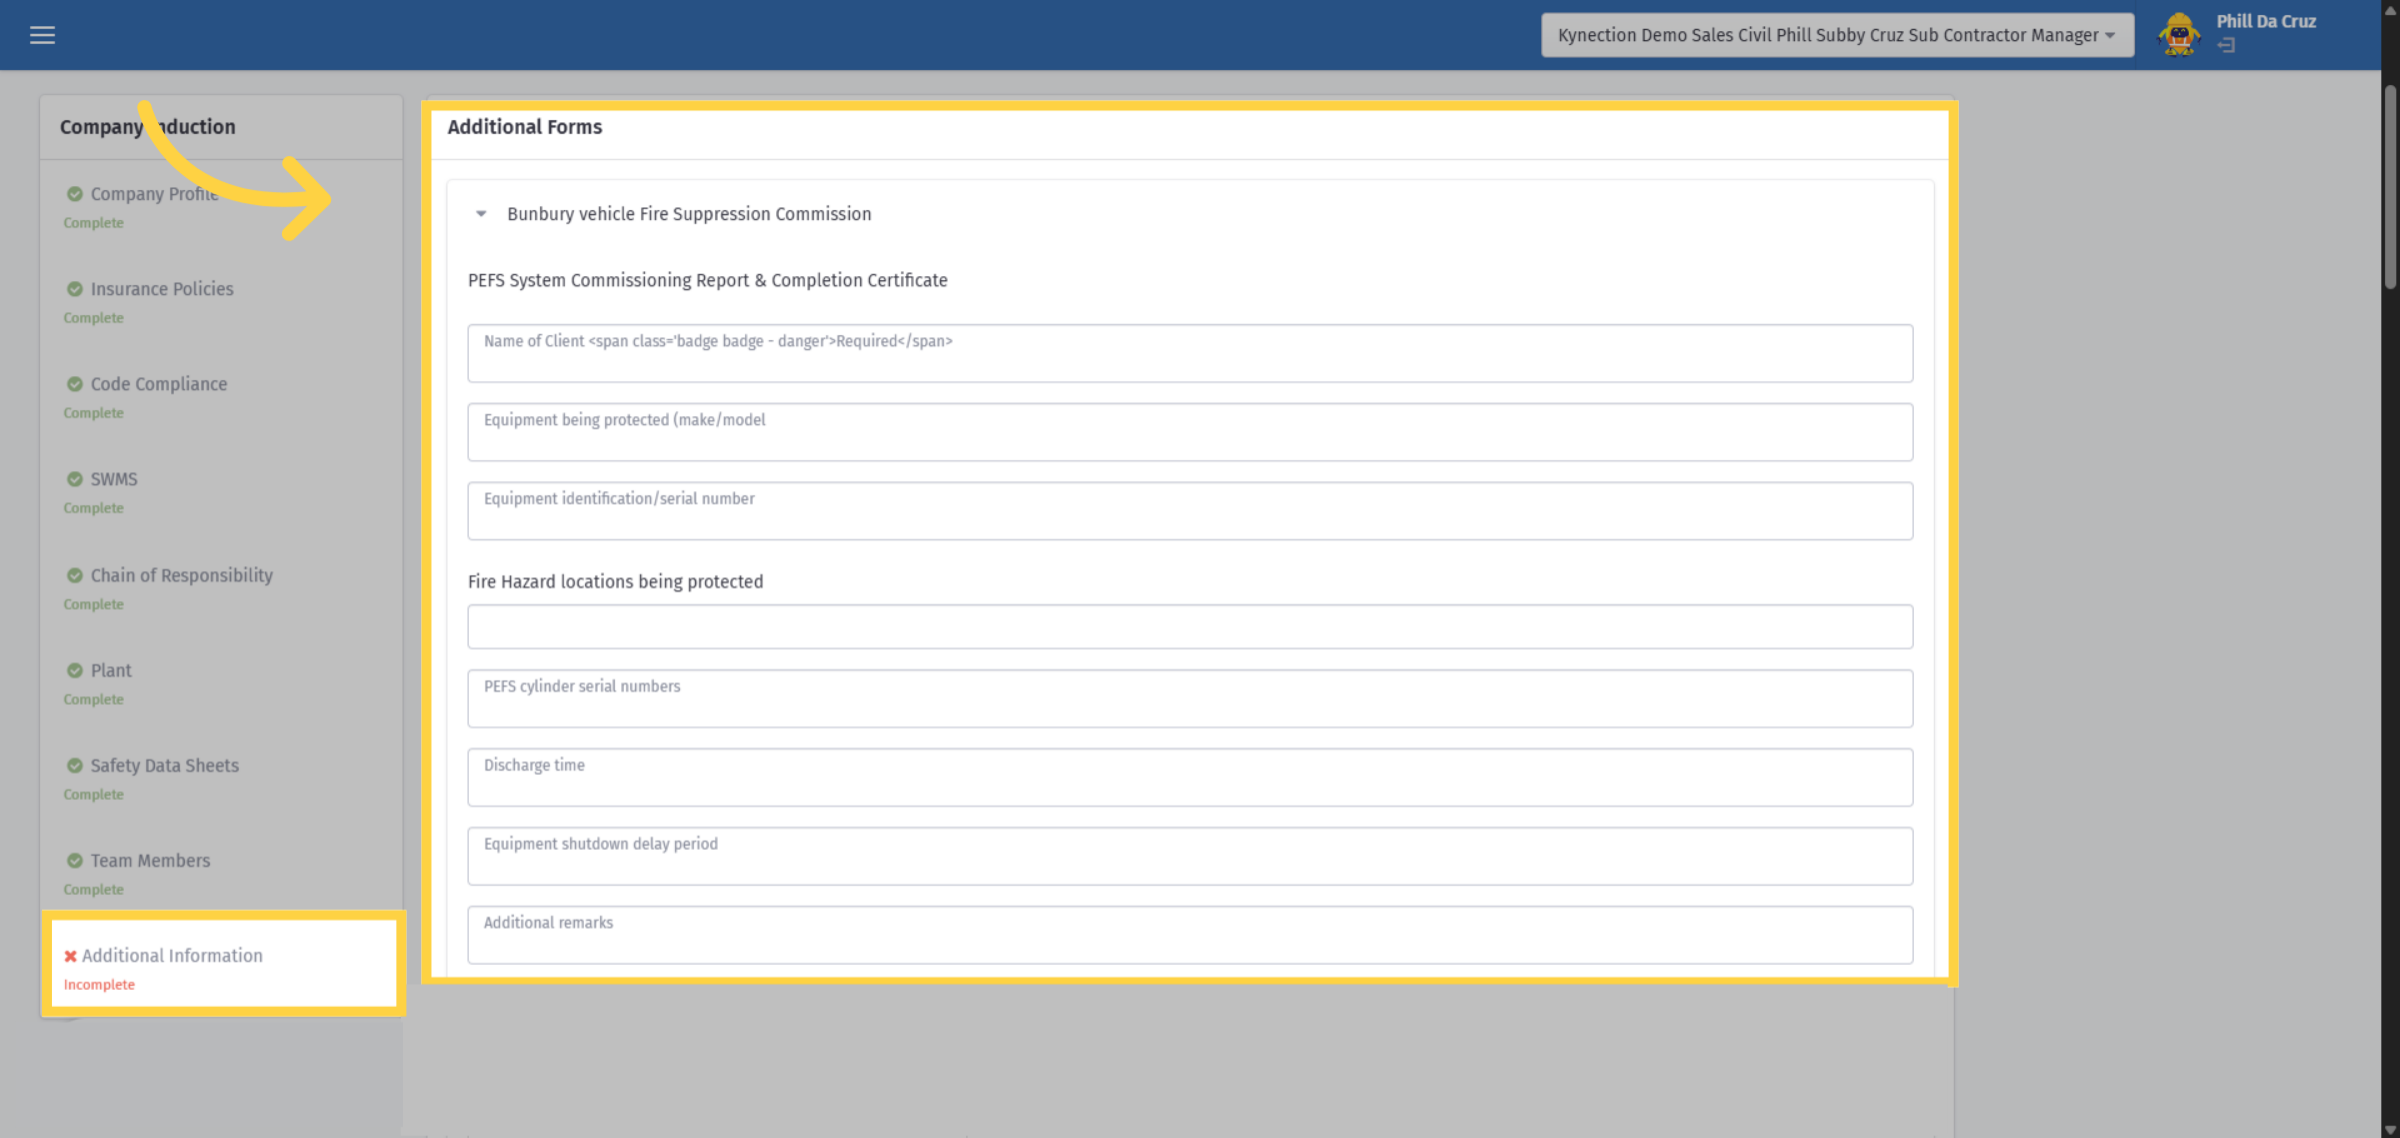
36. Additional Forms
If you have created any additional forms for the subcontractor to complete, you can find them under the Additional Information tab.
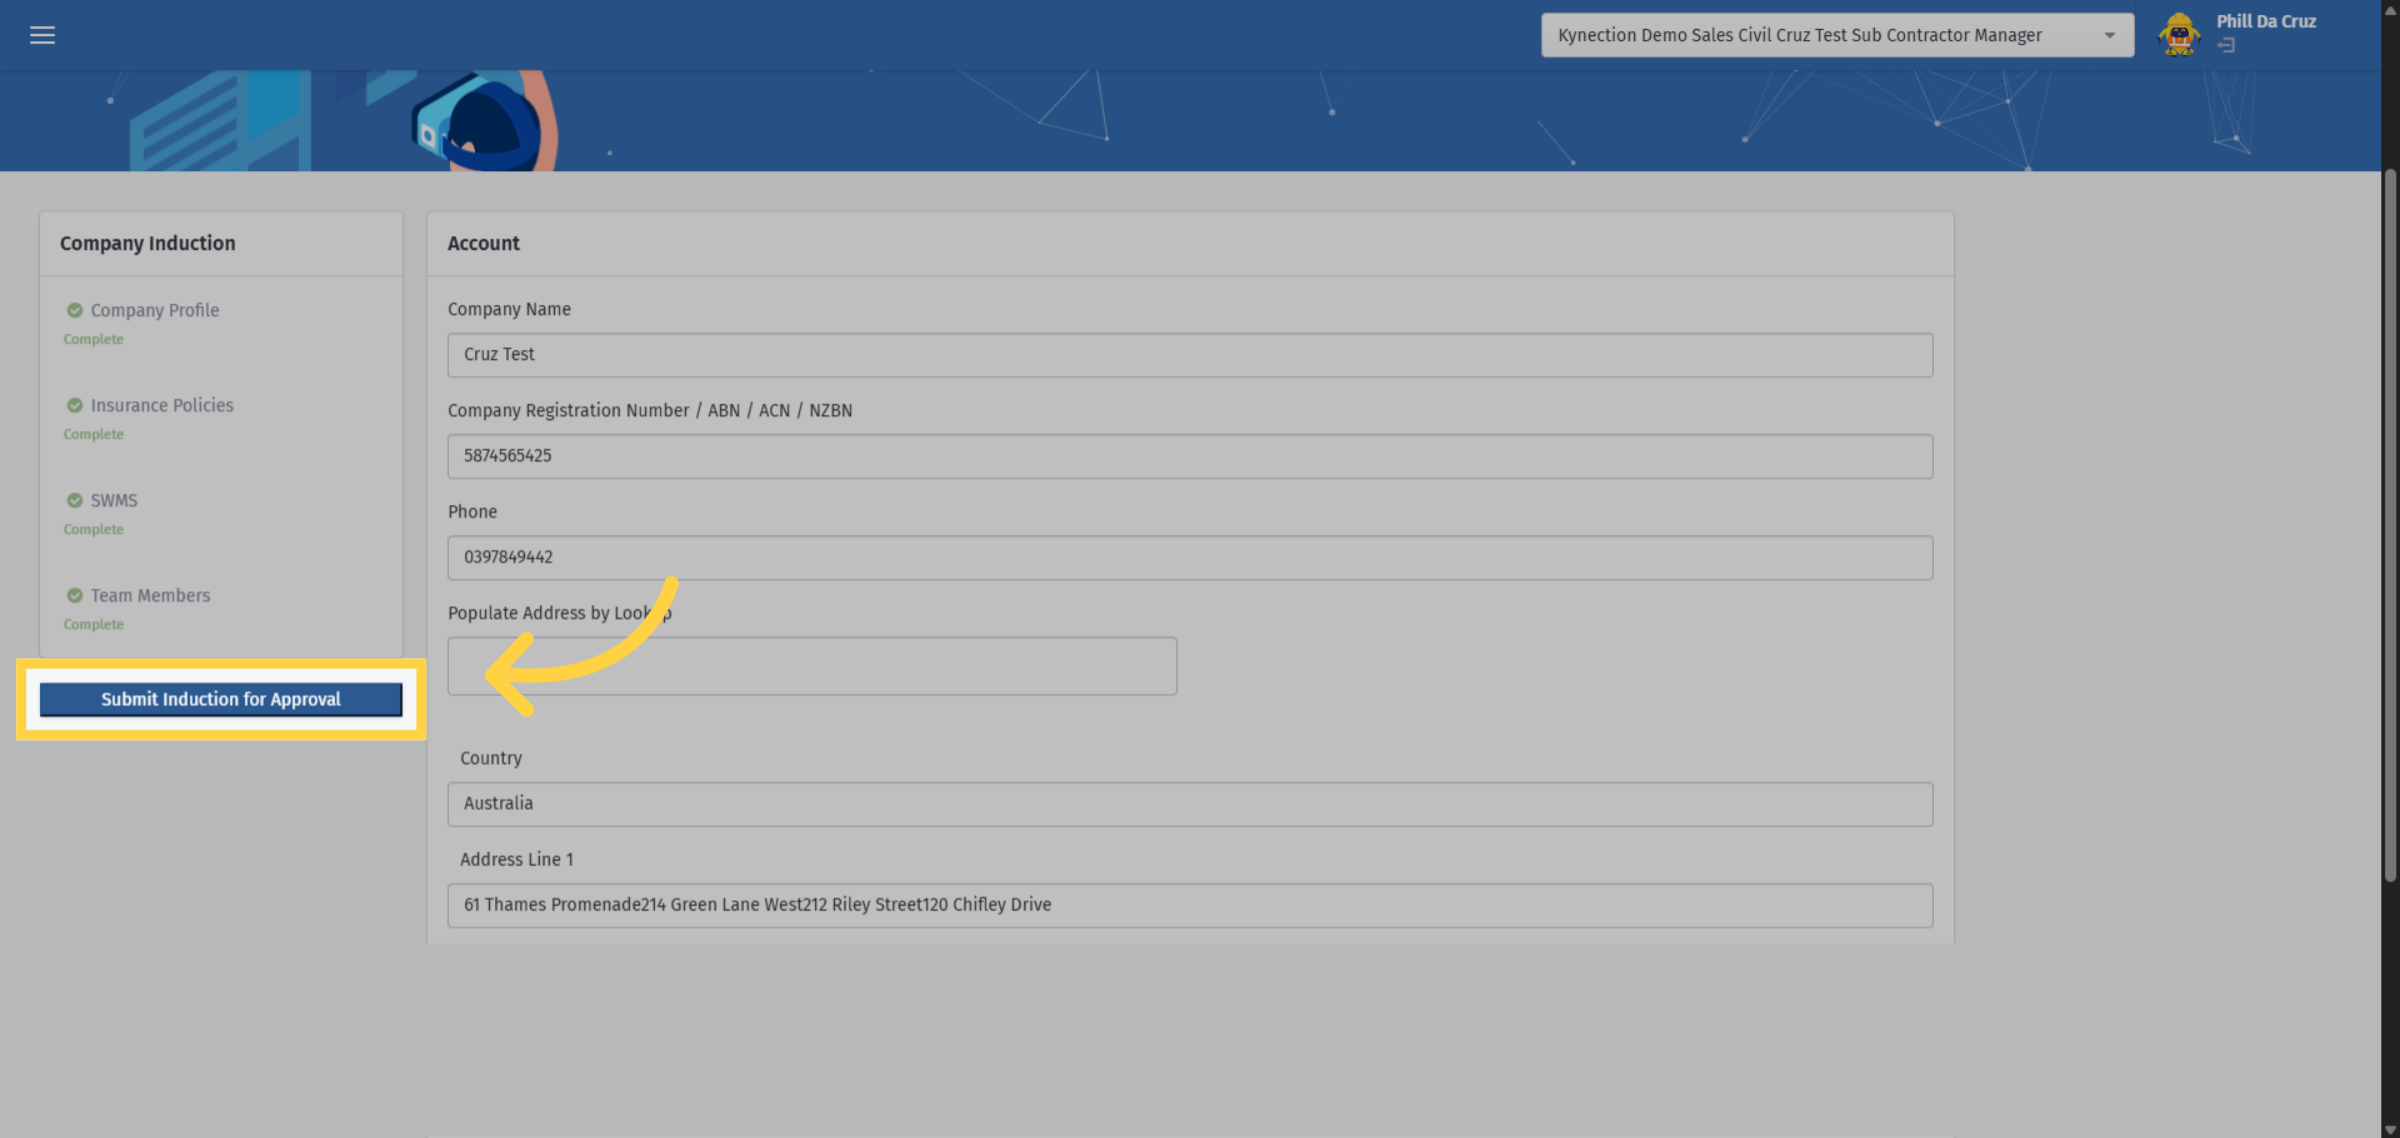
37. Submit Induction for Approval
Once all items on the checklist are complete, click the "Submit Induction for Approval" button.
38. Access Company Documents
In the Company Induction tab within the Kynection portal module, you can find all forms awaiting approval.
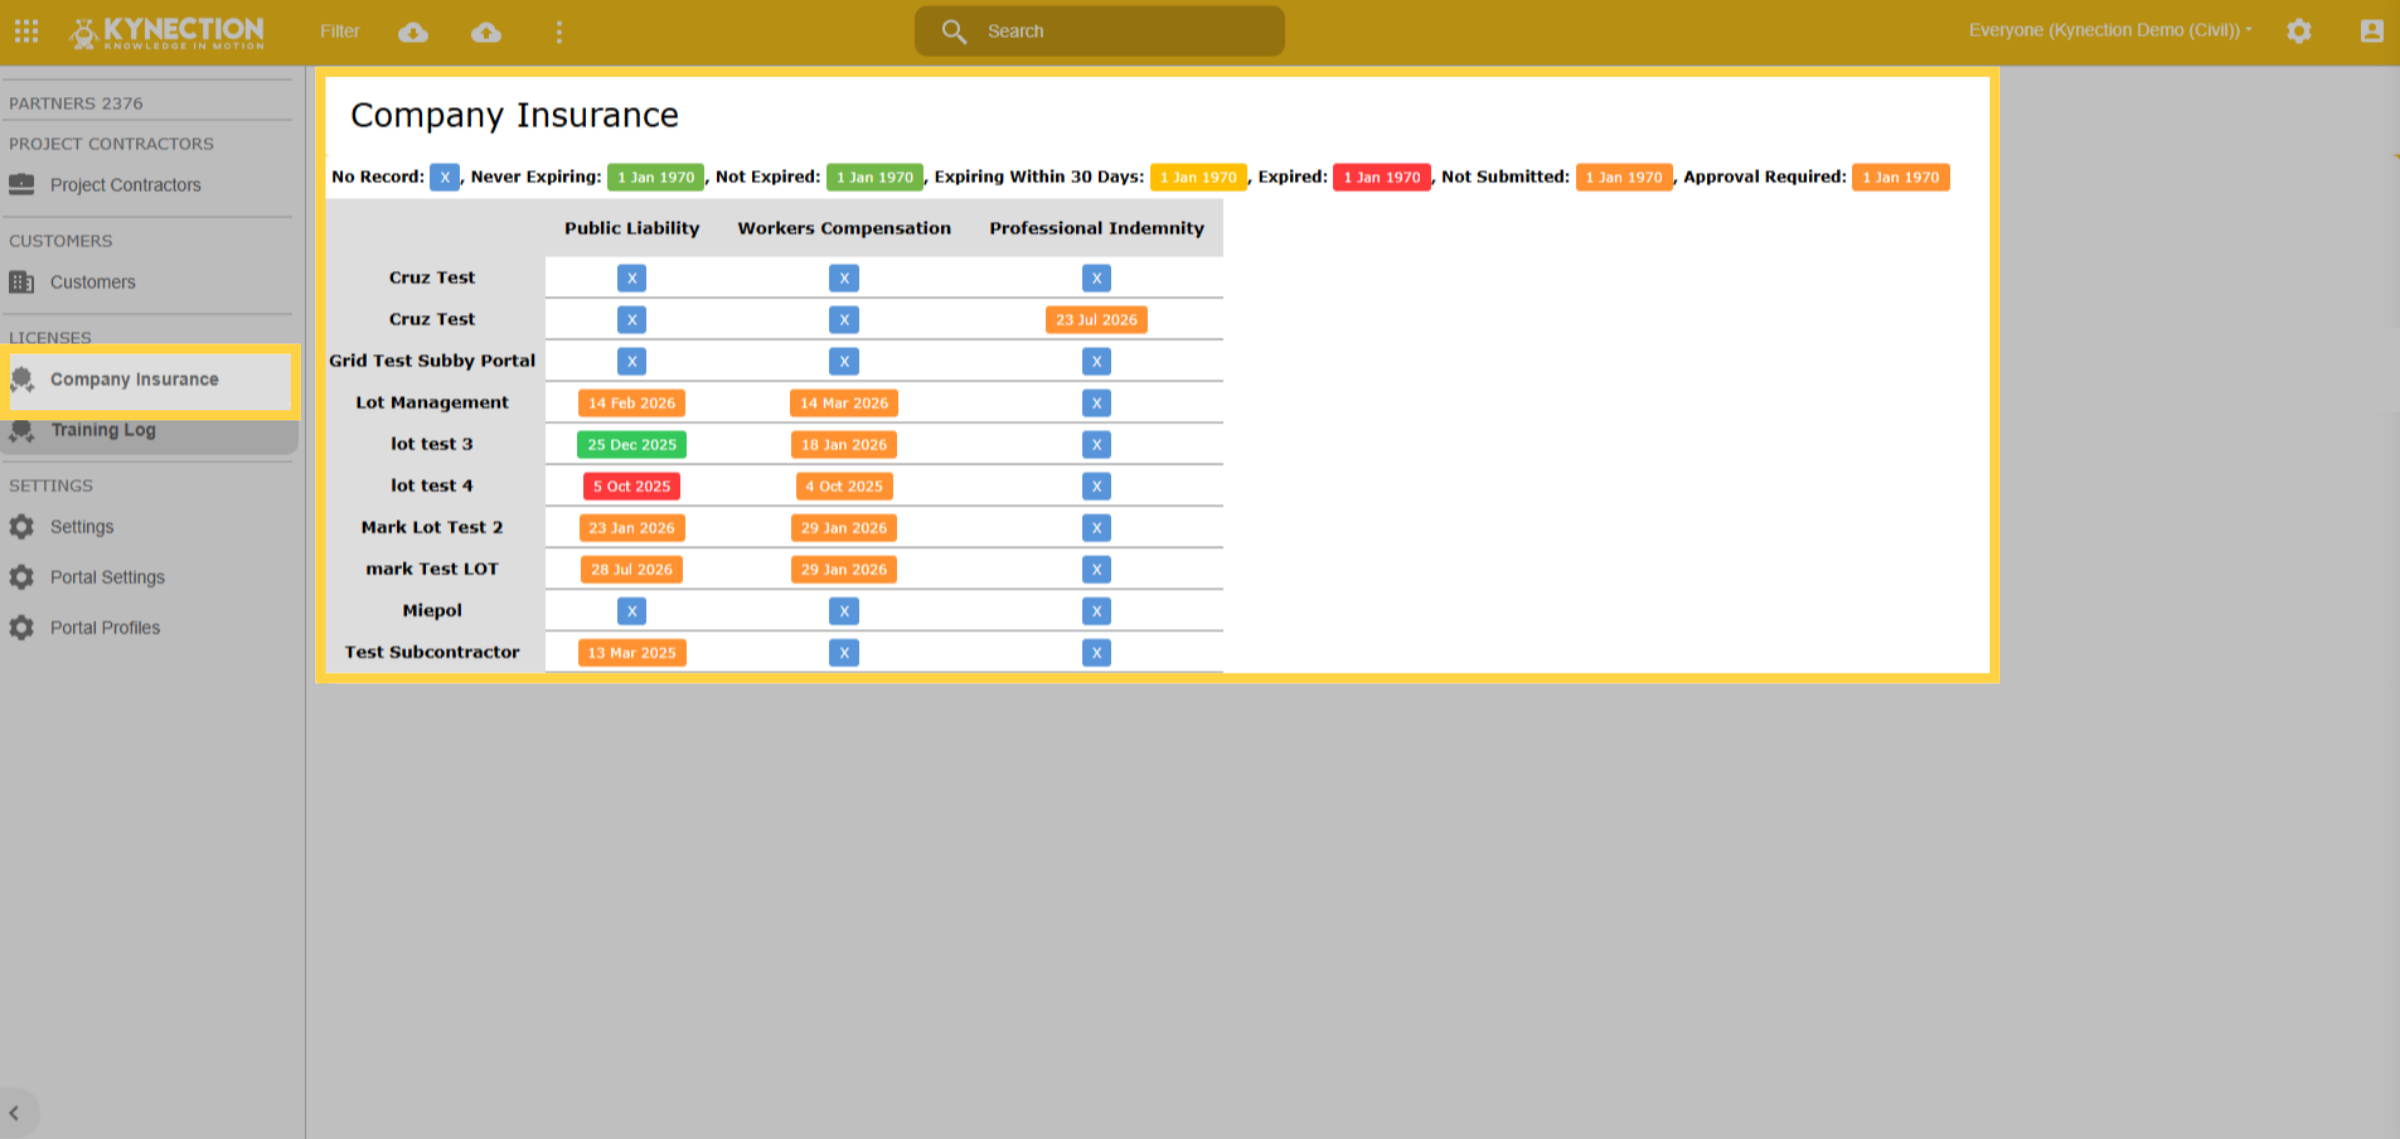
39. Company Insurance
In the company insurance tab, you will find all your subcontractors displayed in a matrix format, complete with records of their insurance details and expiration dates for monitoring purposes. Additionally, automated messages will be sent to subcontractors when their insurance is nearing its expiration date.
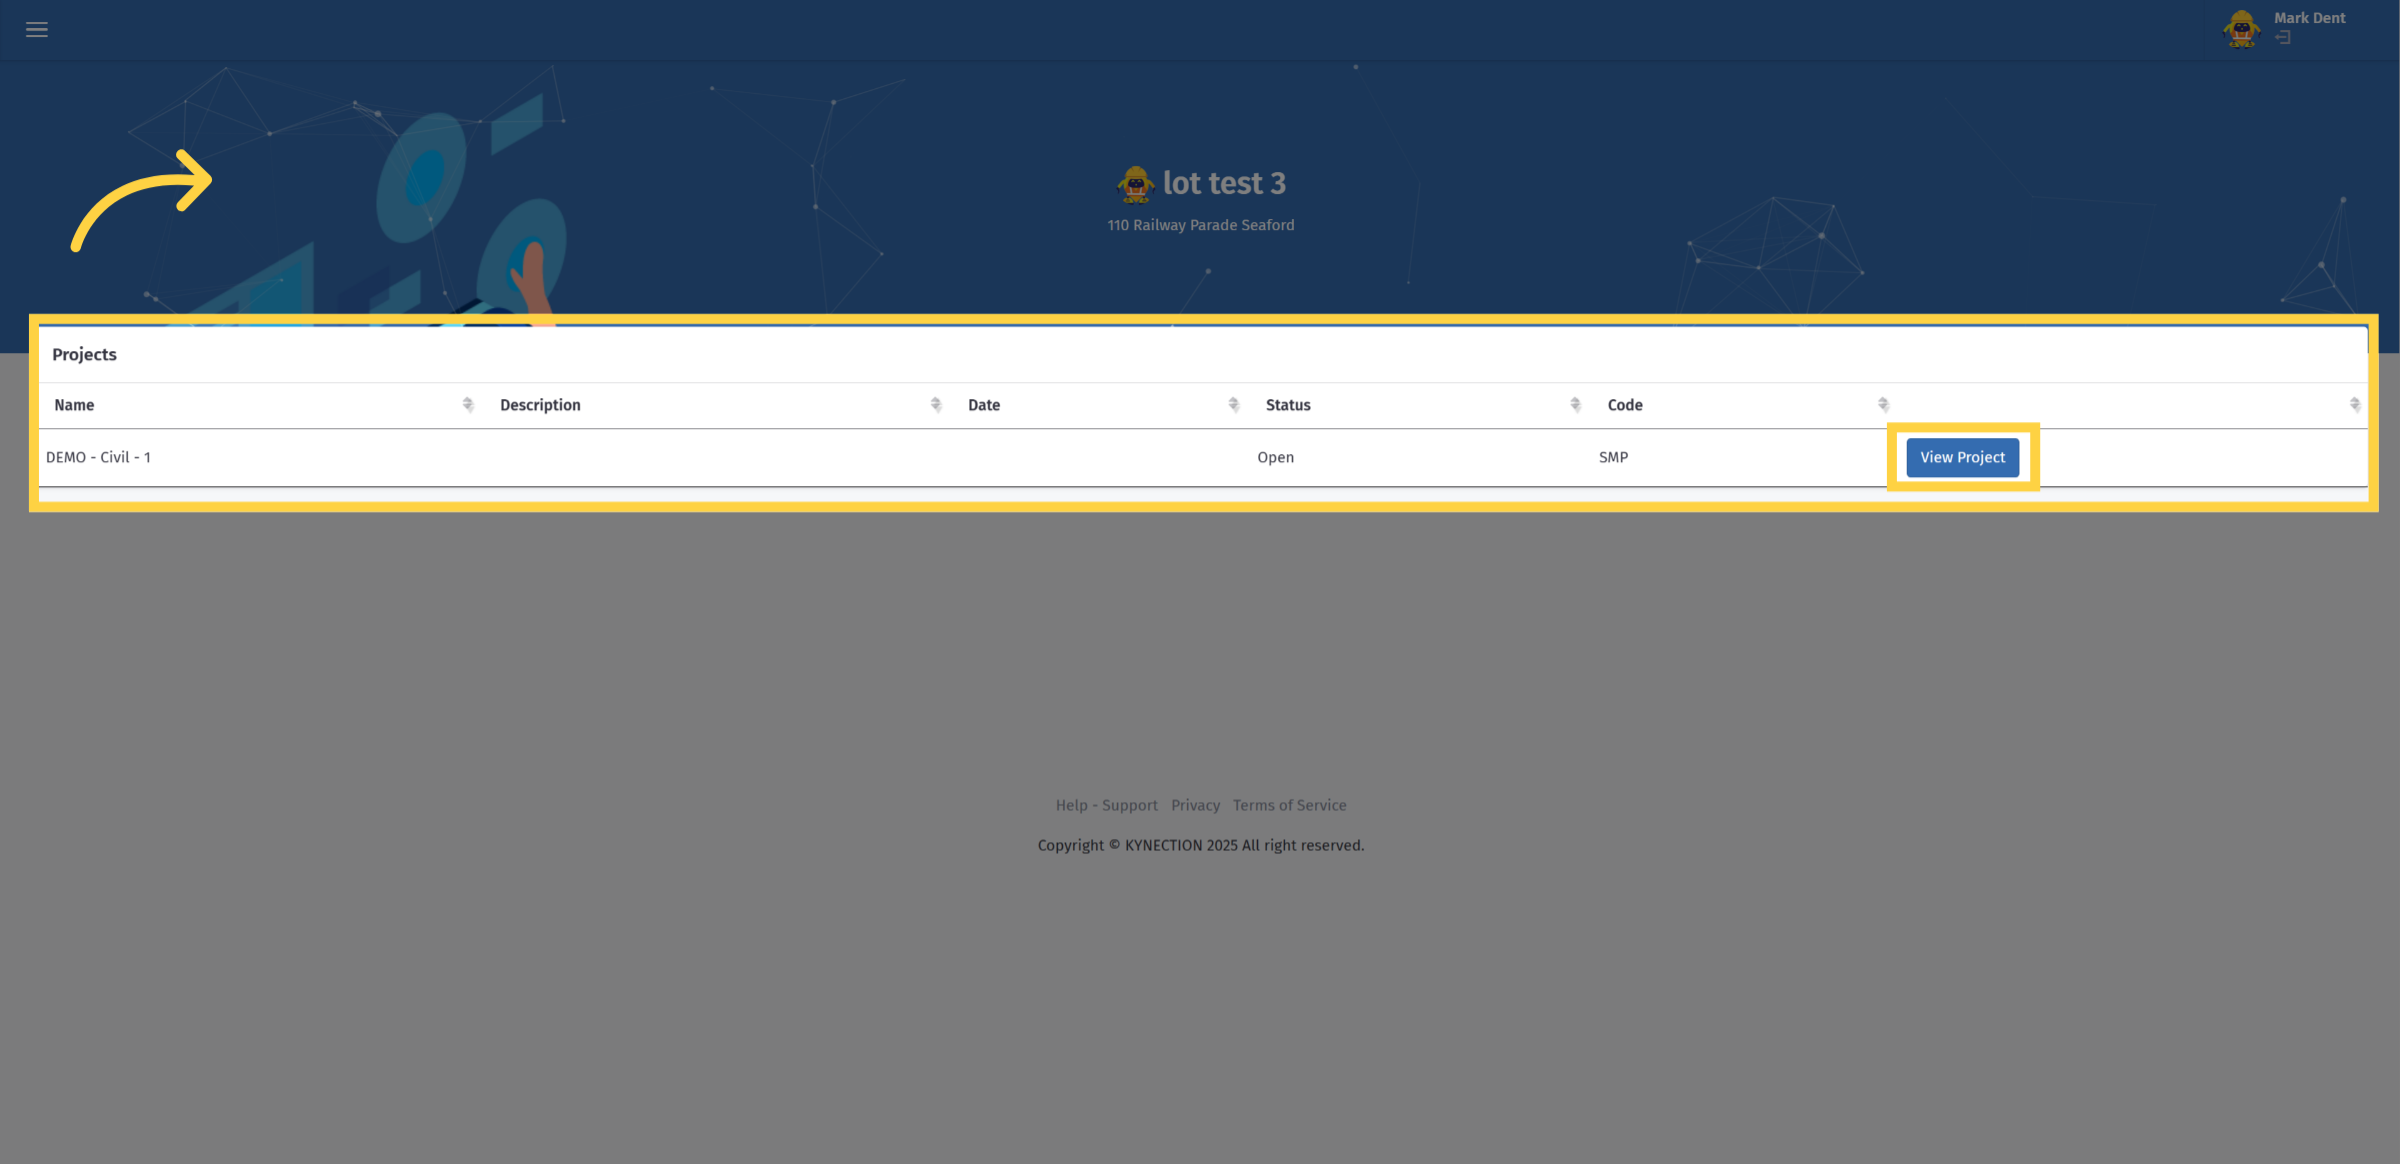
40. Project List
Once the subcontractor is approved, any project you assign will automatically appear in their project list. Select the view Project button for further details.
41. Project Dashboard
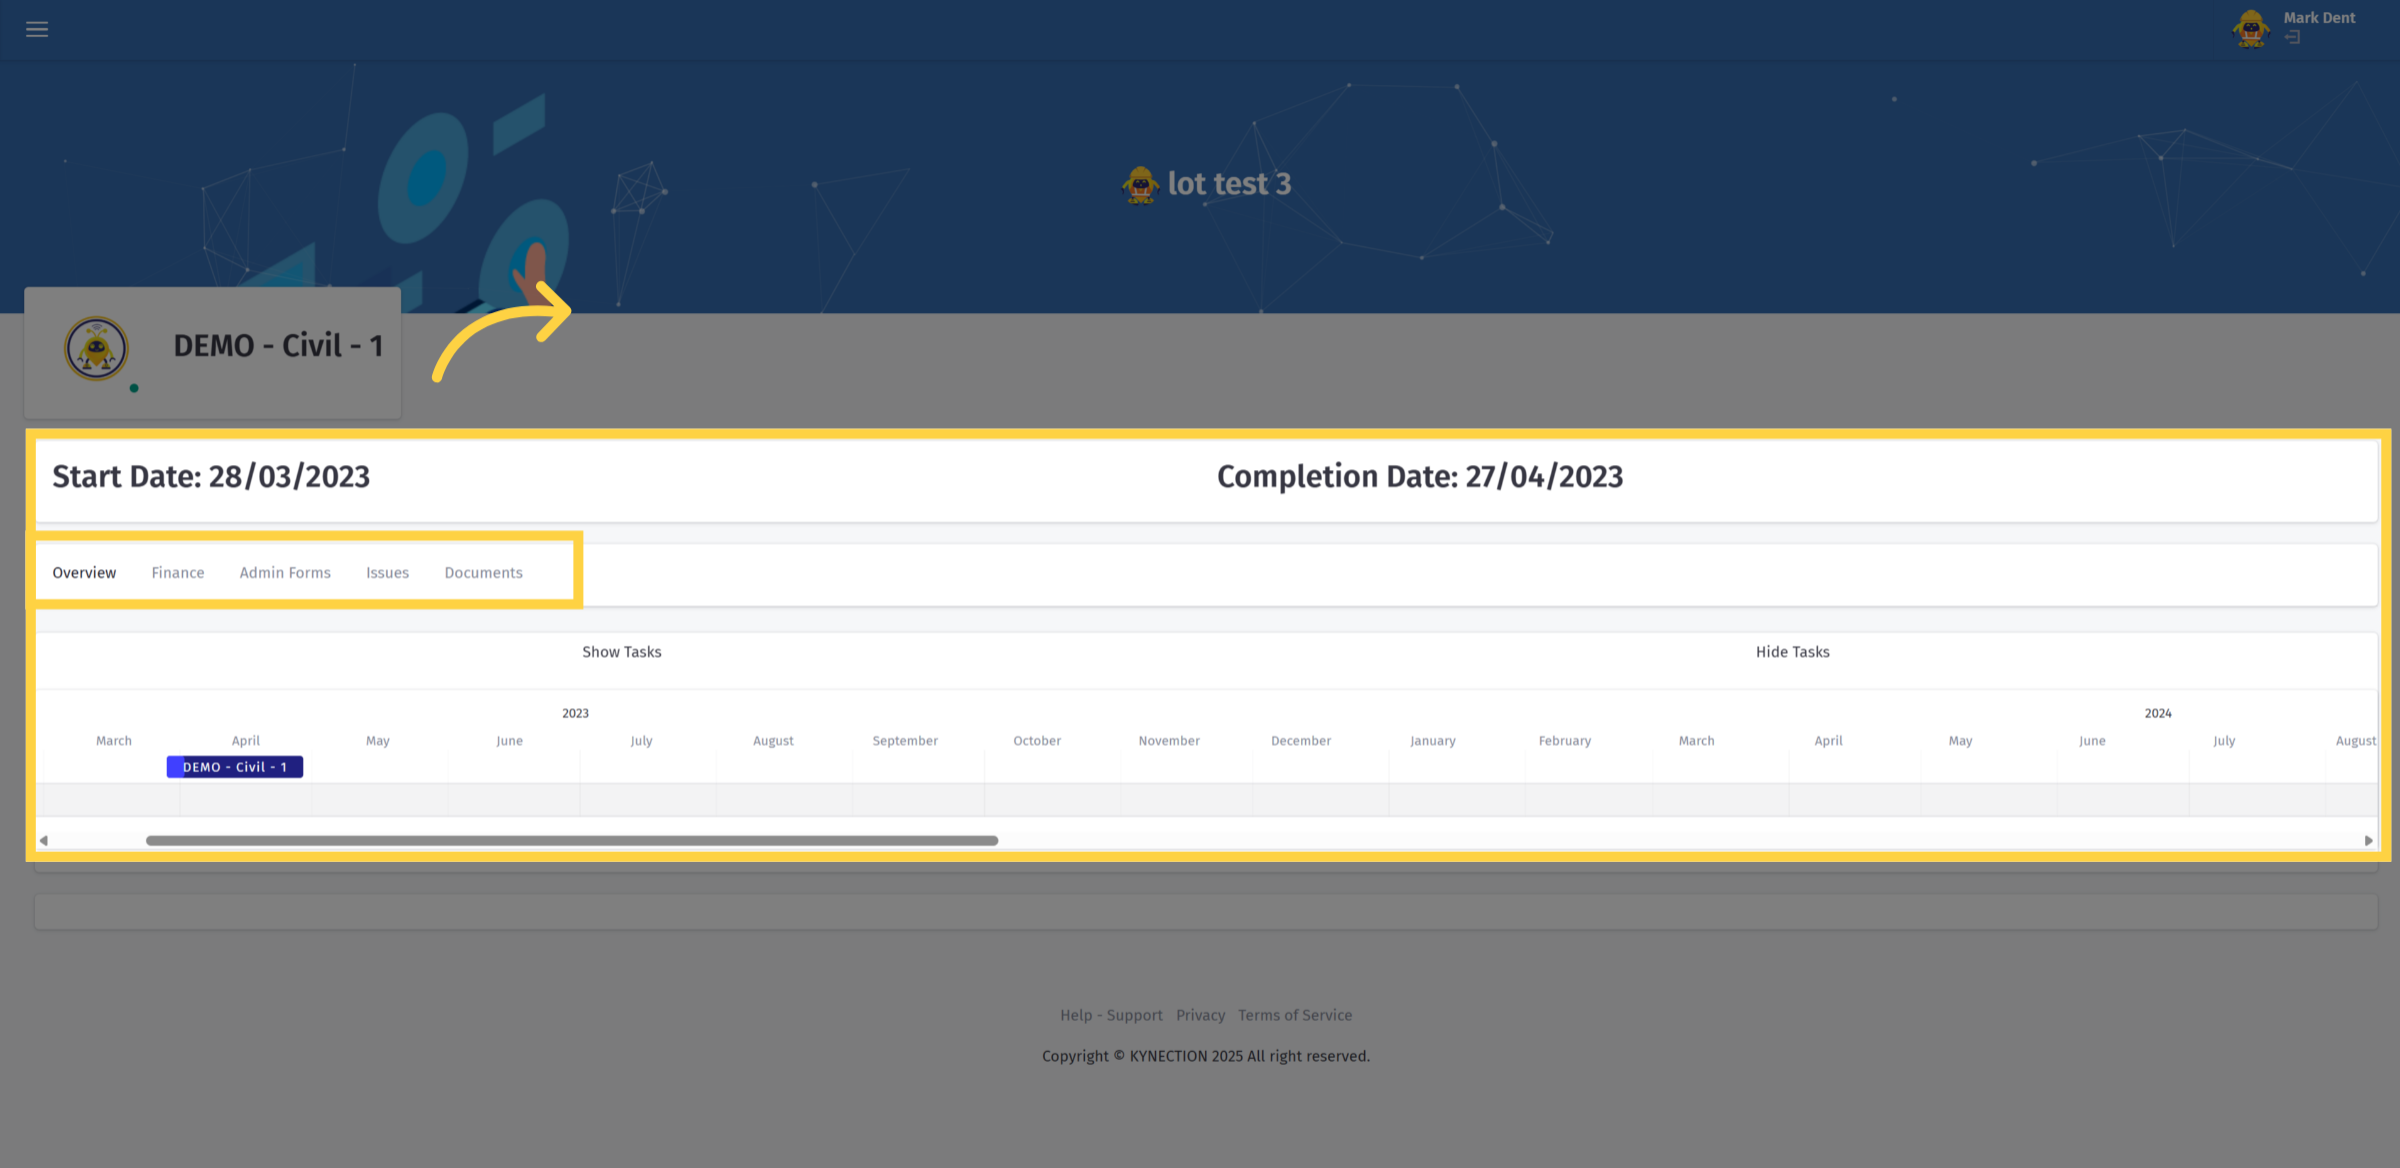
Within the project, you'll find several tabs. The Overview tab displays the project timeline, along with its milestones.
42. Finance
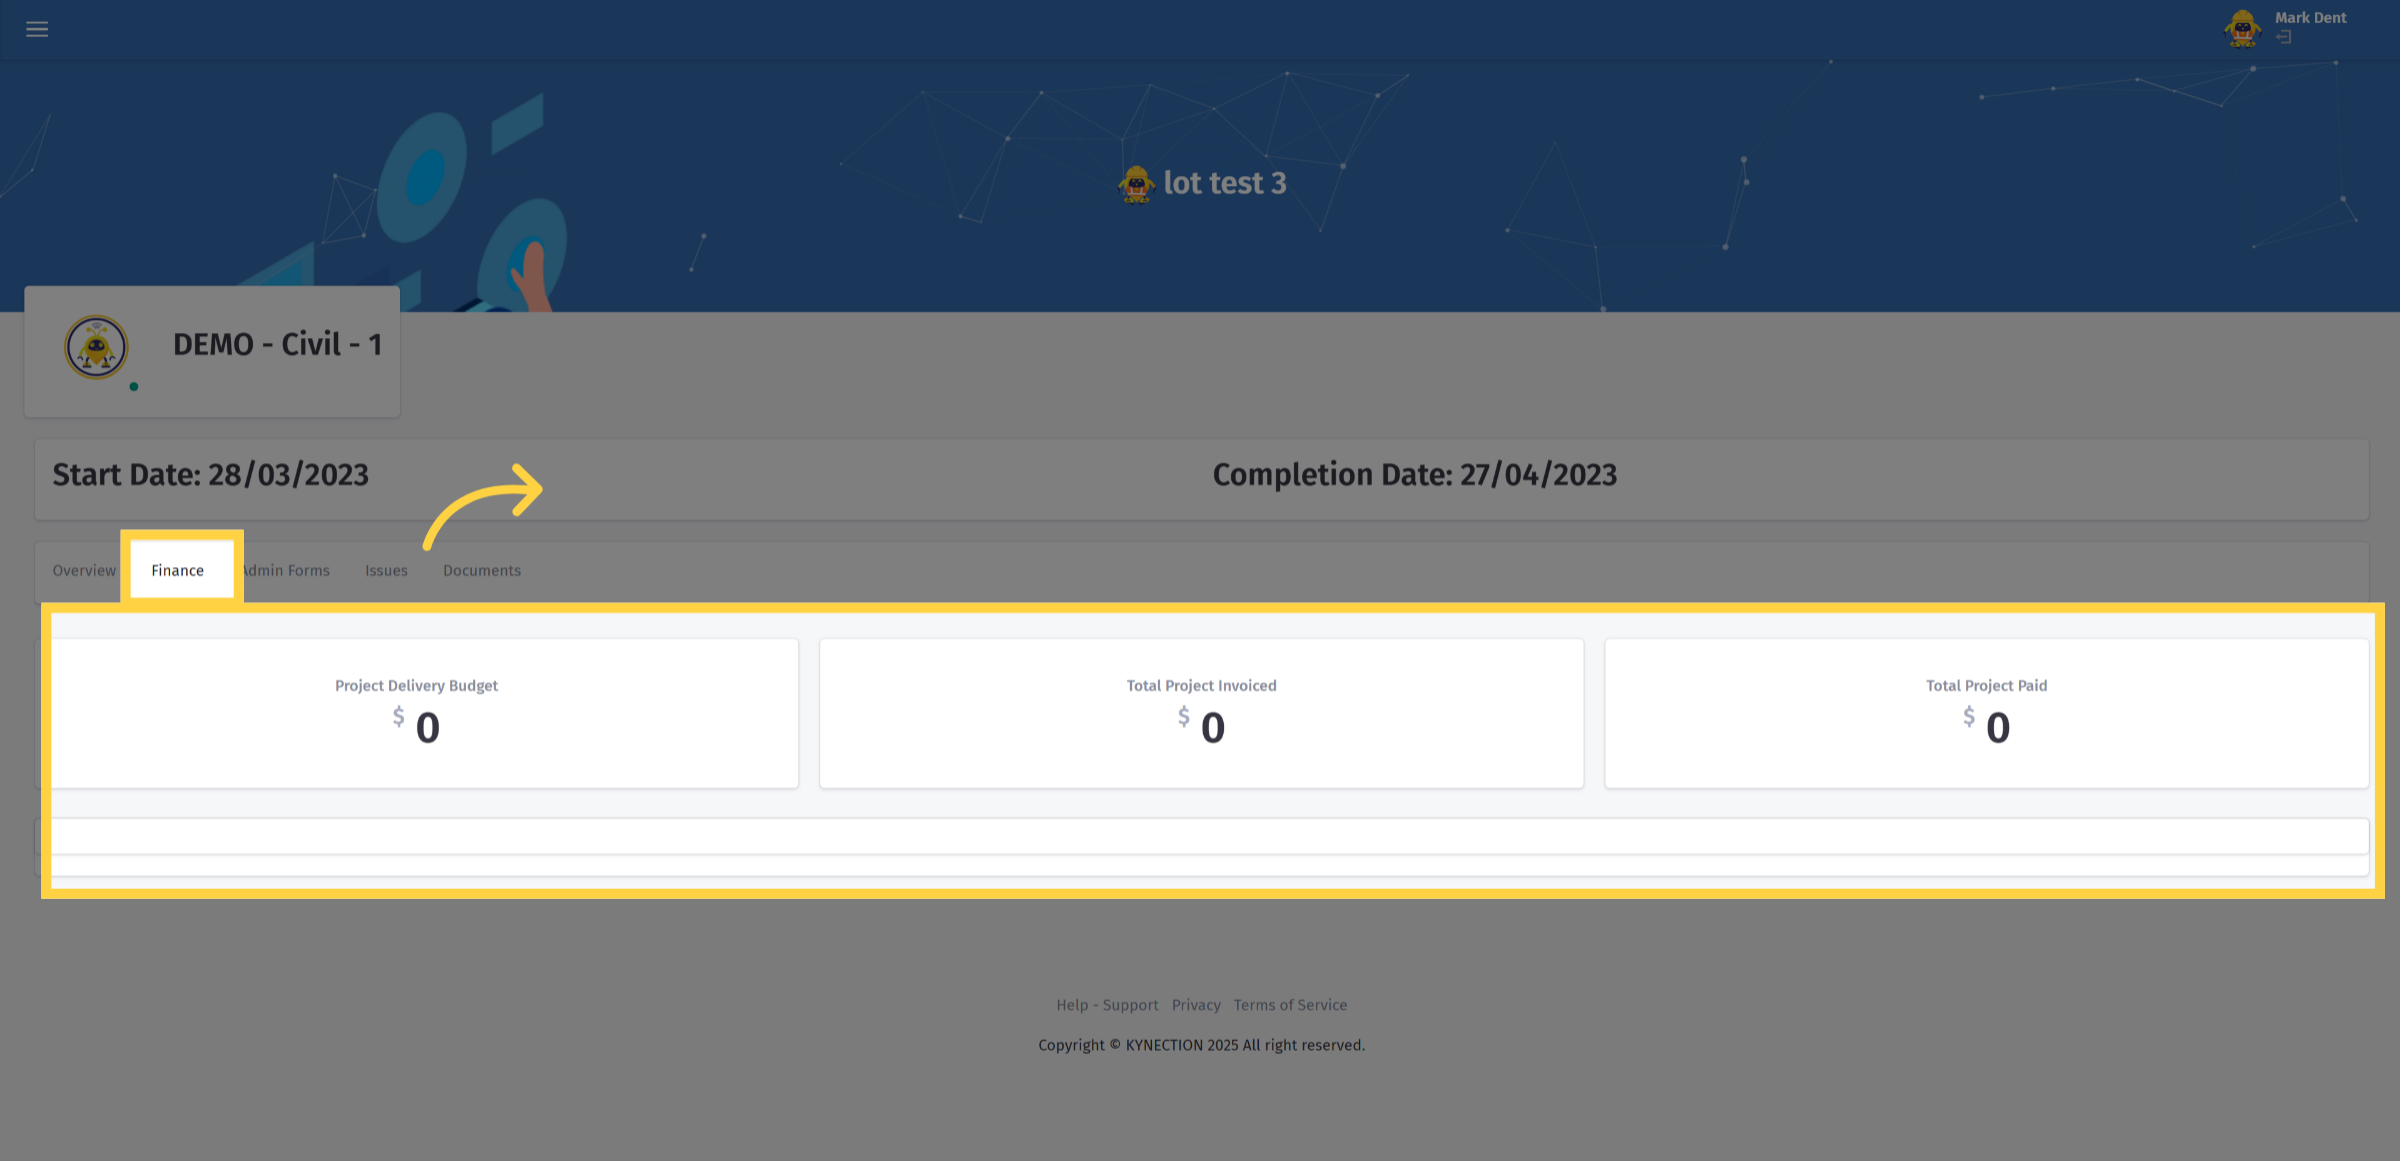
In the Finance tab, you can view the project delivery budget, total project invoices, and total amount paid. This information can be hidden from the subcontractor if necessary.
43. Documents
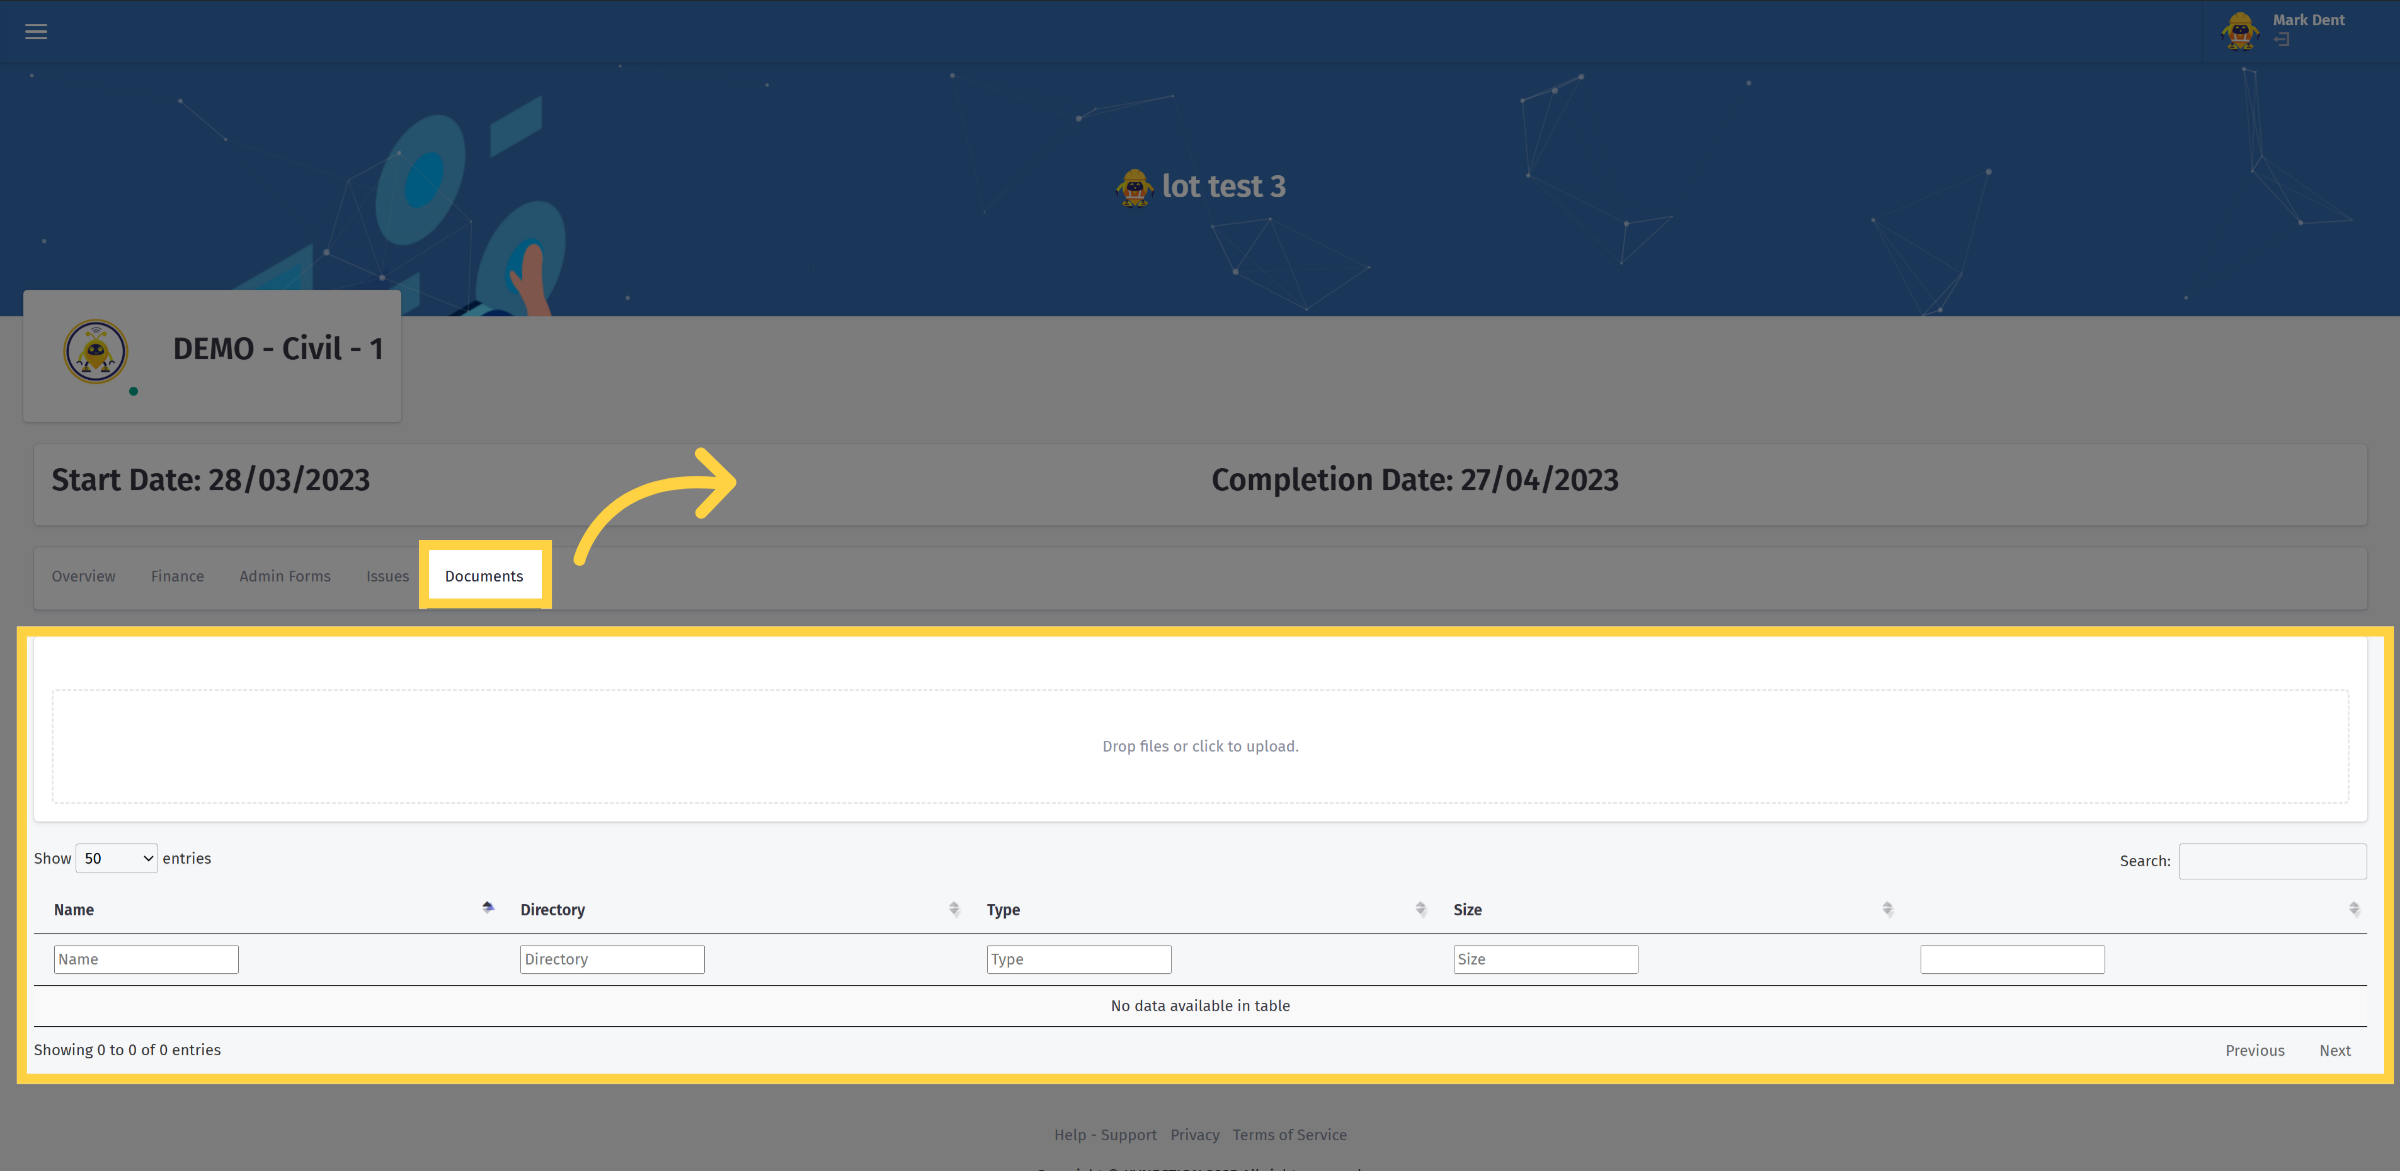
Within the Documents tab, subcontractors can easily upload any document, form, file, or photo. Simply drag files into the designated area or click to upload.
Thanks fo watching

